Articles
How To Store Belts by Marie Kondo
Modified: August 29, 2024
Learn the art of organizing articles using Marie Kondo's belt storage tips and create a clutter-free space in your home.
(Many of the links in this article redirect to a specific reviewed product. Your purchase of these products through affiliate links helps to generate commission for Storables.com, at no extra cost. Learn more)
Introduction
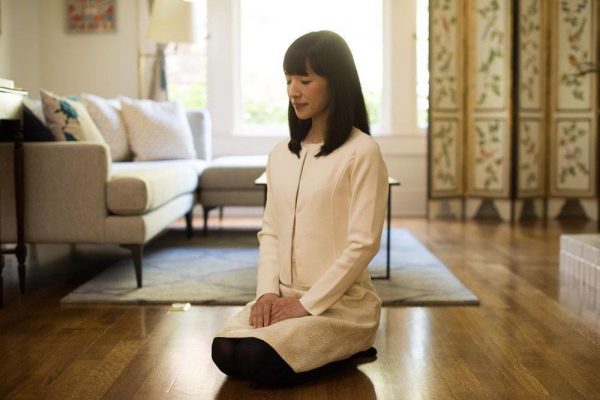
Organizing and decluttering our belongings has gained immense popularity in recent years. Thanks to the influence of Marie Kondo and her famous KonMari method, people are becoming more conscious and intentional about the items they keep in their homes. Belts, for instance, are often overlooked when it comes to organizing, but they play a crucial role in completing an outfit and should be treated with care. In this article, we will explore the art of storing belts using the Marie Kondo method. Whether you have a few belts or a vast collection, these steps will help you declutter, fold, and organize your belts in a way that sparks joy and maximizes space. So, let’s dive in and discover how to store belts Marie Kondo style!
Key Takeaways:
- Declutter and fold belts mindfully using the Marie Kondo method to create a streamlined and functional collection. Keep only the belts that spark joy and store them in a way that maximizes space and accessibility.
- Choose the right storage method for your belt collection, whether it’s hanging, using drawer dividers, an organizer box, or a belt hanger. Keep your belts organized, visible, and easily accessible to elevate your wardrobe organization.
Read more: How To Store Handbags By Marie Kondo
Step 1: Decluttering Belts
Before you can effectively store your belts, it’s essential to declutter and assess which ones truly bring you joy and serve a purpose in your wardrobe. Marie Kondo emphasizes the importance of only keeping items that spark joy in your life.
Start by gathering all your belts in one place. Empty out drawers, bins, and hangers where your belts are stored. As you go through each belt, hold it in your hand and examine how it makes you feel. Does it bring back positive memories? Do you still wear it? If the answer is no, it’s time to let go.
Go through each belt one by one and make a pile of the ones you want to keep and a separate pile for those you want to discard. Consider factors such as fit, style, and condition. Are there any belts that are too worn out or no longer fit properly? Be honest with yourself and be willing to part ways with belts that no longer serve a purpose.
Once you have decided which belts to keep, think about how often you wear each one. If there are belts that rarely see the light of day, consider if they are truly necessary. You want to create a collection that is streamlined and functional.
Now that you have decluttered your belts, you are ready to move on to the next step: folding them in a way that saves space and keeps them organized.
Step 2: Folding Belts
Folding your belts properly not only saves space but also keeps them neat and easy to access. Follow these simple steps to fold your belts the Marie Kondo way:
- Start by laying your belt flat on a clean surface. Straighten it out and ensure there are no twists or tangles.
- Fold your belt in half lengthwise, bringing the buckle end towards the opposite end. This step helps to minimize the overall length of the belt.
- Take the buckle end of the belt and fold it towards the middle. The buckle should be facing outward, creating a neat and compact fold.
- Fold the other end of the belt towards the middle, overlapping it with the buckle end. This creates a folded belt that is compact and easy to store.
- Repeat these steps for each belt in your collection.
By folding your belts in this way, you not only save space but also prevent them from getting tangled or damaged. Plus, it makes it much easier to find the belt you need when getting dressed.
Now that your belts are neatly folded, it’s time to move on to the next step: choosing the right storage method.
Step 3: Choosing the Right Storage Method
The way you store your belts plays a crucial role in keeping them organized and easily accessible. Here are a few storage methods to consider:
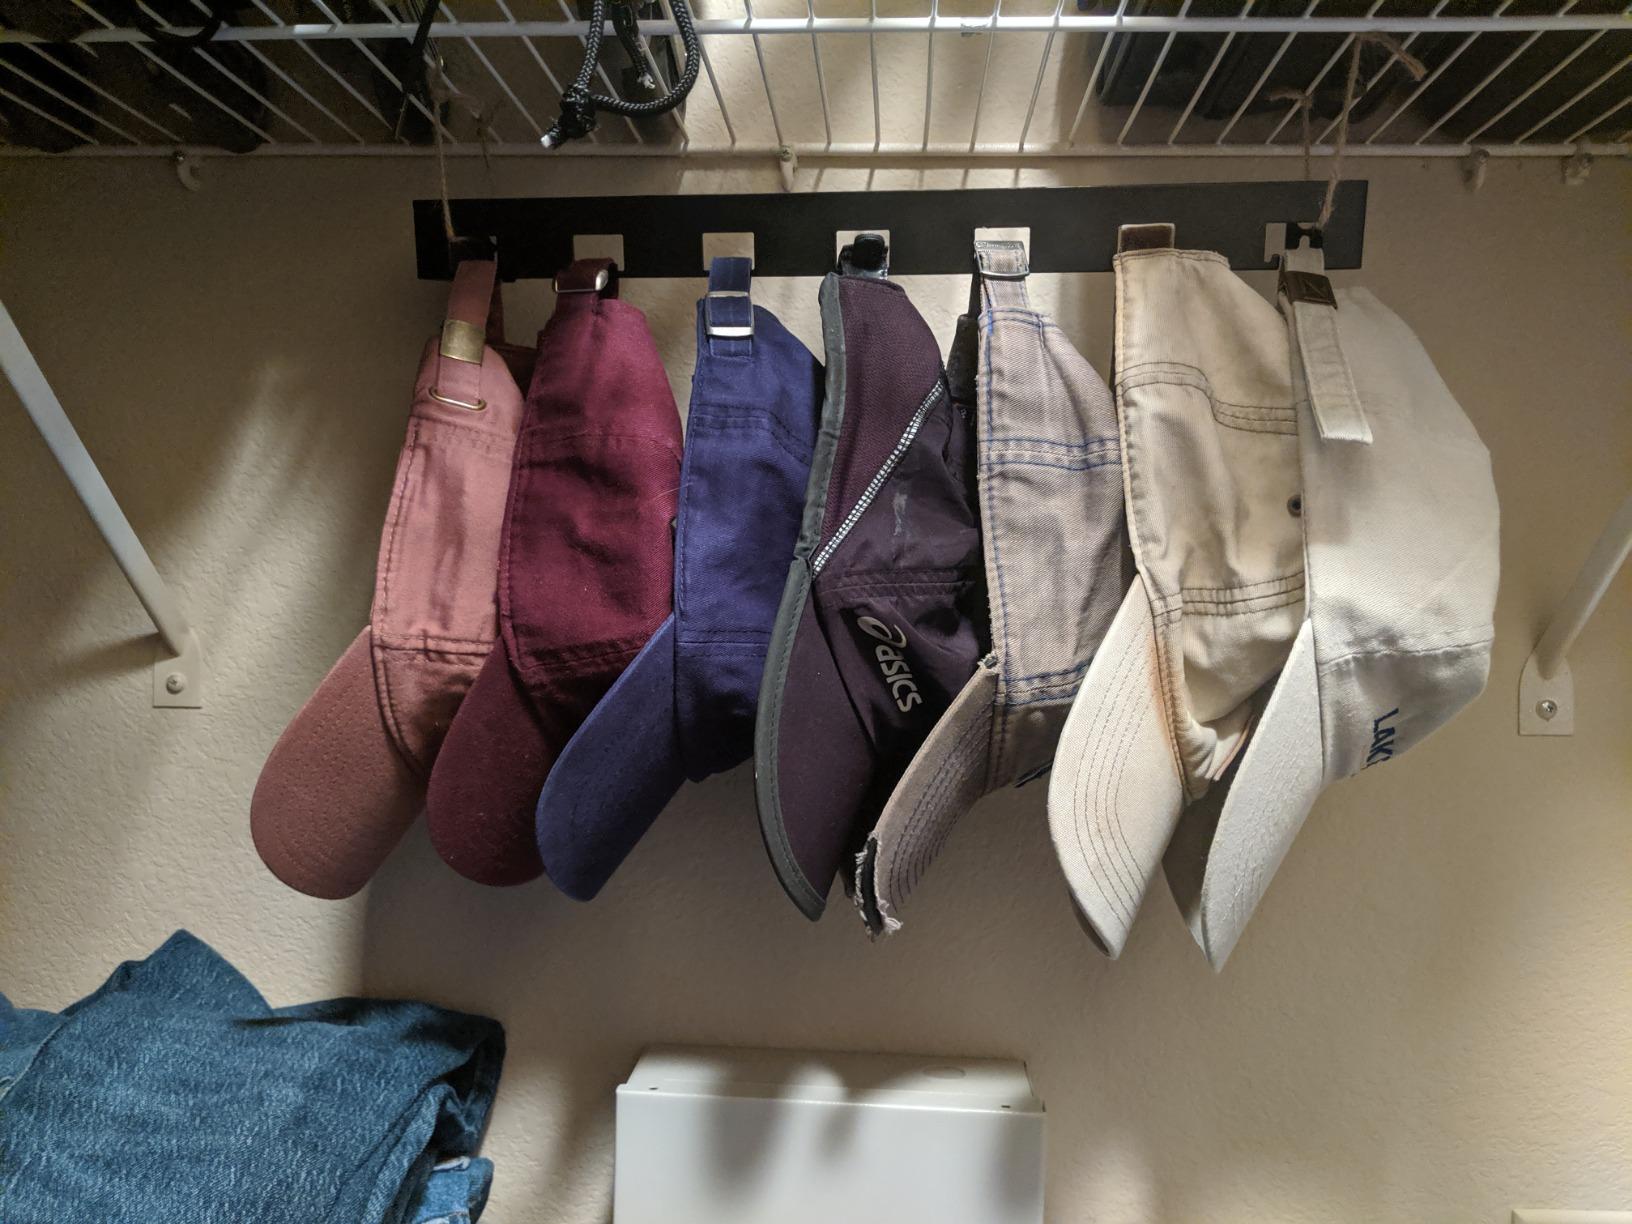
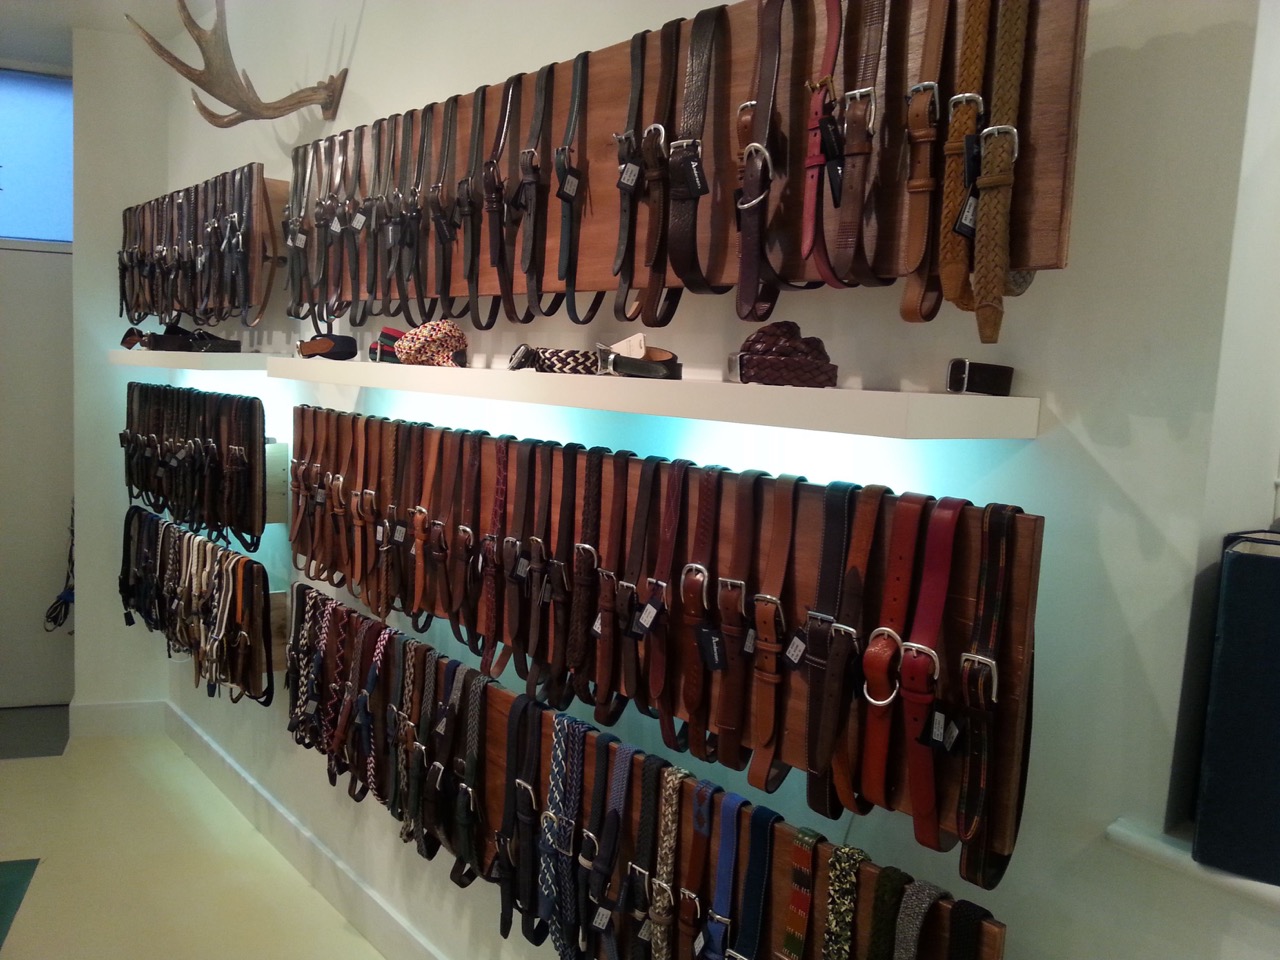
- Hanging Belts: If you have enough space in your closet, hanging your belts is a convenient and visually appealing option. You can use a belt hanger or even repurpose a shower curtain hook to hang your belts neatly. This method allows you to see all your belts at a glance and makes it easy to pick the one you need.
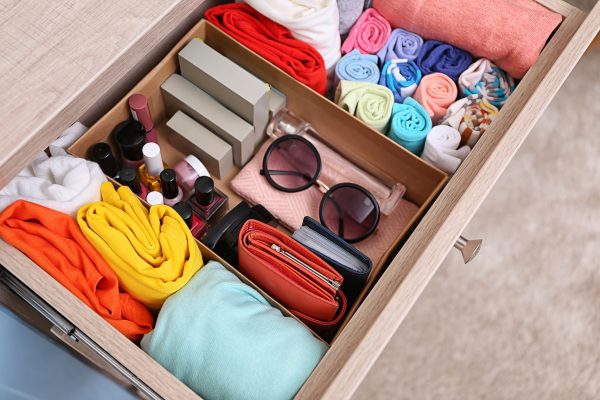
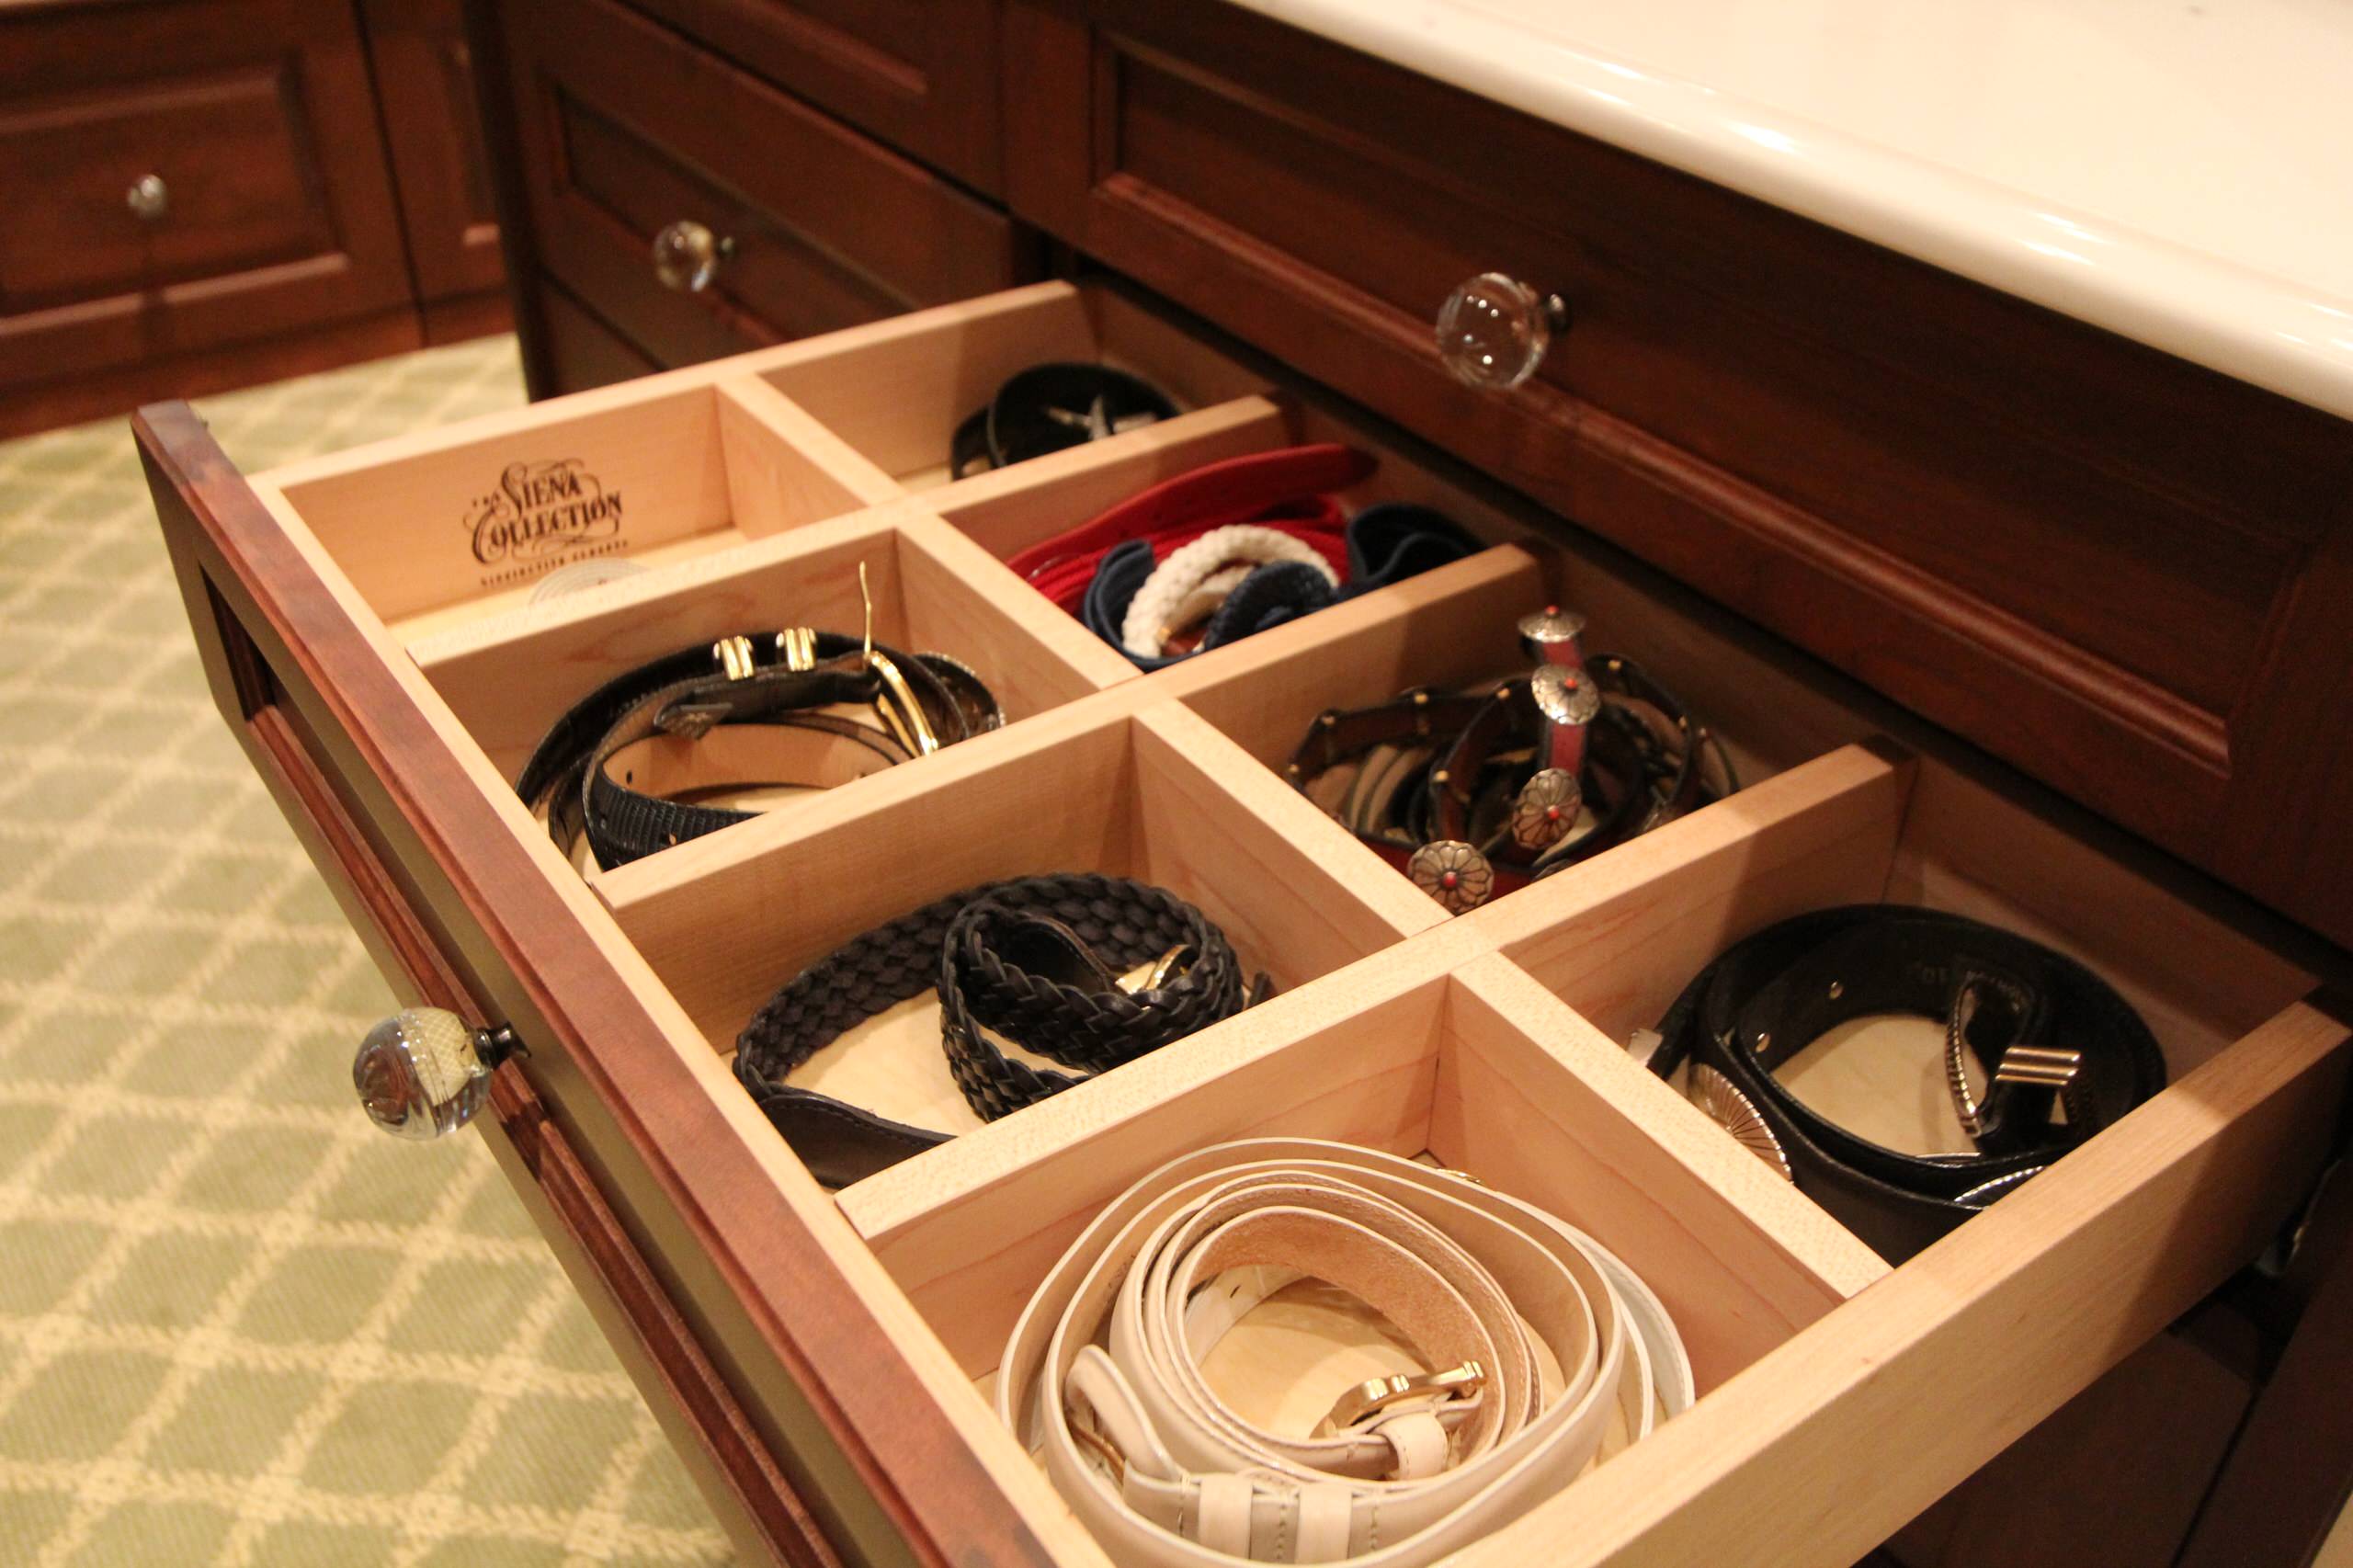
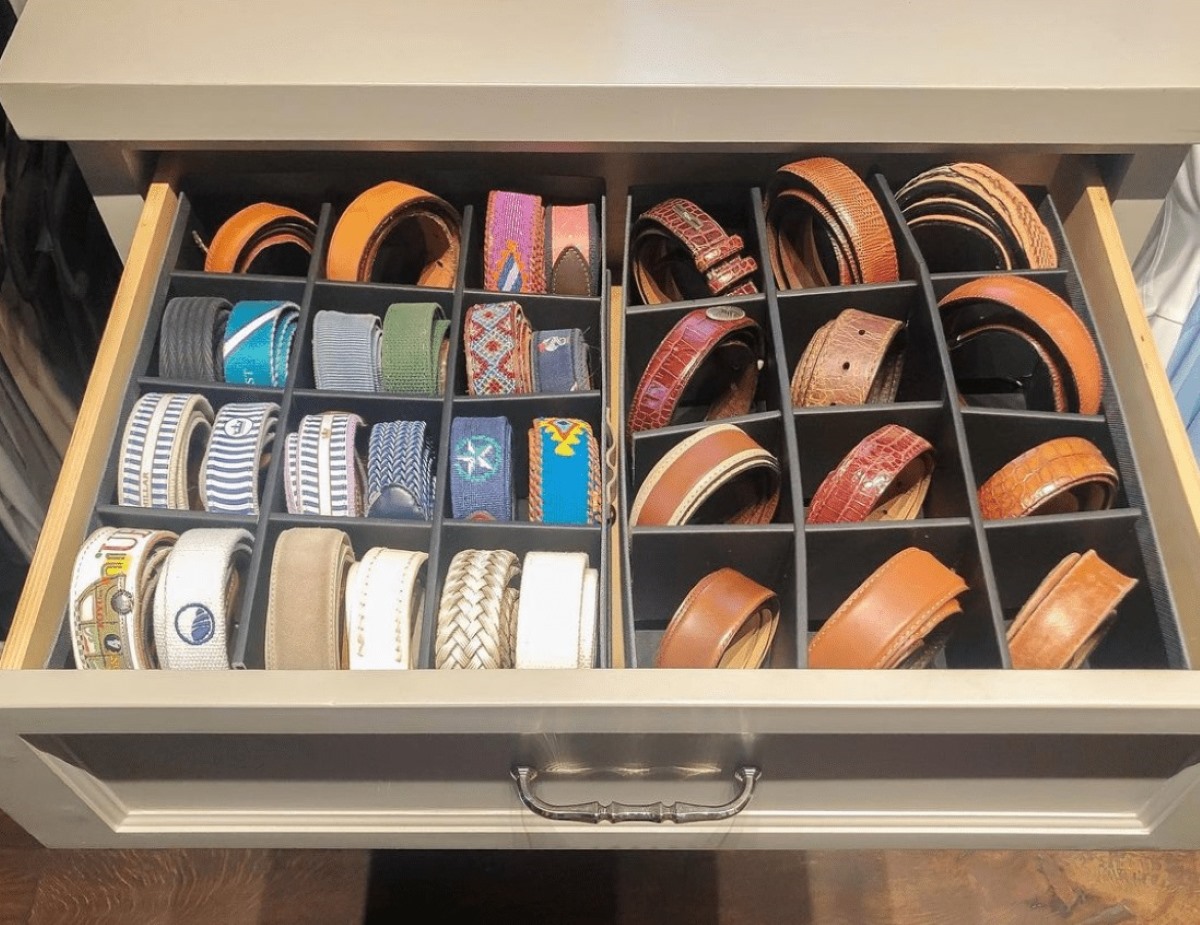
- Drawer Dividers: If you prefer to store your belts in a drawer, consider using drawer dividers. These dividers help keep your belts separated and prevent them from getting tangled. Simply roll each belt and place it in its own section within the drawer. This method works best if you have limited space or want to keep your belts out of sight.
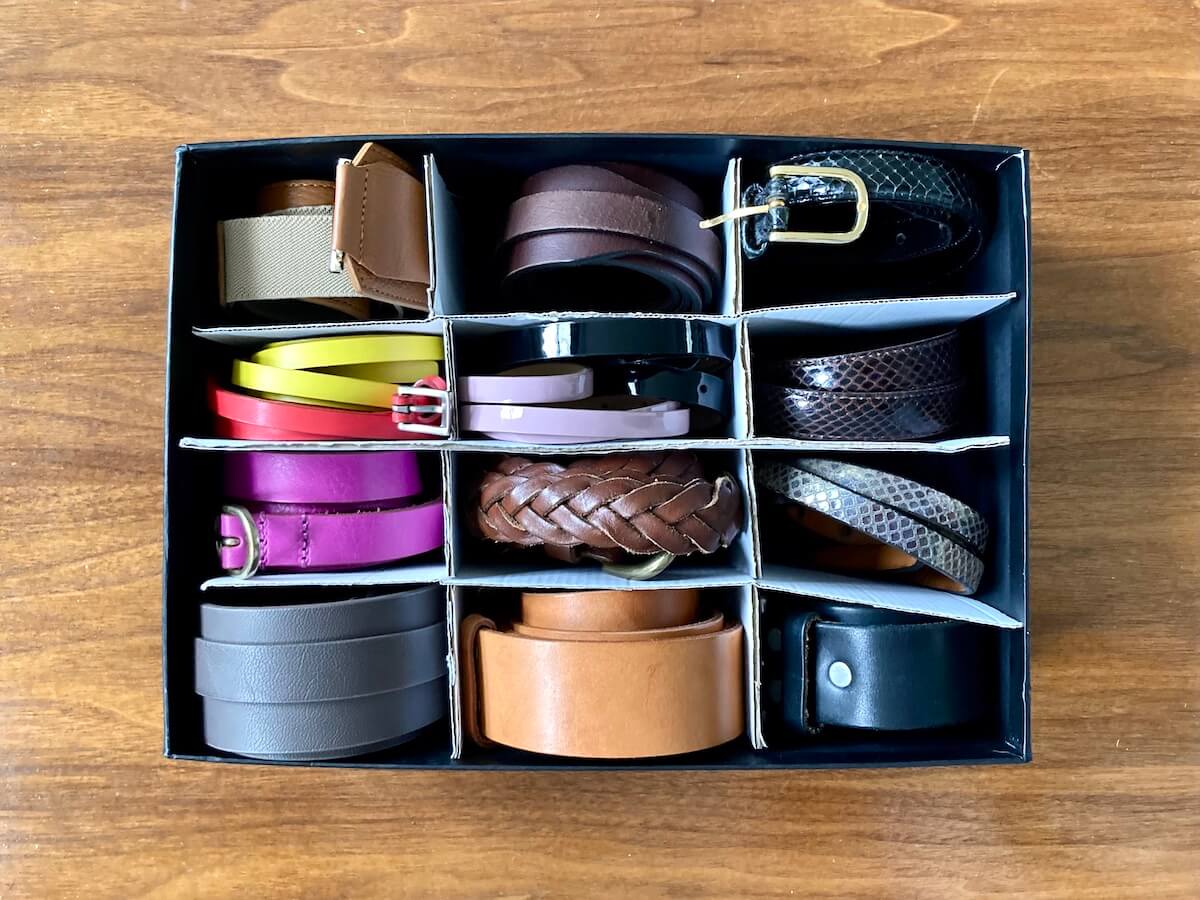
- Organizer Box: Another option is to use an organizer box specifically designed for belts. These boxes typically have compartments or slots to neatly store your belts. This method is useful if you want to protect your belts from dust and keep them in one place.
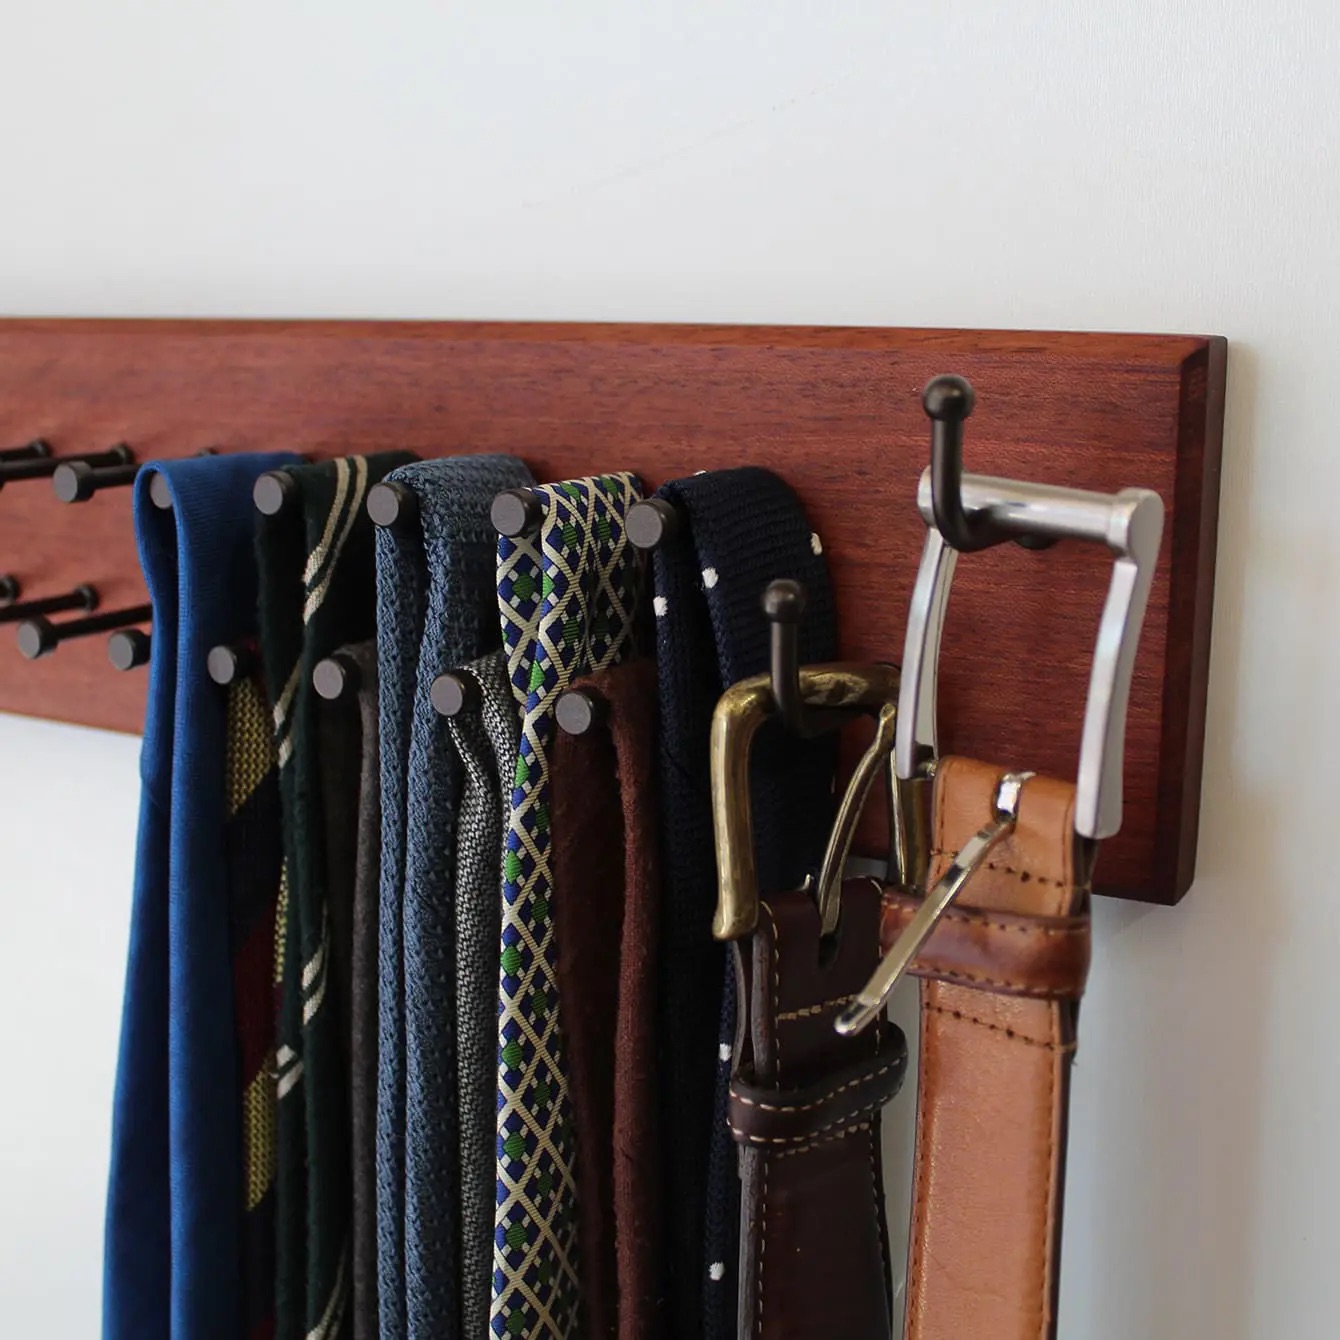
- Belt Hangers: Belt hangers are a great option if you have a large belt collection. These hangers have multiple hooks or clips to hold several belts at once. You can hang the hanger in your closet or on a hook on the wall to save space while keeping your belts easily accessible.
- Hanging Closet Organizer: If you have empty space in your closet, consider using a hanging closet organizer with pockets or compartments. You can roll up your belts and place them in the pockets, keeping them organized and within reach.
Consider your available space and personal preferences when choosing the storage method that works best for you. The goal is to keep your belts organized, visible, and easy to access.
Now that you have chosen the right storage method, you’re ready to move on to the next step: implementing the chosen storage method and organizing your belts accordingly.
Step 4: Hanging Belts
Hanging your belts is a practical and visually appealing method for storing and organizing them. Here’s how you can effectively hang your belts using the Marie Kondo method:
- Choose a designated space in your closet for hanging your belts. This can be a dedicated belt hanger or even a simple hook.
- Straighten out each folded belt and inspect it for any twists or tangles.
- Take the end of the belt without the buckle and hang it over the belt hanger or hook. Make sure it is securely attached and not at risk of falling off.
- Repeat this process for each belt, making sure to leave a small gap between each one to prevent tangling.
- If you have a large collection of belts, consider organizing them by color or style to make it easier to find the one you need.
Hanging your belts not only keeps them organized and accessible but also allows you to visually appreciate your collection. Plus, it prevents them from getting wrinkled or damaged, ensuring they stay in good condition. Whenever you need a belt, you can simply grab it from the hanger and put it back when you’re done. It’s a simple yet effective storage solution.
Now that your belts are hung and looking tidy, it’s time to move on to the next step: utilizing drawer dividers for belts.
To store belts Marie Kondo style, fold them in half and then in thirds to create a compact rectangle. Store them vertically in a drawer or box so you can easily see and access each one.
Step 5: Using Drawer Dividers for Belts
If you prefer to store your belts in a drawer, using dividers is an excellent way to keep them organized and prevent them from getting tangled. Here’s how to utilize drawer dividers for your belts:
- Choose a drawer in your dresser or wardrobe where you’ll store your belts. Make sure the drawer is clean and free from any clutter.
- Measure the width and length of the drawer to determine the size of the dividers you’ll need.
- Purchase or create drawer dividers that fit your specific drawer dimensions. There are various types of dividers available, including adjustable ones or those specifically designed for organizing belts.
- Place the dividers vertically or horizontally within the drawer, depending on your preference and the available space.
- Roll each belt tightly and secure it with an elastic band or a small clip. This prevents the belts from unravelling or tangling.
- Place each rolled belt within its designated section of the drawer divider. You can organize them by color, width, or style to make it easier to find the belt you need.
- Regularly check and rearrange your belts to ensure they remain neat and orderly within the drawer dividers.
Using drawer dividers not only maximizes space but also allows you to easily see and access your belts. It also protects them from getting damaged or tangled, ensuring they remain in good condition.
Now that your belts are neatly stored using drawer dividers, let’s move on to the next step: storing belts in an organizer box.
Step 6: Storing Belts in an Organizer Box
If you prefer to keep your belts in one place and protect them from dust and potential damage, using an organizer box is an ideal solution. Here’s how you can store your belts in an organizer box:
- Choose an organizer box that is the right size to accommodate your belt collection. Look for one with compartments or slots specifically designed for belts.
- Ensure the organizer box is clean and free from any debris. Wipe it down if necessary.
- Straighten out each belt and check for any twists or tangles. If you notice any, gently untangle them to avoid any damage.
- Roll up each belt tightly and secure it with an elastic band or a small clip. This helps to keep them compact and prevent them from unraveling.
- Place each rolled belt into its designated compartment or slot within the organizer box. You can arrange them by color, style, or width to make it easy to find the belt you need.
- Close the lid of the organizer box to protect your belts from dust and maintain their pristine condition.
- Store the organizer box in a location that is easily accessible but also keeps your belts out of the way. This could be a shelf, a drawer, or even on top of your closet.
Storing your belts in an organizer box not only keeps them organized but also protects them from potential damage. It allows you to quickly and easily see all your belts in one place, making it simple to choose the perfect accessory for your outfit.
Now that your belts are stored in an organizer box, let’s move on to the next step: utilizing belt hangers for storage.
Step 7: Utilizing Belt Hangers
Belt hangers are a great option if you have a large collection of belts and want to save space while keeping them easily accessible. Here’s how you can effectively utilize belt hangers for storage:
- Choose a belt hanger that suits your needs. There are various types available, including ones with multiple hooks or clips to accommodate several belts.
- Select a secure location to hang your belt hanger. This can be in your closet, on a hook on the wall, or even on the back of a door.
- Straighten out each belt and check for any twists or tangles. Smooth out any creases or wrinkles.
- Place the end of each belt over the hook or clip on the belt hanger. Ensure they are securely fastened to prevent them from sliding off.
- Maintain a small gap between each belt to prevent tangling and allow for easy access.
- If you have a large collection of belts, consider organizing them by color, width, or style. This makes it easier to locate the belt you need.
- Regularly check and adjust the belts on the hanger to ensure they remain neat and properly aligned.
Using belt hangers not only saves space but also keeps your belts visible and easily accessible. You can quickly scan through your collection and select the perfect belt for your outfit without any hassle or frustration.
Now that your belts are securely hung on a belt hanger, let’s move on to the next step: organizing belts in a hanging closet organizer.
Step 8: Organizing Belts in a Hanging Closet Organizer
If you have some empty space in your closet, utilizing a hanging closet organizer can be a practical and efficient way to store and organize your belts. Here’s how you can organize your belts in a hanging closet organizer:
- Choose a hanging closet organizer with pockets or compartments that is suitable for storing belts. Make sure it is the right size to accommodate your collection.
- Find a suitable spot in your closet to hang the organizer. It can be on the clothing rod or on a hook on the back of the closet door.
- Straighten out each belt and check for any twists or tangles. Smooth out any creases or wrinkles.
- Roll up each belt tightly and secure it with an elastic band or a small clip. This helps to keep them compact and prevent them from unraveling.
- Place each rolled belt into its designated pocket or compartment within the hanging closet organizer. You can arrange them by color, style, or width to make it easy to find the belt you need.
- Ensure that each belt is securely positioned within the organizer to prevent them from falling out or getting tangled.
- Regularly check the organizer’s pockets or compartments to make sure they remain tidy and properly aligned.
Using a hanging closet organizer allows you to maximize the space in your closet while keeping your belts organized and easily accessible. You can quickly browse through the pockets and compartments to find the belt that perfectly complements your outfit.
With your belts organized in a hanging closet organizer, you have successfully completed the steps for storing your belts using the Marie Kondo method. By following these steps, you can declutter, fold, and organize your belts in a way that sparks joy and maximizes space in your living area.
Remember, the key to organizing any item, including belts, is to only keep the ones that truly bring you joy and serve a purpose in your wardrobe. By storing your belts mindfully and keeping them organized, you’ll be able to appreciate and make the most out of your collection.
Now go and enjoy your beautifully organized belts!
Conclusion
Organizing and storing belts may seem like a small task, but it can make a big difference in keeping your wardrobe streamlined and your accessories easily accessible. By following the Marie Kondo method, you can declutter, fold, and organize your belts in a way that sparks joy and maximizes space in your living area.
Start by decluttering your belts and only keeping the ones that bring you joy and serve a purpose in your wardrobe. Then, fold them properly by following the simple steps to save space and keep them neat. Choose the right storage method for your needs, whether it’s hanging them, using drawer dividers, utilizing an organizer box, or embracing a belt hanger. Finally, organize your belts within the chosen storage method, keeping them visible and easily accessible.
By applying these steps, you can maintain a tidy and organized belt collection. Not only will this make getting dressed easier, but it will also increase your appreciation for your belts and make it simpler to create stylish and cohesive outfits.
Remember that the purpose of organizing is to create a space that brings you joy and reflects your personal style. Consider your available space, preferences, and the size of your belt collection when choosing a storage method. Find what works best for you and enjoy the benefits of having an organized and clutter-free wardrobe.
Now that you have the knowledge and guidance to store your belts the Marie Kondo way, it’s time to put it into action. Embrace the process of organizing your belts and enjoy the satisfaction that comes with a well-kept collection. Happy organizing!
Now that you've mastered belt storage with Marie Kondo's guidance, why stop there? Refresh your fridge's interior with smart, space-saving strategies in our guide on fridge organization. Not only will these tips keep your edibles in perfect order, but they also promise to simplify your kitchen routine. Looking for more ways to declutter? Our review of the best fabric storage cubes offers clever solutions to enhance organization throughout your home. These tools are sure to transform any chaotic space into a model of efficiency.
Frequently Asked Questions about How To Store Belts By Marie Kondo
Was this page helpful?
At Storables.com, we guarantee accurate and reliable information. Our content, validated by Expert Board Contributors, is crafted following stringent Editorial Policies. We're committed to providing you with well-researched, expert-backed insights for all your informational needs.


0 thoughts on “How To Store Belts by Marie Kondo”