Articles
How To Store Diapers
Modified: March 2, 2024
Looking for articles on how to store diapers? Find helpful tips and tricks to properly store your diapers and keep them fresh for longer.
(Many of the links in this article redirect to a specific reviewed product. Your purchase of these products through affiliate links helps to generate commission for Storables.com, at no extra cost. Learn more)
Introduction
Welcome to the wonderful world of parenthood! As a new parent, you’ll quickly realize that diaper storage is an essential part of your daily routine. Keeping your baby’s diapers organized and easily accessible not only saves you valuable time but also ensures that your little one stays clean and comfortable.
Proper diaper storage is crucial for maintaining the quality and freshness of the diapers. When diapers are stored correctly, it helps to prevent odor buildup and keeps them ready for use when needed. Whether you’re a first-time parent or a seasoned pro, this guide will provide you with valuable tips and insights on how to store diapers effectively.
In this article, we will explore different diaper storage options and offer practical tips to help you keep your diapering supplies organized. By the end, you’ll be equipped with the knowledge to create a functional and efficient diaper storage system in your home.
Key Takeaways:
- Proper diaper storage is crucial for maintaining diaper quality, preventing odor buildup, and ensuring easy access. Organize by size, use vacuum-sealed bags, and check expiration dates for optimal diaper storage.
- Labeling diaper storage areas and keeping diapers away from direct sunlight are simple yet effective practices for maintaining diaper quality and organization. Regularly checking expiration dates ensures optimal diaper performance.
Read more: How To Store Breast Milk In Diaper Bag
Importance of Proper Diaper Storage
Proper diaper storage is more than just keeping things tidy. It plays a vital role in ensuring that your baby’s diapers are fresh, clean, and ready to use whenever you need them. Here are a few key reasons why proper diaper storage is important:
- Maintaining diaper quality: Diapers are made with materials that can deteriorate over time, especially when exposed to certain environmental factors. By storing diapers properly, you can help preserve their quality and ensure they remain effective in providing protection against leaks and keeping your baby dry.
- Preventing odor buildup: We all know that diapers can produce unpleasant odors. Storing diapers in a proper container, such as a diaper pail, can help contain and minimize odors. This not only creates a more pleasant environment for you and your baby but also reduces the risk of attracting unwanted pests or insects.
- Convenience and accessibility: When you have a well-organized diaper storage system, you can easily locate and access the diapers you need, especially during those urgent diaper changes. This saves you time and allows you to focus more on taking care of your baby’s needs.
- Preventing wastage: When diapers are scattered or not stored properly, they can easily get damaged or lost. This can lead to unnecessary wastage and increase your diaper expenses over time. By storing diapers in a designated space, you can ensure that they are protected and accounted for, reducing the likelihood of wastage.
Overall, proper diaper storage is essential for maintaining the integrity of the diapers, minimizing odors, and ensuring easy access when you need them. By implementing effective diaper storage strategies, you can streamline your diapering routine and provide your baby with the best possible care.
Choosing the Right Diaper Storage Option
Now that you understand the importance of proper diaper storage, it’s time to explore different options available to you. Here are some popular diaper storage solutions to consider:
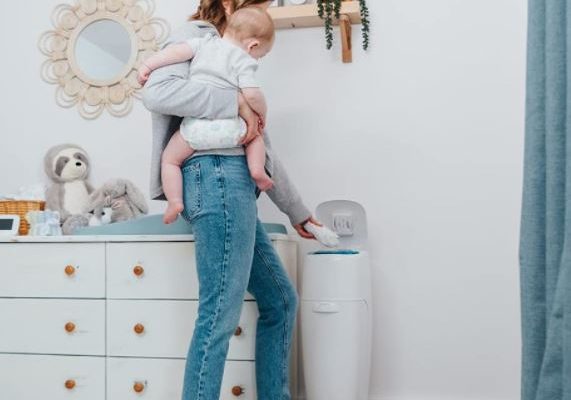
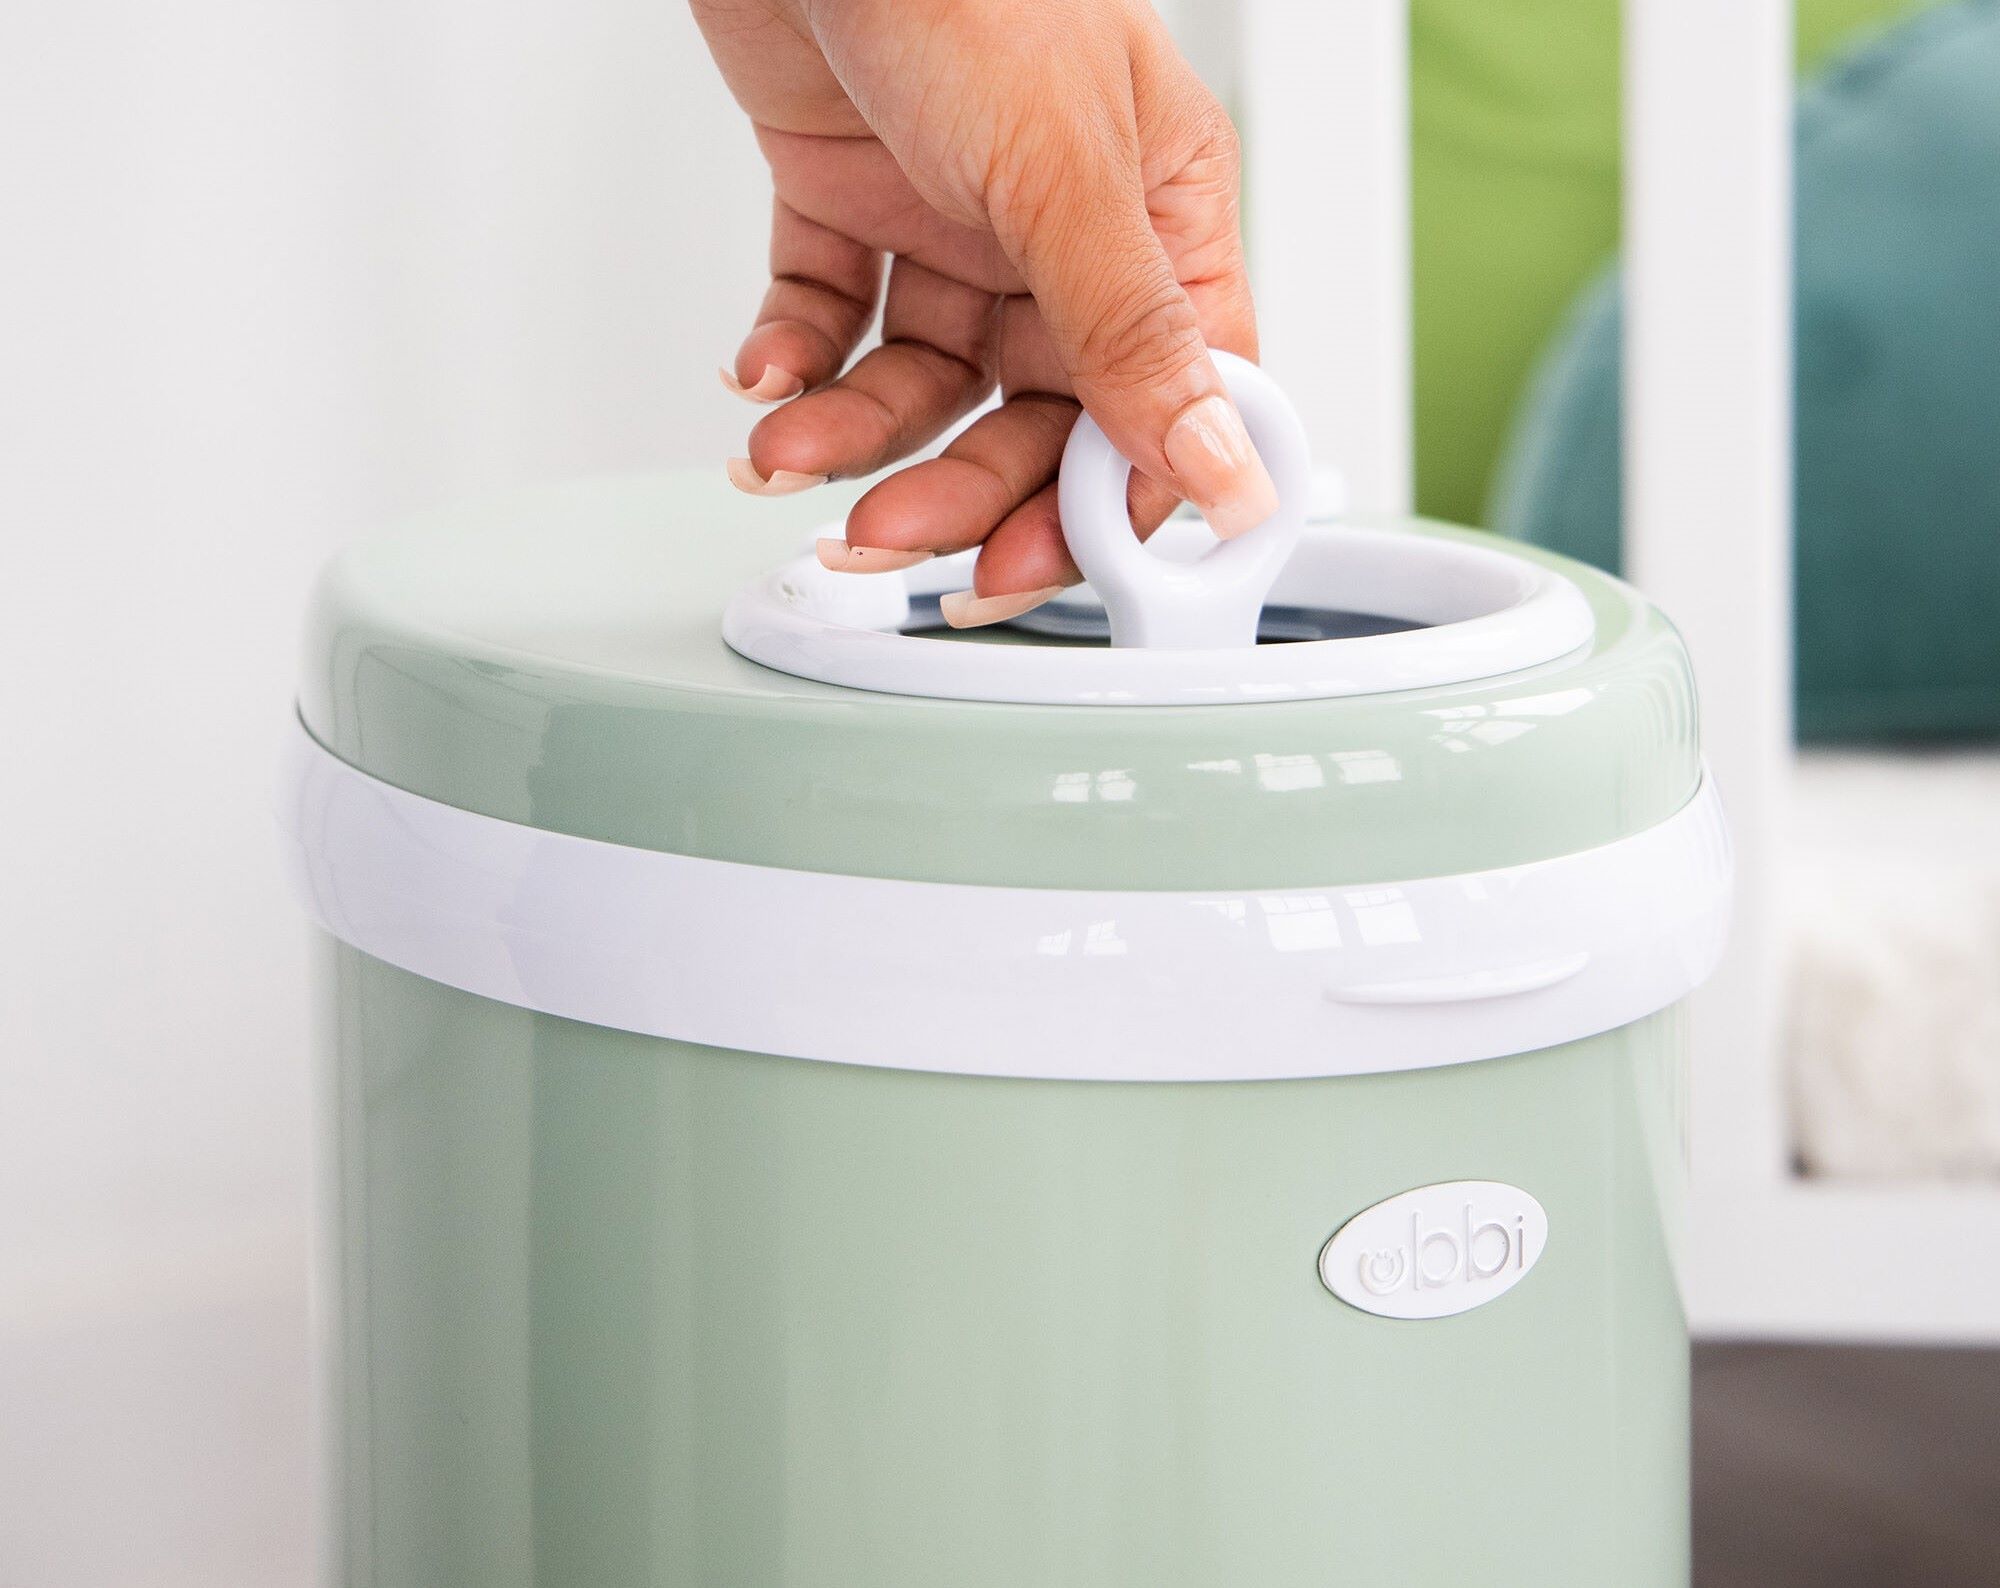
- Diaper Pail: A diaper pail is a dedicated container specifically designed to hold soiled diapers. These pails often have seals or lids to contain odor and prevent it from spreading. Look for a pail with a hands-free lid opening mechanism for easy and hygienic disposal of diapers.
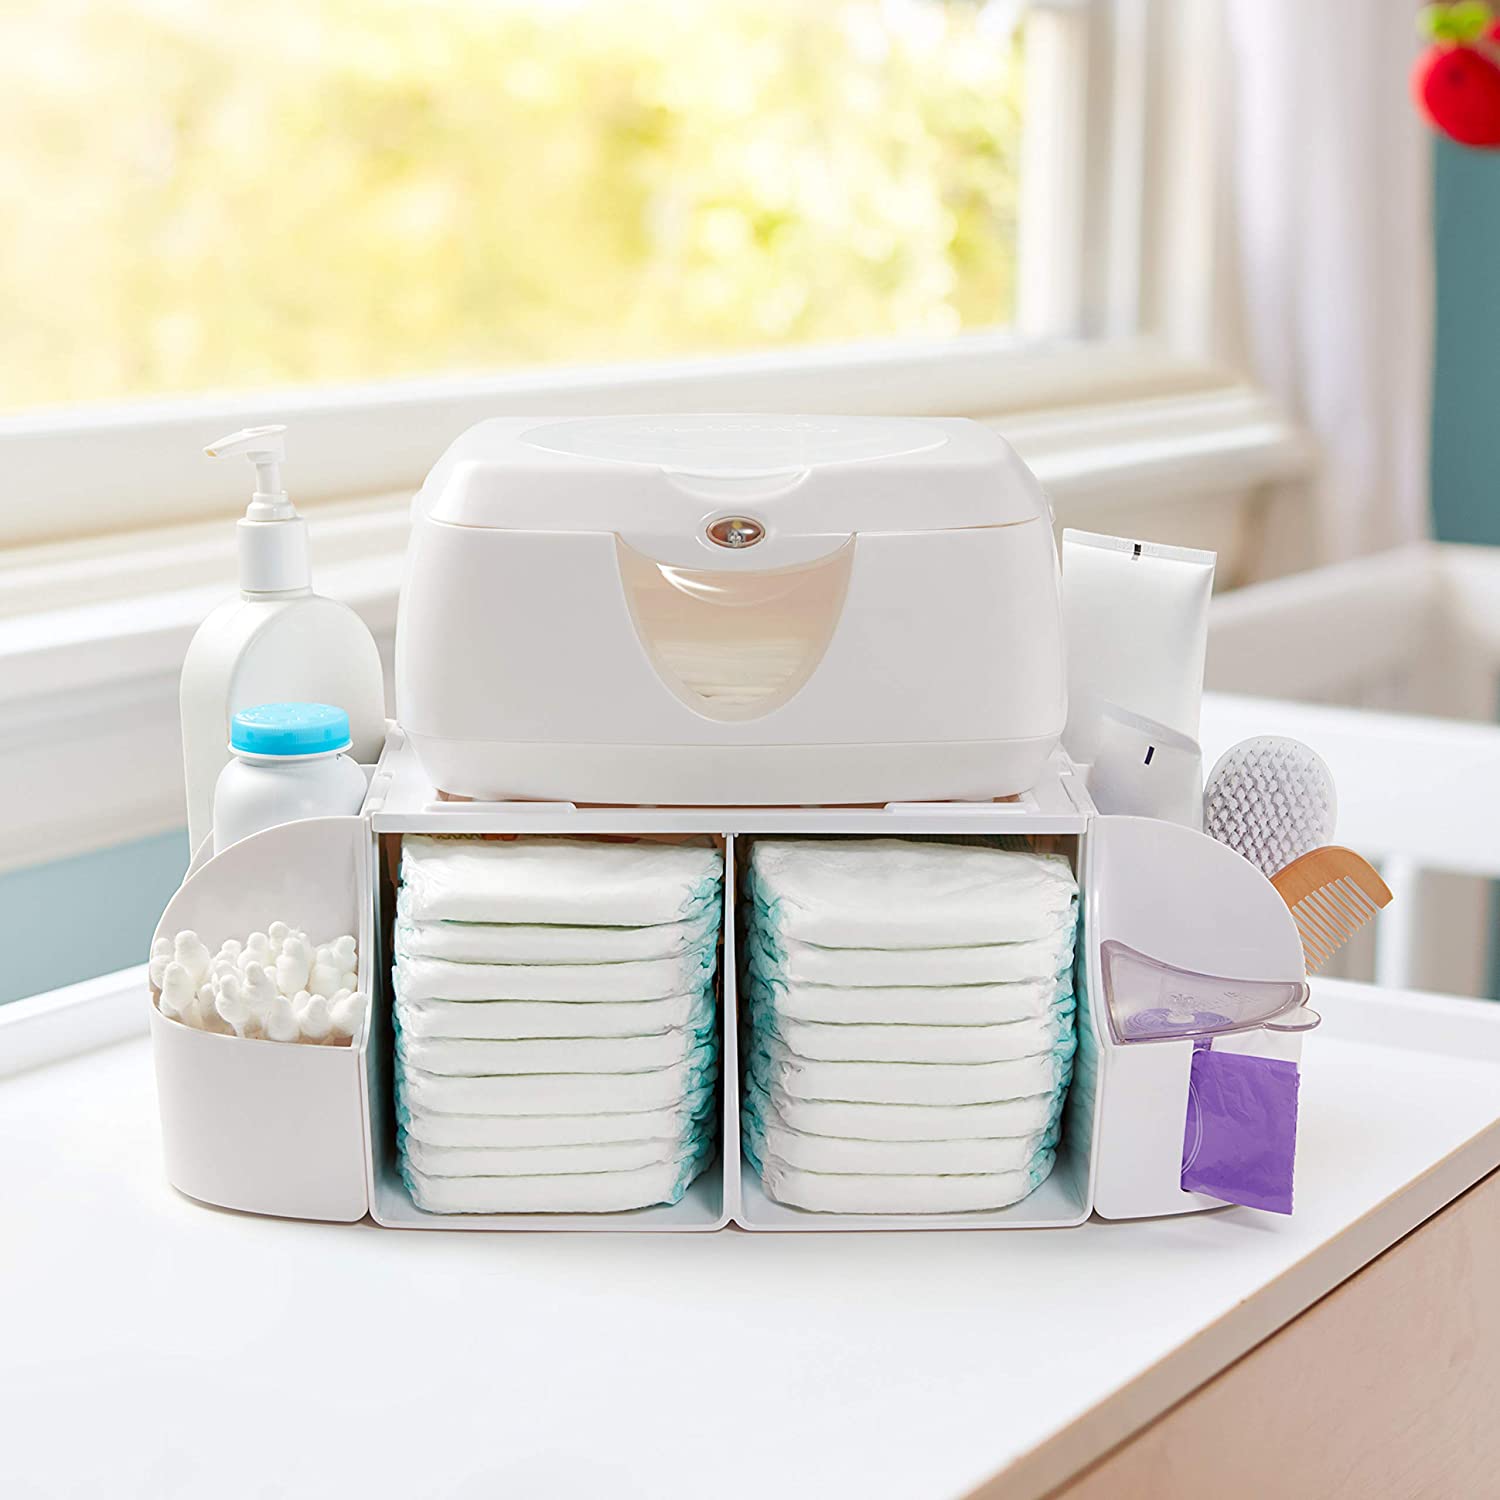
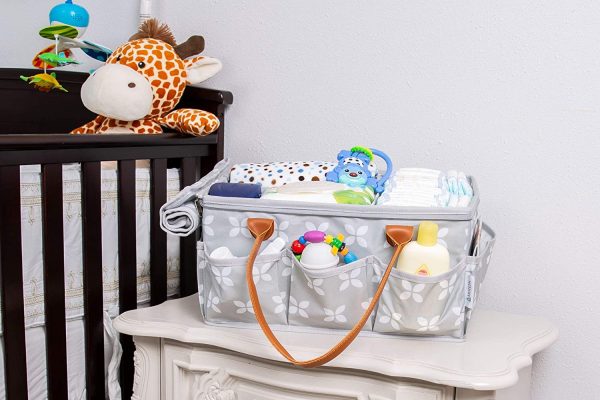
- Diaper Caddy: A diaper caddy is a portable organizer that allows you to store diapers, wipes, and other essentials in one convenient place. Caddies typically have multiple compartments and are ideal for keeping your diapering supplies easily accessible, especially if you frequently move around the house.
- Diaper Bag: If you’re always on the go, a diaper bag is a must-have item. Look for a spacious bag with multiple compartments to keep diapers, wipes, changing pads, and other essentials organized. Some diaper bags even come with built-in insulated pockets for storing bottles.
- Hanging Diaper Organizer: This type of storage solution is perfect if you’re looking to maximize vertical space. Hanging diaper organizers typically have multiple shelves or pockets that can be hung on the back of a door or on a wall. They are great for keeping diapers organized by size and easily accessible.
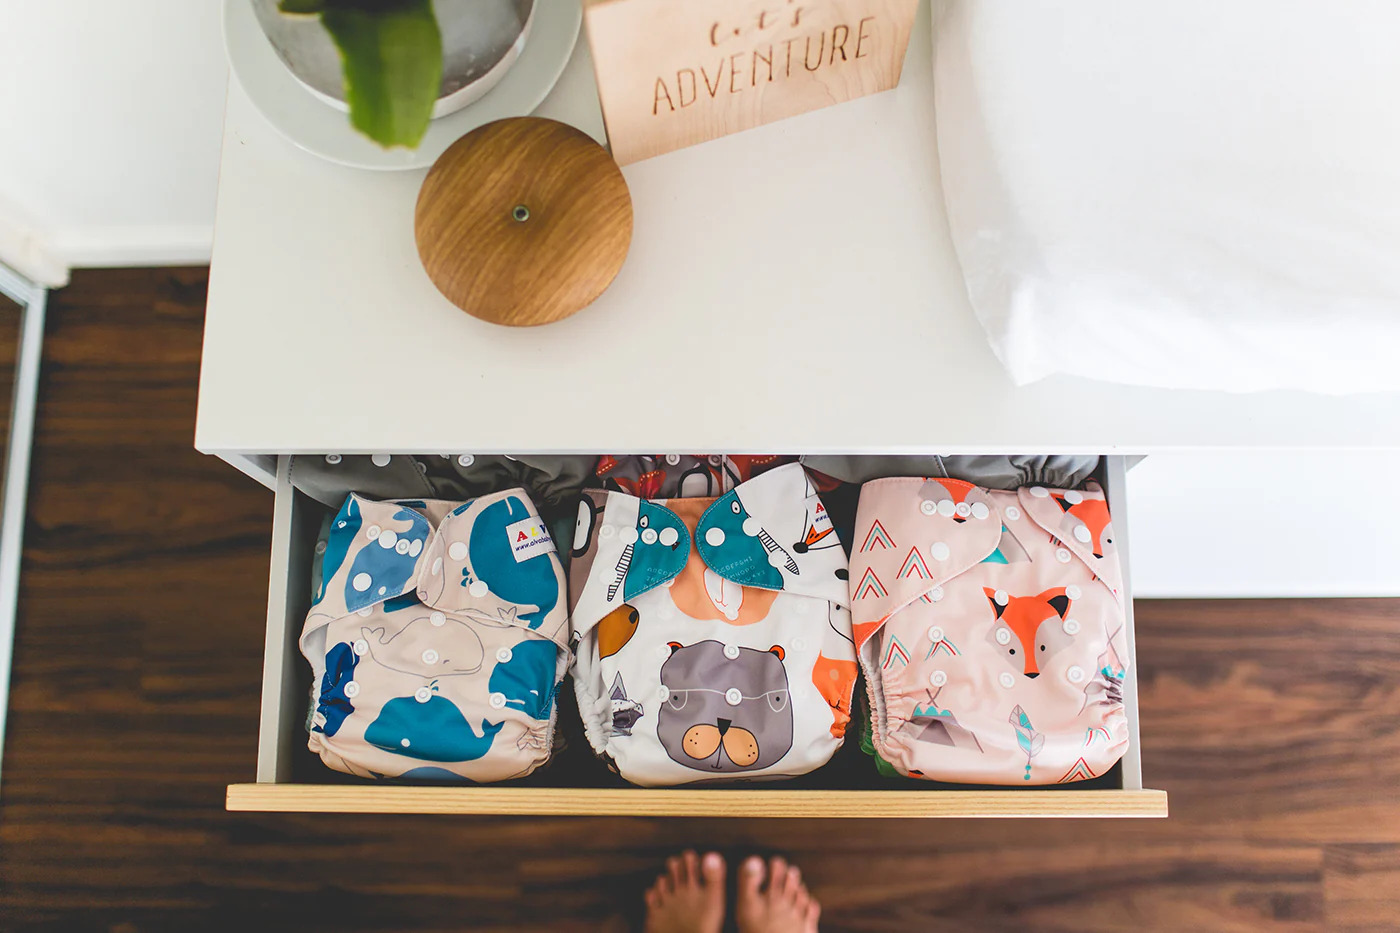
- Drawer Dividers: If you have a designated drawer or dresser for storing diapers, consider using drawer dividers. These dividers allow you to separate diapers by size or type, keeping them neatly organized and easy to find. You can find adjustable dividers that can fit different drawer sizes.
- Diaper Storage Bins: Storage bins are versatile and can be used to store a variety of items, including diapers. Look for bins that are stackable and have handles for easy transportation. Label each bin according to diaper size or type, so you can quickly locate what you need.
When choosing a diaper storage option, consider your available space, lifestyle, and personal preferences. You may even opt for a combination of different storage solutions to meet your specific needs. The key is to ensure that your chosen option allows for proper organization, easy access, and odor containment.
Now that you have a better idea of the different diaper storage options available, let’s move on to some tips for properly storing your diapers.
Diaper Pail
A diaper pail is an essential diaper storage solution for many parents due to its convenience and odor-controlling features. Here’s what you need to know about using a diaper pail:
Function: A diaper pail is specifically designed to hold soiled diapers. It typically has a sealing lid or mechanism to trap odors and prevent them from spreading throughout your home.
Usage: When using a diaper pail, it’s important to follow these steps:
- Step 1: Place a disposable diaper bag or liner inside the pail to make emptying and cleaning easier.
- Step 2: Open the lid of the diaper pail and place the soiled diaper inside.
- Step 3: Close the lid tightly to contain odors.
- Step 4: When the pail is full or when you need to dispose of the diapers, carefully remove the bag or liner, tie it securely, and dispose of it in an appropriate trash bin.
- Step 5: Replace the disposable bag or liner inside the pail for the next use.
Tips for Using a Diaper Pail:
- Choose a high-quality diaper pail: Invest in a good-quality diaper pail with a strong seal to effectively contain odors. Look for models that have features like a foot pedal for hands-free operation, antimicrobial coatings, or self-sealing systems for added convenience.
- Use scented trash bags or deodorizers: To further minimize odors, you can use scented trash bags or place deodorizers specifically designed for diaper pails inside. Make sure to follow the manufacturer’s instructions for using these products.
- Empty the pail regularly: To prevent the build-up of odors, it’s important to empty the diaper pail regularly, especially when it is nearing its capacity. Follow the manufacturer’s guidelines on how often to empty and clean the pail.
- Keep the diaper pail away from direct sunlight: Placing the diaper pail in direct sunlight can accelerate the breakdown of the plastic and affect its functionality. Keep it in a cool and shaded area to maintain its quality.
- Regularly clean and sanitize the diaper pail: Clean the diaper pail periodically to reduce odors and maintain hygiene. Follow the manufacturer’s instructions for cleaning and sanitizing the pail.
A diaper pail is an excellent choice for parents who want a dedicated storage solution that helps control diaper odors. By following these tips, you can effectively use a diaper pail to keep your baby’s nursery smelling fresh and clean.
Diaper Caddy
A diaper caddy is a portable and compact organizer that allows you to conveniently store and transport your diapering essentials. Here’s what you need to know about using a diaper caddy:
Function: A diaper caddy is designed to hold diapers, wipes, lotions, and other diapering supplies. It usually has multiple compartments or pockets to keep your items organized and easily accessible.
Usage: When using a diaper caddy, follow these steps:
- Step 1: Place your diaper caddy in a convenient location, such as your baby’s changing station or any area where you frequently change diapers.
- Step 2: Organize your diapers by stacking them neatly in one compartment or using dividers to separate different sizes.
- Step 3: Arrange your wipes, lotions, creams, and other diapering essentials in the remaining compartments or pockets.
- Step 4: When it’s time for a diaper change, simply grab the caddy and bring it to your desired location.
- Step 5: After the diaper change, return the used supplies to their designated compartments for easy access next time.
Tips for Using a Diaper Caddy:
- Choose a sturdy and spacious caddy: Look for a diaper caddy that is durable and has ample space to store all your diapering essentials. Make sure it has compartments that can accommodate different sizes of diapers and other supplies you use regularly.
- Keep the caddy stocked: Regularly check and restock your diaper caddy to ensure that you never run out of diapers or wipes during a diaper change. This can help you avoid last-minute rushes to refill your supplies.
- Personalize your caddy: Consider adding special touches like name tags, labels, or decorations to your diaper caddy to make it more personal and visually appealing.
- Use the caddy for other purposes: Once your child is out of diapers, repurpose the diaper caddy for other organizing needs. It can be used to store small toys, art supplies, or even as a bathroom organizer.
- Clean the caddy regularly: Keep your diaper caddy clean by wiping it down regularly with a mild cleaning solution. This will help maintain hygiene and prevent any build-up of dirt or residue.
A diaper caddy is a practical and portable storage solution that allows you to have all your diapering essentials in one place. Whether you’re changing diapers in the nursery or on-the-go, a diaper caddy ensures that everything you need is readily available at your fingertips.
Read more: How To Organize A Diaper Bag
Diaper Bag
A diaper bag is an essential item for parents on the go, as it allows you to carry all your baby’s essentials in one convenient and organized place. Here’s what you need to know about using a diaper bag:
Function: A diaper bag is specifically designed to hold diapers, wipes, bottles, extra clothes, and other necessary items for your baby. It typically features multiple compartments, pockets, and insulated sections to keep everything organized and easily accessible.
Usage: When using a diaper bag, follow these steps:
- Step 1: Pack your essentials – Start by packing an adequate supply of diapers, wipes, and a changing pad. Make sure you have enough for the expected duration of your outing.
- Step 2: Organize the compartments – Utilize the different compartments and pockets of the bag to store diapers, wipes, and other necessities. Keep items you may need frequently, such as wipes or a pacifier, in easily accessible pockets.
- Step 3: Include extras – Consider including extras like a change of clothes, burp cloths, bottles, formula or breastmilk, snacks, and any other items you may need during your outing.
- Step 4: Keep it stocked – Regularly check and restock your diaper bag to ensure you have everything you need for each outing. This will help you avoid running out of supplies when you’re away from home.
- Step 5: Pack it efficiently – Arrange items in the bag in a way that maximizes space and makes it easy to find what you need. Consider using pouches or small bags to keep items organized within the larger diaper bag.
- Step 6: Take essential accessories – Don’t forget to include accessories like a portable changing pad, diaper disposal bags, hand sanitizer, and any other items that might aid in diaper changes and hygiene.
Tips for Using a Diaper Bag:
- Choose a well-designed diaper bag: Invest in a high-quality diaper bag with features that suit your needs. Look for adjustable straps, insulated bottle pockets, a dedicated diaper pocket, and durable construction.
- Keep it versatile: Choose a diaper bag that can double as a regular backpack or tote bag to use even after your baby has outgrown diapers. This allows you to get more use out of the bag long-term.
- Organize with pouches: Use small pouches or zippered bags to separate items within the diaper bag. This makes it easier to find what you need quickly and keeps the main compartment tidy.
- Regularly clean your bag: Empty and clean your diaper bag regularly to prevent any lingering odors or bacteria. Follow the manufacturer’s instructions for cleaning and maintenance.
- Personalize it: Add personal touches to your diaper bag by attaching cute keychains, name tags, or zipper pulls. This not only adds a touch of style but also helps identify your bag among others.
A well-stocked and well-organized diaper bag ensures you have everything you need for outings with your baby. Whether it’s a short trip to the park or a day-long adventure, a reliable diaper bag will keep you prepared and make your outings more convenient and enjoyable.
Hanging Diaper Organizer
A hanging diaper organizer is a space-saving solution that allows you to keep your diapers neatly organized and easily accessible. Here’s what you need to know about using a hanging diaper organizer:
Function: A hanging diaper organizer typically consists of multiple shelves or pockets that can be hung on the back of a door, wall, or changing table. It provides a convenient storage solution for diapers, wipes, and other diapering essentials.
Usage: When using a hanging diaper organizer, follow these steps:
- Step 1: Choose a suitable location – Select a suitable location to hang the organizer, such as the back of a door or a wall near your changing area.
- Step 2: Arrange diapers by size – Organize your diapers by size and stack them in the designated compartments or pockets of the hanging organizer.
- Step 3: Store other essentials – Utilize the additional compartments or pockets for storing wipes, creams, lotions, or any other items you frequently use during diaper changes.
- Step 4: Keep it stocked – Regularly check and restock your hanging diaper organizer to ensure you have an ample supply of diapers and other necessities on hand.
- Step 5: Maintain organization – As you use diapers or items from the organizer, make a habit of rearranging and restocking to maintain organization and easy access.
Tips for Using a Hanging Diaper Organizer:
- Choose a durable organizer: Ensure that the hanging diaper organizer is made of sturdy materials that can withstand the weight of diapers and other items. Look for organizers with reinforced stitching and strong hanging hooks.
- Select the right size: Consider the size of your diaper collection when choosing a hanging organizer. Make sure it has enough compartments or pockets to accommodate the number of diapers you use in a given period.
- Label compartments: If you have multiple compartments or sections in your hanging diaper organizer, consider labeling them by diaper size or type. This will make it easier for you or other caregivers to find the diapers they need quickly.
- Use additional storage: If your hanging diaper organizer doesn’t have enough space for all your diapering supplies, consider using additional storage solutions, such as a drawer or shelf, to keep extra diapers and other items nearby.
- Keep the organizer clean: Regularly wipe down the hanging diaper organizer with a damp cloth to keep it clean and remove any dust or dirt that may accumulate.
- Repurpose it later: Once your child is out of diapers, repurpose the hanging diaper organizer for other storage needs. It can be used to store small toys, accessories, or even as a craft organizer.
A hanging diaper organizer is an excellent choice for maximizing vertical space and keeping your diapers and diapering essentials neatly organized. It allows quick and easy access to diapers during diaper changes, saving you time and keeping your changing area clutter-free.
Drawer Dividers
Drawer dividers are a simple yet effective way to create organization within your baby’s dresser or changing table drawers. They provide separate compartments for different sizes or types of diapers, making it easier to locate and access the diapers you need. Here’s what you need to know about using drawer dividers:
Function: Drawer dividers are small partitions or inserts that are placed within drawers to create separate sections. They help you categorize and organize your diapers by size, type, or brand.
Usage: When using drawer dividers, follow these steps:
- Step 1: Measure your drawer space – Measure the width and depth of your drawer to ensure the dividers you choose will fit properly.
- Step 2: Select the appropriate dividers – Choose dividers that are adjustable or come in different sizes to fit your specific drawer dimensions.
- Step 3: Determine your organizational strategy – Decide how you want to organize your diapers (by size, type, brand, etc.). This will help you plan the configuration of dividers within the drawer.
- Step 4: Install the dividers – Insert the dividers vertically or horizontally within the drawer to create separate compartments for each category of diapers. Ensure they are securely in place.
- Step 5: Arrange diapers – Stack or place diapers in their designated compartments according to your organizational strategy. Keep like-sized diapers together for easy access.
Tips for Using Drawer Dividers:
- Choose sturdy dividers: Opt for dividers made of durable materials that can withstand the weight of the diapers. Plastic dividers or ones with rubber grips tend to work well.
- Consider adjustable dividers: Adjustable dividers allow you to customize the compartments within your drawer to accommodate different sizes or quantities of diapers as your baby grows.
- Label the compartments: Use labels or tags to identify each section of the drawer dividers. This will help you and other caregivers quickly locate the desired diaper size or type when needed.
- Regularly check and adjust: Periodically reassess your diaper storage needs and adjust the configuration of the dividers if necessary. As your baby grows, you may need to rearrange the compartments to accommodate different diaper sizes.
- Utilize other sections: In addition to organizing diapers, you can use additional sections created by the dividers to store other diapering supplies, such as wipes, creams, or lotions.
- Maintain cleanliness: Regularly clean and wipe down the dividers to prevent any accumulation of dust, dirt, or debris. This will ensure a hygienic diaper storage environment.
Drawer dividers provide a simple and effective way to keep your baby’s diapers neatly organized and easily accessible. By implementing dividers in your baby’s dresser or changing table drawers, you can create a tidy and efficient storage system that saves you time during diaper changes.
Diaper Storage Bins
Diaper storage bins are versatile and practical solutions for keeping your diapers organized, especially if you have a large diaper supply or multiple diapering stations in your home. Here’s what you need to know about using diaper storage bins:
Function: Diaper storage bins are containers with a wide and open design, allowing you to easily access and store diapers. These bins come in various sizes and materials to accommodate different quantities of diapers.
Usage: When using diaper storage bins, consider the following steps:
- Step 1: Determine the size and quantity needed – Assess the number of diapers you typically use or store and choose storage bins that can comfortably accommodate that quantity.
- Step 2: Select the appropriate design – Consider the space where you plan to place the storage bins and choose a design that complements your nursery’s aesthetics.
- Step 3: Stack or position the bins – Place the storage bins in a designated area, such as a changing table, shelf, or closet, with easy access. You can stack multiple bins if you have a larger diaper supply.
- Step 4: Organize diapers within the bins – Arrange the diapers neatly within each storage bin, either by size or type, to make it easy to identify and grab the diapers you need during diaper changes.
- Step 5: Restock the bins regularly – Keep track of your diaper supply and regularly restock the storage bins to ensure you always have an adequate quantity of diapers readily available.
Tips for Using Diaper Storage Bins:
- Choose durable materials: Opt for storage bins made of sturdy materials like plastic, fabric, or woven materials. These materials are relatively easy to clean and maintain.
- Consider transparent or labeled bins: Transparent bins or bins with labels can help you quickly identify the sizes or types of diapers stored inside. This saves you time during diaper changes.
- Utilize dividers or compartments: If your storage bins are spacious enough, consider using dividers or small containers within the bins to further organize the diapers by size, brand, or type.
- Utilize storage bins for other purposes: Once your baby outgrows diapers, repurpose the storage bins for organizing other items such as toys, clothing, or nursery essentials.
- Keep bins clean and sanitized: Regularly wipe down the storage bins with a damp cloth or disinfectant to ensure a clean and hygienic diaper storage area.
- Coordinate with your nursery decor: Choose storage bins that match the overall theme or color scheme of your nursery to create a cohesive and visually appealing space.
Diaper storage bins provide an efficient and organized solution for storing a large supply of diapers. By implementing these bins in your diapering routine, you can ensure that your baby’s diapers are easily accessible and neatly arranged, making diaper changes a breeze.
Store diapers in a cool, dry place away from direct sunlight and heat sources. Keep them in their original packaging or a sealed container to maintain their quality and absorbency.
Read more: How To Organize Diapers And Wipes
Tips for Proper Diaper Storage
Proper diaper storage is essential for maintaining the quality and freshness of your baby’s diapers. Here are some valuable tips to help you store diapers effectively:
- Keep Diapers in a Cool and Dry Place: It’s important to store diapers in a cool, dry area to prevent moisture from affecting their quality. Avoid storing them in areas prone to humidity, such as the bathroom or near a window.
- Keep Diapers Away from Direct Sunlight: Exposure to direct sunlight can cause diapers to deteriorate more quickly. Store them in a shaded area or use opaque containers to protect them from harmful UV rays.
- Organize Diapers based on Sizes: If you use different sizes of diapers, consider organizing them accordingly. This makes it easier to find the right size quickly and prevents confusion during diaper changes.
- Consider Using Vacuum-Sealed Bags: Vacuum-sealed bags can help preserve the freshness and extend the shelf life of your diapers. By removing excess air, these bags create an airtight seal that keeps diapers protected from moisture, odors, and potential damage.
- Label Diaper Storage Areas: If you have various diaper storage areas, be sure to label them. This ensures that anyone assisting with diaper changes can easily find the right size or type of diapers when needed.
- Regularly Check Diaper Expiration Dates: Diapers have expiration dates, so it’s important to check them regularly. Using expired diapers can lead to reduced effectiveness and potential discomfort for your baby.
- Rotate Stock: To avoid using expired or stale diapers, practice a “first in, first out” approach. This means using the oldest diapers first and restocking the storage with fresh ones at the back to ensure constant rotation.
- Keep Diapers Sealed or Covered: If you have open packages of diapers, ensure they are sealed tightly or covered with adhesive or plastic wrap to prevent exposure to air and potential contamination.
- Dispose of Defective or Damaged Diapers: Inspect diapers regularly for any signs of damage or defects. Dispose of any diapers that are torn, have adhesive issues, or show signs of deterioration.
- Consider Temperature and Humidity: Extremes in temperature and humidity can impact diaper quality. Avoid storing diapers in areas that experience extreme heat or cold, as well as areas prone to high humidity.
By following these tips for proper diaper storage, you can ensure that your baby’s diapers remain fresh, high-quality, and ready for use whenever you need them. A well-organized and well-maintained diaper storage system not only saves you time but also ensures the best possible diapering experience for your little one.
Keep Diapers in a Cool and Dry Place
Proper storage conditions are crucial for maintaining the quality and effectiveness of your baby’s diapers. One key tip for proper diaper storage is to keep them in a cool and dry place. Here’s why it’s important and how to achieve it:
Why it’s important:
Diapers are made with materials that can be affected by moisture and temperature. Storing diapers in a cool and dry place helps prevent issues such as mold, mildew, and degradation of the diaper’s materials. It also helps maintain the overall freshness and functionality of the diapers.
How to achieve it:
- Choose the right storage location: Select a storage location that is away from sources of direct heat or moisture, such as radiators, heating vents, or humid areas in your home. Avoid storing diapers in the bathroom, where humidity levels can be high.
- Use a dedicated diaper storage container: Opt for a container that is specifically designed for diaper storage, such as a diaper pail or airtight storage bin. These containers can help create a suitable environment by sealing out excess moisture and maintaining a consistent temperature.
- Avoid exposure to extreme temperatures: Extreme temperatures can impact the integrity of the diaper materials. Avoid storing diapers in areas that are subject to high heat or freezing temperatures, such as garages or basements that lack temperature control.
- Keep away from direct sunlight: Exposure to direct sunlight can accelerate the breakdown of the diaper materials. Store diapers in shaded areas or use opaque containers to protect them from harmful UV rays.
- Don’t store diapers near cleaning products or chemicals: Chemicals or strong cleaning agents can potentially affect the diapers’ materials or leave residues that could irritate your baby’s skin. Keep diapers away from any areas or products that may contain these substances.
- Regularly inspect the storage area: Periodically check the storage area for any signs of moisture or temperature fluctuations. Address any concerns or issues promptly to ensure the optimal condition of your diaper storage environment.
By keeping your diapers in a cool and dry place, you can help prolong their shelf life, maintain their quality, and ensure they are ready for use whenever your baby needs a diaper change. Remember to assess your current diaper storage area and make any necessary adjustments to create an ideal environment for diaper storage.
Keep Diapers Away from Direct Sunlight
When it comes to proper diaper storage, keeping them away from direct sunlight is essential. Here’s why it’s important and how you can achieve it:
Why it’s important:
Exposure to direct sunlight can have detrimental effects on the quality and functionality of diapers. Sunlight contains ultraviolet (UV) rays, which can lead to the breakdown of the diaper’s materials, diminish their absorbency, and cause them to become less effective in preventing leaks. Additionally, sunlight exposure can also lead to discoloration and an undesirable odor in the diapers.
How to achieve it:
- Choose a suitable storage location: Select a storage area or container that is shielded from direct sunlight. A drawer, closet shelf, or a covered storage bin are great options to protect the diapers from UV rays.
- Use opaque diaper storage containers: If you use transparent storage containers, consider covering them with an opaque material or storing them in a non-transparent diaper bag. This prevents sunlight from directly reaching and affecting the diapers inside.
- Keep the storage area shaded: If your storage area is near a window or receives direct sunlight, position the diapers in a way that they are shielded from the sun. Use curtains, blinds, or shades to block out or reduce the amount of sunlight entering the storage area.
- Avoid leaving diapers in the car or exposed to sunlight during outings: When you’re out and about with your baby, avoid leaving diapers in the car or in direct sunlight for extended periods. If possible, store them in a bag or diaper caddy that is kept in a shaded area or covered with a blanket or towel.
- Consider UV protection: If sunlight exposure is unavoidable in your storage area, look for diaper storage containers or bags made of UV-resistant materials. These can provide an extra layer of protection against harmful UV rays.
- Regularly inspect diapers for discoloration or odor: Keep an eye on your stored diapers and check periodically for any signs of discoloration or unpleasant odor. If you notice any changes, it may be an indication of sunlight damage, and it’s best to discard those diapers.
By keeping your diapers away from direct sunlight, you can help preserve their integrity and ensure they remain effective in providing the necessary absorbency and leak protection for your baby. The extra care in proper storage will help maintain the quality of the diapers, keeping them fresh and ready for use when your little one needs them.
Organize Diapers Based on Sizes
Proper organization is key to efficient diaper storage and diaper changes. One important tip for proper diaper storage is to organize diapers based on their sizes. Here’s why it’s important and how you can effectively implement this practice:
Why it’s important:
Organizing diapers by size saves you time and eliminates the hassle of searching through different packages or stacks to find the right size for your baby. It ensures that you can easily grab the appropriate diaper when needed, making diaper changes quicker and more efficient. Additionally, organizing by size helps you keep track of your diaper inventory, ensuring you always have an adequate supply of each size on hand.
How to achieve it:
- Dedicated storage for each size: Set up separate storage areas or containers for each diaper size. This can be individual drawers, bins, shelves, or labeled sections within a larger storage unit.
- Stack or arrange diapers within each size category: Within each storage area, stack or arrange the diapers of the same size together. Place the newest packages at the back and use the oldest ones first to ensure a rotation system.
- Label or mark the storage areas: Use labels or markers to clearly indicate the size category for each storage area. This makes it easy for you, your partner, or other caregivers to find the correct size without any confusion.
- Regularly restock and organize: Keep track of your diaper inventory and restock each size category as necessary. Regularly check each storage area and rearrange as needed to maintain organization.
- Consider using dividers or separator bins: If you have a large diaper supply or limited storage space, use dividers or separate bins within each size category to further organize and differentiate individual diaper packages.
- Separate preemie or specialty diapers: If you have preemie or specialty diapers for specific needs, consider setting aside a separate storage area specifically for these diapers. This ensures they are easily accessible when required.
- Involve your partner and caregivers: Ensure that your partner or any other caregivers are aware of the organization system and encourage them to follow it. This will maintain consistency and help everyone locate the correct diaper size quickly.
By organizing diapers by size, you create an efficient and accessible system that streamlines diaper changes. This practice saves time, minimizes frustration, and ensures you always have the right size diaper readily available for your baby’s needs.
Read more: How To Fold A Napkin Like A Diaper
Consider Using Vacuum Sealed Bags
Vacuum-sealed bags can be a game-changer when it comes to properly storing diapers. Here’s why you should consider using vacuum-sealed bags and how they can benefit your diaper storage routine:
Why you should consider using vacuum-sealed bags:
Vacuum-sealed bags offer several advantages for diaper storage:
- Preserve freshness: Vacuum sealing removes excess air from the bag, creating an airtight environment that helps preserve the freshness of the diapers. This ensures that they remain clean, odor-free, and ready to use whenever you need them.
- Maximize storage space: By compressing the diapers tightly, vacuum-sealed bags allow you to maximize your storage space. This is especially beneficial if you have a large diaper supply or limited storage area.
- Protect against moisture and pests: Vacuum sealing creates a barrier that protects your diapers from moisture and potential pest infestations. This helps maintain the quality of the diapers and prevents damage or contamination.
- Extend shelf life: Vacuum-sealed bags help extend the shelf life of your diapers by reducing their exposure to light, air, and other elements that can cause degradation over time. This means you can safely store diapers for longer periods without compromising their quality.
How to use vacuum-sealed bags for diaper storage:
- Select the right bags: Choose vacuum-sealed bags that are specifically designed for storing diapers or other household items. Ensure they are made of durable materials that can withstand the compression process.
- Sort diapers by size: Before vacuum sealing, sort your diapers by size or type to make it easier to grab the desired size when needed. This will save you time during diaper changes.
- Place diapers in the bag: Stack or arrange the diapers neatly in the vacuum-sealed bag, ensuring they are evenly distributed and not overpacked.
- Seal the bag using a vacuum sealer: Follow the manufacturer’s instructions for sealing the bag using a vacuum sealer. This typically involves placing the bag in the sealer and activating the vacuum function to remove air from the bag.
- Store in a cool, dry place: Once sealed, store the vacuum-sealed bags of diapers in a cool, dry area away from direct sunlight and fluctuations in temperature or humidity.
By using vacuum-sealed bags for diaper storage, you can ensure that your diapers remain fresh, compact, and protected from external elements. This storage method helps maximize space, extend the shelf life of your diapers, and maintain the quality of your diaper supply.
Label Diaper Storage Areas
Labeling diaper storage areas is a simple yet effective way to create organization and efficiency in your diapering routine. Here’s why you should label diaper storage areas and how it can benefit you:
Why you should label diaper storage areas:
Labeling diaper storage areas provides several benefits:
- Ease of identification: Labels allow you, your partner, and other caregivers to quickly and easily identify the correct diaper size or type, reducing search time and eliminating confusion.
- Promote organization: By assigning specific areas or containers for each diaper size or type, labels help maintain an organized storage system, making it more efficient to store and retrieve diapers.
- Ensure consistency: Labels help maintain consistency and uniformity in your diapering routine, especially when multiple caregivers are involved. Everyone can follow the labeling system, reducing errors and providing a consistent experience for your baby.
- Track inventory: Labels allow you to keep track of your diaper inventory more easily. You can quickly see how many diapers you have left for each size and know when to restock to ensure you have an adequate supply on hand.
- Promote independence: As your child grows, labels can help them become familiar with different sizes or types of diapers. It can serve as a visual cue for them to recognize and select the appropriate diaper for themselves.
How to label diaper storage areas effectively:
- Choose clear and legible labels: Use clear, easy-to-read labels that are visible at a glance. Consider using large, bold fonts or color-coded labels for added clarity.
- Use waterproof labels: Since diapering involves handling liquids, use waterproof or moisture-resistant labels. This ensures that the labels won’t smudge or peel off due to contact with wet hands or wipes.
- Place labels at eye level: Position the labels at eye level or in a prominent location within the storage area. This makes it easy to locate the desired diaper size or type without having to search or move other items around.
- Be consistent with labeling: Establish a consistent labeling system across all your diaper storage areas. Use the same format and labeling method for each size or type of diaper to avoid confusion.
- Update labels as needed: Regularly review and update labels when you restock or change diaper sizes. This ensures that the labels accurately represent the contents of each storage area.
- Involve other caregivers: Inform your partner and any other caregivers about the labeling system and encourage them to follow it. This promotes consistency and helps everyone find the correct diapers easily.
By labeling diaper storage areas, you create a well-organized and efficient system that simplifies your diapering routine. The clear identification of diaper sizes or types saves time, reduces stress, and ensures a seamless diaper-changing experience for both you and your baby.
Regularly Check Diaper Expiration Dates
Regularly checking the expiration dates on your baby’s diapers is important to ensure their effectiveness and quality. Here’s why you should make it a habit to check diaper expiration dates and how to incorporate this essential step into your diaper storage routine:
Why you should check diaper expiration dates:
Checking diaper expiration dates is crucial for the following reasons:
- Ensure optimal performance: Diapers are designed with specific materials and features that provide the best protection and absorbency for your baby. Over time, these materials may degrade, reducing the effectiveness of the diaper. Checking expiration dates ensures that you are using diapers that meet quality standards and will perform optimally.
- Maintain fit and comfort: Diapers are sized to provide a snug fit for your baby. As diapers age, their elasticity may weaken, leading to a looser fit that can result in leaks or discomfort for your little one. Checking expiration dates helps you use diapers within the appropriate timeframe to ensure a proper fit and maximum comfort.
- Prevent irritation or allergies: Expired diapers may contain ingredients or components that break down over time, potentially causing irritation or allergies to your baby’s sensitive skin. Checking expiration dates helps you avoid using diapers that may no longer be hypoallergenic or suitable for your baby’s needs.
- Maximize absorbency and odor control: Diapers have specific designs and technologies to absorb wetness and control odors effectively. Over time, the absorbency and odor control properties may diminish. Checking expiration dates helps ensure that you are using diapers that will provide the highest level of absorbency and odor protection.
How to incorporate checking diaper expiration dates into your routine:
- Check expiration dates during restocking: Make it a habit to check the expiration dates when you restock your diaper supply. Before placing new diapers into storage, verify the expiration dates and place the diapers with the closest expiration date towards the front to ensure proper rotation.
- Review periodically: Set a reminder to review and check expiration dates on a monthly or quarterly basis. During these designated times, inspect the diapers in your storage area to identify any expiring or expired diapers that need to be used or discarded.
- Keep a record: Maintain a record of the expiration dates for your diaper supply. This can be a simple list or a digital note on your phone or computer. This record will help you track and manage your diaper inventory more effectively.
- Dispose of expired diapers: If you come across diapers that have expired or are nearing their expiration date, discard them responsibly. Expired diapers may not offer the same level of protection and could potentially lead to leaks or discomfort for your baby.
- Check individual packages: Some diaper brands may have separate expiration dates for each individual package. Be sure to check the expiration date on each package as you restock them to ensure you are using the diapers in the correct order.
By regularly checking diaper expiration dates, you can ensure that your baby always has fresh and effective diapers. This practice maintains comfort, prevents irritation, and provides your little one with the best possible diapering experience.
Conclusion
Proper diaper storage is essential for maintaining the quality, effectiveness, and overall convenience of diapering for both you and your baby. By implementing the tips and practices discussed in this article, you can create an organized and efficient diaper storage system that simplifies your diapering routine and ensures that your baby always has clean, fresh diapers ready for use.
From choosing the right diaper storage option to implementing proper organization techniques, each step contributes to an optimized diapering experience. Diaper pails, diaper caddies, diaper bags, hanging diaper organizers, drawer dividers, and diaper storage bins all play a role in providing accessible and well-organized storage solutions.
Additionally, keeping diapers in cool and dry places, away from direct sunlight, and organizing them based on sizes are critical practices that help maintain diaper quality and ease of use. Considering the use of vacuum-sealed bags keeps diapers fresh and maximizes storage space, while labeling diaper storage areas allows for quick identification and ensures consistency.
Lastly, regularly checking diaper expiration dates helps you use diapers within their optimal performance period, avoiding issues such as diminished absorbency, poor fit, and potential skin irritation.
By incorporating these tips and practices into your diaper storage routine, you can simplify diaper changes, save time, and provide your baby with the best possible diapering experience.
Remember, proper diaper storage is not just about organization; it’s about creating a clean, comfortable, and efficient environment for your baby. By taking care of your diaper storage, you can focus on what truly matters – nurturing and cherishing those precious moments with your little one.
Frequently Asked Questions about How To Store Diapers
Was this page helpful?
At Storables.com, we guarantee accurate and reliable information. Our content, validated by Expert Board Contributors, is crafted following stringent Editorial Policies. We're committed to providing you with well-researched, expert-backed insights for all your informational needs.


0 thoughts on “How To Store Diapers”