
Articles
How To Store Dill In The Refrigerator
Modified: February 28, 2024
Discover the best methods for storing dill in the refrigerator with this comprehensive article. Keep your dill fresh and flavorful using these simple storage tips.
(Many of the links in this article redirect to a specific reviewed product. Your purchase of these products through affiliate links helps to generate commission for Storables.com, at no extra cost. Learn more)
Introduction
Welcome to this guide on how to store dill in the refrigerator. Dill is a versatile and flavorful herb that can add a refreshing taste to a wide range of dishes, from salads and soups to marinades and sauces. Keeping dill fresh and vibrant is essential to fully enjoy its aromatic qualities. Storing it properly will not only prolong its shelf life but also help retain its flavor and aroma.
Whether you grow dill in your garden, receive it as a gift, or buy it from the grocery store, knowing how to store it correctly is crucial. Improper storage can quickly lead to wilting, loss of flavor, and ultimately, waste.
In this article, we will guide you through the steps to store dill in the refrigerator, ensuring its freshness and flavor for as long as possible. We will cover various methods to keep dill vibrant, ranging from storing it in water to freezing it for long-term use. So let’s dive in and learn how to store dill effectively.
Key Takeaways:
- Store dill in the refrigerator by placing it in a glass of water, a ziplock bag, or freezing it for long-term use to maintain its freshness, flavor, and nutritional value.
- Harvest fresh dill in the morning, clean and dry it thoroughly, and store it in the refrigerator using various methods to extend its shelf life and enjoy its vibrant taste in your dishes.
Read more: How To Store Dill In Refrigerator
Importance of Storing Dill Properly
Properly storing dill is vital to maintain its freshness, flavor, and nutritional value. Here are a few reasons why storing dill correctly is important:
- Prolong Shelf Life: Storing dill properly helps prolong its lifespan. Fresh dill can wilt quickly if not stored correctly, leading to a decrease in quality and potentially rendering it unusable.
- Retain Flavor and Aroma: Dill is known for its distinct and aromatic flavor. By storing it properly, you can preserve its flavor, ensuring that it adds that characteristic taste to your dishes.
- Preserve Nutritional Value: Like many herbs, dill contains essential vitamins and minerals. Proper storage ensures that these nutrients are retained, allowing you to enjoy the health benefits that dill offers.
- Minimize Food Waste: Knowing how to store dill correctly helps reduce food waste. By ensuring its freshness and extending its shelf life, you can use every sprig of dill effectively without having to throw away wilted or spoiled herbs.
- Convenience and Cost-Effectiveness: When you store dill properly, it becomes easier to access whenever you need it. This eliminates the need for frequent grocery store trips and saves you money in the long run, as you won’t have to constantly buy fresh dill.
Now that we understand the importance of storing dill properly, let’s move on to the step-by-step process of keeping dill fresh and flavorful in the refrigerator.
Steps to Store Dill in the Refrigerator
Storing dill in the refrigerator is a simple and effective way to keep it fresh for an extended period. Following these steps will help ensure that your dill retains its flavor and aroma:
- Harvesting Fresh Dill: If you have dill growing in your garden, it’s best to pick it in the morning when the essential oils are at their peak. Use a sharp pair of kitchen shears or scissors to cut the dill stems, leaving about 1/3 of the plant intact to promote regrowth.
- Cleaning and Drying Dill: Rinse the dill gently under cool water to remove any dirt or debris. Pat it dry using a clean kitchen towel or paper towels. Make sure to remove any excess moisture, as wet dill can quickly become limp and develop mold.
- Storing Dill in a Glass of Water: Fill a glass or jar with a few inches of water. Place the dill stems in the water, making sure the cut ends are submerged. Cover the dill loosely with a plastic bag and secure it with a rubber band. Place the glass in the refrigerator, and the dill will stay fresh for up to a week.
- Storing Dill in a Ziplock Bag: Alternatively, you can store dill in a ziplock bag if you don’t have a glass or jar available. Place the dill sprigs inside the bag, gently squeeze out any excess air, and seal the bag. This method will keep the dill fresh for about a week in the refrigerator.
- Freezing Dill for Long-term Storage: Freezing dill is an excellent option if you want to store it for an extended period. Wash and dry the dill as mentioned earlier. Chop the dill into small pieces or leave it as whole sprigs, depending on your preference. Place the dill in an airtight container or a freezer bag, removing as much air as possible. Label the container with the date and place it in the freezer. Frozen dill can retain its flavor for up to six months.
By following these steps, you can store dill effectively and enjoy its freshness in your recipes for an extended period. However, do keep in mind that dill is at its best when used fresh, so try to use it as soon as possible for the most vibrant flavors.
Harvesting Fresh Dill
Harvesting fresh dill is the first step in storing it properly. Whether you have dill growing in your garden or bought a bunch from the store, it’s essential to pick the dill at its peak to ensure the best flavor and aroma. Here’s how you can harvest fresh dill:
- Pick at the Right Time: It’s best to harvest dill in the morning when the essential oils and flavors are at their peak. The flavor tends to diminish as the day progresses, so grabbing it early ensures optimal taste.
- Choose Healthy Plants: Select dill plants that appear healthy and robust. Look for vibrant green foliage and avoid any plants that show signs of wilting or yellowing leaves.
- Use Sharp Kitchen Shears: To harvest dill, use a clean pair of kitchen shears or sharp scissors. Look for the main stem or individual branches that are ready for cutting.
- Leave Some Growth: When cutting dill, leave about 1/3 of the plant intact. By doing so, you allow the plant to regenerate, ensuring a continuous supply of dill throughout the growing season.
- Cut Above Leaf Nodes: Position the shears just above a set of leaf nodes, which are the areas where new growth emerges. Cutting above these nodes encourages the plant to produce new branches and foliage.
- Harvest as Needed: If you have an abundance of dill, it’s best to harvest it as needed. Unlike many other herbs, dill doesn’t store as well when picked in large quantities. Therefore, cutting small batches when required ensures the freshest flavor.
Remember, harvesting dill regularly promotes a healthy, vigorous plant and ensures the freshest taste. By following these steps, you can harvest fresh dill from your garden or select the best bunch from the store for long-lasting flavor and aroma.
Cleaning and Drying Dill
After harvesting fresh dill, it’s crucial to clean and dry it properly before storing it in the refrigerator. This process removes any dirt, debris, and excess moisture, ensuring that the dill stays fresh and aromatic. Follow these steps to clean and dry dill:
- Rinse Gently: Begin by rinsing the dill gently under cool water. Be careful not to handle the dill too roughly as it can bruise or damage the delicate leaves.
- Inspect for Debris: While rinsing, inspect the dill for any signs of dirt, insects, or debris. Remove any unwanted particles by gently rubbing the leaves with your fingers or using a soft-bristle brush.
- Pat Dry: After rinsing, pat the dill dry using a clean kitchen towel or paper towels. Place the dill on the towel and gently press down to absorb the excess moisture.
- Remove Excess Moisture: It’s essential to remove as much moisture as possible before storing the dill. Excess moisture can lead to wilting and the growth of mold or bacteria. Ensure that the dill is completely dry to extend its shelf life.
- Air Drying Option: If you prefer air drying, you can hang the dill upside down by its stems in a well-ventilated area. This method allows the dill to dry naturally, but it may take a few days for it to be completely dry and ready for storage.
By cleaning and drying the dill thoroughly, you eliminate any potential contaminants and reduce the risk of mold or spoilage. This process ensures that the dill stays fresh and vibrant, maintaining its aroma and flavor when stored in the refrigerator.
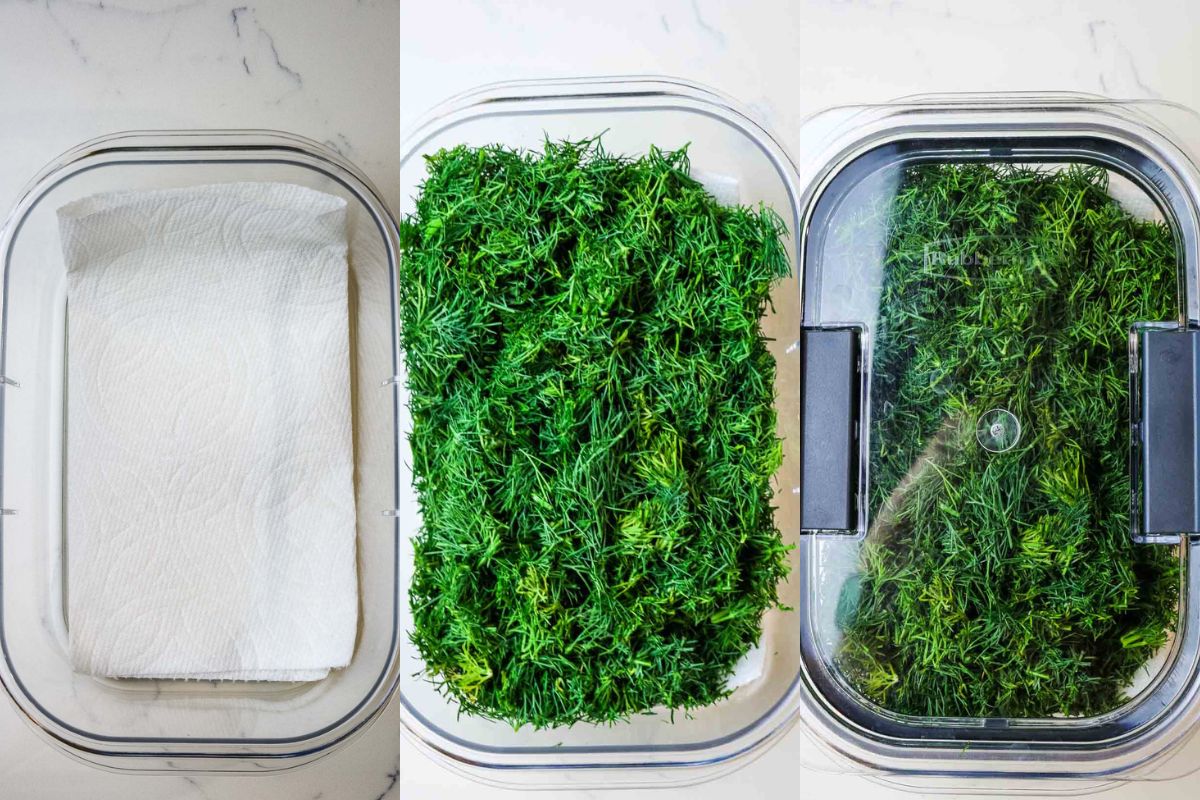
To store dill in the refrigerator, first rinse the dill and pat it dry. Then, wrap it in a slightly damp paper towel and place it in a resealable plastic bag. Store it in the vegetable crisper drawer for up to 1 week.
Read more: How To Store Dill In Fridge
Storing Dill in a Glass of Water
Storing dill in a glass of water is a popular method to keep it fresh in the refrigerator. This technique helps maintain the herb’s moisture level and extends its lifespan. Follow these steps to store dill in a glass of water:
- Select a Suitable Glass: Choose a tall glass or jar that is large enough to accommodate the dill sprigs. Make sure the container is clean and free from any residues.
- Add Water: Fill the glass with a few inches of fresh, cool water. The water should be enough to submerge the cut ends of the dill stems while leaving the foliage above the waterline.
- Trim the Dill Stems: Using a sharp knife or kitchen shears, trim the bottom ends of the dill stems at a 45-degree angle. This allows the dill to absorb water more efficiently.
- Place in the Glass: Insert the trimmed dill stems into the prepared glass of water, making sure the cut ends are submerged in the water. Arrange the dill sprigs in an upright position, ensuring they are not overcrowded.
- Cover with a Bag: Loosely cover the dill with a plastic bag, creating a small tent-like structure over the foliage. Secure the bag lightly with a rubber band or twist tie. This helps to create a humid environment without suffocating the dill.
- Store in the Refrigerator: Place the glass of water with the covered dill in the refrigerator. The cool temperature helps slow down the metabolic processes and keeps the dill fresh for up to a week.
Storing dill in a glass of water maintains its hydration, ensuring that it stays crisp and vibrant. Remember to check the water level periodically and change it if it becomes cloudy or depleted to keep the dill fresh for longer.
Storing Dill in a Ziplock Bag
If you don’t have a glass or jar available, storing dill in a ziplock bag is another effective method to keep it fresh in the refrigerator. This technique creates a sealed environment that helps retain moisture and prevents wilting. Follow these steps to store dill in a ziplock bag:
- Prepare the Dill: Clean and dry the dill as mentioned earlier. Remove any damaged or yellowing leaves, if present.
- Arrange the Sprigs: Place the dill sprigs into the ziplock bag. Depending on the size of the bag and quantity of dill, you may need to fold or trim the sprigs to fit comfortably.
- Remove Excess Air: Squeeze out as much air as possible from the bag before sealing it. This helps create a compact and airtight environment for the dill.
- Seal the Bag: Once you have removed the excess air, seal the ziplock bag securely. Double-check to ensure that the seal is tight, preventing air from entering or escaping.
- Label and Date the Bag: It’s a good practice to label the ziplock bag with the date of storage. This helps you keep track of how long the dill has been stored and make sure to use it within the recommended time.
- Store in the Refrigerator: Place the sealed ziplock bag of dill in the refrigerator. The cool temperature will help maintain the freshness and flavor of the dill for up to a week.
Storing dill in a ziplock bag provides a convenient and compact storage solution. Ensure that the bag is tightly sealed to prevent any air exchange, as exposure to air can accelerate wilting and loss of flavor.
Freezing Dill for Long-term Storage
If you have an abundance of dill or want to store it for an extended period, freezing is an excellent option. Freezing dill helps preserve its flavor and aroma, allowing you to enjoy its freshness even when it’s out of season. Follow these steps to freeze dill for long-term storage:
- Wash and Dry: Begin by washing the dill gently under cool water to remove any dirt or debris. Pat it dry thoroughly using a clean kitchen towel or paper towels.
- Prepare for Freezing: Once the dill is dry, decide whether you want to freeze it as whole sprigs or as chopped leaves. You can choose the method based on your preference and how you plan to use the dill in the future.
- Freezing Whole Sprigs: If you prefer to freeze dill as whole sprigs, carefully arrange them in a single layer on a baking sheet lined with parchment paper. Make sure the sprigs are not touching each other to prevent them from sticking together.
- Freezing Chopped Dill: If you prefer to freeze chopped dill, finely chop the dill leaves using a sharp knife or a pair of kitchen shears. Transfer the chopped dill into an airtight freezer-safe container or a ziplock bag.
- Remove Excess Air: For both methods, it’s important to remove as much air as possible before freezing to prevent freezer burn. If using a ziplock bag, squeeze out any excess air and seal it tightly. If using a container, choose one that fits the chopped dill or the arranged sprigs snugly to reduce air exposure.
- Label and Date: Remember to label the container or the bag with the contents and the date of freezing. This helps you keep track of the dill’s freshness and use it within the recommended period.
- Freeze: Place the baking sheet with the whole sprigs or the sealed container/bag of chopped dill in the freezer. Allow it to freeze completely, which usually takes a few hours.
- Long-term Storage: Once frozen, you can transfer the dill into a more space-efficient storage option, such as stackable freezer bags or vacuum-sealed bags. This helps minimize freezer space and protects the dill from freezer burn.
Frozen dill can retain its flavor for up to six months. It is worth noting that while frozen dill may not have the same fresh texture as fresh dill, it can still be used in cooked dishes and sauces to add a touch of the herb’s distinctive flavor.
Tips for Maintaining Freshness and Flavor
To ensure that your dill stays fresh and flavorful for as long as possible, consider the following tips:
- Store Immediately: After harvesting or buying fresh dill, store it as soon as possible. Delaying storage can lead to wilting and loss of flavor.
- Proper Temperature: Store dill in the refrigerator, ideally in the vegetable crisper drawer. The temperature should be around 32-40°F (0-4°C), which helps retain freshness.
- Moisture Control: Dill prefers slightly humid conditions. Use methods like storing it in a glass of water or placing a damp paper towel in the storage container to maintain the right moisture level.
- Check and Refresh Water: If storing dill in a glass of water, periodically check the water level and refresh it if it becomes cloudy or depleted. Fresh water helps extend the lifespan of the herb.
- Avoid Excess Moisture: While dill needs some moisture, excessive moisture can lead to rotting. Ensure dill is thoroughly dry before storage to prevent mold growth.
- Keep Away from Ethylene-emitting Produce: Ethylene gas can accelerate the wilting of dill. Store it away from ethylene-emitting produce like apples, bananas, and tomatoes.
- Use Fresh Leaves: When cooking, use fresh dill leaves rather than frozen ones whenever possible for the best flavor and aroma.
- Label and Date: Always label the storage container or bag with the contents and the date of storage. This helps you keep track of freshness and use the dill within the recommended time.
- Harvest as Needed: If you have dill growing in your garden, consider harvesting it as needed to ensure the freshest taste. This allows you to enjoy the vibrant flavors of freshly-picked dill.
By following these tips, you can maintain the freshness and flavor of your dill for an extended period, ensuring that it continues to enhance your culinary creations.
Read more: How To Store Dill In The Freezer
Conclusion
Storing dill properly is essential to maintain its freshness, flavor, and nutritional value. Whether you grow dill in your garden or purchase it from the store, following the correct storage techniques will help you enjoy the herb’s distinct taste and aroma for longer periods.
In this article, we have discussed various methods to store dill in the refrigerator. From storing it in a glass of water to freezing it for long-term storage, each method offers its own benefits and allows you to choose the most suitable option based on your needs.
Properly harvesting fresh dill, cleaning and drying it thoroughly, and then storing it using methods like glass of water or ziplock bag are effective ways to maintain its freshness and extend its shelf life. Freezing dill is a great option for long-term storage, ensuring you can enjoy its flavor even when it’s out of season.
It’s important to remember that while storing dill can help retain its flavor, using it fresh is always the best option. Whenever possible, harvest dill as needed and add it to your dishes right before serving to enjoy its vibrant taste.
By implementing the tips mentioned in this article, such as controlling moisture, avoiding ethylene exposure, and properly labeling and dating the storage containers, you can maximize the shelf life of your dill and reduce food waste.
Now that you have learned how to store dill properly, you can enjoy the delightful taste and aroma of this versatile herb in your favorite recipes all year round.
Frequently Asked Questions about How To Store Dill In The Refrigerator
Was this page helpful?
At Storables.com, we guarantee accurate and reliable information. Our content, validated by Expert Board Contributors, is crafted following stringent Editorial Policies. We're committed to providing you with well-researched, expert-backed insights for all your informational needs.




0 thoughts on “How To Store Dill In The Refrigerator”