Articles
How To Store Bread Properly
Modified: August 24, 2024
Learn the best practices for storing bread properly to keep it fresh for longer. Find helpful articles on bread storage tips and techniques here.
(Many of the links in this article redirect to a specific reviewed product. Your purchase of these products through affiliate links helps to generate commission for Storables.com, at no extra cost. Learn more)
Introduction
When it comes to enjoying a delicious loaf of bread, proper storage is key. Many of us have experienced the disappointment of finding our beloved bread loaves stale, dry, or even moldy. But fear not! With a few simple tips and techniques, you can extend the shelf life of your bread and ensure that every slice is as fresh and flavorful as the day it was baked.
Proper bread storage goes beyond just preserving its freshness; it also helps maintain its texture and taste. Whether you purchase your bread from a bakery or make it yourself, understanding how to store it correctly will ensure that you can savor every last crumb.
In this article, we will dive into the importance of proper bread storage and explore the factors that can affect its shelf life. We will also discuss the different types of storage containers available and identify the best locations in your home for storing bread. Additionally, we will provide general guidelines for storing bread and share various techniques for freezing and reviving stale bread.
So, whether you’re a bread enthusiast or someone who simply wants to make their loaf of bread last longer, this article is for you. Let’s delve into the wonderful world of bread storage and learn how to keep our loaves fresh and delectable for as long as possible.
Key Takeaways:
- Proper bread storage is crucial for maintaining freshness, flavor, and texture. Choosing the right container, location, and thawing method can significantly extend the shelf life of your bread, ensuring every slice is enjoyable.
- Reviving stale bread is possible with simple techniques like adding moisture, using the oven, or transforming it into other dishes. Don’t let stale bread go to waste – bring it back to life and savor every bite.
Read more: How To Store Food Properly
Why Proper Bread Storage Matters
Proper bread storage is essential to maintain its quality and freshness. When bread is exposed to air, moisture and temperature fluctuations, it can quickly become stale, dry, or even moldy. This not only affects the taste and texture of the bread but also reduces its shelf life.
Stale bread is characterized by a dry and crumbly texture, making it less enjoyable to eat. It can also lose its aroma and flavor, leaving you with a lackluster eating experience. Additionally, when bread is not stored properly, it is more prone to developing mold, which poses health risks and renders the entire loaf inedible.
By understanding the importance of proper bread storage, you can avoid these issues and prolong the life of your bread. Whether you purchase freshly baked bread or make it yourself, taking the time to store it correctly will ensure that every slice remains soft, flavorful, and enjoyable.
Proper bread storage not only benefits the taste and texture, but it also helps you save money. When bread goes stale or spoils quickly, it often leads to wasted food and unnecessary trips to the grocery store. By implementing effective storage techniques, you can minimize waste and maximize your investment in bread.
Additionally, proper storage is crucial if you plan to freeze bread for later use. Freezing bread is a convenient way to extend its shelf life, but without proper packaging and storage, you risk freezer burn and loss of quality.
Overall, proper bread storage matters because it allows you to enjoy fresh, flavorful bread for an extended period. It helps maintain its quality, prevents waste, and saves you money. So, let’s explore the factors that can affect bread storage and discover the best practices to keep your bread in its prime condition.
Factors That Affect Bread Storage
Several factors can impact the shelf life and quality of your bread. By understanding these factors, you can make informed decisions about how to store your bread to maximize its freshness and taste.
1. Air Exposure:
Bread is best stored in airtight containers or packaging to limit exposure to air. Oxygen can cause bread to go stale more quickly by promoting the oxidation of fats and starches. It can also allow moisture to escape, resulting in a dry and unpalatable texture.
2. Moisture:
While it’s important to protect bread from excessive air exposure, it’s equally crucial to avoid trapping too much moisture. Moisture can lead to mold growth, which can ruin the entire loaf. Find a balance by storing bread in a cool, dry place or utilizing moisture-regulating storage options.
Read more: How To Store Books Properly
3. Temperature:
The temperature at which bread is stored greatly impacts its shelf life. Bread should be kept in a cool place, ideally around 70°F (21°C). Avoid storing bread in direct sunlight or near heat sources, as the warmth can accelerate the staling process.
4. Humidity:
High humidity can cause bread to become stale faster, as moisture from the air can be absorbed into the bread. Conversely, very low humidity can cause the bread to dry out. Aim for a humidity level of around 60-70% for optimal bread storage.
5. Storage Container:
The type of container you use to store your bread can make a significant difference. Containers with good sealing properties, such as airtight plastic bags, bread boxes, or resealable plastic containers, can help maintain freshness and prevent moisture loss or mold growth.
6. Bread Type:
Different types of bread have varying moisture content and shelf lives. Homemade bread or bread without preservatives may need more careful storage to keep it fresh, while store-bought packaged bread often comes with preservatives and can last longer.
By considering these factors and implementing the right storage techniques, you can ensure that your bread remains fresh, moist, and flavorful for as long as possible.
Read more: How To Store Eggs Properly
Finding the Right Storage Container
Choosing the right storage container for your bread is crucial for preserving its freshness and taste. Here are some options to consider:
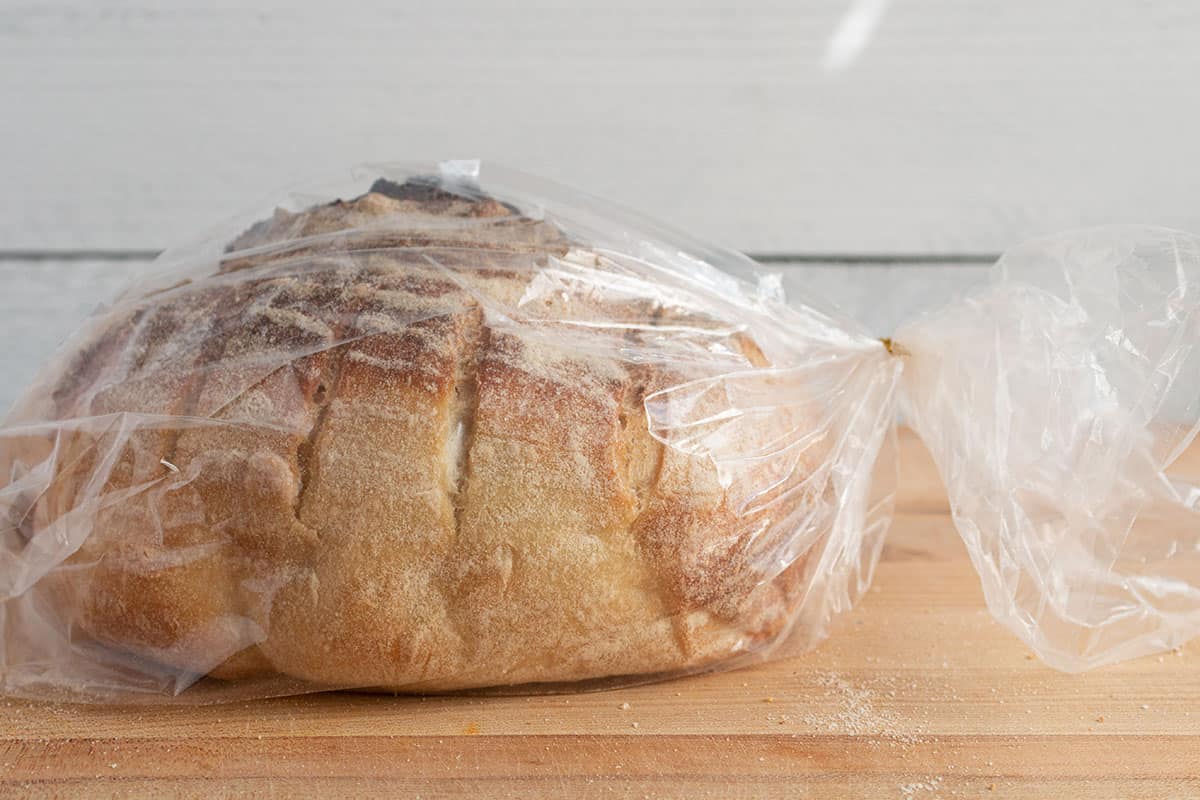
1. Airtight Plastic Bags:
Airtight plastic bags are an inexpensive and convenient option for storing bread. Opt for thick, food-grade plastic bags that can seal tightly to keep air out and moisture in. Make sure to squeeze out any excess air before sealing the bag to create a vacuum-like environment.
2. Bread Boxes:
Bread boxes are stylish and functional storage options. They often have a wooden or metal construction with a lid that can be securely closed. Bread boxes help regulate moisture levels and provide a cool, dry environment for your bread to stay fresh.
3. Sealable Plastic Containers:
Sealable plastic containers with airtight lids are another excellent choice for storing bread. Look for containers specifically designed for food storage, with a tight-fitting lid that locks in freshness. Opt for transparent containers, allowing you to easily see the contents and assess the bread’s condition without opening the container.
Read more: How To Store Handbags Properly
4. Bread Bags with Closure Ties:
Bread bags with closure ties are a convenient option, often made of breathable materials that allow the bread to retain moisture while preventing excessive airflow. These bags are designed specifically for bread storage and can be easily sealed with the attached closure tie.
5. Ceramic Bread Bins or Canisters:
For a more decorative and traditional option, consider using ceramic bread bins or canisters. These containers offer an aesthetically pleasing way to store your bread while providing protection against air and light. Make sure the lid fits securely to maintain freshness.
6. Paper Bags:
If you prefer a more environmentally friendly option, paper bags can be used for short-term bread storage. However, keep in mind that paper bags do not provide an airtight seal, making them less effective for longer-term storage.
When choosing a storage container, consider the size and shape of your bread loaves to ensure a proper fit. Additionally, ensure that the chosen container is easy to clean and maintain to prevent the growth of bacteria or mold.
Remember that the key is to find a storage container that creates an airtight or moisture-regulated environment to keep your bread fresh and tasty. Experiment with different options to find the one that suits your needs and keeps your bread in prime condition.
The Best Locations to Store Bread
Properly storing your bread extends its shelf life and helps maintain its flavor and texture. Here are some optimal locations in your home to store bread:
Read more: How To Store Records Properly
1. Pantry or Cupboard:
A pantry or cupboard is an ideal location for storing bread, especially if it is cool, dry, and away from direct sunlight. Ensure that the area is well-ventilated to prevent the accumulation of excess moisture, which can lead to mold growth.
2. Bread Bin or Bread Box:
If you have a bread bin or bread box, it’s a great place to store your bread. These containers are designed specifically to protect bread from air and light while providing a breathable environment. Place the bread bin or box in a cool area, away from heat sources, to maintain optimal freshness.
3. Refrigerator:
While it may seem counterintuitive, refrigerating bread can actually cause it to stale more quickly. The cold temperature in the refrigerator can dry out the bread, resulting in a less desirable texture. However, if you live in a hot and humid climate or have bread that spoils quickly, refrigeration can help extend its shelf life by a few more days.
4. Freezer:
Freezing bread is an excellent option for long-term storage. Wrap the bread tightly in airtight freezer-safe bags or wrap it in plastic wrap before placing it in the freezer. Freezing bread helps preserve its freshness and can extend its shelf life for several months.
Read more: How To Store Wine Properly
5. Countertop Bread Box:
If you enjoy consuming bread within a few days, storing it in a countertop bread box is convenient. Choose a bread box with ventilation holes to allow air circulation while protecting the bread from direct sunlight. Keep in mind that bread stored in a bread box should be consumed relatively quickly to maintain optimal freshness.
6. Dark and Cool Pantry Shelf:
If you don’t have a dedicated bread storage container, storing bread on a dark and cool pantry shelf is a good alternative. Choose a shelf that is away from sources of heat and light, and ensure that the area is well-ventilated.
Remember, the key to storing bread is to ensure a cool, dry, and protected environment to maintain its freshness. Experiment with different locations in your home to find the optimal spot for your bread storage needs.
General Guidelines for Storing Bread
To ensure that your bread stays fresh and delicious for as long as possible, here are some general guidelines to follow when storing bread:
1. Let It Cool Completely:
Before storing your bread, make sure it has cooled completely. Storing warm bread can create condensation inside the storage container, leading to moisture and potential mold growth. Give your bread at least an hour to cool before storing it.
Read more: How To Properly Store Tofu
2. Wrap It Properly:
When storing bread, it’s important to wrap it properly to protect it from air and moisture. Use plastic wrap, aluminum foil, or airtight plastic bags to create a tight seal around the bread. This helps maintain its moisture levels and prevent it from going stale.
3. Slice as Needed:
If you don’t plan to consume the whole loaf within a day or two, consider slicing the bread as needed. This way, you can keep the remaining loaf tightly wrapped and only expose the sliced portion to air when needed. Slicing bread as you go helps maintain its freshness for a longer period.
4. Avoid Bread Cutting Boards:
While a bread cutting board may seem like a convenient storage option, it can actually lead to faster staling of your bread. The porous nature of a wooden cutting board absorbs moisture and speeds up the staling process. Instead, store your bread in a container or wrap it in plastic wrap or airtight bags.
5. Don’t Refrigerate Fresh Bread:
Unless living in a hot and humid climate, avoid refrigerating freshly baked bread. The cold temperature can cause the bread to dry out and become stale more quickly. Refrigeration is recommended only for extending the shelf life of store-bought bread or if your bread tends to spoil quickly.
6. Avoid Storing Bread near Heat Sources:
Heat sources, such as ovens, toasters, or stovetops, can accelerate the staling process of bread. Keep your bread away from these sources to maintain its freshness and prevent it from drying out prematurely.
7. Check and Rotate:
Regularly check your stored bread for any signs of mold or staleness. If you notice any mold growth, discard the entire loaf immediately. Additionally, if you have multiple loaves of bread, make sure to rotate them, using the oldest loaf first.
8. Consider the Storage Time:
Take into account the storage time when storing bread. Freshly baked bread is best consumed within a day or two, while store-bought bread with preservatives can last longer. If you plan to store bread for an extended period, consider freezing it to maintain its quality.
By following these general guidelines, you can keep your bread fresh, flavorful, and enjoyable for an extended period. Remember to adjust these guidelines based on the type of bread, climate, and personal preferences to ensure the best storage conditions for your specific needs.
Different Techniques for Storing Bread
Storing bread properly can significantly extend its shelf life and keep it fresh. Here are some different techniques you can employ to store your bread:
Read more: How To Store Bread Machine Bread
1. Room Temperature Storage:
If you plan to consume your bread within a few days, storing it at room temperature is a convenient option. Keep it in a cool, dry location away from direct sunlight and heat sources. Wrap the bread tightly in plastic wrap or an airtight container to protect it from air exposure and preserve its moisture.
2. Bread Box or Bread Bin:
A bread box or bread bin is designed specifically for storing bread. These containers help regulate moisture levels, keeping your bread fresh for longer. Choose a bread box with ventilation holes to allow for proper air circulation. Place the bread box in a cool area away from sunlight and heat sources.
3. Refrigeration:
If you live in a hot and humid climate or have bread that tends to spoil quickly, refrigeration can help extend its shelf life. Wrap the bread tightly in plastic wrap or place it in an airtight container before refrigerating. It’s important to note that refrigeration can accelerate the staling process, so consume refrigerated bread within a few days.
4. Freezing:
Freezing bread is an excellent technique for long-term storage. Start by slicing the bread if desired, then wrap each slice or the whole loaf tightly in plastic wrap or aluminum foil. Place the wrapped bread in an airtight freezer bag to prevent freezer burn. Frozen bread can last for several months. Thaw slices or the entire loaf as needed.
Read more: How To Properly Lower Curtains
5. Bread Bags with Closure Ties:
Bread bags with closure ties are specifically designed for bread storage. These breathable bags help retain moisture while preventing excessive airflow. Place your bread in the bag and secure it with the closure tie to maintain freshness. These bags are especially useful for artisan bread or homemade loaves.
6. Vacuum Sealing:
A vacuum sealer is a great investment for storing bread. It removes the air from the packaging, creating a vacuum environment that helps preserve the freshness of the bread. Additionally, vacuum-sealed bread takes up less space in the freezer. Use a vacuum sealer to tightly seal individual slices or the entire loaf before freezing.
7. Bread Cloths or Linen Bags:
Bread cloths or linen bags are an eco-friendly and breathable alternative for storing bread. These natural fabrics help absorb excess moisture and allow air circulation, reducing the risk of mold growth. They can be used for short-term storage but might not be suitable for long-term freezing.
Experiment with these different techniques to find the one that works best for you and the type of bread you have. Remember to consider the storage time, climate, and personal preferences when determining the most effective storage method for your bread.
Wrapping Bread for Freezing
Freezing bread is a great way to extend its shelf life and ensure that you always have a fresh supply on hand. Properly wrapping bread before freezing is crucial to maintain its quality and prevent freezer burn. Here are some steps to follow when wrapping bread for freezing:
Read more: How To Properly Burn Candles
1. Slice the Bread (If Desired):
If you prefer to freeze individual slices of bread for convenience, start by slicing the loaf before wrapping. This allows you to thaw only the slices you need at a time, rather than defrosting the entire loaf.
2. Cool the Bread Completely:
Ensure your bread has cooled completely before freezing. Placing warm bread in the freezer can lead to condensation and moisture buildup, affecting the texture and flavor of the bread.
3. Double Wrap for Extra Protection:
For optimal freezer storage, double wrap the bread. Start by wrapping it tightly in plastic wrap or aluminum foil. This initial layer helps keep the moisture in and prevent freezer burn. Then, place the wrapped bread in an airtight freezer-safe bag or container for an extra layer of protection.
4. Remove Excess Air:
When wrapping the bread, make sure to remove as much air as possible from the packaging. Excess air can lead to freezer burn and degradation of the bread’s quality. Squeeze out the air from the plastic wrap or use a vacuum sealer to eliminate air pockets before sealing the bag.
Read more: How To Use Bidet Properly
5. Label and Date:
Don’t forget to label the package with the type of bread and the date of freezing. This will help you keep track of the bread’s freshness and ensure you use the oldest loaves first.
6. Freeze in Portion Sizes:
If you plan to use smaller portions of bread, consider freezing them separately. Place individual slices or small groups of slices in separate packages before freezing. This way, you can thaw and enjoy only the amount you need at a given time, reducing waste and maintaining the quality of the remaining bread.
7. Store in the Freezer:
Once appropriately wrapped, place the bread in the freezer. Keep it away from other strongly scented foods to prevent the absorption of odors. Ensure the freezer is set to a temperature of 0°F (-18°C) or below for optimal preservation.
By following these steps, you can successfully wrap your bread for freezing. This ensures that your bread retains its freshness and quality for an extended period, so you can enjoy it whenever you’re ready for a slice.
Thawing Frozen Bread
Thawing frozen bread properly is essential to preserve its texture and taste. Here are some methods to consider when thawing your frozen bread:
1. Room Temperature Thawing:
The simplest way to thaw frozen bread is to let it thaw at room temperature. Remove the bread from the freezer and set it on the countertop, still wrapped, for a few hours or overnight. This method works best for pre-sliced bread or smaller portions.
2. Oven Thawing:
If you’re in a hurry and need to thaw the bread more quickly, you can use the oven. Preheat the oven to a low temperature, around 300°F (150°C). Remove the bread from its packaging and place it directly on the oven rack or a baking sheet. Heat it for 10 to 15 minutes, or until the bread is thawed and warmed through. Keep a close eye on the bread to prevent it from drying out or becoming overheated.
3. Toasting Frozen Bread:
If you prefer a toasted slice of bread, you can toast it straight from the freezer. Place the frozen bread directly in the toaster or toaster oven and toast it on a lower setting than you would for fresh bread. This method is quick and convenient, allowing you to enjoy a warm and crispy slice of bread in no time.
4. Steaming Thawing:
For larger or denser loaves of bread, such as artisan-style bread, you can use the steaming method for thawing. Wrap the frozen bread in a damp kitchen towel and place it in a steamer basket or in a covered pot with a little water at the bottom. Steam the bread for several minutes until it thaws and becomes soft. This method helps rehydrate the bread and restore its moisture.
Read more: How To Store Baguette Bread
5. Microwave Thawing:
If you’re in a time crunch, you can try thawing bread in the microwave. Remove the bread from its packaging and place it on a microwave-safe plate. Use the defrost setting or set the microwave to a low power level. Heat the bread in short bursts, checking it regularly, until it is thawed but not heated. Microwave thawing can cause the bread to become slightly chewy or dry, so be cautious when using this method.
Regardless of the thawing method you choose, it’s important to consume the bread soon after thawing. Refreezing thawed bread is not recommended, as it can affect the texture and taste. If you have thawed more bread than you can consume, consider using it for sandwiches, toasting, or turning it into breadcrumbs or croutons to prevent waste.
By using these thawing methods, you can enjoy your frozen bread in its delicious, thawed state, whether you prefer it soft and moist or toasted and crispy.
How to Revive Stale Bread
Stale bread doesn’t have to go to waste! With a few simple techniques, you can revive your bread and make it enjoyable to eat again. Here are some methods to bring stale bread back to life:
1. Sprinkle with Water:
One of the easiest ways to revive stale bread is to sprinkle it lightly with water. Use a spray bottle or sprinkle a few drops of water over the bread’s surface, focusing on the crust. Then, wrap the bread in aluminum foil and place it in a preheated oven at 300°F (150°C) for about 10 minutes. The moisture from the water will help soften the bread, making it more enjoyable to eat.
2. Use the Microwave:
If you’re in a hurry and need to revive a small portion of bread, the microwave can come to the rescue. Dampen a paper towel or kitchen towel and wrap it around the bread. Place the wrapped bread in the microwave and heat it on a low power setting for 10-15 seconds at a time. Be cautious not to overheat the bread, as it can become rubbery. Check the bread’s texture after each interval until it reaches the desired softness.
Read more: How To Sit On The Toilet Properly
3. Oven Method:
To revive a whole loaf or larger portions of bread, the oven method works well. Preheat the oven to 375°F (190°C). Moisten a kitchen towel, wrap it around the bread, and place it directly on the oven rack. Allow the bread to warm up for about 10-12 minutes. The steam generated from the moist towel will penetrate the bread and rehydrate it, restoring its texture and taste.
4. Make Bread Pudding or French Toast:
If you have a lot of stale bread or don’t mind transforming it into a different dish, consider making bread pudding or French toast. Soaking the stale bread in a custard mixture made with eggs, milk, sugar, and flavorings can bring it back to life and create a delicious, comforting dessert or breakfast option.
5. Crisp It Up:
If the stale bread is too soft, you can revive it by crisping it up. Place the bread directly on the oven rack or on a baking sheet and toast it in a preheated oven at 350°F (175°C) for a few minutes. Keep an eye on the bread to prevent it from burning and remove it from the oven when it becomes golden and crispy.
Remember, while these methods can help revive stale bread, they may not completely restore it to its original texture. It’s best to consume revived bread soon after reviving it for the best taste and freshness. Additionally, be aware that bread past its prime may not be salvageable, regardless of the methods used.
By utilizing these techniques, you can turn stale bread into a delicious treat or bring it back to its original softness, reducing waste and ensuring that every slice is enjoyable to eat.
Conclusion
Proper bread storage is essential to maintain its freshness, flavor, and texture. By understanding the factors that affect bread storage and utilizing the right techniques, you can prolong the shelf life of your bread and ensure that every slice is as enjoyable as the first.
Starting with the initial purchase or baking of bread, it’s crucial to handle it with care and let it cool completely before storing. Choosing the right storage container, such as airtight plastic bags, bread boxes, or sealable containers, plays a significant role in preserving the quality of your bread.
Considering the location where you store your bread is equally important. Avoid areas with excess heat or moisture, and instead opt for cool, dry spaces such as pantries or cupboards. Keep in mind that refrigeration can impact the texture of bread, so it’s best to refrigerate only store-bought bread or in hot and humid climates.
When it comes to freezing bread, proper wrapping is key. Double wrapping bread in plastic wrap or aluminum foil and placing it in an airtight bag helps protect the bread from freezer burn and maintain its freshness during longer storage periods.
Thawing frozen bread can be done at room temperature, in the oven, through toasting, steaming, or using the microwave. Each method has its benefits depending on the time available and personal preference.
If you find yourself with stale bread, don’t despair. Techniques like sprinkling it with water, using the microwave, or reviving it in the oven can bring stale bread back to life and make it enjoyable to eat once again. Alternatively, consider transforming stale bread into delicious dishes like bread pudding or French toast.
In conclusion, taking care of your bread from the moment of purchase or baking to storage and reviving can significantly improve its shelf life and quality. By implementing these tips and techniques, you can savor every slice of bread, reduce waste, and ensure that your bread always tastes fresh and delicious. So, go ahead, store your bread with confidence, and enjoy the magic of a perfectly preserved loaf every time.
Frequently Asked Questions about How To Store Bread Properly
Was this page helpful?
At Storables.com, we guarantee accurate and reliable information. Our content, validated by Expert Board Contributors, is crafted following stringent Editorial Policies. We're committed to providing you with well-researched, expert-backed insights for all your informational needs.

0 thoughts on “How To Store Bread Properly”