Articles
How To Store Grains Long Term
Modified: August 17, 2024
Learn the best methods for storing grains long term with our comprehensive articles. Ensure your food supply stays fresh and ready for any emergency situation.
(Many of the links in this article redirect to a specific reviewed product. Your purchase of these products through affiliate links helps to generate commission for Storables.com, at no extra cost. Learn more)
Introduction
Storing grains long term is a essential skill for anyone looking to maintain a stable food supply, whether for emergency preparedness or self-sufficiency. Grains are a staple in many diets around the world and having a reliable source of grains can provide both comfort and security in uncertain times.
When stored properly, grains can last for years or even decades, ensuring that you always have a nutritious and versatile food source at your disposal. However, it’s important to understand the factors that affect grain storage and the methods to mitigate them in order to maximize the shelf life of stored grains.
In this article, we will explore the importance of storing grains long term, the factors to consider before storing grains, and the various methods and containers available for grain storage. We will also discuss tips for monitoring and rotating stored grains to ensure optimal freshness and quality.
By the end of this article, you will have a comprehensive understanding of how to store grains long term and be well-equipped to build a sustainable and reliable food storage system.
Key Takeaways:
- Proper grain storage ensures food security, saves money, and promotes self-sufficiency. Consider factors like quality, environment, and rotation to maintain grain integrity and viability.
- Utilize mylar bags, vacuum sealing, or food-grade buckets to protect grains from moisture, pests, and oxygen. Regular monitoring and rotation ensure long-term grain freshness and safety.
Read more: How To Store Spaghetti Long Term
Importance of Storing Grains Long Term
Storing grains long term is crucial for several reasons. Firstly, it provides an invaluable source of food security. In times of crisis or natural disasters, access to fresh groceries may be limited or even impossible. By having a stockpile of stored grains, you ensure that you and your loved ones have a stable food supply during these challenging times.
Secondly, storing grains long term is a practical way to save money. Buying grains in bulk and storing them yourself is often more cost-effective than purchasing pre-packaged grains from the store. Additionally, you have control over the quality of the grains you store, making it easier to select organic or specialty varieties without breaking the bank.
Another benefit of long-term grain storage is the ability to maintain a well-balanced and nutritious diet. Grains are a rich source of carbohydrates, fiber, and essential nutrients. By storing grains, you ensure that you have access to these vital nutrients throughout the year, regardless of seasonal availability or market fluctuations.
Furthermore, storing grains long term allows you to take advantage of sales and discounts. Oftentimes, purchasing grains in bulk offers significant cost savings. By storing them properly, you can take advantage of these deals and reduce your grocery expenses in the long run.
Lastly, storing grains long term promotes self-sufficiency. By cultivating a habit of long-term grain storage, you become less reliant on external sources for your food needs. This self-reliance empowers you to establish a more sustainable lifestyle by reducing your dependence on commercial food systems and promoting a sense of resilience.
Overall, the importance of storing grains long term cannot be overstated. It provides food security, saves money, ensures a nutritious diet, and promotes self-sufficiency. By investing time and effort into proper grain storage, you create a foundation for a more resilient and sustainable future.
Factors to Consider Before Storing Grains
Before diving into the process of storing grains long term, it’s important to consider a few key factors to ensure successful storage and preservation. These factors will help you make informed decisions and establish a solid foundation for your grain storage strategy.
1. Quality of grains: The quality of the grains you intend to store plays a crucial role in their longevity. Always choose grains that are fresh, free from pests and disease, and have a low moisture content. Damaged or infested grains can spoil quickly and affect the quality of nearby grains, so it’s vital to inspect and select your grains carefully.
2. Storage environment: The environment in which you store grains greatly impacts their shelf life. The ideal conditions for grain storage include a cool, dry, and dark space. Moisture, sunlight, and heat can accelerate the deterioration of grains and promote mold growth. Choose a storage area that is well-ventilated and free from pests and rodents.
3. Temperature and humidity: Both temperature and humidity levels play a critical role in grain storage. Ideally, grains should be stored at temperatures below 70 degrees Fahrenheit (21 degrees Celsius) to minimize the risk of spoilage. Additionally, the humidity level should be kept below 15% to prevent the growth of mold and the development of pests.
4. Air circulation: Proper air circulation is essential in preventing the buildup of moisture and maintaining grain quality. Avoid overcrowding storage containers or tightly packing bags of grains, as this can hinder airflow and create pockets of stagnant air. Opt for containers or storage methods that allow for adequate ventilation.
5. Pests and rodents: Grain storage can attract pests such as insects and rodents, which can quickly damage your stockpile. Before storing grains, take preventive measures such as cleaning and inspecting the storage area, using pest-resistant containers, and implementing pest control methods if necessary. Regularly monitoring for signs of infestation is crucial for maintaining grain quality.
6. Rotation plan: Establishing a rotation plan is crucial to ensure that your stored grains remain fresh and of high quality. Implement a first-in-first-out (FIFO) system to consume older grains first and replenish your stockpile with fresh ones. This practice minimizes the risk of consuming expired or deteriorated grains and helps maintain a consistent supply of stored food.
By considering these factors before storing grains, you can set yourself up for success and maximize the shelf life of your grain stockpile. Taking the time to prepare and create an optimal storage environment will help preserve the quality and nutritional value of your grains for an extended period of time.
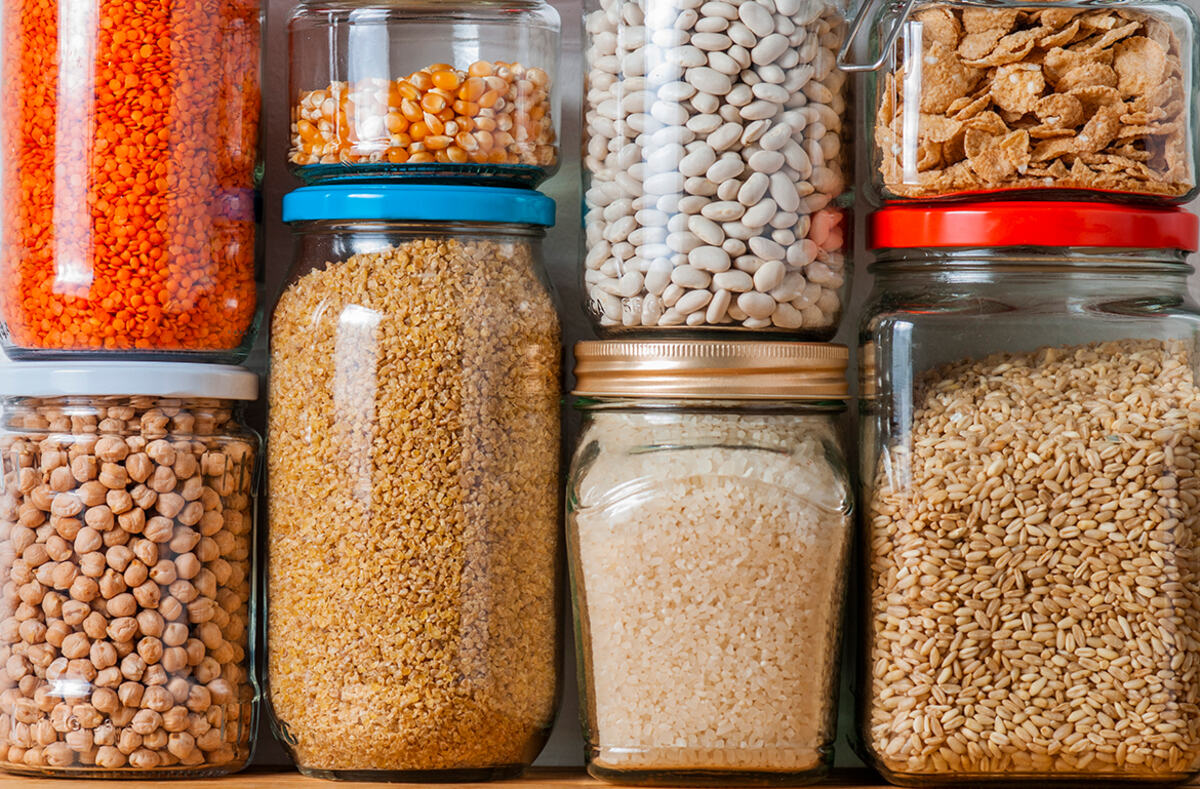
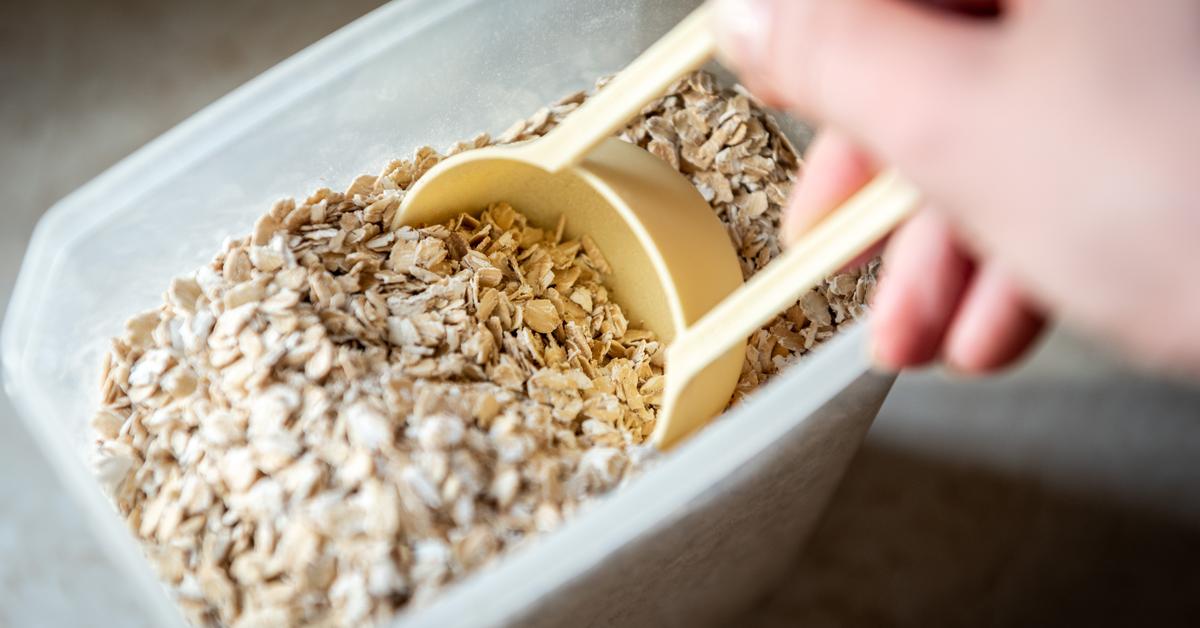
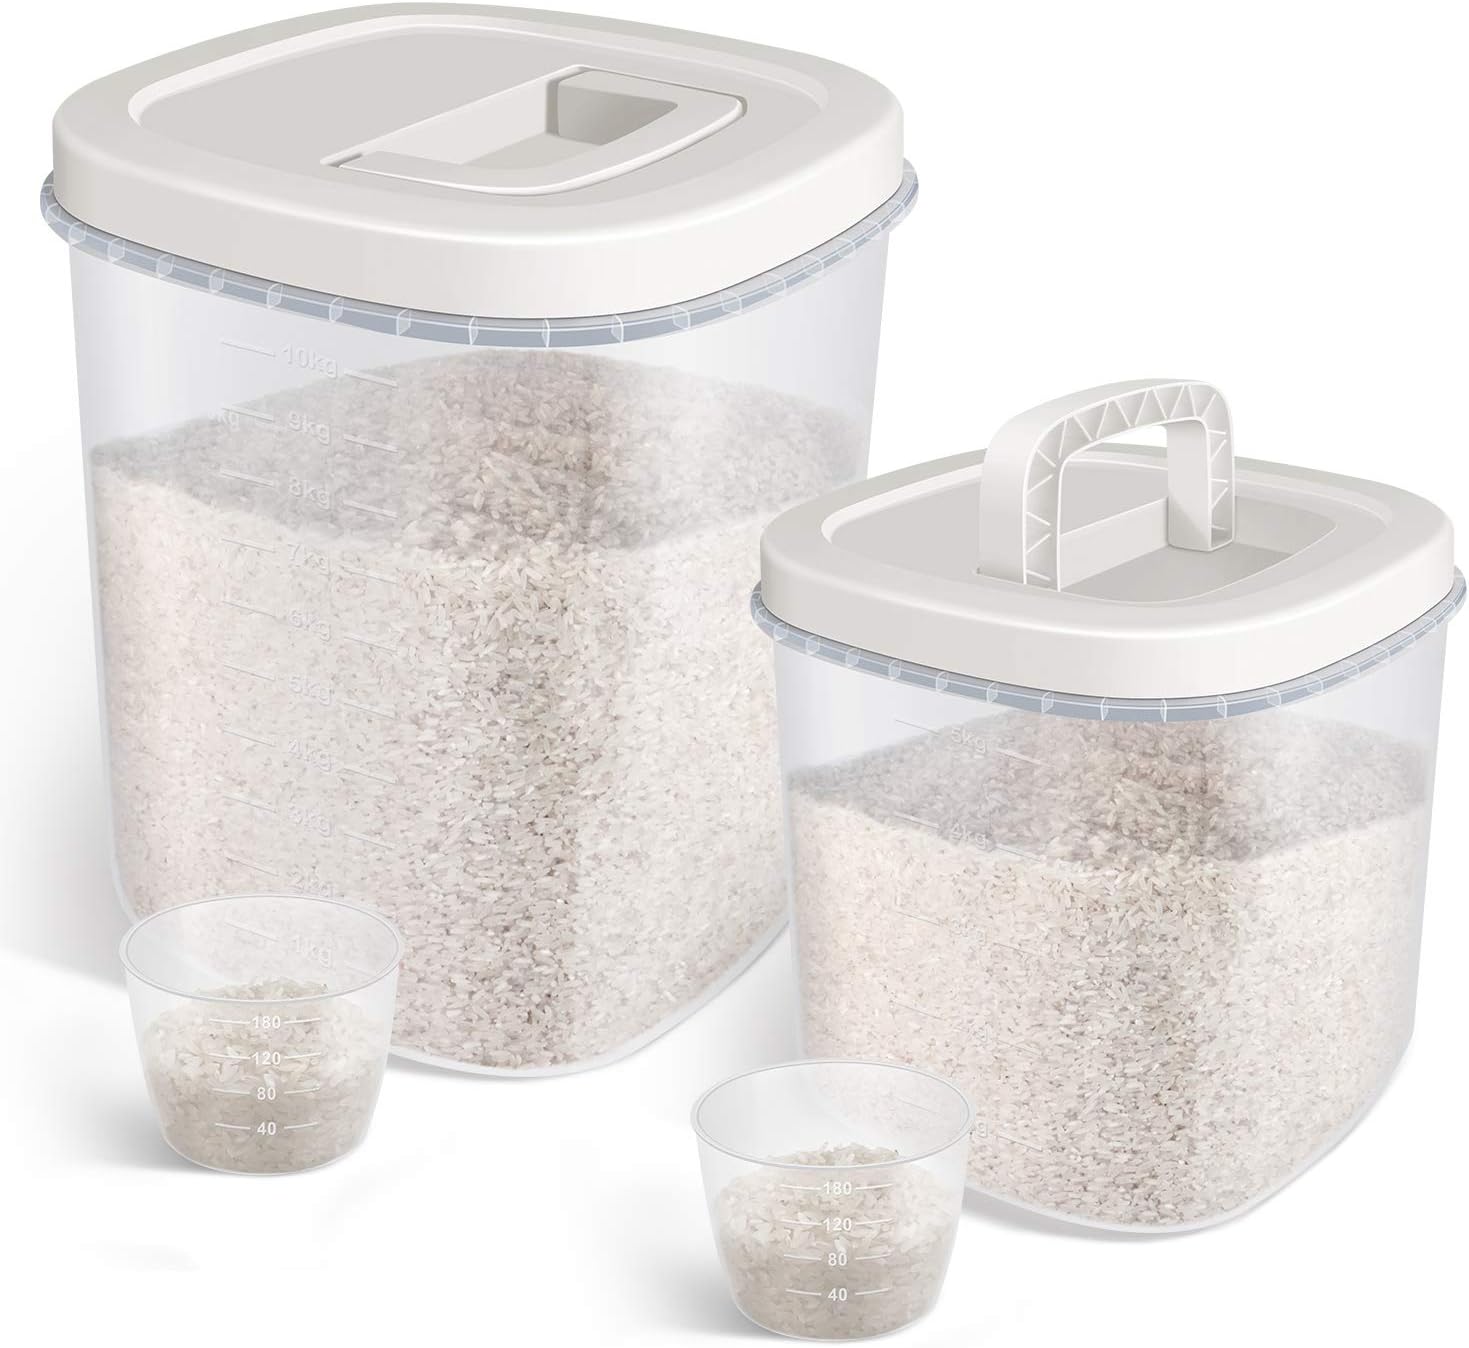
Choosing the Right Containers for Grain Storage
When it comes to storing grains long term, choosing the appropriate containers is crucial to maintain their freshness and longevity. The right containers will protect the grains from environmental factors such as moisture, pests, and oxygen, ensuring that they remain safe and edible for an extended period of time.
Here are some options to consider when selecting containers for grain storage:
1. Mylar Bags: Mylar bags are highly recommended for long-term grain storage. They are made of a durable, laminated material that provides an excellent barrier against moisture, oxygen, and pests. Mylar bags are available in various sizes and can be sealed with heat or by using an iron. Combining mylar bags with oxygen absorbers creates an even more effective storage solution.
2. Food-Grade Buckets: Sturdy food-grade buckets with airtight lids are an excellent option for storing grains. Look for buckets made from high-density polyethylene (HDPE) to ensure they are safe for food storage. The airtight lids prevent oxygen and pests from entering, and the durable material protects the grains from physical damage.
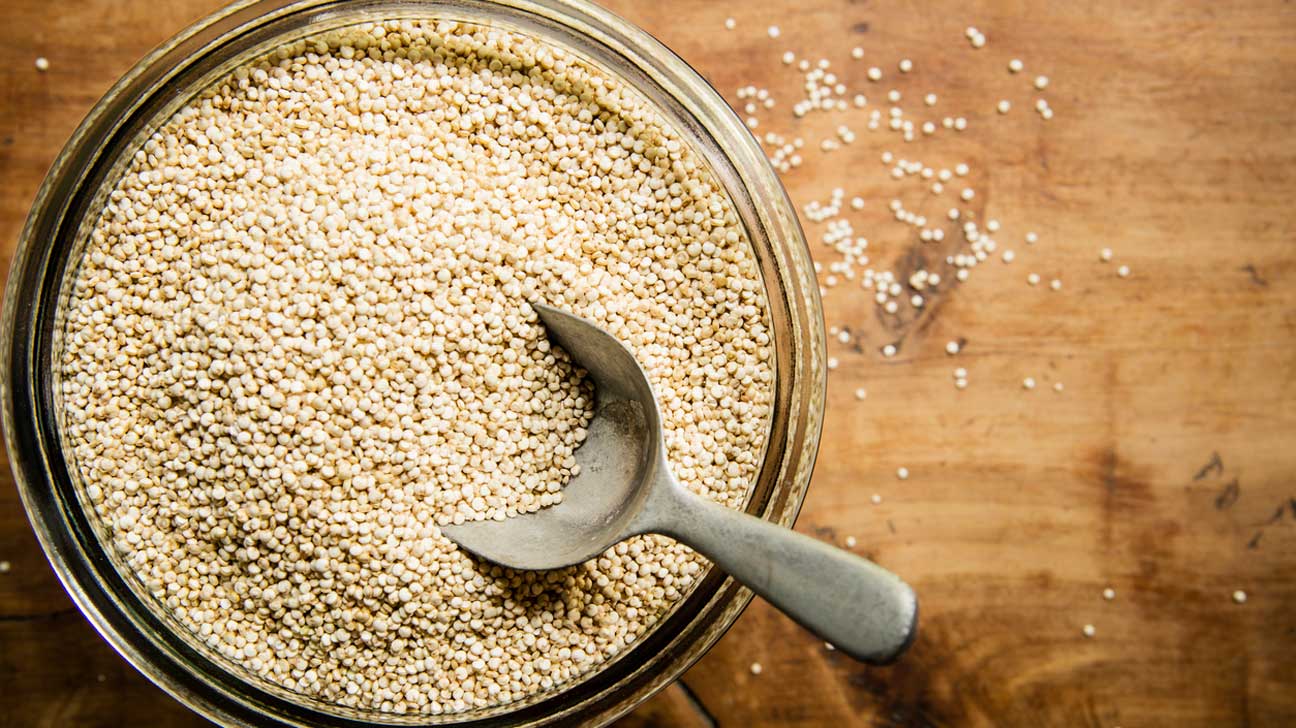
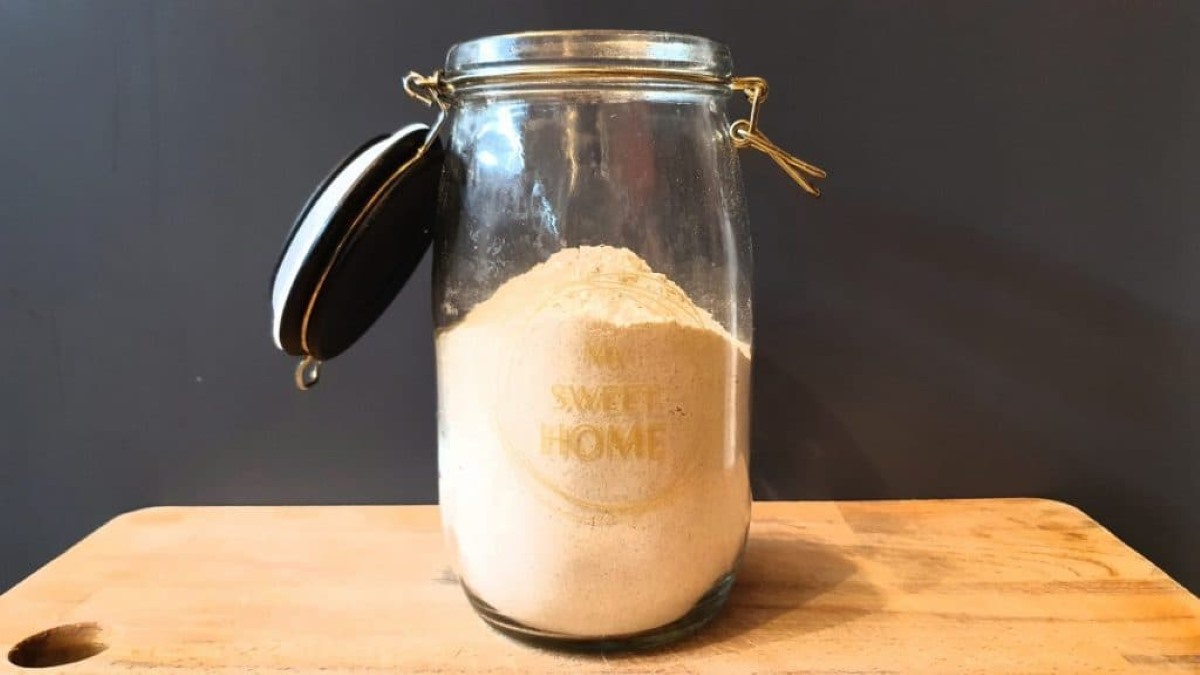
3. Glass Jars: Glass jars can be used for short-term grain storage or when storing smaller quantities. Look for jars with airtight lids to create a sealed environment. They are transparent, allowing you to easily see the contents, and are also resistant to rodents and pests. However, glass jars may not be suitable for long-term storage due to the risk of breakage and potential exposure to light.
4. Vacuum-Sealed Bags: Vacuum-sealed bags are an effective method for storing grains. They remove excess air, minimizing the risk of spoilage due to oxygen exposure. When using vacuum-sealed bags, ensure that the bags are made of food-grade material and have a reliable sealing mechanism to maintain a tight seal.
5. Metal Containers: Metal containers, such as aluminum or stainless steel, can be used for grain storage. They are durable, pest-resistant, and provide a good barrier against light and oxygen. However, it’s important to choose containers that are food-safe and have a tight-fitting lid to prevent moisture infiltration.
6. Plastic Containers: Plastic containers can be suitable for grain storage when chosen carefully. Look for food-grade containers that are BPA-free and have airtight seals. Avoid using containers that are prone to cracking or allowing moisture to seep in.
When selecting containers, ensure they are clean, dry, and free from any odor or contaminants to maintain the quality of your grains. It’s also important to label the containers with the type of grain and the date of storage to enable easy rotation.
Remember to consider the available storage space and the quantity of grains you plan to store when choosing the container size. Keep in mind that larger containers may require additional measures, such as oxygen absorbers, to maintain grain freshness.
By choosing the right containers for grain storage, you can protect your grains from potential spoilage and ensure a long shelf life for your stockpile.
Proper Cleaning and Preparing of Grains for Storage
Before storing grains for the long term, it’s essential to ensure that they are properly cleaned and prepared. This process helps remove any impurities, pests, or contaminants that could compromise the quality and shelf life of the grains. Taking the time to clean and prepare your grains before storage will help ensure that they remain fresh, safe, and ready to use when needed.
Here are the steps to follow for proper cleaning and preparing of grains for storage:
1. Inspect the grains: Before cleaning, carefully inspect the grains for any signs of damage, insect infestation, or mold. Discard any grains that look discolored, have holes, or exhibit other signs of spoilage. It’s crucial to start with high-quality grains to maximize the longevity of your stored stock.
2. Remove foreign matter: Thoroughly examine the grains and remove any foreign matter such as stones, dirt, or sticks. This can be done by sifting the grains through a fine-mesh sieve or by using your hands to pick out any visible contaminants. Removing foreign matter helps prevent pests and unwanted substances from entering your storage containers.
3. Wash the grains: Depending on the type of grain, washing may be necessary to remove dust, residue, or any remaining impurities. For larger grains such as rice or wheat berries, rinsing under running water in a colander can be effective. For smaller grains like quinoa or amaranth, soaking them briefly in water and then draining can help remove any residual debris. Always follow specific instructions for each type of grain.
4. Dry the grains: After washing, it’s crucial to thoroughly dry the grains before storing them. Excess moisture can lead to mold growth and spoilage. Spread the grains in a thin layer on clean, dry towels or baking sheets, and allow them to air dry completely. Ensure the grains are fully dry before proceeding with the storage process.
5. Fumigation (optional): To further protect against pests, you may consider fumigating the grains with food-safe methods. Some options include using diatomaceous earth or placing the grains in a freezer for a few days to eliminate any potential pests. This step is particularly important if you suspect or have had previous issues with pests in your grains.
6. Packaging: Once the grains are clean and dry, transfer them into your chosen storage containers. Use airtight containers such as mylar bags, food-grade buckets, or vacuum-sealed bags to maintain freshness and protect the grains from moisture, pests, and oxidation.
Remember to label the containers with the type of grain and the date of storage for easy identification and rotation. Store the containers in a cool, dry, and dark place to prolong the shelf life of the grains.
By properly cleaning and preparing your grains for storage, you ensure that they are free from impurities, pests, and contaminants. This step is crucial for maintaining the quality and longevity of your stored grains, providing you with a reliable and safe food supply for years to come.
Read more: How To Store Barley Long Term
Methods for Storing Grains Long Term
When it comes to storing grains long term, there are several methods you can employ to ensure the preservation of their quality and nutritional value. Each method offers unique benefits and considerations, allowing you to choose the one that best suits your needs and resources.
Here are some commonly used methods for storing grains long term:
1. Mylar Bags with Oxygen Absorbers: Mylar bags are a popular choice for long-term grain storage. These durable, moisture-proof bags provide an excellent barrier against oxygen, pests, and moisture. To enhance their effectiveness, you can include oxygen absorbers in each bag before sealing. Oxygen absorbers remove the residual oxygen, creating an oxygen-free environment that inhibits spoilage and insect infestation. Ensure the bags are properly sealed and store them in a cool, dark place.
2. Vacuum Sealing: Vacuum sealing is another effective method for long-term grain storage. Vacuum sealing removes excess air from the storage container, minimizing the risk of spoilage due to oxygen exposure. Place the grains in vacuum-seal bags or canisters, remove the air with a vacuum sealer, and ensure a tight seal. Properly vacuum-sealed grains can last for years when stored in a cool, dry environment.
3. Mason Jars: Mason jars can be used for smaller quantities or short-term grain storage. Ensure the jars are clean, dry, and free from any signs of mold or contamination. Fill the jars with grains, leaving some headspace at the top, and seal them tightly with the lid. Store the jars in a cool, dark place to minimize light exposure. Keep in mind that mason jars may not provide the same level of protection against pests and oxygen as other methods.
4. Food Grade Buckets: Food grade buckets with airtight lids are a practical option for storing larger quantities of grains. Ensure the buckets are clean and dry before filling them with grains. Add an additional layer of protection by placing the grains in mylar bags within the buckets. Seal the lid tightly to create an airtight environment. Store the buckets in a cool, dry place away from direct sunlight and pests.
5. Freezing: Freezing grains can help extend their shelf life, particularly for shorter periods. Ensure the grains are properly dry and place them in airtight containers or sealed bags to prevent moisture absorption. Store the containers in the freezer at a consistent temperature. Remember that freezing may affect the texture of some grains, so it’s important to consider their intended use before opting for this method.
It’s crucial to regularly monitor the stored grains regardless of the storage method you choose. Check for signs of spoilage, such as mold, pests, or unusual odors. Implement a rotation system to use the older grains first, replenishing your stockpile with fresh grains regularly.
By utilizing these methods and taking appropriate precautions, you can ensure the long-term storage of grains, maintaining their quality, nutritional value, and freshness for an extended period of time.
Utilizing Mylar Bags and Oxygen Absorbers for Grain Storage
When it comes to long-term grain storage, utilizing mylar bags and oxygen absorbers is a highly effective method that provides optimal protection against moisture, pests, and oxygen. The combination of these two components creates an ideal storage environment, extending the shelf life of your grains and preserving their quality for an extended period of time.
Here’s how to properly utilize mylar bags and oxygen absorbers for grain storage:
1. Selecting the Right Mylar Bags: Choose high-quality, food-grade mylar bags that are specifically designed for long-term storage. These bags are made of a durable, laminated material that acts as an excellent barrier against moisture, pests, and oxygen. Opt for bags with a thickness of at least 4.3 mils for optimal protection.
2. Preparing the Mylar Bags: Before filling the mylar bags, ensure they are clean and dry. Remove any excess air from the bags by gently squeezing them, and then unfold the top of the bag to create a wide opening for easy filling.
3. Adding Oxygen Absorbers: Oxygen absorbers are small packets that contain iron powder, salt, and a powdered form of sodium iron zeolite. They work by absorbing the oxygen present in the bag and creating an oxygen-free environment. Oxygen absorbers come in different sizes and strengths, so calculate the appropriate number based on the volume of grains you are storing. As a general guideline, use 2000cc oxygen absorbers for a 5-gallon bag or container.
4. Sealing the Mylar Bags: Once the oxygen absorbers are added to the bag, carefully seal the mylar bag. It’s important to remove as much air as possible before sealing to create a vacuum-like environment. You can use a heat sealer or iron to achieve a tight seal. Ensure the seal spans the entire width of the bag and is free from any gaps or openings.
5. Storing the Mylar Bags: After sealing, it’s important to store the mylar bags in a cool, dark, and dry place. Direct sunlight and high temperatures can degrade the bags and compromise the integrity of the seal. Additionally, ensure that the storage area is free from pests and rodents.
6. Monitoring and Rotation: Regularly inspect the mylar bags for any signs of damage, pests, or moisture. Check the seal to ensure it remains intact. Implement a rotation system, using the oldest bags of grain first and replenishing your stockpile with fresh bags regularly. Keeping track of the expiration dates of the oxygen absorbers is also important, as they lose their effectiveness over time.
Utilizing mylar bags and oxygen absorbers for grain storage is a cost-effective and reliable method to ensure the long-term preservation of your grains. By creating an oxygen-free and moisture-resistant environment, you can safeguard your grains against spoilage, insects, and oxidation. With proper storage and rotation, grains stored in mylar bags with oxygen absorbers can remain edible and nutritious for several years.
Remember to label the mylar bags with the type of grain and the date of storage for easy identification and rotation. This method provides peace of mind knowing that you have a stable and secure supply of grains for your needs, whether it be for emergency preparedness or everyday use.
Store grains in airtight containers in a cool, dark place to prevent moisture and pests. Consider using oxygen absorbers to extend shelf life.
Vacuum Sealing Grains for Long-Term Storage
Vacuum sealing is a highly effective method for long-term grain storage. By removing excess air from the storage containers, vacuum sealing helps to create an oxygen-free environment, reducing the risk of spoilage, mold, and insect infestation. This method is suitable for various types of grains and ensures the preservation of their quality and nutritional value over an extended period of time.
Here’s a step-by-step guide on how to properly vacuum seal grains for long-term storage:
1. Choose High-Quality Storage Bags or Containers: Select high-quality vacuum-seal bags or containers that are specifically designed for food storage. Opt for bags or containers made from durable, food-grade materials to ensure they are safe and resistant to punctures.
2. Prepare the Grains: Before vacuum sealing, ensure that the grains are clean, dry, and free from any impurities or moisture. Cleaning the grains helps to remove dust, debris, and any remaining foreign matter. Thoroughly dry the grains to prevent the growth of mold or bacteria during storage.
3. Fill the Bags or Containers: Fill the bags or containers with the desired quantity of grains. Be cautious not to overfill, as it may prevent proper sealing. Leave some headspace at the top to allow for the compression of the grains when vacuum sealing.
4. Seal the Bags or Containers: Depending on the type of vacuum sealer you are using, follow its specific instructions to achieve a proper seal. For vacuum-seal bags, place the open end of the bag into the sealer and activate the vacuum sealing function. The sealer will remove the air from the bag and then heat seal it to create an airtight closure. If using containers, place the lid on top and engage the vacuum-sealing function to remove the excess air from the container.
5. Check for a Secure Seal: After vacuum sealing, carefully inspect the bags or containers to ensure a proper, airtight seal. Check for any signs of air leakage or gaps in the seal. If necessary, reseal or use a new bag or container to ensure optimal storage conditions.
6. Store in a Cool and Dry Place: Proper storage conditions are essential for maintaining the quality and longevity of vacuum-sealed grains. Store the vacuum-sealed bags or containers in a cool, dark, and dry place away from direct sunlight, heat sources, and moisture. Avoid areas prone to temperature fluctuations, such as attics or garages.
7. Monitor and Rotate: Regularly check the vacuum-sealed bags or containers for any signs of damage, moisture, or pests. Implement a rotation system, using the oldest sealed bags or containers first and replenishing your stockpile with fresh ones. This helps ensure that your grains remain fresh and edible over time.
By vacuum sealing grains for long-term storage, you create an environment that minimizes the risk of spoilage and maintains the quality of the grains for an extended period. This method can provide peace of mind, knowing that your grains will be well-preserved and ready for consumption whenever needed, whether for emergency situations or everyday use.
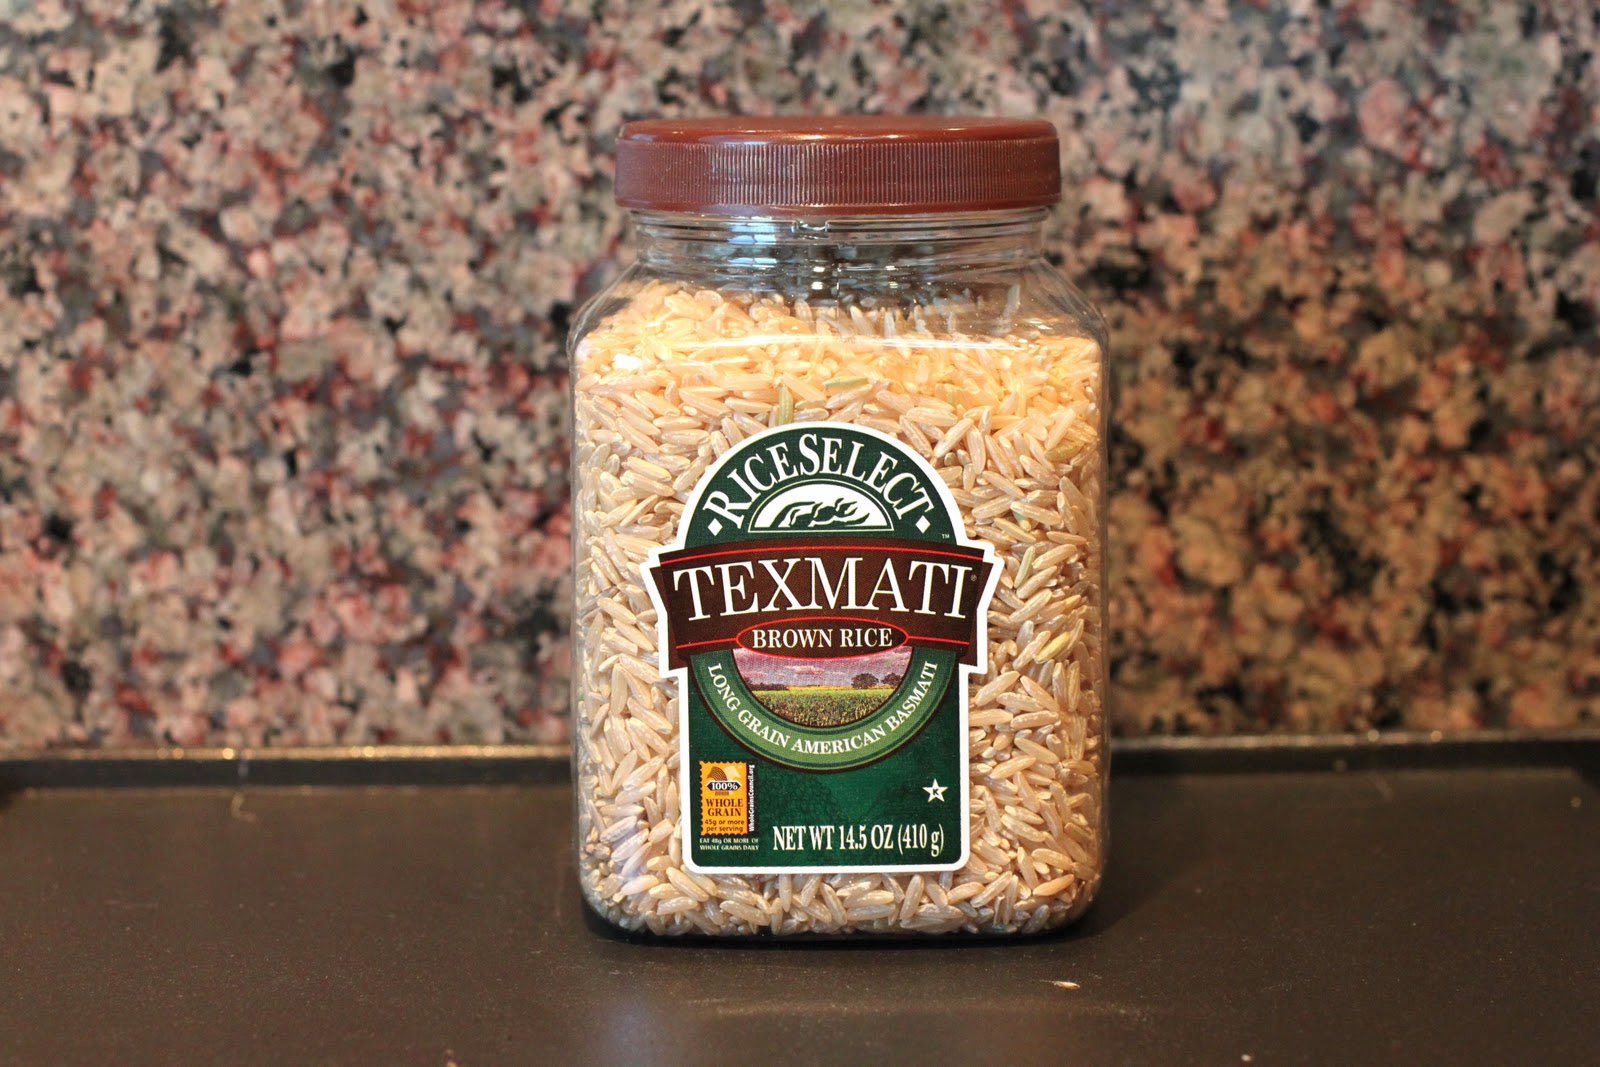
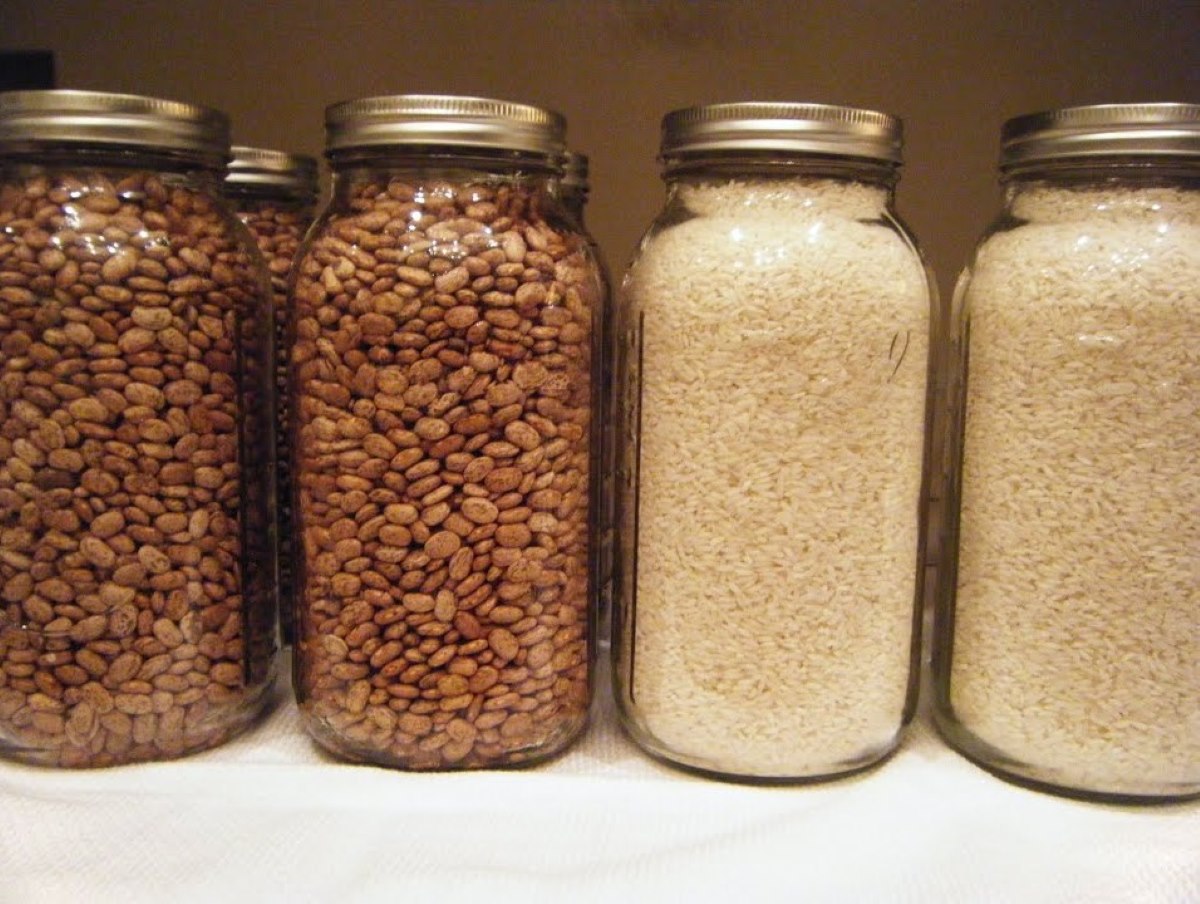
Storing Grains in Mason Jars
Mason jars are a popular choice for storing grains, especially for smaller quantities or short-term storage. They offer a visually appealing and practical solution to keep your grains organized and easily accessible. While they may not provide the same level of protection against pests and oxidation as some other storage methods, storing grains in mason jars can still be an effective option when done correctly.
Here’s a step-by-step guide on how to store grains in mason jars:
1. Select the Right Size Jars: Choose mason jars that are appropriate for the quantity of grains you plan to store. Opt for jars with wide mouths for easy access and filling. Consider the amount of headspace you want to leave in the jar to allow room for movement and prevent the grains from pressing against the lid.
2. Clean and Dry the Jars: Thoroughly clean the mason jars before use to ensure they are free from any residue, odors, or contaminants. Wash them with warm soapy water, rinse well, and allow them to air dry completely. This step is essential to prevent any unwanted flavors or spoilage.
3. Inspect the Grains: Before transferring the grains to the mason jars, inspect them carefully. Remove any foreign matter, such as stones or debris, and discard any grains that show signs of damage, pest infestation, or mold. Starting with clean and high-quality grains helps to maintain the integrity of the stored food.
4. Add the Grains: Fill the prepared mason jars with the desired quantity of grains. Use a funnel or a scoop to ensure a neat transfer and minimize spills. Leave some headspace at the top of the jar to allow for the expansion of the grains and to create a buffer between the lid and the grains.
5. Seal the Jars: Place the lids firmly on the jars and screw on the bands. Ensure the lids are clean and free from any residue. It’s important to create a tight seal to prevent air and moisture from entering the jar. Tighten the bands securely without overtightening.
6. Label and Date: Label each jar with the type of grain and the date of storage. This step is crucial for easy identification and rotation. Use labels or masking tape to write this information and attach it to the jar. It will help you keep track of your stockpile and use the oldest grains first.
7. Store in a Cool, Dark Place: Mason jars filled with grains should be stored in a cool, dark area to preserve their quality and prolong their shelf life. Find a pantry, cupboard, or basement that maintains a relatively stable temperature and is away from direct sunlight and heat sources. Consistent temperature control is essential for preventing spoilage and insect infestation.
8. Monitor and Rotate: Regularly inspect the stored grains for any signs of spoilage, pests, or moisture. Check the lids for tightness and signs of deterioration. To maintain freshness and quality, implement a rotation system, where you use the older jars of grains first and replenish your stockpile with fresh jars.
While mason jars are suitable for shorter-term grain storage, it’s important to note that they may not provide the same level of protection against insects, rodents, and oxidation as more specialized storage methods like mylar bags or vacuum-sealed containers. Consider using additional measures such as desiccant packs to absorb any residual moisture and pest deterrents to further protect the stored grains if necessary.
By following these guidelines, you can store your grains in mason jars effectively, keeping them organized and easily accessible for your culinary needs.
Read more: How To Store Grits Long Term
Utilizing Food Grade Buckets for Grain Storage
Food-grade buckets are a practical and efficient option for storing larger quantities of grains for long-term storage. These buckets provide a secure and airtight environment that helps preserve the freshness and quality of the stored grains. When used properly, food-grade buckets can protect your grains from moisture, pests, and oxygen, ensuring their viability and nutritional value over an extended period of time.
Here’s a step-by-step guide on how to properly utilize food-grade buckets for grain storage:
1. Select Food-Grade Buckets: Choose high-quality food-grade buckets specifically designed for food storage. Look for buckets made from high-density polyethylene (HDPE) that are FDA-approved and food-safe. Ensure they are clean and free from any residual odors or contaminants before use.
2. Prepare the Buckets: Thoroughly clean the buckets with warm soapy water, rinse them well, and allow them to air dry completely. This step is necessary to remove any dirt, debris, or residues that could affect the quality of the stored grains. Avoid using buckets that have previously held non-food items or chemicals.
3. Add a Liner (Optional): For an added layer of protection, consider using a food-grade liner inside the bucket. A Mylar bag or food-grade plastic bag can act as a barrier between the grains and the bucket, reducing the risk of cross-contamination and ensuring easy transfer and rotation of the stored grains.
4. Fill the Buckets: Transfer the grains into the prepared food-grade buckets. Use a scoop or a funnel to ensure a neat transfer and minimize spillage. Fill the buckets to the desired level, leaving some headspace to accommodate any expansion and to allow for a proper seal.
5. Seal the Buckets: Place an airtight lid on each bucket and ensure a tight seal. Some food-grade bucket lids come with a gasket or rubber seal, providing added protection against moisture and pests. Close the lids securely, using the appropriate locking mechanism or lid clamp.
6. Label and Date: Label each bucket with the type of grain and the date of storage. This information will help you easily identify and rotate the stored grains. Use labels or masking tape to write this information and attach it to the bucket lid or side.
7. Store in a Cool, Dark Place: Proper storage conditions are crucial for maintaining the integrity of the grains. Choose a cool, dry, and dark location for storing the food-grade buckets. Avoid areas prone to temperature fluctuations, such as garages or attics, as they can affect the quality of the stored grains. Ensure the storage area is free from pests and rodents.
8. Monitor and Rotate: Regularly inspect the stored buckets for any signs of damage, pests, or moisture. Check the lids for tightness and signs of deterioration. Implement a rotation system, using the oldest buckets of grains first and replenishing your stockpile with fresh buckets as needed. This helps maintain the freshness and viability of your grains over time.
Food-grade buckets provide a reliable and durable solution for long-term grain storage. However, it’s important to note that storing grains in buckets may require additional measures to protect against pests and oxidation. Consider using oxygen absorbers or desiccant packs for moisture control, or adding extra layers of security such as sealing the grains in Mylar bags within the buckets.
By properly utilizing food-grade buckets for grain storage, you can create a secure and organized system that prolongs the shelf life of your grains, providing you with a stable and reliable food source for years to come.
Monitoring and Rotating Stored Grains
Monitoring and rotating stored grains are critical steps in maintaining the quality and freshness of your stockpile. Regularly checking the condition of your stored grains helps prevent spoilage, detect any signs of pests or moisture, and ensures that you use the oldest grains first. By implementing a system of monitoring and rotation, you can effectively manage your grain storage and minimize the risk of consuming spoiled or expired grains.
Here are some important steps to follow for monitoring and rotating stored grains:
1. Regular Inspection: Routinely inspect your stored grains for any signs of spoilage, pests, or moisture. Examine the containers, bags, or buckets for any damage, holes, or signs of rodent activity. Look out for mold growth, strange odors, or insect infestation. Early detection allows for timely intervention and prevents the spread of issues to other stored grains.
2. Check the Seals: Ensure that containers with lids, such as mylar bags, buckets, or jars, have adequately sealed. Inspect the seals regularly to verify that they remain intact and airtight. Damaged or compromised seals can allow oxygen, moisture, and pests to enter the storage containers and compromise the quality of the grains.
3. Storage Environment: Monitor the storage environment for any changes that may impact the quality of your stored grains. Check the temperature and humidity levels regularly to ensure they remain within the recommended ranges for grain storage. Address any issues promptly, such as adjusting the storage location or implementing additional measures like dehumidifiers, if necessary.
4. Implement Rotation: Establish a rotation system to use the oldest stored grains first. This practice ensures that the grains are consumed before their quality starts to deteriorate. Maintain a record or utilize labels to track the dates of storage and distribution. Refill your storage containers with fresh grains as you consume the older ones to maintain a consistent supply.
5. Sensory Evaluation: Periodically evaluate the sensory attributes of your stored grains, such as color, smell, and taste. While visual inspection is essential, trusting your senses can provide further insight into any potential changes in quality. Unusual colors, foul odors, or off-tastes may indicate spoilage, mold, or degradation. If any concerns arise, it’s advisable to discard the affected grains.
6. Follow Expiration Dates: Keep track of the expiration dates for any additives used in grain storage, such as oxygen absorbers or desiccant packs. These additives lose their effectiveness over time, so it’s essential to replace them as needed to maintain optimal storage conditions.
7. Document Inventory: Maintain an inventory of your stored grains, including quantity, variety, and dates of storage. This helps you keep track of your stockpile and ensures that you have a clear understanding of the available supply. Regularly update your inventory as you consume and replenish your grains.
By implementing a monitoring and rotation system, you ensure that your stored grains remain fresh, safe, and nutritious. Regular inspections, vigilance against pests and moisture, and proper rotation practices are all crucial elements in maintaining the quality and viability of your grains over time.
Remember that storage conditions can vary, so it’s important to adapt your monitoring and rotation practices accordingly. By staying proactive and attentive, you can enjoy the benefits of a well-maintained grain storage system and have peace of mind knowing that you have a reliable food source for your needs.
Tips for Extending the Shelf Life of Stored Grains
Extending the shelf life of stored grains is essential to ensure their long-term preservation and maintain their quality and nutritional value. Proper storage and handling techniques are crucial in maximizing the longevity of your grain stockpile. Here are some helpful tips to keep in mind:
1. Choose High-Quality Grains: Start with high-quality grains that are free from damage, pests, and moisture. Select grains that are fresh and have a low moisture content, as this reduces the risk of spoilage during storage.
2. Store in a Cool, Dry, and Dark Place: Grains should be stored in a cool environment with consistent temperatures below 70 degrees Fahrenheit (21 degrees Celsius) to minimize the risk of spoilage. Avoid storing grains in areas that are exposed to direct sunlight, as this can accelerate degradation. Additionally, ensure the storage area is dry and properly ventilated to prevent moisture build-up.
3. Protect from Moisture: Moisture is one of the main factors that can lead to spoilage in stored grains. Store grains in moisture-resistant containers such as mylar bags or food-grade buckets with airtight seals. Consider using desiccant packs or silica gel packets to absorb any residual moisture in the storage containers.
4. Keep Away from Pests: Protect your stored grains from pests such as insects and rodents. Use pest-resistant containers with tight-fitting lids to prevent infestations. Regularly inspect the storage area and containers for signs of pests, and take immediate action if any are detected.
5. Minimize Oxygen Exposure: Oxygen can cause oxidation and reduce the shelf life of grains. When using containers, ensure they are airtight and free from leaks. Utilize oxygen absorbers in your storage containers to absorb any residual oxygen and maintain an oxygen-free environment. This helps prevent spoilage and preserve the quality of the grains.
6. Practice Proper Rotation: Implement a rotation system to ensure that the oldest grains are used first. By consuming the older grains and replenishing your stockpile with fresh grains, you maintain a consistent supply and reduce the risk of consuming expired or deteriorated grains.
7. Avoid Contamination: Keep the storage area clean and free from any potential contaminants that could compromise the quality of the stored grains. Regularly inspect and clean the storage containers, removing any debris or residues.
8. Store in Small Batches: Consider storing grains in smaller batches rather than large quantities. This allows for easier monitoring, reduces the risk of spoilage affecting the entire stockpile, and facilitates rotation practices.
9. Use Proper Handling Techniques: When accessing your stored grains, ensure that your hands and tools are clean to avoid introducing any contaminants. Avoid exposing the remaining grains to air and moisture for longer than necessary when retrieving portions for use.
10. Regularly Monitor and Inspect: Regularly check your stored grains for any signs of spoilage, pests, or moisture. Inspect containers, bags, or buckets for any damage or compromised seals. Use your senses to assess the quality of the grains, including color, smell, and taste, to detect any potential issues.
By implementing these tips, you can extend the shelf life of your stored grains and ensure that they remain fresh, safe, and ready for consumption over an extended period. Proper storage, rotation, and attention to the storage environment are key to preserving the quality and viability of your grain stockpile for years to come.
Conclusion
Storing grains long term is a valuable skill that provides food security, saves money, and promotes self-sufficiency. By following proper techniques and utilizing appropriate storage methods, you can extend the shelf life of your grains while maintaining their quality and nutritional value.
Before storing grains, consider factors such as grain quality, storage environment, temperature, humidity, air circulation, pests, and rotation plans. These considerations will ensure that your grains are stored in optimal conditions, minimizing the risk of spoilage and maintaining their integrity over time.
Utilizing storage options such as mylar bags with oxygen absorbers, vacuum sealing, mason jars, or food-grade buckets provides effective barriers against moisture, pests, oxygen, and light. Each method offers its own advantages, allowing you to choose the most suitable option based on your needs, quantity of grains, and available resources.
Additionally, proper cleaning and preparation of grains before storage is crucial. Inspect, remove foreign matter, wash, dry, and fumigate grains if necessary to maintain their quality throughout the storage period.
Regular monitoring of stored grains is essential to identify any signs of spoilage, pests, or moisture. This includes inspecting seals, evaluating storage conditions, and practicing sensory evaluation to ensure the grains remain fresh and safe for consumption.
Implementing a rotation system helps to ensure that older grains are used first, promoting the continuous replenishment of fresh grains into your stockpile. By following expiration dates of additives such as oxygen absorbers, you can maintain optimal storage conditions.
By implementing these practices and following the tips to extend the shelf life of stored grains, you can confidently build a reliable food storage system. Whether for emergency preparedness or everyday use, your stored grains will provide sustenance and peace of mind in times of need.
Remember to regularly monitor and maintain your stored grains, adjust storage conditions as necessary, and stay vigilant against potential risks. With proper handling and a focus on sustainability, you can create a resilient food supply that will support you and your family for years to come.
Ready to upgrade your food storage techniques? Dive deeper into securing your supplies with our dedicated guides. For those looking to optimize grain preservation, exploring the best mylar bags for food storage offers essential insights. If maintaining freshness is your goal, understanding top oxygen absorbers for food storage is invaluable. Lastly, for a broader perspective, don't miss our review on top solutions for long term food storage, ensuring your pantry remains well-stocked and prepared for any situation.
Frequently Asked Questions about How To Store Grains Long Term
Was this page helpful?
At Storables.com, we guarantee accurate and reliable information. Our content, validated by Expert Board Contributors, is crafted following stringent Editorial Policies. We're committed to providing you with well-researched, expert-backed insights for all your informational needs.


0 thoughts on “How To Store Grains Long Term”