Home>Articles>How To Store Greens To Maintain Their Freshness
Articles
How To Store Greens To Maintain Their Freshness
Modified: September 1, 2024
Learn the best methods for storing and preserving greens in this informative collection of articles. Discover tips and tricks to keep your produce fresh for longer.
(Many of the links in this article redirect to a specific reviewed product. Your purchase of these products through affiliate links helps to generate commission for Storables.com, at no extra cost. Learn more)
Introduction
When it comes to fresh greens, proper storage is essential to maintain their freshness and nutritional value. Whether you have a bountiful harvest from your garden or you’ve purchased a variety of greens from the supermarket, knowing how to store them correctly will ensure that they stay crisp, vibrant, and ready to enjoy for longer periods.
Properly storing greens not only helps to preserve their flavor and texture, but it also minimizes waste and saves you money. No one wants to open their refrigerator to find wilted, slimy greens that are no longer appetizing.
In this article, we will explore the importance of properly storing greens and provide you with the best storage methods to keep them fresh and delicious. Whether you have lettuce, kale, spinach, or any other type of greens, these tips will help you extend their shelf life and avoid unnecessary spoilage.
Key Takeaways:
- Properly storing greens is crucial for preserving their flavor, texture, and nutrients, reducing waste, and saving money. Whether in the refrigerator, freezer, or glass containers, the right storage method ensures longer-lasting freshness.
- From washing and drying to blanching and vacuum-sealing, various methods help maintain the quality of different greens. By following specific storage guidelines, you can enjoy fresh, vibrant greens for a longer period, enhancing your culinary experience.
Read more: How To Store Fresh Oregano
Importance of Properly Storing Greens
Properly storing greens is crucial for maintaining their freshness, flavor, and nutritional value. Here are a few reasons why it’s important to store greens correctly:
- Preserve Texture and Flavor: When greens are stored improperly, they can quickly wilt, become soggy, or develop a bitter taste. Proper storage methods help retain their crispness, texture, and natural flavor.
- Extend Shelf Life: By storing greens correctly, you can extend their shelf life and reduce food waste. This means you can enjoy your greens for a longer period, saving you money and reducing trips to the grocery store.
- Maintain Nutritional Value: Greens are packed with essential vitamins, minerals, and antioxidants. However, improper storage can lead to a loss of nutrients. Storing them properly ensures that you get the maximum nutritional benefits from your greens.
- Prevent Spoilage and Mold: Greens are prone to spoilage and mold growth if not stored properly. Mold not only affects the taste and quality of the greens, but it can also pose health risks. Proper storage methods help prevent mold and spoilage.
- Convenience: Proper storage methods make it easier to grab a handful of fresh greens whenever you need them. This convenience encourages you to include more greens in your meals, promoting a healthier diet.
Now that you understand the importance of proper storage, let’s delve into the best methods for storing various types of greens to ensure their freshness and longevity.
Best Storage Methods for Greens
When it comes to storing greens, there are several methods you can use to keep them fresh and crisp. Here are the best storage methods for greens:
- Washing and Drying Greens: Before storing greens, it’s important to wash them thoroughly to remove any dirt or grit. However, excess moisture can cause greens to deteriorate quickly. After washing, gently pat them dry or use a salad spinner to remove excess water.
- Refrigerator Storage: The refrigerator is the ideal place for storing most greens. One important factor to consider is humidity. Greens prefer a slightly humid environment, so store them in a plastic bag or wrap them loosely in damp paper towels before placing them in the vegetable drawer.
- Freezing Greens: Freezing greens is a great option if you have an abundance that you won’t be able to use before they start to wilt. Blanch the greens briefly in boiling water, then plunge them into ice water to preserve their color and texture. Once they’re cooled, drain and package them in airtight freezer bags, removing as much air as possible.
- Blanching Greens: Blanching is a process in which greens are briefly boiled and then shocked in an ice bath. Blanching helps to preserve the color, texture, and nutrients of the greens before freezing.
- Storing Greens in Glass Containers: For sturdy greens like kale or collard greens, storing them in glass containers with a bit of water at the bottom can help maintain their freshness. Just make sure to cover the container with a lid or plastic wrap to prevent moisture loss.
- Using Vacuum-Sealed Bags for Greens: Vacuum-sealed bags are an excellent option for prolonging the shelf life of greens. They remove excess air from the bag, slowing down the spoilage process. This method works well for tender greens like spinach or arugula.
- Storing Greens in Produce Bags: If you have access to produce bags, they can be an eco-friendly option for storing greens. These breathable bags allow air circulation and prevent moisture build-up while keeping the greens fresh.
- Properly Storing Specific Types of Greens: Different types of greens have unique storage requirements. For example, delicate greens like lettuce or baby spinach should be stored with moisture in a plastic bag, while hearty greens like Swiss chard or cabbage can be stored in the vegetable drawer without a bag.
By following these storage methods, you can ensure that your greens stay fresh, vibrant, and ready to use whenever you need them. Now let’s explore each method in more detail and learn how to store specific types of greens.
Washing and Drying Greens
Properly washing and drying greens is the first step towards ensuring their longevity in storage. Here’s how to do it:
- Remove any damaged or wilted leaves: Before washing your greens, inspect them and remove any leaves that show signs of wilting or damage. This will help preserve the quality of the remaining leaves.
- Fill a clean sink or basin with cold water: Fill a clean sink or basin with cold water. Make sure there is enough water to submerge the greens fully.
- Immerse the greens in water: Place the greens in the water and swish them around gently to dislodge any dirt or debris. Allow them to soak for a minute or two.
- Drain and rinse: Remove the greens from the water and drain them in a colander. Rinse them under cold running water to remove any remaining dirt or particles.
- Dry thoroughly: After rinsing, thoroughly dry the greens. You can use a salad spinner or gently pat them dry with clean kitchen towels or paper towels. Excess moisture can cause greens to spoil quickly, so make sure to remove as much water as possible.
Once your greens are clean and dry, you can proceed to store them using one of the methods mentioned previously, such as refrigerator storage or freezing.
Remember to wash and dry your greens just before storage, rather than in advance, to prevent them from becoming limp or slimy prematurely. By following these steps, you’ll ensure that your greens remain fresh and ready to use for longer periods.
Refrigerator Storage
The refrigerator is an ideal place to store most greens as it provides a cool and controlled environment. Follow these steps to ensure optimal refrigerator storage for your greens:
- Prepare greens for storage: After washing and drying your greens, remove any excess moisture. Excess water can speed up spoilage, so make sure they are thoroughly dry.
- Wrap in damp paper towels: To maintain the right level of moisture, wrap your greens loosely in damp paper towels. This helps to prevent dehydration while providing a slightly humid environment. Alternatively, you can use a clean kitchen towel to achieve the same effect.
- Place in a plastic bag: Once your greens are wrapped, put them in a plastic bag such as a Ziploc bag or a produce bag. Leave the bag slightly open to allow for air circulation.
- Store in the vegetable drawer: The vegetable drawer in your refrigerator is designed to provide the right humidity for storing greens. Place the bag of greens in the vegetable drawer, away from direct contact with other fruits and vegetables.
- Check and refresh: Periodically check on your stored greens and remove any that have started to wilt or develop sliminess. Refresh the damp paper towels or kitchen towel if they have become dry.
Bear in mind that not all greens have the same storage requirements. Delicate greens like lettuce or spinach may require slightly different handling. With delicate greens, you can skip the paper towel and instead store them in a loosely closed plastic bag.
By following these refrigerator storage steps, your greens should stay fresh and crisp for several days, allowing you to enjoy them in salads, sandwiches, or cooked dishes without any loss of quality.
Read more: How To Store Fresh Lettuce
Freezing Greens
If you have an abundance of greens and want to extend their shelf life for future use, freezing is a great option. Here’s how to freeze greens properly:
- Prepare the greens: Start by washing the greens thoroughly to remove any dirt or debris. Remove any wilted or damaged leaves.
- Blanch the greens: Blanching helps preserve the color, texture, and nutrients of greens before freezing. Bring a pot of water to a boil and prepare an ice bath. Submerge the greens in boiling water for a brief period, usually 1-2 minutes, depending on the type of greens. Immediately transfer them to the ice bath to halt the cooking process.
- Drain and dry: After blanching, drain the greens and dry them thoroughly. Excess water can cause freezer burn and affect the texture of the greens.
- Package for freezing: Package the greens for freezing in airtight freezer bags or containers. Remove as much air as possible from the bags before sealing to prevent freezer burn. Alternatively, you can use vacuum-sealed bags for optimal storage.
- Label and date: Don’t forget to label the bags or containers with the type of greens and the date of freezing. This will help you keep track of their freshness and ensure you use them within a reasonable time frame.
- Store in the freezer: Place the packaged greens in the freezer. Ideally, store them in a single layer initially to allow for faster freezing. Once they are frozen, you can stack them to save space.
When you’re ready to use the frozen greens, simply remove the desired amount from the freezer and thaw them in the refrigerator or use them directly in cooked dishes without thawing.
It’s important to note that while freezing greens helps preserve their freshness and nutrients, the texture may change upon thawing. Therefore, frozen greens are best used in cooked dishes rather than raw preparations like salads.
By following these steps, you can extend the shelf life of your greens and enjoy their vibrant flavors and nutritional benefits even when they are out of season.
Store greens in a perforated plastic bag in the refrigerator to maintain freshness. The perforations allow for air circulation while preventing wilting.
Blanching Greens
Blanching is a process that involves briefly boiling greens and then rapidly cooling them in an ice bath. Blanching helps to preserve the color, texture, and nutrients of greens before freezing. Here’s how to blanch greens:
- Prepare the greens: Start by washing the greens thoroughly to remove any dirt or debris. Remove any wilted or damaged leaves.
- Boiling water: Bring a pot of water to a rolling boil. It’s recommended to use about 1 gallon of water per 1 pound of greens.
- Add salt (optional): If desired, you can add a pinch of salt to the boiling water. This helps to enhance the flavor of the greens.
- Blanch the greens: Submerge the greens in the boiling water and let them cook for a brief period, depending on the type of greens. Usually, 1-2 minutes is sufficient, but delicate greens may require even less time. The goal is to soften the greens slightly without fully cooking them.
- Rapid cooling: Immediately after blanching, transfer the greens to an ice bath. This ice bath will cool the greens rapidly and halt the cooking process. Leave them in the ice bath for the same amount of time that they were blanched.
- Drain and dry: Once the greens have cooled, remove them from the ice bath and drain them well. Gently pat them dry with clean kitchen towels or paper towels to remove excess water.
Blanching greens helps to preserve their vibrant color, texture, and nutrients. It also helps to deactivate enzymes that can cause loss of quality during freezing and storage.
After blanching, you can proceed to freeze the greens using airtight freezer bags or containers. Make sure to remove as much air as possible from the packaging to prevent freezer burn. Properly blanched and stored greens can last for several months in the freezer, allowing you to enjoy their freshness and nutritional benefits throughout the year.
Storing Greens in Glass Containers
If you prefer to avoid plastic and want a more eco-friendly option for storing greens, using glass containers can be a great choice. Here’s how to store greens in glass containers:
- Prepare the greens: Start by washing the greens thoroughly to remove any dirt or debris. Remove any wilted or damaged leaves.
- Trim and cut: Trim off any tough stems or ribs from the greens and cut them into manageable sizes.
- Add water: Place a small amount of water, about an inch or so, at the bottom of the glass container. This water will provide moisture and help keep the greens fresh.
- Place the greens: Arrange the greens in the glass container, placing them upright if possible. This helps to prevent crushing and maintain their shape.
- Seal and store: Cover the glass container with a lid or plastic wrap to create a seal and prevent moisture loss. Make sure the lid fits tightly to keep the greens fresh.
- Store in the refrigerator: Place the glass container with the greens in the refrigerator, ideally in the vegetable drawer or in a cool part of the fridge where they won’t be disturbed.
- Check and refresh: Periodically check the condition of the stored greens. Remove any that show signs of wilting or spoilage, and refresh the water in the glass container if it becomes cloudy or evaporates.
Storing greens in glass containers not only helps to maintain their freshness but also minimizes the risk of plastic leaching into your food. Glass containers are also reusable and can be an eco-friendly alternative to disposable plastic bags.
While greens stored in glass containers can stay fresh for a few days, it’s best to consume them as soon as possible for optimal flavor and texture.
By following these steps, you can store your greens in glass containers and enjoy their freshness and nutritional benefits while reducing your environmental impact.
Using Vacuum-Sealed Bags for Greens
Using vacuum-sealed bags for storing greens is an effective method to prolong their freshness and extend their shelf life. The process of vacuum sealing removes excess air from the bag, creating a tightly sealed environment. Here’s how to use vacuum-sealed bags for greens:
- Prepare the greens: Start by washing the greens thoroughly to remove any dirt or debris. Remove any wilted or damaged leaves.
- Trim and dry: Trim off any tough stems or ribs from the greens and ensure they are thoroughly dry. Excess moisture may affect the quality and texture of the greens during vacuum sealing.
- Place in vacuum-seal bag: Put the greens into a vacuum-seal bag. Arrange them in a single layer and make sure they are not overcrowded. Leave some space at the top of the bag for sealing.
- Vacuum seal the bag: Place the open end of the bag into a vacuum-sealing machine and follow the instructions for your specific device to vacuum seal the bag. The machine will remove the air from the bag and seal it tightly.
- Label and date: Use a marker to label the bag with the type of greens and the date of sealing. This will help you keep track of their freshness and use them within a reasonable time frame.
- Store in the refrigerator: Place the vacuum-sealed bag of greens in the refrigerator. Store them in the vegetable drawer or another cool area of the fridge.
Using vacuum-sealed bags helps to preserve the freshness, color, and texture of the greens for a longer period. By removing excess air, you minimize the risk of oxidation and microbial growth, ensuring that your greens stay crisp and flavorful.
When you’re ready to use the vacuum-sealed greens, simply open the bag, remove the desired amount, and reseal the rest for future use. This method is particularly handy if you have a large quantity of greens that you can’t consume all at once.
Remember to consume the vacuum-sealed greens within a reasonable time frame to enjoy their optimal flavor and nutritional value. Vacuum-sealed greens can last for several weeks in the refrigerator, but it’s always best to use them as soon as possible for the freshest taste.
Read more: How To Store Fresh Hops
Storing Greens in Produce Bags
If you’re looking for a simple and eco-friendly way to store greens, using produce bags can be a great option. These breathable bags allow air circulation while protecting your greens from drying out. Here’s how to store greens in produce bags:
- Prepare the greens: Start by washing the greens thoroughly to remove any dirt or debris. Remove any wilted or damaged leaves.
- Trim and dry: Trim off any tough stems or ribs from the greens and ensure they are thoroughly dry. Excess moisture can cause the greens to spoil more quickly.
- Place in produce bags: Put the greens into a produce bag, such as mesh or cloth bags specifically designed for storing produce. Place a handful of greens in each bag, making sure not to overcrowd them.
- Leave the bag slightly open: To allow for air circulation, leave the produce bag slightly open or loosely tie it. This ensures that the greens don’t become too moist or suffocate inside the bag.
- Store in the refrigerator: Place the produce bags of greens in the refrigerator, ideally in the vegetable drawer or in a cool part of the fridge.
- Check and refresh: Periodically check the condition of the stored greens. Remove any that show signs of wilting or decay and refresh the bags if they become too damp or need cleaning.
Produce bags are designed to provide the right balance of airflow and moisture, creating an optimal environment for storing greens. They help protect the greens from excessive moisture build-up, which can lead to spoilage, while still allowing them to breathe.
Using produce bags is not only practical but also an eco-friendly choice as they can be washed and reused multiple times. This reduces the amount of single-use plastic waste generated from your kitchen.
By storing your greens in produce bags, you can maintain their freshness and quality for several days, ensuring that they are ready to use whenever you need them.
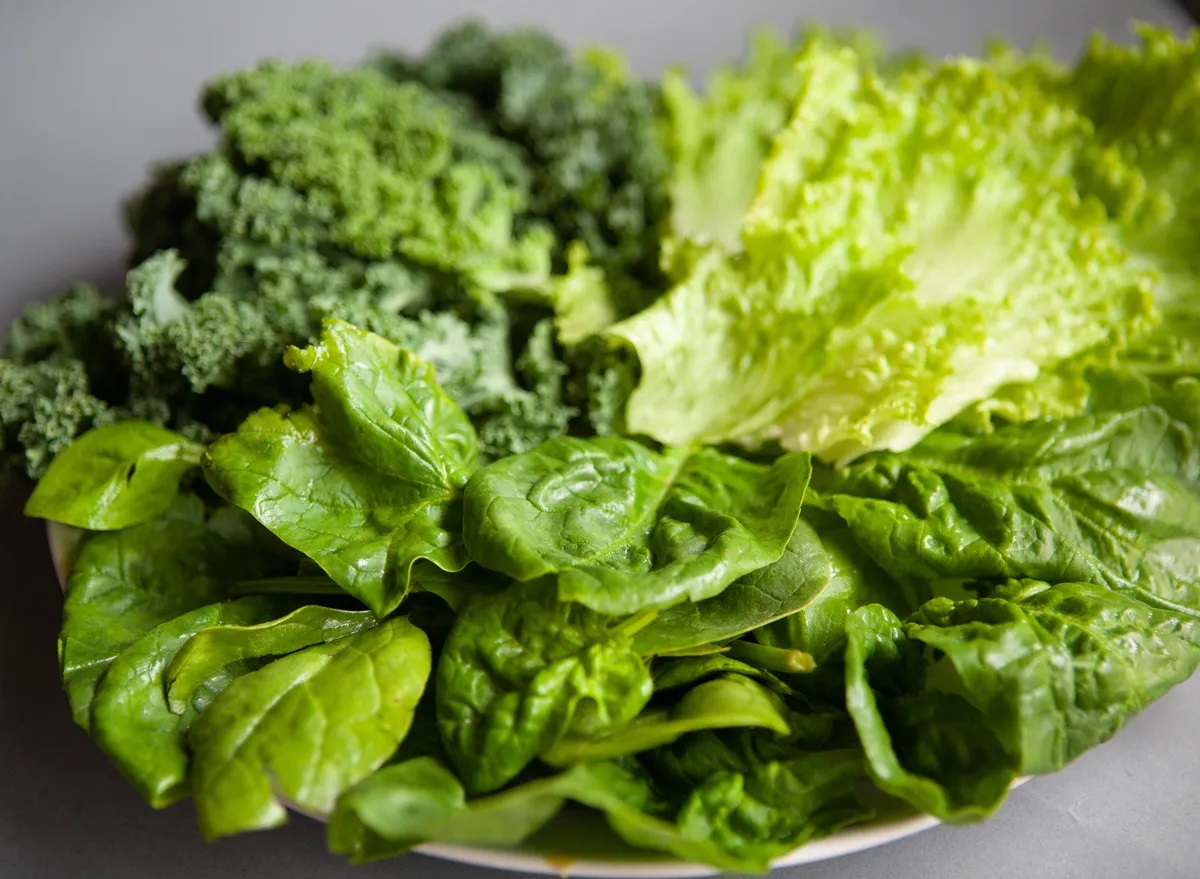
Properly Storing Specific Types of Greens
Different types of greens have unique characteristics and storage requirements. Here are some guidelines for properly storing specific types of greens:
- Lettuce (leafy greens): Remove any damaged leaves and wash the lettuce thoroughly. After washing, spin dry in a salad spinner or gently pat dry with paper towels. Store the lettuce in a plastic bag or an airtight container lined with a paper towel to absorb excess moisture. Refrigerate and use within a week.
- Spinach (leafy greens): Remove any yellow or wilted leaves and wash the spinach thoroughly. Spin dry or pat dry with paper towels. Place the spinach in a plastic bag or airtight container lined with a paper towel. Refrigerate and use within a few days.
- Kale (sturdy greens): Trim off the tough stems and ribs from the kale leaves. Wash and dry the kale thoroughly. Place the kale in a glass container or a plastic bag lined with a damp paper towel. Refrigerate and use within a week.
- Swiss chard (sturdy greens): Separate the stems from the leaves. Wash and dry them thoroughly. Store the chard leaves and stems separately in plastic bags or containers, lined with a damp paper towel. Refrigerate and use within a week.
- Collard greens (sturdy greens): Remove the tough stems and ribs from the collard leaves. Wash and dry the leaves thoroughly. Place the collard greens in a glass container or a plastic bag lined with a damp paper towel. Refrigerate and use within a week.
These are just a few examples of common greens, but the general principles can apply to other types as well. It’s important to remember that each green variety may have specific nuances, so it’s always a good idea to consult specific storage guidelines if available.
By following these storage recommendations, you can ensure that each type of green maintains its optimal freshness and quality, allowing you to enjoy them at their best.
Conclusion
Properly storing greens is essential to maintain their freshness, flavor, and nutritional value. By following the best storage methods for greens, you can extend their shelf life, minimize waste, and enjoy their vibrant taste and health benefits for longer periods.
Whether you choose to wash and dry greens, store them in the refrigerator, freeze them, blanch them, use glass containers, vacuum-sealed bags, or produce bags, each method plays a crucial role in preserving the quality of your greens.
Remember to adjust the storage method based on the specific type of greens you have. Delicate leafy greens like lettuce and spinach require gentle handling and slightly humid conditions, while sturdy greens like kale and collard greens can tolerate a bit more moisture and handling.
By taking the time to properly store greens, you can prevent wilting, spoilage, and loss of nutrients. This not only saves you money but also ensures that you have fresh greens readily available for various culinary creations, whether it’s in salads, cooked dishes, smoothies, or green juices.
So, the next time you have a bundle of fresh greens in your hands, remember these storage methods and choose the one that suits your needs best. With a little effort and knowledge, you can prolong the life of your greens and savor their goodness for as long as possible.
Now, go ahead and enjoy the bountiful flavors and benefits of properly stored greens!
Frequently Asked Questions about How To Store Greens To Maintain Their Freshness
Was this page helpful?
At Storables.com, we guarantee accurate and reliable information. Our content, validated by Expert Board Contributors, is crafted following stringent Editorial Policies. We're committed to providing you with well-researched, expert-backed insights for all your informational needs.


0 thoughts on “How To Store Greens To Maintain Their Freshness”