Articles
How To Store Home Baked Bread
Modified: February 26, 2024
Learn the best techniques and tips for storing home baked bread in this comprehensive collection of articles. Keep your bread fresh and delicious longer!
(Many of the links in this article redirect to a specific reviewed product. Your purchase of these products through affiliate links helps to generate commission for Storables.com, at no extra cost. Learn more)
Introduction
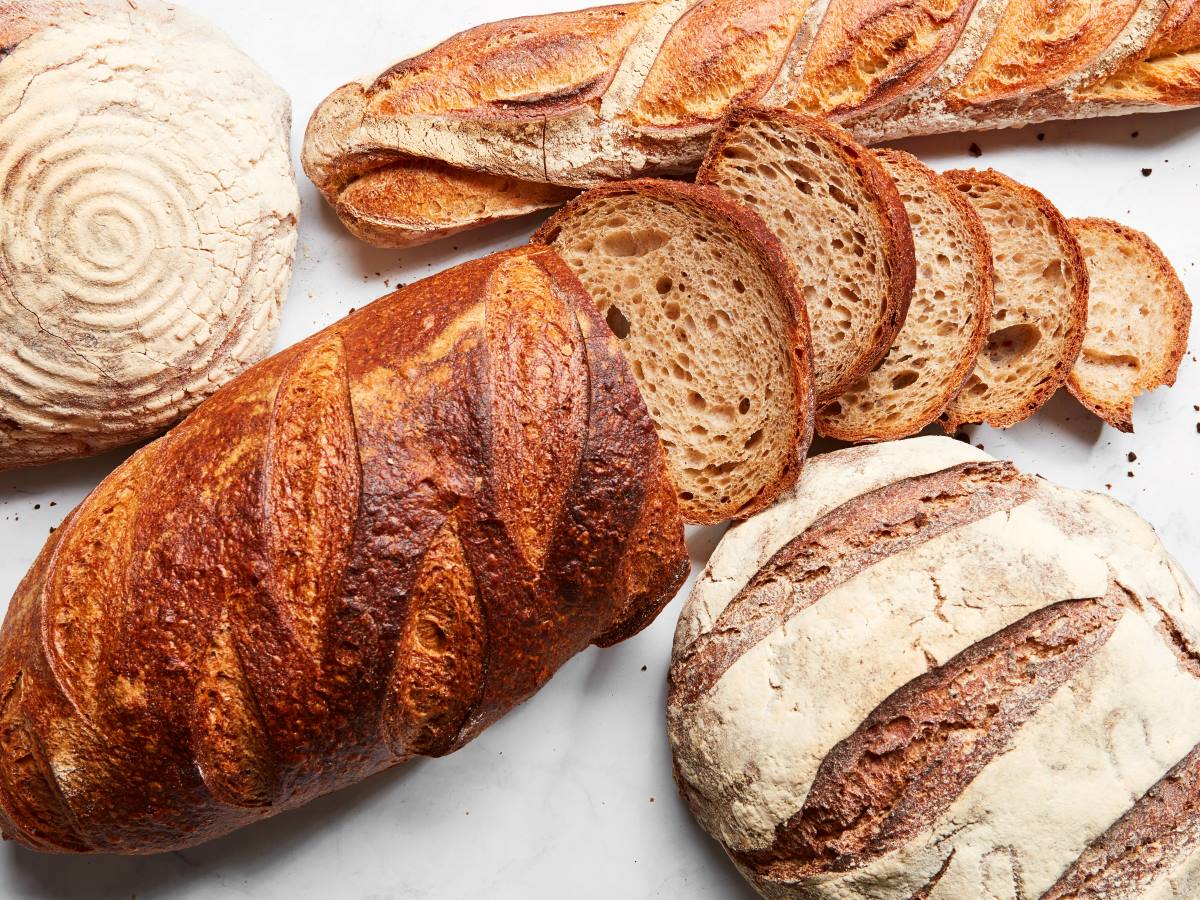
There’s nothing quite like the aroma and taste of freshly baked bread. Whether it’s a crusty baguette, a soft loaf of ciabatta, or a fluffy brioche, home-baked bread is a true delight. However, to fully enjoy the flavors and textures of your homemade bread, it’s essential to know how to store it properly.
Storing bread correctly not only helps to preserve its freshness but also extends its shelf life. The right storage techniques can prevent your bread from drying out, getting stale, or developing mold. In this article, you’ll learn the best practices for keeping your homemade bread fresh and delicious.
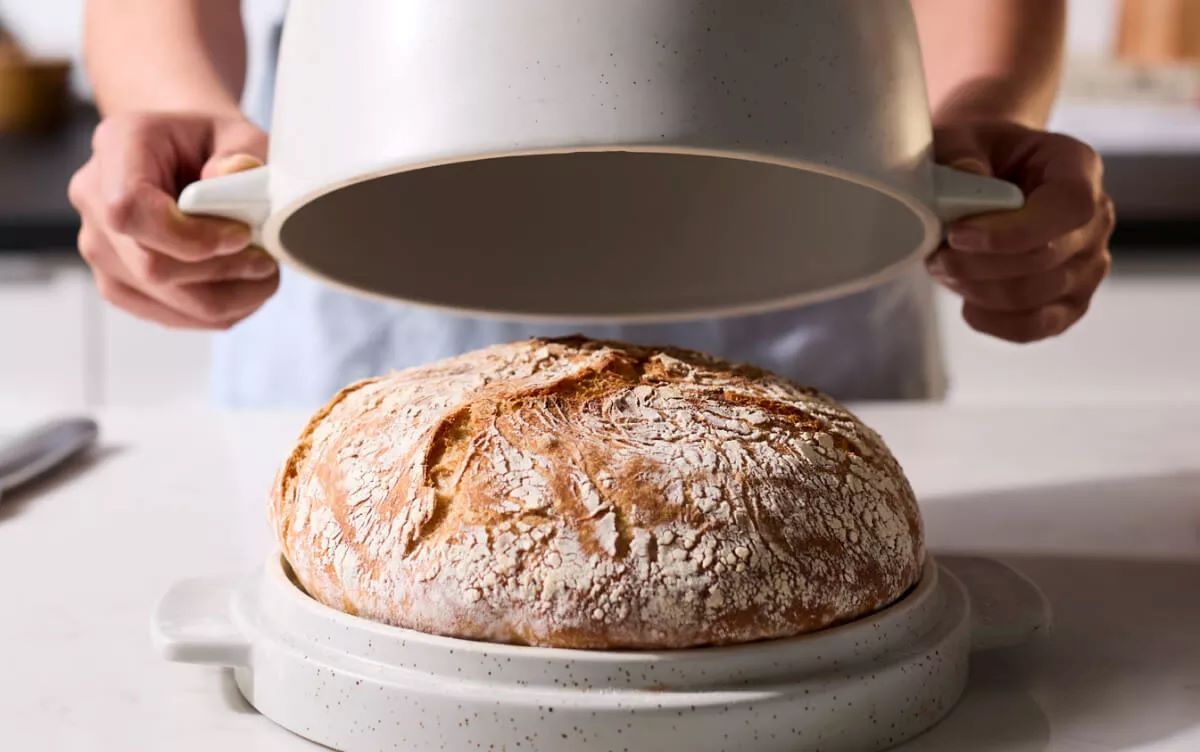
1. Choosing the right container for storing bread
When it comes to storing bread, the container you choose plays a crucial role. Opt for a container that allows for proper airflow while protecting the bread from excessive moisture and exposure to air. A bread box or a lidded container made of food-safe materials like stainless steel or plastic can work well.
2. Cooling the bread properly before storing
Before you st
Key Takeaways:
- Properly storing homemade bread is crucial for maintaining its freshness and flavor. Choosing the right container, cooling the bread, and wrapping it correctly are essential steps to ensure your bread stays delicious for longer.
- Freezing bread allows for long-term storage while preserving its taste and texture. Properly wrapping and thawing frozen bread ensures that you can enjoy your homemade loaves for an extended period, providing delicious slices whenever you crave them.
Read more: How To Store Baked Bread
Choosing the right container for storing bread
When it comes to storing your homemade bread, selecting the right container is essential. The container you choose will impact the bread’s freshness and texture.
First and foremost, it’s important to choose a container that provides proper airflow. Bread needs ventilation to prevent moisture buildup and maintain its crusty exterior. A bread box with slits or vents is an excellent choice as it allows air to circulate while protecting the bread from excessive drying out.
Additionally, consider the material of the container. Food-safe materials like stainless steel or high-quality plastic containers are ideal for storing bread. These materials help maintain the bread’s freshness without imparting any undesirable flavors or odors.
Size is another factor to consider when choosing a container. Opt for a container that is slightly larger than your loaf of bread to prevent it from getting squished or deformed. Having extra space also allows for easy removal and retrieval of slices without damaging the loaf.
Transparent containers with tight-fitting lids are advantageous as they allow you to see the bread without opening the container. This helps to minimize exposure to air and allows you to monitor the freshness of your bread at a glance.
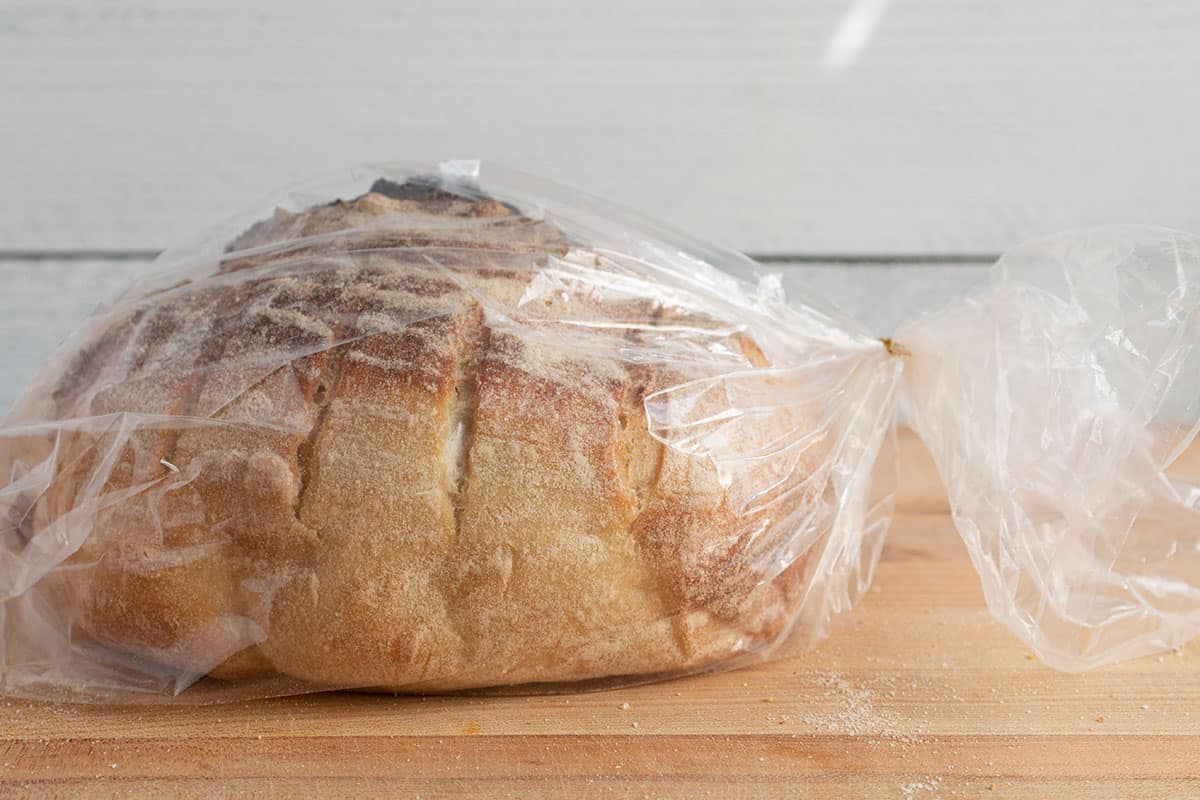
Alternatively, if you don’t have a dedicated bread container, you can use resealable plastic bags. Simply place the bread inside the bag and seal it, removing as much air as possible. This method works well for short-term storage and is convenient if you need to grab a slice on the go.
Remember to clean your bread container regularly to prevent any potential mold or bacteria from contaminating future batches. Wash the container with warm soapy water, rinse well, and dry thoroughly before storing your bread.
By choosing the right container, you can ensure your homemade bread stays fresh and delicious for longer periods, allowing you to savor each slice.
Cooling the bread properly before storing
Properly cooling your homemade bread is crucial before you store it to maintain its freshness and prevent moisture buildup.
After you take the bread out of the oven, resist the temptation to slice into it immediately. Allow the bread to cool completely on a wire rack. This process can take anywhere from 1 to 2 hours, depending on the size and density of the loaf.
During the cooling process, the residual heat continues to cook the bread from the inside. Slicing into the bread too soon can release steam and cause the interior of the loaf to become gummy and dense. Allowing the bread to cool ensures that it sets properly and maintains its desired texture.
When cooling the bread, it’s important to do so in a well-ventilated area. Avoid placing the bread on a solid surface, such as a cutting board or countertop, as this can trap heat and moisture. Instead, use a wire rack that allows air to circulate around the bread, promoting even cooling and preventing condensation.
If you plan to store your bread in a container, make sure it is completely cool before transferring it. Placing warm bread in a sealed container can create a moist environment, which can lead to mold growth or a soggy crust.
Properly cooled bread is not only easier to handle and slice but also stays fresh for a longer period. It allows the residual moisture in the bread to distribute evenly, resulting in a more consistent texture throughout.
By practicing patience and allowing your homemade bread to cool completely before storing it, you can ensure that it retains its delightful aroma, flavor, and texture.
Wrapping the bread for maximum freshness
Properly wrapping your homemade bread is essential for maintaining its freshness and preventing it from drying out or absorbing moisture. The right wrapping technique will help preserve the bread’s texture and flavor for an extended period.
When it comes to wrapping bread, the goal is to create a barrier that protects the loaf from exposure to air and humidity. The choice of wrapping material can make a significant difference in the bread’s shelf life.
One popular option is to use plastic wrap or cling film. Start by tightly wrapping the loaf in a few layers of plastic wrap, making sure there are no gaps or loose ends. This method is effective in preserving moisture and keeping the bread soft and fresh.
Alternatively, you can use aluminum foil to wrap your bread. Aluminum foil provides an additional layer of insulation, protecting the bread from air and light. Wrap the loaf tightly in foil, ensuring it is well-sealed from all sides.
Some bakers prefer using reusable food wraps or beeswax wraps to store bread. These eco-friendly options are made with natural materials and can be washed and reused. Simply wrap the bread in the food wrap, ensuring it is secure and sealed.
If your bread has a crispy crust that you want to preserve, avoid tightly wrapping it in plastic or foil. Instead, use a clean kitchen towel or bread bag to loosely cover the bread. The towel or bag will offer some protection while still allowing air circulation, maintaining the crust’s crispness.
Regardless of the wrapping method you choose, make sure the entire loaf is covered and sealed properly. This prevents air from reaching the bread and keeps it fresh for a longer duration.
It’s important to note that once you’ve wrapped the bread, store it in an appropriate container or bread box to further shield it from external elements.
By taking the time to carefully wrap your homemade bread, you can preserve its quality and enjoy every slice as if it were freshly baked.
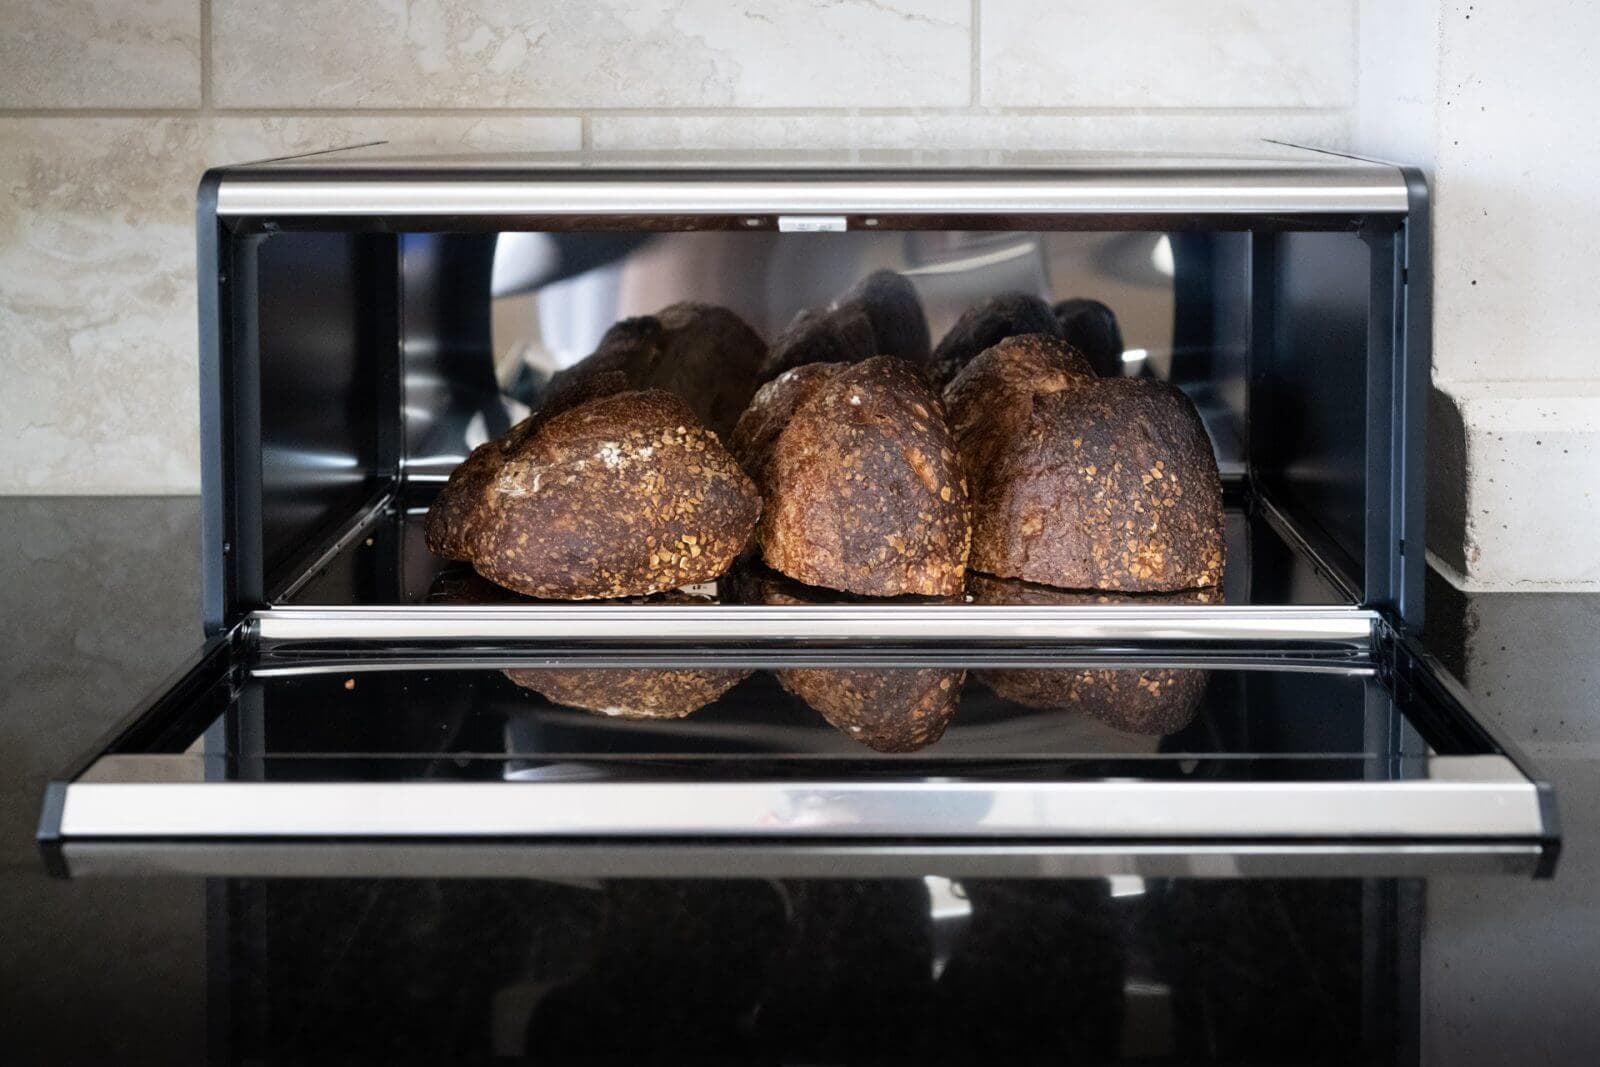
Storing bread at room temperature
Storing bread at room temperature is a common method that works well for short-term storage. However, it’s important to follow a few guidelines to maintain the bread’s freshness and prevent it from spoiling.
When storing bread at room temperature, it’s essential to keep it in a cool, dry place away from direct sunlight or heat sources. Excessive heat and sunlight can accelerate the staling process and promote mold growth.
If you have a bread box, this is an ideal option for storing bread at room temperature. The box provides a controlled environment with proper air circulation, keeping the bread fresh for longer. Make sure to clean the bread box regularly to prevent any potential mold or bacteria buildup.
If you don’t have a bread box, you can use a lidded container or even a clean paper bag to store your bread. Place the wrapped or covered loaf inside the container and keep it in a cool area of your kitchen or pantry.
One important thing to remember when storing bread at room temperature is that it’s best to consume it within a few days. Homemade bread does not contain any preservatives, so it’s more susceptible to spoilage compared to commercially produced bread.
If you’re storing crusty bread, such as a baguette or a sourdough loaf, you can extend its freshness by re-crisping it in the oven. Preheat the oven to 350°F (175°C), spritz the bread lightly with water, and place it on a baking sheet. Bake for 5-10 minutes until the crust becomes crispy again.
Remember to slice the bread only when needed to minimize exposure to air. This helps to retain the bread’s moisture and prevents it from drying out quickly.
Storing bread at room temperature is a convenient option if you plan to consume it within a few days. By ensuring the bread is kept in a cool and dry place, you can enjoy fresh, flavorful slices throughout the week.
Store home-baked bread at room temperature in a paper bag for up to 2 days. For longer storage, wrap the bread in plastic wrap and store in the freezer for up to 3 months.
Read more: How To Store Baked Goods
Storing bread in the refrigerator
Storing bread in the refrigerator can help prolong its shelf life, especially in warmer climates or during hot summer months. However, it’s crucial to be mindful of the potential drawbacks when choosing this storage method.
When you refrigerate bread, it significantly slows down the staling process. The cool temperature reduces the growth of mold and keeps the bread fresher for a more extended period compared to storing it at room temperature.
To store bread in the refrigerator, make sure it’s properly wrapped to prevent it from drying out. Place the tightly wrapped loaf in a plastic bag, a resealable bag, or a container with a lid to protect it from absorbing any odors or flavors from other foods in the fridge.
While refrigeration can extend the shelf life of bread, it can also affect its texture. The cold environment can dry out the bread, leading to a tougher crust and a denser crumb. This is particularly true for softer bread varieties like sandwich bread or buns.
It’s important to note that refrigeration can alter the flavors of some types of bread. Bread made with natural sourdough or artisanal bread with complex flavors may lose some of their distinctive tastes when stored in the fridge.
If you prefer to eat your bread toasted or warmed, refrigeration can be advantageous, as cold bread toasts more evenly and retains its shape better. Simply remove the desired number of slices from the fridge and allow them to come to room temperature before toasting or warming them.
Keep in mind that bread stored in the refrigerator tends to stale faster when returned to room temperature. If you choose to refrigerate your bread, it’s best to consume it within a week for optimal freshness.
Overall, storing bread in the refrigerator can be a suitable option for extending its shelf life, especially in hot and humid environments. Just be aware that the texture and flavor may be slightly affected, so consider your personal preferences when deciding which storage method to use.
Freezing bread for long-term storage
Freezing bread is an excellent option if you want to store it for an extended period, allowing you to enjoy fresh bread whenever you desire. Proper freezing techniques can help preserve the taste, texture, and quality of your homemade bread.
Before freezing your bread, make sure it is completely cool. Partially freezing warm bread can lead to the formation of ice crystals, which can affect the texture and cause sogginess when thawed.
To freeze bread, start by wrapping it tightly in a double layer of plastic wrap or airtight freezer bags. This extra layer helps to prevent freezer burn and protects the bread from absorbing any odors in the freezer. Alternatively, you can use heavy-duty aluminum foil to wrap the bread tightly.
It’s a good idea to slice the bread before freezing if you plan to use it in smaller portions. This way, you can easily take out individual slices as needed without having to thaw the entire loaf. Separate the slices with parchment paper or place them in a freezer-safe storage bag.
Label the wrapped bread with the date of freezing to help keep track of its freshness. Frozen bread is typically best consumed within 2 to 3 months for optimal taste and texture.
When you’re ready to enjoy your frozen bread, remove it from the freezer and let it thaw at room temperature. Avoid using a microwave to defrost the bread, as it can lead to uneven thawing and result in a soggy texture.
Once the bread has thawed, you can refresh it in the oven to restore its crustiness. Preheat the oven to 350°F (175°C), spritz the bread lightly with water, and place it directly on the oven rack or a baking sheet. Bake for 5-10 minutes until the crust becomes crispy again.
It’s important to note that freezing bread can slightly alter its texture. While it may not be as soft and fresh as when freshly baked, it will still be tasty and enjoyable.
Freezing bread allows you to enjoy your homemade loaves for an extended period. Proper wrapping and thawing techniques ensure that the bread retains its quality, providing you with delicious slices whenever you crave them.
Properly thawing frozen bread
Thawing frozen bread properly is essential to preserve its taste, texture, and overall quality. Following the right thawing techniques will ensure that your bread retains its freshness and doesn’t become soggy or dry.
The best way to thaw frozen bread is to let it thaw naturally at room temperature. Simply remove the wrapped loaf from the freezer and place it on a countertop or cutting board. It’s crucial to keep the bread wrapped during the thawing process to prevent moisture loss.
Allow the bread to thaw for several hours or overnight, depending on the size and density of the loaf. Sliced bread or smaller portions may thaw in a shorter time, while larger loaves will take longer. It’s important to be patient and avoid rushing the thawing process to maintain the bread’s quality.
Avoid thawing bread in the microwave as it can result in uneven thawing and may make the bread too soft or even soggy. Microwaves can also cause the bread to lose its crustiness. It’s best to opt for a gradual thaw at room temperature for the best results.
Once the bread has thawed completely, you can refresh it in the oven if desired to regain its crustiness. Preheat the oven to 350°F (175°C) and place the thawed bread directly on the oven rack or a baking sheet. Bake for 5-10 minutes until the crust becomes crispy again.
If you need to thaw individual slices, you can remove them from the freezer and toast them straight from frozen. Place the frozen slice in a toaster or toaster oven and toast it until it reaches your desired level of crispiness.
It’s important to note that once bread is thawed, it should be consumed within a few days for optimal freshness. Thawed bread can stale faster compared to freshly baked bread, so it’s best to enjoy it as soon as possible.
By following proper thawing techniques, you can ensure that your frozen bread retains its delicious taste and enjoyable texture. Take the time to thaw the bread naturally and consider refreshing it in the oven if desired, and you’ll be able to enjoy your homemade bread as if it were freshly baked.
Tips for maintaining bread freshness
Keeping your homemade bread fresh for as long as possible requires some additional care and attention. Here are some tips to help you maintain the freshness and quality of your bread:
a. Store bread in smaller portions: If you’re not planning to consume the entire loaf at once, consider slicing the bread and storing it in smaller portions. This allows you to take out only what you need, minimizing exposure to air and helping to preserve the rest of the loaf.
b. Avoid slicing the bread until needed: Slicing bread exposes more surface area to air, causing it to dry out faster. To maintain freshness, slice the bread only when you’re ready to eat or use it.
c. Use a bread knife: When slicing bread, use a serrated bread knife. A bread knife cuts through the loaf without crushing it, helping to maintain its structure and overall freshness.
d. Keep bread away from moisture: Moisture can cause bread to become soggy or develop mold. Ensure that your bread is stored in a cool and dry place, away from areas that may have excessive moisture, such as near sinks or windows.
e. Avoid storing bread in the refrigerator for extended periods: While the refrigerator can slow down staling, storing bread in the fridge for an extended period can cause it to dry out and lose its freshness. If you plan to eat the bread within a few days, storing it at room temperature is often sufficient.
f. Freeze bread for long-term storage: If you have excess bread that you won’t consume within a few days, consider freezing it. Properly wrapped and stored, frozen bread can maintain its freshness for several months.
g. Refresh crusty bread before serving: If your bread has a crust that has lost its crispness, you can refresh it in the oven. Preheat the oven to 350°F (175°C) and place the bread directly on the oven rack or a baking sheet. Bake for a few minutes until the crust becomes crispy again.
h. Avoid direct exposure to sunlight: Sunlight can accelerate the staling process and cause bread to become stale more quickly. Store your bread in a shaded area or use a bread container that protects it from direct sunlight.
i. Check for signs of spoilage: Regularly inspect your bread for any signs of mold, unusual odors, or abnormal textures. If you notice any of these signs, discard the bread to prevent any potential health risks.
j. Freeze bread dough: If you prefer freshly baked bread, you can freeze the dough instead of the baked loaf. Simply shape the dough, wrap it tightly in plastic wrap, and place it in a freezer bag. When ready to bake, thaw the dough in the refrigerator overnight and bake as usual. This allows you to enjoy the experience of freshly baked bread whenever you desire.
By following these tips, you can maintain the freshness, flavor, and texture of your homemade bread for an extended period. Enjoy every slice and savor the satisfaction of baking your own delicious bread at home.
Read more: How To Store Baked Muffins
Conclusion
Proper storage is essential to maintain the freshness, flavor, and texture of your homemade bread. Whether you’re storing it at room temperature, in the refrigerator, or freezing it for long-term storage, following the right techniques can ensure that your bread stays delicious and enjoyable for an extended period.
Choosing the right container, cooling the bread properly, wrapping it for maximum freshness, and selecting the appropriate storage method are all crucial steps in preserving your homemade bread. By understanding the best practices and implementing them, you can savor every slice of your bread as if it were freshly baked.
Remember to store bread in a cool, dry place away from direct sunlight and heat sources. Use airtight containers, plastic wrap, or aluminum foil to protect it from moisture and air exposure. When thawing frozen bread, allow it to thaw naturally at room temperature to maintain its texture and taste.
Additionally, keep in mind the importance of consuming bread within a reasonable time frame to ensure optimal freshness. Homemade bread does not have preservatives like store-bought bread, so it is more susceptible to spoilage.
Lastly, be sure to check for signs of spoilage and discard any bread that shows mold growth or unusual odors. It’s better to be safe than sorry when it comes to consuming bread that may have gone bad.
With these tips in mind, you can confidently and successfully store your homemade bread, prolonging its shelf life and enjoying the delightful flavors of your baked creations for as long as possible.
So go ahead, bake that delicious loaf of bread, and with proper storage techniques, continue to relish the joy of homemade bread long after it emerges from the oven!
Frequently Asked Questions about How To Store Home Baked Bread
Was this page helpful?
At Storables.com, we guarantee accurate and reliable information. Our content, validated by Expert Board Contributors, is crafted following stringent Editorial Policies. We're committed to providing you with well-researched, expert-backed insights for all your informational needs.


0 thoughts on “How To Store Home Baked Bread”