Articles
How To Store Okra For Long Time
Modified: December 7, 2023
Looking for tips on how to store okra for a long time? Check out our informative articles for expert advice on preserving okra's freshness and flavor.
(Many of the links in this article redirect to a specific reviewed product. Your purchase of these products through affiliate links helps to generate commission for Storables.com, at no extra cost. Learn more)
Introduction
Okra, also known as lady’s fingers, is a versatile and nutritious vegetable commonly used in various culinary dishes. Whether you enjoy it in soups, stir-fries, or pickled as a snack, proper storage is essential to preserve its freshness and extend its shelf life.
By implementing the right storage techniques, you can ensure that your okra stays crisp, flavorful, and ready to use whenever you desire. In this article, we will explore the importance of proper storage for okra and provide you with tips on how to store it for an extended period. So, let’s dive in!
Key Takeaways:
- Proper storage of okra is crucial to maintain its freshness, prevent waste, and extend its shelf life. By following the right techniques, you can enjoy crisp, flavorful okra in your recipes for a longer period.
- Selecting fresh okra, preparing it properly, and choosing the right storage method are essential for preserving its quality. Whether you opt for refrigerator storage, freezing, canning, or dehydrating, proper packaging and regular inspection ensure the best results.
Read more: How To Store Okra Seeds
Why is Proper Storage Important for Okra?
Proper storage is crucial for okra to maintain its quality and prevent spoilage. Here are a few reasons why it’s important:
- Preserving Freshness: Okra is best when it’s fresh, with a vibrant green color and a crisp texture. Using proper storage techniques helps retain these qualities for a longer period, allowing you to enjoy the best of this vegetable in your recipes.
- Preventing Waste: Improper storage can lead to okra becoming soft, slimy, or moldy, making it unfit for consumption. By storing okra correctly, you can avoid wastage and ensure that every piece is usable when you’re ready to cook.
- Extending Shelf Life: Okra is a perishable vegetable that starts deteriorating soon after harvest. With proper storage, you can extend its shelf life and preserve it for a longer duration, making it convenient to have on hand whenever you need it.
- Maintaining Nutritional Value: Okra is packed with essential vitamins, minerals, and dietary fiber. Storing it properly helps retain its nutritional value, ensuring that you get the maximum benefits from this nutritious vegetable.
- Cost Efficiency: Buying okra in bulk when it’s in season and storing it properly allows you to take advantage of lower prices. It also allows you to have okra available during off-seasons when the prices may be higher.
By understanding the importance of proper storage, you can make the most out of the okra you have and enjoy its freshness and nutritive value for a longer period of time.
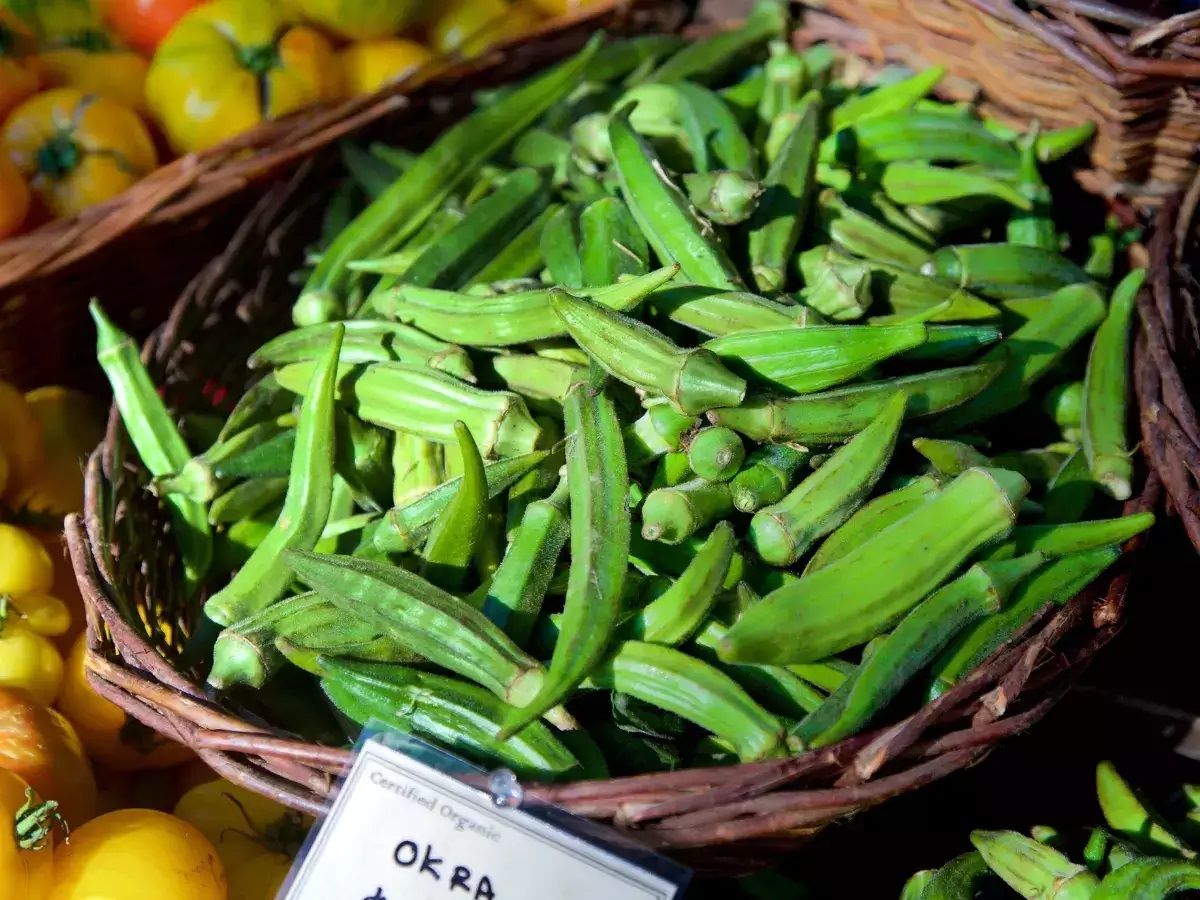
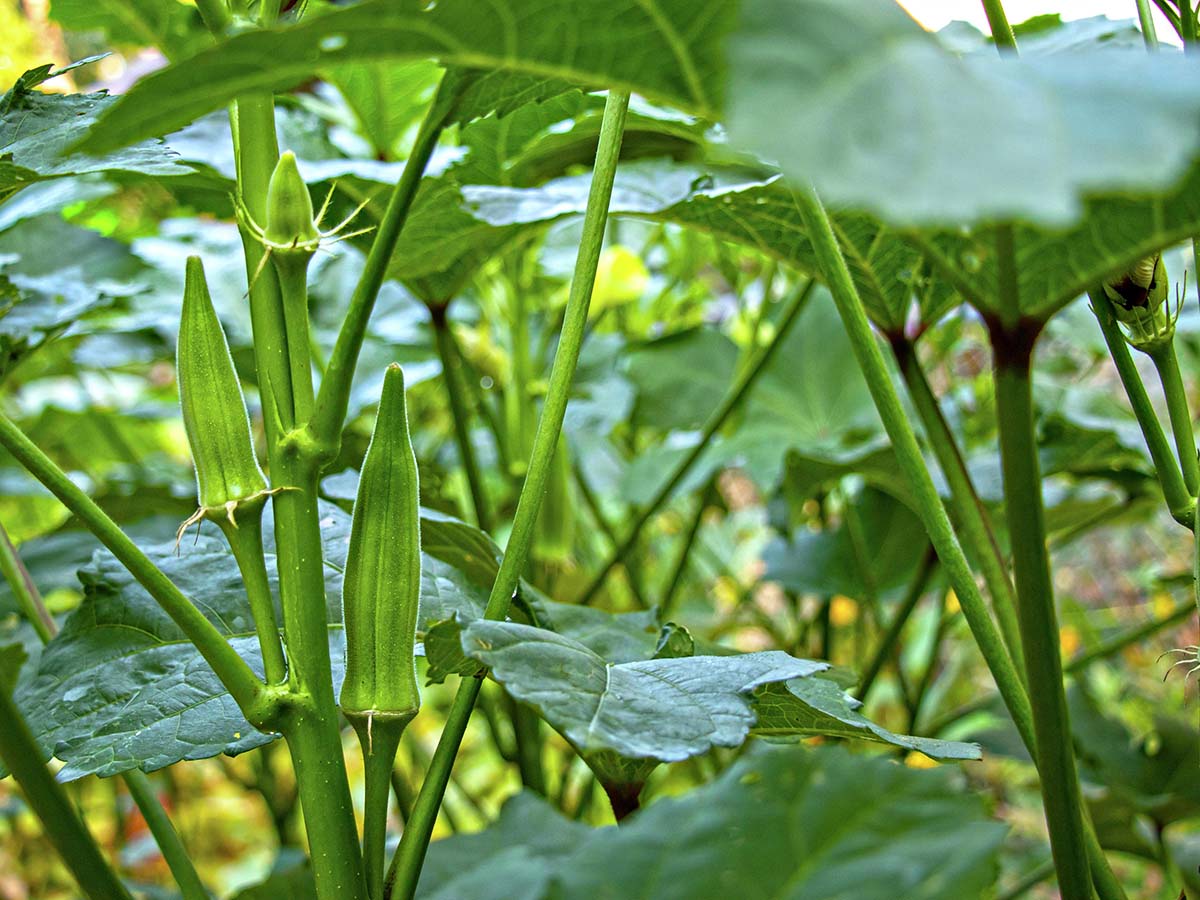
Tips for Selecting Fresh Okra
When it comes to storing okra, selecting fresh and high-quality produce is the first step. Here are some tips to help you choose the best okra:
- Appearance: Look for okra pods that are bright green in color, firm to the touch, and have smooth skin. Avoid any pods that appear discolored, soft, or have blemishes.
- Size: Choose okra pods that are small to medium in size, around 3-4 inches long. These pods tend to be more tender and have fewer seeds compared to larger ones.
- Texture: Gently squeeze the okra pods to ensure they are firm and not mushy. The pods should have a slight give without feeling overly soft or slimy.
- Stems: Check the stem end of the okra pods. They should be fresh and free from any signs of wilting or browning.
- Flexibility: Bend a pod gently to check its flexibility. Fresh okra should bend easily without breaking.
- Picking Time: If possible, choose okra that has been picked within the last day or two. The fresher the okra, the longer it will last in storage.
- Farmers’ Markets: Consider purchasing okra from local farmers’ markets or trusted sources. This ensures that you are getting fresh produce directly from the source.
By using these guidelines, you can select fresh and high-quality okra that is more likely to stay fresh and flavorful during storage.
Preparing Okra for Storage
Before you store okra, it is important to prepare it properly to maximize its shelf life. Follow these steps to prepare okra for storage:
- Washing: Start by washing the okra pods under cool running water. Gently scrub the pods with your hands or a vegetable brush to remove any dirt or debris. Ensure that the pods are dry before proceeding to the next step.
- Trimming: Trim the stems of the okra pods, cutting them just above the cap. Be careful not to cut too much, as this can lead to moisture loss and faster spoilage.
- Cutting: Determine how you plan to use the okra in your recipes. If you prefer to use whole pods, leave them intact. However, if you prefer sliced okra, cut the pods into uniform pieces of your desired thickness.
- Blanching (optional): Blanching okra before storage helps to preserve its color, texture, and flavor. Bring a pot of water to a boil and drop the okra into the boiling water for 2-3 minutes. Then, transfer the blanched okra to an ice bath to stop the cooking process. Drain the okra and pat it dry before proceeding.
Once the okra has been prepared, you can choose from various storage methods depending on your preferences and the availability of storage space. The following sections will outline different methods for storing okra, including refrigerator storage, freezing, canning, and dehydrating.
Method 1: Refrigerator Storage
Refrigerator storage is a convenient option for keeping okra fresh for a short period, typically up to a week. Follow these steps to store okra in the refrigerator:
- Wrap Individually: Wrap each okra pod individually in a dry paper towel or place them in a perforated plastic bag to absorb excess moisture.
- Seal in a Container: Place the wrapped okra pods in a sealed plastic or glass container, ensuring there is enough space for air circulation.
- Temperature and Humidity: Store the container in the vegetable crisper drawer or the coolest part of your refrigerator at a temperature between 40 and 45°F (4 to 7°C) with a humidity level of around 90%.
- Check and Discard: Regularly check the okra for any signs of spoilage like mold or sliminess. Remove any spoiled pods immediately to prevent them from affecting the others.
Remember that okra’s shelf life is limited even when stored in the refrigerator. It is best to consume the okra within a week for optimal freshness and taste.
Now that you know how to store okra in the refrigerator, let’s explore another method for preserving okra: freezing.
Read more: How To Store Ammo For Long Time
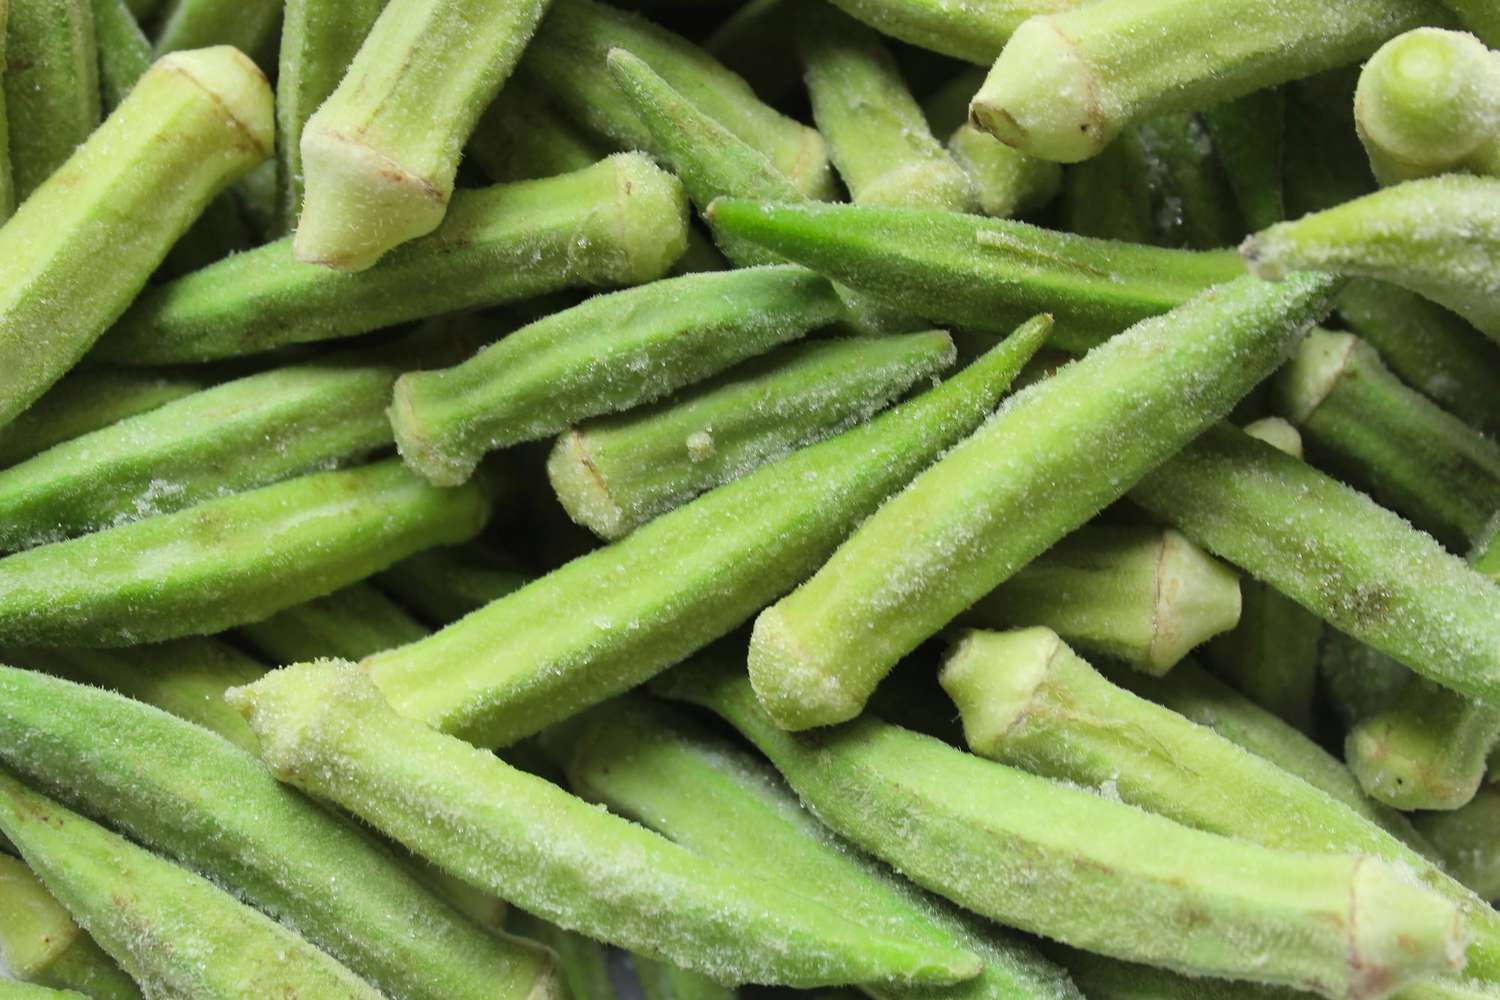
Method 2: Freezing Okra
Freezing okra is an excellent way to preserve this vegetable for a more extended period, allowing you to enjoy it even during off-seasons. Here’s how you can freeze okra:
- Blanching: Start by blanching the okra to deactivate enzymes that can cause loss of flavor and texture. Bring a pot of water to a boil and place the okra in boiling water for 3 minutes. Then, quickly transfer the okra to an ice bath to halt the cooking process.
- Drain and Dry: Drain the blanched okra and pat it dry using a clean kitchen towel or paper towels. Make sure to remove any excess moisture.
- Slice (optional): If you prefer sliced okra, you can slice the pods into uniform pieces of your desired thickness at this stage.
- Packaging: Place the blanched and dried okra in freezer-safe bags or airtight containers. Remove as much air as possible from the bag or container to minimize the risk of freezer burn.
- Label and Date: Label the bags or containers with the date of freezing to keep track of its freshness.
- Freezing: Place the bags or containers in the freezer, ensuring they are placed flat to prevent the okra from sticking together or becoming squished.
Frozen okra can typically be stored for up to 12 months. When you’re ready to use the frozen okra, simply thaw it in the refrigerator overnight before cooking.
Now that you have learned how to freeze okra, let’s explore another preservation method: canning.
To store okra for a long time, wrap it in a paper towel and place it in a perforated plastic bag in the refrigerator. This will help to absorb excess moisture and keep the okra fresh for longer.
Method 3: Canning Okra
Canning is another great option for preserving okra, especially if you want to enjoy it throughout the year. Here’s how you can can okra:
- Choose Fresh Okra: Select fresh, young okra pods for canning. Avoid using overripe or tough pods.
- Wash and Trim: Wash the okra pods thoroughly and trim the stems, leaving them intact.
- Prepare Brine: In a large pot, prepare a brine solution by combining water, vinegar, and salt. Bring the brine to a boil.
- Pack Okra: Pack the okra pods tightly into sterilized canning jars, making sure to leave a ½ inch headspace at the top.
- Add Seasonings (optional): You may add garlic cloves, mustard seeds, or other desired seasonings to each jar for added flavor.
- Pour the Brine: Pour the boiling brine over the okra pods, leaving the ½ inch headspace. Ensure that all the okra is fully submerged in the brine.
- Remove Air Bubbles: Use a non-metallic utensil to remove any air bubbles trapped inside the jars by gently stirring the contents.
- Seal and Process: Wipe the rims of the jars to ensure they are clean and place the sterilized lids and bands. Process the jars in a boiling water canner for the recommended time according to your altitude.
- Cool and Store: After the processing time is complete, carefully remove the jars from the canner and allow them to cool at room temperature. Once cooled, check the seals, and store the jars in a cool, dark place.
Canned okra can be stored for up to a year. Remember to check the jars for any signs of spoilage before consuming.
Now that you know how to can okra, let’s explore another method: dehydrating.
Method 4: Dehydrating Okra
Dehydrating okra is a fantastic way to preserve this versatile vegetable for an extended period. Here’s how you can dehydrate okra:
- Wash and Dry: Begin by washing the okra pods under cool running water. Pat them dry using a kitchen towel or paper towels.
- Trim and Slice: Trim the stems of the okra pods, and then slice them into thin, uniform pieces. Ensure that all the slices are similar in thickness for even drying.
- Pre-treatment (optional): You can blanch the okra slices in boiling water for a couple of minutes to help retain their color. However, this step is optional.
- Arrange on Dehydrator Trays: Place the okra slices in a single layer on the dehydrator trays, ensuring they are not touching each other. This allows for proper air circulation and even drying.
- Set Temperature and Time: Set the dehydrator to a temperature between 125°F and 135°F (52°C and 57°C) and let the okra slices dry for approximately 8 to 10 hours. The drying time may vary depending on the thickness of the slices and your dehydrator model.
- Check for Dryness: To ensure the okra is fully dehydrated, remove a few slices and let them cool completely. They should be crisp and brittle. If they are still leathery or have moisture, continue drying for an additional hour or so.
- Cool and Store: Once the okra slices are completely dry, allow them to cool before storing them in airtight containers such as mason jars or resealable bags. Store them in a cool, dry place away from moisture and sunlight.
Dried okra can be stored for several months to a year. When you are ready to use them, rehydrate the slices by soaking them in water for a few minutes before adding them to your recipes.
By following these steps, you can enjoy the delicious taste and texture of okra long after its harvest season has passed.
Now that you have explored various methods of storing okra, it’s important to learn about proper packaging to ensure the best storage conditions.
Proper Packaging for Okra Storage
Choosing the right packaging for storing okra is crucial to maintain its freshness and prevent spoilage. Here are some tips for proper packaging:
- Refrigerator Storage: If you are storing okra in the refrigerator, wrap each individual okra pod in a dry paper towel or place them in a perforated plastic bag. This helps absorb excess moisture and prevents the pods from becoming slimy.
- Freezer Storage: For freezing okra, use freezer-safe bags or airtight containers. Remove as much air as possible from the bag or container to minimize the risk of freezer burn. Make sure to label the packaging with the date.
- Canning: When canning okra, use sterilized canning jars with proper seals and lids. Ensure that all the okra is submerged in the brine or liquid to prevent spoilage.
- Dehydrating: After dehydrating okra, store the dried slices in airtight containers such as mason jars or resealable bags. Make sure the containers are clean and dry to avoid moisture from damaging the dried okra.
In addition to the packaging, consider the following tips to further enhance the storage of okra:
- Labeling: Label all containers with the storage date to keep track of freshness.
- Organization: Keep your okra inventory organized, placing the newer batches at the back and using the older ones first.
- Avoid Overpacking: Do not overpack your storage containers, as it can lead to bruising or damage to the okra pods.
- Keep Away from Moisture: Moisture can cause spoilage, so ensure that the packaging and storage area are dry to prevent the growth of mold or bacteria.
By following these packaging tips, you can maintain the quality and freshness of your okra for an extended period.
Now that you understand the importance of proper packaging, let’s explore alternative storage options for okra.
Read more: How To Store Eggs For A Long Time
Storing Okra in a Root Cellar or Cool Basement
If you have access to a root cellar or a cool and dark basement, storing okra in these areas can provide ideal conditions for long-term storage. Here’s how to store okra in a root cellar or cool basement:
- Select the Right Storage Area: Choose a cool and dry area in your root cellar or basement that maintains a temperature between 45°F and 55°F (7°C and 13°C). The humidity level should range between 45% and 55% to prevent the okra from drying out or becoming too moist.
- Prepare the Okra: Wash the okra pods under cool running water and pat them dry. Trim the stems if desired, leaving a small portion intact.
- Avoid Washing: Unlike other storage methods, it’s best not to wash okra before storing it in a root cellar or cool basement. The moisture can lead to mold growth and spoilage.
- Air Circulation: Provide proper airflow around the okra by placing them in a single layer on racks, shelves, or trays. This ensures better ventilation and helps prevent condensation and moisture buildup.
- Check for Spoilage: Regularly inspect the okra for signs of spoilage such as mold, discoloration, or sliminess. Remove any spoiled pods immediately to prevent them from affecting the others.
- Rotate the Stock: Use a first-in, first-out (FIFO) approach to ensure that older okra is used before newer ones. This helps prevent any potential waste and ensures that you enjoy the freshest okra available.
Storing okra in a root cellar or cool basement can extend its shelf life for several weeks, allowing you to enjoy its freshness even beyond its usual harvest season.
Ensure that the storage area is well-maintained, with proper temperature and humidity levels, to prevent any adverse effects on the okra. Regularly monitor the condition of the okra and adjust storage conditions as needed.
Now that you have explored different storage options for okra, it’s important to understand how to check for spoilage and maintain its quality.
Checking for Spoilage and Maintaining Quality
Regularly checking for spoilage and maintaining the quality of stored okra is essential to ensure that it remains fresh and safe for consumption. Here are some tips for checking for spoilage and maintaining the quality of okra:
- Visual Inspection: Regularly inspect the okra for any signs of spoilage such as mold, discoloration, or sliminess. Discard any pods that show these signs of deterioration.
- Texture and Firmness: Gently squeeze the okra pods to check their firmness. Fresh okra should feel firm and have a slight give. Avoid using okra that feels mushy or overly soft.
- Odor: Give the okra a sniff to detect any off or unpleasant odors. If you notice any strong, unpleasant smells, it may indicate spoilage, and the okra should be discarded.
- Store Separately: Avoid storing okra with other fruits or vegetables that emit ethylene gas, such as apples or bananas. Ethylene gas can accelerate the ripening process and cause okra to spoil more quickly.
- Temperature and Humidity Control: Ensure that the storage area maintains the proper temperature and humidity levels as recommended for the specific storage method. Temperature fluctuations or excessive humidity can lead to spoilage.
- Rotate the Stock: As mentioned earlier, use a first-in, first-out (FIFO) approach when consuming stored okra. This ensures that older okra is used before newer ones, minimizing any potential waste.
- Label and Date: Properly label the storage containers with the date of storage. This helps you keep track of the freshness and allows you to use older okra first.
By following these tips and regularly inspecting the stored okra, you can ensure that it remains of the highest quality and safe for consumption.
Remember, while proper storage techniques can extend the shelf life of okra, it is still a perishable vegetable, and its quality will gradually decline over time. It is recommended to use the okra within a reasonable period to enjoy its optimal taste and texture.
With these guidelines, you are now equipped with the knowledge to store and maintain the freshness of okra, ensuring that you can enjoy this delicious and nutritious vegetable whenever you desire.
Now, go ahead and store your okra with confidence!
Enjoy your fresh and crisp okra!
Conclusion
Proper storage is essential for maintaining the freshness and quality of okra. Whether you have a surplus of okra from your garden or want to take advantage of seasonal prices, knowing how to store okra correctly enables you to enjoy this nutritious vegetable for an extended period.
By following the tips and methods outlined in this article, you can store okra in various ways to suit your needs and preferences. Refrigerator storage is ideal for short-term use, while freezing allows for longer-term preservation. Canning and dehydrating methods offer alternative ways to enjoy okra throughout the year.
Remember to select fresh okra, prepare it properly, and package it appropriately for the chosen storage method. Regularly check for signs of spoilage and maintain optimal storage conditions, such as temperature, humidity, and proper labeling, to ensure the best quality and preservation of your okra.
Whether you’re adding okra to your favorite recipes or experimenting with new dishes, having properly stored okra on hand enables you to incorporate its unique flavor, texture, and nutrition into your culinary creations.
So, the next time you come across a bountiful supply of okra, remember the tips and methods shared in this article to confidently store it and enjoy its freshness long after its harvest season.
Happy okra storage and bon appétit!
Frequently Asked Questions about How To Store Okra For Long Time
Was this page helpful?
At Storables.com, we guarantee accurate and reliable information. Our content, validated by Expert Board Contributors, is crafted following stringent Editorial Policies. We're committed to providing you with well-researched, expert-backed insights for all your informational needs.


0 thoughts on “How To Store Okra For Long Time”