Articles
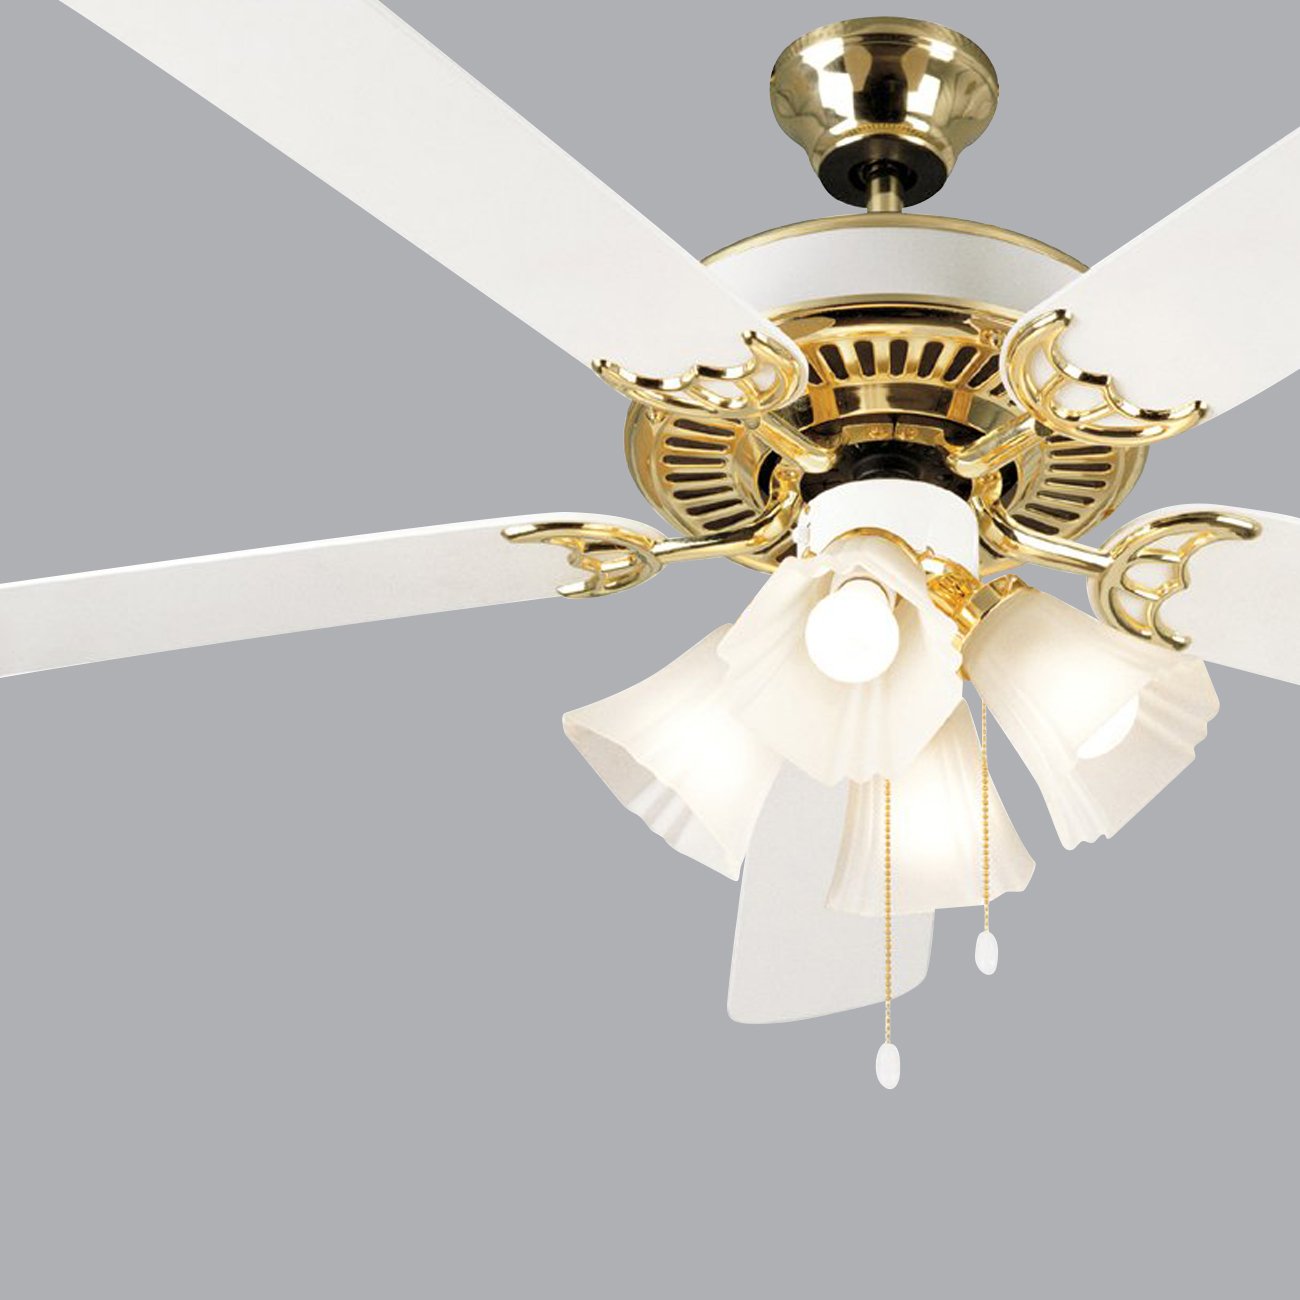
How Many Watts Does A Ceiling Fan Use
Modified: September 2, 2024
Discover how many watts a ceiling fan uses and save energy with these informative articles. Learn about the different factors that affect energy consumption and make an informed decision for your home.
(Many of the links in this article redirect to a specific reviewed product. Your purchase of these products through affiliate links helps to generate commission for Storables.com, at no extra cost. Learn more)
Introduction
Ceiling fans are a popular and practical addition to any home, providing both comfort and style. However, many homeowners often wonder about the energy consumption of these appliances. Understanding the wattage of a ceiling fan is essential for optimizing energy efficiency and managing electricity costs.
In this article, we will delve into the world of ceiling fan energy consumption, exploring the factors that impact wattage and how to calculate the power usage of your ceiling fan. Additionally, we will provide some valuable energy-saving tips to help you make the most of your ceiling fan while minimizing your environmental footprint.
So, if you’re curious about how many watts your ceiling fan uses and want to learn some practical ways to conserve energy, read on!
Key Takeaways:
- Understanding the wattage of your ceiling fan is crucial for managing energy consumption. Factors like fan size, motor type, and usage patterns impact wattage, so make informed decisions to optimize efficiency.
- Maximize energy savings with your ceiling fan by following simple tips like adjusting speed settings, utilizing reversible mode, and considering energy-efficient models. Harness the power of your fan while reducing your environmental footprint.
Read more: How Many Watts Does A Fan Use
Understanding Ceiling Fan Energy Consumption
Before we dive into the specifics of wattage, it’s important to understand how ceiling fans consume energy. Unlike air conditioning units, which cool the air by removing heat from the room, ceiling fans work by creating a breeze that provides a cooling effect on the skin. They do not actually lower the temperature in the room. As a result, ceiling fans operate at a fraction of the energy consumption compared to air conditioners.
Ceiling fans are typically powered by electric motors that rotate the fan blades, creating airflow. The amount of energy consumed by a ceiling fan is measured in watts, which indicates the rate at which electrical energy is being used. Higher wattage generally corresponds to a more powerful fan, capable of moving air more efficiently.
It’s worth noting that ceiling fan energy consumption can vary depending on several factors, including the fan’s size, speed settings, motor type, and the efficiency of the blades. These factors will influence how much electricity your ceiling fan uses.
So, let’s explore these factors in more detail to gain a better understanding of ceiling fan energy consumption.
Factors Affecting Ceiling Fan Wattage
Several factors influence the wattage of a ceiling fan. Understanding these factors will help you determine the energy consumption of your fan and make informed decisions about its usage and efficiency. Here are some key factors that affect ceiling fan wattage:
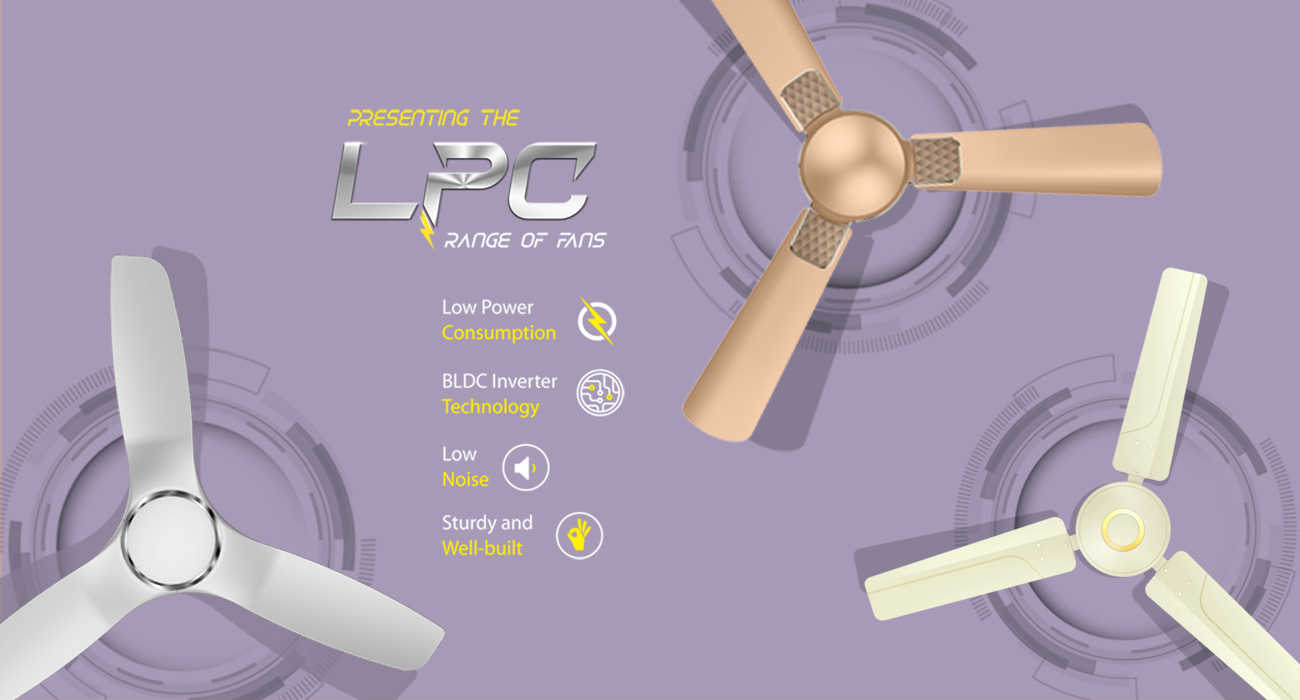
- Fan Size: The size of the fan blades plays a significant role in determining the wattage. Generally, larger fans with longer blades will consume more electricity compared to smaller fans.
- Motor Type: The type of motor used in a ceiling fan can impact its wattage. There are two main types of motors: standard motors and DC motors. DC motors are more energy-efficient, consuming up to 70% less energy than standard motors.
- Speed Settings: Most ceiling fans have multiple speed settings, allowing users to adjust the airflow according to their comfort level. Higher speed settings will typically use more wattage compared to lower speed settings.
- Blade Design and Pitch: The design and pitch of the fan blades affect the air movement and efficiency. Fans with steeper blade pitches or more aerodynamic designs may use more energy to generate stronger airflow.
- Lighting Features: Some ceiling fans come equipped with built-in lighting fixtures. If your fan has lights, it’s important to consider their wattage as well, as they contribute to the overall energy consumption of the fan.
- Usage Patterns: How often and how long you use your ceiling fan will also impact its wattage. Using the fan for extended periods or at higher speeds will result in higher energy consumption.
By considering these factors, you can gain a better understanding of the energy consumption of your ceiling fan and make informed choices about its usage and efficiency.
Ceiling fans typically use between 15-75 watts of electricity, depending on the size and speed. Using a more energy-efficient fan can help reduce electricity costs.
Calculating the Wattage of a Ceiling Fan
Calculating the wattage of a ceiling fan is relatively straightforward. Most ceiling fans have their wattage rating mentioned on a label or in the product specification. However, if this information is not readily available, you can estimate the wattage using a simple formula:
Wattage (in watts) = Voltage (in volts) x Amperage (in amps)
The voltage is typically 120V for residential homes in the United States. The amperage can be found by checking the fan’s specifications or by referring to the user manual. Once you have these two values, multiply them together to determine the wattage of your ceiling fan.
For example, let’s say the voltage is 120V and the amperage is 0.5A. Multiplying these values, we get:
Wattage = 120V x 0.5A = 60 watts
So, in this example, the wattage of the ceiling fan would be 60 watts.
Keep in mind that this calculation only provides an estimation of the wattage and may not account for variables such as motor efficiency or lighting features. Therefore, it’s always best to refer to the manufacturer’s specifications whenever possible.
Understanding the wattage of your ceiling fan allows you to manage your energy consumption and make informed decisions about usage and efficiency.
Energy Saving Tips for Ceiling Fans
While ceiling fans are more energy-efficient than air conditioners, there are still ways to maximize their energy-saving potential. By following these tips, you can reduce your electricity consumption while enjoying the comfort and breeze provided by your ceiling fan:
- Optimal Usage: Use your ceiling fan only when you’re in the room. Remember, fans cool people, not rooms. Turn off the fan when you leave to conserve energy.
- Adjust Speed Settings: Experiment with different speed settings to find the optimum balance between comfort and energy usage. Using a lower speed setting can significantly reduce the energy consumption of your fan.
- Take Advantage of Reversible Mode: Many ceiling fans have a reversible mode, which allows them to rotate in the opposite direction. In the warmer months, set the fan to rotate counterclockwise to create a cooling breeze. In the colder months, switch the rotation to clockwise to circulate warm air downward.
- Use in Conjunction with Air Conditioning: If you have central air conditioning, use your ceiling fan in conjunction with it. By circulating the cool air from the AC throughout the room, you can set your thermostat at a higher temperature, reducing the load on your AC unit.
- Keep Fan Blades Clean: Dust and debris can accumulate on the fan blades, making it harder for the fan to circulate air efficiently. Regularly clean your fan blades to maintain optimal performance and reduce energy consumption.
- Consider Energy-Efficient Models: When purchasing a new ceiling fan, look for energy-efficient models that are ENERGY STAR certified. These fans have met strict efficiency standards and can help you save energy and lower your electricity bills.
- Utilize Natural Ventilation: During mild weather, take advantage of natural ventilation by opening windows and allowing fresh air to circulate. This can help reduce the need for the ceiling fan and further conserve energy.
- Install Dimmer Switches and Timers: Adding dimmer switches or timers to your fan can help you control usage and optimize energy efficiency. Dimming the lights or setting a timer can ensure the fan is not left running unnecessarily.
By following these energy-saving tips, you can make the most of your ceiling fan while minimizing energy consumption and reducing your carbon footprint.
Read more: How Many Watts Does A Projector Use
Conclusion
Ceiling fans are not only stylish additions to your home but also energy-efficient cooling solutions. Understanding the wattage of a ceiling fan and the factors that influence its energy consumption can help you optimize its usage and reduce electricity costs.
By considering the size, motor type, speed settings, blade design, and usage patterns of your ceiling fan, you can better estimate its wattage and make informed decisions about energy efficiency. Additionally, incorporating energy-saving habits such as adjusting speed settings, utilizing reversible mode, cleaning fan blades, and using natural ventilation can further enhance the energy efficiency of your ceiling fan.
When purchasing a new ceiling fan, also keep an eye out for energy-efficient models that have earned the ENERGY STAR certification. These fans meet strict efficiency standards and can help you save energy while keeping your home comfortable.
Remember, using your ceiling fan intelligently and in conjunction with other cooling solutions such as air conditioning can help you reduce energy consumption without sacrificing comfort. Taking simple steps like turning off the fan when you leave the room and keeping the blades clean can also make a significant impact on energy savings.
Ultimately, harnessing the power of your ceiling fan while being mindful of energy consumption can not only benefit your wallet but also contribute to a greener and more sustainable future.
So, make the most of your ceiling fan, stay comfortable, and save energy!
Frequently Asked Questions about How Many Watts Does A Ceiling Fan Use
Was this page helpful?
At Storables.com, we guarantee accurate and reliable information. Our content, validated by Expert Board Contributors, is crafted following stringent Editorial Policies. We're committed to providing you with well-researched, expert-backed insights for all your informational needs.


0 thoughts on “How Many Watts Does A Ceiling Fan Use”