Articles
How To Replace A Light With A Ceiling Fan
Modified: September 2, 2024
Learn how to replace a light fixture with a stylish ceiling fan in just a few simple steps. Find step-by-step articles and guides to help you complete this DIY project.
(Many of the links in this article redirect to a specific reviewed product. Your purchase of these products through affiliate links helps to generate commission for Storables.com, at no extra cost. Learn more)
Introduction
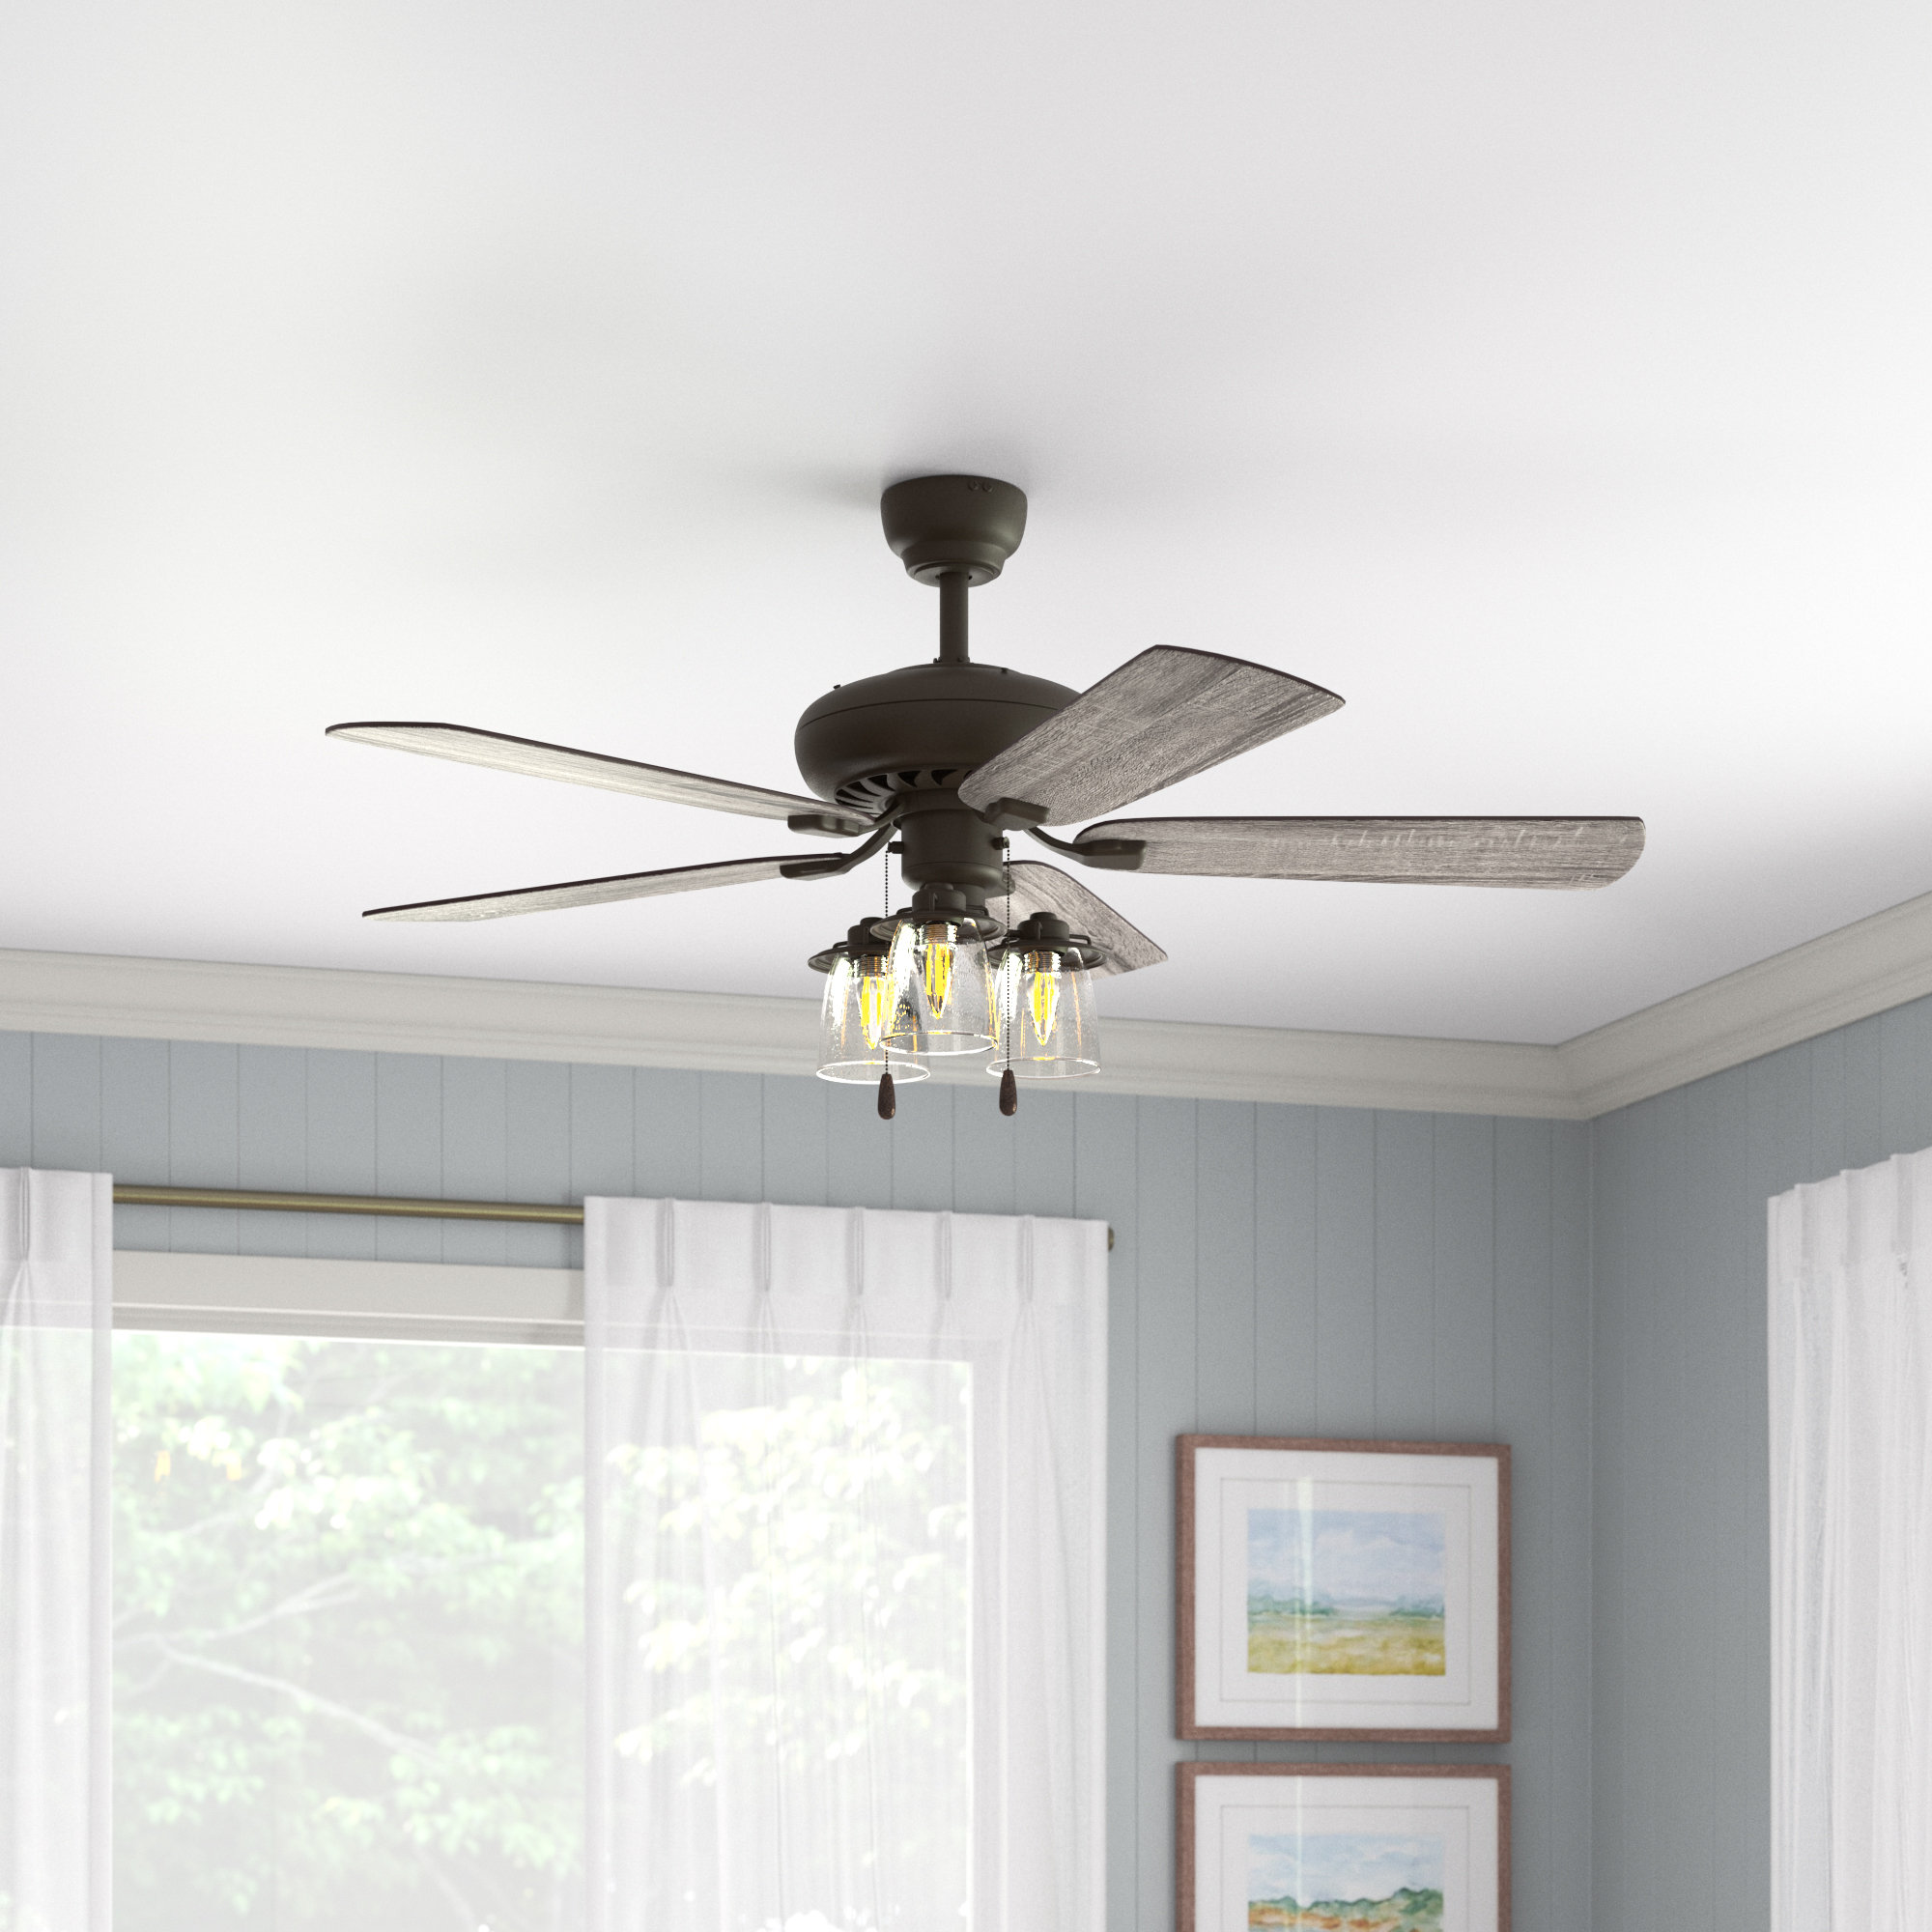
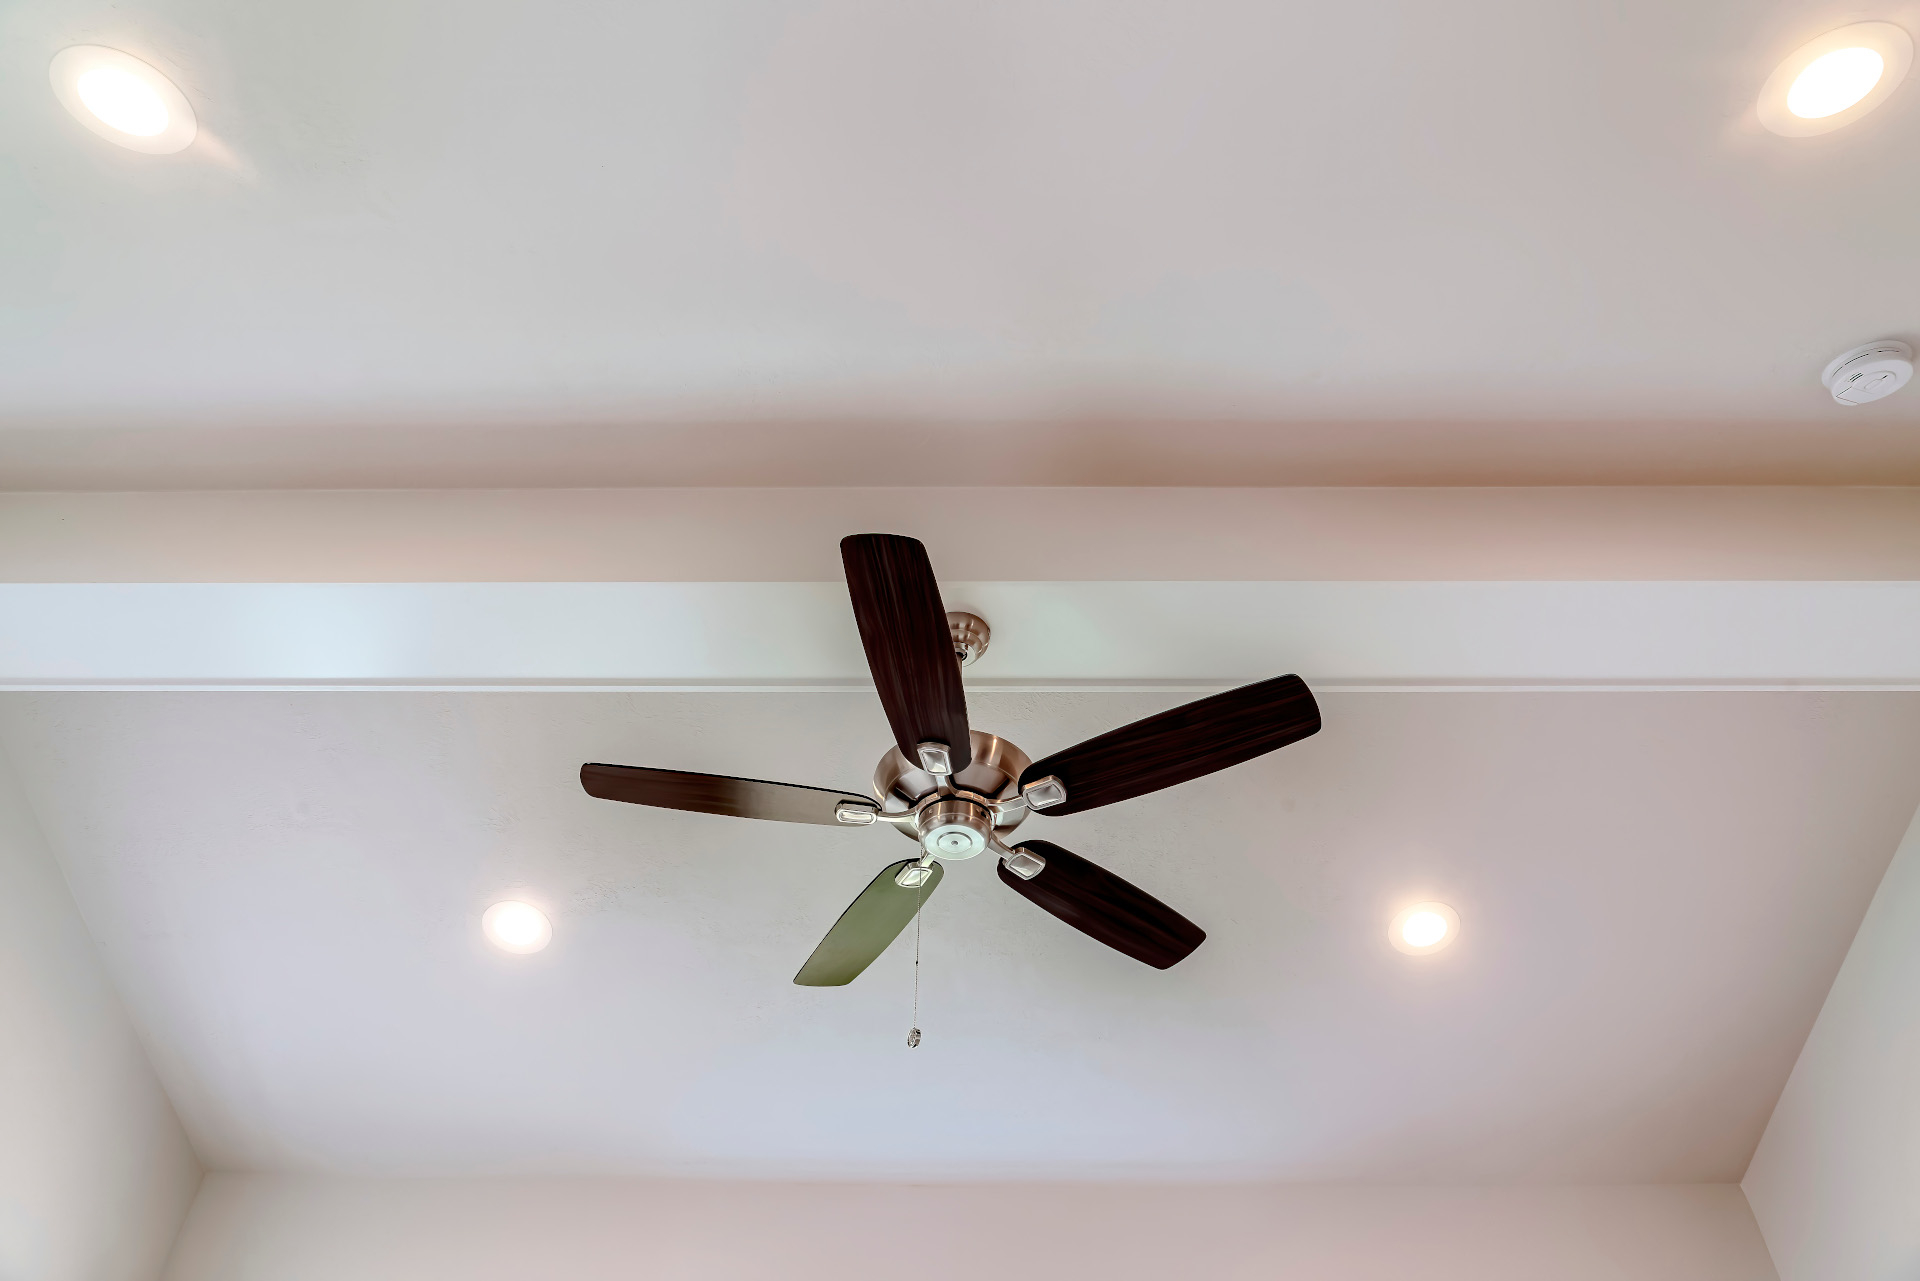
Replacing a light fixture with a ceiling fan is a great way to upgrade the functionality and aesthetic appeal of any room. Not only does a ceiling fan provide much-needed air circulation during hot summer months, but it also adds a touch of style and elegance to your space. Whether you’re looking to improve the cooling in your bedroom, living room, or any other area of your home, this step-by-step guide will help you successfully replace a light fixture with a ceiling fan.
Before you begin, it’s important to gather the necessary tools and materials. You’ll need a ladder, screwdrivers, wire strippers, electrical tape, wire connectors, and, of course, your new ceiling fan. It’s also crucial to turn off the power supply before starting any electrical work. Safety should always be your top priority, so make sure to follow all safety precautions, including wearing gloves and safety glasses.
Once you’re ready to start, the first step is to remove the existing light fixture. This involves disconnecting the wires and unscrewing the fixture from the ceiling. With the light fixture removed, you can proceed to install the ceiling fan mounting bracket. This bracket allows for secure attachment and proper support of the ceiling fan.
Next, it’s time to assemble the ceiling fan. This usually involves attaching the fan blades to the motor housing and securing any additional components, such as a light kit or remote control. Each manufacturer may have specific instructions, so be sure to carefully follow the included manual.
With the ceiling fan assembled, you can attach it to the previously installed mounting bracket. This step requires aligning the fan’s mounting plate with the bracket and securing it in place with screws. Once the fan is securely attached, you’ll need to connect the electrical wiring. This involves matching the corresponding wires – black to black, white to white, and green to green – and using wire connectors to join them together. It’s essential to double-check all connections and ensure they are tightly secured.
Once the wiring is complete, it’s time to attach the fan blades. This step typically involves inserting each blade into its designated slot and securing it with screws. Make sure to tighten the screws properly to ensure the blades are securely fastened.
Before finishing up, it’s crucial to test the ceiling fan to ensure it’s functioning correctly. Turn on the power supply and test each fan speed, as well as any additional features like rotating direction or light settings. This step allows you to identify and troubleshoot any issues before completing the installation.
Finally, once you confirm the fan is working properly, take a moment to clean up any debris or packaging materials. Give the fan a final wipe down to remove any dust or fingerprints and enjoy your newly installed ceiling fan!
Replacing a light fixture with a ceiling fan may seem like a daunting task, but with the right tools, materials, and the guidance provided in this comprehensive guide, you’ll be able to tackle the project with confidence. Not only will you enjoy the enhanced cooling and airflow provided by the ceiling fan, but you’ll also add a stylish and functional element to your space. So, roll up your sleeves, gather your tools, and let’s get started on this exciting home improvement project!
Key Takeaways:
- Upgrade your space with a stylish and functional ceiling fan by following these step-by-step installation tips. Enjoy improved cooling and airflow while adding a touch of elegance to any room.
- Prioritize safety, gather the right tools, and confidently replace a light fixture with a ceiling fan. Test the fan’s functionality and enjoy the enhanced comfort of your newly upgraded space.
Read more: How To Replace Ceiling Fan Light Switch
Step 1: Gather the necessary tools and materials
Before you begin replacing a light fixture with a ceiling fan, it’s essential to gather all the necessary tools and materials. Having everything readily available will ensure a smooth and efficient installation process. Here’s a list of items you’ll need:
- Ladder: A sturdy ladder is essential for reaching the ceiling safely.
- Screwdrivers: You’ll need both a flathead and a Phillips screwdriver to loosen and tighten screws.
- Wire strippers: These tools are used to remove the insulation from the electrical wires, exposing the conductive copper.
- Electrical tape: Electrical tape is used to insulate and secure wire connections.
- Wire connectors: These connectors are essential for joining wires together securely.
- New ceiling fan: Choose a ceiling fan that suits the style and size of your room. Consider factors such as blade span, motor power, and additional features like a light kit or remote control.
Additionally, you may need the following tools and materials depending on the specific installation requirements:
- Adjustable wrench: An adjustable wrench may be necessary for tightening hardware such as downrods or mounting brackets.
- Wire nuts: Wire nuts are used for connecting and insulating multiple wires together.
- Electrical tester: An electrical tester is a useful tool for determining if power is present in the wires and ensuring the power is turned off before beginning any work.
- Ceiling fan mounting bracket: This bracket is necessary for attaching the ceiling fan securely to the ceiling.
Be sure to check the manufacturer’s instructions for the specific tools and materials required for your ceiling fan installation. Some ceiling fans may come with their own mounting brackets or unique installation requirements.
Once you have gathered all the necessary tools and materials, double-check that you have everything you need before starting the installation process. This will save you time and prevent interruptions during the project. Having a well-organized workspace with all your tools at hand will contribute to a successful and smooth installation of your new ceiling fan.
Step 2: Turn off the power supply
Before you start any electrical work, it’s crucial to turn off the power supply to ensure your safety. Working with live wires can be extremely dangerous and can result in electrical shock or other injuries. Follow these steps to turn off the power supply:
- Locate the main electrical panel in your home. This is usually found in the basement, garage, or utility room.
- Open the electrical panel door using a screwdriver or by following the instructions provided by the manufacturer.
- Identify the circuit breaker corresponding to the area where you will be installing the ceiling fan. Most circuit breakers are labeled and grouped according to the different areas of your home.
- Flip the switch for the identified circuit breaker to the “off” position. This will cut off power to the designated area, ensuring that no electricity is flowing to the light fixture you’re going to replace.
- For an additional layer of safety, use a non-contact voltage tester to verify that there is no electrical current present. Hold the voltage tester near the wires or electrical box to confirm that the power has been successfully turned off.
Once you have turned off the power supply and confirmed that there is no electricity flowing to the circuit, it’s important to inform other household members about the ongoing electrical work. This will prevent anyone from inadvertently turning the power back on while you are working.
Remember, even with the power turned off, treat all wires as if they were live and avoid touching them directly. Safety should always be your top priority when working with electricity.
By taking the necessary precautions and turning off the power supply, you can ensure a safe working environment and minimize the risk of accidents or injuries during the installation process. Proceed to the next step with confidence, knowing that you have taken the necessary steps to protect yourself and others from electrical hazards.
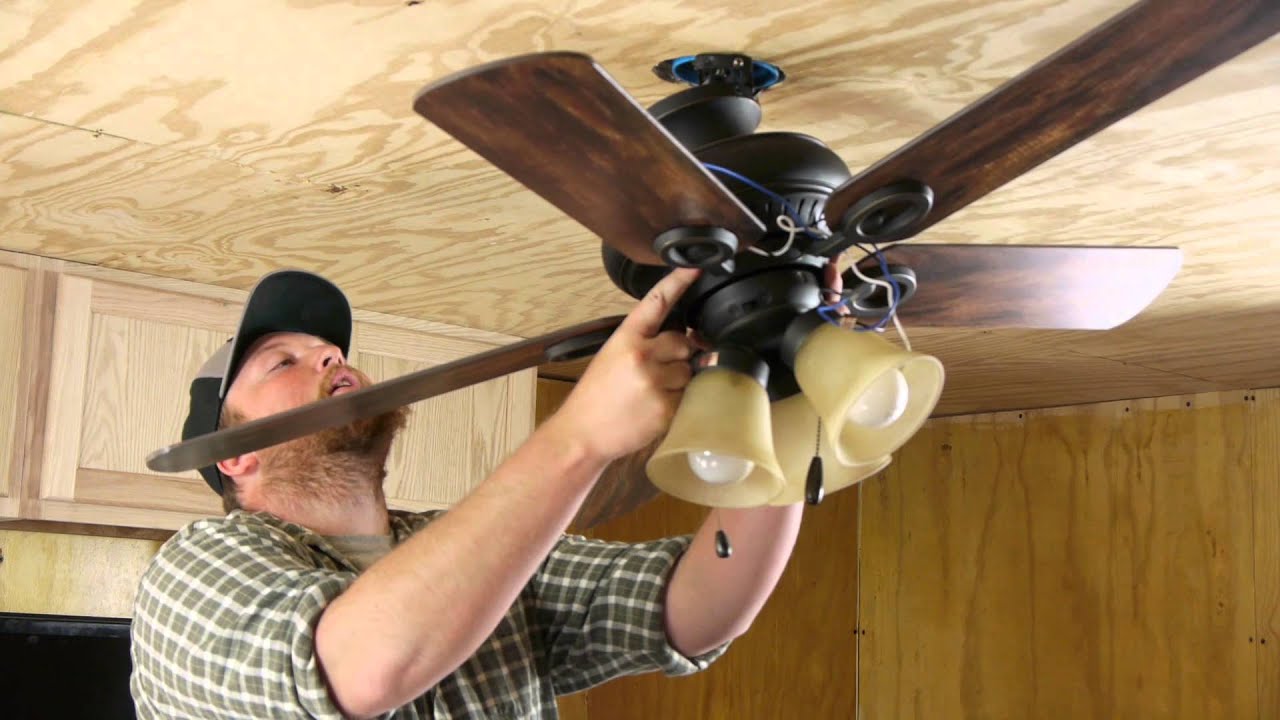
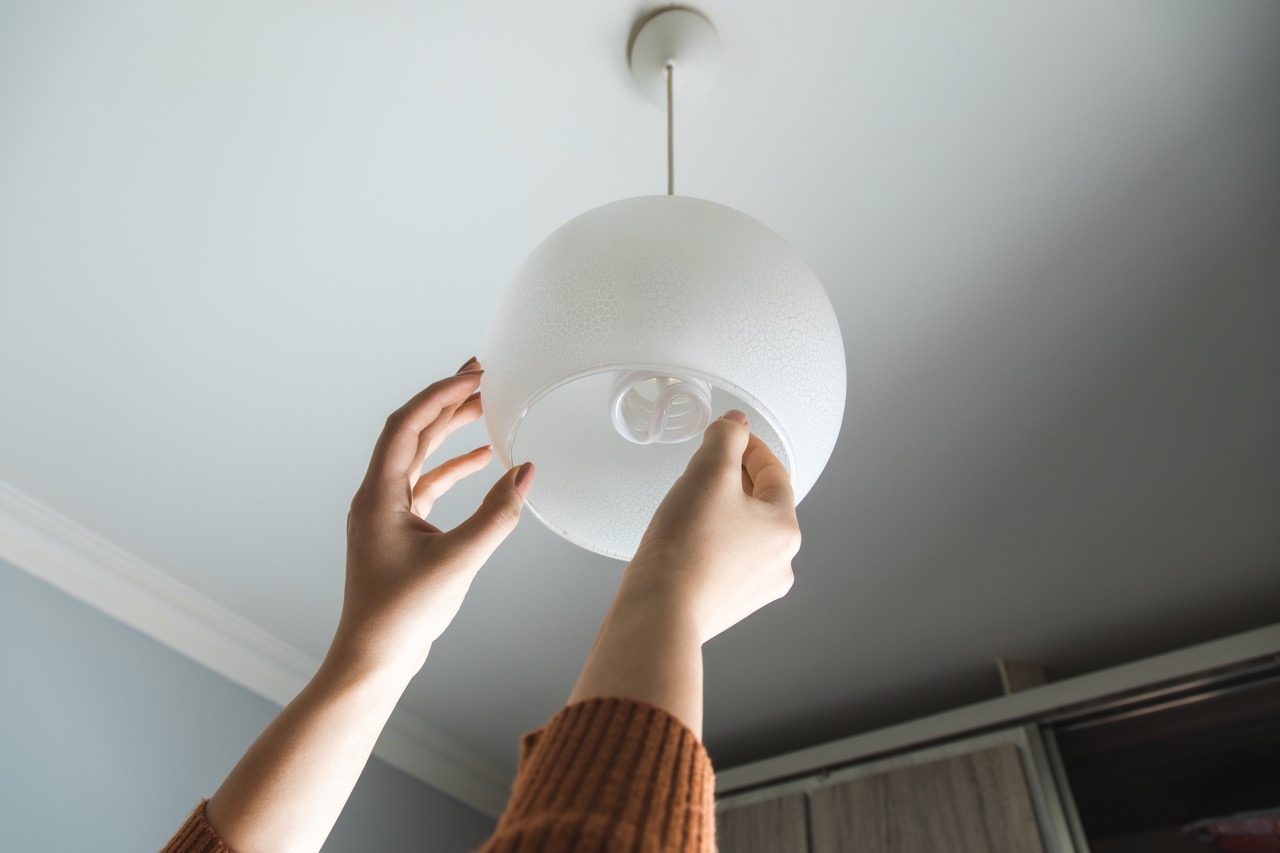
Step 3: Remove the light fixture
Now that you have turned off the power supply, it’s time to remove the existing light fixture. Removing the light fixture will involve disconnecting the wires and unscrewing the fixture from the ceiling. Follow these steps to safely remove the light fixture:
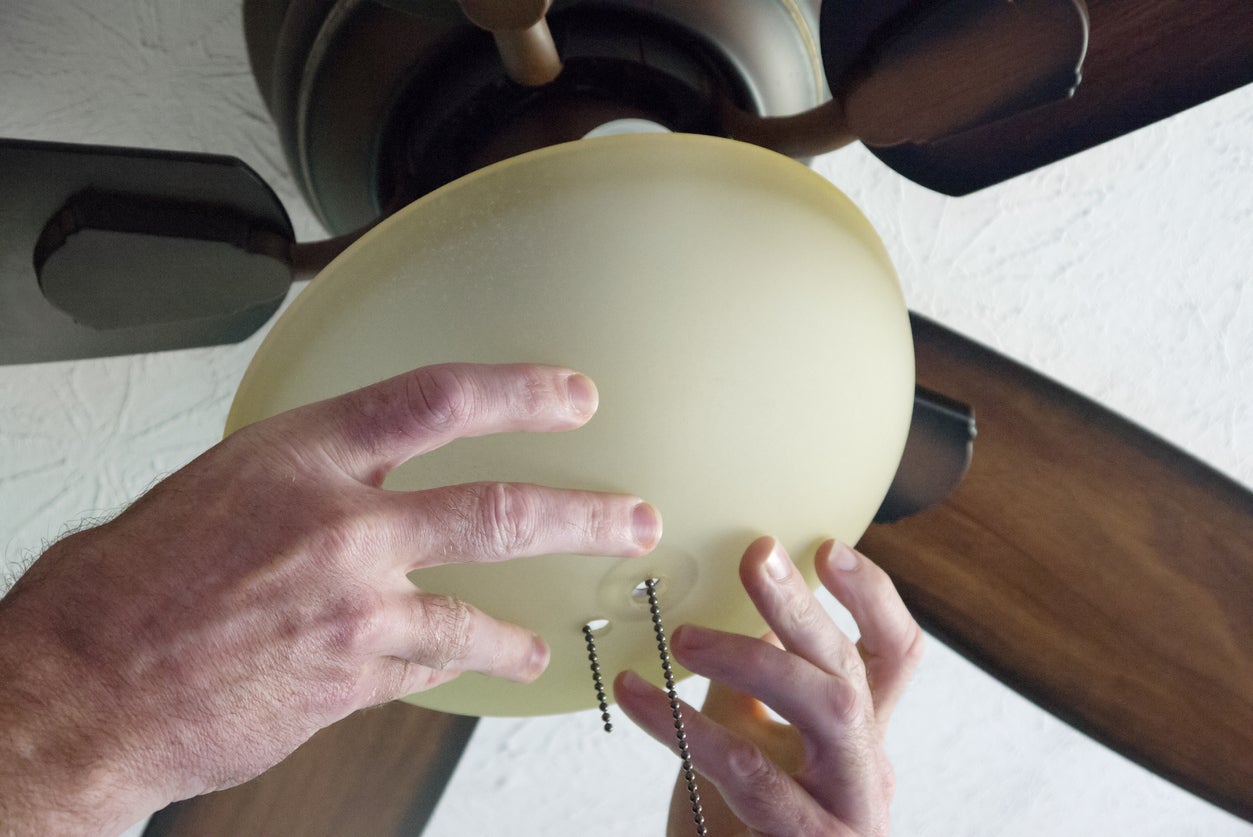
- Start by removing any glass shades or decorative elements attached to the light fixture. These are usually secured with screws or clips. Carefully unscrew or unclip them and set them aside.
- If your light fixture has a canopy, which is the decorative covering that hides the wiring and electrical box, use a screwdriver to remove any screws holding it in place. Gently lower the canopy and expose the wiring and mounting bracket.
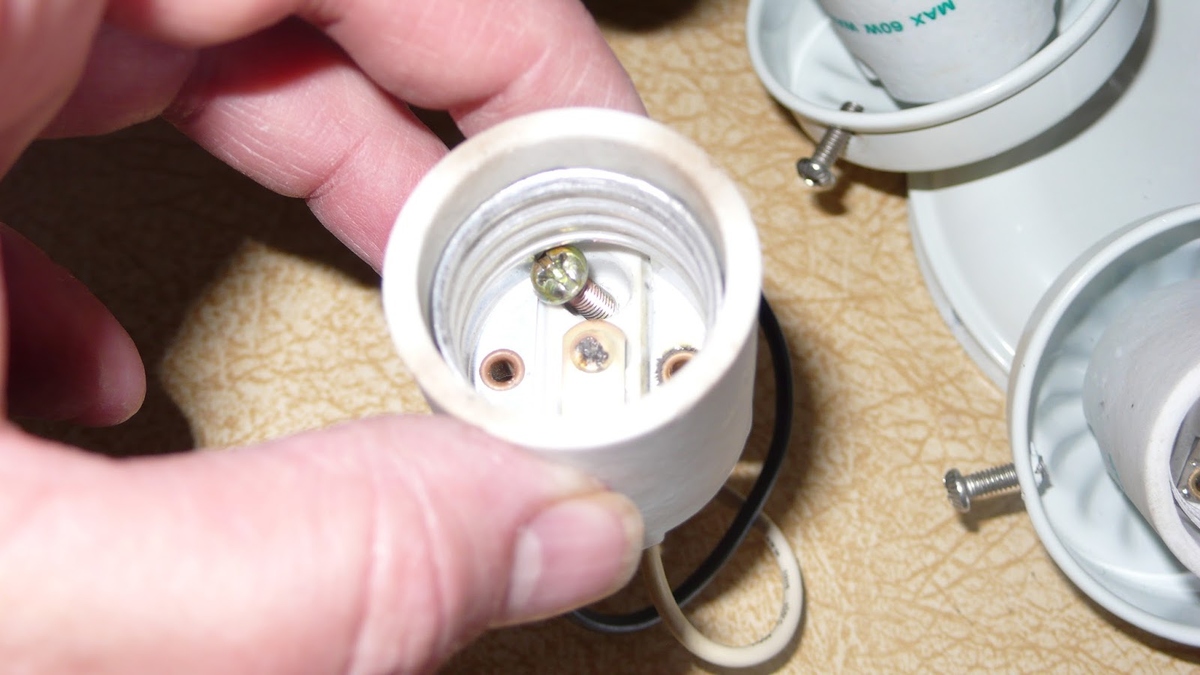
- With the canopy removed, locate the wire connections. There will typically be three wires: a black wire (hot), a white wire (neutral), and a green or copper wire (ground).
- Using a screwdriver, loosen the wire nuts that are connecting the wires together. Twist the wire nuts counterclockwise to loosen them and carefully separate the wires. Be cautious as you handle the wires to avoid any accidental contact or tangling.
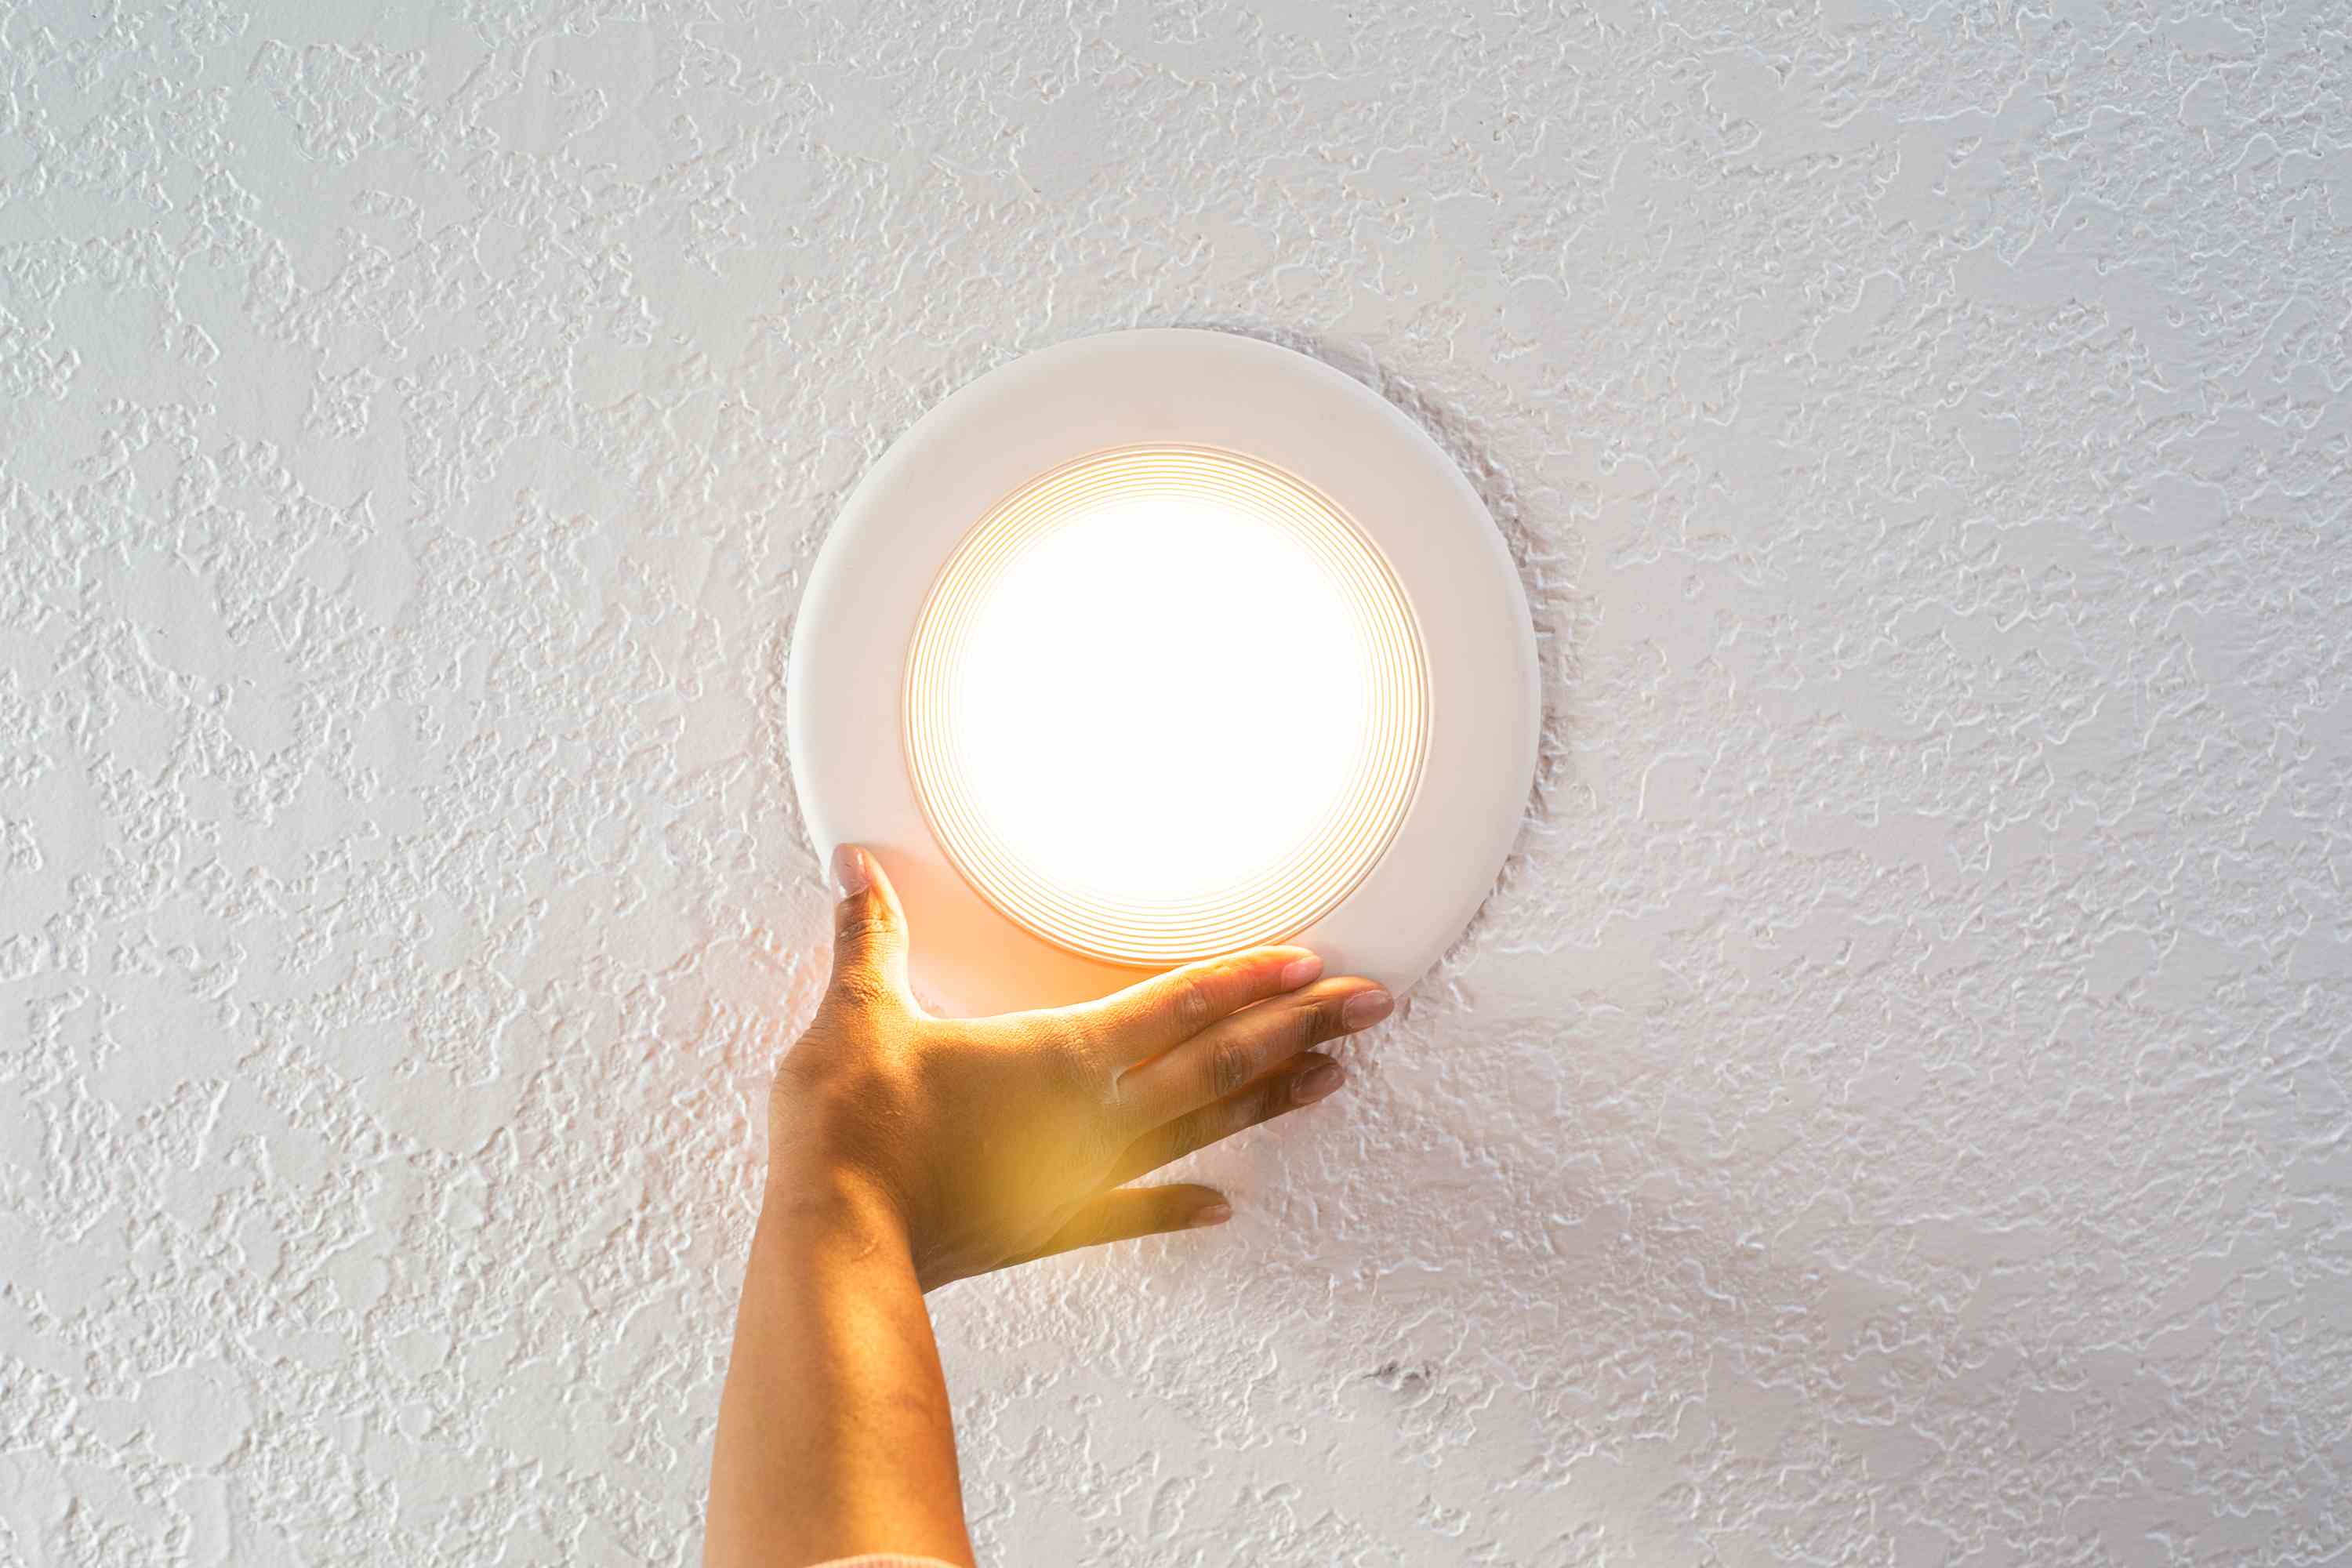
- Once the wire connections are disconnected, locate the mounting screws or decorative nuts that are securing the light fixture to the ceiling. Use a screwdriver or wrench to unscrew and remove them, allowing the light fixture to detach from the mounting bracket.
- Hold the light fixture with one hand as you remove the final screw or nut to prevent it from falling. Lower the fixture gently and set it aside.
With the light fixture removed, take a moment to inspect the wiring and assess the condition of the electrical box. Look for any signs of damage, such as frayed wires or loose connections. If you notice any issues, it’s important to address them before proceeding with the installation of the ceiling fan.
Keep the removed light fixture in a safe place in case you ever decide to reinstall it or use it in another location. It’s always a good idea to store the necessary components so that you can easily retrieve them if needed.
Now that the light fixture has been removed, you’re ready to move on to the next step: installing the ceiling fan mounting bracket.
Step 4: Install the ceiling fan mounting bracket
With the light fixture removed, it’s time to install the ceiling fan mounting bracket. The mounting bracket provides the necessary support and stability for the ceiling fan. Follow these steps to install the mounting bracket:
- Start by locating the mounting bracket in your ceiling fan kit. The bracket is typically designed to fit over the electrical box and attach to the ceiling joist or support beam.
- Position the mounting bracket over the electrical box, aligning the screw holes with the holes in the box. Ensure that the bracket is level and centered in the desired location for your ceiling fan.
- Using the screws provided with the fan kit, secure the mounting bracket to the electrical box. Insert the screws into the pre-drilled holes in the bracket and tighten them using a screwdriver or drill.
- Double-check that the mounting bracket is securely attached and does not wobble or move when lightly touched. A stable and sturdy bracket is essential for a safe installation.
If your ceiling fan kit includes a support bar or brace, follow the manufacturer’s instructions to install it at this stage. A support bar provides additional stability for ceiling fans installed on ceilings without a joist or support beam directly above the electrical box. It ensures that the weight of the ceiling fan is evenly distributed and supported.
Once the mounting bracket and support bar, if applicable, are securely installed, give them a final inspection to ensure everything is properly aligned and tightened. Any loose connections or instability can cause issues during the installation of the ceiling fan or affect its performance.
Now that the mounting bracket is in place, you’re ready to move on to the next step: assembling the ceiling fan itself.
Step 5: Assemble the ceiling fan
Now that the mounting bracket is installed, it’s time to assemble the ceiling fan. Assembling the ceiling fan involves attaching the fan blades to the motor housing and securing any additional components such as a light kit or remote control. Follow these steps to assemble your ceiling fan:
- Remove all the components from the ceiling fan kit and lay them out on a clean surface. Make sure you have all the necessary parts before proceeding.
- If the ceiling fan has a light kit, attach it to the bottom of the motor housing according to the manufacturer’s instructions. Most light kits are designed to easily connect to the motor housing using screws or clips.
- Next, locate the fan blades in the kit. These blades are usually made of wood, metal, or plastic, and they can come in various shapes and sizes. Align each blade with its corresponding blade bracket, ensuring that the holes for attaching them line up.
- Secure each fan blade to its bracket using the screws provided. Tighten the screws securely, but be careful not to over-tighten them, as this could damage the blade or bracket.
- Once all the fan blades are attached, check each one to ensure they are properly aligned and balanced. An improperly balanced fan can cause wobbling or noise issues when in operation. Most ceiling fan kits come with a balancing kit that includes weights or clips to correct any imbalances.
- If your ceiling fan kit includes a remote control, assemble it according to the manufacturer’s instructions. This may involve inserting batteries and syncing the remote with the fan motor.
- After assembling the fan blades and any additional components, give the entire fan a final inspection. Ensure all the parts are securely attached and properly aligned.
It’s important to closely follow the manufacturer’s instructions for assembling your specific ceiling fan model. Each fan may have slight variations in the assembly process or additional steps to consider.
Once you have successfully assembled the ceiling fan, you’re ready to move on to the next step: attaching the ceiling fan to the mounting bracket.
Make sure to turn off the power to the light fixture before starting the installation process. Use a voltage tester to double-check that the power is off before handling any wires.
Step 6: Attach the ceiling fan to the mounting bracket
With the ceiling fan assembled, it’s time to attach it to the mounting bracket that was previously installed. Attaching the ceiling fan to the mounting bracket ensures that it is securely supported and properly aligned. Follow these steps to attach the ceiling fan:
- Lift the assembled ceiling fan and carefully position it below the mounting bracket. Align the holes in the fan’s mounting plate with the corresponding holes in the bracket.
- Once aligned, insert the screws provided with your ceiling fan kit into the holes and tighten them using a screwdriver or drill. Make sure the screws are secure but avoid over-tightening, as this can damage the mounting plate or bracket.
- Verify that the ceiling fan is stable and level. Gently give it a light tug to ensure it is securely attached to the mounting bracket.
- Some ceiling fans may include a decorative canopy that covers the mounting and wiring. Attach the canopy to the ceiling using the screws provided, following the manufacturer’s instructions.
- Double-check all the connections and components to ensure everything is properly aligned and secured. It’s important to ensure a stable and balanced installation for reliable and safe operation.
During this step, it’s important to take care when working with the ceiling fan. They can be quite heavy, so it’s recommended to have a helper assist you with the installation process. By working together, you can safely and efficiently attach the fan to the mounting bracket.
Once the ceiling fan is securely attached to the mounting bracket, give it a final inspection. Verify that all screws and connections are tight, and ensure the fan is level and balanced. This will help prevent any issues, such as wobbling or noise, during operation.
With the ceiling fan successfully attached to the mounting bracket, you’re ready to move on to the next step: connecting the electrical wiring.
Step 7: Connect the electrical wiring
Connecting the electrical wiring is a crucial step in the installation process as it provides power to the ceiling fan. Properly connecting the wires ensures safe and efficient operation. Follow these steps to connect the electrical wiring:
- Start by identifying the wires coming from the ceiling and the wires from the ceiling fan. Typically, there will be three wires: a black wire (hot), a white wire (neutral), and a green or copper wire (ground).
- If necessary, strip about half an inch of insulation from the ends of the wires using wire strippers. This exposes the bare copper for a secure connection.
- While holding the ceiling fan near the mounting bracket, align the black wire from the ceiling with the black wire from the fan and twist them together in a clockwise direction. Once twisted, secure them with a wire nut. Repeat this step with the white wires and the green or copper wires.
- Once the wires are connected, gently push them up into the electrical box and neatly tuck them inside. Avoid pinching or crushing the wires as you push them in.
- With the wires properly connected, use electrical tape to secure the wire nut connections. This provides an additional layer of protection and prevents the wire nuts from coming loose.
- Carefully tuck any excess wiring into the electrical box, ensuring that it’s not interfering with any moving components of the ceiling fan or obstructing the airflow.
It’s important to note that some ceiling fans may have additional wiring for features like a light kit or remote control. Make sure to consult the manufacturer’s instructions for specific wiring instructions for your ceiling fan model.
After completing the wiring connections, it’s crucial to double-check all the wire nut connections to ensure they are tight and secure. Give the wires a gentle tug to confirm they are firmly connected and won’t come loose.
Once you’re satisfied that the electrical wiring is properly connected, you can proceed to the next step: attaching the fan blades.
Step 8: Attach the fan blades
Attaching the fan blades is an important step that brings your ceiling fan installation one step closer to completion. The fan blades not only provide the airflow but also contribute to the aesthetic appeal of the fan. Follow these steps to attach the fan blades:
- Take the fan blades and locate the blade mounting brackets on the motor housing. The number of blades and corresponding brackets will vary depending on your specific ceiling fan model.
- Align each blade with its respective mounting bracket, ensuring that the holes in the blades match up with the holes in the brackets.
- Insert the screws provided with your ceiling fan kit through the holes in the blades and into the brackets. Use a screwdriver or a drill to tighten the screws securely. Be careful not to overtighten, as this can damage the blades or brackets.
- Repeat this process for each fan blade, ensuring that they are evenly spaced and aligned. It’s important to maintain a balanced configuration to prevent wobbling or noise during operation.
- Once all the fan blades are securely attached, give them a gentle tug to confirm that they are properly fastened. This helps to ensure that the blades won’t become loose during operation.
Take a moment to step back and visually inspect the fan blades. Confirm that they are all correctly attached and positioned. Ensure that the blades are balanced and aligned to maintain smooth and efficient airflow.
As a safety precaution, be mindful of any dangling or loose wires while attaching the fan blades. Ensure that the wires are secure and properly tucked away to avoid interference with the blades or risk of electrical hazards.
Now that the fan blades are securely attached, you’re one step closer to enjoying the cooling breeze of your new ceiling fan. The next step is to test the fan to ensure it is functioning correctly.
Read more: How To Replace A Ceiling Fan Capacitor
Step 9: Test the ceiling fan
After successfully installing the ceiling fan and attaching the blades, it’s important to test the fan to ensure that it is functioning correctly. Testing allows you to identify any issues or adjustments that may be needed before completing the installation. Follow these steps to test your ceiling fan:
- Turn on the power supply to the ceiling fan by flipping the corresponding circuit breaker switch in the electrical panel.
- Locate the fan control switch on the fan or any associated remote control. Ensure that the switch is in the “Off” position before proceeding.
- Turn on the fan control switch to the desired speed. Most ceiling fans come with multiple speed settings, typically low, medium, and high.
- Observe the fan blades for smooth and balanced rotation. Pay attention to any wobbling, excessive noise, or vibrations, as this could indicate an issue with the fan’s installation or balance.
- If your ceiling fan is equipped with a light kit, test the light by turning on the corresponding switch or using the remote control (if applicable).
- Test any additional features or settings of the ceiling fan, such as reverse rotation or fan direction. This can usually be controlled through the fan’s switch or remote control.
- Listen for any unusual noises or clicking sounds that may indicate loose parts or wiring issues. If you notice anything concerning, turn off the power supply immediately and investigate the source of the problem before continuing.
If everything appears to be functioning smoothly during the test, congratulations! You have successfully installed and tested your ceiling fan. You can now proceed to the final step to complete the installation process.
However, if you encounter any issues during the test, it’s essential to troubleshoot and address them before finalizing the installation. Common issues may include wobbling, noise, or improper airflow. Refer to the manufacturer’s instructions for troubleshooting tips specific to your ceiling fan model. If needed, consult a professional electrician for assistance.
By thoroughly testing the ceiling fan, you can ensure its optimal performance and enjoy the benefits of a properly installed and functioning fan in your space.
Step 10: Finishing touches and clean up
With the ceiling fan successfully installed and tested, it’s time to focus on the final touches and clean up. This step ensures that everything is in order and that your space is left neat and tidy. Follow these steps to complete the installation process:
- Inspect the ceiling fan, checking for any loose screws or connections. Tighten any screws or nuts that may have loosened during the installation or testing process.
- If your ceiling fan came with a remote control, make sure to install the batteries and sync it with the fan motor according to the manufacturer’s instructions. Place the remote in a convenient location for quick and easy access.
- Remove any protective plastic covering or packaging materials from the ceiling fan. Wipe down the fan blades, motor housing, and any other visible surfaces with a soft cloth to remove any dust or debris.
- Dispose of any packaging materials, such as cardboard boxes or plastic wrap, in an appropriate recycling or trash bin.
- Clean up the work area, removing any tools, debris, or wire offcuts. Make sure the area is free from tripping hazards and clutter.
- If you had to move furniture or any other items to access the ceiling fan installation area, return them to their original positions.
- Take a moment to appreciate your newly installed ceiling fan and enjoy the improved cooling and airflow it provides to your space.
By completing these finishing touches and cleaning up the installation area, you ensure that everything is organized and in order. This not only adds to the aesthetic appeal but also promotes a safe and clutter-free environment.
Remember to keep the instruction manual and any warranty information in a safe place for future reference. This will be helpful if you need to troubleshoot any issues or seek customer support in the future.
Now that you have successfully completed the installation and finishing touches, you can sit back, relax, and enjoy the comfort and functionality provided by your newly installed ceiling fan.
Frequently Asked Questions about How To Replace A Light With A Ceiling Fan
Was this page helpful?
At Storables.com, we guarantee accurate and reliable information. Our content, validated by Expert Board Contributors, is crafted following stringent Editorial Policies. We're committed to providing you with well-researched, expert-backed insights for all your informational needs.


0 thoughts on “How To Replace A Light With A Ceiling Fan”