
Articles
How to Use a Dish Washer
Modified: October 20, 2024
Learn how to use a dishwasher with our insightful articles. Discover tips and tricks for efficient and effective dishwashing, making your life easier.
(Many of the links in this article redirect to a specific reviewed product. Your purchase of these products through affiliate links helps to generate commission for Storables.com, at no extra cost. Learn more)
Introduction
Welcome to the world of convenience and efficiency – the dishwasher. Gone are the days of laboriously hand-washing each and every dish, only to find yourself exhausted and with little time for other activities. The dishwasher is here to lend a helping hand, taking care of the dirty work while you relax or attend to other tasks. In this article, we will guide you through the process of using a dishwasher effectively, ensuring squeaky clean dishes with minimal effort.
Whether you’re a seasoned dishwasher user or a first-time owner, it’s always good to have a refresher on the basics. A dishwasher not only saves you time and energy, but it also helps conserve water compared to hand-washing. So, let’s dive in and discover the steps to harness the power of this incredible appliance.
In this article, we will cover the following steps:
- Loading the dishwasher
- Adding detergent and rinse aid
- Selecting the wash cycle
- Loading the dirty dishes
- Starting the dishwasher
- Unloading the clean dishes
- Cleaning the dishwasher
By following these steps, you’ll be able to optimize the performance of your dishwasher and achieve sparkling clean dishes every time. So, let’s get started with step 1: loading the dishwasher.
Key Takeaways:
- Proper loading, detergent selection, and wash cycle customization are essential for maximizing dishwasher efficiency and achieving spotless, sparkling clean dishes with minimal effort.
- Regular cleaning and maintenance of the dishwasher are crucial for ensuring optimal performance, preventing odors, and maintaining the cleanliness and hygiene of your dishes.
Read more: How To Repair A Dish Washer
Step 1: Loading the Dishwasher
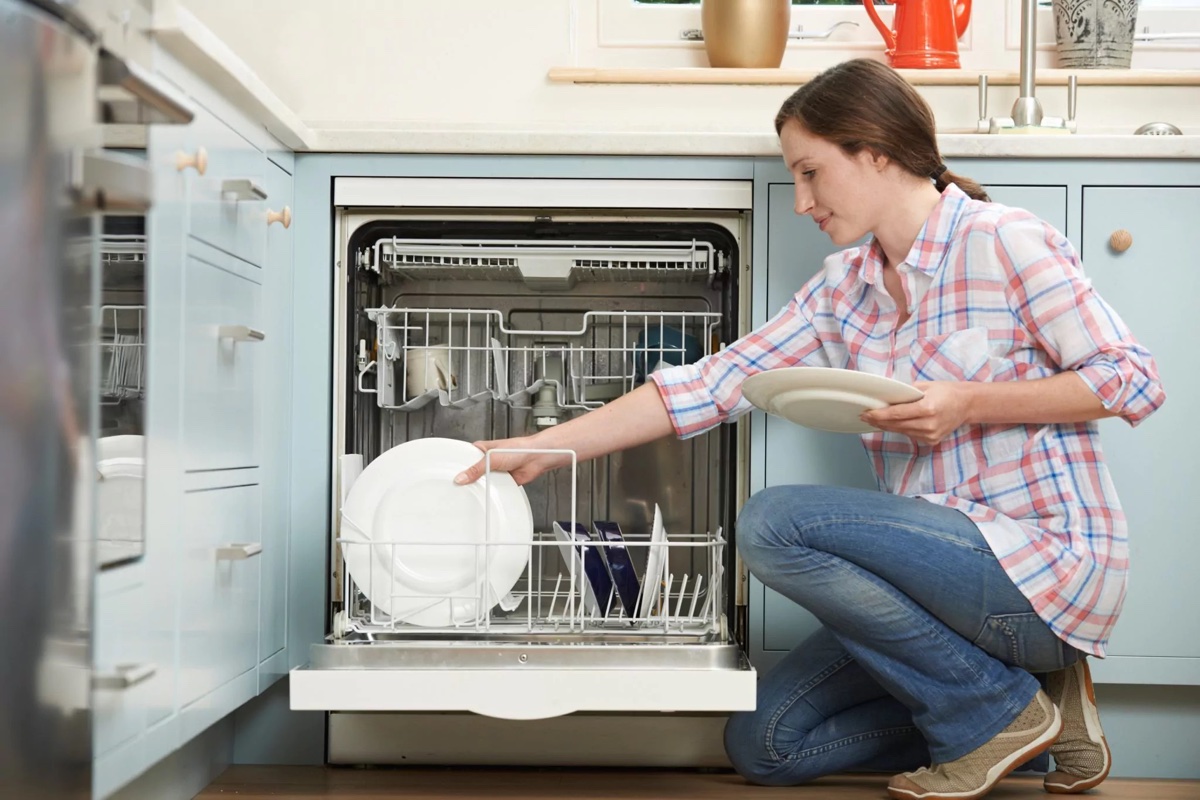
The first step to using a dishwasher effectively is loading it correctly. Properly loading the dishwasher ensures that every dish gets cleaned thoroughly and reduces the risk of breakage or damage. Here’s how you can make the most out of this step:
- Scrape off excess food: Before loading the dishes, it’s essential to scrape off any large food particles or debris. This prevents the dishwasher from clogging and ensures that the cleaning process is efficient.
- Arrange dishes strategically: Start by placing larger items such as plates, bowls, and cookware on the bottom rack. Make sure to leave enough space between them so that the water and detergent can reach each dish. If you’re stacking plates, alternate between placing them facing forward and backward to create better water circulation.
- Load utensils properly: Place utensils like spoons, forks, and knives in the dishwasher’s utensil basket. To ensure optimum cleanliness, separate these items and avoid overcrowding. Mix up the utensils to prevent nesting and promote better water flow.
- Secure delicate items: Fragile items such as glassware and stemware should be loaded on the top rack. Make sure to position them securely, using the racks and tines to hold them in place. If you have wine glasses, it’s recommended to use silicone stemware holders to prevent them from moving during the wash cycle.
- Load dishwasher-safe plastics on the top rack: If you have plastic containers or other dishwasher-safe plastic items, it’s best to load them on the top rack. Placing them on the bottom rack may cause them to melt or warp due to the proximity to the heating element.
- Avoid overcrowding: While it may be tempting to fit as many dishes as possible, overcrowding the dishwasher can hinder the effectiveness of the wash cycle. It’s important to leave enough space between the dishes for the water and detergent to circulate freely, ensuring a thorough clean.
- Check for spinning arms: Before closing the dishwasher door, double-check that the spinning arms can rotate freely. Remove any objects, such as long utensils or large plates, that might obstruct their movement.
By following these loading tips, you can maximize the efficiency of your dishwasher and ensure that all your dishes come out sparkling clean. Once you have successfully loaded the dishwasher, you are ready to move on to the next step: adding detergent and rinse aid.
Step 2: Adding Detergent and Rinse Aid
Adding the right amount of detergent and rinse aid is crucial to ensure effective cleaning and spot-free drying of your dishes. Here’s what you need to know about this step:
- Select the appropriate detergent: Choose a dishwasher detergent that is specifically designed for automatic dishwashers. Avoid using regular dish soap or hand-washing detergent, as they can create excessive suds and may damage your dishwasher. Opt for a high-quality dishwasher detergent that suits your water hardness level and the type of dishes you are washing.
- Measure the detergent: Follow the manufacturer’s instructions on the detergent packaging to determine the appropriate amount. In general, a tablespoon or dishwasher detergent pod is sufficient for a standard load. Be careful not to exceed the recommended amount, as it can lead to residue buildup or poor rinsing.
- Add rinse aid: Rinse aid helps to promote better drying and prevent water spots and streaks on your dishes. Check if your dishwasher has a built-in rinse aid dispenser and fill it according to the manufacturer’s instructions. If there is no dispenser, you can use rinse aid balls or add it manually to the dishwasher’s designated compartment.
- Consider additional additives: Depending on your needs, you may want to consider adding specialized dishwasher additives such as dishwasher cleaner or descaling agent. These can help remove stubborn stains, mineral deposits, and odors from your dishwasher, ensuring its optimal performance.
- Avoid overloading the dispenser: Take care not to overfill the detergent dispenser or rinse aid compartment. Wipe away any excess spills or drips to prevent them from interfering with the dishwasher’s functioning.
By adding the appropriate detergent and rinse aid in the correct amounts, you can ensure that your dishes come out clean and sparkling, with no leftover residue or water spots. With this step completed, it’s time to move on to step 3: selecting the wash cycle.
Step 3: Selecting the Wash Cycle
Choosing the right wash cycle is essential for achieving the best results from your dishwasher. Different wash cycles are designed to accommodate different levels of dish dirtiness and sensitivity. Here’s how you can select the appropriate wash cycle:
- Refer to the dishwasher manual: Consult your dishwasher’s manual to understand the available wash cycles and their specific settings. Manufacturers often include descriptions of each cycle, allowing you to choose the most suitable option based on your needs.
- Consider energy efficiency: Many dishwashers offer eco-friendly or energy-efficient cycles. These cycles use less water and energy, making them ideal for moderately soiled dishes or when you want to conserve resources. Choose this option if you’re not in a rush and want to minimize your environmental impact.
- Adjust based on dish dirtiness: Assess the level of dirtiness on your dishes to determine the appropriate wash cycle. Most dishwashers offer standard, heavy-duty, or express cycles. Standard cycles are suitable for everyday cleaning, heavy-duty cycles tackle more stubborn stains and grime, while express cycles are designed for lightly soiled dishes and quick cleaning.
- Utilize specialized cycles: Some dishwashers have specialized cycles, such as delicate or sanitize cycles. Delicate cycles use lower water temperatures and gentle wash action, making them perfect for fragile items like fine china or wine glasses. Sanitize cycles use higher temperatures to kill bacteria and ensure hygienic cleaning. Use these cycles when necessary.
- Customize where available: Certain dishwashers allow you to customize the wash cycle by adjusting parameters such as water temperature, rinse time, or intensity. Take advantage of this feature to tailor the cleaning process to your specific needs.
- Consider delay start: If your dishwasher has a delay start feature, you can set it to begin the wash cycle at a later time. This can be useful if you want the dishwasher to run during off-peak hours or if you want the dishes to be ready at a specific time.
By selecting the appropriate wash cycle, you can ensure that your dishes receive the optimal cleaning treatment based on their level of dirtiness and sensitivity. Now that you’ve chosen the perfect cycle, it’s time to move on to step 4: loading the dirty dishes into the dishwasher.
Step 4: Loading the Dirty Dishes
Now that you have selected the wash cycle, it’s time to load the dirty dishes into the dishwasher. Follow these tips to ensure efficient and effective cleaning:
- Pre-rinse if necessary: If your dishwasher doesn’t have a food disposal system, it’s a good idea to pre-rinse heavily soiled dishes to remove any large food particles. This prevents clogging and ensures a better cleaning result.
- Place dishes strategically: Similar to the loading process, ensure that there is ample space between dishes to allow for proper water circulation. Place larger items such as plates, pots, and pans on the bottom rack and arrange them so that they are not blocking the spinning arms.
- Load utensils appropriately: Place utensils in the designated utensil basket or rack. Separate knives, forks, and spoons to prevent nesting and ensure thorough cleaning. Pointing the utensils with their handles facing down allows for more effective cleaning and prevents injury when unloading.
- Load delicate items carefully: Fragile items, like glassware or delicate china, should be placed on the top rack to avoid potential damage. Ensure that they are spaced out and secured between the tines or by using stemware holders to prevent them from moving during the wash cycle.
- Pay attention to dishwasher-safe items: Some plastic items may not be dishwasher-safe, so be sure to check the manufacturer’s instructions. If they are dishwasher-safe, load them on the top rack to prevent warping or melting due to the proximity to the heating element.
- Avoid overcrowding: While it may be tempting to fit as many dishes as possible, overcrowding can hinder the cleaning process. Leave enough space between items to allow water and detergent to reach every surface. This will result in cleaner dishes and prevent potential damage from items nesting together.
- Place larger items strategically: When loading larger items like baking sheets or cutting boards, position them on the sides of the dishwasher. This allows water to circulate freely and ensures thorough cleaning of all the dishes.
By following these loading tips, you can maximize the efficiency of your dishwasher and ensure that your dirty dishes come out sparkling clean. With step 4 completed, it’s time to move on to the next step: starting the dishwasher.
Make sure to scrape off excess food before loading dishes. Use the right detergent and load dishes properly for efficient cleaning. Run hot water before starting the cycle for better results.
Read more: How To Clean A Dish Washer
Step 5: Starting the Dishwasher
Now that you have loaded the dirty dishes into the dishwasher, it’s time to start the cleaning process. Follow these steps to start your dishwasher:
- Close the dishwasher door: Make sure that the dishwasher door is securely closed. Most dishwashers have sensors that detect if the door is properly shut before initiating the wash cycle.
- Select any additional settings: Depending on your dishwasher model, you may have additional settings or options to choose from. These can include options like delayed start, extra drying, or half-load mode. Adjust these settings according to your preferences.
- Ensure proper water supply and drainage: Before starting the dishwasher, ensure that the water supply is turned on and that the dishwasher is properly connected to the water source. Also, make sure that the drain hose is positioned correctly and not kinked or blocked.
- Press the “Start” button: Once you have closed the door and set any additional settings, press the “Start” button on your dishwasher control panel to initiate the wash cycle. Some dishwashers may require you to select the wash cycle first before pressing the start button.
- Avoid interruption: Once the dishwasher has started, it’s best to let it complete the entire wash cycle without interruption. Opening the door during the cycle can release steam and disrupt the cleaning process.
- Monitor the progress: While the dishwasher is running, you can monitor the progress through the control panel display if your dishwasher has one. This allows you to keep track of the remaining time and adjust any settings if necessary.
- Safety precautions: It’s important to follow safety precautions while the dishwasher is running. Keep children and pets away from the dishwasher, avoid touching the hot surfaces, and only open the dishwasher once the cycle is complete and the dishes have cooled down.
By following these steps, you can ensure a smooth and successful dishwasher cycle. Once the dishwasher has finished its cleaning cycle, it’s time to move on to the next step: unloading the clean dishes.
Step 6: Unloading the Clean Dishes
Now that your dishwasher has completed its cleaning cycle, it’s time to unload the clean dishes. Follow these steps to ensure a seamless unloading process:
- Check for hot surfaces: Before opening the dishwasher door, take a moment to ensure that the dishes and interior surfaces have cooled down. Some dishwashers have a cool-down cycle that helps dissipate heat, but it’s always a good idea to exercise caution.
- Start with the bottom rack: Begin by unloading the bottom rack. Carefully remove any pots, pans, or large items first, taking care not to spill any water that may have collected on them.
- Handle delicate items with care: When unloading fragile dishware or glassware, grasp them by the base or stem to prevent accidentally dropping or breaking them. Place these items on a stable surface or directly into cabinets to avoid any mishaps.
- Empty the utensil basket: Next, remove the utensil basket from the dishwasher. Unload the silverware and utensils, taking care to separate them properly. Be cautious of sharp knives and handle with care.
- Unloading the top rack: Finally, unload the top rack, which usually contains smaller items like cups, mugs, and glasses. Pay attention to any remaining water that may have collected inside the cups or glasses, and empty it out before putting them away.
- Avoid water spots and streaks: To prevent water spots, it’s recommended to unload the dishwasher from bottom to top. This way, any droplets from the upper rack won’t fall onto the already unloaded dishes below.
- Inspect for cleanliness: As you remove each dish, inspect it for cleanliness. If you notice any dishes that didn’t come out completely clean, consider rewashing them by hand or running them through the dishwasher again.
- Put dishes away: Once all the dishes have been unloaded, it’s time to return them to their designated storage locations. Take this opportunity to organize and declutter, ensuring that everything is in its proper place.
By following these steps, you can efficiently and safely unload the clean dishes from your dishwasher. With step 6 completed, there is just one more step left to complete the process: cleaning the dishwasher itself.
Step 7: Cleaning the Dishwasher
Regularly cleaning your dishwasher helps maintain its performance and ensures a hygienic environment for your dishes. Follow these steps to effectively clean your dishwasher:
- Remove any debris: Start by inspecting and removing any food particles or debris that may have accumulated in the bottom of the dishwasher or around the drain. Use a damp cloth or sponge to wipe away any residue.
- Clean the filter: Most dishwashers have a filter that traps food particles and prevents them from clogging the drain. Check your dishwasher’s manual to locate the filter and remove it. Rinse the filter under warm water to remove any dirt or debris. If the filter is heavily soiled, you can use a soft brush or toothbrush to gently scrub it clean.
- Wipe down the interior: Use a damp cloth or sponge to wipe down the interior walls, racks, and door of the dishwasher. Pay attention to the corners, crevices, and seals, as these areas can accumulate grime or residue. For stubborn stains or buildup, you can use a mixture of warm water and mild dish soap to scrub the surfaces gently.
- Deodorize the dishwasher: If your dishwasher has any unpleasant odors, you can eliminate them by deodorizing the dishwasher. One effective method is to place a cup of white vinegar on the top rack and run a hot water cycle. The vinegar helps break down any residual odors and leaves your dishwasher smelling fresh.
- Clean the spray arms: The spray arms play a crucial role in distributing water and detergent to clean the dishes. Over time, they can become clogged with mineral deposits or food particles. To clean the spray arms, remove them from the dishwasher (refer to the manual for instructions) and rinse them under running water. Use a toothpick or small brush to unclog any blocked spray holes.
- Run a cleaning cycle: Some dishwashers have a special cleaning cycle or option that you can activate to thoroughly clean the interior. Follow the instructions in your dishwasher’s manual to initiate this cycle. Alternatively, you can run an empty cycle with a dishwasher cleaner or a cup of white vinegar to remove any buildup and sanitize the dishwasher.
- Maintain regular cleaning: To keep your dishwasher in top condition, it’s recommended to clean it regularly, ideally once a month. This routine maintenance helps prevent the buildup of residue, odors, and bacteria.
By following these steps, you can keep your dishwasher clean, odor-free, and in optimal working condition. Regular cleaning not only ensures the longevity of your dishwasher but also maintains the cleanliness and hygiene of your dishes. With step 7 completed, you have successfully completed all the necessary steps to use your dishwasher effectively. Enjoy the convenience and efficiency it offers!
Do you need further assistance with anything else?
Conclusion
Congratulations! You have learned the step-by-step process for effectively using a dishwasher. By following these instructions, you can make the most of this time-saving appliance and ensure sparkling clean dishes with minimal effort. Let’s recap what we covered:
We began with the importance of loading the dishwasher correctly to ensure thorough cleaning and prevent breakage. It’s essential to arrange dishes strategically, load utensils properly, and handle delicate items with care. Avoid overcrowding and ensure that the spinning arms can rotate freely.
Next, we discussed the significance of adding the right amount of detergent and rinse aid. Choosing a dishwasher detergent specifically formulated for automatic dishwashers and measuring the appropriate amount ensures optimal cleaning results. Rinse aid promotes spot-free drying and prevents water spots and streaks on your dishes.
Then, we delved into selecting the right wash cycle based on dish dirtiness and sensitivity. Whether you need a standard, heavy-duty, or specialty cycle like delicate or sanitize, it’s crucial to choose the one that suits your needs. Consider energy efficiency and any customizable options your dishwasher offers.
After selecting the wash cycle, we moved on to loading the dirty dishes, ensuring they are properly positioned to allow for effective water circulation and cleaning. We emphasized the importance of scraping off excess food, strategically placing dishes, and treating delicate items with extra care.
Once the dishwasher is loaded, it’s time to start the cleaning process. Close the dishwasher door, select any additional settings, and press the “Start” button. Remember to monitor the progress and avoid interrupting the cycle.
Once the cleaning cycle is complete, we discussed the proper technique for unloading the clean dishes. Starting with the bottom rack, handle delicate items with care, and unload the top rack to prevent water spots. Inspect each dish for cleanliness and return them to their designated storage locations.
Lastly, we covered the importance of cleaning the dishwasher itself. Regular maintenance, such as removing debris, cleaning the filter, wiping down the interior, and deodorizing the dishwasher, ensures optimal performance and prevents odors.
By following these steps, you can enjoy the convenience and efficiency of your dishwasher while maintaining spotlessly clean dishes. Remember to clean your dishwasher regularly to keep it in top condition. Now, go ahead and enjoy more free time, knowing that your dishwasher is working its magic!
If you have any further questions or need assistance, feel free to ask. Happy dishwashing!
Frequently Asked Questions about How To Use A Dish Washer
Was this page helpful?
At Storables.com, we guarantee accurate and reliable information. Our content, validated by Expert Board Contributors, is crafted following stringent Editorial Policies. We're committed to providing you with well-researched, expert-backed insights for all your informational needs.









0 thoughts on “How to Use a Dish Washer”