
Articles
Kenmore Washer How To Use
Modified: October 20, 2024
Learn how to use your Kenmore washer with these helpful articles. Find step-by-step instructions and tips to optimize your laundry routine.
(Many of the links in this article redirect to a specific reviewed product. Your purchase of these products through affiliate links helps to generate commission for Storables.com, at no extra cost. Learn more)
Introduction
Welcome to the world of Kenmore washers! If you’ve recently purchased a Kenmore washer or are considering buying one, you’re probably looking for guidance on how to use it effectively. Look no further! In this article, we’ll walk you through the step-by-step process of setting up and operating your Kenmore washer.
With its innovative features and durable construction, a Kenmore washer is designed to make laundry day a breeze. Whether you’re a seasoned laundry pro or a first-time user, understanding the proper usage of your washer is crucial for achieving optimal results.
By following our comprehensive guide, you’ll learn how to set up your washer, load the clothes correctly, select the appropriate wash cycle, add detergent and additives, start the wash, and safely remove the clothes. We’ll also cover regular maintenance tips to keep your washer running smoothly for years to come.
So, let’s jump right in and discover how to get the most out of your Kenmore washer!
Key Takeaways:
- Proper setup, loading, and maintenance are crucial for effective use of a Kenmore washer. Follow the step-by-step guide to achieve clean, fresh, and well-maintained laundry every time.
- Understanding the control panel, selecting the right wash cycle, and adding the appropriate detergent are key to customizing the wash based on specific laundry needs. Regular maintenance ensures efficient and reliable performance for years to come.
Read more: How To Fix A Kenmore Washer
Step 1: Setting up the washer
Before you can start using your Kenmore washer, it’s important to set it up properly. Here are the key steps to follow:
Connecting the power supply
The first step is to connect your washer to a power source. Locate the power cord and plug it into a grounded outlet. Ensure that the outlet is compatible with the washer’s power requirements to avoid any electrical issues. It’s also a good idea to use a surge protector for added protection.
Connecting the water supply
Next, you’ll need to connect the water supply to your washer. Most Kenmore washers have two inlet hoses, one for hot water and one for cold water. Locate the water inlet valve at the back of the washer and attach the hoses securely. Make sure to connect the hot water hose to the hot water faucet and the cold water hose to the cold water faucet.
Adjusting the leveling feet
To ensure proper operation and minimize vibration, it’s important to level your washer. Check if your Kenmore washer has adjustable leveling feet. If it does, adjust them accordingly to make sure the washer is sitting evenly on the floor. Use a bubble level or simply slide your hand across the top of the washer to determine if it’s level. If needed, adjust the feet until the washer is stable and level.
By following these steps, you’ll have your Kenmore washer set up and ready to go. Now that your washer is properly connected and level, you can move on to the next step: loading your laundry.
Read more: How To Reset Kenmore Washer
Step 2: Loading the clothes
Now that your Kenmore washer is all set up, it’s time to tackle the task of loading your laundry. Properly sorting and loading the clothes will ensure efficient washing and help to maintain the quality of your garments. Let’s break down this step into two key components:
Sorting the laundry
Before loading the drum, it’s important to sort your laundry properly. Start by separating the clothes based on color and fabric type. Sort dark colors, light colors, and whites into separate piles. This will help prevent color bleeding and ensure that your clothes stay looking their best.
Additionally, you may choose to further sort clothes based on fabric type. Separate delicate fabrics, like silk or lace, from sturdier materials, like denim or towels. This will help protect your delicates from potential damage during the wash cycle.
By taking the time to sort your laundry, you’ll ensure that each garment receives the appropriate care and treatment during the wash cycle.
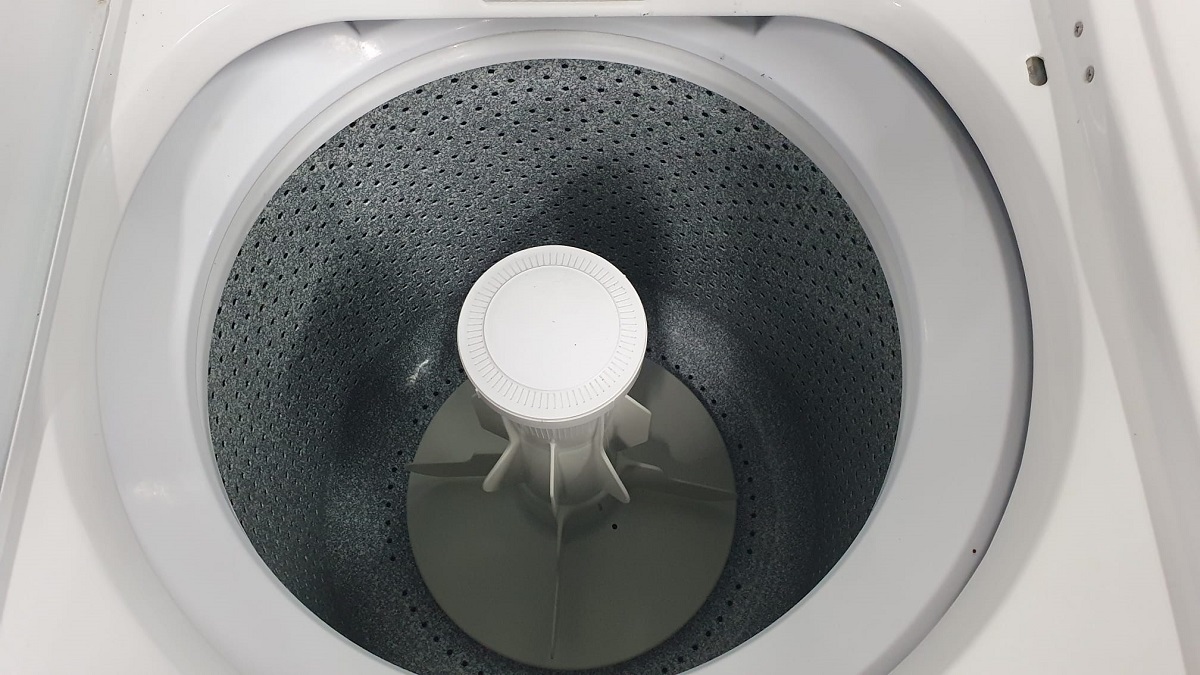
Loading the drum
Once you’ve sorted your laundry, it’s time to load the drum of your Kenmore washer. Open the washer door and check for any items or debris that may be left inside from previous loads.
Start by placing larger items, such as bed sheets or towels, loosely in the drum. This will allow for better water and detergent distribution. Next, add smaller items, like shirts or underwear, making sure not to overload the drum. Overloading can lead to ineffective cleaning and increased wear and tear on the machine.
As you load the clothes, distribute them evenly around the drum to maintain a balanced load. This will help minimize vibration and ensure that the washer operates smoothly.
By following these steps, you’ll be well on your way to properly loading your laundry into your Kenmore washer. Next, we’ll move on to selecting the appropriate wash cycle.
Step 3: Selecting the wash cycle
Once your laundry is loaded, it’s time to choose the right wash cycle for your needs. Kenmore washers offer a variety of cycle options to accommodate different fabric types and levels of soil. Let’s dive into the details of this step:
Read more: How To Drain A Kenmore Washer
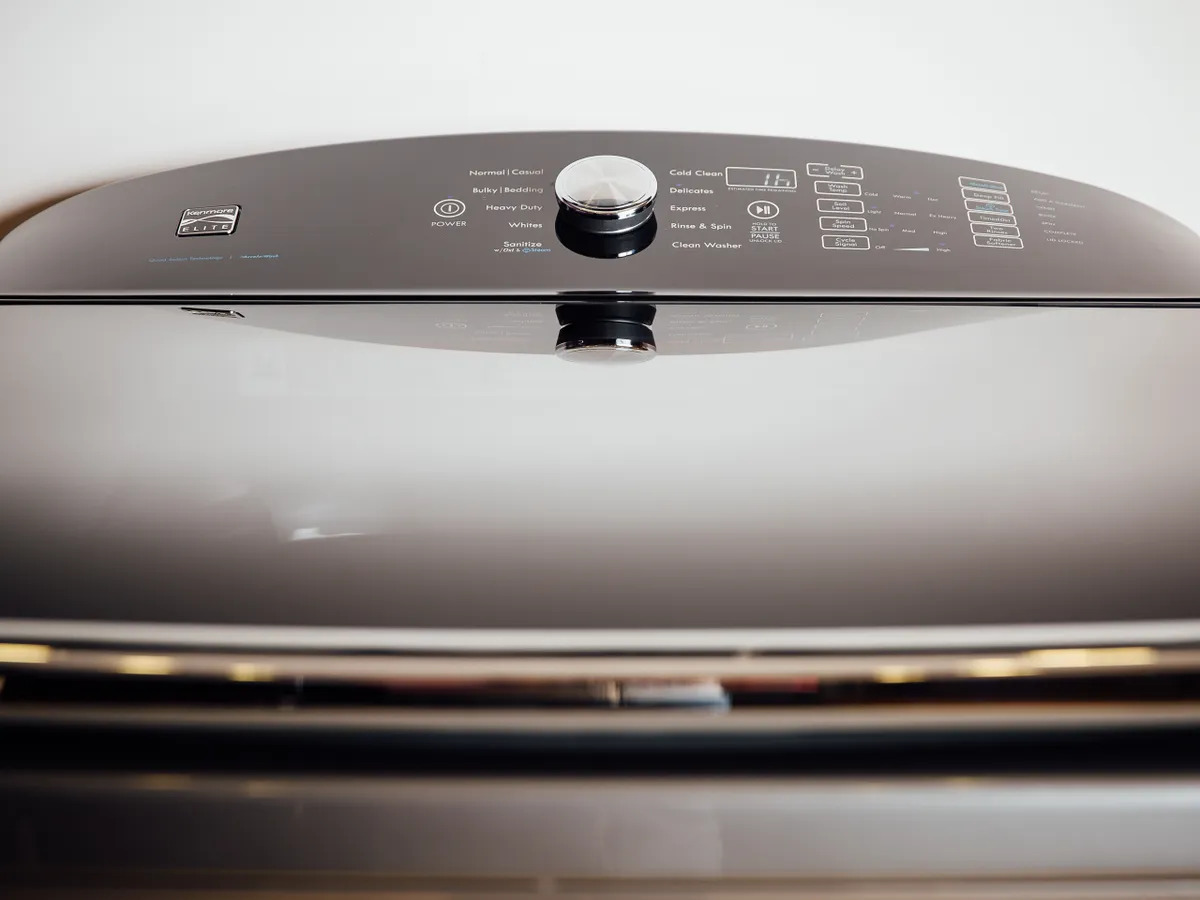
Understanding the control panel
Take a moment to familiarize yourself with the control panel of your Kenmore washer. The control panel typically features a display screen, buttons, and dials. Refer to the user manual for specific information on the control panel layout for your model, as it may vary.
Choosing the desired cycle
Selecting the appropriate wash cycle is crucial to ensure that your clothes are cleaned effectively. Kenmore washers offer a range of cycles, including normal, delicate, heavy-duty, and more. Consider the fabric type and level of soil when choosing a cycle.
For everyday clothing, the normal cycle is often suitable. Delicate fabrics may require a gentle or hand wash cycle. Additionally, heavily soiled items may benefit from a heavy-duty or extra rinse cycle for a thorough clean.
Refer to the user manual for a detailed description of each cycle and its recommended use. This will help you make an informed choice based on your specific laundry needs.
Making additional settings
Aside from selecting the wash cycle, you may have the option to further customize the settings on your Kenmore washer. Common additional settings include temperature control, spin speed, and soil level.
Choose the appropriate temperature based on the fabric care label and the type of stains or dirt on your clothes. Select a higher spin speed to remove more water from your laundry, or a lower spin speed for delicate items. Adjust the soil level setting to match the level of dirtiness in your clothes.
By utilizing these additional settings, you can tailor the wash cycle to perfectly suit your needs and ensure optimal cleaning performance.
With the wash cycle and settings selected, you’re now ready to move on to the next step: adding detergent and additives.
Step 4: Adding detergent and additives
Adding the right amount of detergent and any necessary additives is essential for achieving clean and fresh-smelling laundry. Here’s what you need to know:
Read more: How To Clean Kenmore Elite Washer
Selecting the appropriate detergent
Choosing the right detergent is important to ensure effective cleaning without damaging your clothes or the washer. Kenmore recommends using high-efficiency (HE) detergents specifically formulated for front-loading washers. These detergents are designed to produce less suds and ensure optimal performance.
Look for detergents that are suitable for your specific laundry needs, such as stain removal, color protection, or sensitive skin. Read the detergent labels for dosage instructions and any additional recommendations for your type of washer.
Measuring and adding detergent
When it comes to adding detergent, it’s crucial to follow the manufacturer’s instructions. Use the measuring cap or cup provided with the detergent to measure the correct amount. In most cases, you’ll need less detergent than you might think, as too much can lead to excess suds or residue on your clothes.
Pour the measured detergent into the appropriate dispenser drawer or directly into the drum, depending on your Kenmore washer model. Close the dispenser drawer securely, or if pouring directly, spread the detergent evenly around the clothes in the drum.
Using fabric softener or bleach (if needed)
If desired, you can also use fabric softener or bleach to enhance the freshness and appearance of your laundry. Kenmore washers usually have separate compartments for fabric softener and bleach. Follow the instructions on the respective product labels for dosage and pouring instructions.
Add fabric softener to the designated dispenser or at the appropriate time during the wash cycle, depending on your washer’s features. Only use bleach if your clothes and the washer’s instruction manual recommend it. Remember to never mix bleach and fabric softener.
By selecting the appropriate detergent, measuring and adding it correctly, and using fabric softener or bleach when necessary, you’ll ensure clean and fresh laundry every time.
Now that you have added the detergent and any additives, you’re all set to begin the wash cycle. Let’s move on to the next step: starting the wash.
Step 5: Starting the wash
With your laundry loaded and the detergent added, it’s time to start the wash cycle. Let’s go through the steps to get your Kenmore washer up and running:
Closing the door
Ensure that the door of your Kenmore washer is closed securely. Most models have a latch mechanism that locks the door during the wash cycle for safety reasons. Double-check that the door is closed properly before proceeding to the next step.
Initiating the wash cycle
Once the door is closed, it’s time to initiate the wash cycle. Depending on your Kenmore washer model, you may have different options for starting the cycle. Some models have a power button that needs to be pressed, while others require you to select the desired cycle and let the machine automatically start.
Follow the instructions in your washer’s manual to ensure that you start the cycle correctly. Pay attention to any specific sequence or settings required for your chosen cycle.
Monitoring the progress
Once the wash cycle has started, you can sit back and relax while your Kenmore washer does its job. It’s a good idea to monitor the progress occasionally to ensure that everything is running smoothly.
Many Kenmore washers have a digital display that shows the remaining time for the cycle or the current stage of the wash process. You can check this display periodically to keep track of the progress.
During the wash cycle, you may also hear the sound of water filling the drum, the swishing of clothes in the water, and the occasional spin cycle. Don’t be alarmed; these are all normal sounds that indicate your washer is doing its job.
By closing the door, initiating the wash cycle correctly, and monitoring the progress, you’re well on your way to clean and fresh laundry. In the next step, we’ll cover how to safely remove the clothes from the washer.
Step 6: Removing the clothes
Once the wash cycle is complete, it’s time to remove your freshly cleaned laundry from the Kenmore washer. Follow these steps to ensure a smooth and hassle-free process:
Read also: 9 Unbelievable Kenmore Washer For 2025
Pausing or stopping mid-cycle (if necessary)
Sometimes, you may need to pause or stop the wash cycle before it’s completed. If you find that you need to make any adjustments or add/remove items mid-cycle, consult your washer’s manual for specific instructions on how to pause or stop the cycle safely.
It’s important to note that not all Kenmore washers allow for mid-cycle pauses or stops. If it’s not recommended by the manufacturer, it’s best to let the cycle run its course before removing your clothes.
Opening the door safely
Before opening the washer door, give it a few moments to unlock. Many Kenmore washers have a safety feature that prevents the door from being opened immediately after the cycle is finished. This feature is to protect you from hot water or spinning motion that may still be present in the drum.
Once the door unlocks, you can proceed to open it. Handle the door with care and ensure your hands are dry to prevent any slips or accidents. Open the door slowly to allow any remaining steam to escape.
Removing the laundry
Now that the door is open, you can safely remove your laundry from the Kenmore washer. Start by taking out larger items, like towels or bed sheets, and place them in a laundry basket or a clean surface. Then, carefully remove smaller items, such as clothes or delicates, ensuring they are free from any tangled or twisted pieces.
Give the inside of the drum a quick check to make sure there are no clothes left behind or stuck to the sides. If you find any leftover items, remove them before closing the washer door.
By pausing or stopping the cycle as needed, opening the door safely, and removing your laundry with care, you’ll complete this step with ease. In the final step, we’ll discuss the importance of cleaning your Kenmore washer regularly.
Step 7: Cleaning the washer
Regular maintenance and cleaning of your Kenmore washer are essential to keep it running efficiently and ensure the longevity of its performance. Let’s explore the key aspects of cleaning your washer:
Read more: How To Open Kenmore Stacked Washer Dryer
Regular maintenance
Performing regular maintenance tasks will help prevent any build-up of dirt, grime, or residue in your washer. Check your Kenmore washer’s user manual for specific instructions on maintenance tasks as they may vary based on the model.
Some common maintenance tasks include cleaning the exterior surface of the washer with a soft, damp cloth, checking and cleaning the drain pump filter, and inspecting the hoses and connections for any leaks or damage. Follow the manufacturer’s guidelines to ensure you’re performing these tasks correctly.
Cleaning the drum and detergent dispenser
Over time, dirt, detergent residue, and fabric softener can accumulate in the drum and detergent dispenser of your Kenmore washer. Cleaning these areas regularly is important to maintain optimal performance and prevent any unpleasant odors.
To clean the drum, you can run a self-clean cycle if your washer has that feature. Alternatively, you can create a cleaning solution using equal parts water and vinegar. Pour the solution into the drum and run a hot water cycle with no clothes inside. This will help remove any build-up and freshen the drum.
For the detergent dispenser, remove it from the washer according to the user manual instructions. Rinse it thoroughly with warm water to remove any residue. If there are stubborn stains or build-up, you can use a soft brush or toothbrush to gently scrub the dispenser. Once clean, dry it thoroughly and reinsert it into the washer.
By performing regular maintenance tasks and keeping the drum and detergent dispenser clean, you’ll help ensure the longevity of your Kenmore washer and maintain optimal cleaning performance. With clean clothes and a well-maintained machine, laundry day will be a breeze!
Congratulations! You have now completed the seven steps to using your Kenmore washer effectively. By following these guidelines, you can enjoy clean and fresh laundry for years to come. Happy washing!
Conclusion
Using your Kenmore washer doesn’t have to be a daunting task. With the proper knowledge and guidance, you can easily set up, operate, and maintain your washer for optimal performance. By following the seven steps outlined in this article, you’ll be able to achieve clean, fresh, and well-maintained laundry every time.
Starting with setting up the washer, including connecting the power and water supply, and adjusting the leveling feet, you’ll ensure that your washer is ready for action. Sorting and loading the clothes correctly will help maintain the quality of your garments and ensure efficient washing.
The selection of the right wash cycle and additional settings like temperature and spin speed will allow you to customize the wash based on your specific laundry needs. Adding the appropriate amount of detergent and any necessary additives is crucial for effective cleaning results.
Once the wash cycle is initiated, it’s important to monitor the progress and ensure that the machine is running smoothly. When the cycle is complete, safely remove your laundry, pausing or stopping mid-cycle if necessary, and open the door with caution.
Regular maintenance, including cleaning the drum and detergent dispenser, will help keep your Kenmore washer in top shape. By performing these tasks and keeping your machine clean, you’ll enjoy efficient and reliable performance for years to come.
Remember, always consult your washer’s user manual for specific instructions and recommendations. Each Kenmore washer model may have unique features and requirements.
With this comprehensive guide, you’re now equipped with the knowledge and understanding to make the most of your Kenmore washer. So, let’s get started on your laundry journey and enjoy the convenience and efficiency that your Kenmore washer brings to your home!
Frequently Asked Questions about Kenmore Washer How To Use
Was this page helpful?
At Storables.com, we guarantee accurate and reliable information. Our content, validated by Expert Board Contributors, is crafted following stringent Editorial Policies. We're committed to providing you with well-researched, expert-backed insights for all your informational needs.


0 thoughts on “Kenmore Washer How To Use”