Articles
How To Use VEVOR Pizza Oven
Modified: August 27, 2024
Learn how to properly use the VEVOR Pizza Oven with our informative articles. Discover tips and techniques to achieve delicious, restaurant-quality pizza at home.
(Many of the links in this article redirect to a specific reviewed product. Your purchase of these products through affiliate links helps to generate commission for Storables.com, at no extra cost. Learn more)
Introduction
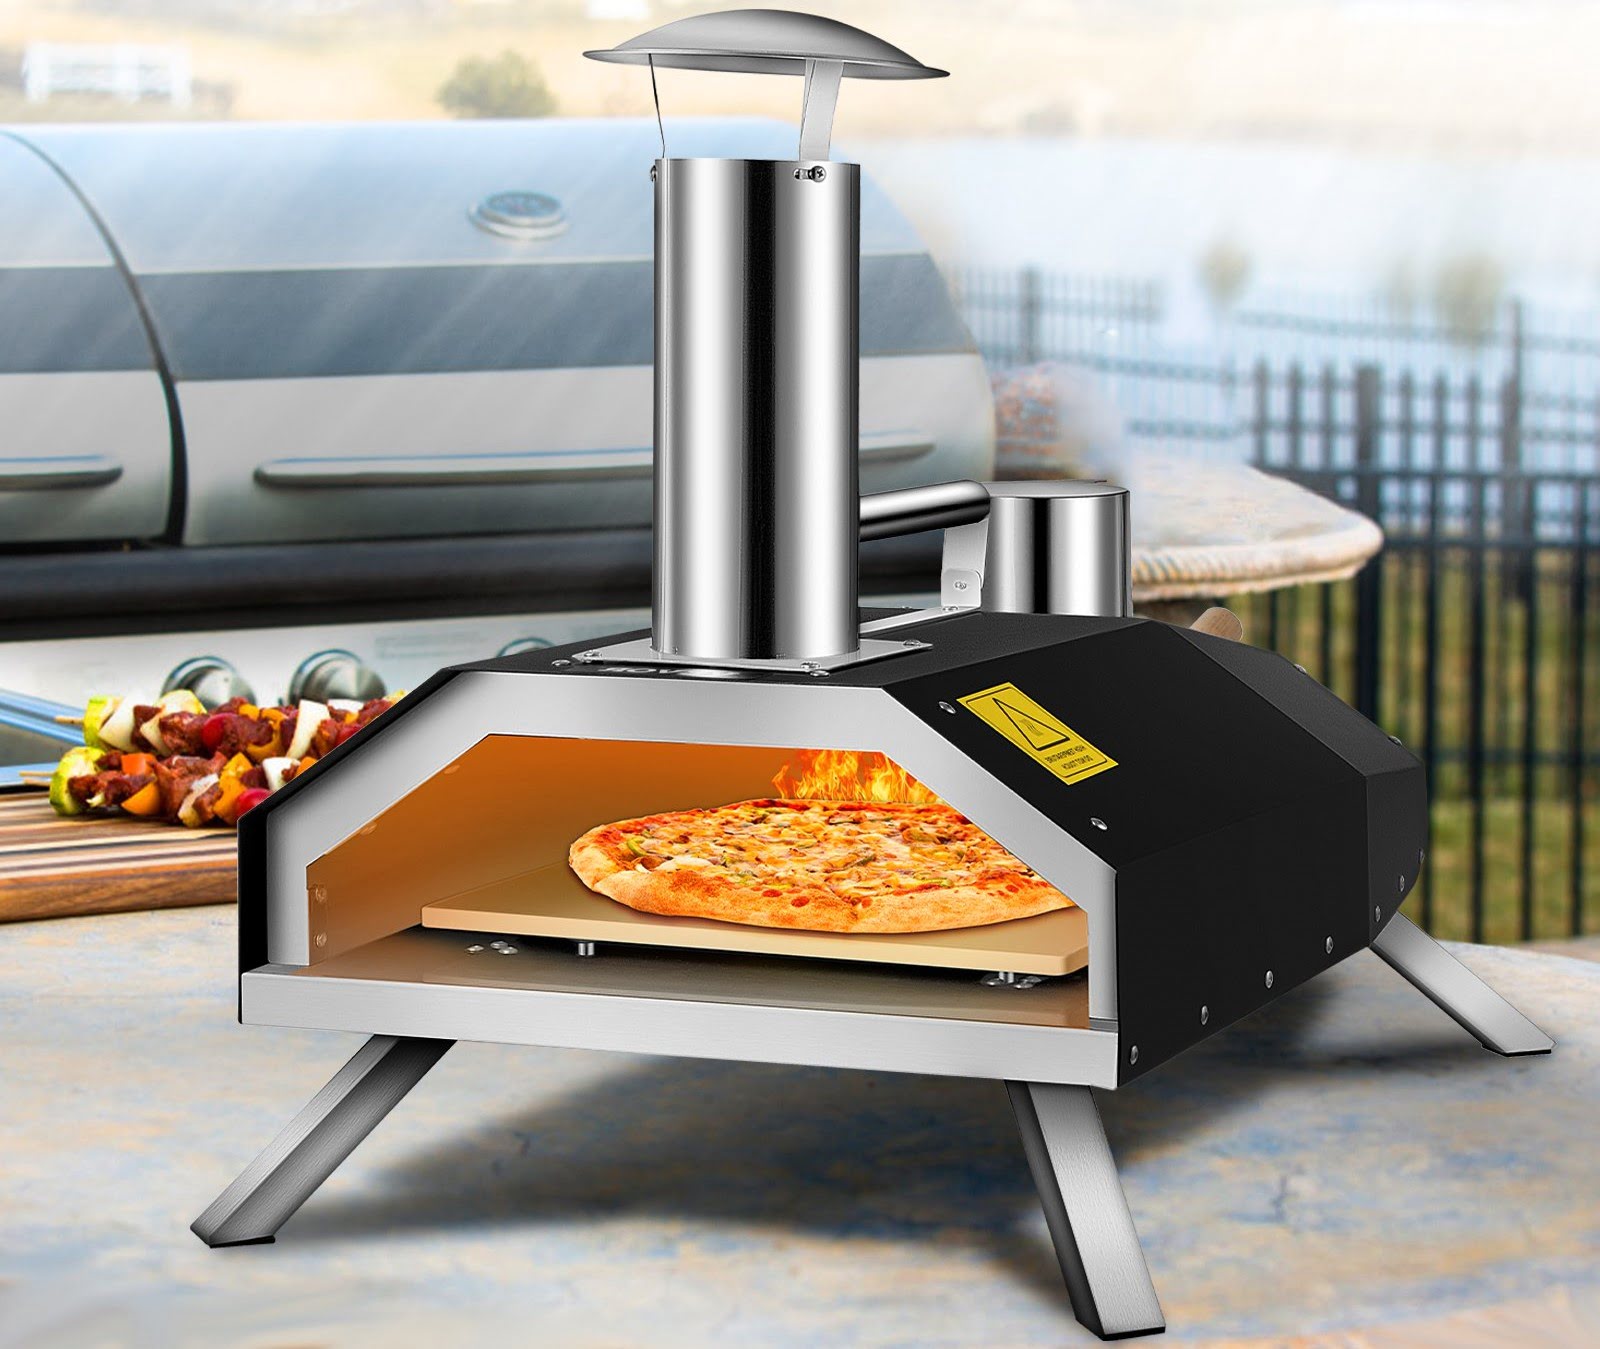
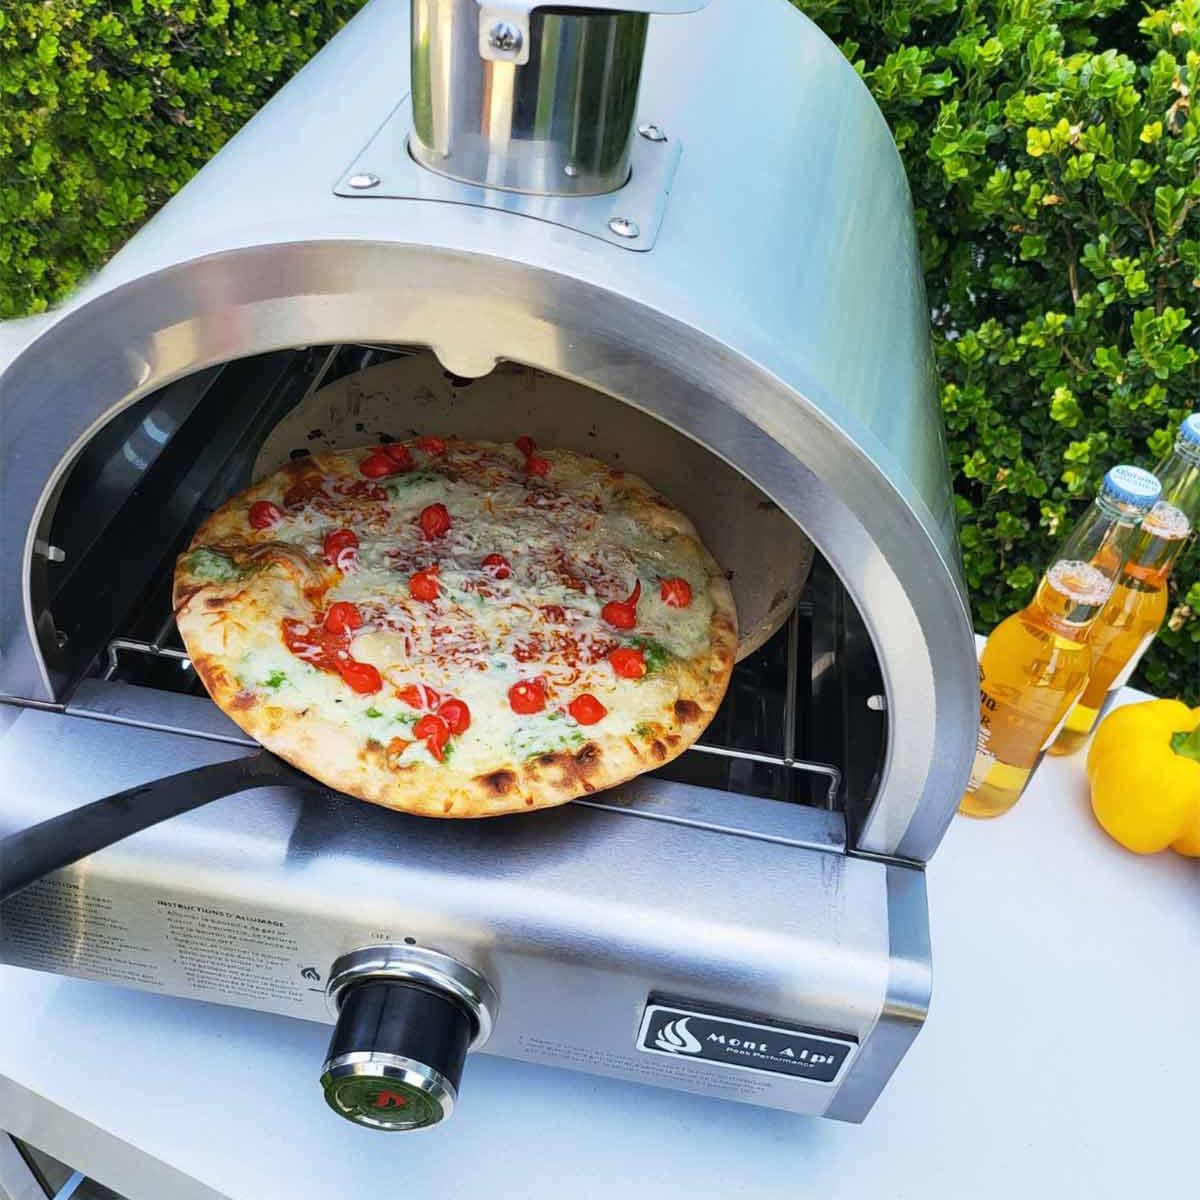
Welcome to the world of homemade pizza with the VEVOR Pizza Oven! Whether you’re a pizza enthusiast or simply looking to switch up your culinary skills, this versatile oven offers a convenient and efficient way to bake delicious pizzas in the comfort of your own home. With its compact design and user-friendly features, the VEVOR Pizza Oven is a game-changer for pizza lovers everywhere.
With this comprehensive guide, we will walk you through the essential steps of using the VEVOR Pizza Oven, from setting it up to mastering the art of pizza-making. We’ll cover safety precautions, preheating techniques, dough preparation tips, adding toppings, and monitoring the cooking process. Additionally, we’ll provide you with cleaning and maintenance tips to keep your pizza oven in top-notch condition.
Before we dive into the specifics, it’s important to familiarize yourself with the VEVOR Pizza Oven’s basic components. This countertop appliance typically consists of a sturdy stainless steel housing that encloses the heating elements and a temperature control knob. Some models also feature a viewing window, a timer, and adjustable racks for greater versatility.
Now, let’s explore the exciting world of pizza-making with the VEVOR Pizza Oven. Not only will you enjoy the mouthwatering flavors of homemade pizza, but you’ll also impress your family and friends with your newfound culinary skills. So, roll up your sleeves, gather your favorite ingredients, and let’s get started!
Key Takeaways:
- Master the art of homemade pizza-making with the VEVOR Pizza Oven by following safety precautions, setting up the oven, preheating effectively, and adding mouthwatering toppings. Embrace the joy of creating delicious pizzas in the comfort of your home!
- Ensure the longevity and optimal performance of your VEVOR Pizza Oven by practicing regular cleaning and maintenance. Troubleshoot common issues with confidence and embark on a flavorful pizza-making journey filled with creativity and culinary delight!
Read more: How To Use Roccbox Pizza Oven
Safety Precautions
When using the VEVOR Pizza Oven, it’s important to prioritize safety to ensure a worry-free cooking experience. Here are some key safety precautions to keep in mind:
- Read the Instruction Manual: Before using the VEVOR Pizza Oven, carefully read the instruction manual provided by the manufacturer. Familiarize yourself with the oven’s features, operating instructions, and safety guidelines.
- Keep Children and Pets Away: When operating the pizza oven, ensure that children and pets are kept at a safe distance. The oven reaches high temperatures, posing a burn risk, and the exterior may become hot during use.
- Use in a Well-Ventilated Area: To prevent the build-up of smoke and odors, make sure to use the VEVOR Pizza Oven in a well-ventilated area. Open windows or use a kitchen hood to improve air circulation.
- Avoid Contact with Heating Elements: Exercise caution when placing and removing pizzas from the oven to avoid accidental burns. Use oven mitts or heat-resistant gloves to handle hot trays or racks.
- Do Not Overcrowd the Oven: To ensure even cooking and efficient airflow, avoid overcrowding the oven with too many pizza trays or dishes. Leave enough space between each item for proper heat circulation.
- Do Not Leave Unattended: It is crucial to never leave the VEVOR Pizza Oven unattended while in use. Constantly monitor the cooking process to prevent any mishaps or overcooking.
- Follow Recommended Temperature and Time Guidelines: Refer to the recipe or package instructions for recommended cooking temperatures and times. Cooking at temperatures higher or lower than recommended may affect the final result of your pizza.
- Disconnect from Power Source: After use, make sure to disconnect the pizza oven from the power source. This will prevent any potential accidents or risks of electrical mishaps.
- Clean Regularly: Regular cleaning and maintenance of the VEVOR Pizza Oven are essential for its optimal performance and longevity. Follow the cleaning instructions in the manual to keep the oven clean and free from any leftover food debris.
By adhering to these safety precautions, you can enjoy a safe and enjoyable pizza-making experience with your VEVOR Pizza Oven. Now that we have covered the safety guidelines, let’s move on to setting up the oven for use.
Setting Up the VEVOR Pizza Oven
Before you begin using your VEVOR Pizza Oven, it’s important to properly set it up for optimum performance. Follow these steps to ensure a seamless setup process:
- Choose a Suitable Location: Select a sturdy and level surface in your kitchen or outdoor area to place the pizza oven. Ensure there is enough space around the oven for proper ventilation.
- Unpack the Oven: Carefully remove the VEVOR Pizza Oven from its packaging, making sure to remove any protective covers or tapes.
- Inspect for Damage: Take a moment to inspect the oven for any signs of damage or defects. If you notice any issues, contact the manufacturer or retailer for assistance.
- Assemble the Oven: If the oven requires assembly, follow the instructions provided in the manual to assemble the various components. This usually involves attaching the handles, racks, or other accessories as needed.
- Plug in the Oven: Locate a nearby electrical outlet and plug the pizza oven into it. Ensure that the outlet is compatible with the oven’s power requirements.
- Preheat the Oven: Before using the oven, it’s important to preheat it to the desired temperature. This helps ensure that the pizza cooks evenly and thoroughly.
- Adjust the Temperature: Use the temperature control knob on the oven to set the desired cooking temperature. Refer to the recipe or package instructions for the recommended temperature.
- Allow Preheating Time: Depending on the oven’s heating capacity, it may take a few minutes to reach the desired temperature. Allow sufficient preheating time to ensure optimal cooking results.
Once you have completed the setup process, your VEVOR Pizza Oven is ready to use. In the next sections, we will guide you through the process of preheating the oven and preparing the pizza dough. Get ready to embark on a flavorful pizza-making adventure!
Preheating the Oven
Preheating the VEVOR Pizza Oven is a crucial step to ensure that your pizzas cook evenly and achieve that perfect golden crust. Follow these steps to effectively preheat your oven:
- Check the Recipe or Package Instructions: Refer to the recipe you are using or the instructions on the pizza dough package to find the recommended preheating temperature for your specific pizza.
- Turn on the Oven: Locate the power switch or button on the pizza oven and turn it on. You should hear a sound indicating that the oven is powered on.
- Adjust the Temperature: Use the temperature control knob to set the desired preheating temperature. Rotate the knob to increase or decrease the temperature as needed.
- Allow Sufficient Preheating Time: It may take a few minutes for the oven to reach the desired temperature. Refer to the recipe or package instructions to determine the duration of the preheating process.
- Monitor the Oven Temperature: Some pizza ovens come with a built-in temperature indicator or display. Keep an eye on the display or use an external oven thermometer to ensure that the oven reaches the desired preheating temperature.
- Preheat with the Door Closed: For optimal heat retention, keep the oven door closed during the preheating process. This helps maintain a consistent temperature inside the oven.
- Test the Heat Distribution: Before placing the pizza in the oven, it’s a good idea to quickly open the door and feel for any hot or cold spots. This will give you an idea of how the heat is distributed inside the oven.
- Wait for the Preheating Indicator: Some pizza ovens come with a preheating indicator that notifies you when the oven has reached the desired temperature. Look out for any audible signals or visual cues that indicate the oven is ready.
Once you have preheated the VEVOR Pizza Oven to the recommended temperature, you’re ready to start preparing the pizza dough and adding your favorite toppings. The preheating process ensures that the oven is hot enough to cook the pizza thoroughly and achieve that delicious crispy crust. Let’s move on to the next steps in our pizza-making journey!
Preparing the Pizza Dough
Now that your VEVOR Pizza Oven is preheated and ready to go, it’s time to prepare the pizza dough. While you can use store-bought dough for convenience, making your own dough from scratch allows you to customize the taste and texture of your pizza crust. Here’s a step-by-step guide to preparing the pizza dough:
- Gather Ingredients: Depending on the recipe you choose, the basic ingredients for pizza dough usually include flour, water, yeast, salt, and olive oil. Ensure you have all the ingredients ready before you start.
- Combine Dry Ingredients: In a mixing bowl, whisk together the flour and salt. This helps distribute the salt evenly throughout the dough.
- Activate the Yeast: If you’re using active dry yeast, activate it by mixing it with warm water and a pinch of sugar. Allow it to sit for a few minutes until it becomes frothy and bubbly.
- Add in the Wet Ingredients: Create a well in the center of the dry ingredients and pour in the yeast mixture and olive oil. Slowly combine the ingredients with a spatula or your hands until a shaggy dough forms.
- Knead the Dough: Transfer the dough to a floured surface and knead it for about 5-10 minutes until it becomes smooth and elastic. This helps develop the gluten in the dough, resulting in a chewy texture.
- Let it Rest: Place the dough in a lightly oiled bowl and cover it with a clean kitchen towel or plastic wrap. Let it rise in a warm, draft-free area for about 1-2 hours, or until it doubles in size.
- Punch Down and Divide: Once the dough has doubled in size, gently punch it down to release the air pockets. Divide the dough into smaller portions, depending on the desired size of your pizzas.
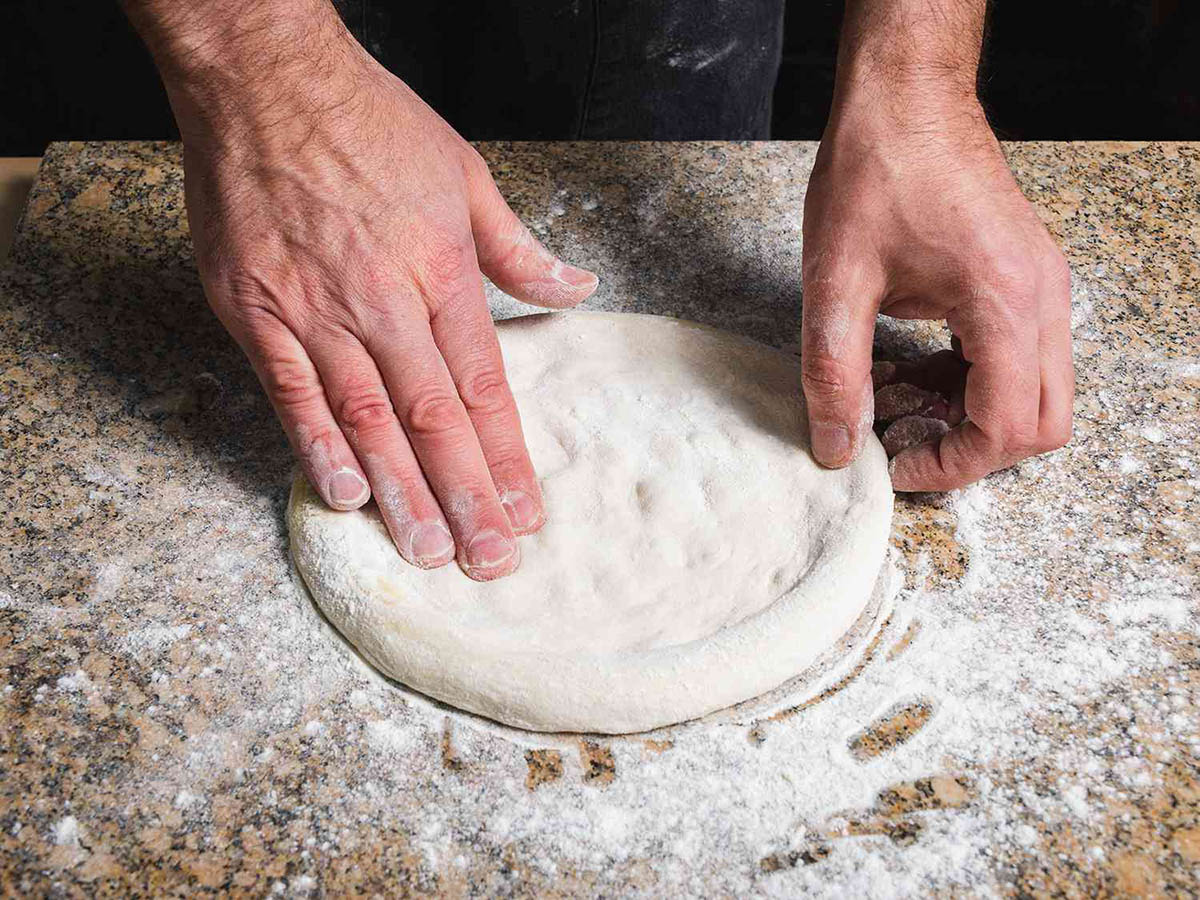
- Shape the Dough: On a lightly floured surface, take one portion of the dough and shape it into a round ball. Use your hands or a rolling pin to flatten and stretch the dough into your desired pizza shape.
- Transfer to a Pizza Peel: Dust a pizza peel or a flat surface with flour or cornmeal to prevent the dough from sticking. Carefully transfer the shaped dough onto the peel, ready for topping.
Once you’ve prepared the pizza dough, it’s time to get creative with the toppings. From traditional margherita to unique gourmet combinations, the possibilities are endless. In the next section, we’ll explore how to add delicious toppings to your homemade pizza using the VEVOR Pizza Oven.
Read more: How To Use A Charcoal Pizza Oven
Adding Toppings to the Pizza
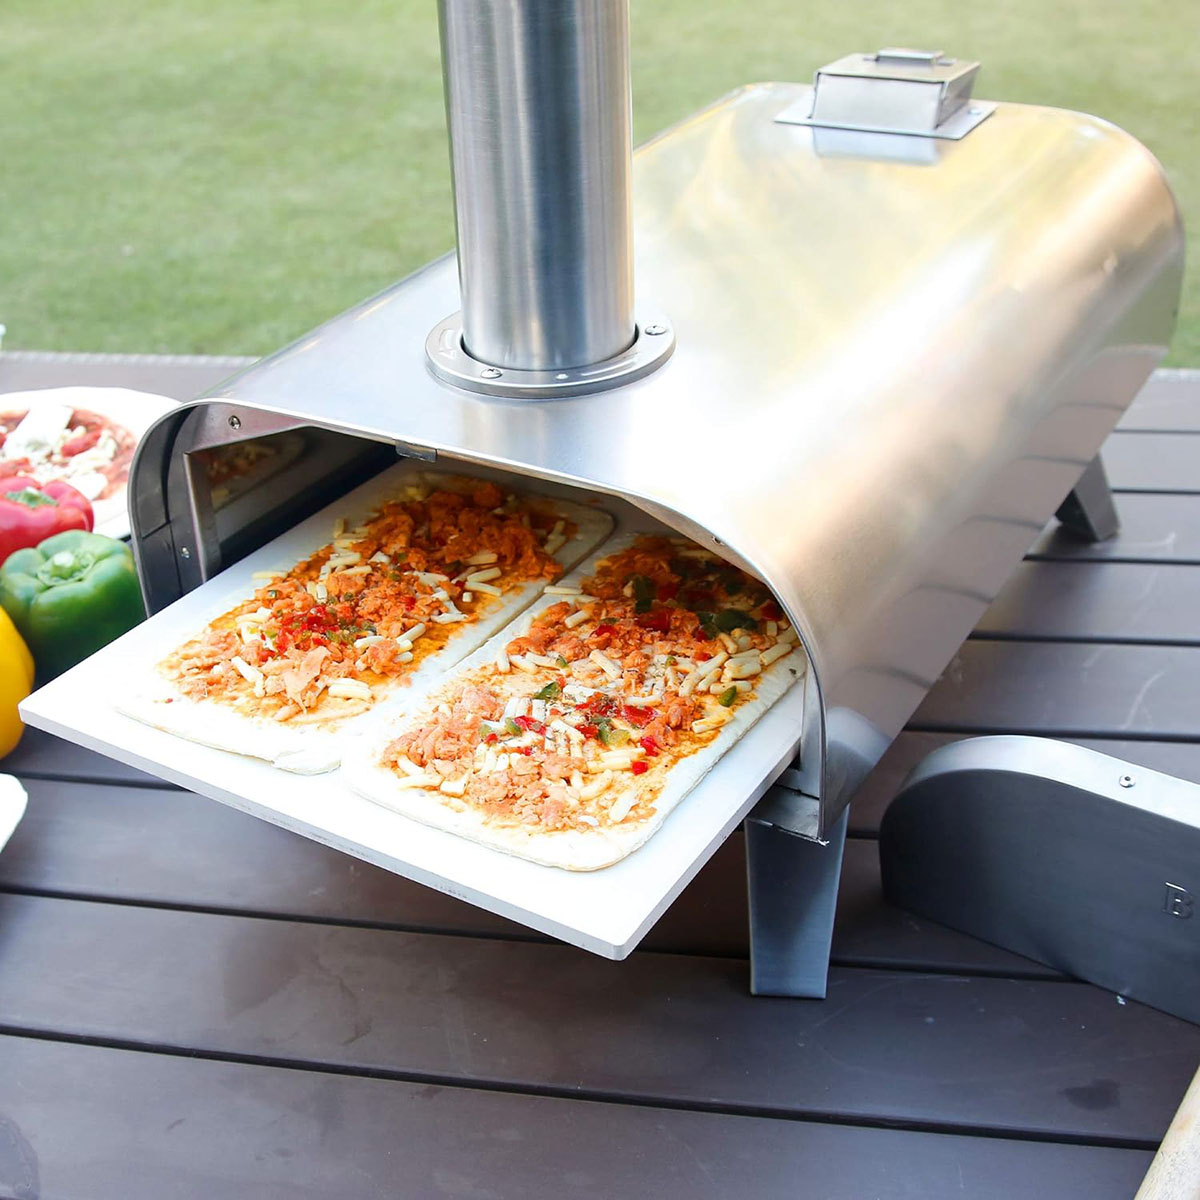
Adding toppings to your pizza is where your creativity can shine. Whether you prefer classic combinations or adventurous flavor profiles, the VEVOR Pizza Oven provides the perfect platform to showcase your culinary skills. Here’s how to add toppings to your pizza:
- Choose Your Sauce: Start by spreading a thin layer of your favorite pizza sauce over the dough. You can use traditional marinara sauce, creamy alfredo sauce, or even experiment with pesto or barbecue sauce.
- Add Cheese: Sprinkle a generous amount of cheese over the sauce. Mozzarella cheese is the classic choice, but you can also mix it up with cheddar, provolone, or a blend of different cheeses for extra flavor.
- Add Protein: If you enjoy meat on your pizza, consider adding cooked and seasoned toppings such as pepperoni, sausage, or grilled chicken. For a vegetarian option, opt for ingredients like tofu, tempeh, or plant-based protein substitutes.
- Vegetable Delights: Enhance the flavors and textures of your pizza by adding a variety of vegetables. From bell peppers and onions to mushrooms, tomatoes, and olives, the options are limitless. Don’t forget fresh herbs like basil or oregano for a burst of freshness.
- Spice it Up: If you like a bit of heat, add some sliced jalapenos or sprinkle some crushed red pepper flakes for that fiery kick. You can also experiment with different herbs, spices, and seasonings to elevate the flavors of your pizza.
- Finish with a Drizzle: For a final touch of flavor, consider drizzling some extra-virgin olive oil, balsamic glaze, or truffle oil over the finished pizza. This adds a delightful richness and enhances the overall taste.
Remember, the key to achieving a perfectly cooked pizza is not to overload it with too many toppings. Be mindful of the quantity and distribute the toppings evenly to ensure even cooking. Assemble your pizza with care and creativity, and get ready to place it in the VEVOR Pizza Oven for a mouthwatering culinary experience.
In the next section, we’ll walk you through the process of placing the pizza in the oven and monitoring the cooking process. Get ready to witness the magic of your homemade pizza coming to life!
When using the VEVOR Pizza Oven, make sure to preheat the oven to the recommended temperature before placing the pizza inside. This will ensure that the pizza cooks evenly and thoroughly.
Placing the Pizza in the Oven
Now that you have prepared your pizza with delicious toppings, it’s time to place it in the VEVOR Pizza Oven for the cooking process. Follow these steps to ensure a seamless transition from prep to oven:
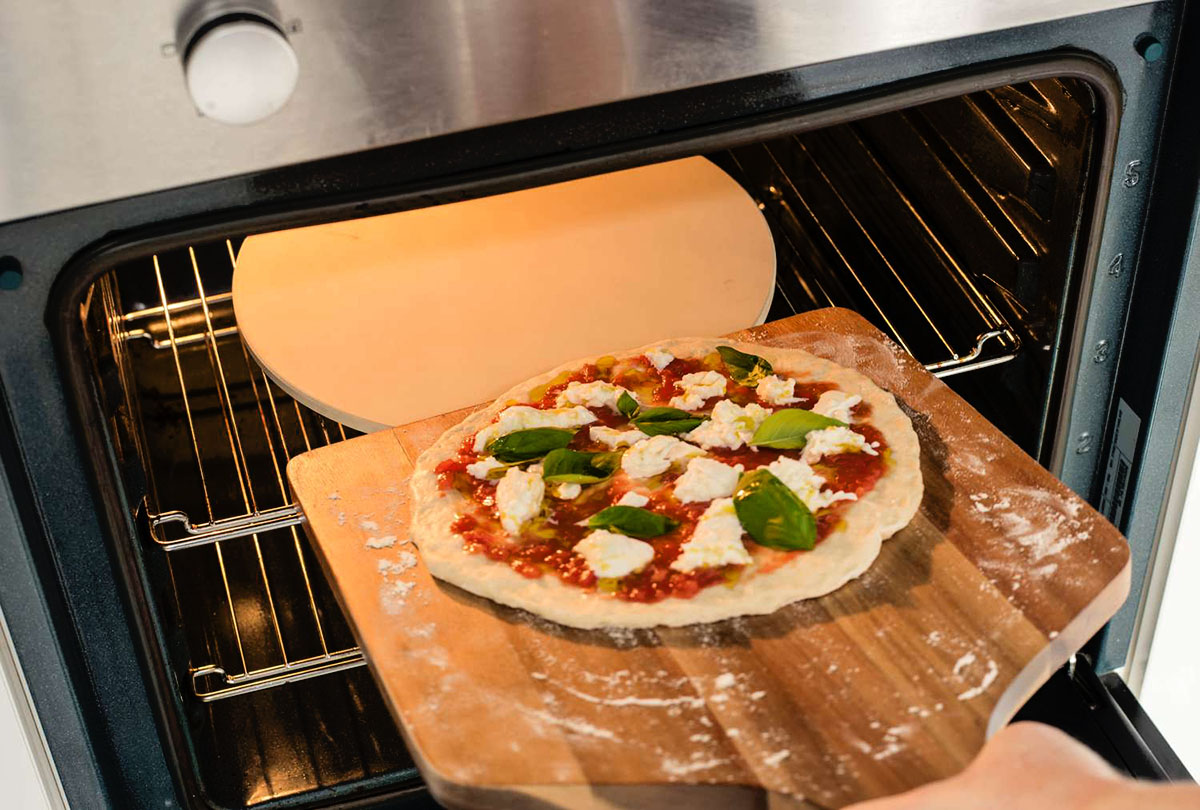
- Prepare a Pizza Stone or Baking Tray: To achieve a crispy crust, it’s recommended to use a pizza stone or a baking tray specifically designed for pizza. Sprinkle the stone or tray with cornmeal or semolina flour to prevent sticking and enhance the crust texture.
- Transfer the Pizza onto the Stone or Tray: Carefully transfer your prepared pizza onto the stone or tray. Be cautious when handling the dough to maintain the shape and avoid any toppings from sliding off.
- Place the Stone or Tray in the Oven: Open the oven door and slide the pizza stone or tray onto one of the racks. Ensure that there is enough space around the pizza for proper heat circulation.
- Close the Oven Door: Close the oven door gently to maintain the heat inside. Avoid opening the door frequently during the cooking process, as this can cause heat loss and affect the overall baking time.
- Set the Cooking Time: Refer to the recipe or guidelines provided for the recommended cooking time. Follow the suggested timing directives, but keep an eye on the pizza through the oven window or by briefly opening the door to check for desired doneness.
- Rotate the Pizza: About halfway through the cooking time, rotate the pizza 180 degrees. This helps ensure even cooking and prevents any hot spots in the oven from affecting the results.
- Monitor the Cooking Process: Keep a watchful eye on the pizza as it cooks. Look for the cheese melting, crust browning, and toppings sizzling. Adjust the cooking time accordingly if the pizza appears to be cooking too quickly or slowly.
- Use Oven Mitts or Gloves: When it’s time to remove the pizza from the oven, remember to use oven mitts or heat-resistant gloves to protect your hands from the hot surfaces.
With these simple steps, you can confidently place your pizza in the VEVOR Pizza Oven and allow it to bake to perfection. The aroma of freshly baked pizza will fill your kitchen, and you’ll soon be ready to enjoy a scrumptious meal. In the next section, we’ll discuss how to monitor the cooking process and determine when your pizza is ready to be taken out of the oven.
Monitoring the Cooking Process
While your pizza is cooking in the VEVOR Pizza Oven, it’s important to monitor the process to ensure that it cooks to your desired level of crispiness and doneness. Follow these steps to effectively monitor the cooking process:
- Observe Through the Oven Window: Many pizza ovens come equipped with a window, allowing you to view the progress of your pizza without opening the oven door. Check on the pizza periodically to see how it’s doing.
- Check Crust Browning: The crust is a good indicator of the pizza’s readiness. As the pizza cooks, the crust will gradually turn golden brown. Keep an eye on the crust color to determine when it’s done to your liking.
- Look for Melting Cheese: The cheese on top of the pizza should begin to melt and become bubbly. A perfectly cooked pizza will have a nicely melted and gooey cheese, but avoid overcooking it until the cheese becomes excessively browned or burnt.
- Assess Toppings’ Cooked State: The toppings on your pizza should be cooked and heated through. Vegetables should appear slightly softened, while meat toppings should be thoroughly cooked. Make sure everything looks delicious before removing the pizza from the oven.
- Use a Thermometer (Optional): If you prefer to be precise about the internal temperature of your pizza, you can use an instant-read food thermometer. Insert it into the center of the pizza to check if it has reached your desired temperature.
As you become more experienced with using the VEVOR Pizza Oven, you will develop a sense of timing and know exactly when your pizza is ready. It’s always better to slightly undercook the pizza initially, as you can always put it back in the oven for an extra minute or two if needed.
Keep in mind that cooking times may vary depending on the thickness of the dough, temperature settings, and the specific ingredients used. Practice and experimentation will help you determine the perfect cooking time for your preferred pizza style.
Once you are satisfied with the pizza’s appearance and doneness, it’s time to remove it from the oven. In the next section, we’ll discuss the crucial steps for safely removing the pizza and getting it ready for serving and indulging in its deliciousness!
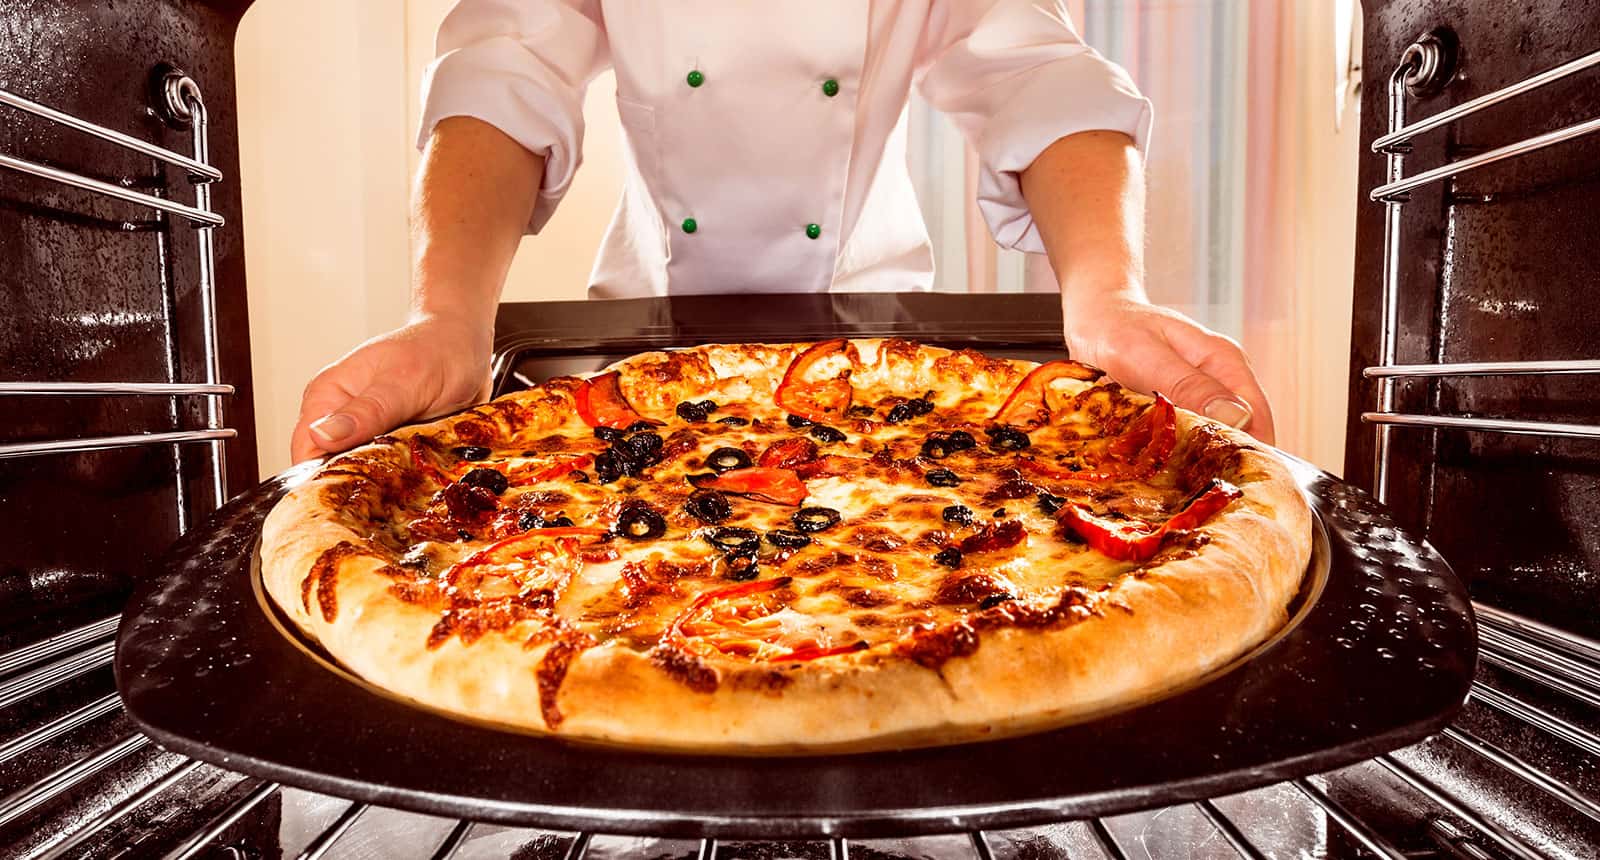
Removing the Pizza from the Oven
Congratulations! Your pizza is cooked to perfection in the VEVOR Pizza Oven. Now, let’s go through the necessary steps to safely remove the pizza and get it ready for devouring:
- Put on Oven Mitts or Heat-Resistant Gloves: Before opening the oven door and handling the hot pizza, make sure to protect your hands by putting on oven mitts or heat-resistant gloves. This will prevent burns or accidents.
- Open the Oven Door Carefully: Gently open the oven door, being cautious of the hot air that may escape. Avoid standing directly in front of the oven to prevent any injuries from the released heat.
- Use a Pizza Peel or Spatula: If you used a pizza peel or baking tray with a handle, carefully slide it under the pizza to lift it off the stone or tray. If not, use a spatula or similar tool to carefully lift the pizza from the surface it was cooking on.
- Transfer to a Cutting Board or Serving Plate: Once you have lifted the pizza off the cooking surface, transfer it to a cutting board or serving plate. Make sure the surface you place the pizza on is heat-resistant and stable.
- Allow the Pizza to Rest: Give the pizza a few minutes to rest before slicing and serving. This allows the cheese and toppings to settle, making it easier to cut and preventing potential burns from hot toppings.
- Slice and Serve: Use a pizza cutter or sharp knife to slice the pizza into your desired portions. Serve it while it’s still warm and enjoy the delectable flavors you’ve created.
- Repeat for Additional Pizzas: If you have more pizzas to bake, repeat the cooking and removing process for each one, allowing the oven to preheat between batches.
Now that you have removed the pizza from the VEVOR Pizza Oven and prepared it for serving, it’s time to savor the deliciousness you’ve created. Gather your loved ones and enjoy the fruits of your pizza-making labor!
Before we conclude, let’s go over some essential cleaning and maintenance tips to keep your VEVOR Pizza Oven in top-notch condition for many more pizza-making adventures.
Read more: How To Use An Outdoor Pizza Oven
Cleaning and Maintenance Tips
Proper cleaning and maintenance of your VEVOR Pizza Oven will not only ensure its longevity but also contribute to optimal performance. Follow these cleaning and maintenance tips to keep your pizza oven in top-notch condition:
- Allow the Oven to Cool: Before cleaning the pizza oven, make sure it has completely cooled down. This will prevent any accidents or burns during the cleaning process.
- Remove Food Debris: Use a soft brush or cloth to remove any food debris or crumbs from the interior of the oven. Pay close attention to the heating elements and any removable parts.
- Clean the Interior: Wipe the interior of the oven with a damp cloth or sponge. For more stubborn stains, use a mild detergent or oven cleaner recommended by the manufacturer. Avoid abrasive cleaners that may damage the oven surface.
- Wash Removable Parts: If your pizza oven comes with removable parts such as trays or racks, wash them with warm soapy water. Rinse and dry them thoroughly before placing them back into the oven.
- Clean the Exterior: Wipe the exterior of the oven with a damp cloth or sponge to remove any grease or dirt. Avoid using harsh chemicals that may damage the surface or leave residue behind.
- Check and Clean Ventilation Openings: Ensure that the ventilation openings of the pizza oven are free from any blockages. Use a brush or a can of compressed air to remove any dust or debris that may accumulate in these areas.
- Perform Regular Maintenance: Regularly inspect the pizza oven for any signs of wear or damage. Check the power cord for any fraying or exposed wires. If you notice any issues, contact the manufacturer or a qualified technician for assistance.
- Store Properly: If you plan to store the pizza oven when not in use, make sure it’s properly cleaned and completely dry. Store it in a cool, dry place, away from moisture and extreme temperatures.
By following these cleaning and maintenance tips, you can ensure that your VEVOR Pizza Oven remains in excellent condition, ready to serve you with delicious homemade pizzas for years to come.
Now that we’ve covered the cleaning and maintenance aspect, let’s address some common issues you may encounter while using the VEVOR Pizza Oven and provide troubleshooting tips to help resolve them.
Troubleshooting Common Issues
While using the VEVOR Pizza Oven, you may encounter some common issues that can be easily resolved with a few troubleshooting techniques. Here are some common problems you might encounter and the corresponding solutions:
- Inconsistent Heating: If you notice uneven heat distribution or inconsistent cooking results, it could be due to a buildup of food debris on the heating elements. Clean the elements thoroughly, ensuring they are free from any obstructions or blockages.
- Burnt Crust: If your pizza crust is consistently burning before the toppings are cooked, try lowering the oven temperature or reducing the cooking time. You can also move the pizza to a lower rack to prevent excessive heat exposure to the crust.
- Soggy or Undercooked Crust: If your crust is turning out soggy or undercooked, it might be because the oven temperature is too low or the cooking time is too short. Adjust the temperature and cooking time accordingly, allowing the pizza to cook for a longer duration if needed.
- Pizza Sticking to the Stone or Tray: If your pizza is sticking to the cooking surface, generously sprinkle cornmeal or semolina flour on the stone or tray before placing the pizza on it. This creates a barrier, preventing the dough from sticking while enhancing the crust texture.
- Excessive Smoke: Excessive smoke can result from excess grease or oil from toppings dripping onto the heating elements. Make sure to use moderate amounts of oil or grease and avoid overloading the pizza with heavy or greasy toppings.
- Oven Not Powering On: If your pizza oven is not turning on, check if it is properly plugged into a working electrical outlet. Ensure that the outlet is providing power by testing it with another device. If the issue persists, contact the manufacturer or a professional for assistance.
- Uneven Cooking: If you notice that certain areas of the pizza are cooking faster than others, try rotating the pizza halfway through the cooking process. This allows for even heat distribution and helps avoid any potential hot spots.
If you encounter any other issues or concerns with your VEVOR Pizza Oven, refer to the instruction manual provided by the manufacturer. It may contain additional troubleshooting tips specific to your model. If the problem persists, contacting customer support or seeking professional assistance is recommended.
With these troubleshooting techniques in mind, you’ll be better equipped to tackle any issues that may arise during your pizza-making adventures with the VEVOR Pizza Oven.
As we conclude this comprehensive guide, we hope that you feel empowered and excited to make delicious homemade pizzas using your VEVOR Pizza Oven. Get creative with your toppings, experiment with different flavors, and enjoy the delightful experience of crafting your own perfect pizza!
Conclusion
Congratulations! You have reached the end of this comprehensive guide on how to use the VEVOR Pizza Oven to create mouthwatering homemade pizzas. Armed with the knowledge of safety precautions, setup procedures, preheating techniques, dough preparation, adding toppings, and monitoring the cooking process, you are now ready to embark on your pizza-making journey.
The VEVOR Pizza Oven offers a convenient and efficient way to indulge in the flavors and aromas of freshly baked pizza from the comfort of your own home. With its compact design, user-friendly features, and versatility, this countertop appliance is a game-changer for pizza enthusiasts and cooking enthusiasts alike.
Remember, safety should always be a priority when using any kitchen appliance. Familiarize yourself with the manufacturer’s instructions and adhere to the recommended guidelines. Keep children and pets away from the pizza oven and use oven mitts or heat-resistant gloves to protect yourself from burns.
From preheating the oven to preparing the pizza dough, adding delicious toppings, and finally removing the pizza from the oven, each step is essential in creating a delectable culinary masterpiece. The VEVOR Pizza Oven allows you to unleash your creativity, experiment with flavors, and wow your loved ones with homemade pizzas that rival those from a pizzeria.
Regular cleaning and maintenance of the pizza oven will ensure its optimal performance and longevity. Follow the provided tips for cleaning the oven’s interior and exterior, and properly store it when not in use. Troubleshooting common issues such as inconsistent heating or burnt crust will ensure that you can overcome any obstacles that may arise along the way.
Now, armed with this knowledge and the passion for pizza-making, it’s time to let your imagination run wild. Explore different toppings, experiment with sauces and seasonings, and create pizzas that reflect your personal tastes and preferences. Share the joy of homemade pizza with family and friends, and relish in the rewarding experience of bringing people together through the love of good food.
So, roll up your sleeves, gather your ingredients, and let the VEVOR Pizza Oven transport you to a world of delicious flavors and endless possibilities. Get ready to embark on a pizza-making adventure that will delight your taste buds and leave you craving for more. Bon appétit!
Frequently Asked Questions about How To Use VEVOR Pizza Oven
Was this page helpful?
At Storables.com, we guarantee accurate and reliable information. Our content, validated by Expert Board Contributors, is crafted following stringent Editorial Policies. We're committed to providing you with well-researched, expert-backed insights for all your informational needs.


0 thoughts on “How To Use VEVOR Pizza Oven”