Articles
What Goes In A Carpenter Tool Belt
Modified: October 18, 2024
Discover the essential tools every carpenter should have in their tool belt. Read our informative articles for helpful tips and recommendations.
(Many of the links in this article redirect to a specific reviewed product. Your purchase of these products through affiliate links helps to generate commission for Storables.com, at no extra cost. Learn more)
Introduction
A carpenter’s tool belt is an essential accessory that provides easy access to the necessary tools needed for woodworking and construction projects. Whether you are a professional carpenter or a DIY enthusiast, having a well-stocked tool belt can significantly improve your efficiency and productivity on the job site.
In this article, we will explore the must-have tools that should be included in a carpenter’s tool belt. These tools are not only essential for various carpentry tasks but also enable you to tackle a wide range of projects with confidence and precision.
By having these tools at your fingertips, you can save time by eliminating the need to constantly search for tools or make repeated trips to the toolbox. Plus, with all the necessary tools accessible on your waist, you can work more comfortably and maintain a steady workflow throughout your project.
No matter if you are framing walls, installing trim, or working on intricate joinery, having the right tools readily available is crucial. So, without further ado, let’s dive into the essential tools every carpenter should have in their tool belt.
Key Takeaways:
- A well-stocked carpenter’s tool belt, including essential tools like a tape measure, hammer, and safety glasses, enhances efficiency, precision, and safety, contributing to the success of woodworking projects.
- Proper maintenance and care of tools in a carpenter’s tool belt ensure longevity and effectiveness, allowing for continuous achievement of outstanding results with confidence and professionalism.
Read also: 10 Amazing Carpenter Tool Belt for 2025
Essential Tools for a Carpenter Tool Belt
When it comes to building and woodworking projects, a carpenter’s tool belt should contain a variety of essential tools. These tools will not only help you complete your tasks efficiently but also ensure accuracy and precision in your work. Let’s explore each of these tools in detail:
- Tape Measure: A tape measure is a carpenter’s best friend. It allows you to measure and mark dimensions accurately, facilitating precise cuts and installations.
- Pencil or Carpenter’s Pen: Marking your measurements is essential in carpentry. Keep a pencil or carpenter’s pen in your tool belt for marking cuts, jotting down notes, or drawing reference lines.
- Utility Knife: A utility knife is handy for cutting various materials, including drywall, insulation, or opening packaging. Opt for a knife with a retractable blade for safety.
- Chalk Line: A chalk line is used to create straight and level lines over long distances. It is indispensable when marking guidelines for framing, flooring, or tile installations.
- Speed Square: Also known as a rafter square, a speed square assists with making accurate and precise angle measurements. It is ideal for marking and cutting angles in framing and roofing projects.
- Hammer: A carpenter’s tool belt would be incomplete without a hammer. From driving nails to removing them, a hammer is a versatile tool that can handle a variety of tasks.
- Screwdrivers: Both a flathead and a Phillips head screwdriver are essential for carpentry projects. Choose screwdrivers that fit comfortably in your hand and have magnetic tips for easy handling of screws.
- Carpenter’s Pouch: A carpenter’s pouch is a convenient way to carry small tools such as nails, screws, and measuring tapes. Look for a sturdy pouch with multiple pockets to keep your tools organized.
- Nail Puller: Also called a pry bar or a cat’s paw, a nail puller is crucial for removing nails or prying apart materials. It is designed with a curved end to provide leverage when extracting nails.
- Adjustable Wrench: An adjustable wrench is essential for tightening and loosening nuts and bolts of various sizes. It is a versatile tool for plumbing and assembling furniture.
- Level: A level is indispensable for ensuring that surfaces and structures are perfectly horizontal or vertical. Invest in a high-quality, durable level for accurate measurements.
- Nail Set: A nail set is a small tool used to drive nails below the surface of the wood. It is crucial for achieving a clean and professional finish.
- Pry Bar: A pry bar, also known as a crowbar, is useful for removing stubborn nails, prying apart materials, or lifting heavy objects.
- Electrician’s Pliers: Electrician’s pliers, or lineman’s pliers, are versatile tools for cutting, bending, and gripping wires. They are essential when working on electrical installations or repairs.
- Gloves: Protecting your hands is crucial in carpentry. Good-quality work gloves offer increased safety and prevent injury from sharp edges, splinters, or tools.
- Safety Glasses: Safety glasses are an absolute must when working with power tools or performing tasks that may generate debris or dust. They protect your eyes from potential hazards and ensure a safe working environment.
By having these essential tools readily available in your carpenter’s tool belt, you can tackle a wide range of tasks with ease and efficiency. Remember to select high-quality tools that are durable and comfortable to use, as they will withstand the demands of carpentry work and contribute to the overall success of your projects.
Tape Measure
A tape measure is an indispensable tool for any carpenter. It allows you to measure and mark dimensions accurately, ensuring precise cuts and installations. Whether you’re framing a wall, hanging shelves, or building furniture, a tape measure will be your most trusted companion.
When selecting a tape measure, consider the length and width of the tape. Longer tapes, typically measuring 25 feet or more, are ideal for measuring longer distances, while shorter tapes (6 to 12 feet) are handy for smaller projects or measurements in tight spaces. Opt for a tape with a wide and durable blade, as it will stay straight and provide reliable measurements.
Some tape measures also have additional features that can be useful for carpentry tasks. Look for a tape measure with a locking mechanism, allowing you to keep the tape extended without it retracting. This is especially handy when working alone or when measuring larger distances.
Another useful feature is a standout capability, which refers to how far the tape can extend without collapsing. A tape measure with a longer standout will make measuring and marking easier when working alone or in awkward positions.
Additionally, consider the markings on the tape. Look for a tape measure with clear, easy-to-read markings, including both imperial and metric measurements. These markings should be accurate and legible, ensuring precision in your measurements.
Lastly, a good tape measure should be comfortable to use. Look for a tape with a comfortable, nonslip grip and a sturdy case that can withstand the rigors of everyday use. Some tapes have rubberized casings for increased durability and a comfortable feel in your hand.
Remember to take proper care of your tape measure by avoiding excessive bending or dropping as it can affect accuracy. Clean the tape regularly to remove any dirt or debris that may impact readings, and always retract the tape fully into the case to keep it tidy and prevent damage.
A tape measure is an essential tool for every carpenter, and having one in your tool belt will save you time and effort on the job. Invest in a high-quality tape measure that meets your specific needs, and you’ll have a reliable tool for accurate measurements throughout your carpentry projects.
Pencil or Carpenter’s Pen
A pencil or carpenter’s pen is a simple yet indispensable tool for any carpenter. It serves the purpose of marking your measurements and making notations on your materials, ensuring accuracy and precision in your work.
When it comes to pencils, opt for a mechanical pencil with a fine lead. Mechanical pencils allow for precise markings and are convenient as they don’t require sharpening. Ensure that the pencil has a sturdy construction and a comfortable grip for extended use.
If you prefer a traditional pencil, choose one with a quality graphite lead that can create clean and easily visible marks. Keep a pencil sharpener in your tool belt to maintain a sharp point for accurate markings.
In addition to pencils, consider using a carpenter’s pen. Carpenter’s pens are specifically designed for carpentry work, featuring a lead that is both durable and easy to erase. These pens typically have a flat shape, preventing them from rolling away on surfaces when not in use.
Regardless of whether you choose a pencil or a carpenter’s pen, it’s important to have a reliable marking tool that won’t smudge or fade easily. This will ensure that your measurements and reference lines stay visible throughout your project.
When marking measurements, try to make clean and precise lines. Use a straight edge, such as a speed square or a straight board, to ensure your lines are straight and accurate. For longer lines, consider using a chalk line for a straight and visible marking.
In addition to marking measurements, pencils or carpenter’s pens can be used for making notations on your materials. This can include marking cut lines, indicating assembly instructions, or writing notes for future reference. These notations can help you stay organized and minimize mistakes during the construction process.
Remember to keep your pencil or carpenter’s pen sharp and within reach in your tool belt. It’s a small tool, but it plays a crucial role in maintaining accuracy and precision in your carpentry work.
By having a reliable marking tool in your tool belt, you’ll be able to make accurate measurements and markings, ensuring that your carpentry projects are built to perfection.
Utility Knife
A utility knife is an essential tool that every carpenter should have in their tool belt. It’s a versatile cutting tool that can be used for a wide range of tasks, making it invaluable for various woodworking and construction projects.
One of the primary uses of a utility knife is cutting various materials. Whether you’re working with drywall, insulation, cardboard, or even opening packages, a utility knife provides a precise and efficient cutting solution. Its retractable blade allows you to extend and retract the blade as needed, providing safety when not in use.
When selecting a utility knife, choose one with a sturdy and durable construction. Look for a knife with a metal handle that provides a solid grip and can withstand heavy-duty use. Additionally, consider the blade replacement mechanism. Some knives have a simple and quick blade replacement feature, while others require manual changing of the blade.
There are different types of utility knife blades available, each designed for specific purposes. Standard utility blades have a sharp, straight edge, making them ideal for general cutting tasks. Hooked blades have a hooked edge, which allows for easy cutting of materials such as carpet or vinyl flooring. Serrated blades have small teeth on the edge, providing better grip and control when cutting materials like foam or rubber.
When using a utility knife, always prioritize safety. Ensure that the blade is fully retracted when not in use and handle the knife with caution to avoid accidental cuts. Use the blade lock if your knife has one to secure the blade in place during cutting.
Along with cutting materials, a utility knife can also be used for scoring or marking surfaces. By lightly running the blade along a marked line, you create a shallow groove or score. This makes it easier to make precise cuts with other tools or to break materials along the score line.
It’s important to keep your utility knife blade sharp for optimum performance. Dull blades can be dangerous and make cutting more difficult. Replace the blade whenever it becomes dull or damaged to ensure clean and efficient cuts.
Having a utility knife in your tool belt provides you with a versatile cutting tool that is essential for various carpentry tasks. From cutting materials to marking surfaces, this tool will save you time and effort, making your projects more efficient and accurate.
Read more: What Goes In A Tool Chest
Chalk Line
A chalk line is a simple yet indispensable tool for carpenters. It is used to create straight and level lines over long distances, making it an essential tool for framing, flooring, tile installations, and other carpentry projects that require precise measurements.
The chalk line consists of a reel, a line, and powdered chalk. The reel is a small container with a handle that holds the line. The line is typically made of cotton or nylon and is coated with powdered chalk. When pulled taut and snapped against a surface, the line leaves a straight, visible mark.
Using a chalk line is relatively easy. Begin by filling the reel with powdered chalk, ensuring that it is evenly distributed. Next, extend the line to the length you desire, holding it at both ends. Snap the line against the surface, and the chalk will leave a straight and visible mark.
There are a few tips to keep in mind when using a chalk line. First, make sure the line is tightly stretched before snapping it. This will ensure a straight and accurate mark. Additionally, hold the line close to the surface you’re marking to prevent it from sagging or moving, which can result in an uneven line.
It’s important to note that different colored chalks are available, with white and blue being the most common. White chalk is highly visible on dark surfaces, while blue chalk stands out on lighter surfaces. Choose the chalk color that provides the best contrast against the material you are marking.
When choosing a chalk line, look for one with a durable reel and a taut and sturdy line. A durable reel will withstand repeated use and impact, while a taut line will ensure accurate marks. Some chalk lines have a gear or clutch mechanism that allows for easy rewinding and avoiding tangles.
After use, it’s essential to clean and maintain the chalk line properly. Remove any excess chalk and debris from the line and reel, ensuring smooth operation for future uses. Store the chalk line in a dry place to prevent the chalk from clumping or becoming damp.
A chalk line is a valuable tool in a carpenter’s arsenal, allowing for precise and straight markings over long distances. By incorporating a chalk line into your tool belt, you can ensure accuracy and efficiency in your carpentry projects, resulting in professional and polished results.
Speed Square
A speed square, also known as a rafter square, is an essential tool for carpenters and woodworkers. It is a versatile and multifunctional tool that helps with making accurate angle measurements and cutting lines, making it invaluable for framing, roofing, and other carpentry projects.
The speed square is typically made of aluminum or steel and has a triangular shape with various markings and measurements. It features a lip or fence along one side that allows for easy positioning and secure placement against the material being worked on.
One of the most common uses of a speed square is for making precise angle measurements. The square incorporates multiple angles, such as 90 degrees, 45 degrees, and often additional common roof pitches like 6/12 or 8/12. By aligning the square’s lip with the edge of the material, you can mark or cut accurate angles quickly and efficiently.
Another useful feature of the speed square is its ability to work as a saw guide. By lining up the lip of the square along the edge of the material, you can run a circular saw along the square to make straight and precise cuts. This eliminates the need for additional markings or guides, resulting in clean and accurate cuts.
When selecting a speed square, look for one with clear and easy-to-read markings. Ensure that the markings are etched or stamped into the square instead of just printed on, as this will provide better durability. Some speed squares also have extra features like measurement tables, scribe notches, or a level.
It’s important to familiarize yourself with the various features and markings on the speed square. Practice using it to make accurate angle measurements and cuts before incorporating it into your carpentry projects. This will help you gain confidence in its usage and ensure precise results.
Keep your speed square clean and in good condition by wiping off any dirt or debris after use. Store it in a dry place to prevent corrosion or damage to the markings and edges.
A speed square is a must-have tool for carpenters, as it provides accuracy and efficiency in making angle measurements and cutting lines. By incorporating a speed square into your tool belt, you’ll have a versatile and reliable tool that will enhance your carpentry skills and contribute to the success of your projects.
Hammer
A hammer is a timeless and essential tool for carpenters and woodworkers. It is a versatile tool that is used for driving nails, removing nails, and general construction tasks. Whether you’re framing a wall, assembling furniture, or doing trim work, a hammer is a tool that you will reach for time and time again.
When selecting a hammer, consider the weight and handle material. Hammers come in various weights, typically ranging from 16 to 28 ounces. The weight of the hammer should be chosen based on personal preference and the type of work you will be doing. Heavier hammers can provide more driving force, while lighter hammers offer better control and precision.
The handle material is crucial for comfort and durability. Wooden handles are traditional and offer a natural grip, but they may be prone to breaking or splintering over time. Fiberglass and steel handles are more durable and can withstand heavy use without the risk of splintering. Ergonomically designed handles provide a comfortable grip, reducing strain and fatigue during extended use.
Another consideration is the type of hammerhead. The most common hammerhead is the claw hammer, which has a flat striking surface on one side and a claw on the other for removing nails. The curved claw allows you to grip and extract nails efficiently. There are also ball-peen hammers, used for shaping and striking metal, and framing hammers with a straight-claw design, which are perfect for heavy-duty framing and demolition work.
When using a hammer, it’s important to wear safety glasses to protect your eyes from flying debris, and consider wearing gloves to protect your hands from impact and vibrations. Use proper striking technique by aiming for the center of the object and striking with a controlled and firm motion, ensuring accuracy and efficiency.
Maintaining your hammer is essential for its longevity and performance. Regularly clean the hammerhead and handle to remove dirt and debris. Periodically inspect the handle for any signs of damage, such as cracks or splintering, and replace it if necessary. Keep the hammerhead sharp and free of any nicks or dents for optimal driving performance.
A hammer is a classic and indispensable tool in a carpenter’s tool belt. With the right weight, handle material, and hammerhead type, it becomes a trusted companion in numerous woodworking and construction projects, allowing you to drive nails, remove nails, and accomplish various tasks with precision and ease.
Screwdrivers
Screwdrivers are essential tools that every carpenter should have in their tool belt. These versatile tools allow for the tightening and loosening of screws, making them indispensable for a wide range of woodworking and construction projects.
When it comes to screwdrivers, it’s important to have a variety of sizes and types to tackle different screw heads and sizes. The most common types of screwdrivers include flathead and Phillips head screwdrivers.
Flathead screwdrivers have a single, flat blade that fits into the straight slot of a flathead screw. These screwdrivers come in various sizes to match different screw head widths. When using a flathead screwdriver, ensure that the blade matches the width of the screw head to prevent slippage and damage to the screw or surrounding material.
Phillips head screwdrivers feature a cross-shaped tip and are designed to fit into Phillips head screws. These screws are commonly found in many household appliances, electrical devices, and furniture. Phillips head screwdrivers also come in different sizes ranging from 0 to 4, with 0 being the smallest and 4 being the largest.
It’s important to choose screwdrivers with comfortable handles that provide a secure grip. Look for screwdrivers with ergonomic handles, offering better control and reducing hand fatigue during extended use. Some screwdrivers have cushioned or rubberized handles that provide additional comfort and grip.
In addition to flathead and Phillips head screwdrivers, there are specialized screwdrivers for specific screw types, such as Torx, square, or hex. These screwdrivers are used for specific applications and can be valuable additions to your tool belt if you frequently encounter these types of screws.
When using a screwdriver, ensure that the tip fits securely into the screw head. Apply firm, consistent pressure when turning the screwdriver to prevent slippage and maintain control. If you encounter resistance when tightening a screw, avoid using excessive force, as it may damage the screw or strip the threads.
Screwdrivers require regular maintenance to keep them in optimal condition. Inspect the tips for any signs of wear or damage and replace them as needed. Clean the screwdrivers after use to remove any dirt or debris that can affect performance.
Screwdrivers are indispensable tools for carpenters, allowing for the precise installation and removal of screws. With a variety of sizes and types in your tool belt, you’ll be equipped to handle a wide range of carpentry tasks efficiently and effectively.
Read more: How Much Does A Carpenters Tool Belt Weigh
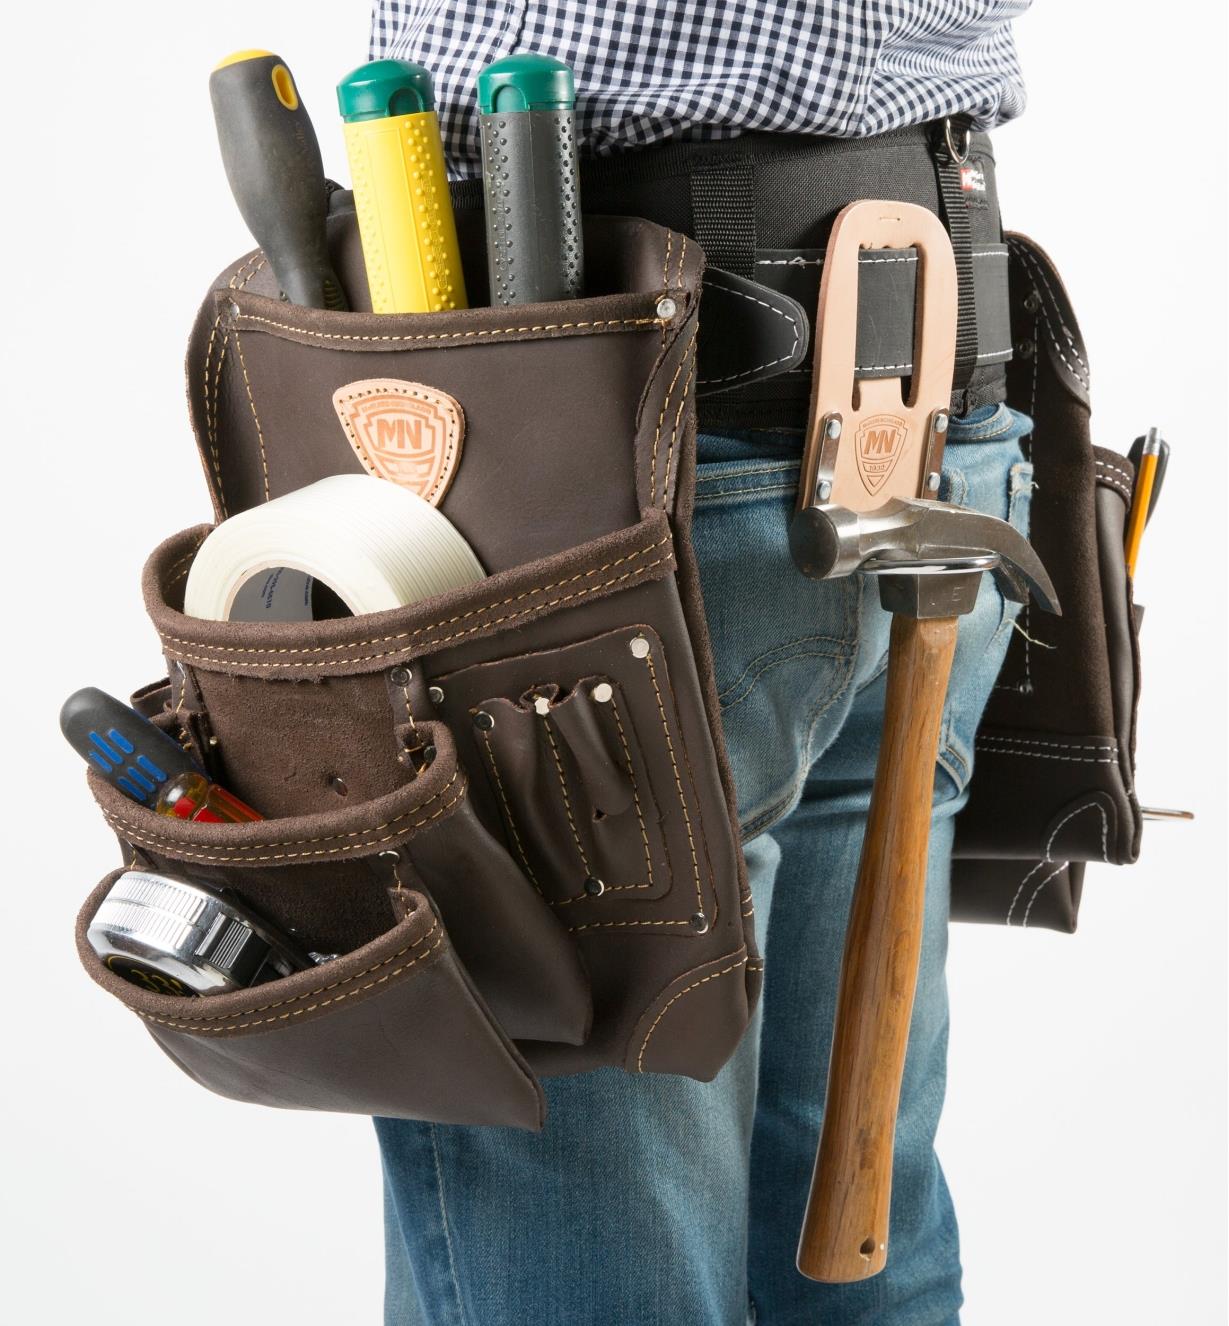
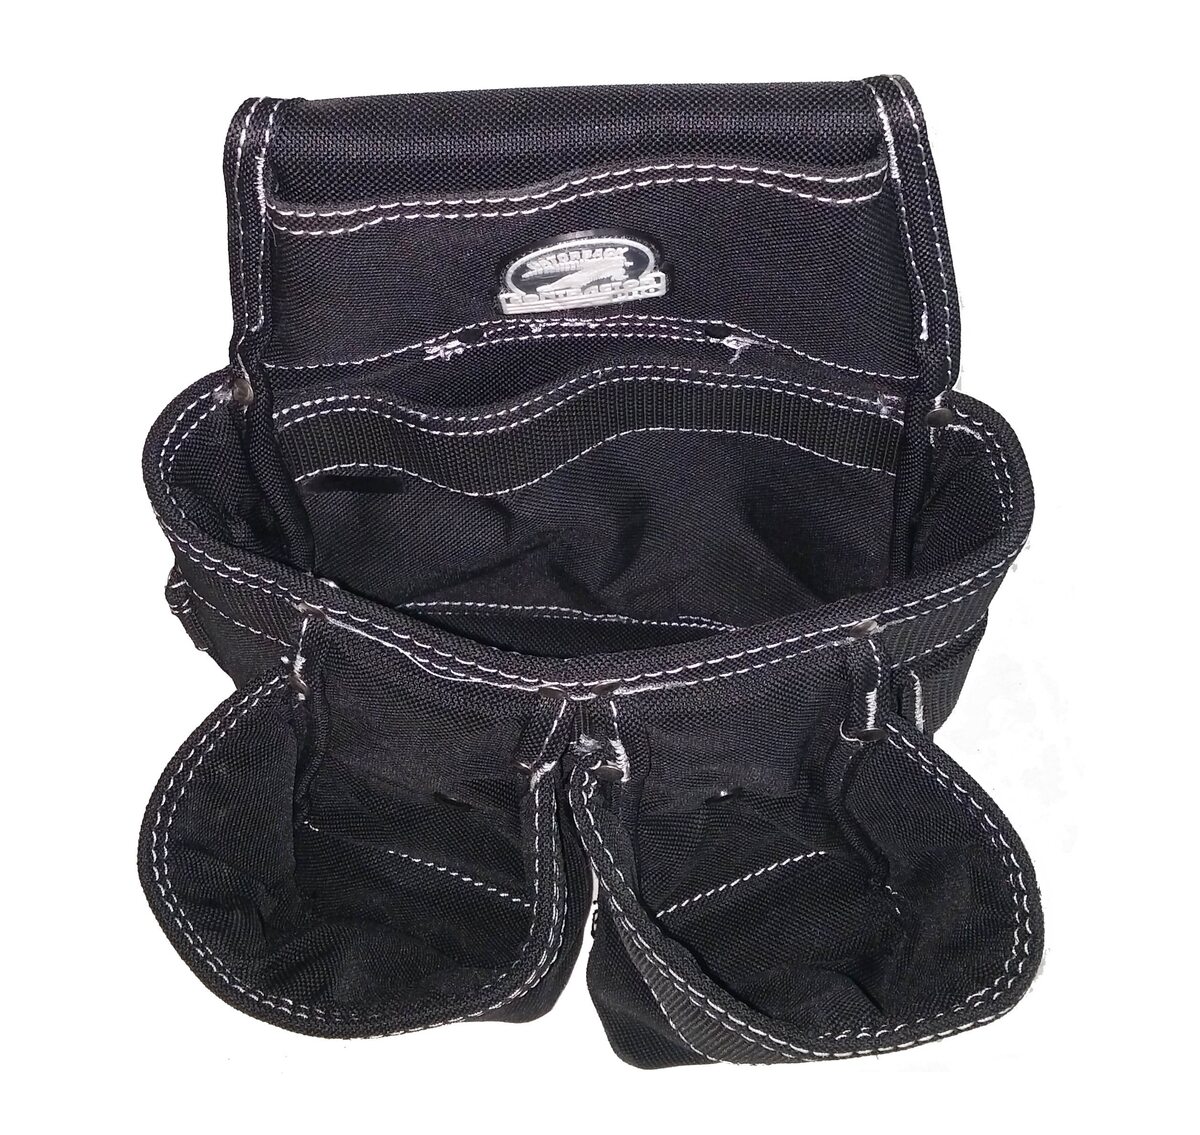
Carpenter’s Pouch
A carpenter’s pouch, also known as a tool pouch or tool belt organizer, is a practical accessory that allows carpenters to carry their essential tools within easy reach. It provides convenient storage and organization, saving you time and effort by eliminating the need to constantly search for tools or make repeated trips to the toolbox.
When choosing a carpenter’s pouch, consider the design and functionality. Look for a sturdy pouch made from durable materials that can withstand the demands of daily use in a construction environment. The pouch should have multiple pockets and compartments of various sizes to accommodate different tools and accessories.
Organizing your tools within the carpenter’s pouch is crucial for efficiency. Arrange your tools based on their size and frequency of use. Keep frequently used tools, such as a tape measure, pencil, or utility knife, in easily accessible pockets for quick retrieval. Place larger tools like hammers or screwdrivers in larger compartments for better stability.
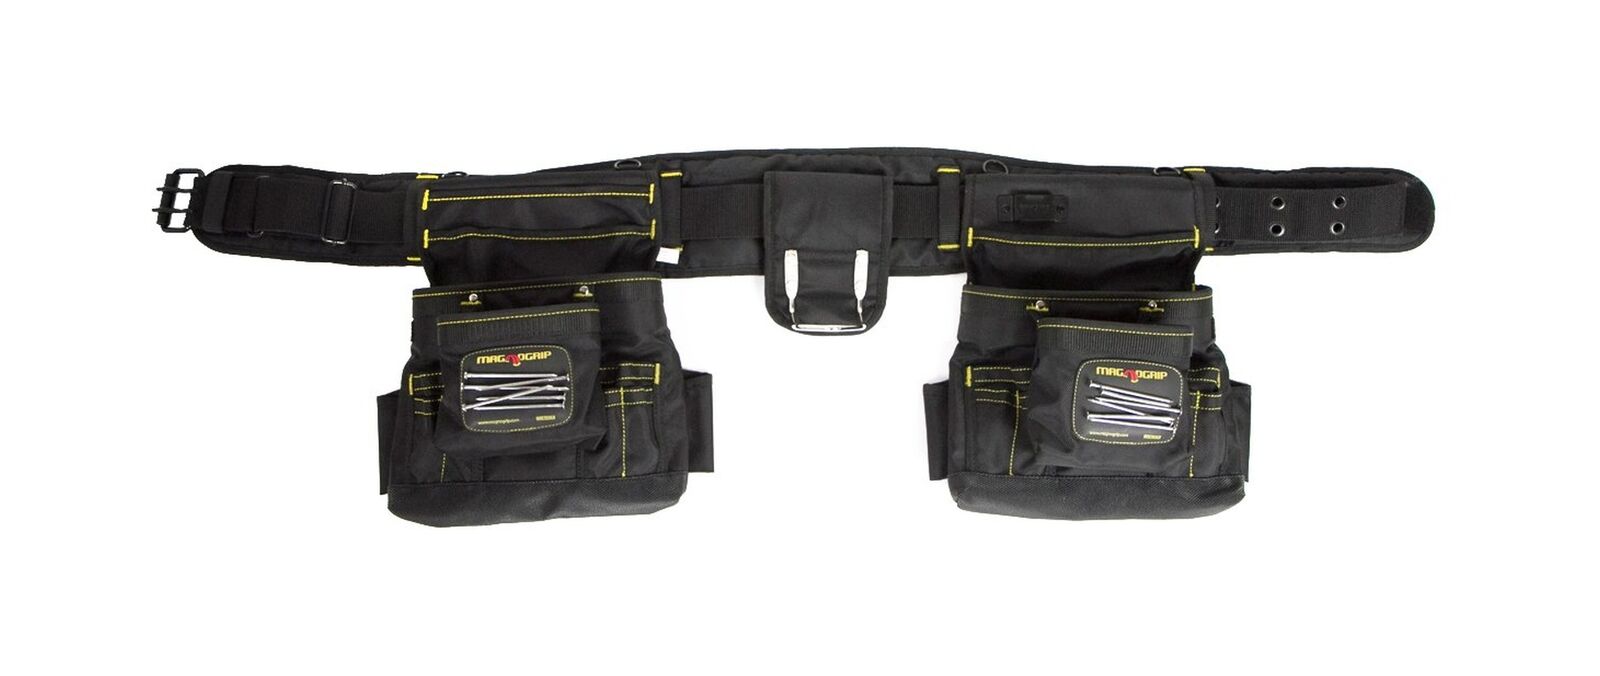
Additionally, choose a carpenter’s pouch that offers a comfortable fit. Look for adjustable straps or belts that can be customized to your waist size, providing a secure and comfortable fit. Padded belts or straps help distribute the weight of the tools evenly, reducing strain and discomfort on your back and hips during extended use.
Ensure that your carpenter’s pouch allows for easy access and secure storage of your tools. Some pouches feature zippered compartments or Velcro closures to keep your tools in place and prevent them from falling out while you’re moving or climbing. Look for a pouch with reinforced stitching and reinforced pockets to withstand the weight and movement of your tools.
Regularly inspect your carpenter’s pouch for any signs of wear or damage. Reinforce any loose stitching, replace worn-out pockets or straps, and clean the pouch as needed to maintain its functionality and durability.
A carpenter’s pouch is an essential tool for keeping your most-used tools organized and easily accessible. By having your tools within arm’s reach, you can work more efficiently and maintain a steady workflow throughout your carpentry project. Invest in a reliable carpenter’s pouch that meets your requirements, and you’ll have a convenient and practical tool organizer at your side.
When choosing tools for a carpenter tool belt, prioritize essential items like a hammer, tape measure, utility knife, screwdriver, and speed square. These versatile tools will cover a wide range of tasks on the job.
Nail Puller
A nail puller, also known as a pry bar or a cat’s paw, is an essential tool for any carpenter. It is specifically designed to extract nails from wood or other materials, making it invaluable for demolition, remodeling, or salvage projects.
A nail puller typically has a curved or V-shaped end with a sturdy handle. The curved end is wedge-shaped and enables you to grip the nail head firmly, providing leverage to remove it from the material. Some nail pullers also have a flat pry bar on the opposite end for additional functionality.
When selecting a nail puller, look for one with a durable construction and a comfortable handle. The tool should be made from high-quality steel that can withstand the pressure and stress of pulling nails. The handle should provide a secure grip and be ergonomically designed to reduce hand fatigue during extended use.
Using a nail puller requires proper technique to ensure effective and safe nail removal. Begin by positioning the curved end of the nail puller under the nail head, ensuring a firm grip. Apply pressure to the handle while securely holding the material to prevent it from splintering or moving as you pull the nail out. Use slow, steady force to avoid damaging the surrounding material or injuring yourself.
A nail puller is not only useful for removing nails, but it can also be employed for other tasks. The flat pry bar end can be used for lifting or prying apart materials, removing trim, or even as a makeshift hammer when needed. This versatility makes it a valuable addition to your carpenter’s tool belt.
Regularly inspect your nail puller for any signs of wear or damage. Check the grip, handle, and curved end to ensure they are still in good condition. Clean the tool after use to remove any debris or particles that may affect its performance.
Having a nail puller in your tool belt allows you to efficiently and safely remove nails during various carpentry projects. It saves time, effort, and potentially costly damage caused by improper nail removal methods. Invest in a high-quality nail puller that fits comfortably in your hand, and you’ll have a reliable tool for extracting nails and tackling demolition or remodeling tasks with ease.
Adjustable Wrench
An adjustable wrench is a versatile tool that every carpenter should have in their tool belt. It is a must-have for plumbing work, furniture assembly, and various carpentry tasks that require tightening or loosening nuts and bolts of different sizes.
An adjustable wrench features a movable jaw that can be adjusted to fit various sizes of nuts and bolts. This flexibility makes it an essential tool for situations where multiple fixed-size wrenches would be impractical or not readily available.
When choosing an adjustable wrench, consider the size range it can accommodate. Look for a wrench that can adjust to the sizes commonly encountered in your work, from small nuts and bolts to larger ones. The jaw should move smoothly and precisely to ensure a proper fit and prevent slipping.
It’s also important to choose an adjustable wrench with a sturdy construction. Look for a wrench made from high-quality steel that can withstand the pressure and torque required for tightening or loosening fasteners. The handle should provide a comfortable grip, allowing for secure and efficient operation.
When using an adjustable wrench, make sure to position the jaw squarely onto the nut or bolt you are working on. Grip the handle firmly and apply even pressure to avoid slipping or damaging the fastener. If possible, position the wrench in a way that provides optimal leverage for easier turning.
An adjustable wrench is a versatile tool that can also be used as a substitute for other wrench types. However, it’s important to note that using an adjustable wrench may not provide the same level of grip or torque as a fixed-size wrench. For situations where precision and high torque are required, using the appropriate dedicated wrench is recommended.
Maintaining your adjustable wrench is essential for its longevity and performance. Regularly clean the wrench after use to remove any dirt or debris that may affect its functionality. Lubricate the moving parts periodically to keep them operating smoothly.
An adjustable wrench is a valuable addition to your carpenter’s tool belt, providing versatility and convenience in various carpentry and construction tasks. By investing in a high-quality adjustable wrench, you’ll always have the right tool on hand to tackle nuts and bolts of different sizes, ensuring efficient and precise fastening operations.
Level
A level is a fundamental tool for carpenters that ensures accuracy and precision in their work. Whether you’re hanging shelves, installing cabinets, or building structures, a level is essential for ensuring that surfaces are perfectly horizontal or vertical.
A level typically consists of a long, straight body with one or more vials filled with liquid and an air bubble. The vials are carefully calibrated to indicate when the surface is level or plumb (vertical). When the bubble is centered between the lines in the vial, it indicates that the surface is level or plumb.
When selecting a level, you have a choice between different lengths, ranging from a small pocket-sized level to longer levels that span several feet. Consider the type of projects you’ll be working on and choose a level that best suits your needs.
It’s important to choose a level with accurate and easy-to-read vials. Look for levels with vials made of high-quality materials and clear, visible markings. Some levels also have additional vials or features, such as a 45-degree vial or a digital display for increased accuracy.
Using a level is straightforward. Place the level on the surface you want to check and adjust it until the bubble is centered between the lines in the vial. Ensure that the level is held firmly against the surface to prevent any gaps or movement that may affect the readings. For longer distances, use a longer level or a series of shorter levels to achieve accurate results.
A level is a versatile tool that can be used in a variety of carpentry applications. Whether you’re installing doors, framing walls, or leveling floors, a level ensures that your work is professional and visually appealing. It helps prevent uneven surfaces, crooked lines, and misaligned structures.
Proper maintenance is important for your level’s accuracy. Store it in a protective case to prevent any accidental damage to the vials. Check the vials periodically for any signs of damage or leakage, and replace them if necessary. Clean the level after use to remove any dirt or debris that may affect the readings.
Having a level in your tool belt is crucial for achieving precise and level surfaces in your carpentry projects. By investing in a high-quality level and utilizing it consistently, you’ll ensure that your work is of the highest quality and meets professional standards.
Read more: What Is A Construction Carpenter
Nail Set
A nail set is a small but essential tool in a carpenter’s tool belt. It is specifically designed for driving nails below the surface of wood, ensuring a clean and professional finish to your carpentry projects.
The nail set typically consists of a steel rod with a flattened tip. The flattened tip is placed on the head of a nail, and with a few taps from a hammer, it drives the nail below the wood surface. This allows you to create a smooth and even surface for woodworking or finishing tasks.
When selecting a nail set, consider the size of the nail heads you will be working with. Nail sets come in different sizes to accommodate various nail head diameters. Choose a nail set that matches the nail sizes you commonly use to achieve the best results.
Using a nail set requires proper technique and precision. To start, position the nail set tip onto the head of the nail. Hold the nail set perpendicular to the wood surface and tap it gently with a hammer. Gradually increase the force of the taps until the nail is driven below the wood surface, without damaging the surrounding material.
One important aspect of using a nail set is controlling the depth at which the nail is set. The goal is to drive the nail just below the surface, without going too deep or leaving it protruding. Practice and experience will help you achieve the desired results consistently.
A nail set is particularly useful when working with finishing nails or when you need to conceal the nail heads for aesthetic reasons. It allows you to create a smooth and even surface, eliminating any visible nail heads that may detract from the final appearance of your project.
Maintaining your nail set is essential for its longevity and usability. Keep it clean and free from any debris or rust. Lubricate the tip occasionally to prevent sticking or dulling.
A nail set is a simple yet valuable tool for achieving a polished and professional finish in your carpentry projects. By having a nail set in your tool belt, you’ll have the ability to drive nails below the surface with precision, enhancing the overall quality and visual appeal of your work.
Pry Bar
A pry bar, also known as a crowbar, is an indispensable tool in a carpenter’s toolkit. It is designed to provide leverage and strength for prying, lifting, and separating materials during construction or demolition projects.
A pry bar typically consists of a long, sturdy steel or iron rod with a flattened end at one or both ends. This flattened end is sometimes curved or angled to provide better grip and control when prying or lifting materials. The opposite end may have a beveled tip or a claw for removing nails.
When choosing a pry bar, consider the length and size that suits your needs. Pry bars come in various lengths, ranging from small, handheld versions to larger, heavy-duty ones. The size and weight of the pry bar should be appropriate for the tasks you’ll be performing and the materials you’ll be working with.
A pry bar is incredibly versatile and can be used in a wide range of carpentry applications. It is ideal for removing baseboards, prying apart boards, lifting heavy objects, or even prying open doors and windows during demolition or renovation projects.
When using a pry bar, remember to prioritize safety and use proper technique. Keep a firm grip on the handle, ensuring that your hands are clear of the area you’re prying. When prying, apply consistent and controlled force to avoid damaging the surrounding materials or injuring yourself.
It’s important to note that using excessive force or prying at the wrong angle can cause damage or splintering to the materials you’re working with. Assess the situation, plan your approach, and execute the prying motion with care and precision.
After using a pry bar, inspect it for any signs of wear or damage. Look for any bent or chipped edges and replace the pry bar if necessary. Keep the pry bar clean and free from debris to ensure its longevity.
A pry bar is an invaluable tool for carpenters, providing the strength and leverage needed to tackle a variety of tasks. By including a pry bar in your tool belt, you’ll be well-equipped to handle any prying or lifting challenges that arise during your carpentry projects.
Electrician’s Pliers
Electrician’s pliers, also known as lineman’s pliers or combination pliers, are versatile tools that are essential for both electricians and carpenters. They are designed to grip, twist, and cut wires, making them invaluable for electrical installations, repairs, and various carpentry tasks.
Electrician’s pliers typically have a combination of features, including a gripping jaw, a cutting edge, and insulated handles. The gripping jaw allows for a secure hold on wires and cables, while the cutting edge provides the ability to cut or strip wires cleanly and efficiently.
When selecting electrician’s pliers, it is important to choose a pair made from high-quality materials. Look for pliers made from durable steel, ensuring they can withstand the rigors of electrical work and heavy-duty use. Insulated handles are a critical safety feature and protect against electrical shock.
The gripping jaw of electrician’s pliers is designed with serrated edges, providing a strong and non-slip grip on wires and cables. This allows you to manipulate and bend wires with precision, ensuring secure connections. The cutting edge is sharp and should be able to cleanly cut various wire gauges, including copper and aluminum.
Electrician’s pliers are not only used for electrical work but are also handy for a variety of carpentry tasks. They can be used for pulling nails, tightening screws or bolts, crimping connectors, and cutting small materials such as nails or screws.
When using electrician’s pliers, ensure that you grip the handles firmly and position the wire or material securely within the jaws of the pliers. Apply even pressure and use a twisting motion when necessary, maintaining control over the wire or material throughout the process.
Always prioritize safety when working with electrician’s pliers. Ensure that the handles are properly insulated and check them regularly for any signs of wear or damage. Wear appropriate personal protective equipment, including insulated gloves, when working with live electrical wires or conducting electrical work.
Maintaining your electrician’s pliers is crucial for their longevity and effectiveness. Clean the pliers regularly to remove any debris or residue that may affect their functionality. Lubricate the joint periodically to keep the pliers operating smoothly.
Electrician’s pliers are versatile and indispensable tools that are essential for carpenters and electricians alike. They provide the ability to grip, twist, and cut wires, making them vital for electrical work and a wide range of carpentry applications. By having electrician’s pliers in your tool belt, you’ll be equipped to handle various tasks with efficiency, precision, and safety.
Gloves
Gloves are a vital part of a carpenter’s toolkit, providing protection and comfort during a wide range of woodworking projects. They safeguard your hands from potential hazards, reduce the risk of injuries, and enhance your overall safety while working.
When selecting gloves for carpentry tasks, choose a pair specifically designed for the job. Look for gloves made from durable materials such as leather, synthetic leather, or heavy-duty fabric. These materials provide excellent resistance against cuts, abrasions, and punctures while maintaining flexibility and dexterity.
The right pair of gloves should fit snugly, yet allow for comfortable movement and flexibility of the fingers. Avoid gloves that are too loose or restrictive, as they may affect your grip and control over tools or materials. Adjustable wrist closures can help ensure a secure fit and prevent debris from entering the gloves.
Carpentry gloves offer several protective features. Reinforced palms and fingers provide added durability and grip, especially when handling heavy or rough materials. Some gloves have padded areas or additional layers of protection in high-impact areas to guard against impacts and vibrations.
One important consideration when choosing gloves is their breathability. Look for gloves with breathable fabric or mesh panels that allow air circulation to keep your hands cool and dry during extended use. This is especially beneficial in warm or humid working environments.
Gloves play a vital role in preventing injuries caused by sharp tools, splinters, or accidental contact with electricity. They provide a barrier against potential cuts, punctures, or abrasions that may occur during carpentry tasks. Additionally, gloves can protect your hands from potential exposure to chemicals, such as stains or adhesives.
It’s crucial to maintain and care for your gloves to prolong their lifespan and effectiveness. Regularly inspect them for tears or signs of wear and replace them when necessary. Clean them according to the manufacturer’s instructions to remove any dirt, debris, or residue that may accumulate.
Remember that while gloves provide protection, they may not be suitable for all carpentry tasks. When working with certain power tools or performing intricate tasks that require precision and high dexterity, you may need to remove the gloves to maintain optimal control and grip. Assess the situation and adjust your glove usage accordingly.
Overall, wearing the appropriate gloves for carpentry work is essential for your safety and comfort. They not only shield your hands from potential injuries and hazards but also enhance your grip and control over tools and materials. Invest in a good pair of carpentry gloves that fit well, offer adequate protection, and make a positive impact on your woodworking experience.
Read more: What Goes With Candles
Safety Glasses
Safety glasses are a crucial item in a carpenter’s arsenal, providing essential eye protection on the job site. They safeguard your eyes from potential hazards such as flying debris, wood chips, and dust, ensuring your safety and preventing potential injuries.
When selecting safety glasses for carpentry work, look for a pair that meets the appropriate safety standards. ANSI Z87.1 certification ensures that the glasses meet the required impact resistance and optical clarity standards. This certification ensures that the glasses provide reliable eye protection in various working conditions.
Choose safety glasses with lenses made from polycarbonate, a durable material that can withstand impact and resist scratches. Polycarbonate lenses are lightweight, which makes them comfortable to wear for extended periods without causing strain or discomfort.
Clear lenses are suitable for most carpentry tasks as they provide maximum visibility and allow for accurate color recognition. However, if you are working outdoors or in environments with intense sunlight or glare, consider using safety glasses with tinted or polarized lenses to reduce eyestrain and improve visibility.
Additionally, consider safety glasses with anti-fog coatings, especially if you are working in humid conditions or during activities that generate heat, such as sanding or cutting. Anti-fog coatings help prevent the formation of condensation on the lenses, ensuring clear vision and maintaining safety throughout your carpentry tasks.
It’s crucial to wear safety glasses at all times when engaged in carpentry work, even if the task seems minor or low-risk. Hazards can arise unexpectedly, and protecting your eyes should always be a priority. Ensure that you have a designated place to store your safety glasses when not in use, such as a protective case or pouch, to prevent damage and maintain their clarity.
Maintaining and caring for your safety glasses is essential for their longevity and effectiveness. Clean them regularly using mild soap and water, and dry them with a soft, lint-free cloth or a lens cleaning wipe. Avoid using harsh chemicals or abrasive materials that may scratch or damage the lenses. Inspect them periodically for any signs of damage or wear, and replace them if necessary to ensure continuous protection.
Wearing safety glasses is a proactive step in safeguarding your eyes and preventing potential injuries during carpentry work. By investing in a quality pair of safety glasses and making them a non-negotiable part of your carpenter’s toolkit, you prioritize your safety and well-being while ensuring clear vision and optimal performance on the job site.
Conclusion
A carpenter’s tool belt is an essential companion for every carpenter, providing easy access to a comprehensive collection of tools needed to tackle woodworking and construction projects. Each tool serves a specific purpose, enhancing efficiency, precision, and safety in your carpentry work.
From the tape measure that ensures accurate measurements to the safety glasses that protect your eyes, each tool plays a crucial role in your carpentry endeavors. The pencil or carpenter’s pen allows you to mark measurements and make notations, while the utility knife provides a versatile cutting solution for various materials.
The chalk line ensures straight and level markings over long distances, while the speed square assists in precise angle measurements and cutting lines. The hammer drives and removes nails with ease, and the screwdriver offers the means to tighten and loosen screws of different types.
The carpenter’s pouch keeps your essential tools organized and easily accessible, while the nail puller and adjustable wrench provide the strength and grip necessary for their respective tasks. The level ensures accurate horizontal and vertical surfaces, while the nail set enables nails to be driven below the wood surface for a professional finish.
The pry bar allows for efficient prying and lifting materials, while electrician’s pliers offer versatility in gripping, twisting, and cutting wires. Gloves provide essential protection for your hands, and safety glasses safeguard your eyes from potential hazards.
In conclusion, a well-stocked and organized carpenter’s tool belt is essential for any carpenter or woodworking enthusiast. By equipping yourself with these essential tools and incorporating them into your carpentry projects, you’ll enhance your efficiency, precision, and safety. Whether you’re framing, installing trim, or building furniture, having the right tools readily available will contribute to the success of your projects and ensure professional, polished results.
Make sure to properly maintain and care for your tools, ensuring their longevity and effectiveness. Regularly inspect, clean, and replace any damaged or worn-out tools to keep your tool belt fully functional and ready for any task that comes your way.
Invest in high-quality tools, prioritize safety, and continuously refine your skills as a carpenter. With a well-stocked and well-maintained tool belt, you’ll be equipped with the essentials to tackle any woodworking project that comes your way, and achieve outstanding results with confidence.
Equipped with the right tools in your carpenter tool belt, you're almost ready to tackle any job. But where do you store all these gadgets when they're not buckled snugly at your waist? For insights on keeping your gear organized and accessible, dive into our article on the best options for tool storage. You'll find practical solutions that simplify your workspace and make every project smoother.
Frequently Asked Questions about What Goes In A Carpenter Tool Belt
Was this page helpful?
At Storables.com, we guarantee accurate and reliable information. Our content, validated by Expert Board Contributors, is crafted following stringent Editorial Policies. We're committed to providing you with well-researched, expert-backed insights for all your informational needs.


0 thoughts on “What Goes In A Carpenter Tool Belt”