Articles
What Is The Easiest Way To Sand A Ceiling
Modified: December 7, 2023
Discover the easiest way to sand a ceiling with our informative articles. From tips to tools, we've got you covered for a smooth and seamless finish.
(Many of the links in this article redirect to a specific reviewed product. Your purchase of these products through affiliate links helps to generate commission for Storables.com, at no extra cost. Learn more)
Introduction
Welcome to our comprehensive guide on the easiest way to sand a ceiling! Whether you’re renovating your home, tackling a DIY project, or simply refreshing the look of your ceilings, sanding is a crucial step in achieving a smooth and professional finish.
While sanding a ceiling may seem like a daunting task, with the right tools, techniques, and preparation, you can make the process much more manageable and achieve excellent results. In this article, we will walk you through each step, providing valuable insights and tips to ensure a successful ceiling sanding project.
Before we dive into the specifics, it’s important to note that safety should always be a top priority. Make sure to wear protective goggles, a dust mask, and gloves to shield yourself from potential hazards. Also, be sure to secure any loose objects and cover furniture to minimize dust and debris accumulation. Now, let’s get started with the necessary tools and materials you’ll need for a successful ceiling sanding project.
Key Takeaways:
- Sanding a ceiling can be made easier by gathering the right tools, preparing the workspace, and choosing the appropriate sanding method. Attention to detail and safety measures are crucial for achieving a smooth and professional finish.
- Addressing imperfections, thorough cleaning, and adding finishing touches are essential steps in achieving a flawless and polished result when sanding a ceiling. Patience, methodical work, and attention to detail are key to success.
Tools and Materials Needed
Before you begin sanding your ceiling, it’s important to gather all the necessary tools and materials to ensure a smooth and efficient process. Here’s a list of what you’ll need:
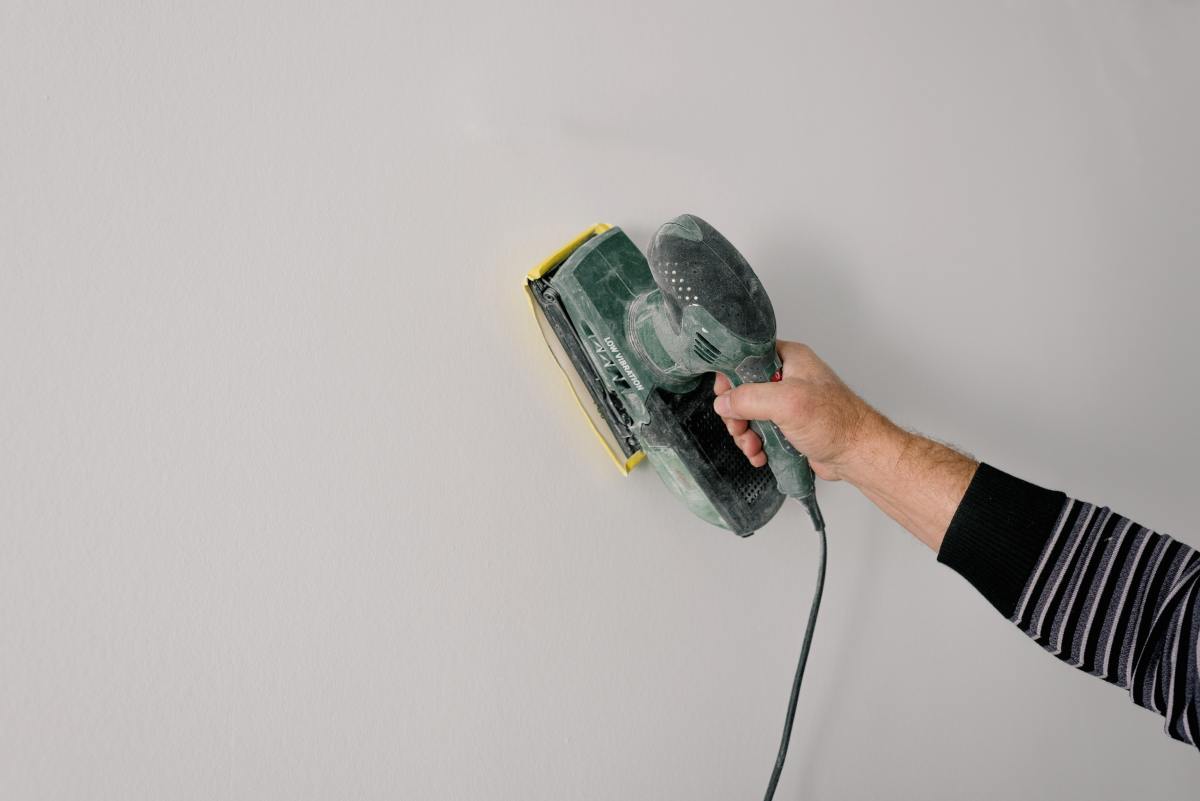
- Sanding pole or hand sander: A sanding pole with an attachable sanding pad is ideal for reaching high ceilings. If you’re working on a lower ceiling or prefer a handheld option, a hand sander will suffice.
- Sanding discs or sheets: Depending on the type of sander you’re using, you’ll either need sanding discs that fit your sanding pole or sanding sheets that can be securely attached to your hand sander.
- Safety goggles, dust mask, and gloves: These protective gears are essential for your safety and to prevent inhalation of dust particles.
- Drywall compound: This is used to fill in any cracks, holes, or imperfections on the ceiling surface.
- Putty knife or trowel: Ideally, you’ll need a 6 or 8-inch putty knife or trowel to apply the drywall compound smoothly.
- Sanding sponge: This is useful for sanding corners and hard-to-reach areas that the sander may not be able to reach.
- Vacuum cleaner or dust control system: To minimize dust and debris, it’s recommended to have a vacuum cleaner or a dust control system that can effectively capture and contain the mess.
- Drop cloths or plastic sheets: To protect your floors and furniture from dust and debris, it’s essential to cover them with drop cloths or plastic sheets.
- Painter’s tape: Used to secure the drop cloths or plastic sheets in place and to protect any areas you don’t want to be sanded.
- Cleaning supplies: After sanding, you’ll need cleaning supplies such as a broom, mop, and bucket to thoroughly clean the area.
Gathering all these tools and materials before you start will ensure a smoother and more efficient sanding process, allowing you to achieve professional-looking results. In the next section, we’ll discuss how to prepare the workspace to make the sanding process even easier.
Preparing the Workspace
Before you begin sanding your ceiling, it’s essential to take the time to properly prepare your workspace. Here are some steps to follow:
- Clear the area: Remove any furniture, decorations, or objects that could obstruct your work or get damaged during the sanding process. If removing them is not feasible, cover them tightly with drop cloths or plastic sheets to protect them from dust and debris.
- Cover the floor: Lay down drop cloths or plastic sheets to cover the entire floor beneath the area you’ll be sanding. This will make it easier to clean up afterward and prevent the dust from spreading to other parts of the room.
- Protect walls and fixtures: Use painter’s tape to cover any surrounding fixtures, such as light fixtures or ceiling fans, and to protect walls or any other surfaces you don’t want to be sanded.
- Turn off the electricity: If you’re working near electrical outlets or fixtures, turn off the electricity to ensure your safety while sanding.
- Ensure proper lighting: Make sure the workspace is well-lit so that you can clearly see any imperfections or areas that need to be sanded.
- Ventilate the area: Open windows and doors, or use fans to improve ventilation in the room. This will help to minimize the concentration of dust and keep the air fresh.
By taking the time to properly prepare your workspace, you’ll create a safer and more efficient environment for sanding your ceiling. With the workspace ready, you can now move on to assessing the condition of your ceiling in the next section.
Assessing the Ceiling
Before you begin sanding your ceiling, it’s important to assess its condition to determine the appropriate sanding method and the level of preparation needed. Here are a few things to look out for:
- Cracks and holes: Examine the ceiling for any cracks, holes, or other imperfections. These areas will require repair before sanding. Use a putty knife or trowel to apply drywall compound to fill in the cracks and holes, and allow it to dry completely before proceeding.
- Texture: Assess the texture of the ceiling. If the ceiling has a popcorn or textured finish, it may require additional steps before sanding. Consult with a professional or refer to specific guides on how to sand textured ceilings.
- Stains and discoloration: Look for any stains or discoloration on the ceiling. These may require additional treatment or priming before sanding to ensure a consistent finish.
- Structural issues: Check for any structural issues, such as water damage or sagging. These issues may require the help of a professional to address before sanding.
By carefully assessing the condition of your ceiling, you’ll be able to address any underlying issues and choose the appropriate sanding method and preparation steps. Once you’ve determined the condition of your ceiling, it’s time to move on to choosing the right sanding method in the next section.
Choosing the Right Sanding Method
When it comes to sanding a ceiling, there are a few different methods you can choose from, depending on the size of the area, your comfort level, and the tools you have available. Here are the primary sanding methods to consider:
- Using a sanding pole: If you have a large ceiling or prefer a more efficient and less physically demanding option, using a sanding pole is a great choice. Attach a sanding pad to the end of the pole and sand the ceiling in long, sweeping motions. This method allows you to reach high ceilings with ease.
- Using a hand sander: If you’re working on a smaller area or prefer a handheld option, a hand sander is a suitable choice. Choose a hand sander with a grip handle and attach sanding sheets securely to the bottom. Move the hand sander in small circular motions, overlapping each pass until the desired smoothness is achieved.
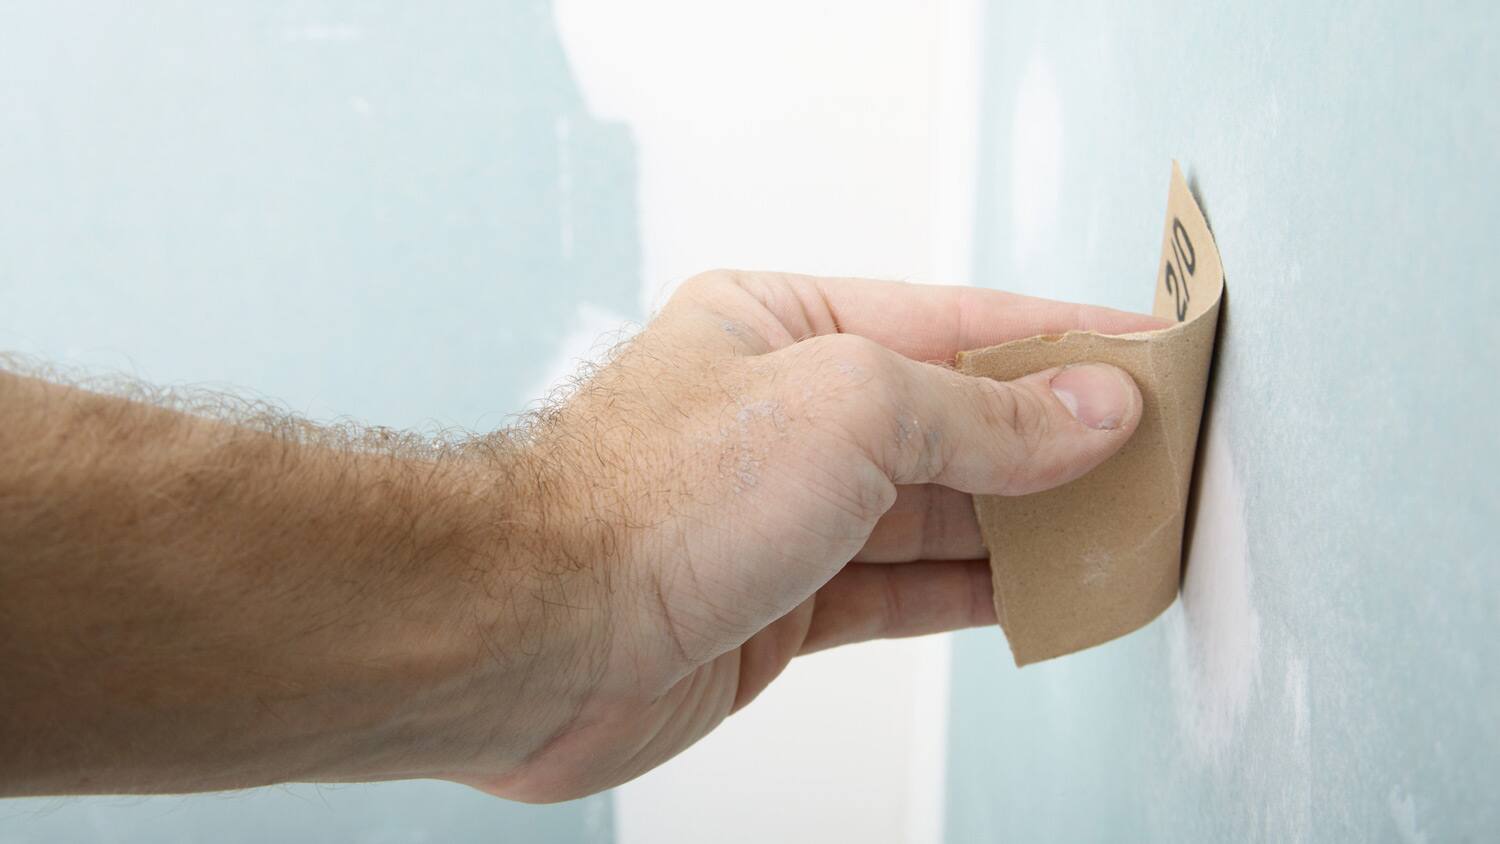
- Using a sanding sponge: For corners and hard-to-reach areas that the sanding pole or hand sander may not be able to reach, a sanding sponge is the ideal tool. Its flexibility allows you to mold it to the shape of the ceiling and sand with precision.
Consider the size of the ceiling, your comfort level, and the tools you have on hand when selecting the sanding method. Whichever method you choose, it’s important to maintain a consistent pressure and avoid applying excessive force to prevent uneven sanding or damage to the surface.
Now that you’ve chosen the right sanding method, it’s time to dive into the step-by-step guide on how to sand your ceiling. Let’s move on to the next section to learn the proper technique and tips for achieving a smooth finish.
Use a pole sander with a sanding screen to easily sand a ceiling. This allows you to reach high areas without needing a ladder and the screen prevents clogging.
Step-by-Step Guide to Sanding the Ceiling
Now that you’re ready to start sanding your ceiling, follow this step-by-step guide to ensure a smooth and successful process:
- Put on your safety gear: Before you begin, put on your safety goggles, dust mask, and gloves to protect yourself from dust and debris.
- Start with repairs: If there are any cracks, holes, or imperfections on the ceiling, use a putty knife or trowel to apply drywall compound and fill them in. Allow the compound to dry completely.
- Attach the sanding pad or sheet: Depending on the sanding method you’ve chosen, attach the appropriate sanding pad to your sanding pole or secure a sanding sheet to your hand sander.
- Test your sanding technique: Before sanding the entire ceiling, start with a small test area to get comfortable with the sanding technique and assess the smoothness of the surface.
- Begin sanding: Starting from one corner of the ceiling, move the sanding pole or hand sander in long, sweeping motions. Overlap each pass slightly to ensure even sanding. Apply consistent pressure and avoid applying too much force.
- Work in sections: Divide the ceiling into manageable sections and sand one section at a time. This will help you maintain control and prevent fatigue.
- Check periodically: Pause periodically to check your progress. Look for any remaining imperfections or uneven areas. If needed, go over those spots again with the sanding tool.
- Switch to a sanding sponge for corners: Use a sanding sponge to sand corners and hard-to-reach areas where the sanding pole or hand sander cannot reach.
- Clean as you go: Use a vacuum cleaner or a dust control system to regularly clean up the dust and debris. This will help you see the surface more clearly and prevent it from settling back onto the ceiling.
- Continue until smooth: Repeat the sanding process, section by section, until the entire ceiling is smooth and free of imperfections.
Remember to take breaks as needed to prevent fatigue and ensure quality results. Additionally, it’s important to keep the sanding tool flat against the ceiling to avoid creating uneven patches.
Once you’ve completed the sanding process, it’s time to address any remaining imperfections on the ceiling. In the next section, we’ll discuss how to deal with imperfections and achieve a flawless finish.
Dealing with Imperfections
After sanding your ceiling, it’s common to encounter imperfections such as small dents, scratches, or areas that still require some level of touch-up. Here are some tips for addressing these imperfections:
- Inspect the ceiling: Carefully examine the entire ceiling for any remaining imperfections. Use good lighting and inspect from different angles to ensure you don’t miss anything.
- Touch up with drywall compound: If you spot any small dents or scratches, use a putty knife or trowel to apply a thin layer of drywall compound. Smooth it out and feather the edges to blend it with the surrounding area. Allow the compound to dry according to the manufacturer’s instructions.
- Sand the repaired areas: Once the drywall compound is completely dry, gently sand the repaired areas using a sanding sponge or a fine-grit sandpaper. Blend the edges of the repaired areas with the surrounding surface for a seamless finish.
- Inspect and repeat if necessary: After sanding the repaired areas, inspect them closely to ensure they are smooth and properly blended. If you notice any remaining imperfections, repeat the touch-up and sanding process until you are satisfied with the result.
Keep in mind that it’s normal to encounter some imperfections during the sanding process. The key is to address them promptly and methodically to achieve a flawless finish. Take your time and pay attention to detail to ensure the best possible outcome.
With the imperfections dealt with, it’s time to move on to the next step: cleaning up the mess. We’ll discuss how to effectively clean up the dust and debris in the following section.
Cleaning up the Mess
After sanding your ceiling, it’s important to thoroughly clean up the dust and debris to ensure a clean and tidy space. Here’s how you can effectively clean up the mess:
- Use a vacuum cleaner: Start by using a vacuum cleaner with a brush attachment to remove as much dust as possible from the ceiling. Pay close attention to the corners, edges, and any areas that may have accumulated more dust.
- Sweep or use a broom: If there are large particles or clumps of dust on the floor, sweep them up or use a broom to gather them into a dustpan. Dispose of the collected dust in a sealed bag or container.
- Mop the floor: After sweeping, mop the floor with a damp mop or a mop lightly sprayed with a mild cleaning solution. This will help remove any remaining dust and leave the floor clean and ready for use.
- Wipe down surfaces: Use a damp cloth or sponge to wipe down any surfaces that may have accumulated dust during the sanding process. This includes walls, furniture, and any other nearby objects.
- Dispose of debris: Ensure that all dust, debris, and leftover drywall compound are properly disposed of. Seal them in a bag or container and dispose of them according to local regulations.
Remember to work methodically and take your time to ensure all areas are adequately cleaned. It’s also a good idea to ventilate the room by opening windows or using fans to help remove any lingering dust and freshen the air.
Once you’re satisfied with your cleaning efforts, you’re ready for the final steps to complete your ceiling sanding project. In the next section, we’ll cover the finishing touches.
Finishing Touches
With the sanding and cleaning complete, it’s time to add the finishing touches to your newly sanded ceiling. These final steps will help ensure a polished and professional-looking result:
- Inspect for any remaining imperfections: Take a close look at the ceiling and surrounding areas to check for any missed spots or remaining imperfections. Touch up any areas as needed with drywall compound and sand them smooth.
- Prime the ceiling: Consider applying a primer to the sanded ceiling before painting. Priming helps create a smooth and even surface for better paint adhesion and can help hide any remaining imperfections.
- Paint the ceiling (optional): If desired, apply a fresh coat of paint to your sanded and primed ceiling. Choose a high-quality paint that is suitable for ceilings and will give you the desired finish.
- Inspect the final result: Take a step back and inspect your completed ceiling. Ensure that it looks smooth, even, and free of visible imperfections. If necessary, make any final touch-ups or adjustments to achieve the desired result.
By paying attention to these finishing touches, you’re ensuring that your sanded ceiling will look flawless and professional. It’s worth taking the time to achieve these final steps for a truly polished end result.
Congratulations on successfully sanding your ceiling! With the proper tools, preparation, and technique, you’ve achieved a smooth and refreshed surface. Take a moment to admire your hard work and enjoy the renewed look of your room.
Remember, it’s always important to prioritize safety and follow manufacturer guidelines for the tools and materials used. With careful planning and execution, sanding a ceiling can be a rewarding and satisfying project.
We hope this guide has provided you with valuable insights and tips for the easiest way to sand a ceiling. Now, go ahead and enjoy your beautifully sanded ceiling! If you have any further questions or need more assistance, feel free to reach out.
Happy sanding!
Conclusion
In conclusion, sanding a ceiling may seem like a challenging task, but with the right tools, techniques, and preparation, it can be accomplished easily and efficiently. By following the step-by-step guide outlined in this article, you’ll be able to achieve a smooth and professional finish for your ceiling.
Remember to prioritize safety by wearing protective gear and properly preparing your workspace. Gathering the necessary tools and materials, assessing the condition of your ceiling, and choosing the appropriate sanding method are all important steps to ensure a successful project.
During the sanding process, take your time and pay attention to detail. Work in sections, clean as you go, and address any imperfections promptly to achieve the desired result. Once the sanding is complete, thoroughly clean up the dust and debris to create a clean and tidy space.
Don’t forget the finishing touches, such as addressing any remaining imperfections, priming the ceiling, and painting if desired. These final steps will elevate the overall look and ensure a polished and professional finish.
By following the steps and tips outlined in this guide, you’re well on your way to successfully sanding your ceiling. Remember to take breaks when needed and have patience throughout the process. With determination and attention to detail, you’ll be rewarded with a beautifully sanded ceiling that adds a fresh and renewed look to your space.
We hope this article has provided you with valuable insights and guidance on the easiest way to sand a ceiling. Good luck with your project, and enjoy the satisfying results of your hard work!
Frequently Asked Questions about What Is The Easiest Way To Sand A Ceiling
Was this page helpful?
At Storables.com, we guarantee accurate and reliable information. Our content, validated by Expert Board Contributors, is crafted following stringent Editorial Policies. We're committed to providing you with well-researched, expert-backed insights for all your informational needs.


0 thoughts on “What Is The Easiest Way To Sand A Ceiling”