Articles
Why Does My Toilet Run
Modified: January 6, 2024
Discover articles on why your toilet keeps running and how to fix it. Get expert advice and tips to stop the constant water flow in your toilet.
(Many of the links in this article redirect to a specific reviewed product. Your purchase of these products through affiliate links helps to generate commission for Storables.com, at no extra cost. Learn more)
Introduction
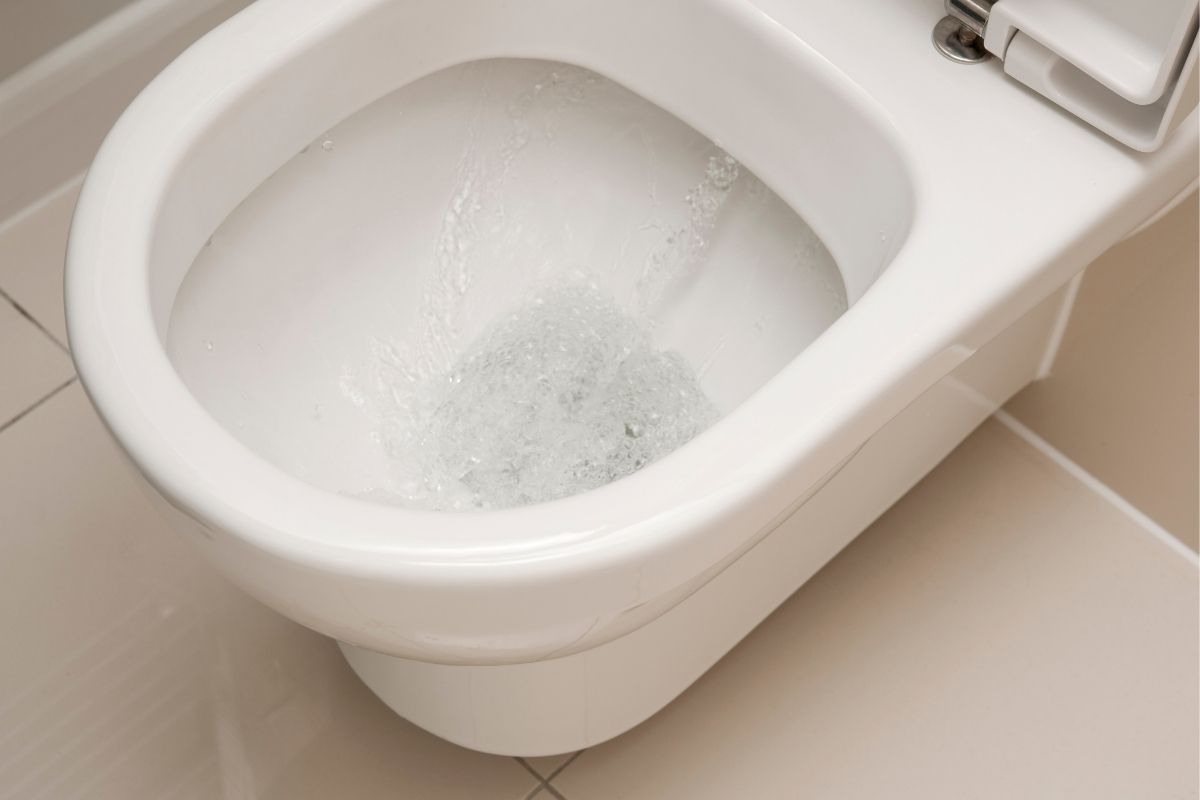
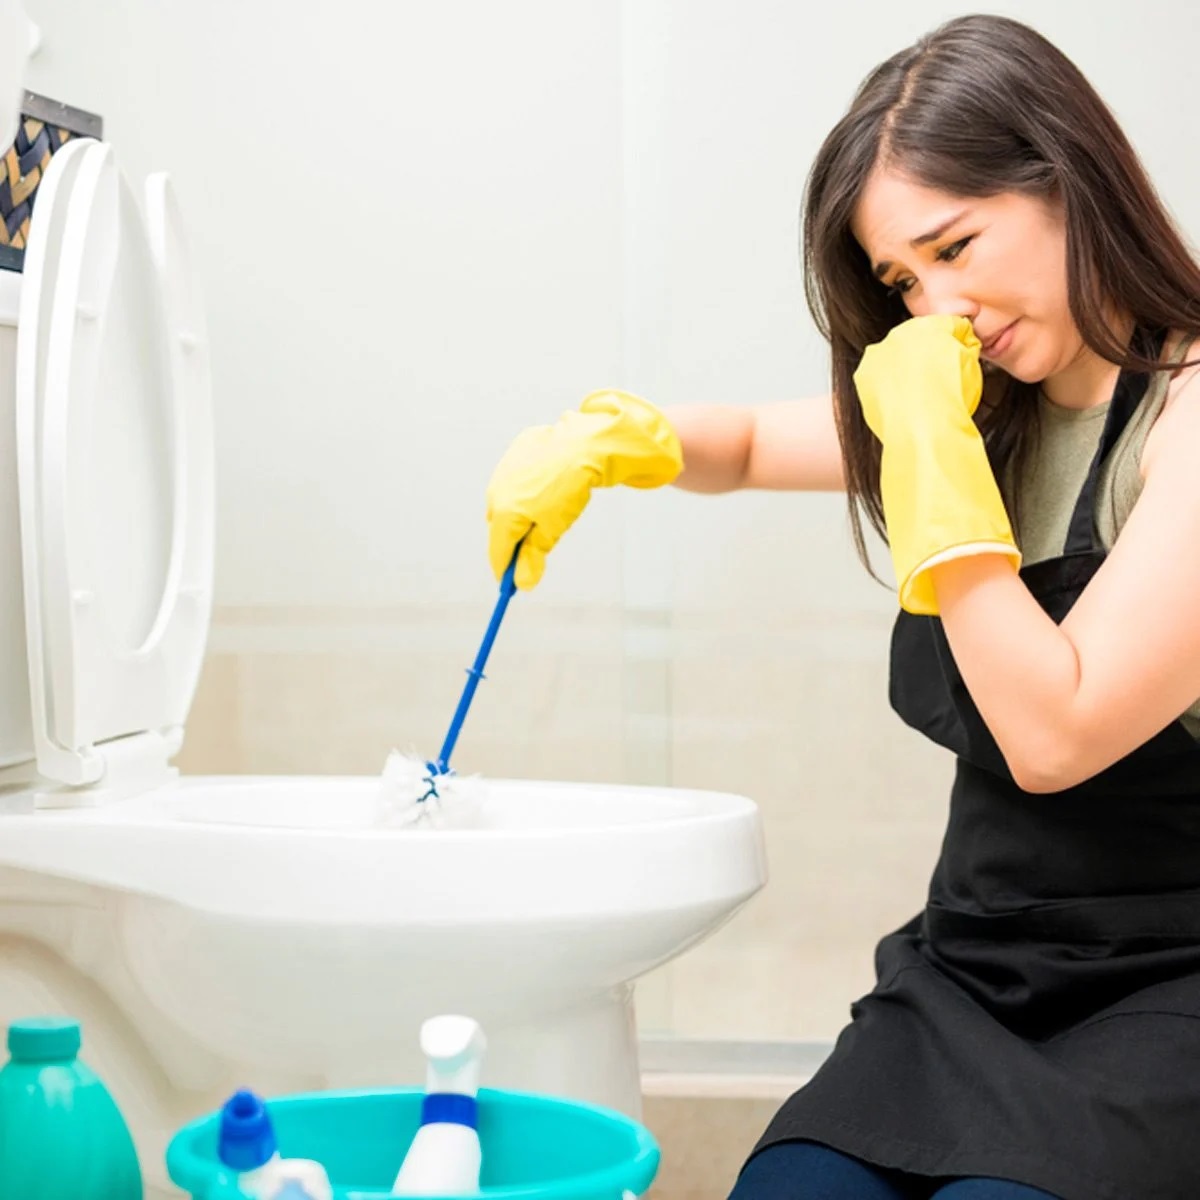
A running toilet can be a frustrating and wasteful problem to deal with. Not only does it result in a continuous flow of water, but it can also impact your water bill. If you’ve ever wondered why your toilet keeps running even after you’ve flushed it, this article is for you.
A running toilet occurs when water constantly flows from the tank into the bowl, even when the toilet is not in use. While it may seem like a minor inconvenience, it can contribute to water wastage and increase your water bill significantly over time.
Understanding the common causes of a running toilet can help you identify and fix the issue effectively. In this article, we will explore some of the most common causes and provide practical solutions to resolve the problem.
Key Takeaways:
- Don’t let a running toilet drain your patience and water bill. Troubleshoot and fix common issues like a faulty flapper valve or improper chain length to restore proper functionality and eliminate wasteful water flow.
- Take proactive steps to address potential causes of a running toilet, such as adjusting the water level or replacing the float ball. Regular maintenance and prompt troubleshooting can prevent future issues and ensure efficient water use.
Read more: Why Does My Toilet Run Randomly
Common Causes of a Running Toilet
A running toilet can be caused by various factors. Here are some of the most common culprits:
- Faulty Flapper Valve: The flapper valve is responsible for sealing the tank and preventing water from continuously flowing into the bowl. If the flapper valve is worn out or not sealing properly, water can escape and cause the toilet to run.
- Improper Chain Length: The chain that connects the flapper valve to the toilet handle can sometimes be too loose or too tight. If it is too tight, it can keep the flapper valve open, causing water to continuously flow. If it is too loose, the flapper valve may not seal properly, resulting in a running toilet.
- Water Level Adjustment: The water level in the tank should be set at the appropriate level. If it is set too high, water can overflow into the overflow tube and cause the toilet to continuously run. If it is set too low, it can result in a weak flush and incomplete emptying of the bowl.
- Defective Float Ball: The float ball floats on the surface of the water in the tank and signals the fill valve when to stop filling. If the float ball is damaged or incorrectly adjusted, it can cause the fill valve to malfunction and lead to a running toilet.
- Malfunctioning Fill Valve: The fill valve is responsible for refilling the tank with water after a flush. If the fill valve is worn out or not functioning properly, it can cause water to continuously flow into the tank, leading to a running toilet.
- Blockage in the Flush Valve: A blockage in the flush valve can prevent water from properly emptying the tank into the bowl. As a result, water may continuously flow into the bowl after a flush, leading to a running toilet.
- Damaged Overflow Tube: The overflow tube prevents the tank from overflowing by diverting excess water into the bowl. If the overflow tube is damaged or improperly installed, it can result in a continuous flow of water into the bowl, causing a running toilet.
Identifying the specific cause of a running toilet is essential for effectively resolving the issue. In the following section, we will provide step-by-step instructions on how to fix a running toilet and address each of these common causes.
Faulty Flapper Valve
The flapper valve is a crucial component in a toilet tank that controls the flow of water from the tank into the bowl. If the flapper valve is faulty, it can lead to a running toilet. Here’s how you can determine if the flapper valve is the cause of your problem and how to fix it:
Identification: To check if the flapper valve is faulty, remove the lid of the toilet tank and observe the flapper. If the flapper is warped, cracked, or deteriorating, it needs to be replaced. Additionally, if the flapper is not sealing properly, you may notice water constantly flowing into the bowl.
Fixing the Flapper Valve:
- Turn off the water supply to the toilet by closing the shut-off valve, usually located beneath the tank.
- Flush the toilet to empty the tank of water.
- Disconnect the chain connected to the flapper valve from the flush handle lever.
- Remove the old flapper valve by unhooking it from the flush valve assembly.
- Install the new flapper valve by attaching it to the flush valve assembly. Ensure it is properly positioned and aligned.
- Reconnect the chain to the flush handle lever, making sure it has the correct amount of slack.
- Turn on the water supply to the toilet by opening the shut-off valve.
- Test the toilet by flushing it to check if the flapper valve is sealing properly and if the running toilet issue is resolved.
By replacing a faulty flapper valve, you can restore the proper functioning of your toilet and eliminate the issue of a running toilet. It is important to choose a flapper valve that is compatible with your toilet model to ensure a proper fit and reliable performance.
If the running toilet problem persists after replacing the flapper valve, move on to the next potential cause for further troubleshooting.
Improper Chain Length
An improperly adjusted or malfunctioning chain connecting the flush handle lever to the flapper valve can also be a common cause of a running toilet. Here’s how you can identify if the chain length is the issue and how to fix it:
Identification: To determine if the chain length is causing your toilet to run, flush the toilet and observe the chain when the flapper valve closes. If the chain is too tight and preventing the flapper valve from fully sealing, or if it is too loose and getting caught under the flapper, it could cause continuous water flow.
Fixing the Chain Length:
- Turn off the water supply to the toilet by closing the shut-off valve.
- Remove the lid of the toilet tank.
- Identify the chain attached to the flush handle lever and the flapper valve.
- If the chain is too tight, causing the flapper valve to not seal properly, adjust the length by sliding the chain clip closer to the flush handle lever.
- If the chain is too loose and getting caught under the flapper, adjust the length by sliding the chain clip away from the flush handle lever.
- Ensure the chain has enough slack to allow the flapper valve to fully close and seal.
- Turn on the water supply to the toilet by opening the shut-off valve.
- Flush the toilet to check if the chain length adjustment resolved the running toilet issue.
By adjusting the chain length appropriately, you can ensure that the flapper valve seals properly after each flush, preventing water from continuously flowing into the bowl.
If adjusting the chain length does not fix the running toilet problem, move on to the next possible cause for further investigation and resolution.
Water Level Adjustment
The water level in the toilet tank plays a crucial role in the proper functioning of the toilet. If the water level is set too high or too low, it can lead to a running toilet. Here’s how you can identify if the water level is the issue and how to adjust it:
Identification: To determine if the water level is causing your toilet to run, remove the lid of the toilet tank and observe the water level. It should be approximately one inch below the overflow tube. If the water level is significantly higher, it may spill into the overflow tube and cause a continuous flow of water into the bowl.
Fixing the Water Level:
- Turn off the water supply to the toilet by closing the shut-off valve.
- Flush the toilet to empty the tank of water.
- Locate the water level adjustment screw or float adjustment mechanism in the tank. This can vary depending on the type of toilet.
- Adjust the water level by either turning the adjustment screw or moving the float up or down.
- Refer to the manufacturer’s guidelines or consult a professional if you are unsure about the appropriate water level for your specific toilet model.
- Turn on the water supply to the toilet by opening the shut-off valve.
- Flush the toilet and observe if the water level is now set at the desired height.
By properly adjusting the water level, you can prevent an overflow into the overflow tube and ensure that the toilet tank fills and empties correctly, resolving the issue of a running toilet.
If adjusting the water level does not resolve the problem, proceed to the next potential cause for further troubleshooting.
Read more: Why My Toilet Keeps Running
Defective Float Ball
The float ball or float cup in the toilet tank is responsible for signaling the fill valve when to shut off the water flow after a flush. If the float ball is defective or incorrectly adjusted, it can lead to a running toilet. Here’s how you can identify if the float ball is the issue and how to fix it:
Identification: To check if the float ball is defective, remove the toilet tank lid and observe the float ball while the tank is filling with water. If the float ball is damaged, leaking, or not rising properly with the water level, it may not trigger the fill valve to shut off, causing continuous water flow into the tank.
Fixing the Float Ball:
- Turn off the water supply to the toilet by closing the shut-off valve.
- Flush the toilet to empty the tank of water.
- Inspect the float ball for any damage or signs of wear. If it is defective, purchase a new float ball from a hardware store or plumbing supply shop.
- Replace the old float ball with the new one, ensuring it is securely attached to the float arm or float rod.
- If the float ball is adjustable, adjust it to the appropriate height. This height determines when the fill valve shuts off, so follow the manufacturer’s guidelines or consult a professional if needed.
- Turn on the water supply to the toilet by opening the shut-off valve.
- Test the toilet by flushing it to see if the float ball rises with the water level and triggers the fill valve to shut off at the correct time.
By replacing a defective or improperly adjusted float ball, you can ensure that the fill valve stops filling the tank when it should, preventing water from continuously flowing and resolving the issue of a running toilet.
If addressing the float ball does not solve the running toilet problem, move on to the next potential cause for further troubleshooting.
Malfunctioning Fill Valve
The fill valve in your toilet tank is responsible for refilling the tank with water after each flush. If the fill valve is malfunctioning, it can lead to a running toilet. Here’s how you can identify if the fill valve is the issue and how to address it:
Identification: To determine if the fill valve is causing the running toilet, listen for any unusual sounds coming from the tank, such as hissing or constant water flow. Additionally, check if the water level in the tank is constantly rising and overflowing into the overflow tube.
Addressing the Fill Valve:
- Turn off the water supply to the toilet by closing the shut-off valve.
- Flush the toilet to empty the tank of water.
- Locate the fill valve, which is usually situated on the left-hand side of the toilet tank.
- Inspect the fill valve for any visible signs of damage or wear, such as leaking or a misaligned float ball or float cup.
- If the fill valve is faulty, it may need to be replaced. Consult the manufacturer’s instructions or seek advice from a professional plumber.
- If the fill valve appears to be in good condition, it may need to be cleaned to remove any debris or mineral buildup that can impact its performance.
- Turn on the water supply to the toilet by opening the shut-off valve.
- Observe the fill valve as the tank refills. Ensure that the water stops flowing when it reaches the appropriate level.
By addressing any malfunctioning or dirty fill valve, you can restore proper water flow and resolve the issue of a running toilet.
If the running toilet problem persists, move on to the next potential cause for further investigation and resolution.
Blockage in the Flush Valve
A blockage in the flush valve can prevent water from properly emptying the tank into the toilet bowl, leading to a running toilet. Here’s how you can identify if there is a blockage and how to address it:
Identification: If you notice that the toilet tank is not emptying completely or that water is slowly trickling into the bowl after a flush, there may be a blockage in the flush valve. Additionally, if you hear gurgling sounds or see bubbles in the bowl when flushing, it can also indicate a blockage.
Addressing the Flush Valve Blockage:
- Turn off the water supply to the toilet by closing the shut-off valve.
- Flush the toilet to drain the water from the tank.
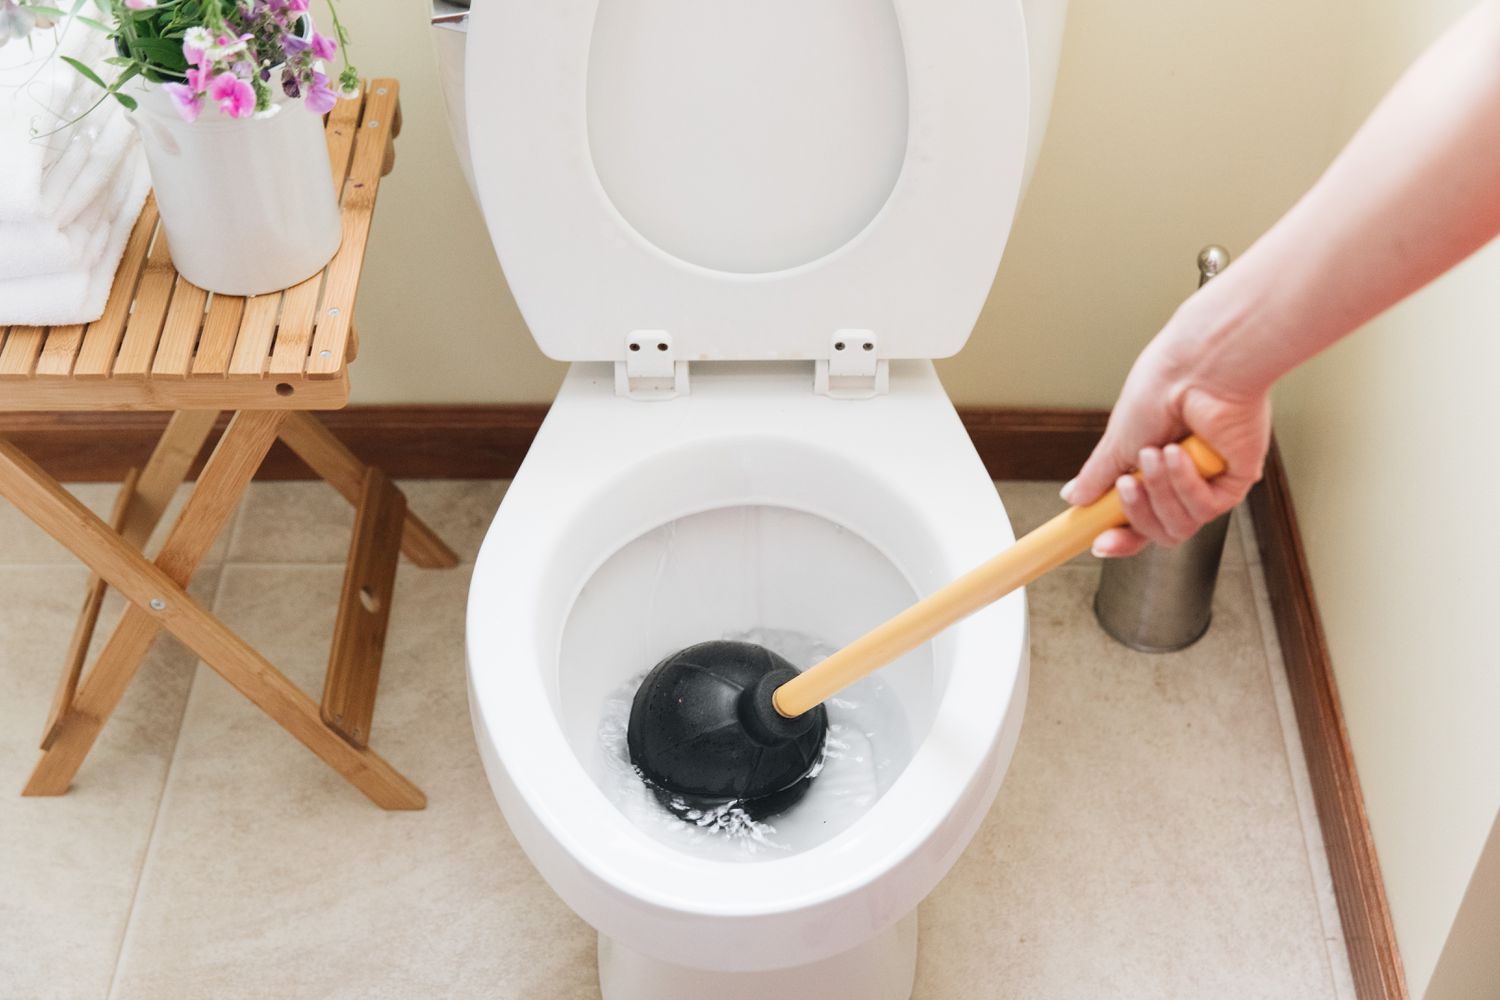
- Using a toilet plunger, create a seal around the flush valve opening in the bottom of the toilet tank.
- Plunge vigorously to dislodge any debris or blockage from the flush valve.
- Flush the toilet and observe if the water is now draining properly without any residual flow.
- If the blockage persists, you may need to use a toilet auger or call a professional plumber to remove the obstruction.
- Turn on the water supply to the toilet by opening the shut-off valve.
- Flush the toilet again to ensure that the flush valve is now clear and the running toilet issue has been resolved.
By addressing any blockage in the flush valve, you can allow water to flow freely from the tank to the bowl, eliminating the problem of a running toilet.
If this step does not resolve the running toilet issue, move on to the next possible cause for further troubleshooting.
Damaged Overflow Tube
A damaged or improperly installed overflow tube can contribute to a running toilet. The overflow tube prevents the tank from overflowing by diverting excess water into the toilet bowl. Here’s how you can identify if the overflow tube is the problem and how to address it:
Identification: Check the overflow tube inside the toilet tank to see if it is cracked, broken, or not installed correctly. Additionally, if you notice that water is constantly flowing into the bowl despite the tank being full, it may indicate an issue with the overflow tube.
Addressing the Damaged Overflow Tube:
- Turn off the water supply to the toilet by closing the shut-off valve.
- Flush the toilet to empty the tank of water.
- Inspect the overflow tube for any signs of damage, such as cracks or breaks. If it is damaged, a replacement overflow tube may be needed.
- If the overflow tube is not installed properly, adjust it according to the manufacturer’s instructions to ensure it is positioned at the correct height.
- Ensure that the overflow tube is securely connected to the fill valve and not loose or misaligned.
- If a replacement overflow tube is needed, disconnect the old one from the fill valve and install the new one, following the manufacturer’s guidelines.
- Turn on the water supply to the toilet by opening the shut-off valve.
- Test the toilet by flushing it to check if the overflow tube is functioning correctly and if the running toilet problem has been resolved.
By addressing any damage or incorrect installation of the overflow tube, you can ensure that excess water is properly diverted and prevent a continuous flow into the toilet bowl, resolving the issue of a running toilet.
If the running toilet problem persists after addressing the overflow tube, it may be necessary to consult a professional plumber to further investigate and resolve the issue.
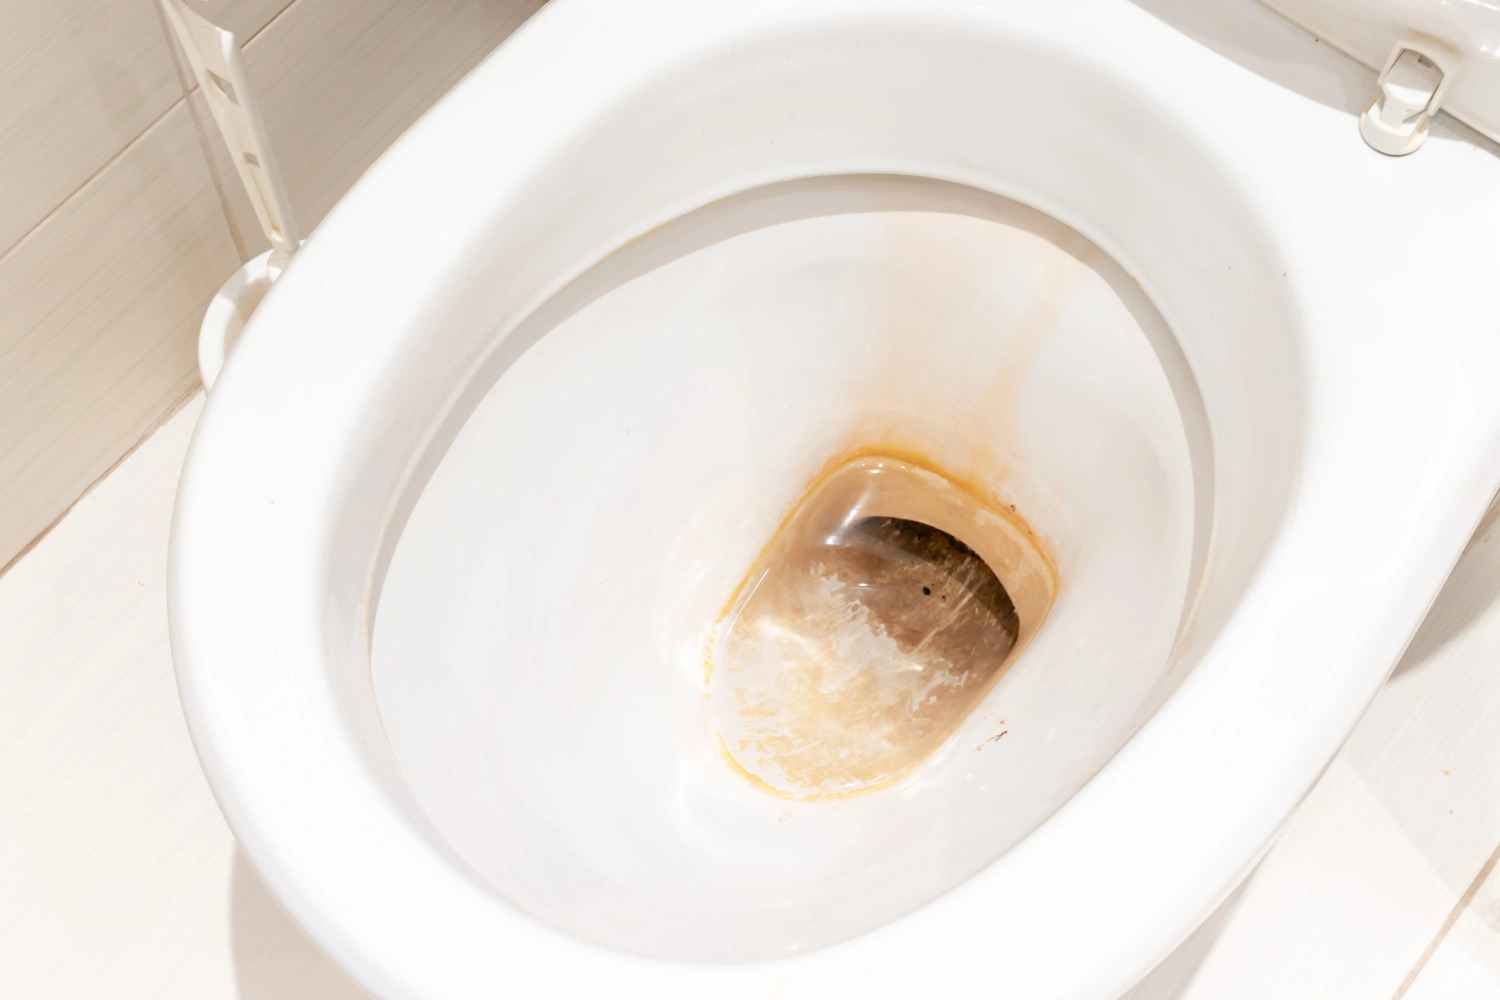
Check the flapper in the toilet tank. If it’s worn or damaged, it may not be sealing properly, causing the toilet to run. Replace it to stop the running and save water.
Read more: Why Does Water Keep Running In Toilet Bowl
How to Fix a Running Toilet
Dealing with a running toilet can be frustrating, but fortunately, many common causes can be easily fixed. Here are some steps you can take to resolve the issue:
- Identify the problem: Determine the cause of the running toilet by checking for common issues such as a faulty flapper valve, improper chain length, water level adjustment, defective float ball, malfunctioning fill valve, blockage in the flush valve, or a damaged overflow tube.
- Address the specific cause: Based on the identified problem, follow the appropriate steps to fix it. This may involve replacing a flapper valve, adjusting the chain length, adjusting the water level, replacing a float ball or fill valve, removing a blockage in the flush valve, or fixing a damaged overflow tube.
- Turn off the water supply: Before making any repairs or adjustments, turn off the water supply to the toilet by closing the shut-off valve, usually located beneath the tank. This will prevent water from flowing into the tank and allow you to work on the toilet without any water-related issues.
- Flush and empty the tank: Flush the toilet to empty the tank of any remaining water. This will make it easier to access and work on the various components without getting wet.
- Follow step-by-step instructions: Whether you need to replace a part or adjust a component, carefully follow the step-by-step instructions provided for each specific cause. Be sure to consult the manufacturer’s guidelines or seek professional assistance if needed.
- Turn on the water supply and test: Once you have made the necessary repairs or adjustments, turn on the water supply by opening the shut-off valve. Flush the toilet and observe if the running toilet problem has been resolved. Ensure that the toilet flushes properly and that there is no continuous flow of water into the bowl.
- Seek professional help if needed: If the running toilet problem persists or if you are unsure about how to fix it on your own, it is best to seek the assistance of a professional plumber. They have the expertise to diagnose and resolve more complex toilet issues.
By following these steps and addressing the specific cause of the running toilet, you can restore the proper functionality of your toilet, stop the wasteful water flow, and eliminate the frustration of dealing with a constantly running toilet.
Remember, regular maintenance and periodic checks can help prevent future running toilet issues. It’s always a good idea to keep an eye on your toilet’s condition and address any potential problems promptly to avoid further complications.
Replace the Flapper Valve
The flapper valve is a common culprit when it comes to a running toilet. Over time, the flapper valve can wear out, become warped, or lose its sealing ability, leading to water continuously flowing from the tank into the bowl. Here’s how you can replace the flapper valve to fix a running toilet:
- Turn off the water supply: Locate the shut-off valve near the base of the toilet and turn it clockwise to shut off the water supply. This will prevent any water from flowing into the tank during the replacement process.
- Drain the tank: Flush the toilet to drain the water from the tank. Hold down the flush handle until almost all of the water has been emptied from the tank. You can also use a sponge or towel to soak up any remaining water if needed.
- Remove the old flapper: Locate the flapper valve connected to the flush valve at the bottom of the tank. Disconnect the chain from the flush lever or slide the flapper off the pins or hooks that hold it in place. Take note of the type and size of the old flapper for purchasing a suitable replacement.
- Purchase a new flapper valve: Visit a hardware store or home improvement center to find a replacement flapper valve that matches the old one in terms of size and style. There are universal flapper valves available that fit most toilet models. You may also consider choosing a flapper valve with adjustable settings for optimal performance.
- Install the new flapper: Position the new flapper valve over the flush valve opening, making sure it fits securely. Connect the chain or reattach it to the flush lever, ensuring there is enough slack for proper movement. If necessary, adjust the chain length to achieve the appropriate tension on the flapper valve.
- Turn on the water supply: Open the shut-off valve by turning it counterclockwise to restore water flow to the toilet tank.
- Test the new flapper valve: Flush the toilet and observe if the flapper valve seals correctly and stops the water from continuously flowing into the bowl. If the flapper valve does not seal properly or if the running toilet issue persists, ensure the chain length is adjusted correctly or consider consulting a professional plumber for further assistance.
By replacing a faulty flapper valve, you can restore the proper functioning of your toilet and eliminate the issue of a running toilet. Remember, it’s essential to choose a flapper valve that is compatible with your toilet model to ensure a perfect fit and reliable performance.
Adjust the Chain Length
If the chain connecting the flush handle lever to the flapper valve is too tight or too loose, it can cause a running toilet. The chain should have the correct amount of slack to allow the flapper valve to seal properly and prevent continuous water flow. Here’s how you can adjust the chain length to fix a running toilet:
- Turn off the water supply: Locate the shut-off valve near the base of the toilet and turn it clockwise to shut off the water supply. This will prevent any water from flowing into the tank during the adjustment process.
- Remove the toilet tank lid: Lift the lid of the toilet tank and set it aside in a safe place where it won’t get damaged.
- Locate the chain: Look for the chain connecting the flush handle lever to the flapper valve. It is usually attached to a small rod or lever extending from the flapper valve.
- Adjust the chain length: If the chain is too tight, it can keep the flapper valve open, causing a running toilet. To adjust it, simply detach the chain from the flush handle lever and move the chain clip closer to the lever, creating more slack. If the chain is too loose and getting caught under the flapper, move the chain clip away from the lever to tighten it.
- Test the chain length: Reattach the chain to the flush handle lever, ensuring that it has the correct amount of slack. The chain should have enough slack to allow the flapper valve to fully close and create a tight seal. Too much slack may result in the flapper not sealing properly, while too little slack may prevent the flapper from opening fully during a flush.
- Turn on the water supply: Open the shut-off valve by turning it counterclockwise to restore water flow to the toilet tank.
- Test the chain adjustment: Flush the toilet and observe if the flapper valve seals correctly and stops the water from continuously flowing into the bowl. Make sure the chain does not obstruct the flapper valve’s movement or cause it to stay open.
By adjusting the chain length appropriately, you can ensure that the flapper valve seals properly after each flush, preventing water from continuously flowing into the bowl and resolving the issue of a running toilet.
If adjusting the chain length does not fix the running toilet problem, move on to the next potential cause for further troubleshooting.
Check and Adjust the Water Level
The water level in the toilet tank is essential for proper flushing and preventing a running toilet. If the water level is set too high or too low, it can lead to water continuously flowing into the toilet bowl. Here’s how you can check and adjust the water level to fix a running toilet:
- Turn off the water supply: Locate the shut-off valve near the base of the toilet and turn it clockwise to shut off the water supply. This will prevent any water from flowing into the tank during the adjustment process.
- Remove the toilet tank lid: Lift the lid of the toilet tank and set it aside in a safe place.
- Inspect the water level: Look inside the toilet tank and observe the water level. It should be approximately one inch below the overflow tube, which is a vertical tube usually located in the center or back of the tank.
- Adjust the water level: To adjust the water level, locate the water adjustment mechanism, which can vary depending on the type of toilet. It may be a screw or a float adjustment mechanism.
- Lowering the water level: If the water level is too high, turn the adjustment mechanism counterclockwise to lower it. This will decrease the amount of water in the tank and prevent it from overflowing into the overflow tube.
- Raising the water level: If the water level is too low, turn the adjustment mechanism clockwise to raise it. This will increase the amount of water in the tank, ensuring a more robust and effective flush.
- Test the water level adjustment: Flush the toilet and observe the water level in the tank. It should neither be too high nor too low, but rather approximately one inch below the overflow tube.
- Turn on the water supply: Open the shut-off valve by turning it counterclockwise to restore water flow to the toilet tank.
- Flush the toilet: Flush the toilet again and observe if the water level remains steady and does not overflow into the overflow tube. Additionally, ensure that the toilet flushes properly and that there is no continuous flow of water into the bowl.
By checking and adjusting the water level appropriately, you can ensure optimal flushing performance and prevent a running toilet. It’s important to find the right balance to avoid both insufficient and excessive water levels in the tank.
If adjusting the water level does not resolve the running toilet issue, move on to the next potential cause for further troubleshooting.
Read more: Why Does My Hot Tub Keep Running
Replace the Float Ball
The float ball or float cup in the toilet tank is responsible for signaling the fill valve to shut off the water flow after a flush. A defective or misaligned float ball can cause a running toilet. Here’s how you can replace the float ball to fix the issue:
- Turn off the water supply: Locate the shut-off valve near the base of the toilet and turn it clockwise to shut off the water supply. This will prevent any water from flowing into the tank during the replacement process.
- Remove the toilet tank lid: Lift the lid of the toilet tank and set it aside in a safe place.
- Identify the float ball: The float ball is a buoyant object that floats on the water’s surface in the tank. It is usually connected to a rod or arm that activates the fill valve.
- Inspect the float ball: Check the float ball for any signs of damage such as cracks or leaks. If it is damaged or not functioning properly, it needs to be replaced.
- Purchase a new float ball: Visit a hardware store or home improvement center to find a replacement float ball that matches the size and style of the old one. Universal float balls are often available and suitable for most toilet models.
- Replace the float ball: Disconnect the old float ball from the arm or rod by unscrewing or unclipping it. Attach the new float ball to the arm or rod, ensuring a secure connection.
- Adjust the float ball: If the new float ball is adjustable, position it to the appropriate height. It should be set according to the manufacturer’s guidelines, allowing the ball to rise and signal the fill valve to shut off the water flow at the desired tank level.
- Turn on the water supply: Open the shut-off valve by turning it counterclockwise to restore water flow to the toilet tank.
- Test the new float ball: Flush the toilet and observe if the float ball rises with the water level and signals the fill valve to shut off at the correct time. Make any necessary adjustments to the float ball height if the water level is not optimal.
By replacing a defective or misaligned float ball, you can ensure that the fill valve stops filling the tank when it should, preventing water from continuously flowing and resolving the issue of a running toilet.
If the running toilet problem persists after replacing the float ball, move on to the next potential cause for further troubleshooting.
Clean or Replace the Fill Valve
The fill valve in your toilet tank is responsible for refilling the tank with water after each flush. A malfunctioning or clogged fill valve can cause a running toilet. Here’s how you can clean or replace the fill valve to fix the issue:
- Turn off the water supply: Locate the shut-off valve near the base of the toilet and turn it clockwise to shut off the water supply. This will prevent any water from flowing into the tank during the cleaning or replacement process.
- Remove the toilet tank lid: Lift the lid of the toilet tank and set it aside in a safe place.
- Inspect the fill valve: Examine the fill valve for any signs of damage, such as leaks or worn-out components. If the fill valve is visibly damaged or not functioning properly, it may need to be replaced.
- Clean the fill valve: If the fill valve appears to be dirty or clogged, you can try cleaning it. Use a soft brush, such as an old toothbrush, to gently scrub away any debris or mineral deposits that may be affecting its performance. Rinse the fill valve with water to ensure it is thoroughly cleaned.
- Replace the fill valve: If the fill valve is severely damaged or cleaning does not resolve the issue, it may need to be replaced. Consult the manufacturer’s instructions or seek professional assistance for the appropriate replacement fill valve for your specific toilet model.
- Install the new fill valve: Follow the manufacturer’s instructions to install the new fill valve. This typically involves removing the old fill valve, connecting the new one to the water supply line, adjusting the height if necessary, and securing it in place.
- Turn on the water supply: Open the shut-off valve by turning it counterclockwise to restore water flow to the toilet tank.
- Test the fill valve: Flush the toilet and observe if the fill valve fills the tank with water to the appropriate level and shuts off when it should. Make any necessary adjustments, such as adjusting the float arm or setting the desired water level, to ensure the fill valve is functioning correctly.
By cleaning or replacing the fill valve, you can ensure proper water flow and prevent a running toilet. Remember to follow the manufacturer’s instructions or seek professional help if you are unsure about the installation process.
If the running toilet problem persists after cleaning or replacing the fill valve, move on to the next potential cause for further troubleshooting.
Remove any Flush Valve Blockages
A blockage in the flush valve can prevent water from properly emptying the tank into the toilet bowl, causing a running toilet. Here’s how you can remove any flush valve blockages to fix the issue:
- Turn off the water supply: Locate the shut-off valve near the base of the toilet and turn it clockwise to shut off the water supply. This will prevent any water from flowing into the tank during the removal process.
- Remove the toilet tank lid: Lift the lid of the toilet tank and set it aside in a safe place.
- Inspect the flush valve: The flush valve is typically a rubber or plastic flap at the bottom of the tank. Examine the flush valve to check for any visible blockages, such as debris, mineral deposits, or buildup.
- Remove the blockage: Use a soft brush, such as an old toothbrush, to gently scrub away any debris or buildup on the flush valve. If there is a significant blockage, you can use a wire hanger or a straightened paper clip to carefully dislodge it from the flush valve. Avoid using sharp objects that could damage the flush valve or other components.
- Flush the toilet: After removing the blockage, flush the toilet several times to ensure that the water flows freely and there is no residual blockage in the flush valve.
- Turn on the water supply: Open the shut-off valve by turning it counterclockwise to restore water flow to the toilet tank.
- Test the flush valve: Flush the toilet and observe if the water flows properly from the tank into the bowl without any remaining blockages. Ensure that there is no continuous flow of water into the bowl after the flush.
By removing any blockages in the flush valve, you can allow water to flow freely into the toilet bowl, preventing a running toilet. Regular maintenance and periodic checks can help prevent blockages and ensure proper toilet functioning.
If the running toilet problem persists after removing the flush valve blockages, move on to the next potential cause for further troubleshooting.
Repair or Replace the Overflow Tube
A damaged or improperly installed overflow tube can contribute to a running toilet. The overflow tube prevents the tank from overflowing by diverting excess water into the toilet bowl. Here’s how you can repair or replace the overflow tube to fix the issue:
- Turn off the water supply: Locate the shut-off valve near the base of the toilet and turn it clockwise to shut off the water supply. This will prevent any water from flowing into the tank during the repair or replacement process.
- Remove the toilet tank lid: Lift the lid of the toilet tank and set it aside in a safe place.
- Inspect the overflow tube: Check the overflow tube for any visible signs of damage, such as cracks, breaks, or misalignment. Ensure that it is properly installed and securely connected to the fill valve.
- Repair the overflow tube: If the overflow tube has minor cracks, it may be possible to repair it. Use epoxy or plumbing putty to seal the cracks and reinforce the integrity of the tube. Follow the manufacturer’s instructions for the specific product you are using.
- Replace the overflow tube: If the overflow tube is severely damaged or if repair attempts are unsuccessful, it may need to be replaced. Measure the length and diameter of the old overflow tube to find a suitable replacement. Visit a hardware store or plumbing supply shop to find an overflow tube that matches the dimensions of your old one.
- Install the new overflow tube: Disconnect the old overflow tube from the fill valve and remove it from the toilet tank. Install the new overflow tube in the same location, making sure it is securely connected to the fill valve and positioned correctly to divert excess water into the toilet bowl.
- Turn on the water supply: Open the shut-off valve by turning it counterclockwise to restore water flow to the toilet tank.
- Test the overflow tube: Flush the toilet and observe if the water level remains steady and does not overflow into the overflow tube. Additionally, ensure that there is no continuous flow of water into the bowl.
By repairing or replacing the overflow tube, you can ensure proper water flow and prevent a running toilet. It’s important to follow the manufacturer’s instructions or seek professional assistance if you are unsure about the installation process.
If the running toilet problem persists after repairing or replacing the overflow tube, it may be necessary to consult a professional plumber to further investigate and resolve the issue.
Read more: Why Does My Air Conditioner Run Constantly
Conclusion
A running toilet can be a frustrating and wasteful problem, but fortunately, it can often be resolved with some simple troubleshooting and repairs. By addressing the common causes of a running toilet, such as a faulty flapper valve, improper chain length, water level adjustment, defective float ball, malfunctioning fill valve, blockage in the flush valve, or a damaged overflow tube, you can restore the proper functioning of your toilet and eliminate the continuous flow of water.
Throughout this article, we have provided step-by-step instructions for fixing a running toilet, including how to replace the flapper valve, adjust the chain length, check and adjust the water level, replace the float ball, clean or replace the fill valve, remove flush valve blockages, and repair or replace the overflow tube. Following these instructions and taking appropriate action based on the identified cause can help you successfully resolve the problem.
Remember to always turn off the water supply before making any repairs or adjustments. Take care to follow the manufacturer’s guidelines or seek professional assistance if needed. Regular maintenance, periodic checks, and prompt troubleshooting can help prevent future running toilet issues and ensure the effective and efficient use of water in your home.
If you have addressed all the potential causes without success or if you prefer professional assistance, don’t hesitate to contact a licensed plumber who can provide expert advice and further resolve any persistent running toilet problems.
With the right knowledge and actions, you can fix a running toilet, save water, and enjoy a properly functioning bathroom fixture once again.
Frequently Asked Questions about Why Does My Toilet Run
Was this page helpful?
At Storables.com, we guarantee accurate and reliable information. Our content, validated by Expert Board Contributors, is crafted following stringent Editorial Policies. We're committed to providing you with well-researched, expert-backed insights for all your informational needs.
0 thoughts on “Why Does My Toilet Run”