Articles
Why Is My Rv Water Pump So Loud
Modified: August 16, 2024
Discover the reasons why your RV water pump is making excessive noise and find helpful articles to troubleshoot and fix the issue.
(Many of the links in this article redirect to a specific reviewed product. Your purchase of these products through affiliate links helps to generate commission for Storables.com, at no extra cost. Learn more)
Introduction
Welcome to the world of RV travel, where the open road awaits and adventure is just a turn of the key away. As any seasoned RV owner knows, there can be occasional challenges that arise during your travels. One common issue that many RV enthusiasts encounter is a loud water pump. If you’ve ever been startled by the noisy whirring and vibrating sounds coming from your RV’s water pump, you’re not alone.
An RV water pump is an essential component of your RV’s plumbing system. It is responsible for drawing water from the storage tank and delivering it to your faucets, shower, and toilet. However, when the water pump becomes loud, it can disrupt the peaceful atmosphere of your RV and leave you wondering what could be causing the noise.
In this article, we will delve deeper into the world of RV water pumps and explore why they can be so loud. We’ll discuss the common reasons behind the noise and provide practical solutions to help you quiet down your water pump. So, if you’re tired of the obnoxious noise and looking for ways to enjoy a quiet and peaceful RV journey, read on.
Key Takeaways:
- Say goodbye to the disruptive noise of your RV water pump by identifying and addressing common causes such as low water levels, air in the system, and worn-out parts. Enjoy a peaceful RV journey with these practical solutions.
- Keep your RV water pump running smoothly and quietly with regular maintenance. From purging air from the system to using RV-friendly toilet paper, these simple steps will ensure a peaceful and hassle-free RV experience.
Read more: Why Is My Rv Water Pump Not Working
Understanding RV Water Pumps
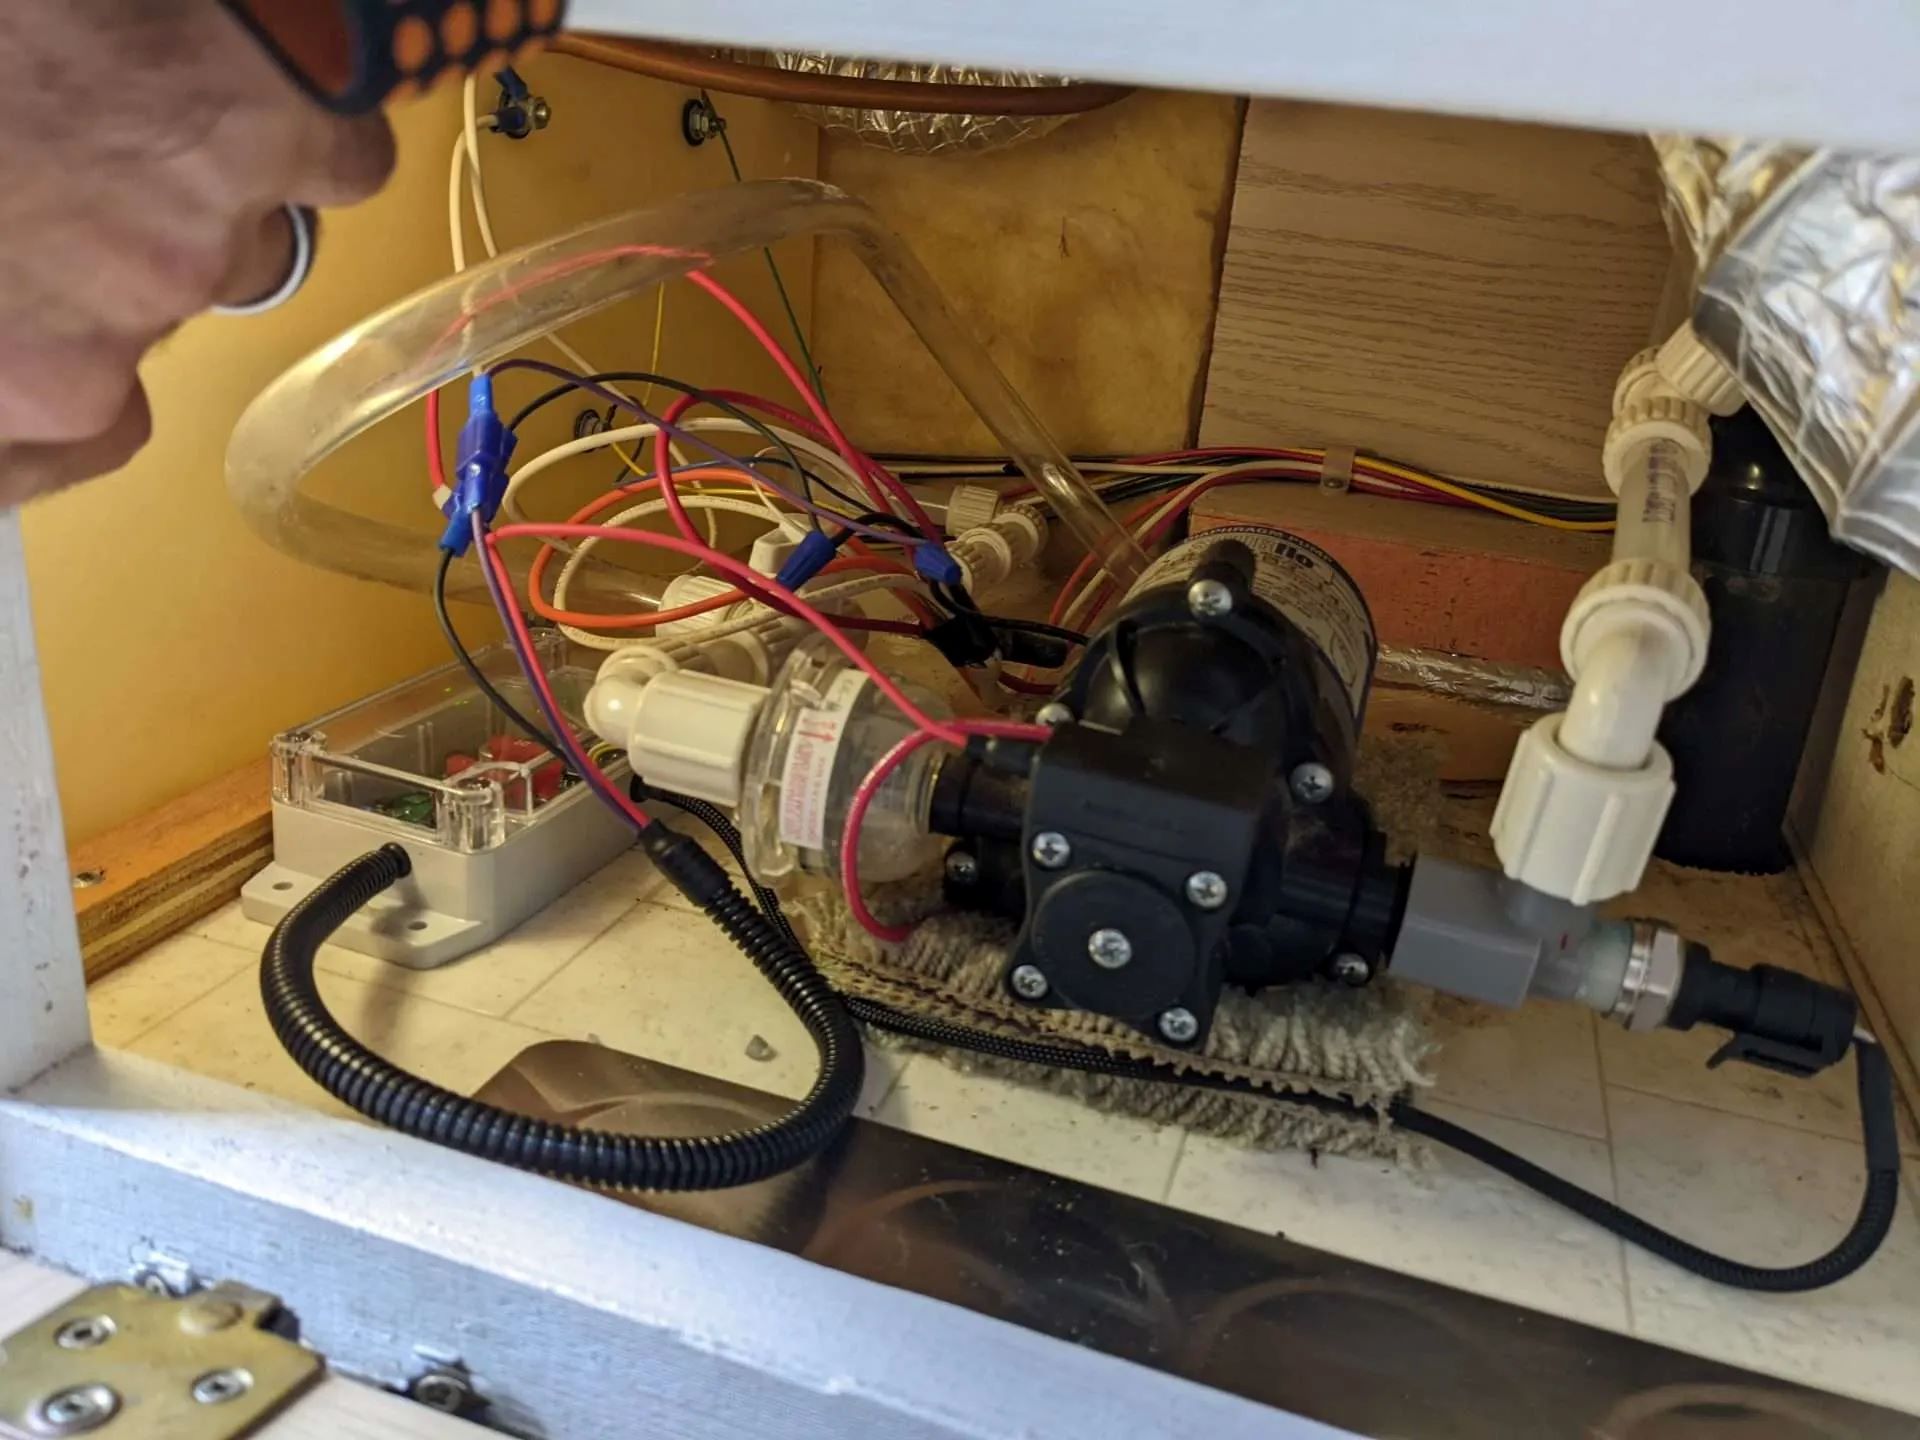
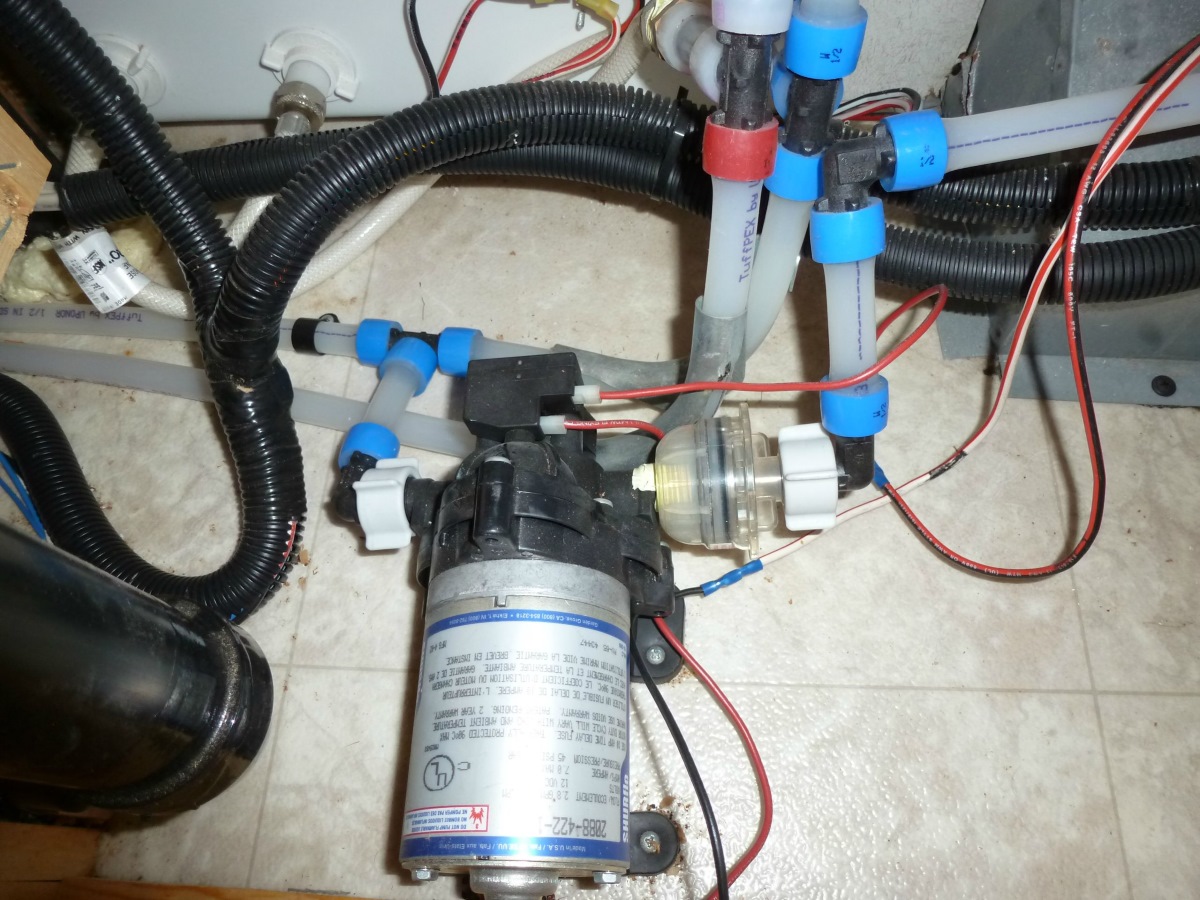
Before we dive into the reasons for a loud RV water pump, let’s first understand how these pumps function. RV water pumps are typically electrically powered and designed to provide a steady flow of water throughout your recreational vehicle.
The water pump is connected to your RV’s storage tank and works by creating a vacuum, which pulls water into the pump from the tank. From there, the pump pressurizes the water and sends it through the plumbing system to your faucets and other water fixtures.
It’s important to note that RV water pumps are designed to be self-priming, meaning they can draw water from the tank even if it’s not filled to capacity. This feature is essential for RVs, as they may not always have access to a full water source.
RV water pumps can vary in size and capacity, depending on the size of your rig and your water needs. They are typically constructed with lightweight materials and equipped with a diaphragm or impeller mechanism, which helps create the necessary pressure to supply water throughout the RV.
Now that we have a basic understanding of how RV water pumps work, let’s explore the common reasons why they can generate so much noise.
Common Reasons for a Loud RV Water Pump
There are several factors that can contribute to a loud RV water pump. Understanding these reasons can help you identify the source of the noise and take appropriate measures to fix it. Here are some common causes:
- Lack of water: If the water level in your RV’s storage tank is too low, the water pump may have to work harder to draw water. This can result in increased noise as the pump strains to pull in water.
- Air in the system: Air can enter the plumbing system, which can cause the water pump to vibrate and produce noise. This can happen if there are leaks in the plumbing or if you recently filled the water tank and air was trapped in the lines.
- Loose fittings: Loose fittings or connections in the plumbing system can create vibrations, leading to a noisy water pump. Check all the connections around the pump and tighten any loose fittings.
- Worn-out parts: Over time, the diaphragm or impeller in the water pump can wear out, causing the pump to become noisy. If you’ve had your RV for a while and haven’t replaced these parts, it may be time to do so.
- Excessive pressure: If the pressure regulator on your water pump is set too high, it can cause the pump to vibrate and produce noise. Adjust the pressure to the manufacturer’s recommended levels to minimize the noise.
- Water hammer: Water hammer occurs when the flow of water is abruptly stopped or changed direction, causing a shockwave and resulting in loud banging noises. This can happen when faucets are closed too quickly or if the plumbing system is not properly installed with water hammer arrestors.
By identifying the root cause of the noise, you can take the necessary steps to address the issue and enjoy a quieter RV water pump. Let’s explore some solutions to fix the noise problem next.
Check for any air in the water lines, as this can cause the water pump to work harder and become louder. You can also try adding a water pump silencer to reduce the noise.
Fixing the Noise Issue
Dealing with a loud RV water pump can be frustrating, but fortunately, there are several solutions available to help mitigate the noise. Here are some steps you can take to fix the noise issue:
- Check the water level: Ensure that your RV’s water tank is sufficiently filled. A low water level can cause the pump to work harder, resulting in increased noise. If needed, fill the tank with water to the recommended level.
- Purge air from the system: If you suspect there is air trapped in the plumbing system, you can try purging it out. To do this, turn on all faucets in your RV and let the water run for a few minutes. This will help push out any trapped air and reduce the noise.
- Tighten loose fittings: Inspect the connections around the water pump and tighten any loose fittings. This will help minimize vibrations and reduce noise. You may also consider using rubber washers or adding insulation around the fittings for further noise reduction.
- Replace worn-out parts: If your water pump’s diaphragm or impeller is worn out, it may be necessary to replace them. These parts can degrade over time, causing the pump to become noisy. Consult your RV’s manual or contact the manufacturer for guidance on replacing these components.
- Adjust pressure regulator: Check the pressure regulator on your water pump and make sure it is set to the manufacturer’s recommended pressure levels. Adjusting the pressure to the appropriate range can help reduce vibrations and minimize noise.
- Install water hammer arrestors: If water hammer is the cause of the noise, consider installing water hammer arrestors in your RV’s plumbing system. These devices absorb the shockwaves created by water hammer, preventing loud banging noises. Consult a professional or refer to your RV’s manual for proper installation.
By following these steps, you can effectively address the noise issue and enjoy a quieter RV water pump. However, it’s essential to remember that regular maintenance is crucial to prevent future noise problems.
Proper Maintenance for RV Water Pumps
To keep your RV water pump functioning efficiently and quietly, regular maintenance is essential. Here are some maintenance tips to help prolong the life of your water pump and prevent noise issues:
- Clean or replace filters: Many RV water pumps have filters that help prevent debris from entering the pump. Regularly clean or replace these filters to ensure optimal water flow and reduce strain on the pump.
- Check for leaks: Inspect your RV’s plumbing system for any leaks. Leaks can introduce air into the system and cause the water pump to vibrate and produce noise. Fix any leaks promptly to prevent further issues.
- Use RV-friendly toilet paper: Certain toilet paper brands can be more prone to clogging and causing strain on the water pump. Opt for RV-friendly toilet paper that is designed to dissolve easily and avoid potential clogs.
- Winterize your RV: If you plan to store your RV during the winter months, properly winterize your water pump to prevent any damage from freezing temperatures. Consult your RV’s manual or seek professional guidance on the appropriate winterization process.
- Keep the pump clean: Periodically clean the exterior of the water pump to remove any dirt or debris that may have accumulated. A clean pump is less likely to experience unnecessary vibrations and noise.
- Follow manufacturer’s instructions: Always refer to the manufacturer’s instructions for specific maintenance guidelines and recommendations. Each water pump may have unique requirements, and following these instructions will help ensure optimal performance and minimize noise.
By incorporating these maintenance practices into your routine, you can help prolong the life of your RV water pump and prevent noise issues from occurring. Additionally, regular maintenance will contribute to a more enjoyable and hassle-free RV experience.
Read more: Why Is My Electric Kettle So Loud
Conclusion
A loud RV water pump can be a nuisance during your travels, but with a better understanding of how these pumps work and the reasons behind the noise, you can take the necessary steps to address the issue. By checking the water level, purging air from the system, tightening fittings, replacing worn-out parts, adjusting the pressure regulator, and installing water hammer arrestors, you can significantly reduce the noise produced by your RV’s water pump.
Proper maintenance is key to preventing future noise problems and ensuring the longevity of your water pump. Regularly cleaning or replacing filters, checking for leaks, using RV-friendly toilet paper, winterizing your RV when necessary, and keeping the pump clean will help keep your water pump running smoothly and quietly.
Remember, each RV and water pump may have unique characteristics and requirements, so it’s important to consult your RV’s manual or seek professional advice for specific maintenance guidelines. By following these steps and being proactive in addressing any noise issues, you can enjoy the peace and tranquility of your RV travels without the disruptive noise of a loud water pump.
So, next time you hit the road in your RV, rest assured knowing that you have the knowledge and tools to keep your water pump operating quietly, allowing you to fully immerse yourself in the joy of the RV lifestyle.
Frequently Asked Questions about Why Is My Rv Water Pump So Loud
Was this page helpful?
At Storables.com, we guarantee accurate and reliable information. Our content, validated by Expert Board Contributors, is crafted following stringent Editorial Policies. We're committed to providing you with well-researched, expert-backed insights for all your informational needs.


0 thoughts on “Why Is My Rv Water Pump So Loud”