Home>Dining>Events & Etiquette>How To Make A Graduation Dinner Invitation
Events & Etiquette
How To Make A Graduation Dinner Invitation
Modified: February 27, 2024
Learn the proper event and etiquette to create a memorable graduation dinner invitation with our step-by-step guide. Impress your guests and celebrate this milestone with style!
(Many of the links in this article redirect to a specific reviewed product. Your purchase of these products through affiliate links helps to generate commission for Storables.com, at no extra cost. Learn more)
Introduction
Congratulations on your upcoming graduation! It’s an exciting milestone that deserves to be celebrated with your loved ones. One of the best ways to mark this achievement is by hosting a graduation dinner. It’s a perfect opportunity to gather friends and family together to commemorate your hard work and accomplishments.
Planning a graduation dinner can be an enjoyable and rewarding experience. It allows you to showcase your personal style and creativity while creating lasting memories. From choosing a theme to designing the invitations, and from preparing the menu to organizing the entertainment, there are several key steps to follow to ensure a successful event.
In this article, we’ll guide you through each step of the process, providing valuable tips and ideas to help you create a memorable graduation dinner invitation. So, let’s dive in and start planning an extraordinary celebration!
Key Takeaways:
- Celebrate your graduation with a themed dinner to reflect your journey and achievements. From classic elegance to beach vibes, choose a theme that resonates with your personality and style.
- Ensure a memorable graduation dinner by capturing precious memories through photographs, videos, and personalized touches. Cherish the moments and share the joy with your loved ones for years to come.
Read more: How To Cancel A Dinner Invitation
Step 1: Choose a Theme
Choosing a theme for your graduation dinner can add a fun and unique touch to the event. It sets the tone and atmosphere, making it a memorable experience for both you and your guests. When selecting a theme, consider your personal preferences, interests, and future goals.
There are endless theme possibilities to choose from, depending on your style and the type of celebration you envision. Here are a few ideas to get you started:
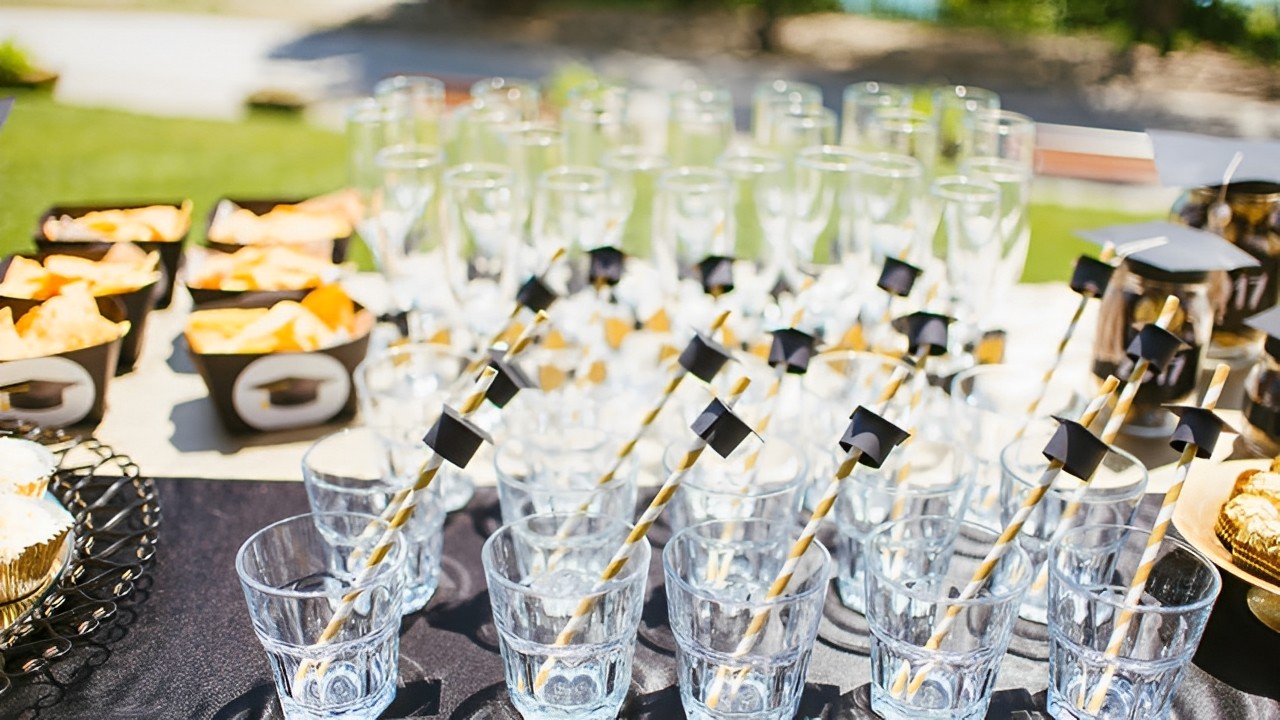
- Classic Elegance: Opt for a sophisticated and timeless theme that exudes style and sophistication. Use a color scheme of black, white, and gold, and decorate with elegant centerpieces and formal table settings.
- Rustic Charm: Create a cozy and inviting atmosphere with a rustic theme. Incorporate natural elements like burlap, twine, and wooden accents. Use mason jars as vases and arrange wildflowers as centerpieces.
- Beach Vibes: If you love the ocean, a beach-themed graduation dinner can be a great choice. Decorate with seashells, starfish, and tropical flowers. Set up a beach-inspired backdrop for photos and consider serving seafood dishes.
- Hollywood Glamour: Embrace the glitz and glamour of Hollywood with a red carpet-themed celebration. Roll out a red carpet as guests arrive and set up a photo booth with props. Serve appetizers inspired by classic movie snacks.
- Travel Adventure: If you have a passion for exploring the world, a travel-themed graduation dinner can be a fantastic idea. Incorporate globe decorations, vintage suitcases, and maps. Create a menu featuring dishes from different countries.
Once you decide on a theme, be consistent with your choice of decorations, colors, and overall ambiance. This will ensure a cohesive and visually appealing event.
Remember to choose a theme that reflects your personality and resonates with your guests. It’s your special day, and the theme should be a reflection of your journey and achievements. So, take some time to brainstorm ideas and create a theme that truly speaks to you!
Step 2: Select a Date and Time
Once you have chosen a theme for your graduation dinner, it’s time to select a date and time that works best for you and your guests. When deciding on the date, consider your graduation ceremony, as well as the availability of your friends and family.
Here are a few tips to help you choose the perfect date and time:
- Check your graduation ceremony schedule: Find out the date and time of your graduation ceremony to ensure that your dinner doesn’t clash with it. It’s essential to give yourself enough time to attend the ceremony and get ready for the dinner.
- Consider weekdays or weekends: Decide whether you prefer a weekday or weekend for your graduation dinner. Weekends are often more convenient for guests who may have work or other commitments during the week.
- Think about the time of day: Determine if you want to host a lunchtime gathering or an evening dinner. Consider what works best for you and your guests’ schedules. If you choose an evening event, it allows for a more formal and elegant atmosphere.
- Factor in travel arrangements: If you have guests coming from out of town, make sure to give them enough notice to plan their travel arrangements. Consider their availability and any potential conflicts they may have.
Once you have a few potential dates in mind, reach out to your close friends and family to check their availability. You can do this through a group chat or by sending out a preliminary save-the-date message. Once you have a consensus on the best date and time, move forward with the planning process.
Remember to be flexible and considerate of your guests’ schedules. Graduation is a busy time for everyone, so choosing a date and time that works for the majority of your guests will ensure maximum attendance and enjoyment.
Step 3: Create a Guest List
Creating a guest list for your graduation dinner is a crucial step in the planning process. It will help you determine the size and scope of your event and ensure that you invite all the important people in your life. Here are some tips to guide you:
- Immediate Family: Start by including your immediate family members, such as parents, siblings, and grandparents. They are an important part of your support system and will undoubtedly want to celebrate this special occasion with you.
- Close Friends: Think about your closest friends who have been there for you throughout your educational journey. Include those who have supported and encouraged you along the way.
- Mentors and Teachers: Consider inviting mentors, professors, and teachers who have had a significant impact on your academic and personal growth. It’s a gesture of appreciation for their guidance and support.
- Extended Family: If you have a close relationship with your extended family members, such as aunts, uncles, and cousins, include them on your guest list. They will be delighted to celebrate your accomplishments.
- Close Colleagues: If you’ve formed strong bonds with colleagues or fellow students during your time in school or college, consider inviting them to share in the celebration.
- Special Individuals: Include any other special individuals who have played a significant role in your life. This could be a mentor from an extracurricular activity, a coach, or a tutor who helped you excel academically.
Remember, it’s important to strike a balance between inviting those closest to you and keeping the event manageable. Take into account the size of the venue, budget constraints, and any limitations on the number of guests.
To ensure accuracy, keep track of the names and contact information of your guests in a spreadsheet or digital document. This will make it easier to send out invitations and keep all the necessary information in one place.
Creating a guest list is an exciting opportunity to bring together the people who have been an important part of your educational journey. By inviting those who have supported and believed in you, your graduation dinner will be filled with love and joy.
Step 4: Design the Invitation
Designing the invitation for your graduation dinner plays a crucial role in setting the tone and excitement for the event. It’s your opportunity to showcase your creativity and personality while providing your guests with essential information. Here’s how to design a standout invitation:
- Choose a format: Decide on the format of your invitation. You can opt for traditional physical invitations, digital invitations, or a combination of both. Consider your budget, the convenience for your guests, and the overall aesthetic you want to achieve.
- Select a design: Choose a design that aligns with your graduation dinner theme. You can use online invitation platforms that offer customizable templates or hire a graphic designer for a personalized touch. Include meaningful graphics, symbols, or images that represent your journey and accomplishments.
- Incorporate your graduation photo: Including a recent graduation photo of yourself adds a personal touch to the invitation. It’s a wonderful way to showcase your achievement and make your guests feel more connected to the festivities.
- Consider typography and colors: Select fonts and colors that match your theme and reflect your style. Use clear and legible fonts for the text, ensuring that all the information is easily readable. Consider using your school colors or colors that represent your future goals.
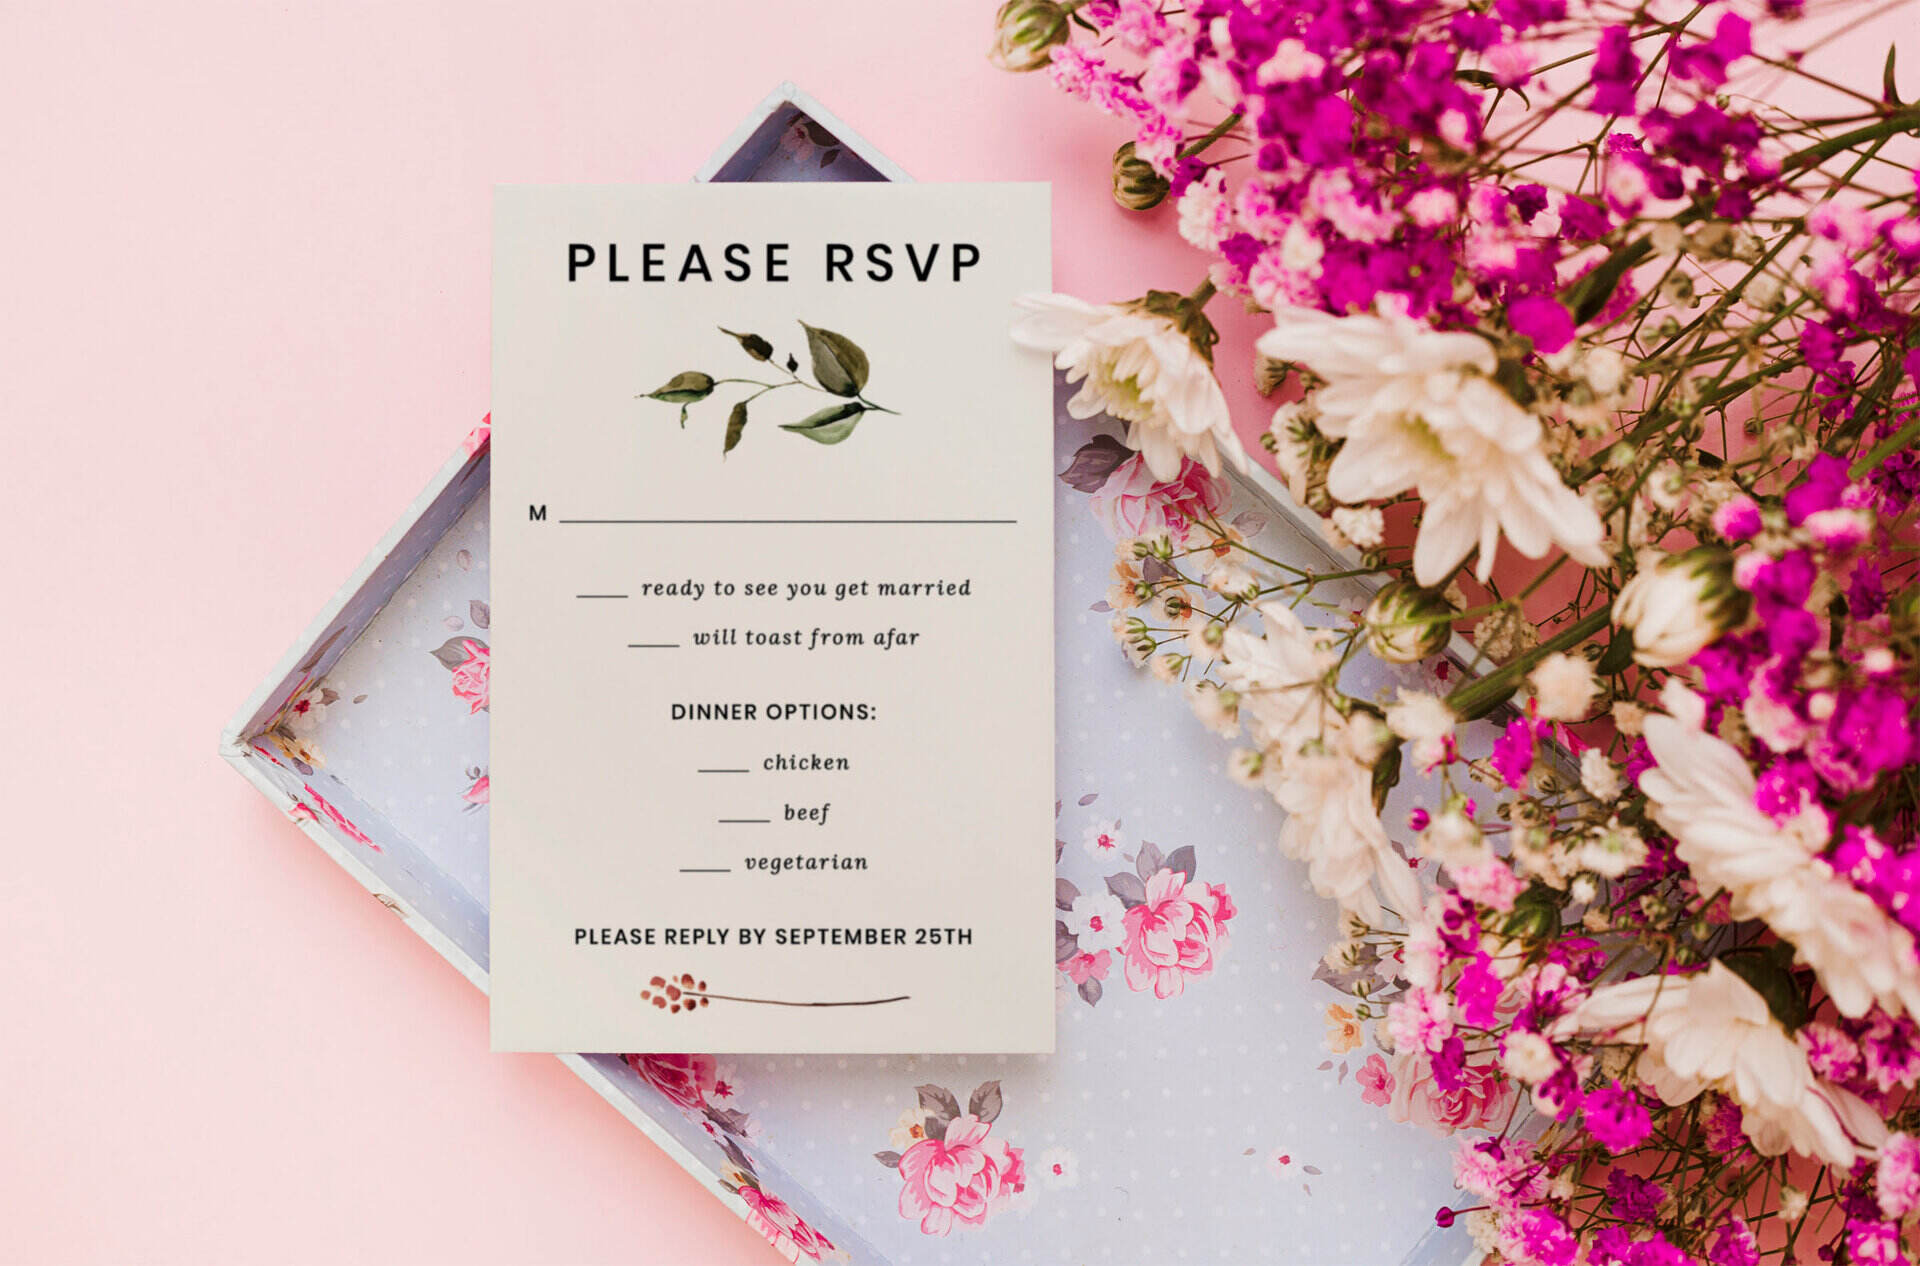
- Include the necessary details: Make sure to include all the essential information on the invitation. This includes the date, time, location, dress code (if applicable), RSVP instructions, and any additional instructions or requests you may have for your guests.
- Add a personal touch: Consider including a heartfelt message or a short poem that reflects your journey and gratitude. It’s an excellent opportunity to express your appreciation and excitement for sharing this special occasion with your guests.
Remember to proofread the invitation before finalizing it. Check for any spelling errors, grammatical mistakes, or missing information. It’s also a good idea to have a trusted friend or family member review it as an extra set of eyes.
Whether you choose a physical or digital invitation, ensure that it conveys the excitement and importance of your graduation dinner. Your well-designed and informative invitation will make a lasting impression on your guests and generate excitement for the upcoming celebration.
Read more: How To Accept A Dinner Invitation
Step 5: Include Relevant Information
When it comes to creating a graduation dinner invitation, it’s essential to include all the relevant information that your guests will need to know. Providing clear and concise details ensures that everyone is well-informed and prepared for the event. Here’s a list of relevant information to include:
- Date and time: Clearly state the date and time of the graduation dinner. Include the day of the week, the month, and the specific time when the event will start.
- Location and address: Provide the complete address of the venue where the dinner will take place. Include the street name, city, and any additional details that will help your guests find the location easily.
- Dress code: If you have a specific dress code for the event, make sure to include it on the invitation. Whether it’s formal attire, casual or themed dress, let your guests know what is expected of them.
- RSVP instructions: Clearly state how you would like your guests to RSVP. Include your contact information, such as your phone number or email address, and specify the deadline for RSVPs. This will help you plan for the right number of guests and make necessary arrangements.
- Additional instructions: If there are any special instructions or requests for your guests, such as bringing a dish to share or informing you of any dietary restrictions, make sure to include them on the invitation. This will ensure that everyone is well-prepared and accommodated.
- Graduation achievements: Consider including a section on the invitation to highlight your academic achievements. Mention any honors, awards, or special recognitions you received during your education. This will give your guests a sense of your accomplishments and make the event even more meaningful.
Ensure that the information is presented in a clear and organized manner on the invitation. Use bullet points or separate sections to make it easy for guests to find the information they need. You may also consider including a small map or directions to the venue if it’s in an unfamiliar location.
By including all the relevant information, you’ll provide your guests with a comprehensive understanding of the graduation dinner, leaving no room for confusion or uncertainty. It’s important to make your guests feel well-informed and excited to celebrate this milestone with you.
Step 6: Finalize and Print the Invitation
Once you have designed the graduation dinner invitation and included all the relevant information, it’s time to finalize and prepare them for distribution. Here’s how to ensure your invitations are ready for print:
- Double-check the details: Before sending the invitations for printing, carefully review and double-check all the information on the invitation. Make sure there are no spelling errors, missing details, or inconsistencies. It’s crucial to ensure the accuracy of the information.
- Select the printing method: Decide on the printing method that best suits your needs and budget. You can choose to print the invitations yourself if you have the necessary equipment and expertise. Alternatively, you can hire a professional printing service to ensure high-quality results.
- Choose the paper and finish: Select the type of paper and finish that aligns with your desired aesthetic. Consider factors such as texture, thickness, and glossiness to enhance the overall appeal of the invitation.
- Review the layout and design: Take a final look at the layout and design of the invitation. Ensure that all the elements, such as fonts, colors, and images, are well-balanced and visually appealing. Make any necessary adjustments to improve the overall presentation.
- Print a sample: Before printing a large batch of invitations, it’s wise to print a sample copy first. This allows you to assess the print quality, colors, and overall appearance of the invitation. If any adjustments are needed, you can make them before printing the final batch.
- Print an appropriate quantity: Estimate the number of guests you plan to invite and print an appropriate quantity of invitations. It’s always a good idea to have a few extra invitations on hand for any last-minute additions or for keepsakes.
- Consider eco-friendly options: If you’re environmentally conscious, consider using recycled paper or eco-friendly printing practices. This helps reduce your carbon footprint and demonstrates your commitment to sustainability.
Once the invitations are printed, carefully inspect each one for quality control. Check for any smudges, misprints, or packaging errors. Ensure that all the invitations are in pristine condition before preparing them for distribution.
Remember to keep a copy of the invitation for your own records as a memento of this significant milestone in your life. It’s a keepsake that you can cherish and look back on with fond memories.
By finalizing and printing the invitations with precision and care, you’ll be able to share your graduation dinner details in a beautiful and professional manner. The invitations will serve as a meaningful representation of your accomplishment and set the stage for an unforgettable celebration.
Step 7: Send out the Invitations
With your graduation dinner invitations finalized and printed, it’s time to send them out to your guests. This step is crucial in ensuring that your loved ones receive their invitations in a timely manner and have all the necessary details for the event. Here’s how to send out the invitations:
- Organize your guest list: Retrieve your guest list and ensure that all the names and contact details are up to date. This will help you track who you’ve sent invitations to and who you’re still waiting for responses from.
- Address the envelopes: Carefully address each envelope with the appropriate guest’s name and address. Pay attention to proper spelling and accurate information to avoid any delivery issues.
- Include the invitations: Insert the invitations, along with any additional materials such as RSVP cards or envelopes, into the addressed envelopes. Be sure to handle the invitations with care to avoid smudging or damaging them.
- Add postage: Affix the necessary postage to each envelope. Check the weight and size of the envelope to ensure you use the correct postage amount. If in doubt, visit your local post office for assistance.
- Send the invitations: Take your prepared invitations to the post office or a mailbox to send them out. Keep in mind any recommended mailing timelines to allow for sufficient delivery time, especially if guests are located far away.
- Follow up if needed: Keep track of which guests have received their invitations and who may require a follow-up. Send a gentle reminder or reach out to guests you haven’t heard from after the RSVP deadline to ensure you have an accurate count for your preparations.
- Consider digital invitations: In addition to or instead of physical invitations, you may choose to send digital invitations through email or online platforms. Digital invitations are convenient and eco-friendly alternatives, especially for guests who prefer electronic communication.
Remember to allow sufficient time between sending the invitations and the RSVP deadline. This will give your guests enough time to respond and make the necessary arrangements to attend your graduation dinner.
Personalize the process by adding a short handwritten note or a personalized message to each invitation. This small gesture adds warmth and shows your guests that you genuinely value their presence at your celebration.
By sending out the invitations promptly and keeping track of responses, you’ll ensure that your guests receive their invitations in a timely manner and have ample opportunity to RSVP. This step brings you one step closer to the exciting day of your graduation dinner!
Include the date, time, location, and RSVP information on the invitation. You can also add a personal touch by including a photo of the graduate or a graduation-themed design.
Step 8: Plan the Menu
Planning the menu for your graduation dinner is an essential step to ensure that your guests are treated to a delicious and memorable meal. Whether you’re hosting a formal sit-down dinner, a buffet-style gathering, or a casual backyard BBQ, here are some tips to help you plan the menu:
- Consider dietary restrictions: Take into account any dietary restrictions or allergies that your guests may have. Ask for their preferences and ensure that there are suitable options for everyone. Include vegetarian, vegan, gluten-free, or other special dietary dishes to accommodate their needs.
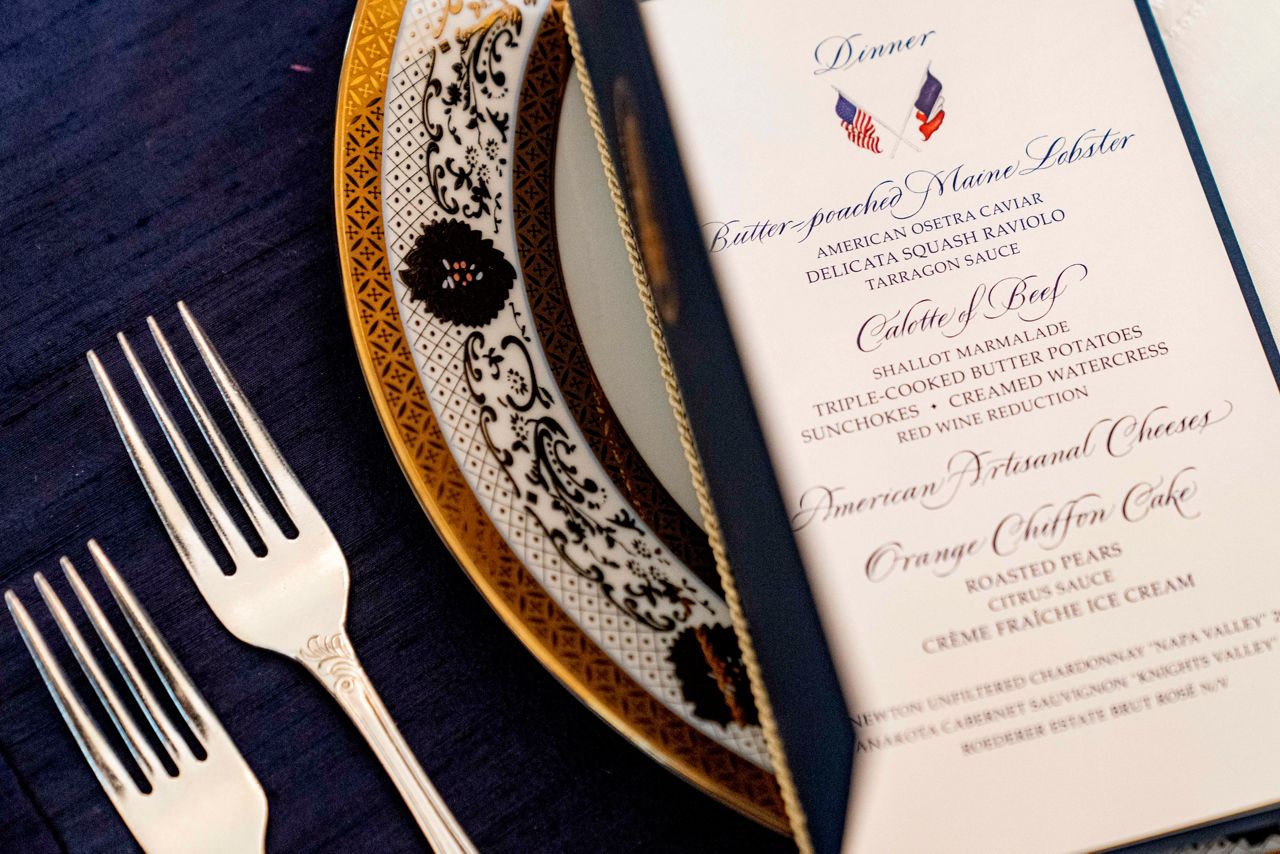
- Choose a variety of dishes: Aim for variety in your menu to cater to different tastes and preferences. Include a mix of appetizers, main courses, side dishes, and desserts. Consider offering a selection of proteins, such as chicken, beef, seafood, as well as vegetarian options. Make sure to have a balance of flavors and textures.
- Showcase your favorite dishes: Use this opportunity to share some of your favorite dishes with your guests. Think about dishes that hold sentimental value or are representative of your culinary interests. Incorporate family recipes or dishes that have a personal connection to your educational journey.
- Local and seasonal ingredients: Consider using local and seasonal ingredients in your menu. This not only supports local farmers and businesses but also ensures that you’re serving the freshest and most flavorful dishes. Incorporate seasonal produce and ingredients into your appetizers, salads, and main courses.
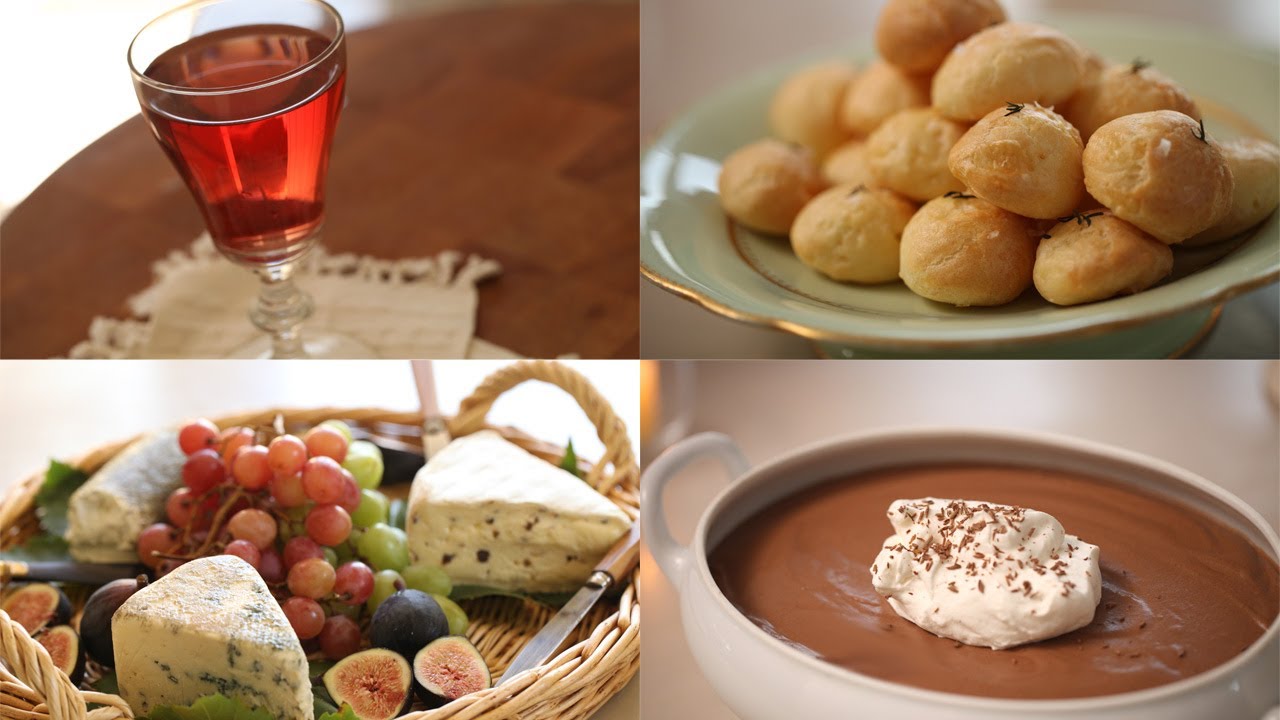
- Coordinate flavors and courses: Plan your menu to have a progression of flavors and courses. Start with lighter appetizers or salads, followed by more substantial main courses, and finish with delectable desserts. Consider complementing flavors and textures, such as pairing a savory main course with a refreshing side dish.
- Beverage selection: Alongside the food, plan a beverage selection that complements your menu. Offer a variety of options, including non-alcoholic beverages, as well as alcoholic options such as wine, beer, or signature cocktails. Ensure that you have enough drinks for all your guests.
- Leave room for creativity: Put your own twist on the menu by adding unique elements or flavors that reflect your style and personality. Don’t be afraid to experiment with new recipes or incorporate cultural dishes that are meaningful to you.
Consider your budget when planning the menu and be realistic about what you can afford. Keep in mind that it’s more important to have quality and well-prepared dishes rather than trying to offer a large quantity of food.
If you’re not confident in your cooking abilities, consider hiring a professional caterer or seeking assistance from family members or friends who are skilled in the kitchen. This will ensure that the food is expertly prepared and allow you to focus on enjoying the celebration with your guests.
Planning a well-thought-out menu will not only satisfy your guests’ appetites but also create a memorable dining experience that complements the significance of your graduation celebration.
Read more: How To Respond To A Dinner Invitation
Step 9: Arrange for Decorations
To make your graduation dinner visually appealing and create a festive atmosphere, it’s important to set your table with the right decorations. These elements not only enhance the overall ambiance but also add a personal touch to your celebration. Here’s how to arrange for decorations that will make your event memorable:
- Consider your theme: Take your chosen theme into account when selecting decorations. Ensure that the decorations align with the overall style and ambiance you want to create. Coordinate colors, patterns, and elements to create a cohesive look.
- Table centerpieces: Create eye-catching table centerpieces that tie into your theme. You can use flowers, candles, or themed decorations that reflect your graduation journey. Balance the size and height of the centerpieces so they don’t obstruct guests’ views during the meal.
- Table linens and place settings: Choose table linens and place settings that complement your theme and color scheme. Consider using tablecloths, napkins, and table runners that enhance the overall aesthetic of the event. Use coordinating or personalized place cards to guide guests to their seats.
- Backdrop and photo area: Create a designated area with a backdrop where guests can take memorable photos. This could be a decorated wall, a customized photo booth, or even a themed backdrop that aligns with your graduation dinner. Provide props or signs for guests to use in their photos.
- Banners and signs: Hang banners or signs that celebrate your graduation achievement. These can include phrases like “Congratulations,” “Class of [Year],” or any personalized messages you want to include. Display them prominently to add a festive touch to the venue.
- Graduation memorabilia: Showcase your diploma, awards, and other graduation memorabilia as part of the decorations. Include framed photos or a memory board to highlight memorable moments from your educational journey. This adds a personal touch and serves as a visual representation of your achievements.
- Lighting: Use appropriate lighting to create a warm and inviting ambiance. Consider string lights, candles, or soft LED lights to add a touch of elegance to the event. Dim the lights slightly during dinner to create a cozy atmosphere.
- Personalized touches: Incorporate personalized touches throughout the venue. This could include displaying your graduation cap or gown, creating a display of your favorite quotes or achievements, or showcasing a slideshow of memories from your educational journey.
Remember, decorations should enhance the celebration and create an enjoyable atmosphere, but they should not be overwhelming or obstructive. Strike a balance between creating a visually appealing space and allowing ample room for guests to move around comfortably.
If you need assistance with decorating, consider involving your friends and family. They may have creative ideas or be willing to help set up the decorations on the day of the event. Teamwork can make the process more enjoyable and efficient.
By arranging for decorations that tie into your theme and showcase your accomplishments, you’ll create a visually stunning backdrop for your graduation dinner and leave a lasting impression on your guests.
Step 10: Prepare a Schedule of Events
Creating a schedule of events for your graduation dinner will help ensure that everything flows smoothly and that you make the most of the celebration. It allows you to organize the different activities and ensure that each moment is memorable. Here’s how to prepare a schedule of events:
- Welcome and introductions: Begin your schedule with a warm welcome and introductions. Take a moment to thank your guests for attending and acknowledge any special guests or individuals who have supported you throughout your educational journey.
- Speech or toast: Consider delivering a short speech or toast to express your gratitude and share your thoughts on this milestone. Use this opportunity to reflect on your achievements, thank your loved ones, and express your excitement for the future.
- Dinner service: Organize the timeline for dinner service. Coordinate with the catering team or plan the order of service if you are self-catering. Ensure that there is enough time for guests to mingle and enjoy their meal.
- Entertainment or performances: If you have planned any entertainment or performances, allocate time in the schedule for these activities. This could include music performances, a DJ, a live band, or even a slideshow or video presentation.
- Special recognitions: If you plan to acknowledge any special individuals or achievements during the dinner, schedule a specific time for these recognitions. This could include honoring mentors, presenting awards, or sharing stories about your educational journey.
- Cake cutting and dessert: Allocate a moment for the cake cutting ceremony if you have one. Plan for dessert service and any special desserts or treats you have prepared. Make sure to allow time for guests to enjoy the sweet offerings.
- Speeches or messages from guests: If you have invited guests who would like to share their well wishes or messages, allocate time on the schedule for these speeches. Coordinate with the individuals beforehand to ensure a smooth and organized program.
- Dancing or entertainment continuation: If there is ample space or a designated area for dancing or continued entertainment, plan for this time in the schedule. This allows guests to let loose, celebrate, and enjoy the rest of the evening.
- Closing remarks: End the schedule with closing remarks to express your gratitude once again, thank your guests for attending, and signal the end of the formal program. Encourage guests to continue celebrating and enjoying the remainder of the event.
Keep in mind that the schedule is a guide and can be flexible. Allow for some spontaneity and ensure that there is ample time for conversations, laughter, and enjoyable moments with your guests.
Communicate the schedule of events to your guests in advance. This can be done through the invitation, a separate printed program, or by sharing the schedule verbally at the beginning of the dinner. This ensures everyone is aware of the flow of the evening.
By preparing a schedule of events, you’ll have a clear plan for the evening, ensuring that everything runs smoothly and that each moment is meaningful and enjoyable for both you and your guests.
Step 11: Consider Additional Entertainment
Incorporating additional entertainment into your graduation dinner can elevate the celebration and create a lively and engaging atmosphere. It adds an element of fun and ensures that guests of all ages have a memorable experience. Here are some ideas to consider for additional entertainment:
- Live music: Hire a live band or musician to perform during the dinner. Choose a genre that suits your taste and complements the atmosphere of the event. Live music adds a touch of elegance and can create a vibrant energy in the room.
- DJ or dance floor: Set up a dance floor and hire a DJ to provide music and entertainment for your guests. This allows everyone to let loose and celebrate your graduation on the dance floor. Make sure to include a mix of songs that cater to different genres and generations.
- Photo booth: Set up a photo booth area with props and backdrops where guests can take fun and memorable photos. Provide a camera or hire a professional photographer to capture these special moments. Guests can take home printed photos as souvenirs.
- Magician or entertainer: Hire a magician or entertainer to perform tricks or engage guests with interactive performances. This adds a sense of wonder and excitement to the evening and keeps guests entertained during lulls in the schedule.
- Trivia or games: Include trivia or interactive games during the dinner to engage and entertain your guests. Prepare trivia questions related to your educational journey or incorporate games that encourage mingling and interaction.
- Slideshow or video presentation: Create a slideshow or video presentation showcasing memorable moments from your educational journey. Include photos, videos, and quotes that capture the essence of your experience. This can be a heartwarming and nostalgic addition to the evening.
- Guest performances: Encourage guests to showcase their talents by inviting them to perform during the dinner. This can include singing, playing musical instruments, reciting poetry, or even displaying artwork. It creates a supportive and collaborative environment that celebrates the talents of your guests.
Consider the size of the venue, the preferences of your guests, and your budget when choosing additional entertainment. You want to ensure that it aligns with the overall atmosphere of the graduation dinner and enhances the celebratory mood.
Communicate the additional entertainment options to your guests beforehand so they can come prepared to participate or enjoy the activities. This can be done through the invitation or by including a separate program or schedule of events.
By incorporating additional entertainment into your graduation dinner, you can create a festive and engaging atmosphere that will keep your guests entertained and leave a lasting impression on everyone in attendance.
Step 12: Set Up and Decorate the Venue
Setting up and decorating the venue for your graduation dinner is an exciting and crucial step in bringing your vision to life. It’s your opportunity to transform the space into a beautiful and inviting atmosphere that reflects your style and celebrates your achievements. Here’s how to set up and decorate the venue:
- Plan the layout: Consider the flow of the event and the number of guests when planning the layout of the venue. Arrange tables, chairs, and any additional seating in a way that allows for easy movement and conversation. Ensure that there is enough space to accommodate all the planned activities.
- Table and chair setup: Set up tables and chairs, taking into account the number of guests and the desired seating arrangement. Ensure that each guest has a comfortable and designated seat. Use tablecloths, napkins, and chair covers that match your theme or color scheme.
- Decorate the tables: Add centerpieces, table runners, and place settings to decorate the tables. Incorporate elements that match your chosen theme, such as flowers, candles, or themed decor. Make sure that the decorations are visually appealing but not obstructive to conversation across the table.
- Adorn the walls: Decorate the walls of the venue with banners, signs, or themed decorations. Hang up pictures, posters, or displays that represent your academic journey. Consider displaying your achievements, such as diplomas or certificates, in prominent areas.
- Lighting: Pay attention to the lighting in the venue to create the desired ambiance. Use a combination of natural and artificial lighting to set the mood. Consider string lights, candles, or soft overhead lighting to create a warm and inviting atmosphere.
- Backdrop and photo area: Set up a designated backdrop or area for photos. Use props, banners, or themed decor to create an attractive photo spot. This will encourage guests to take memorable snapshots and create lasting memories.
- Create a focal point: Consider creating a focal point in the venue, such as a decorated stage or a decorated area for speeches and presentations. This draws attention to important moments and serves as a visual centerpiece of the event.
- Personalized touches: Add personalized touches throughout the venue that reflect your personality and educational journey. This can include framed photos, special mementos, or displays of your accomplishments. These personal touches make the venue feel uniquely yours.
- Consider seating arrangements: If you have designated seating arrangements, create place cards or a seating chart to guide guests to their seats. This helps to ensure a smooth flow and seating arrangements that foster conversation and connections.
- Coordinate with vendors: If you’re working with outside vendors, such as catering or entertainment, communicate with them regarding the setup and decor requirements. Provide them with any necessary information or instructions to ensure a seamless integration of their services into the overall venue setup.
Enlist the help of family members, friends, or a professional event planner to assist with setting up and decorating the venue. This will help alleviate some of the stress and ensure that everything is done efficiently.
Remember to take a moment to step back and appreciate the venue setup before the guests arrive. Take pride in the effort and thought you’ve put into creating a beautiful and meaningful space for your graduation dinner.
By setting up and decorating the venue with care and attention to detail, you’ll create a visually stunning and welcoming environment that will set the stage for a memorable celebration of your achievements.
Read more: How To RSVP To A Dinner Invitation
Step 13: Prepare and Serve the Dinner
Preparing and serving the dinner for your graduation celebration is an important and rewarding task. It’s an opportunity to showcase your culinary skills and treat your guests to a delicious meal. Here’s how to ensure a successful dinner service:
- Plan the menu: Refer to the menu you previously planned and finalize the list of dishes you’ll be serving. Make sure to consider any dietary restrictions or preferences of your guests.
- Organize the ingredients and supplies: Create a shopping list and gather all the necessary ingredients and supplies for the meal. Check if you have adequate cookware, serving dishes, and utensils. Consider renting or borrowing any additional items you may need.
- Prepare dishes in advance: Whenever possible, prepare dishes that can be made ahead of time. This will help alleviate stress on the day of the dinner and allow you to focus on other preparations.
- Coordinate with caterers or helpers: If you’ve enlisted the help of professional caterers or hired individuals to assist with the dinner preparation and service, communicate with them to ensure a smooth coordination of efforts. Provide them with clear instructions and timelines.
- Set up a food station: If you’re hosting a buffet-style dinner, designate a specific area for the food station. Arrange the dishes in an organized manner and provide serving utensils, plates, and napkins for guests to serve themselves.
- Ensure food safety: Take steps to maintain proper food safety and hygiene throughout the preparation and serving process. Keep perishable items refrigerated until they’re ready to be served, and ensure that all cooked food reaches the appropriate temperatures.
- Consider a plated dinner: If you prefer a more formal dining experience, consider serving a plated dinner. Assign servers or volunteers to distribute the plated meals to each guest. Ensure that each plate is presented well and that all guests are served simultaneously.
- Stay organized during the service: Keep track of the timing and coordination of the dinner service. Communicate with the kitchen staff, servers, or helpers to ensure smooth and timely delivery of dishes. Maintain a calm and organized presence to minimize any hiccups during the dinner.
- Consider a dessert table: Set up a designated area for desserts where guests can help themselves to a variety of sweet treats. Display the desserts attractively and provide labels or small note cards to identify each dessert.
- Accommodate special dietary needs: If any guests have notified you of specific dietary restrictions or allergies, ensure that their dietary needs are accommodated. Offer alternative dishes or provide clear labeling of ingredients for their reference.
To ensure a smooth dinner service, consider having a small team of helpers, such as family members or friends, to assist with serving and clearing the dishes. This allows you to focus on attending to your guests and enjoying the evening.
Remember, the dinner is not only about the food but about the overall experience and celebration. Pay attention to the presentation of the dishes, ensuring they are visually appealing and well-prepared.
By carefully preparing and serving the dinner, you’ll create a delightful culinary experience for your guests, filling their hearts and stomachs with joy and fond memories.
Step 14: Capturing Memories
No graduation dinner is complete without capturing the special moments and memories that will be cherished for years to come. Preserving these memories through photographs and other means ensures that the celebration lives on even after the event is over. Here’s how to capture and preserve memories from your graduation dinner:
- Hire a professional photographer: Consider hiring a professional photographer to capture high-quality photos throughout the event. A skilled photographer can capture candid moments, group photos, and individual portraits, ensuring that you have beautiful and professional images to look back on.
- Assign a designated photographer: If a professional photographer is not within your budget, designate a family member or friend to be the designated photographer for the evening. Provide them with a camera or smartphone and request that they capture moments throughout the dinner.
- Set up a photo booth: Create a designated area with props and a backdrop where guests can take fun and memorable photos. Set up a camera or encourage guests to use their smartphones to take photos. Provide instructions on how to access and share the photos later.
- Encourage guests to share photos: Create a designated hashtag for your graduation dinner and encourage guests to share their photos on social media using the hashtag. This allows everyone to contribute their own perspective and share their favorite moments from the evening.
- Record video messages: Set up a video recording area where guests can leave video messages to commemorate the occasion. Include a video camera or use smartphones to record heartfelt messages and well wishes from your loved ones.
- Create a memory book or guestbook: Prepare a memory book or guestbook where guests can write personal messages, share memories, or offer words of encouragement. Include photos from your educational journey or leave space for guests to insert their own photos.
- Curate a slideshow or video montage: Create a slideshow or video montage with photos and videos from your academic journey. Include images from school events, trips, or memorable moments. Set it to music and play it during the dinner to reminisce and share these memories with your guests.
- Collate and organize photos: Collect all the photos and videos captured during the graduation dinner. Create a digital album or physical photo album to compile these precious memories. Organize them chronologically or thematically to tell the story of your educational journey.
- Share and distribute the memories: Share the photos, videos, and other memories captured from the graduation dinner with your guests. This can be done through a dedicated online platform, email, or by mailing physical copies to your guests as a token of appreciation.
Remember to enjoy the celebration and be present in the moment, but also encourage your guests to capture and share their own memories. The more perspectives and memories that are documented, the richer the collection of memories will be.
By capturing and preserving memories from your graduation dinner, you’ll create a lasting keepsake that allows you to revisit the joyous moments and share them with future generations. These memories will be cherished for a lifetime.
Conclusion
Congratulations on reaching this important milestone in your educational journey! Planning a graduation dinner is an exciting opportunity to celebrate your accomplishments and create lasting memories with your loved ones. By following the steps outlined in this guide, you can organize a memorable and enjoyable event that reflects your personal style and highlights your achievements.
From choosing a theme and designing the invitation to preparing a delicious meal and capturing precious memories, each step plays a significant role in creating a successful graduation dinner. Remember to infuse your own personality and creativity into the planning process, making the event uniquely yours.
As you embark on the journey of planning your graduation dinner, pay attention to the details, but also take time to enjoy the process. This is a celebration of your hard work, dedication, and growth throughout your educational journey. It’s an occasion to express your gratitude to those who have supported and encouraged you along the way.
Whether you’re hosting an intimate gathering or a larger affair, remember that the most important aspect is the presence of your loved ones. Surround yourself with the people who have played a significant role in your life, and celebrate the collective achievements that bring you all together.
As you prepare for your graduation dinner, keep in mind the importance of etiquette and being a gracious host. Extend warm invitations, consider your guests’ dietary restrictions, and ensure their comfort throughout the event. A well-executed and thoughtful celebration will leave a lasting impression on your guests and make the evening unforgettable.
Lastly, cherish the memories created during your graduation dinner. From the laughter and heartfelt speeches to the shared moments of joy and reflection, these memories will serve as a reminder of your educational journey and the support of your loved ones. Preserve these memories through photographs, videos, and other means so that you can revisit and share these special moments in the years to come.
Once again, congratulations on this significant achievement. Embrace the excitement of planning your graduation dinner and enjoy every moment of this remarkable celebration. Cheers to a bright future ahead!
Frequently Asked Questions about How To Make A Graduation Dinner Invitation
Was this page helpful?
At Storables.com, we guarantee accurate and reliable information. Our content, validated by Expert Board Contributors, is crafted following stringent Editorial Policies. We're committed to providing you with well-researched, expert-backed insights for all your informational needs.


0 thoughts on “How To Make A Graduation Dinner Invitation”