Home>Furniture & Design>Bathroom Accessories>How To Open A Philips Sonicare Toothbrush
Bathroom Accessories
How To Open A Philips Sonicare Toothbrush
Modified: March 2, 2024
Learn how to open a Philips Sonicare toothbrush easily and safely. Find out the best techniques for maintaining your bathroom accessories.
(Many of the links in this article redirect to a specific reviewed product. Your purchase of these products through affiliate links helps to generate commission for Storables.com, at no extra cost. Learn more)
Introduction
Opening a Philips Sonicare toothbrush may seem like a daunting task, but with the right tools and a bit of know-how, it can be a straightforward process. Whether you need to replace the battery, clean the internal components, or simply satisfy your curiosity about the inner workings of this innovative device, understanding how to open a Philips Sonicare toothbrush is essential.
By following a few simple steps, you can gain access to the internal components of the toothbrush, allowing you to perform maintenance or repairs as needed. This guide will walk you through the process, providing clear instructions and tips to ensure a successful outcome.
Before embarking on this endeavor, it's important to note that opening your Philips Sonicare toothbrush may void any existing warranties. If your toothbrush is still under warranty, consider contacting the manufacturer or an authorized service center for assistance. However, if you're confident in your DIY skills and eager to explore the inner workings of your toothbrush, let's dive into the step-by-step process of opening a Philips Sonicare toothbrush.
With the right approach and attention to detail, you can safely open your Philips Sonicare toothbrush and gain a deeper understanding of its components. So, gather your tools and let's begin the journey of uncovering the inner secrets of your trusty oral care companion.
Key Takeaways:
- Opening a Philips Sonicare toothbrush requires gathering tools, removing the brush head and battery, and opening the casing. It’s a fascinating journey that offers insights into the device’s inner workings.
- Reassembling the toothbrush after exploration is crucial for maintaining its functionality. It’s a process that requires organization, attention to detail, and a sense of accomplishment.
Read more: Philips Sonicare Toothbrush: How To Use
Step 1: Gather the necessary tools
Before embarking on the process of opening a Philips Sonicare toothbrush, it's essential to gather the necessary tools to ensure a smooth and successful operation. Here's a comprehensive list of tools you'll need:
-
Philips Sonicare Toothbrush: The toothbrush itself is the primary tool you'll be working on. Ensure it is powered off and the brush head is removed before proceeding.
-
Small Screwdriver Set: A precision screwdriver set with various head sizes is crucial for removing the screws that secure the casing of the toothbrush. Phillips and flathead screwdrivers in different sizes will cover most types of screws used in the toothbrush.
-
Plastic Opening Tools: These non-conductive tools are designed to safely pry open electronic devices without causing damage. They come in various shapes and sizes and are ideal for separating the casing of the toothbrush without scratching or denting it.
-
Safety Glasses: When working with small components and tools, it's important to prioritize safety. Wearing safety glasses can protect your eyes from any accidental debris or small parts that may dislodge during the disassembly process.
-
Work Surface: Choose a clean, well-lit, and spacious work area to lay out the toothbrush and its components. A flat surface with ample space will provide a comfortable and organized environment for the disassembly process.
-
Container for Screws: As you remove screws and small components, it's crucial to keep them organized and prevent them from getting lost. A small container or magnetic tray can be used to store the screws and small parts as they are removed from the toothbrush.
By ensuring that you have all the necessary tools at your disposal, you can approach the task of opening a Philips Sonicare toothbrush with confidence and precision. With the right tools and a methodical approach, you'll be well-equipped to navigate the subsequent steps of disassembly and gain access to the internal components of the toothbrush.
Step 2: Remove the brush head
Removing the brush head is the initial step in gaining access to the internal components of your Philips Sonicare toothbrush. This process is essential for performing maintenance, replacing the battery, or exploring the inner workings of the device. Here's a detailed guide on how to remove the brush head safely and effectively.
-
Power Off the Toothbrush: Before proceeding, ensure that the toothbrush is powered off to prevent any accidental activation during the disassembly process. If the toothbrush has multiple cleaning modes, cycle through them to ensure it is completely powered down.
-
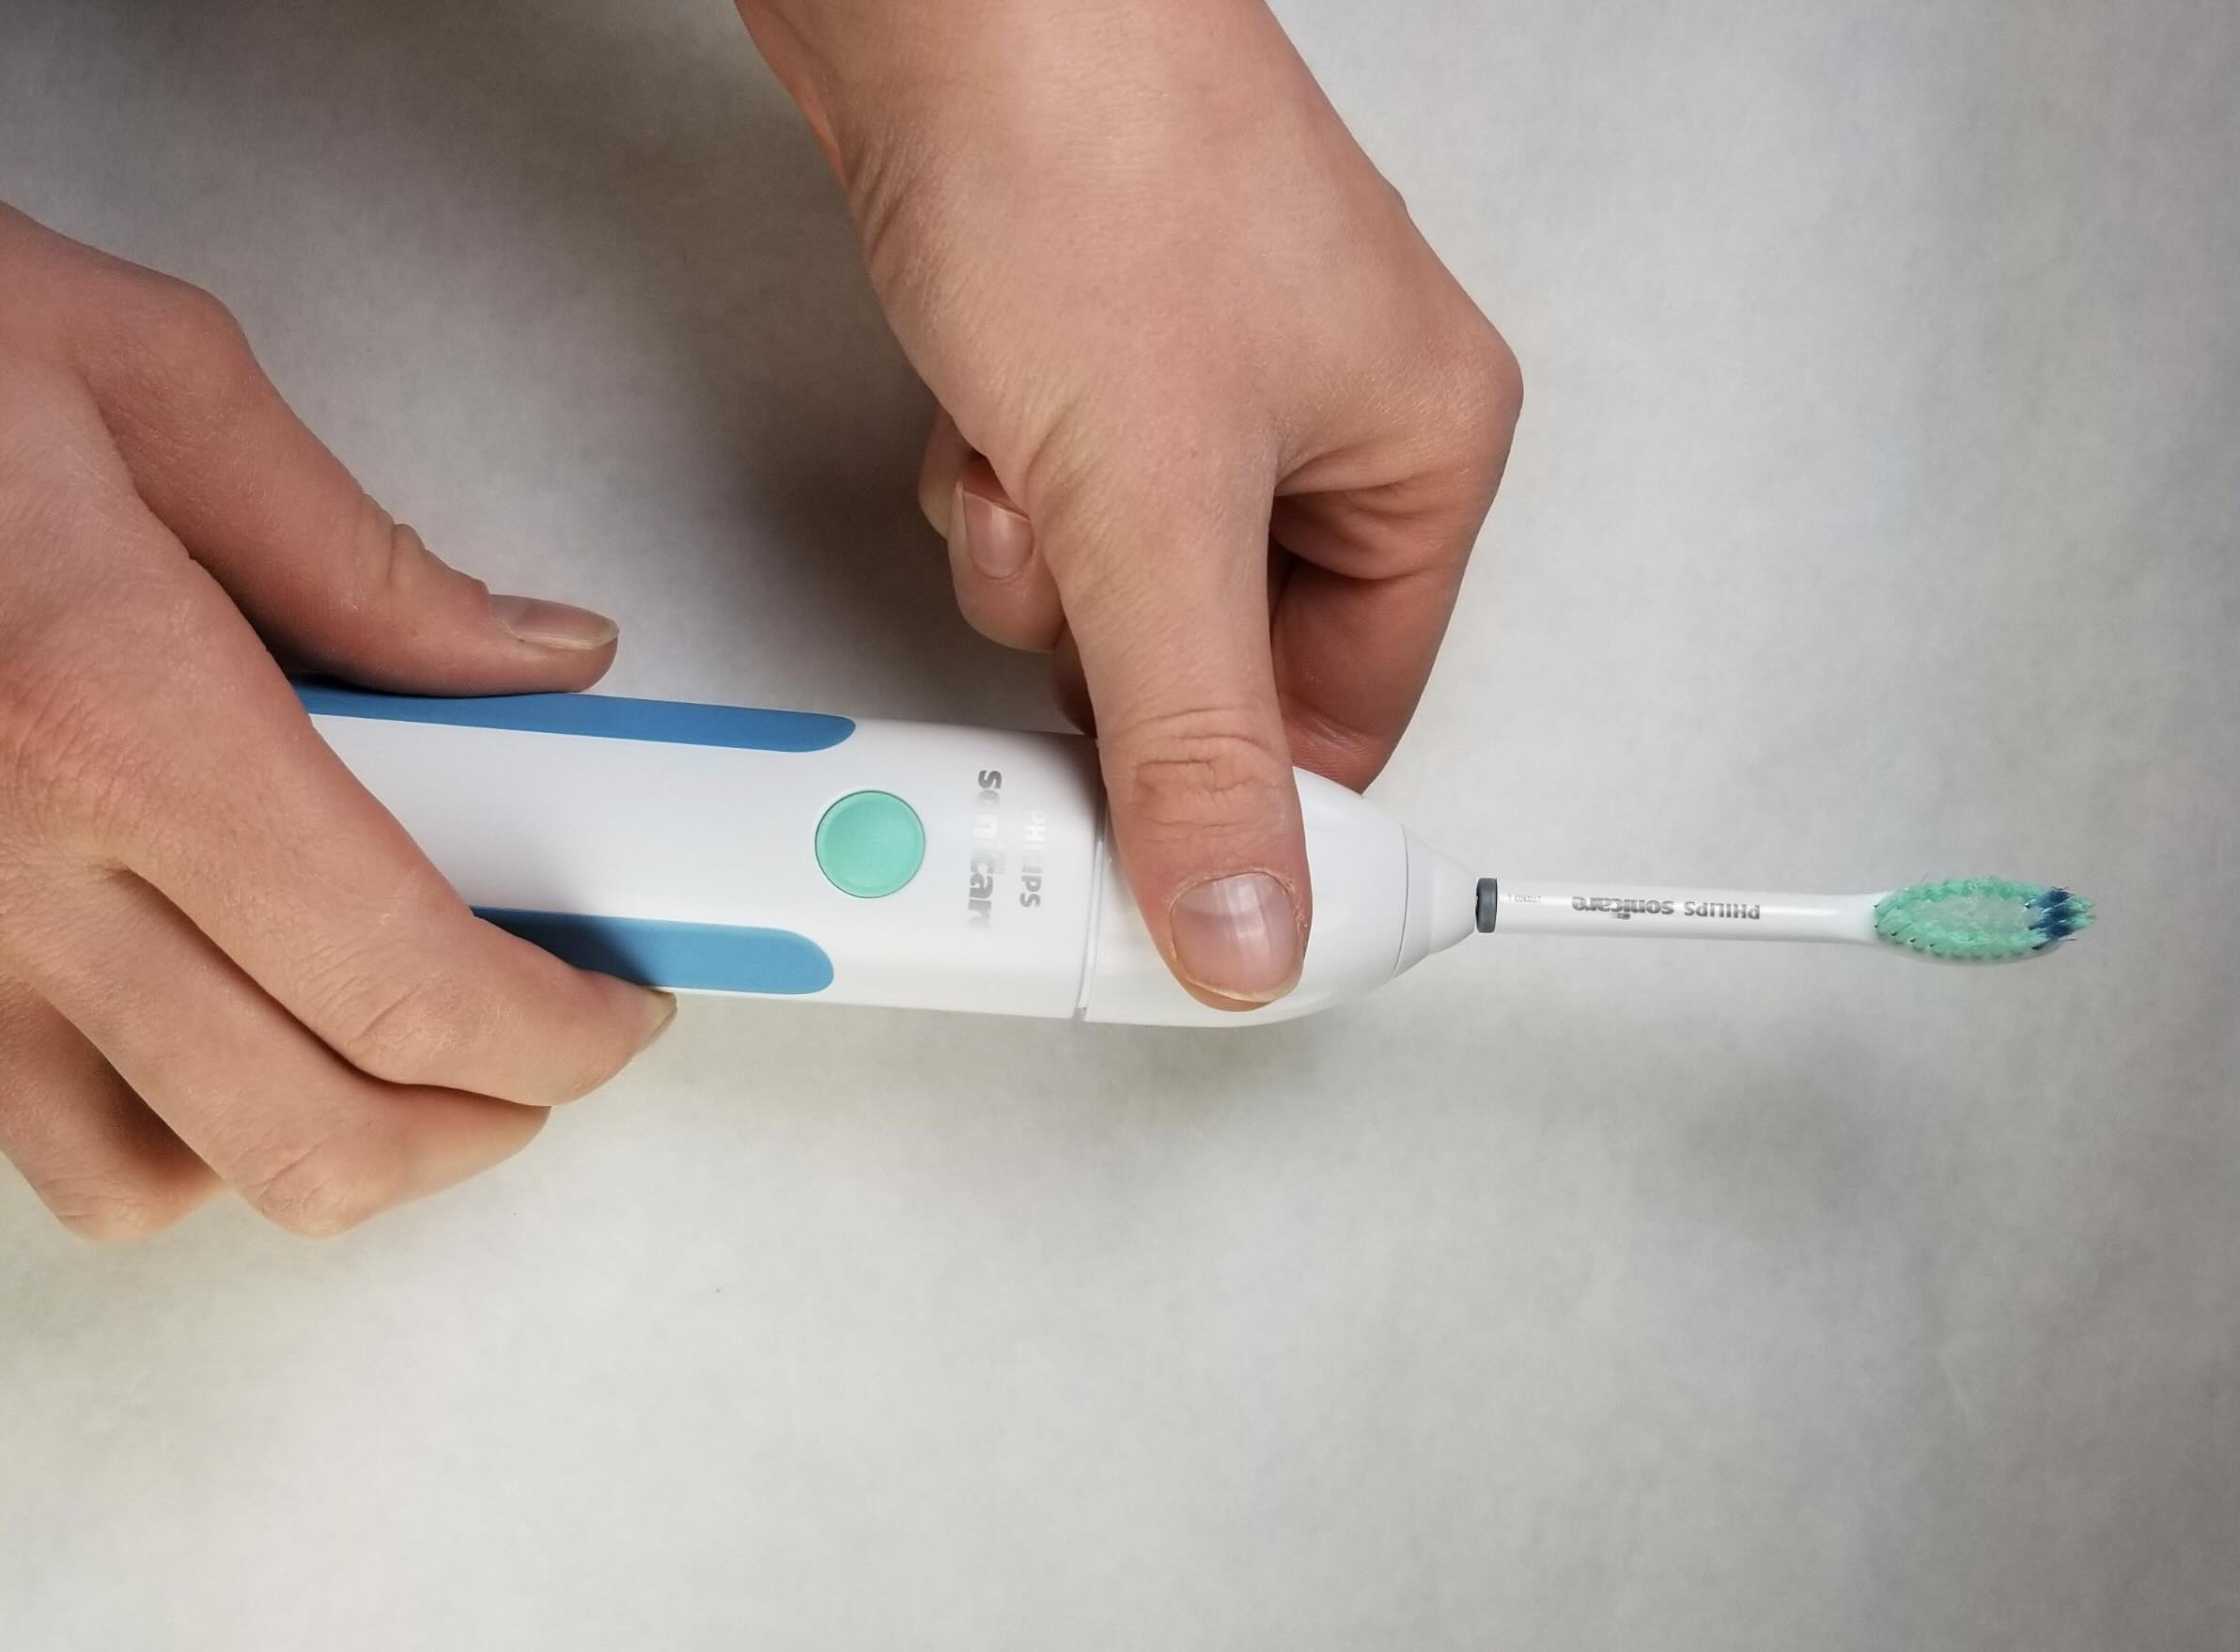
Grip and Twist: Hold the handle of the toothbrush firmly with one hand, and with the other hand, grip the brush head. Apply gentle but firm pressure and twist the brush head counterclockwise to loosen it from the handle. The brush head is designed to be detachable for easy replacement and maintenance.
-
Remove the Brush Head: Once the brush head is loosened, carefully lift it away from the handle. Be mindful of any rubber gaskets or seals that may be present between the brush head and the handle. These components help maintain the toothbrush's water resistance and should be handled with care to prevent damage.
-
Inspect the Connection: With the brush head removed, take a moment to inspect the connection point on the handle. Ensure that the metal contact points and the internal threads are clean and free from any debris or buildup. This inspection can help identify any issues that may be affecting the performance of the toothbrush.
-
Secure the Brush Head: If you plan to reassemble the toothbrush after performing maintenance or exploration, store the brush head in a clean and secure location. This will prevent any damage or contamination and ensure that it can be easily reattached when needed.
By following these steps, you can safely remove the brush head from your Philips Sonicare toothbrush, paving the way for further disassembly and exploration. With the brush head removed, you can proceed to the next steps of accessing the internal components and gaining a deeper understanding of your toothbrush's construction and functionality.
Step 3: Remove the battery
Removing the battery from your Philips Sonicare toothbrush is a crucial step in gaining access to the internal components and performing maintenance or replacement. Whether you're experiencing battery issues or simply want to explore the inner workings of the toothbrush, the process of removing the battery requires precision and attention to detail. Here's a detailed guide on how to safely remove the battery from your Philips Sonicare toothbrush.
-
Identify the Battery Type: Philips Sonicare toothbrushes are equipped with rechargeable batteries, typically lithium-ion or nickel-metal hydride (NiMH) batteries. Before proceeding with the removal process, it's essential to identify the specific type of battery used in your toothbrush. This information can often be found in the product manual or by researching the model of your toothbrush.
-
Power Off the Toothbrush: Ensure that the toothbrush is completely powered off and disconnected from any charging sources. This step is crucial for safety and prevents any electrical hazards during the battery removal process.
-
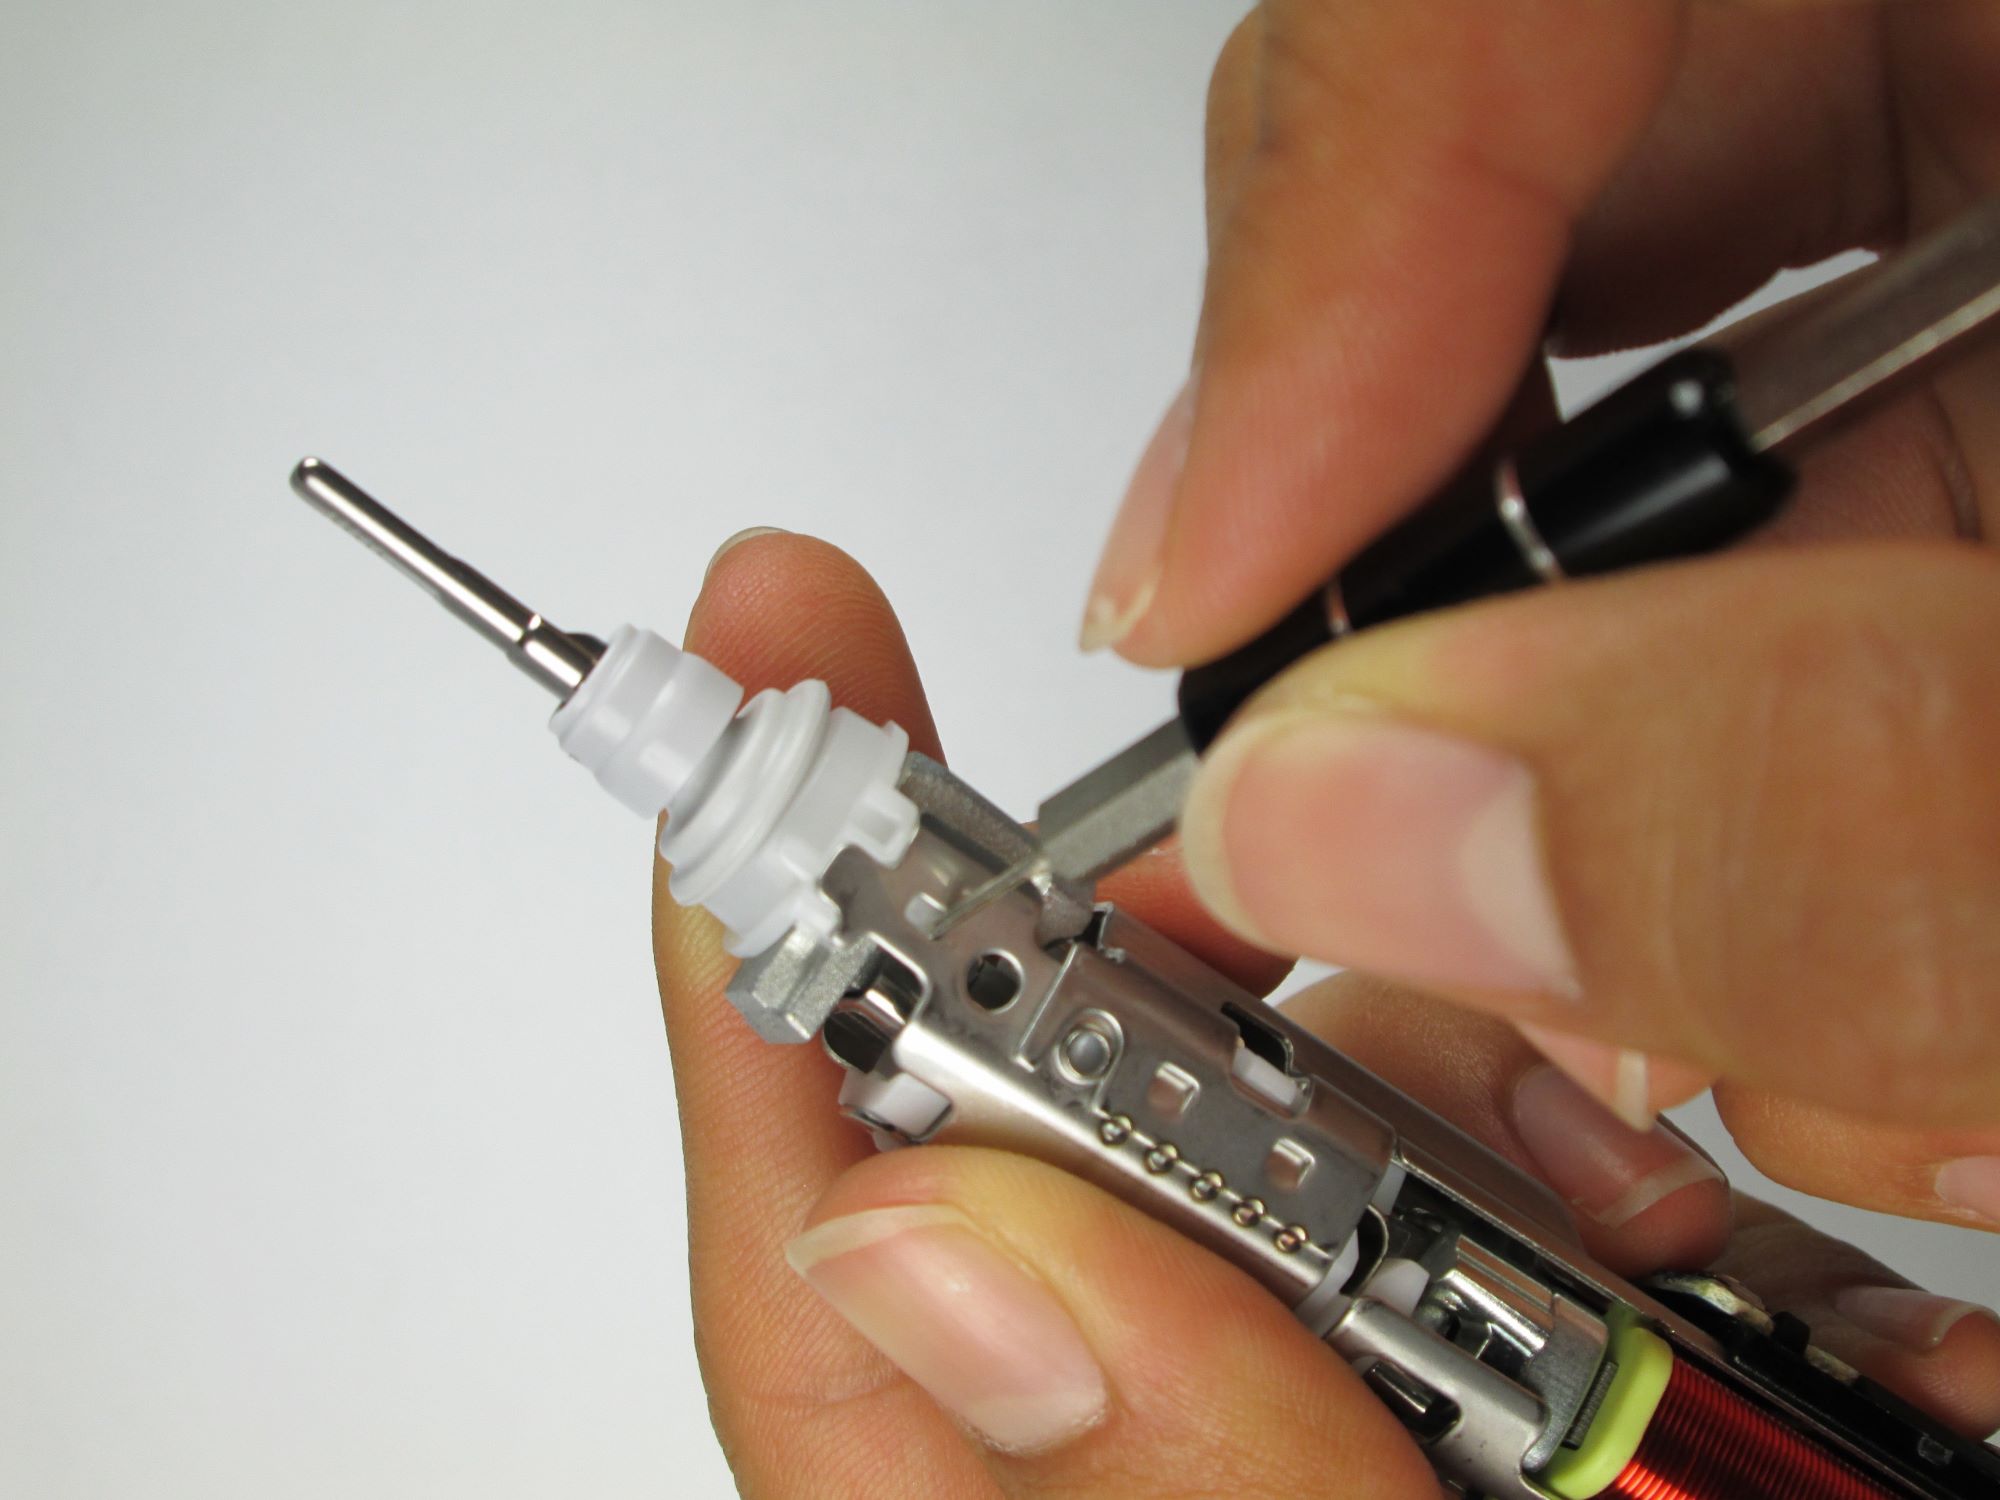
Disassemble the Casing: Using a small screwdriver from your toolset, carefully remove the screws securing the casing of the toothbrush. Keep the screws organized in a container to prevent misplacement. Once the screws are removed, use plastic opening tools to gently pry open the casing, exposing the internal components of the toothbrush.
-
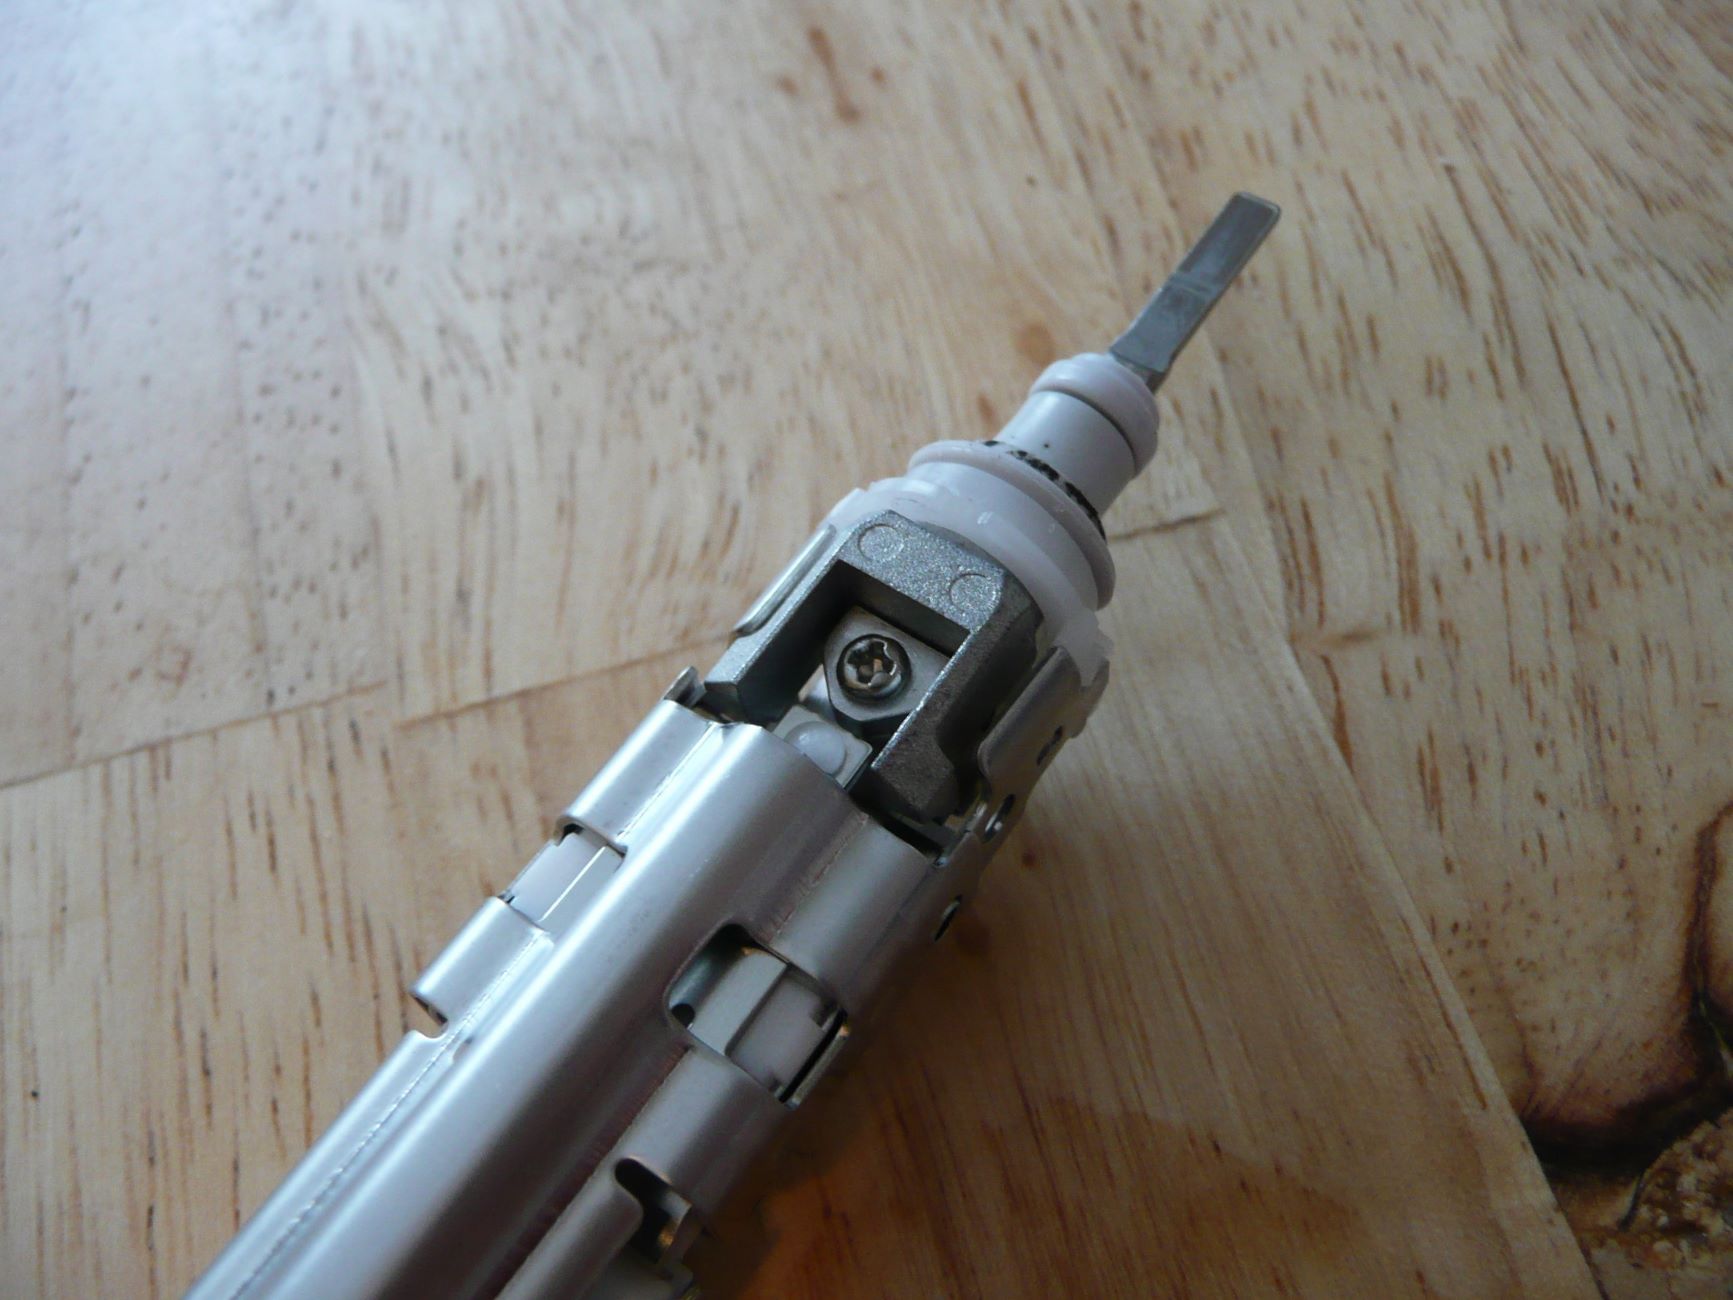
Locate the Battery: Once the casing is opened, locate the battery within the toothbrush. Depending on the model, the battery may be easily accessible or situated within a compartment that requires further disassembly. Exercise caution when handling the internal components to avoid damaging delicate circuitry or wiring.
-
Disconnect the Battery: If the battery is connected to the toothbrush's circuitry with wires or connectors, carefully disconnect it to prepare for removal. Take note of the battery's orientation and placement within the toothbrush to ensure proper reassembly later.
-
Remove the Battery: With the battery disconnected, gently remove it from its housing within the toothbrush. Pay attention to any adhesive or securing mechanisms that may be in place. If the battery is secured with adhesive, use a plastic opening tool to carefully loosen it from the housing.
-
Inspect the Battery Compartment: While the battery is removed, take the opportunity to inspect the battery compartment for any debris, corrosion, or signs of damage. Cleaning the compartment with a soft, dry cloth can help maintain the integrity of the toothbrush's internal components.
By following these steps, you can safely remove the battery from your Philips Sonicare toothbrush, allowing for maintenance, replacement, or exploration of the internal components. Remember to handle the battery with care and dispose of it responsibly if it requires replacement. With the battery removed, you can proceed to the next steps of opening the casing and gaining a deeper understanding of your toothbrush's construction and functionality.
To open a Philips Sonicare toothbrush, look for a small indentation or slot near the bottom of the handle. Use a small flathead screwdriver or a coin to twist and open the compartment for the battery or to access the internal components.
Step 4: Open the casing
Opening the casing of your Philips Sonicare toothbrush is a pivotal step in gaining access to its internal components. This process requires precision, patience, and the right tools to ensure a successful disassembly without causing damage to the toothbrush. Here's a detailed guide on how to open the casing of your Philips Sonicare toothbrush:
-
Prepare the Work Area: Before proceeding, ensure that you are working on a clean and well-lit surface. Lay out the toothbrush and its components in an organized manner to prevent misplacement of screws or small parts during the disassembly process.
-
Identify the Casing: The casing of the toothbrush is the outer shell that encloses the internal components. It is typically secured with screws and may have snap-fit or interlocking features. Take a moment to familiarize yourself with the design and construction of the casing before proceeding.
-
Select the Correct Screwdriver: Using the small screwdriver from your toolset, identify the appropriate head size that matches the screws securing the casing. Philips and flathead screwdrivers in various sizes are commonly used for this purpose. Using the wrong size or type of screwdriver can result in stripped screws and make the disassembly process challenging.
-
Remove the Screws: Carefully insert the screwdriver into the screw head and apply gentle but firm pressure in a counterclockwise direction to loosen and remove the screws. Keep the removed screws organized in a container to prevent misplacement. Some toothbrush models may have multiple screws securing the casing, so ensure that all screws are removed before attempting to open the casing.
-
Use Plastic Opening Tools: Once the screws are removed, use plastic opening tools to gently pry open the casing. These tools are designed to safely separate the casing without causing damage or leaving marks. Start at a seam or edge of the casing and work your way around, gradually releasing the interlocking tabs or snaps that hold the casing together.
-
Exercise Caution: As you open the casing, be mindful of any delicate wires, circuit boards, or internal components that may be attached to the casing. Avoid applying excessive force or sudden movements that could damage these components. Take your time and proceed with patience to ensure a smooth and controlled separation of the casing.
-
Inspect the Interior: Once the casing is opened, take a moment to inspect the interior of the toothbrush. Observe the arrangement of components, the layout of the circuitry, and any additional features or mechanisms housed within the casing. This visual inspection can provide valuable insights into the construction and functionality of the toothbrush.
By following these steps, you can successfully open the casing of your Philips Sonicare toothbrush, gaining access to its internal components for maintenance, exploration, or repair. With the casing opened, you are one step closer to unraveling the inner workings of your trusty oral care companion.
Read more: How To Reset A Philips Sonicare Toothbrush
Step 5: Reassemble the toothbrush
After successfully exploring the internal components of your Philips Sonicare toothbrush, it's time to reassemble the device to its original state. The reassembly process is crucial to ensure that the toothbrush functions properly and maintains its structural integrity. Here's a detailed guide on how to reassemble your Philips Sonicare toothbrush:
-
Organize the Components: Begin by organizing the components and screws that were removed during the disassembly process. Keeping the screws and small parts in a container will prevent misplacement and ensure that they are readily available for reassembly.
-
Inspect the Components: Before reassembly, take a moment to inspect the internal components, including the battery, circuitry, and any additional features. Ensure that the components are clean, free from damage, and properly aligned for reinstallation.
-
Position the Battery: If the battery was removed, carefully position it back into its housing within the toothbrush. Pay attention to the orientation and alignment of the battery to ensure a secure fit. If the battery is secured with adhesive, gently press it into place to establish a firm connection.
-
Connect the Battery: If the battery is connected to the toothbrush's circuitry with wires or connectors, reestablish the connection according to the original configuration. Take care to align the connectors properly and ensure a secure and stable connection.
-
Close the Casing: With the internal components in place, carefully align the casing of the toothbrush and gently press it together to engage any interlocking tabs or snaps. Ensure that the casing is aligned properly and that there are no gaps or misalignments.
-
Reinstall the Screws: Using the appropriate screwdriver, reinsert and tighten the screws to secure the casing. Start with one screw and gradually work your way around, ensuring that each screw is tightened evenly to maintain a balanced and secure closure of the casing.
-
Attach the Brush Head: Once the casing is secured, it's time to reattach the brush head to the handle. Align the brush head with the handle and twist it clockwise until it is firmly in place. Ensure that the brush head is securely attached to prevent any issues during use.
-
Test the Toothbrush: After reassembly, power on the toothbrush and test its functionality. Confirm that the power modes, vibrations, and any additional features are operational. Run a brief test cycle to ensure that the toothbrush functions as expected.
By following these steps, you can effectively reassemble your Philips Sonicare toothbrush, restoring it to its original state after exploration or maintenance. With the toothbrush reassembled, you can continue to enjoy the benefits of this innovative oral care device, knowing that you have gained valuable insights into its inner workings.
Conclusion
In conclusion, the process of opening a Philips Sonicare toothbrush offers a fascinating glimpse into the intricate design and advanced technology that powers this essential oral care device. By following the step-by-step guide outlined in this article, you have gained valuable insights into the disassembly, exploration, and reassembly of your Philips Sonicare toothbrush.
The journey of opening your toothbrush began with the essential step of gathering the necessary tools, emphasizing the importance of preparation and precision. From small screwdrivers to plastic opening tools, each instrument played a crucial role in facilitating a safe and successful disassembly process. This initial step set the stage for the subsequent exploration of the toothbrush's internal components.
Removing the brush head and the battery provided a deeper understanding of the toothbrush's construction and functionality. Whether for maintenance, replacement, or simple curiosity, these steps allowed you to gain access to the inner workings of the device, fostering a sense of familiarity and empowerment in handling its components.
Opening the casing marked a pivotal moment in the process, unveiling the intricate circuitry, mechanisms, and features housed within the toothbrush. With precision and caution, you successfully navigated the disassembly process, gaining a firsthand view of the technology that drives the performance of your oral care companion.
The reassembly phase brought the exploration full circle, as you carefully restored the toothbrush to its original state. From positioning the battery to securing the casing and reattaching the brush head, each step underscored the importance of attention to detail and methodical execution. The successful reassembly not only reaffirmed the structural integrity of the toothbrush but also provided a sense of accomplishment and mastery over its inner workings.
As you power on the toothbrush and witness its seamless functionality, you can take pride in the knowledge and experience gained from the process of opening and reassembling your Philips Sonicare toothbrush. Whether for maintenance, exploration, or a deeper connection with your oral care device, this journey has equipped you with valuable insights and skills that extend beyond the realm of everyday maintenance.
In essence, the process of opening a Philips Sonicare toothbrush transcends a mere technical endeavor; it represents a journey of discovery, empowerment, and a deeper appreciation for the innovative technology that enhances our daily lives. So, as you embark on your continued oral care routine, remember the journey of exploration and mastery that has enriched your relationship with your trusty Philips Sonicare toothbrush.
Frequently Asked Questions about How To Open A Philips Sonicare Toothbrush
Was this page helpful?
At Storables.com, we guarantee accurate and reliable information. Our content, validated by Expert Board Contributors, is crafted following stringent Editorial Policies. We're committed to providing you with well-researched, expert-backed insights for all your informational needs.

0 thoughts on “How To Open A Philips Sonicare Toothbrush”