Home>Furniture & Design>Bathroom Accessories>How To Wash A Comforter In A Bathtub

Bathroom Accessories
How To Wash A Comforter In A Bathtub
Modified: October 18, 2024
Learn how to wash a comforter in a bathtub with the right bathroom accessories. Follow our step-by-step guide for a clean and fresh comforter.
(Many of the links in this article redirect to a specific reviewed product. Your purchase of these products through affiliate links helps to generate commission for Storables.com, at no extra cost. Learn more)
Introduction
Washing a comforter in a bathtub can be a practical and effective way to ensure that this essential bedding item remains clean and fresh. Whether you're dealing with a delicate comforter that requires gentle care or simply don't have access to a large washing machine, the bathtub method offers a convenient alternative. By following a few simple steps, you can achieve a thorough cleaning without the need for specialized equipment.
This article will guide you through the process of washing a comforter in a bathtub, providing detailed instructions to help you achieve optimal results. From preparing the bathtub to properly drying the comforter, each step is designed to ensure that your bedding receives the care it deserves. By the end of this guide, you'll have the knowledge and confidence to tackle this task with ease, allowing you to maintain a clean and cozy sleeping environment.
Whether you're dealing with a down comforter, a synthetic fill, or any other type of bedding, the bathtub method can be adapted to suit your specific needs. With a bit of patience and attention to detail, you can effectively remove dirt, dust, and odors from your comforter, restoring its freshness and comfort. So, let's dive into the step-by-step process of washing a comforter in a bathtub and discover how simple and rewarding this method can be.
Key Takeaways:
- Washing a comforter in a bathtub is a practical and gentle way to keep it clean and fresh, even without a large washing machine. With the right steps, you can achieve a thorough cleaning and maintain a cozy sleeping environment.
- By following the step-by-step process of washing a comforter in a bathtub, you can effectively remove dirt, dust, and odors, restoring its freshness and comfort. This method is adaptable to different types of bedding and can be a simple and rewarding experience.
Step 1: Prepare the bathtub
Before beginning the process of washing a comforter in a bathtub, it's essential to ensure that the bathtub is clean and free of any residue that could transfer onto the bedding. Start by thoroughly cleaning the bathtub with a mild detergent or a cleaning solution to remove any dirt, soap scum, or other impurities. Rinse the bathtub with water to ensure that it's completely clean and free of any cleaning product residue.
Once the bathtub is clean, it's important to check for any sharp or abrasive surfaces that could potentially damage the comforter during the washing process. Inspect the bathtub for any rough patches, chipped enamel, or exposed metal that could snag or tear the fabric of the comforter. If any such imperfections are found, consider using a cushioned mat or a soft towel to cover these areas and provide a gentle surface for the comforter.
Additionally, it's advisable to address any drainage concerns before filling the bathtub with water. Ensure that the bathtub drain is clear and functioning properly to prevent any potential overflow or drainage issues during the washing process. If necessary, use a drain stopper or strainer to prevent the loss of small items such as buttons or decorative elements that may be attached to the comforter.
By taking the time to prepare the bathtub properly, you can create a clean and safe environment for washing your comforter. This initial step sets the stage for a successful and effective cleaning process, ensuring that the comforter receives the care and attention it needs to emerge fresh and revitalized.
Preparing the bathtub is a crucial first step in the process of washing a comforter, as it sets the foundation for a successful cleaning experience. By ensuring that the bathtub is clean, free of potential hazards, and equipped with proper drainage, you can proceed with confidence to the next steps in the comforter washing process.
Step 2: Fill the bathtub with water and detergent
Once the bathtub is prepared, it's time to fill it with water and detergent to create a cleansing solution for the comforter. The water temperature and the type of detergent used are crucial factors in ensuring an effective and gentle cleaning process.
Water Temperature
The water temperature plays a significant role in the cleaning process, as it can impact the comforter's fabric and the removal of dirt and impurities. For most comforters, using lukewarm water is recommended, as it effectively helps to dissolve detergent while being gentle on the fabric. Lukewarm water, typically around 85°F (29°C), strikes a balance between effectively cleaning the comforter and preventing potential damage from hot water.
It's important to note that the water temperature should be suitable for the comforter's specific care instructions. Some comforters may require cold water to prevent shrinkage or preserve delicate materials, while others may benefit from slightly warmer water to effectively remove stains and odors. Always refer to the care label on the comforter for guidance on the appropriate water temperature.
Adding Detergent
Selecting the right detergent is essential for achieving a thorough and gentle clean. For most comforters, a mild, liquid detergent that is free of harsh chemicals and additives is ideal. Avoid using bleach or fabric softeners, as these can potentially damage the comforter's fabric or cause irritation.
When adding detergent to the water, follow the manufacturer's instructions regarding the recommended amount based on the load size. Typically, a capful or a few tablespoons of detergent is sufficient for washing a comforter in a bathtub. Gently swirl the water to ensure that the detergent is evenly distributed and dissolved, creating a gentle yet effective cleaning solution.
Read more: How To Make Your Bathtub More Comfortable
Achieving a Balanced Solution
Achieving a balanced solution of water and detergent is essential to ensure that the comforter is thoroughly cleaned without being overwhelmed by excessive suds or detergent residue. The goal is to create a solution that effectively lifts dirt and odors from the comforter while remaining gentle on the fabric.
By carefully considering the water temperature and selecting a suitable detergent, you can create an optimal cleaning solution that sets the stage for a successful washing process. With the bathtub filled with the appropriate water and detergent mixture, you're now ready to proceed to the next step of soaking the comforter and beginning the cleansing process.
Step 3: Soak the comforter
With the bathtub filled with the cleansing solution, it's time to immerse the comforter and allow it to soak thoroughly. This step is crucial as it enables the detergent-infused water to penetrate the fabric, effectively loosening dirt, dust, and any embedded impurities. The soaking process also helps to eliminate odors, leaving the comforter fresh and revitalized.
When placing the comforter in the bathtub, gently submerge it into the water, ensuring that it is fully immersed. Take care to avoid vigorous agitation or wringing, as this can potentially damage the fabric or cause uneven saturation. Instead, allow the comforter to naturally absorb the cleansing solution, giving the detergent ample time to work its magic.
The duration of the soaking process may vary depending on the level of soiling and the type of fabric. As a general guideline, allowing the comforter to soak for 15 to 30 minutes is often sufficient to achieve a thorough cleansing. However, for heavily soiled or larger comforters, extending the soaking time may be beneficial in ensuring a comprehensive clean.
During the soaking period, consider gently pressing down on the comforter at intervals to encourage the cleansing solution to penetrate the fabric. This gentle agitation can help dislodge dirt and debris, allowing the detergent to lift them away from the comforter's fibers. However, it's important to exercise caution and avoid excessive manipulation that could potentially damage the comforter.
As the comforter soaks, take the opportunity to gently swish the water around to ensure that the detergent is evenly distributed and reaches all areas of the bedding. This gentle movement can help to disperse the cleansing solution, maximizing its contact with the comforter and enhancing the overall cleaning process.
By allowing the comforter to soak in the cleansing solution, you are providing it with the opportunity to undergo a thorough and gentle cleaning. This step sets the stage for the effective removal of dirt, odors, and impurities, preparing the comforter to emerge from the washing process refreshed and rejuvenated.
The soaking process is a vital component of washing a comforter in a bathtub, as it allows the cleansing solution to work its magic, lifting away dirt and odors while being gentle on the fabric. With the comforter fully immersed and the detergent infused throughout, you're now ready to proceed to the next step of agitating and scrubbing the comforter to further enhance its cleanliness.
Step 4: Agitate and scrub the comforter
After the soaking process, it's time to gently agitate and scrub the comforter to further enhance its cleanliness. This step involves carefully manipulating the bedding to help dislodge dirt, debris, and any remaining impurities, ensuring a thorough and effective cleaning process.
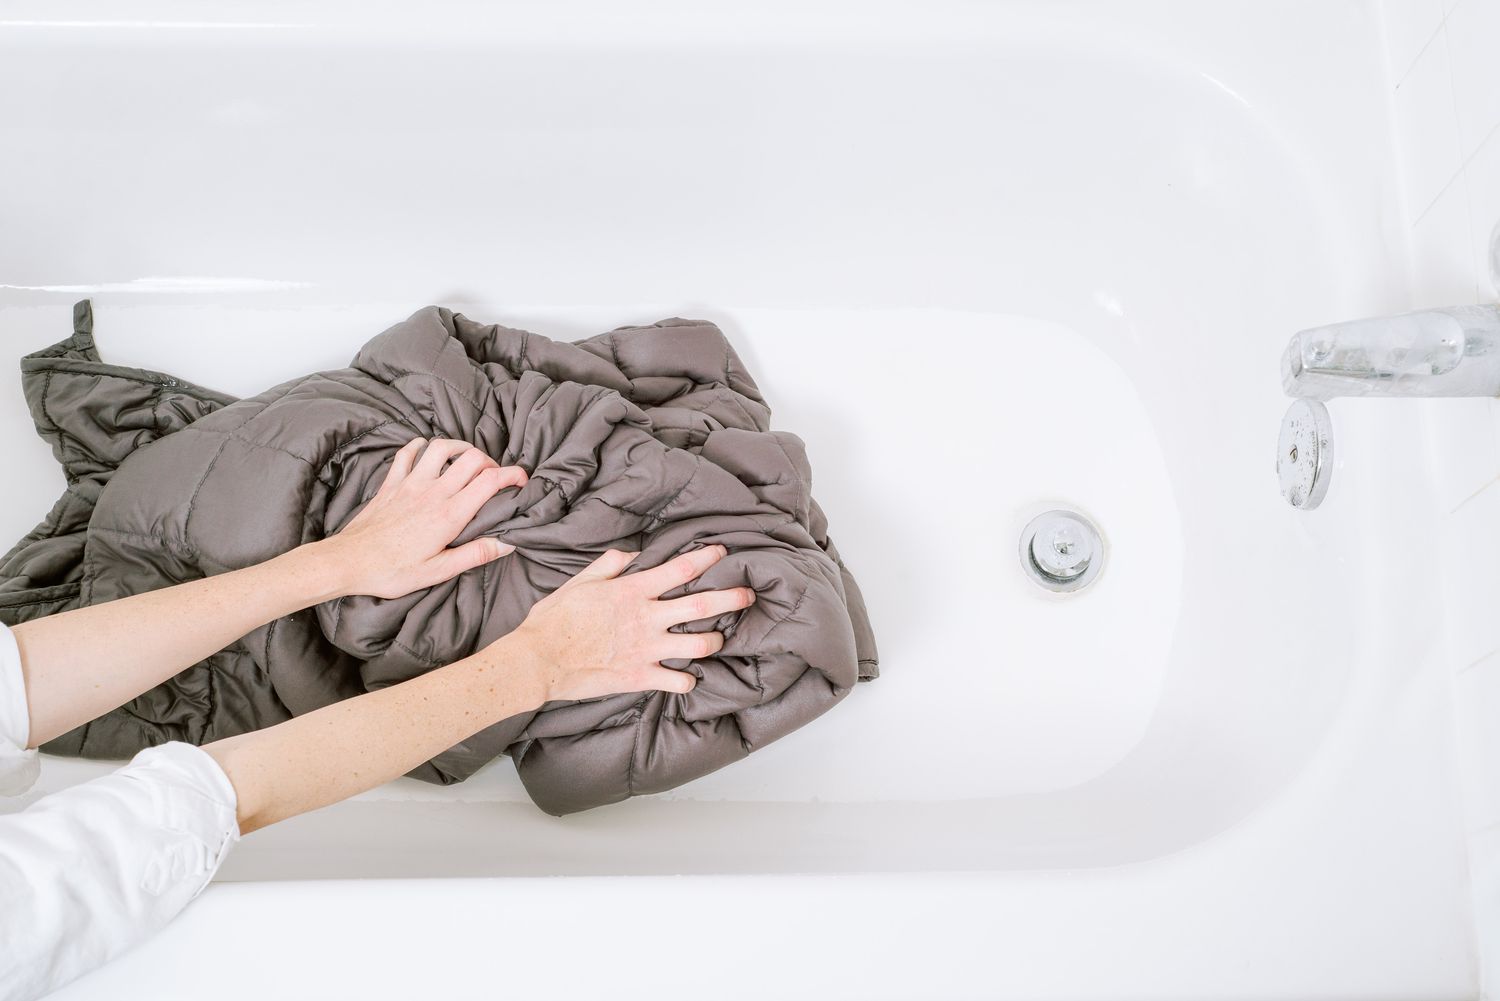
To begin, carefully lift the comforter from the cleansing solution, taking care to support its weight and prevent excessive strain on the fabric. Once lifted, gently squeeze the comforter to remove excess water, being mindful not to wring or twist the fabric, which could potentially cause damage.
With the comforter prepared for the next phase, it's time to focus on agitating and scrubbing specific areas that may require additional attention. Using a soft-bristled brush or a clean, non-abrasive sponge, lightly scrub any visible stains or soiled areas, working in gentle, circular motions. This targeted approach helps to address localized dirt and ensures that the cleansing solution effectively penetrates the fabric.
As you agitate and scrub the comforter, pay close attention to any stubborn stains or areas of discoloration. For particularly challenging spots, consider applying a small amount of mild detergent directly to the affected area and gently working it into the fabric. This targeted treatment can help to lift away tough stains without compromising the overall integrity of the comforter.
Throughout the agitating and scrubbing process, maintain a gentle touch and avoid aggressive or forceful movements that could potentially damage the fabric. The goal is to delicately dislodge impurities and address specific areas of concern while preserving the comforter's overall quality and appearance.
After addressing any targeted areas, take a moment to gently agitate the entire comforter by lightly swishing it in the cleansing solution. This gentle movement helps to ensure that the detergent effectively reaches all areas of the bedding, further enhancing the overall cleanliness.
By carefully agitating and scrubbing the comforter, you are actively contributing to its thorough cleaning, addressing specific areas of concern while maintaining a gentle and considerate approach. This step sets the stage for the next crucial phase: rinsing the comforter to remove the cleansing solution and any remaining impurities, bringing you one step closer to achieving a fresh and revitalized bedding experience.
Step 5: Rinse the comforter
Rinsing the comforter is a critical step in the process of washing it in a bathtub. This step ensures that the cleansing solution, along with any loosened dirt and impurities, is thoroughly removed from the fabric, leaving the comforter fresh and free of detergent residue. Proper rinsing also helps to prevent potential skin irritation that may occur if detergent is left in the fabric.
To begin the rinsing process, carefully lift the comforter from the cleansing solution, allowing the excess liquid to drain back into the bathtub. Gently press down on the comforter to facilitate the release of the cleansing solution, taking care to avoid excessive wringing or twisting that could potentially damage the fabric.
Once the excess liquid has been removed, it's time to introduce clean, lukewarm water into the bathtub to initiate the rinsing phase. The water should be at a similar temperature to that used during the initial soaking process, ensuring a gentle and effective rinse without subjecting the comforter to extreme temperature changes.
Submerge the comforter in the clean water, gently pressing it down to facilitate the removal of the cleansing solution. Allow the comforter to soak briefly in the clean water, enabling it to undergo a thorough rinsing process. During this time, gently swish the comforter in the water to help dislodge any remaining detergent and impurities, promoting a comprehensive rinse.
After the initial soaking, carefully lift the comforter from the clean water, allowing the excess liquid to drain back into the bathtub. Repeat this process as needed to ensure that the comforter undergoes a sufficient rinsing, with the water running clear and free of detergent residue.
Once the comforter has been thoroughly rinsed, gently squeeze out the excess water, taking care to maintain the integrity of the fabric. Avoid excessive wringing, as this can potentially distort the comforter's shape and texture. Instead, opt for gentle pressure to encourage the release of water without causing unnecessary strain on the fabric.
With the rinsing process complete, the comforter is now ready for the next step: squeezing out excess water to facilitate the drying process. This crucial phase sets the stage for the final step of hanging the comforter to dry, bringing you one step closer to enjoying a freshly cleaned and revitalized bedding experience.
After soaking the comforter in soapy water, gently agitate it by hand to remove dirt and stains. Rinse thoroughly and press out excess water before air drying.
Step 6: Squeeze out excess water
After the thorough rinsing process, the next step in washing a comforter in a bathtub involves gently squeezing out the excess water. This crucial phase is essential for preparing the comforter for the drying process, ensuring that it retains an optimal level of moisture to facilitate efficient and effective drying.
To begin, carefully lift the rinsed comforter from the bathtub, supporting its weight to prevent strain on the fabric. As you lift the comforter, allow the excess water to drain back into the bathtub, taking care to maintain a gentle and considerate approach. By allowing the excess water to naturally release, you can avoid unnecessary stress on the fabric, preserving the comforter's integrity.
Once the comforter has been lifted from the bathtub, it's time to address the excess water that remains within the fabric. Gently press down on the comforter to encourage the release of water, using a delicate and controlled approach to avoid excessive manipulation. By applying gentle pressure, you can facilitate the removal of excess moisture without subjecting the fabric to undue stress.
To further expedite the water removal process, consider rolling the comforter gently within a clean, absorbent towel. This method helps to absorb additional moisture, drawing it away from the comforter and into the towel. As you roll the comforter within the towel, apply gentle pressure to encourage the transfer of moisture, repeating the process with a dry section of the towel as needed.
It's important to approach the water removal process with patience and care, ensuring that the comforter's fabric is not subjected to excessive wringing or twisting. By maintaining a gentle touch and allowing the water to release gradually, you can effectively prepare the comforter for the subsequent drying phase, setting the stage for a successful and efficient drying process.
By conscientiously squeezing out the excess water, you are actively contributing to the comforter's preparation for the drying phase, ensuring that it retains an optimal level of moisture for efficient drying. This step brings you one step closer to completing the comforter washing process, setting the stage for the final step of hanging the comforter to dry and ultimately enjoying a freshly cleaned and revitalized bedding experience.
Step 7: Hang the comforter to dry
After effectively removing the excess water from the comforter, the next crucial step is to hang it to dry. Proper drying is essential to ensure that the comforter emerges fresh, clean, and free of excess moisture, ready to provide cozy warmth and comfort once again.
To begin the drying process, identify a suitable location where the comforter can be hung with ample space for air circulation. Ideally, choose an area that is well-ventilated and receives indirect sunlight, as this can aid in the natural evaporation of moisture while helping to prevent musty odors.
When hanging the comforter, ensure that it is evenly distributed to prevent excessive weight strain on specific areas. Use a sturdy clothesline or a drying rack to support the comforter, taking care to avoid overstretching or distorting the fabric. Gently drape the comforter over the drying apparatus, allowing it to unfold naturally and maintain its shape.
As the comforter hangs to dry, periodically fluff and reposition it to promote even drying and prevent the formation of any potential creases or folds. Lightly patting and smoothing the fabric can help to maintain its loft and ensure that it dries evenly, contributing to a plush and inviting texture once the process is complete.
Throughout the drying period, monitor the comforter for any signs of lingering moisture or dampness. If necessary, adjust the positioning or increase airflow to facilitate thorough drying. Depending on the climate and humidity levels, the drying process may take several hours to a day or more, so patience is key to achieving optimal results.
As the comforter gradually dries, take the opportunity to appreciate the revitalizing effects of the washing process. The gentle swaying of the comforter in the breeze, coupled with the fresh air and subtle warmth, symbolizes the transformation from cleansing to rejuvenation, culminating in a comforting and inviting bedding experience.
Once the comforter is completely dry, gently fluff and shake it to restore its loft and softness. Take a moment to appreciate the renewed freshness and cleanliness, knowing that your efforts have contributed to maintaining a hygienic and inviting sleeping environment.
By hanging the comforter to dry with care and consideration, you have completed the final step in the process of washing a comforter in a bathtub. The thorough cleansing, gentle handling, and meticulous drying have collectively contributed to the restoration of the comforter, ensuring that it is ready to provide cozy comfort and warmth for restful nights ahead.
Conclusion
Washing a comforter in a bathtub is a rewarding and practical endeavor that allows you to maintain the cleanliness and comfort of this essential bedding item. By following the step-by-step process outlined in this guide, you have embarked on a journey to ensure that your comforter receives the care and attention it deserves. From preparing the bathtub to gently hanging the comforter to dry, each step has contributed to the thorough cleansing and revitalization of this cherished bedding essential.
As you reflect on the washing process, it's evident that each step serves a crucial purpose in ensuring the comforter's cleanliness and longevity. The meticulous preparation of the bathtub created a safe and clean environment for the washing process, setting the stage for a successful cleaning experience. Filling the bathtub with the appropriate water and detergent mixture, soaking the comforter, and gently agitating and scrubbing it contributed to the effective removal of dirt, odors, and impurities, restoring the comforter's freshness and comfort.
The rinsing and water removal process further enhanced the cleanliness of the comforter, ensuring that it emerged free of detergent residue and excess moisture. Finally, hanging the comforter to dry symbolizes the culmination of the washing process, signifying the transformation from cleansing to rejuvenation. The gentle swaying in the breeze and the gradual evaporation of moisture encapsulate the essence of this revitalizing journey.
As you witness the freshly cleaned and revitalized comforter, take a moment to appreciate the efforts invested in maintaining a hygienic and inviting sleeping environment. The comforter, now free of dirt, odors, and impurities, stands ready to provide cozy warmth and comfort for restful nights ahead. The dedication and care demonstrated throughout the washing process have contributed to preserving the comforter's quality and ensuring that it continues to be a source of comfort and relaxation.
In conclusion, the process of washing a comforter in a bathtub is not only a practical cleaning method but also a testament to the commitment to maintaining a clean and inviting living space. By embracing this approach, you have taken proactive steps to ensure that your bedding remains fresh, clean, and conducive to a restful night's sleep. As you tuck into bed and envelop yourself in the freshly cleaned comforter, take pride in knowing that your efforts have contributed to a hygienic and comforting sanctuary, fostering a sense of well-being and tranquility.
Frequently Asked Questions about How To Wash A Comforter In A Bathtub
Was this page helpful?
At Storables.com, we guarantee accurate and reliable information. Our content, validated by Expert Board Contributors, is crafted following stringent Editorial Policies. We're committed to providing you with well-researched, expert-backed insights for all your informational needs.











0 thoughts on “How To Wash A Comforter In A Bathtub”