Home>Furniture & Design>Bathroom Accessories>How To Frame A Bathtub
Bathroom Accessories
How To Frame A Bathtub
Modified: August 28, 2024
Learn how to frame a bathtub for your bathroom renovation project with our expert tips and advice. Find the best bathroom accessories and design ideas.
(Many of the links in this article redirect to a specific reviewed product. Your purchase of these products through affiliate links helps to generate commission for Storables.com, at no extra cost. Learn more)
Introduction
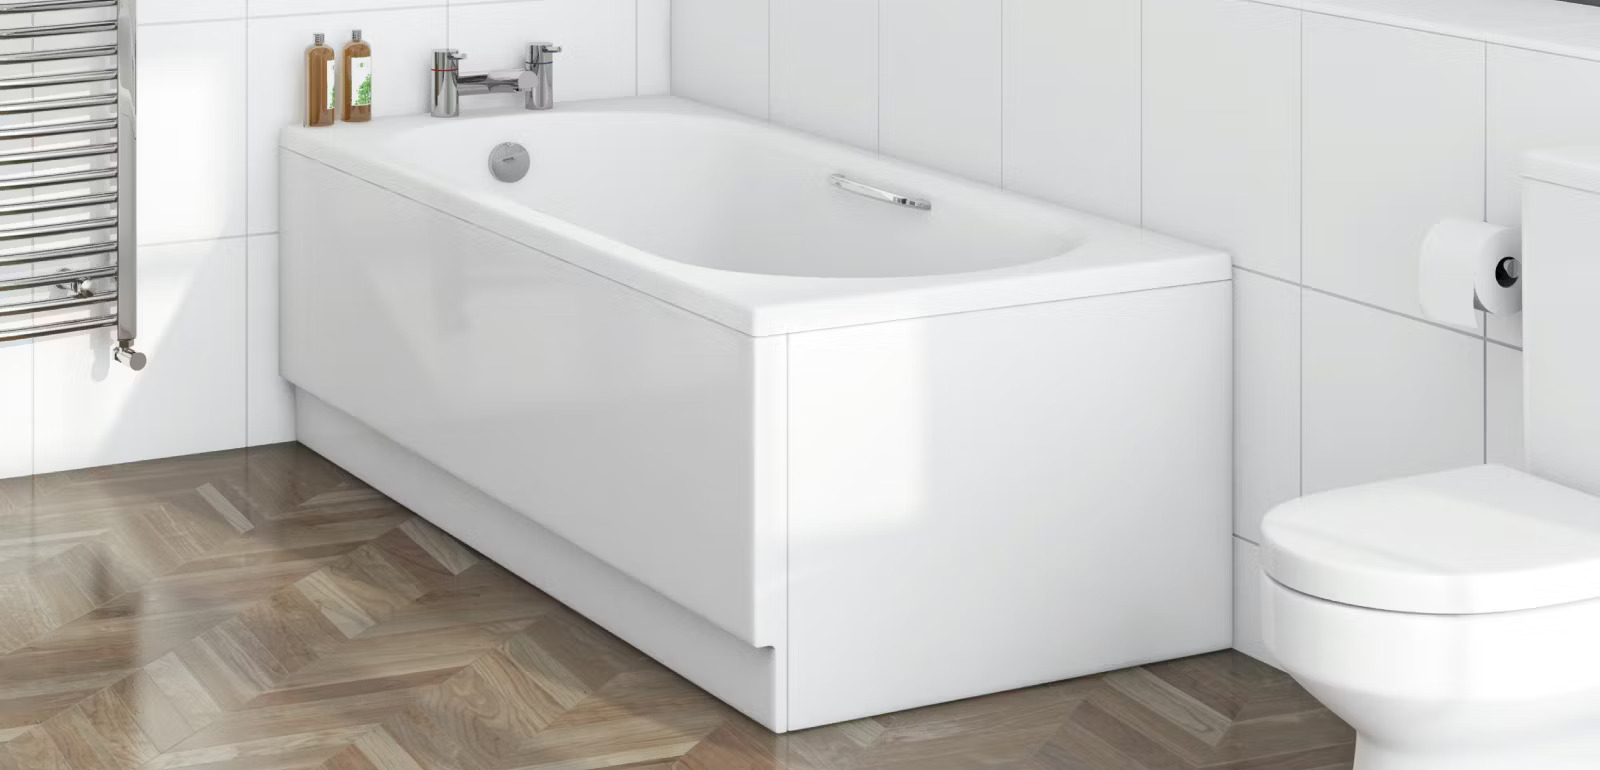
When it comes to bathroom renovations, framing a bathtub is a crucial step that sets the foundation for a successful and visually appealing installation. The bathtub frame not only provides structural support but also ensures that the bathtub is securely positioned and aligned with the surrounding walls and plumbing fixtures. Whether you are remodeling an existing bathroom or constructing a new one, understanding the process of framing a bathtub is essential for achieving a professional and long-lasting result.
Properly framing a bathtub involves a series of precise measurements, sturdy construction, and attention to detail. By following the correct steps and utilizing the right materials, you can create a solid and stable framework that will support the weight of the bathtub and withstand the test of time. Additionally, a well-constructed bathtub frame facilitates the seamless integration of the bathtub with the surrounding walls, allowing for a smooth and polished finish that enhances the overall aesthetic of the bathroom.
In this comprehensive guide, we will walk you through the step-by-step process of framing a bathtub, covering everything from initial measurements to final adjustments. Whether you are a seasoned DIY enthusiast or a homeowner embarking on your first bathroom renovation project, this guide will equip you with the knowledge and confidence to tackle the task with precision and efficiency.
So, roll up your sleeves and get ready to dive into the world of bathtub framing. By the end of this guide, you will have the expertise to frame a bathtub like a pro, setting the stage for a successful and visually stunning bathroom transformation. Let's get started!
Key Takeaways:
- Framing a bathtub is like building a strong foundation for a house. It involves precise measurements, sturdy construction, and attention to detail to ensure the bathtub is securely positioned and aligned with the surrounding walls and plumbing fixtures.
- Adding extra support within the bathtub frame, like cross braces and blocking, is like giving the frame extra muscles to bear the weight of the bathtub. This makes the frame strong, stable, and long-lasting.
Read more: How To Frame A Fireplace
Step 1: Measure and Mark the Location
Before diving into the construction of the bathtub frame, it is crucial to begin with precise measurements and markings to ensure that the frame aligns perfectly with the designated location in the bathroom. This initial step sets the foundation for the entire framing process and significantly impacts the overall outcome of the bathtub installation.
Assess the Space:
Start by carefully assessing the designated area where the bathtub will be installed. Take into account the dimensions of the bathtub, as well as any surrounding fixtures such as walls, plumbing, and alcoves. Understanding the spatial requirements will guide the framing process and help determine the exact placement of the frame.
Mark the Layout:
Using a measuring tape, mark the dimensions of the bathtub on the floor, outlining the area where the frame will be constructed. Ensure that the markings are accurate and symmetrical, taking into consideration any specific design or layout preferences. This step is crucial for visualizing the positioning of the bathtub and planning the frame accordingly.
Check for Level and Square:
Utilize a level and framing square to verify that the marked layout is perfectly level and square with the surrounding walls and floor. This step is essential for ensuring that the bathtub will fit seamlessly within the designated space and that the frame will provide a stable and balanced foundation for the installation.
Read more: How To Polish A Bathtub
Consider Plumbing and Drainage:
Take into account the location of existing plumbing and drainage fixtures, ensuring that the frame allows for easy access and proper alignment with the necessary connections. Careful consideration of plumbing requirements at this stage can prevent complications during the later stages of installation.
Double-Check Measurements:
Before proceeding to the construction phase, double-check all measurements and markings to confirm accuracy. Precision at this stage is crucial for avoiding potential issues during the construction of the frame and the subsequent installation of the bathtub.
By meticulously measuring and marking the location for the bathtub frame, you establish a solid starting point for the framing process, setting the stage for a successful and well-aligned installation. With the location accurately determined, you are ready to move on to the next step of building the frame with confidence and precision.
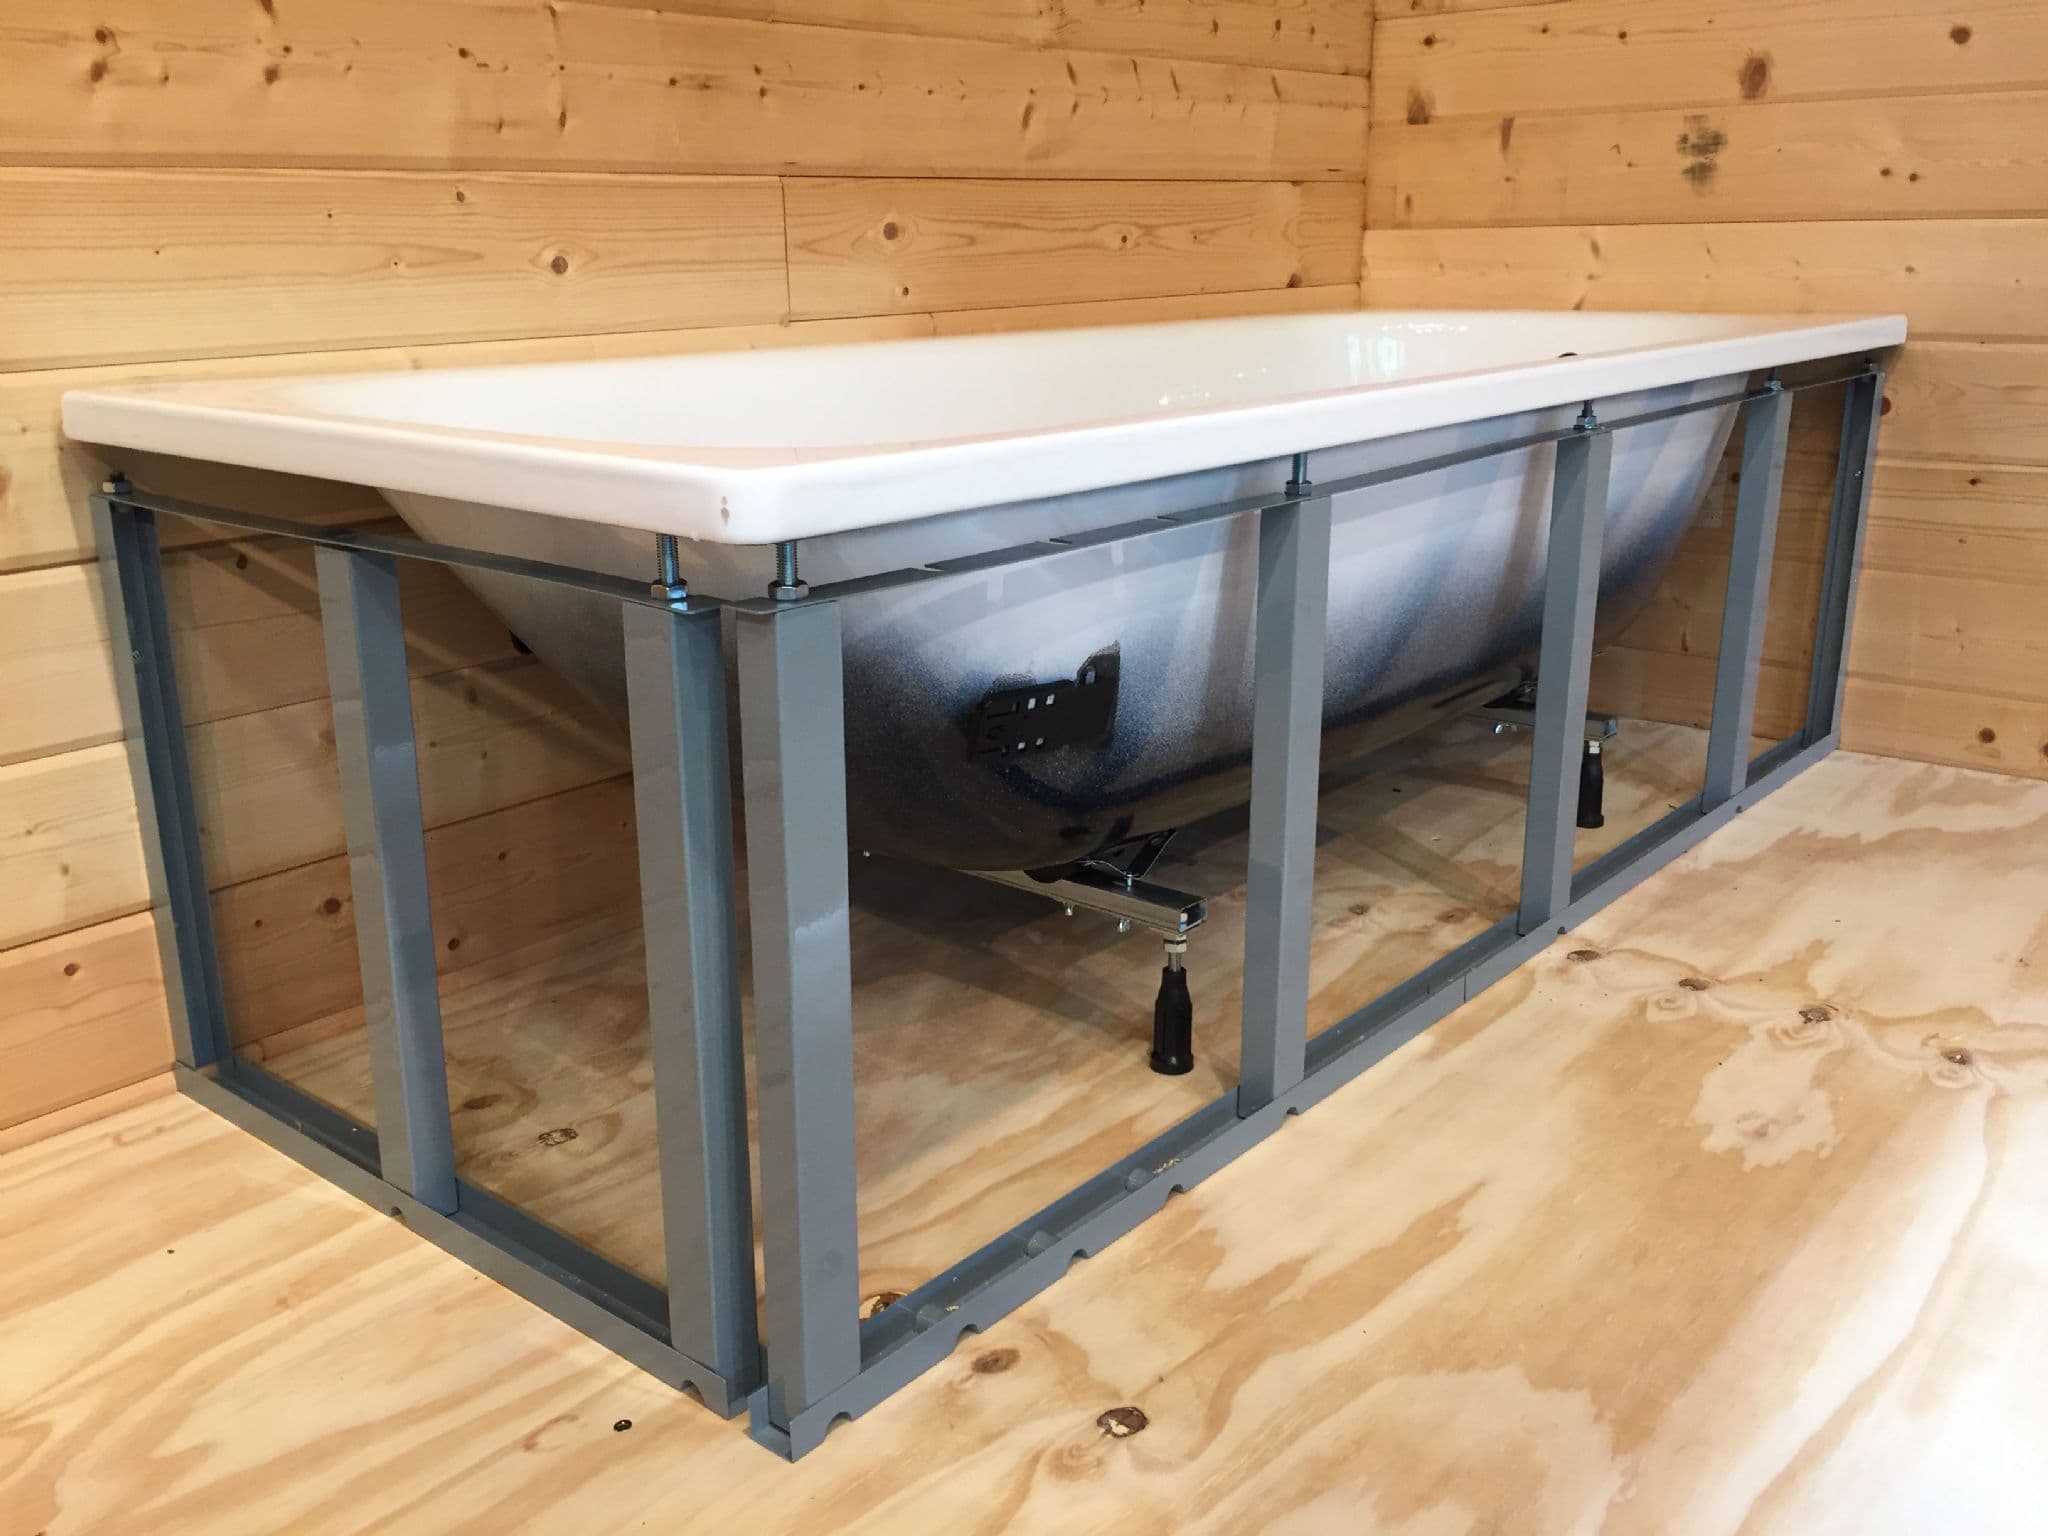
Step 2: Build the Frame
With the location for the bathtub frame accurately marked and confirmed, it's time to transition into the construction phase. Building the frame is a critical step that demands precision and attention to detail to ensure a sturdy and reliable foundation for the bathtub installation.
Gather the Necessary Materials:
Before commencing the construction of the frame, gather all the essential materials and tools required for the task. This typically includes pressure-treated lumber, framing nails or screws, a circular saw, a power drill, wood shims, and a carpenter's square. Ensuring that all materials are readily available will streamline the construction process and minimize interruptions.
Read more: How To Cover A Bathtub
Cut the Lumber to Size:
Using a circular saw, carefully cut the pressure-treated lumber to the appropriate dimensions based on the marked layout for the bathtub frame. It is crucial to maintain precision during the cutting process to ensure that the individual components of the frame fit together seamlessly and align with the designated space.
Assemble the Frame Components:
With the lumber cut to size, begin assembling the frame components according to the layout markings on the floor. Utilize a carpenter's square to ensure that the frame corners are perfectly square, promoting stability and structural integrity. Secure the frame components together using framing nails or screws, creating a rigid and well-constructed framework.
Incorporate Additional Support:
Depending on the specific design and structural requirements, consider incorporating additional support elements within the frame to enhance its strength and stability. This may involve adding cross braces or reinforcing the corners to fortify the overall structure and prepare it for the weight of the bathtub.
Verify Alignment and Fit:
Once the frame components are assembled, carefully position the frame within the marked layout on the floor, ensuring that it aligns precisely with the designated space. Use a level to confirm that the frame is perfectly horizontal and adjust as necessary to achieve an optimal fit.
Read more: How To Shower In A Bathtub?
Finalize the Frame Construction:
Upon confirming the alignment and fit of the frame, make any required adjustments and finalize the construction by securely fastening the frame to the floor. This step is crucial for ensuring that the frame remains in place during the subsequent stages of the bathtub installation.
By methodically building the bathtub frame with precision and attention to detail, you establish a solid and reliable foundation that sets the stage for the seamless integration of the bathtub within the designated space. With the frame constructed, you are now prepared to proceed to the next phase of installing the frame and preparing it for the final steps of the bathtub installation.
Step 3: Install the Frame
With the bathtub frame meticulously constructed, the next pivotal step is the installation of the frame within the designated space in the bathroom. This phase requires careful maneuvering and precise positioning to ensure that the frame aligns seamlessly with the surrounding walls and plumbing fixtures, setting the stage for the successful integration of the bathtub.
Position the Frame:
Carefully lift the constructed frame and maneuver it into the marked layout on the floor, ensuring that it aligns precisely with the designated space for the bathtub. Take into account any surrounding walls and plumbing fixtures, and position the frame with a focus on achieving a snug and secure fit within the allocated area.
Align with Markings:
Referencing the layout markings on the floor, verify that the frame aligns accurately with the designated position for the bathtub. Utilize a level to confirm that the frame is perfectly horizontal and make any necessary adjustments to achieve optimal alignment with the surrounding space.
Read more: How To Not Slip In The Bathtub
Secure the Frame:
Once the frame is positioned and aligned, proceed to secure it in place using appropriate fastening methods. Depending on the flooring material, this may involve anchoring the frame to the subfloor using screws or nails, ensuring that it remains stable and stationary during the subsequent stages of the bathtub installation.
Check for Stability:
After securing the frame, perform a thorough assessment of its stability and sturdiness. Apply gentle pressure to different sections of the frame to ensure that it remains firmly in place and does not exhibit any signs of shifting or instability. This step is crucial for confirming the reliability of the frame as a foundation for the bathtub.
Integrate with Plumbing:
If the bathtub installation involves connecting to existing plumbing fixtures, ensure that the frame allows for seamless integration with the necessary plumbing connections. Verify that the frame positioning aligns with the plumbing requirements, allowing for easy access and proper alignment of the plumbing components with the bathtub.
Prepare for Subsequent Steps:
With the frame securely installed and aligned within the designated space, prepare for the subsequent stages of the bathtub installation process. This may involve additional adjustments to the frame, as well as the preparation of surrounding areas for the seamless integration of the bathtub with the frame and the overall bathroom environment.
By meticulously installing the bathtub frame with precision and attention to detail, you establish a solid foundation that sets the stage for the seamless integration of the bathtub within the designated space. With the frame securely in place, you are now prepared to proceed to the final steps of the bathtub installation, bringing you one step closer to a fully functional and visually stunning bathroom transformation.
Read more: How To Lift A Bathtub
Step 4: Secure the Frame to the Floor
Securing the bathtub frame to the floor is a critical step that ensures the stability and reliability of the entire installation. By firmly anchoring the frame to the floor, you create a solid foundation that can support the weight of the bathtub and withstand the rigors of daily use. This process involves strategic fastening methods and meticulous attention to detail to guarantee a secure and long-lasting result.
Select Appropriate Fasteners:
Before proceeding with securing the frame, it is essential to select the appropriate fasteners based on the type of flooring material. For wooden subfloors, galvanized screws are commonly used, while concrete subfloors may require concrete anchors or masonry screws. Ensuring that the chosen fasteners are suitable for the specific flooring material is crucial for achieving a secure attachment.
Position and Pre-Drill Holes:
Carefully position the frame in its designated location and mark the spots where the frame will be fastened to the floor. Using a power drill equipped with the appropriate drill bit, pre-drill holes through the frame and into the floor to accommodate the selected fasteners. This preparatory step helps prevent the wood from splitting and ensures precise placement of the fasteners.
Secure with Fasteners:
With the pre-drilled holes in place, proceed to secure the frame to the floor using the selected fasteners. Drive the screws or anchors through the frame and into the floor, ensuring a snug and secure fit. It is important to maintain consistent pressure while fastening to prevent any shifting or misalignment of the frame.
Read more: How To Select A Bathtub
Verify Stability and Alignment:
After securing the frame to the floor, perform a thorough assessment of its stability and alignment. Apply gentle pressure to different sections of the frame to ensure that it remains firmly in place and does not exhibit any signs of movement. Additionally, utilize a level to confirm that the frame is still perfectly horizontal, making any necessary adjustments if required.
Reinforce as Needed:
Depending on the specific design and structural requirements, consider reinforcing the frame with additional fasteners or braces to further enhance its stability and strength. This may involve adding extra screws or anchors at strategic points along the frame to fortify its attachment to the floor, providing added assurance of its reliability.
By meticulously securing the bathtub frame to the floor with the appropriate fasteners and reinforcing as needed, you establish a solid and dependable foundation that forms the backbone of the entire bathtub installation. With the frame securely anchored, you are now poised to proceed to the subsequent stages of the installation process, bringing you one step closer to the realization of a fully functional and visually stunning bathroom transformation.
Step 5: Check for Level and Plumb
Ensuring that the bathtub frame is perfectly level and plumb is a critical step that directly impacts the overall stability and functionality of the installation. By meticulously verifying the alignment and orientation of the frame, you lay the groundwork for a seamless integration of the bathtub within the designated space, promoting optimal performance and visual appeal.
Utilize a Level and Plumb Bob:
To begin the process of checking for level and plumb, utilize a reliable spirit level to assess the horizontal alignment of the frame. Place the level on the upper edges of the frame, adjusting its position as needed to achieve a perfectly level orientation. This step is essential for guaranteeing that the bathtub will sit securely within the frame without any tilting or imbalance.
In addition to the spirit level, employ a plumb bob to assess the vertical alignment of the frame. Suspended from the top edge of the frame, the plumb bob provides a precise indication of whether the frame is perfectly plumb, ensuring that the bathtub will fit snugly against the walls without any leaning or misalignment.
Read more: How To Repaint A Bathtub
Make Necessary Adjustments:
As you assess the levelness and plumbness of the frame, be prepared to make any necessary adjustments to achieve the desired alignment. This may involve adding or removing shims beneath the frame to correct any unevenness, as well as gently tapping the frame into position to achieve a perfectly plumb orientation. Attention to detail during this phase is crucial for ensuring a stable and balanced foundation for the bathtub.
Confirm Stability and Alignment:
After making adjustments, thoroughly verify the stability and alignment of the frame by rechecking with the spirit level and plumb bob. It is essential to confirm that the frame maintains its level and plumb orientation consistently across all sections, ensuring uniform support for the bathtub and promoting a seamless integration with the surrounding walls and fixtures.
Prepare for Subsequent Steps:
Upon confirming the levelness and plumbness of the frame, prepare for the subsequent stages of the bathtub installation process. This may involve finalizing any remaining adjustments to the frame, as well as ensuring that the surrounding areas are ready for the seamless integration of the bathtub with the frame and the overall bathroom environment.
By meticulously checking for level and plumb with precision and attention to detail, you establish a solid and balanced foundation that sets the stage for the seamless integration of the bathtub within the designated space. With the frame confirmed to be level and plumb, you are now poised to proceed to the final steps of the bathtub installation, bringing you one step closer to a fully functional and visually stunning bathroom transformation.
Step 6: Add Additional Support
In the process of framing a bathtub, the incorporation of additional support elements within the frame plays a crucial role in enhancing its strength, stability, and overall structural integrity. While the primary frame provides the foundational structure for the bathtub installation, the strategic inclusion of supplementary support elements further fortifies the framework, ensuring that it can effectively bear the weight of the bathtub and withstand the demands of daily use.
One of the key considerations when adding additional support is the specific design and layout of the bathtub installation. Depending on the dimensions and configuration of the bathtub, as well as the surrounding structural elements, such as alcoves or adjacent walls, the need for supplemental support may vary. Additionally, factors such as the type of flooring and the presence of underlying subflooring materials can influence the requirements for additional support within the frame.
Common methods of incorporating additional support within the bathtub frame include the use of cross braces, blocking, and reinforcement at critical load-bearing points. Cross braces, typically constructed from the same pressure-treated lumber used for the primary frame, are positioned diagonally across the frame to distribute weight and minimize lateral movement. This effectively stabilizes the frame and prevents shifting or twisting, contributing to the overall rigidity of the installation.
Blocking, which involves adding solid pieces of lumber between frame components, serves to reinforce specific areas of the frame, particularly where the bathtub will exert significant pressure. By strategically placing blocking at key points along the frame, such as beneath the bathtub's base or along the edges, the overall load-bearing capacity of the frame is enhanced, promoting a secure and durable foundation for the bathtub.
In cases where the bathtub installation necessitates attachment to surrounding walls or fixtures, reinforcing the frame at these connection points is essential. This may involve the strategic placement of additional support elements to ensure that the frame can effectively bear the forces exerted during the installation and subsequent use of the bathtub.
By thoughtfully integrating additional support within the bathtub frame, you bolster its capacity to withstand the weight and pressures associated with the bathtub installation, ultimately contributing to a stable, secure, and long-lasting foundation. With the strategic inclusion of supplementary support elements, the bathtub frame is fortified to accommodate the demands of the installation process and provide a reliable base for the seamless integration of the bathtub within the designated space.
Read more: How To Frame A Roof
Conclusion
In conclusion, framing a bathtub is a fundamental aspect of any bathroom renovation or construction project, playing a pivotal role in establishing a sturdy, reliable, and visually appealing foundation for the installation of the bathtub. Throughout this comprehensive guide, we have delved into the step-by-step process of framing a bathtub, emphasizing the importance of precision, attention to detail, and strategic planning to achieve optimal results.
From the initial measurements and markings to the meticulous installation and alignment of the frame, each step contributes to the overall stability and functionality of the bathtub installation. By carefully assessing the spatial requirements, constructing a well-aligned frame, and securing it to the floor, the groundwork is laid for a successful integration of the bathtub within the designated space.
The process of checking for level and plumb further ensures that the frame provides uniform support and alignment, setting the stage for a seamless fit with the surrounding walls and fixtures. Additionally, the strategic incorporation of additional support elements within the frame enhances its strength and load-bearing capacity, reinforcing its structural integrity and long-term durability.
As a result of following these detailed steps, you can confidently approach the framing of a bathtub with the knowledge and expertise needed to achieve professional and reliable results. Whether you are a seasoned DIY enthusiast or a homeowner embarking on your first bathroom renovation project, this guide equips you with the essential understanding of framing a bathtub, empowering you to tackle the task with precision and efficiency.
Ultimately, a well-constructed bathtub frame not only provides the necessary structural support for the bathtub but also contributes to the overall aesthetic and functionality of the bathroom. By meticulously following the steps outlined in this guide, you are poised to create a solid and reliable foundation that forms the cornerstone of a visually stunning and fully functional bathroom transformation.
In essence, framing a bathtub is not merely a technical task but a foundational element that sets the stage for the realization of a space that seamlessly combines practicality and elegance. With the knowledge and insights gained from this guide, you are well-prepared to embark on the journey of framing a bathtub with confidence and precision, ultimately contributing to the creation of a captivating and functional bathroom environment.
Frequently Asked Questions about How To Frame A Bathtub
Was this page helpful?
At Storables.com, we guarantee accurate and reliable information. Our content, validated by Expert Board Contributors, is crafted following stringent Editorial Policies. We're committed to providing you with well-researched, expert-backed insights for all your informational needs.


0 thoughts on “How To Frame A Bathtub”