Home>Furniture & Design>Outdoor Furniture>How To Build Outdoor Chaise Lounges
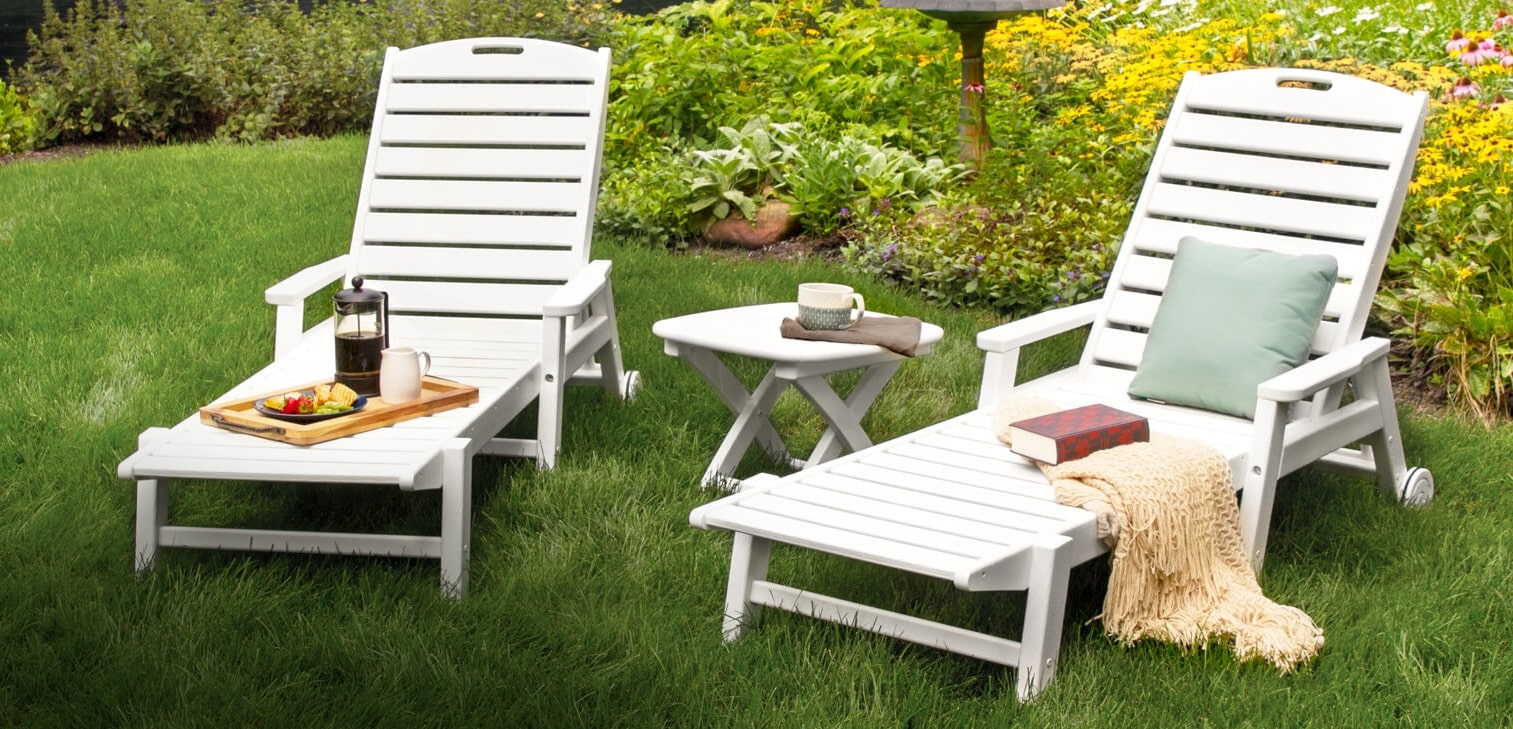

Outdoor Furniture
How To Build Outdoor Chaise Lounges
Modified: January 18, 2024
Learn how to build stylish and comfortable outdoor chaise lounges with our expert tips and designs. Create the perfect addition to your outdoor furniture collection.
(Many of the links in this article redirect to a specific reviewed product. Your purchase of these products through affiliate links helps to generate commission for Storables.com, at no extra cost. Learn more)
Introduction
Welcome to the world of outdoor furniture design and craftsmanship! Building your own outdoor chaise lounge can be an immensely rewarding and fulfilling experience. Imagine basking in the warm sunlight, comfortably reclined on a chaise lounge that you meticulously crafted with your own hands. This article will guide you through the process of creating a beautiful and functional outdoor chaise lounge, offering insights into the materials, tools, and techniques required to bring your vision to life.
Crafting a chaise lounge for your outdoor space allows you to personalize the design to perfectly complement your existing decor. Whether you prefer a sleek, modern aesthetic or a rustic, natural look, the possibilities are limited only by your imagination. By embarking on this DIY project, you not only save on the cost of purchasing a pre-made chaise lounge but also gain the satisfaction of honing your woodworking skills and creating a piece that reflects your unique style.
Throughout this guide, we will explore the step-by-step process of building an outdoor chaise lounge, from selecting the right materials to adding the finishing touches that elevate the final product. By the end of this journey, you will have not only gained valuable insights into outdoor furniture construction but also acquired a stunning addition to your outdoor living space that is sure to impress friends and family alike. So, roll up your sleeves, gather your tools, and let's dive into the art of crafting a custom outdoor chaise lounge that will become the centerpiece of your relaxation oasis.
Key Takeaways:
- Crafting your own outdoor chaise lounge allows you to personalize the design, save on costs, and gain valuable woodworking skills while creating a stunning addition to your outdoor space.
- By meticulously selecting materials, cutting and sanding wood, and adding finishing touches, you can transform raw materials into a functional and aesthetically captivating chaise lounge that reflects your passion and vision.
Read more: How To Build A Chaise Lounge Chair
Materials Needed
Before embarking on the construction of your outdoor chaise lounge, it’s essential to gather the necessary materials to ensure a smooth and efficient building process. Here’s a comprehensive list of materials you’ll need:
- Pressure-treated lumber or cedar: These materials are ideal for outdoor furniture due to their resistance to rot and decay. Select high-quality boards that are straight and free from knots for the best results.
- Stainless steel or galvanized screws: Opt for corrosion-resistant screws to ensure the longevity of your chaise lounge, especially when exposed to outdoor elements.
- Wood glue: Choose a weatherproof wood glue to reinforce the connections between wooden components and enhance the overall structural integrity.
- Waterproof wood finish or outdoor sealant: Applying a protective finish or sealant will shield the wood from moisture, UV rays, and other environmental factors, prolonging the lifespan of your chaise lounge.
- Cushions: Depending on your preference, select comfortable outdoor cushions that complement the design of your chaise lounge and provide a cozy seating experience.
- Stainless steel or brass hardware: If your design includes adjustable backrest positions, you’ll need durable and rust-resistant hardware to facilitate smooth adjustments.
- Sandpaper: Ensure you have a variety of grits to prepare the wood surfaces for assembly and achieve a smooth, splinter-free finish.
- Wood filler: This will come in handy for concealing any visible screw heads and filling small imperfections in the wood for a polished appearance.
- Measuring tape, carpenter’s square, and level: These essential tools will help you accurately measure, align, and assemble the components of your chaise lounge.
By gathering these materials, you’ll be well-equipped to commence the construction of your outdoor chaise lounge, setting the stage for a successful and enjoyable woodworking endeavor.
Tools Required
Equipping yourself with the right tools is crucial for executing the construction of your outdoor chaise lounge with precision and efficiency. Here’s a comprehensive list of tools you’ll need to bring your woodworking project to fruition:
- Power saw: A circular saw or miter saw will enable you to make accurate and clean cuts in the lumber, ensuring the components fit together seamlessly.
- Drill/driver: A versatile tool for drilling pilot holes and driving screws, the drill/driver is indispensable for assembling the wooden frame and attaching the slats.
- Clamps: Utilize clamps to hold the wooden pieces securely in place during assembly, facilitating precise and stable connections.
- Sanding block or orbital sander: To achieve a smooth and splinter-free finish, a sanding block or orbital sander is essential for preparing the wood surfaces before assembly and adding the final touches.
- Screwdriver set: Ensure you have a variety of screwdrivers, including Phillips and flat-head, to accommodate different screw sizes and types during the construction process.
- Carpenter’s square: This tool is invaluable for ensuring that your cuts and joints are perfectly perpendicular, promoting the structural integrity and aesthetic appeal of your chaise lounge.
- Paintbrushes or applicators: If you choose to apply a wood finish or sealant, high-quality paintbrushes or applicators will facilitate an even and professional-looking application.
- Workbench or sawhorses: Having a stable and elevated surface for cutting and assembling the lumber will enhance safety and convenience throughout the construction process.
- Protective gear: Prioritize safety by wearing protective eyewear, a dust mask, and hearing protection when operating power tools and working with wood materials.
By ensuring that you have these essential tools at your disposal, you’ll be well-prepared to tackle the construction of your outdoor chaise lounge with confidence and precision, setting the stage for a successful and enjoyable woodworking experience.
Step 1: Cutting the Wood
As you embark on the construction of your outdoor chaise lounge, precision in cutting the wood is paramount to achieving a sturdy and visually appealing final product. Follow these steps to ensure accurate and clean cuts:
- Measure and mark: Begin by measuring and marking the pressure-treated lumber or cedar according to the dimensions specified in your chaise lounge design plans. Use a measuring tape and carpenter’s square to ensure the accuracy of your marks.
- Set up your cutting area: Create a designated cutting area with a stable workbench or sawhorses. This will provide a secure and elevated surface for operating your power saw, enhancing safety and precision.
- Use the appropriate saw: Depending on the type of cuts required, utilize a circular saw or miter saw to carefully execute each cut. Ensure that the saw blade is suitable for cutting wood and is securely fastened in place.
- Execute the cuts: With steady hands and a firm grip on the saw, carefully execute each cut along the marked lines. Take your time to maintain accuracy and follow all safety precautions recommended for operating power tools.
- Check for accuracy: After making each cut, verify the dimensions and angles to ensure they align with your design specifications. Make any necessary adjustments to guarantee that the cut pieces fit together seamlessly during assembly.
By meticulously measuring, marking, and executing precise cuts, you lay the foundation for a well-crafted chaise lounge that embodies both structural integrity and visual harmony. With the wooden components accurately prepared, you’re ready to progress to the next stage of the construction process.
Step 2: Sanding the Wood
Once the wood components for your outdoor chaise lounge have been cut to the desired dimensions, the next crucial step is to prepare the surfaces through thorough sanding. This process not only ensures a smooth and splinter-free finish but also sets the stage for the application of wood finish or sealant. Follow these steps to achieve impeccably sanded wood:
- Select the appropriate sandpaper: Begin by choosing the right grit of sandpaper for the initial sanding. Coarse grits, such as 80 or 100, are effective for removing rough surfaces and irregularities, while finer grits, such as 220 or 240, are ideal for achieving a polished finish.
- Sand with the grain: Always sand in the direction of the wood grain to avoid creating visible scratches or imperfections. Use a sanding block or orbital sander to maintain consistent pressure and achieve even results.
- Round sharp edges: For added comfort and a refined appearance, consider rounding the sharp edges and corners of the wood components using sandpaper. This simple touch enhances the tactile experience and visual appeal of the chaise lounge.
- Remove dust and debris: After the initial sanding, use a clean cloth or tack cloth to thoroughly remove all dust and debris from the wood surfaces. This prepares the wood for subsequent sanding stages and ensures a pristine foundation for finishing.
- Progress to finer grits: Gradually transition to finer grits of sandpaper to achieve a progressively smoother finish. Each successive sanding stage contributes to the refinement of the wood surfaces, resulting in a professional-grade appearance.
- Inspect for uniformity: As you progress through the sanding stages, inspect the wood surfaces to ensure uniformity and smoothness. Address any remaining imperfections or rough spots to achieve a consistent and inviting texture.
By diligently sanding the wood components, you elevate the overall quality and aesthetic appeal of your outdoor chaise lounge, setting the stage for the application of a protective finish or sealant. With the surfaces impeccably prepared, you’re ready to proceed to the assembly phase of the construction process.
When building outdoor chaise lounges, make sure to use weather-resistant materials like cedar or teak to ensure durability and longevity.
Read more: What Is A Chaise Lounge?
Step 3: Assembling the Frame
With the wood components meticulously cut and sanded to perfection, it’s time to embark on the pivotal stage of assembling the frame of your outdoor chaise lounge. This phase requires precision and attention to detail to ensure the structural integrity and stability of the final product. Follow these steps to execute the assembly with finesse:
- Organize the components: Lay out all the cut and sanded wooden pieces in an organized manner, referring to your design plans to confirm the placement of each component. This preparatory step streamlines the assembly process and minimizes the likelihood of errors.
- Apply wood glue: Prior to securing the joints with screws, apply weatherproof wood glue to the mating surfaces of the wooden components. This enhances the strength of the connections and fortifies the overall stability of the chaise lounge frame.
- Utilize clamps: Secure the wooden pieces in place using clamps to maintain alignment and stability during assembly. This step is crucial for achieving tight and secure joints that contribute to the robustness of the frame.
- Pre-drill pilot holes: With the components aligned and clamped, pre-drill pilot holes using a drill/driver to facilitate the insertion of screws. This minimizes the risk of wood splitting and ensures precise screw placement.
- Drive screws securely: Carefully drive stainless steel or galvanized screws into the pre-drilled pilot holes to firmly connect the wooden components. Exercise caution to avoid over-tightening, which can compromise the integrity of the wood.
- Verify squareness and alignment: Throughout the assembly process, regularly check for squareness and alignment using a carpenter’s square and measuring tape. Adjust the positioning of components as needed to maintain the desired dimensions and angles.
By methodically assembling the frame of your chaise lounge, you lay the groundwork for a durable and visually striking outdoor furniture piece. The meticulous execution of this phase sets the stage for the final steps of adding the slats and finishing touches, bringing you one step closer to the completion of your custom chaise lounge.
Step 4: Attaching the Slats
As your outdoor chaise lounge begins to take shape, the next critical step involves attaching the slats to the assembled frame. The slats not only contribute to the comfort and functionality of the chaise lounge but also play a significant role in defining its visual appeal. Follow these steps to seamlessly integrate the slats into your custom creation:
- Prepare the slats: Ensure that the slats are cut to the specified dimensions and have been meticulously sanded to achieve a smooth and splinter-free surface. This preparatory step sets the stage for a professional and inviting finish.
- Position the slats: Carefully position the slats on the assembled frame, ensuring equal spacing between each slat for a visually balanced and comfortable seating surface. Use spacers or a measuring tool to maintain consistent gaps between the slats.
- Pre-drill holes: To prevent wood splitting and facilitate precise screw placement, pre-drill pilot holes in the slats before attaching them to the frame. This preparatory step streamlines the attachment process and minimizes the risk of errors.
- Secure the slats: Utilizing stainless steel or galvanized screws, securely attach the slats to the frame by driving the screws through the pre-drilled holes. Exercise caution to avoid over-tightening, which can compromise the integrity of the wood.
- Verify alignment and stability: Throughout the attachment process, verify the alignment and stability of the slats to ensure a level and uniform seating surface. Make any necessary adjustments to guarantee the comfort and visual appeal of the chaise lounge.
- Apply wood finish or sealant: Following the successful attachment of the slats, consider applying a waterproof wood finish or outdoor sealant to protect the wood from moisture, UV rays, and other environmental factors. This crucial step enhances the longevity and resilience of your chaise lounge.
By skillfully attaching the slats to the frame and considering the application of a protective finish, you bring your outdoor chaise lounge one step closer to completion. The meticulous execution of this phase contributes to the comfort, durability, and aesthetic allure of your custom-crafted furniture piece.
Step 5: Adding Finishing Touches
As the construction of your outdoor chaise lounge nears completion, it’s time to infuse the finishing touches that will elevate the visual appeal, comfort, and functionality of your custom creation. Follow these steps to add the final flourishes that will transform your chaise lounge into a stunning centerpiece of your outdoor living space:
- Install adjustable backrest positions: If your design incorporates an adjustable backrest, carefully install the necessary hardware to facilitate smooth and secure adjustments. Stainless steel or brass hardware is ideal for achieving both durability and aesthetic cohesion.
- Conceal screw heads: Utilize wood filler to conceal any visible screw heads on the surface of the chaise lounge. This simple yet essential step contributes to a polished and professional appearance, ensuring that the focus remains on the natural beauty of the wood.
- Apply a wood finish or sealant: Consider applying a high-quality outdoor wood finish or sealant to protect the wood from the elements and enhance its natural beauty. Whether you prefer a clear protective coat or a tinted finish to enrich the wood’s hue, this step prolongs the lifespan and luster of your chaise lounge.
- Accessorize with cushions: Select comfortable and weather-resistant outdoor cushions that complement the design of your chaise lounge. The addition of cushions not only enhances the comfort of the seating surface but also introduces a touch of personal style and inviting warmth.
- Personalize with decorative elements: Consider incorporating decorative elements, such as engraved patterns, carved details, or custom hardware, to infuse your chaise lounge with a unique and personalized aesthetic. These subtle embellishments can transform your creation into a true reflection of your individual style.
- Perform a final inspection: Thoroughly inspect the completed chaise lounge, ensuring that all components are securely fastened, the finish is even and protective, and the overall appearance aligns with your design vision. Make any necessary adjustments to guarantee the quality and integrity of your custom-crafted furniture piece.
By meticulously attending to the finishing touches, you bring your outdoor chaise lounge to its full potential, embodying both functional excellence and aesthetic allure. With these final embellishments, your custom creation is poised to become a cherished and inviting retreat within your outdoor sanctuary.
Conclusion
Congratulations on successfully navigating the art of crafting your own outdoor chaise lounge! Through meticulous planning, precise woodworking techniques, and a touch of creativity, you have brought to life a stunning and functional piece of outdoor furniture that reflects your unique style and craftsmanship. As you bask in the satisfaction of your completed chaise lounge, it’s important to acknowledge the invaluable skills and insights gained throughout this DIY journey.
By selecting high-quality materials, meticulously cutting and sanding the wood, and executing precise assembly and finishing techniques, you have not only created a beautiful outdoor chaise lounge but also honed your woodworking skills and deepened your appreciation for the art of furniture construction. The knowledge and experience gained from this endeavor will undoubtedly serve as a foundation for future woodworking projects and creative pursuits.
Furthermore, the custom chaise lounge you’ve crafted is more than just a piece of furniture; it’s a testament to your ingenuity and dedication. Whether positioned on a sun-drenched patio, nestled in a tranquil garden, or adorning a poolside retreat, your chaise lounge stands as a symbol of your ability to transform raw materials into a functional and aesthetically captivating creation.
As you enjoy the comfort and relaxation offered by your custom chaise lounge, take pride in the fact that you’ve not only built a piece of furniture but also imbued it with your passion, vision, and personal touch. Your outdoor space has been enriched with a one-of-a-kind centerpiece that invites moments of leisure, contemplation, and shared enjoyment with friends and family.
Embrace the sense of fulfillment that comes with creating something tangible and enduring, and let your outdoor chaise lounge serve as a constant reminder of the remarkable capabilities within your own hands. Whether embarking on future DIY projects or simply reveling in the tranquility of your outdoor sanctuary, may your custom-crafted chaise lounge continue to inspire and delight for years to come.
Frequently Asked Questions about How To Build Outdoor Chaise Lounges
Was this page helpful?
At Storables.com, we guarantee accurate and reliable information. Our content, validated by Expert Board Contributors, is crafted following stringent Editorial Policies. We're committed to providing you with well-researched, expert-backed insights for all your informational needs.






0 thoughts on “How To Build Outdoor Chaise Lounges”