Home>Furniture>Living Room Furniture>How To Build A Chaise Lounge Chair
Living Room Furniture
How To Build A Chaise Lounge Chair
Modified: October 28, 2024
Learn how to build a comfortable and stylish chaise lounge chair for your living room with our easy-to-follow DIY guide. Transform your space with this essential piece of living room furniture.
(Many of the links in this article redirect to a specific reviewed product. Your purchase of these products through affiliate links helps to generate commission for Storables.com, at no extra cost. Learn more)
Introduction
Welcome to the world of DIY furniture! Building your own chaise lounge chair can be a rewarding and fulfilling project that not only allows you to create a unique piece of furniture but also saves you money in the process. Whether you’re a seasoned DIY enthusiast or just starting out, this step-by-step guide will walk you through the process of building your very own chaise lounge chair.
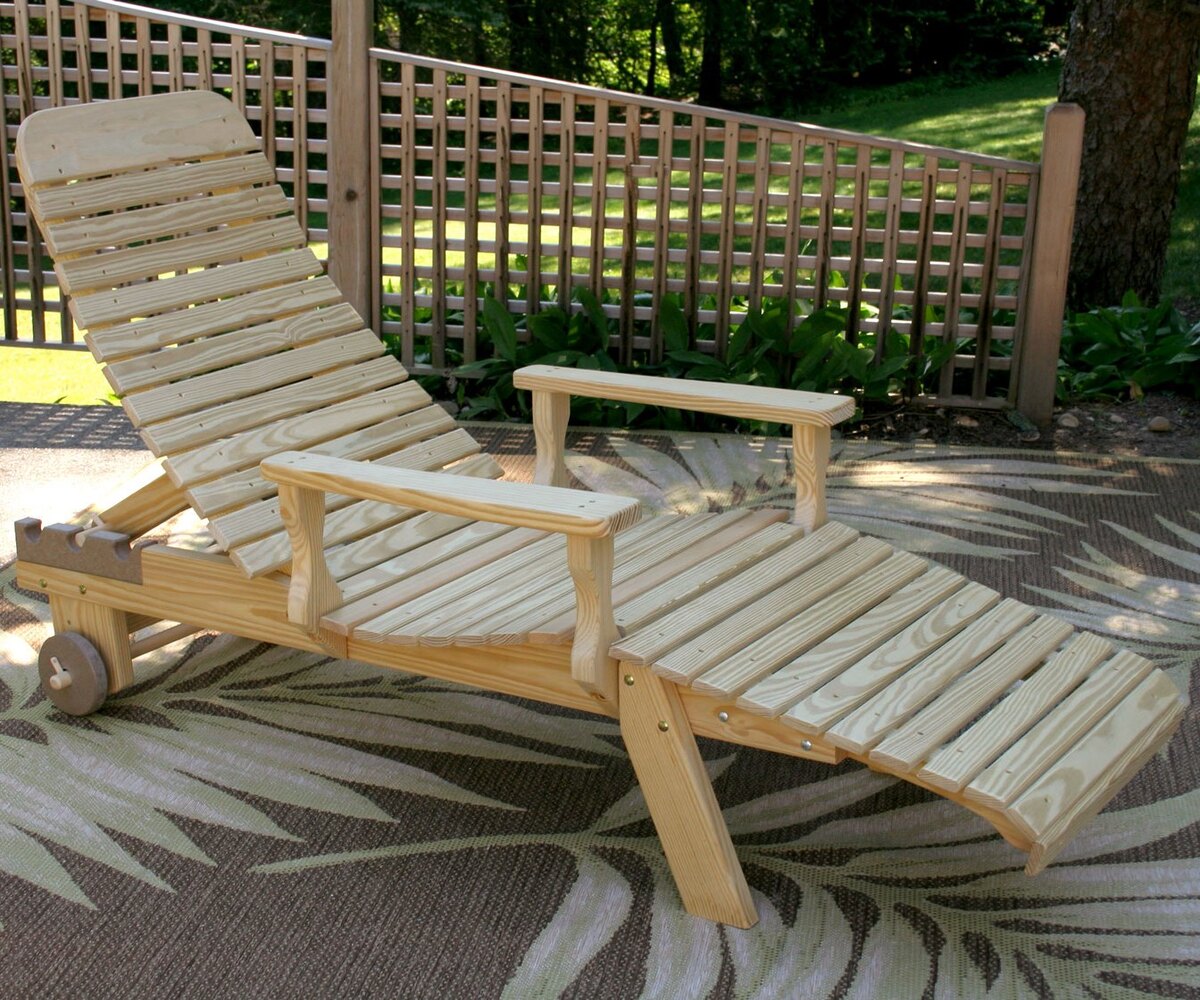
A chaise lounge chair is the perfect addition to any living room or outdoor space. It provides a comfortable and stylish spot to relax and unwind after a long day. By building your own chaise lounge chair, you have the freedom to customize it to your specific preferences and design aesthetic.
In this guide, we will cover everything from gathering the necessary materials and tools to assembling and finishing your chair. Don’t worry if you’re new to woodworking – we will provide detailed instructions and helpful tips along the way to ensure a successful project.
Before we dive into the construction process, let’s briefly go over the materials and tools you’ll need to have handy.
Key Takeaways:
- Building your own chaise lounge chair allows you to customize it to your style and save money. It’s a fun and rewarding DIY project that adds a unique touch to your living space.
- Attention to detail and patience are key to a successful DIY project. By following the step-by-step guide, you can create a sturdy and comfortable chaise lounge chair for relaxation and enjoyment.
Read more: How Long Is A Chaise Lounge Chair
Step 1: Gathering Materials and Tools
Before you can start building your chaise lounge chair, it’s important to gather all the necessary materials and tools. Here’s a list of what you’ll need:
Materials:
- Wood: Choose a sturdy and durable wood, such as pine or oak, for the frame and slats of the chair.
- Foam: Opt for high-density foam for the seat and backrest cushions, ensuring optimal comfort.
- Fabric: Select a durable and aesthetically pleasing fabric to cover the cushions. Consider the overall color scheme and décor of your living room when choosing.
- Screws: Use screws of the appropriate length and thickness to securely fasten the different components of the chair together.
- Wood glue: This will be used in conjunction with the screws to strengthen the joints.
- Sanding paper: You’ll need sanding paper in various grits to smooth out any rough edges and create a polished finish.
- Paint or stain: If desired, choose a paint or stain that complements the wood and matches your interior or outdoor space.
Tools:
- Measuring tape: A measuring tape will be crucial for ensuring accurate dimensions throughout the construction process.
- Saw: You’ll need both a circular saw and a miter saw to cut the wooden boards to the appropriate lengths and angles.
- Drill: A power drill with assorted drill bits will be necessary for pre-drilling holes for the screws.
- Screwdriver: A screwdriver will be used to tighten the screws and securely fasten the components together.
- Sewing machine: If you’re planning to make your own cushion covers, a sewing machine will be essential.
- Staple gun: This will come in handy for securing the fabric to the foam cushions.
- Clamps: Clamps will be useful when gluing and clamping the wood together for stronger joints.
- Sander: An electric sander or sanding block will help you achieve a smooth and polished finish on the wood surfaces.
Make sure to gather all the necessary materials and have the tools readily available before you begin the construction process. Once everything is in place, you’re ready to move on to the next step: cutting the wood.
Step 2: Cutting the Wood
Now that you have all the materials and tools gathered, it’s time to start cutting the wood for your chaise lounge chair. Follow these steps for precise cuts:
Read more: How To Build Outdoor Chaise Lounges
1. Measure and mark:
Using a measuring tape, determine the desired dimensions for the backrest, seat, and legs of your chair. Mark these measurements on the wooden boards using a pencil or a marker.
2. Cut the backrest and seat:
Using a circular saw or a miter saw, carefully cut the wooden boards according to the marked measurements for the backrest and seat. Make sure to maintain straight lines and smooth edges.
3. Angled cuts:
For a more ergonomic design, you may want to make angled cuts on the backrest and seat pieces. Measure and mark the desired angles on the boards, then use a miter saw to make precise cuts.
4. Cutting the legs:
Measure and mark the length of the legs on the wooden boards. Take into consideration the desired height of the chair, as well as any angle adjustments for comfort. Use a saw to cut the legs accordingly.
Read more: How To Build An Outdoor Lounge Chair
5. Additional components:
If your chaise lounge chair design includes additional components such as armrests or side tables, repeat the measuring and cutting process for these pieces as well.
Remember to take safety precautions while cutting the wood, such as wearing safety glasses and gloves and securing the wood firmly in place before making any cuts. Double-check your measurements and pay attention to the angles to ensure precise cuts.
Once all the wood pieces are accurately cut, you’re ready to move on to the next step: building the backrest of your chaise lounge chair.
Step 3: Building the Backrest
With the wood pieces cut to the desired dimensions, it’s time to start building the backrest of your chaise lounge chair. Follow these steps to construct a sturdy and comfortable backrest:
1. Position the backrest boards:
Take the cut wooden boards for the backrest and lay them out on a flat surface. Arrange them in the desired position, ensuring they are aligned properly and flush with one another.
2. Pre-drill holes:
Using a drill with an appropriate-sized drill bit, pre-drill holes at regular intervals along the edges where the backrest boards will be joined together. This will prevent the wood from splitting when screws are inserted.
Read more: What Is A Chaise Lounge?
3. Apply wood glue:
Apply a generous amount of wood glue along the edges of the backrest boards that will be joined together. Use a brush or a spreader to evenly distribute the glue, ensuring full coverage.
4. Join the boards:
Place the boards back in position and carefully align them. Insert screws through the pre-drilled holes to secure the backrest boards together. Use a screwdriver to tighten the screws, creating a strong and stable connection.
5. Reinforce with brackets:
If desired, additional reinforcement can be achieved by attaching metal brackets to the backside of the backrest boards. Line up the brackets and screw them into place using appropriate screws.
6. Sand the backrest:
Once the backrest is assembled, use sandpaper or a sander to smooth out any rough edges. Pay attention to the corners and edges, ensuring a comfortable and polished finish.
By following these steps, you will have successfully built the backrest of your chaise lounge chair. The next step will focus on constructing the seat, an essential component for providing ultimate comfort and relaxation.
Step 4: Constructing the Seat
Now that you have the backrest of your chaise lounge chair completed, it’s time to move on to constructing the seat. Follow these steps to create a comfortable and sturdy seat:
1. Prepare the seat boards:
Take the wooden boards that you previously cut for the seat and arrange them on a flat surface. Ensure that they are aligned and evenly spaced.
2. Pre-drill holes:
Using a drill with an appropriate-sized drill bit, pre-drill holes along the edges of the seat boards. These holes will facilitate easy screw insertion and prevent wood splitting.
Read more: What Is A Chaise Lounge?
3. Apply wood glue:
Apply a layer of wood glue along the edges of the seat boards that will be joined together. Use a brush or spreader to evenly distribute the glue.
4. Join the boards:
Place the boards back into position and align them carefully. Insert screws through the pre-drilled holes to secure the seat boards together. Use a screwdriver to tighten the screws, ensuring a strong and stable connection.
5. Reinforce with braces:
If desired, you can reinforce the seat by attaching metal braces or brackets underneath. This will provide extra support and stability. Secure the braces in place using appropriate screws.
6. Create support slats:
To support the cushion on the seat, cut and attach wooden slats across the seat boards, spacing them evenly. These slats will distribute weight and provide additional strength.
7. Sand the seat:
After the seat is assembled, use sandpaper or a sander to smoothen any rough edges. Pay particular attention to the corners and edges to ensure a comfortable and polished finish.
With the seat construction complete, you’re one step closer to finishing your chaise lounge chair. In the next step, we will focus on assembling the different components of the chair for a unified structure.
Read more: How To Reupholster A Chaise Lounge
Step 5: Assembling the Chair
Now that you have constructed the backrest and seat of your chaise lounge chair, it’s time to assemble all the different components together. Follow these steps to bring your chair to life:
1. Position the backrest and seat:
Place the backrest and seat in the desired orientation and position. Ensure that they are aligned and flush with one another.
2. Join the backrest and seat:
Using screws and a screwdriver, attach the backrest to the seat. Secure them together at the connection point, ensuring a strong and stable joint. Consider using additional support brackets or corner braces for added stability if desired.
3. Attach the legs:
Take the wooden legs that you previously cut and position them at the corners of the seat. Use screws to attach the legs to the seat securely. Double-check for stability and adjust the angles and heights of the legs as needed for comfort.
Read also: 9 Amazing Small Chaise Lounge For 2025
4. Optional: Add armrests or side tables:
If your chaise lounge chair design includes armrests or side tables, attach them to the chair using screws and a screwdriver. Make sure they are positioned securely and at a comfortable height.
5. Check for stability:
Once all the components are assembled, test the stability of the chair by sitting on it and gently rocking back and forth. Make any necessary adjustments or reinforcements as needed to ensure a sturdy and safe structure.
6. Optional: Apply finish or paint:
If desired, you can apply a finish or paint to the wooden surfaces of the chair to protect them and enhance their appearance. Follow the manufacturer’s instructions for the specific product you choose.
With the chair fully assembled, you have successfully completed the construction process. The next and final step will focus on sanding and finishing touches to ensure a polished and comfortable chaise lounge chair.
Step 6: Sanding and Finishing
After assembling the different components of your chaise lounge chair, it’s time to focus on the final details to make it visually appealing and comfortable. Follow these steps for sanding and finishing:
Read also: 9 Amazing Black Chaise Lounge For 2025
1. Sand the chair:
Using sandpaper or an electric sander, carefully sand all the wooden surfaces of the chair. Start with rough-grit sandpaper to remove any rough edges or imperfections, then gradually move to finer-grit sandpaper to achieve a smooth and polished finish. Pay attention to the corners, edges, and intricate details.
2. Smooth out the curves:
If your chaise lounge chair design includes curved or rounded edges, use a sanding block or sandpaper to smooth out these curves. Take your time and make gentle, even strokes to ensure a consistent finish.
3. Dust off the chair:
Once sanding is complete, use a brush or a lint-free cloth to remove any dust or debris from the chair’s surface. This will ensure a clean and smooth surface for the finishing steps.
4. Apply a finish:
If you prefer a natural look, you can apply a clear varnish or sealant to protect the wood. Follow the manufacturer’s instructions for application and drying times. Alternatively, you can apply paint or stain to give your chaise lounge chair a pop of color or match it to your existing decor.
5. Upholstery:
Finish off your chaise lounge chair by upholstering the seat and backrest cushions with the fabric of your choice. Measure and cut the fabric to fit securely around the foam cushions, leaving a slight overhang to wrap around the edges. Use a staple gun to attach the fabric tightly to the cushions, ensuring a smooth and professional finish.
6. Add final touches:
Once the finish is dry and the cushions are upholstered, give your chaise lounge chair a thorough final inspection. Check for any loose screws or joints, and tighten them if necessary. Wipe down the surfaces with a clean cloth to remove any remaining dust or debris.
Congratulations! You have successfully completed the construction, sanding, and finishing of your chaise lounge chair. Now it’s time to sit back, relax, and enjoy the comfort of your custom-made piece of furniture.
Conclusion
Congratulations on successfully completing the construction of your very own chaise lounge chair! By embarking on this DIY project, you have not only created a unique and personalized piece of furniture but also honed your woodworking skills along the way.
A chaise lounge chair is a versatile and stylish addition to any living room or outdoor space. It provides a comfortable spot to relax, read a book, or simply unwind after a long day. Building your own chaise lounge chair allows you to customize it to your specific preferences, ensuring that it perfectly complements your existing decor and reflects your personal style.
Throughout this step-by-step guide, we have covered everything from gathering the necessary materials and tools to cutting the wood, building the backrest and seat, assembling the chair, and finally sanding and finishing. By following these instructions, you have constructed a sturdy and comfortable chaise lounge chair that will serve as a focal point of relaxation and comfort.
Remember, the key to a successful DIY project is attention to detail and patience. Take your time, follow the instructions carefully, and don’t hesitate to seek assistance if needed. Woodworking is a skill that improves with practice, and each project is an opportunity to learn and grow.
Now that you have completed your chaise lounge chair, it’s time to sit back, recline, and enjoy the fruits of your labor. Whether you’re curling up with a good book, sipping a cup of tea, or simply soaking up the sun, your chaise lounge chair will provide the perfect spot for relaxation and rejuvenation.
Thank you for joining us on this DIY journey. We hope you have found this guide informative and inspiring. Happy lounging!
Frequently Asked Questions about How To Build A Chaise Lounge Chair
Was this page helpful?
At Storables.com, we guarantee accurate and reliable information. Our content, validated by Expert Board Contributors, is crafted following stringent Editorial Policies. We're committed to providing you with well-researched, expert-backed insights for all your informational needs.


0 thoughts on “How To Build A Chaise Lounge Chair”