
Furniture
How To Get Rid Of Bed Bugs In A Dresser
Modified: August 27, 2024
Learn how to effectively eliminate bed bugs from your dresser and other furniture. Follow our step-by-step guide to get rid of these pesky pests and regain peace of mind.
(Many of the links in this article redirect to a specific reviewed product. Your purchase of these products through affiliate links helps to generate commission for Storables.com, at no extra cost. Learn more)
Introduction
Bed bugs are one of the most dreaded pests that can infest your home. These tiny, blood-sucking insects can quickly multiply and spread, causing discomfort and distress. While bed bugs are commonly associated with mattresses and bedding, they can also infest other areas of your home, including your dresser.
Having bed bugs in your dresser can be a nightmare, as these pests can easily hide within the cracks and crevices of the furniture, making it challenging to eliminate them completely. However, with the right approach and careful attention to detail, you can get rid of bed bugs in your dresser and prevent future infestations.
In this article, we will guide you through the steps to effectively eradicate bed bugs from your dresser. From identifying the signs of infestation to treating the furniture and preventing future outbreaks, we will provide you with the necessary knowledge and techniques to reclaim your dresser from these pesky pests.
Before we dive into the process of eliminating bed bugs, it’s important to note that early detection is key. Being aware of the signs of a bed bug infestation can help you address the problem before it becomes severe. Look out for small reddish-brown stains on your dresser’s surface, tiny dark spots (which are bed bug excrement), shed skins, or even live bugs crawling on or around the furniture.
Once you have confirmed a bed bug infestation in your dresser, it’s essential to take immediate action to prevent the pests from multiplying and spreading to other areas of your home. Now, let’s get started on the steps to get rid of bed bugs in your dresser!
Key Takeaways:
- Say goodbye to bed bugs in your dresser by following a comprehensive process that includes identifying, clearing, vacuuming, disassembling, washing, treating, and preventing future infestations.
- Keep your dresser bed bug-free with regular inspections, cleanliness, bed bug-proof covers, cautiousness with used furniture, proper storage, and vigilance for early detection.
Read more: How To Get Rid Of Bed Bugs
Identifying Bed Bugs in a Dresser
Before you can effectively eliminate bed bugs from your dresser, it’s crucial to properly identify the presence of these pests. While bed bugs are small and can be difficult to spot, there are several signs that can help you determine if your dresser is infested.
First, thoroughly inspect the surface of the dresser for any reddish-brown stains or dark spots. These stains are caused by bed bug excrement and may appear as small dots or smears on the wood or fabric. Additionally, look for any shed skins, as bed bugs molt as they grow, leaving behind their old skins.
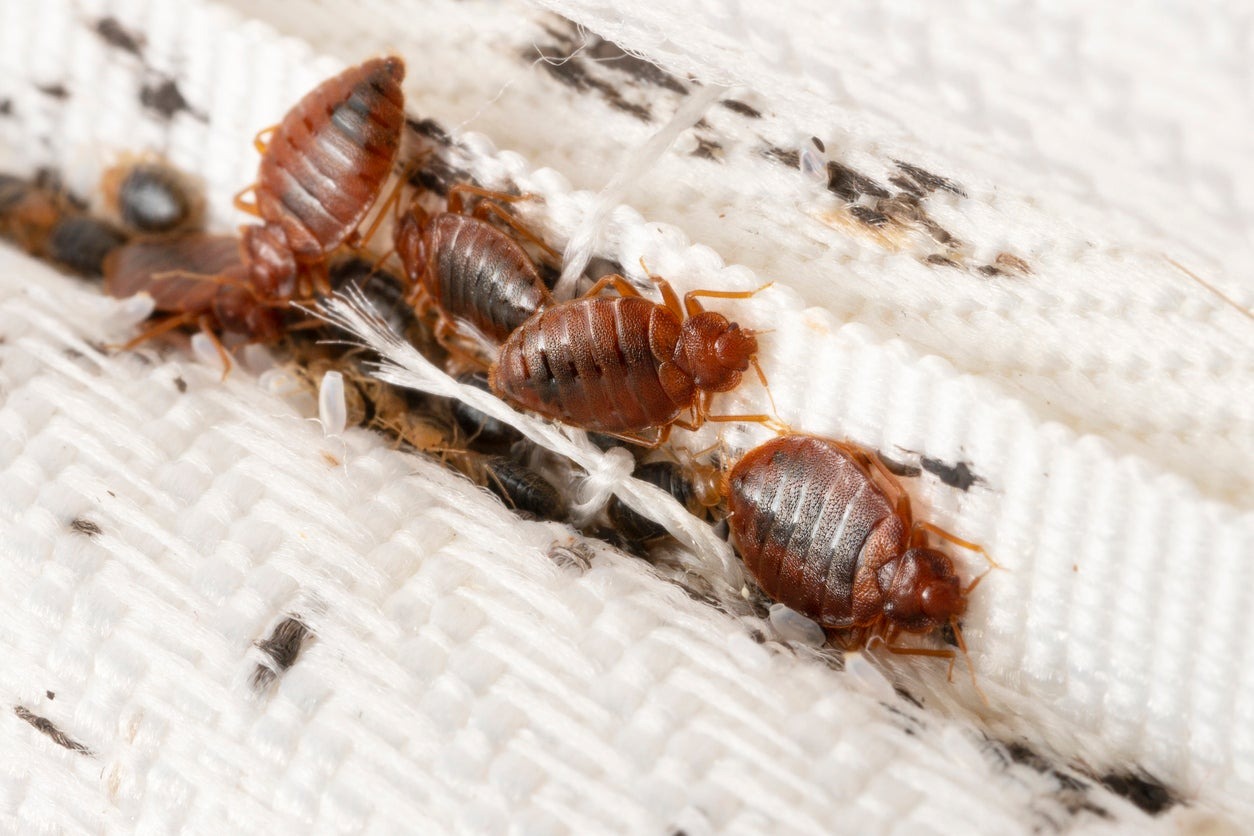
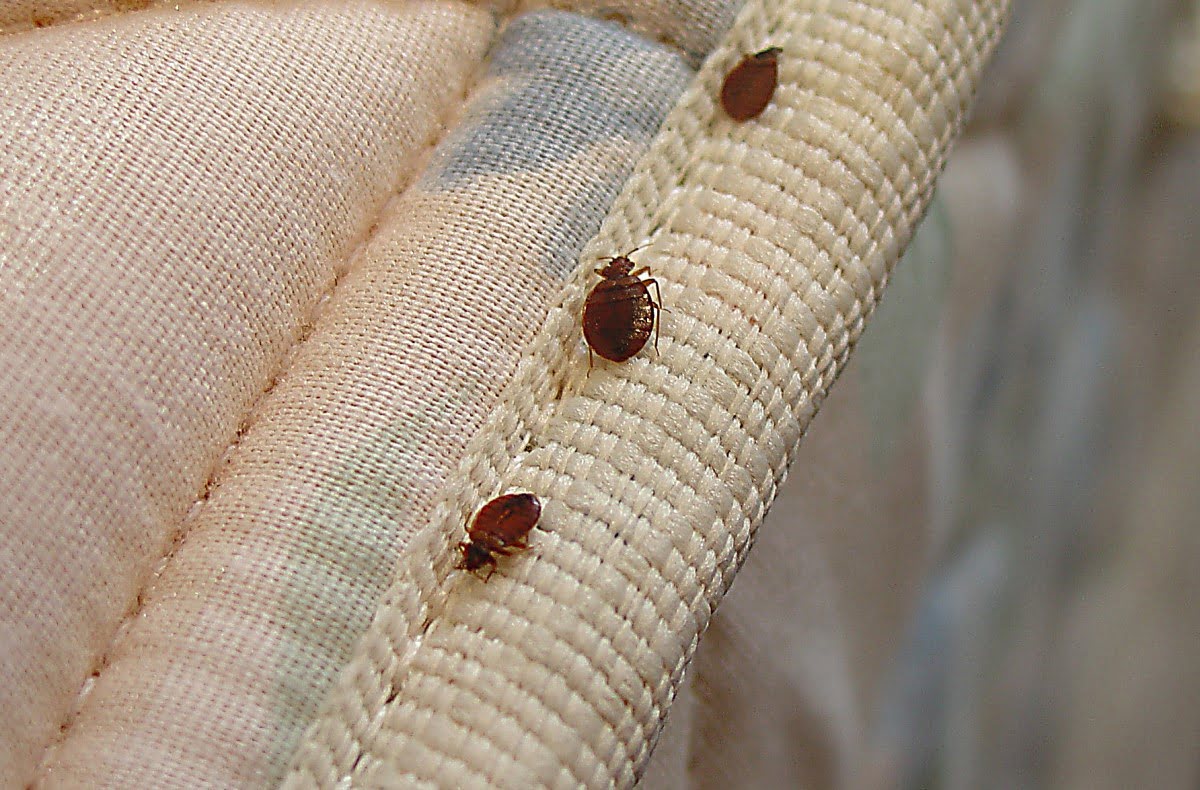
Another indication of a bed bug infestation is the presence of live bugs or eggs. Bed bugs are roughly the size of an apple seed and are usually reddish-brown in color. They have flat bodies, allowing them to easily hide in small cracks and crevices. Utilize a flashlight and carefully examine the corners, seams, and joints of the dresser for any signs of movement.
If you suspect that your dresser is infested with bed bugs but are unable to find any visible signs, you can also try using a bed bug detector or monitor. These devices are specifically designed to attract and trap bed bugs, offering a more accurate assessment of their presence.
Once you have successfully identified that your dresser is infested with bed bugs, it’s time to move on to the next step: clearing the dresser and floor.
Step 1: Clearing the Dresser and Floor
Before you can begin treating a bed bug infestation in your dresser, it is essential to clear out the contents of the furniture and create a clean and accessible workspace. Follow these steps to effectively clear the dresser and floor:
- Remove all items from the dresser: Take out all clothing, linens, and any other items stored in the dresser. Place them in plastic bags or containers that can be sealed tightly to prevent further spread of bed bugs.
- Inspect and separate infested items: Examine each item carefully for signs of bed bugs. If you find any infested items, such as clothing with stains or live bugs, separate them from the rest to prevent cross-contamination.
- Wash and dry infested items: Launder the infested items using high heat settings, if possible. This includes washing them in hot water (at least 120°F or 49°C) and drying them on high heat for at least 30 minutes to ensure that any bed bugs or eggs are killed.
- Vacuum the dresser and surrounding area: Use a vacuum cleaner with a hose attachment to thoroughly vacuum the dresser, paying close attention to the cracks, crevices, and joints where bed bugs may hide. Also, vacuum the surrounding floor and baseboards.
- Dispose of vacuumed debris: After vacuuming, carefully empty the contents of the vacuum cleaner into a sealed plastic bag and discard it outside of your home to prevent any potential bed bugs from re-infesting.
- Clean the dresser: Use a mild detergent or disinfectant solution to clean the surface of the dresser. Scrub it thoroughly, removing any visible dirt or bed bug excrement. Rinse with clean water and dry the dresser completely before proceeding to the next step.
By clearing the dresser and floor, you create a clean and organized space to effectively treat the bed bug infestation. This step also helps to minimize the potential for bed bugs to spread to other areas of your home, ensuring a more targeted approach to eradication.
Now that you have prepared the dresser and its surroundings, you can move on to the next step: vacuuming the dresser.
Step 2: Vacuuming the Dresser
Vacuuming the dresser is an important step in eliminating bed bugs and their eggs from the furniture. By using a vacuum cleaner with a hose attachment, you can effectively remove the pests and their debris from the surface and crevices of the dresser. Follow these steps to properly vacuum the dresser:
- Attach a crevice tool or brush attachment: Select a crevice tool or brush attachment for your vacuum cleaner that can reach into small cracks and crevices. This will allow you to thoroughly clean the hard-to-reach areas.
- Start from the top of the dresser: Begin vacuuming from the top of the dresser and work your way down. Focus on the areas where bed bugs are most likely to hide, such as corners, joints, and edges.
- Vacuum the entire surface: Move the vacuum cleaner in slow, methodical motions across the surface of the dresser. Pay special attention to any visible signs of bed bugs, such as stains, excrement, or shedding skins.
- Use the crevice tool in cracks and crevices: Insert the crevice tool into any cracks or crevices of the dresser where bed bugs might be hiding. Gently move it back and forth to dislodge the pests and vacuum up any eggs or debris.
- Empty the vacuum bag or canister: After vacuuming the dresser, carefully empty the contents of the vacuum bag or canister into a sealed plastic bag. Dispose of the bag outside of your home to prevent any potential re-infestation.
- Inspect the vacuum cleaner: Take a close look at the vacuum cleaner to ensure there are no bed bugs or eggs stuck in the hose or attachments. If you spot any, remove and dispose of them as well.
By vacuuming the dresser, you physically remove a significant portion of the bed bug population, including live bugs, eggs, and debris. It helps to reduce the infestation and prepares the dresser for further treatment.
Now that you have thoroughly vacuumed the dresser, it’s time to move on to the next step: disassembling the dresser.
Step 3: Disassembling the Dresser
Disassembling the dresser is an important step in accessing all areas where bed bugs may be hiding. By taking apart the furniture, you can effectively treat each component and eliminate the pests more thoroughly. Follow these steps to properly disassemble the dresser:
- Gather the necessary tools: Before you begin, gather the tools you will need, such as a screwdriver or Allen wrench, to remove the screws or fasteners holding the dresser together.
- Remove the drawers: Start by removing the drawers from the dresser. Carefully pull them out and set them aside.
- Take apart the dresser: Begin removing the screws or fasteners that hold the dresser together. Start with the top piece and work your way down, disassembling each section until you have separated all the components.
- Inspect each piece: Once you have disassembled the dresser, thoroughly inspect each piece for signs of bed bugs. Check the corners, edges, and joints where the pests may hide. Look for stains, excrement, shed skins, or live bugs.
- Treat the disassembled pieces: Treat each piece of the dresser individually. You can use various methods, such as heat treatment, freezing, or applying an appropriate bed bug insecticide. Follow the manufacturer’s instructions carefully for each treatment method.
- Clean the disassembled pieces: After treating the pieces, clean them with a mild detergent or disinfectant solution to remove any residue or debris. Rinse them thoroughly and allow them to dry completely before reassembling the dresser.
Disassembling the dresser allows you to target each component and treat them more effectively. It ensures that all areas where bed bugs may be hiding are thoroughly addressed, increasing the chances of successful eradication.
Now that you have disassembled and treated the pieces of the dresser, you can move on to the next step: washing infested items.
Read more: How To Get Rid Of Bed Bugs On A Couch
Step 4: Washing Infested Items
When dealing with a bed bug infestation in your dresser, it is important to address not only the furniture but also the items that have been in contact with the pests. Washing infested items, such as clothing, linens, and fabrics, is crucial to eliminate any bed bugs or eggs that may be present. Follow these steps to properly wash infested items:
- Sort and separate the items: Divide the infested items into categories, such as clothing, bedding, and other fabrics. This will help you manage the washing process more efficiently.
- Check washing instructions: Before proceeding, check the washing instructions on the labels of each item. Make sure they can withstand the recommended water temperature and cycle.
- Pre-treat stains: If you notice any stains or spots on the items, pre-treat them with a stain remover or a combination of detergent and water before washing.
- Wash with hot water: Place the infested items in the washing machine and set the water temperature to the hottest setting allowed for the fabric. Bed bugs and their eggs are sensitive to high temperatures, and hot water can effectively kill them.
- Use a detergent: Add an appropriate laundry detergent to the wash cycle. The detergent will help to break down any remaining bed bug debris and ensure a thorough cleaning.
- Dry on high heat: After washing, transfer the items to the dryer and set it to the highest heat setting. Bed bugs and their eggs cannot survive high temperatures, so this step will eliminate any remaining pests. Dry the items thoroughly.
- Inspect and store the items properly: Once the items are dry, inspect them carefully for any signs of bed bugs. If you do not find any, store the items in sealed plastic bags or containers to prevent re-infestation. If you still notice signs of infestation, repeat the washing process or consider discarding heavily infested items.
Washing infested items is a crucial step in getting rid of bed bugs in your dresser. By subjecting the items to high temperatures and using detergent, you can effectively eliminate the pests and prevent them from spreading to other areas of your home.
Now that you have washed the infested items, it’s time to move on to the next step: treating the dresser with heat.
Vacuum and steam clean the dresser thoroughly, paying special attention to seams and crevices where bed bugs may hide. Use a bed bug spray or diatomaceous earth to treat the inside of the dresser and prevent re-infestation.
Step 5: Treating the Dresser with Heat
One effective method for eliminating bed bugs in your dresser is heat treatment. Heat can penetrate deep into the furniture, reaching all the cracks and crevices where bed bugs may be hiding. Follow these steps to properly treat the dresser with heat:
- Choose a heat treatment option: There are a few ways to heat treat your dresser. You can use a portable steamer, a clothes iron, or a specialized heat chamber designed for bed bug extermination.
- Prepare the dresser: Before applying heat, ensure that the dresser is empty and clean. Remove any drawers, shelves, or other removable parts to expose as much surface area as possible.
- Apply heat to the dresser: Use your chosen heat treatment method to apply heat to the dresser. Move the heat source slowly over the surface of the furniture, paying close attention to the cracks and joints. Make sure that the temperature reaches at least 120°F (49°C) throughout the treatment process.
- Monitor the temperature: Use a temperature probe or infrared thermometer to monitor the temperature inside the dresser. Ensure that it remains at the desired heat level for a sustained period, typically around 1-2 hours, to ensure all bed bugs and their eggs are killed.
- Cool down and inspect: After the heat treatment, allow the dresser to cool down naturally. Once it reaches room temperature, thoroughly inspect all components of the furniture for any signs of bed bugs. If you find any, repeat the heat treatment or consider using alternative methods.
Heat treatment is an effective and chemical-free option to eradicate bed bugs from your dresser. The high temperatures are lethal to bed bugs and can eliminate the entire population, including eggs. It is important to ensure that the heat is evenly distributed throughout the dresser for optimal results.
Now that you have treated the dresser with heat, it’s time to move on to the next step: applying insecticide.
Step 6: Applying Insecticide
In addition to heat treatment, applying an appropriate insecticide to your dresser can help eliminate any remaining bed bugs and prevent re-infestation. Follow these steps to properly apply insecticide to your dresser:
- Select a suitable insecticide: Choose an insecticide specifically labeled for bed bug control. Look for products that contain effective active ingredients, such as pyrethroids or neonicotinoids.
- Read and follow the instructions: Carefully read the instructions provided by the manufacturer. Follow the recommended dosage, application method, and safety precautions to ensure proper use.
- Prepare the spraying area: Prepare a well-ventilated area for applying the insecticide. Lay down plastic sheets or newspapers to protect the surrounding surfaces from any potential overspray or dripping.
- Disassemble the dresser if necessary: If you have not already disassembled the dresser, consider doing so to access all the hidden areas. Apply the insecticide to each component, paying close attention to cracks, crevices, and joints.
- Apply the insecticide: Hold the insecticide spray canister approximately 12-18 inches away from the dresser surface. Spray a light, even coat of the insecticide, ensuring complete coverage of the affected areas.
- Allow for drying time: Allow the insecticide to dry completely before reassembling the dresser. Follow the recommended drying time provided on the product label.
- Clean up and dispose of materials: Safely dispose of any unused insecticide, following the instructions on the product label. Clean up the spraying area and properly store any remaining insecticide out of reach of children or pets.
Applying insecticide to your dresser can provide an additional layer of protection against bed bugs. However, it is important to exercise caution and only use insecticides that are specifically labeled for indoor use and bed bug control.
Now that you have applied insecticide to your dresser, it’s time to move on to the final step: reassembling the dresser.
Step 7: Reassembling the Dresser
After completing the necessary treatments to eliminate bed bugs from your dresser, it’s time to reassemble the furniture. Follow these steps to properly reassemble your dresser:
- Clean and inspect each component: Before reassembling, ensure that each component of the dresser is clean and free of any bed bug debris, insecticide residue, or other contaminants. Wipe down each piece with a mild detergent or disinfectant solution.
- Ensure proper alignment: As you begin reassembling the dresser, make sure that each piece is aligned correctly. Check that all screw holes, joints, and connectors line up properly.
- Tighten screws or fasteners: Use a screwdriver or Allen wrench to securely fasten all screws or fasteners. Ensure that the components are tightly connected to provide stability and structural integrity to the dresser.
- Check for any gaps or spaces: As you reassemble the dresser, carefully inspect for any gaps or spaces between the components. Bed bugs can easily hide in these small openings, so seal them if necessary using wood putty or a suitable sealant.
- Double-check for signs of bed bugs: Once the dresser is reassembled, conduct a final inspection for any signs of bed bugs. Carefully examine all surfaces, corners, and joints to ensure that the infestation has been successfully eradicated.
Reassembling the dresser is an important final step in the process of eliminating bed bugs and restoring its functionality. Ensure that each component is properly cleaned, aligned, and secured to minimize the risk of re-infestation.
Congratulations! You have successfully gone through the steps to get rid of bed bugs in your dresser. But the work doesn’t stop here. It’s important to take preventative measures to avoid future infestations.
Please join us for the final section: preventing future bed bug infestations in the dresser.
Read more: How To Get Rid Of Bed Bugs On A Mattress
Preventing Future Bed Bug Infestations in the Dresser
After successfully eliminating bed bugs from your dresser, it’s important to take proactive steps to prevent future infestations. Here are some measures you can take to keep your dresser bed bug-free:
- Regularly inspect and clean: Make it a habit to inspect your dresser regularly for any signs of bed bugs. Keep the surface clean by wiping it down regularly with a mild detergent or disinfectant solution.
- Use bed bug-proof covers: Consider using bed bug-proof covers for your dresser to create a physical barrier against potential infestations. These covers are designed to encase the entire dresser, preventing bed bugs from accessing the furniture.
- Keep the surrounding area clean: Maintain cleanliness in the area surrounding your dresser. Vacuum regularly, especially along baseboards, to remove any potential hiding spots for bed bugs.
- Be cautious with used furniture: If you are considering bringing in used furniture, including dressers, into your home, thoroughly inspect it for any signs of bed bugs before introducing it. Consider treating or heat-treating the furniture before bringing it indoors.
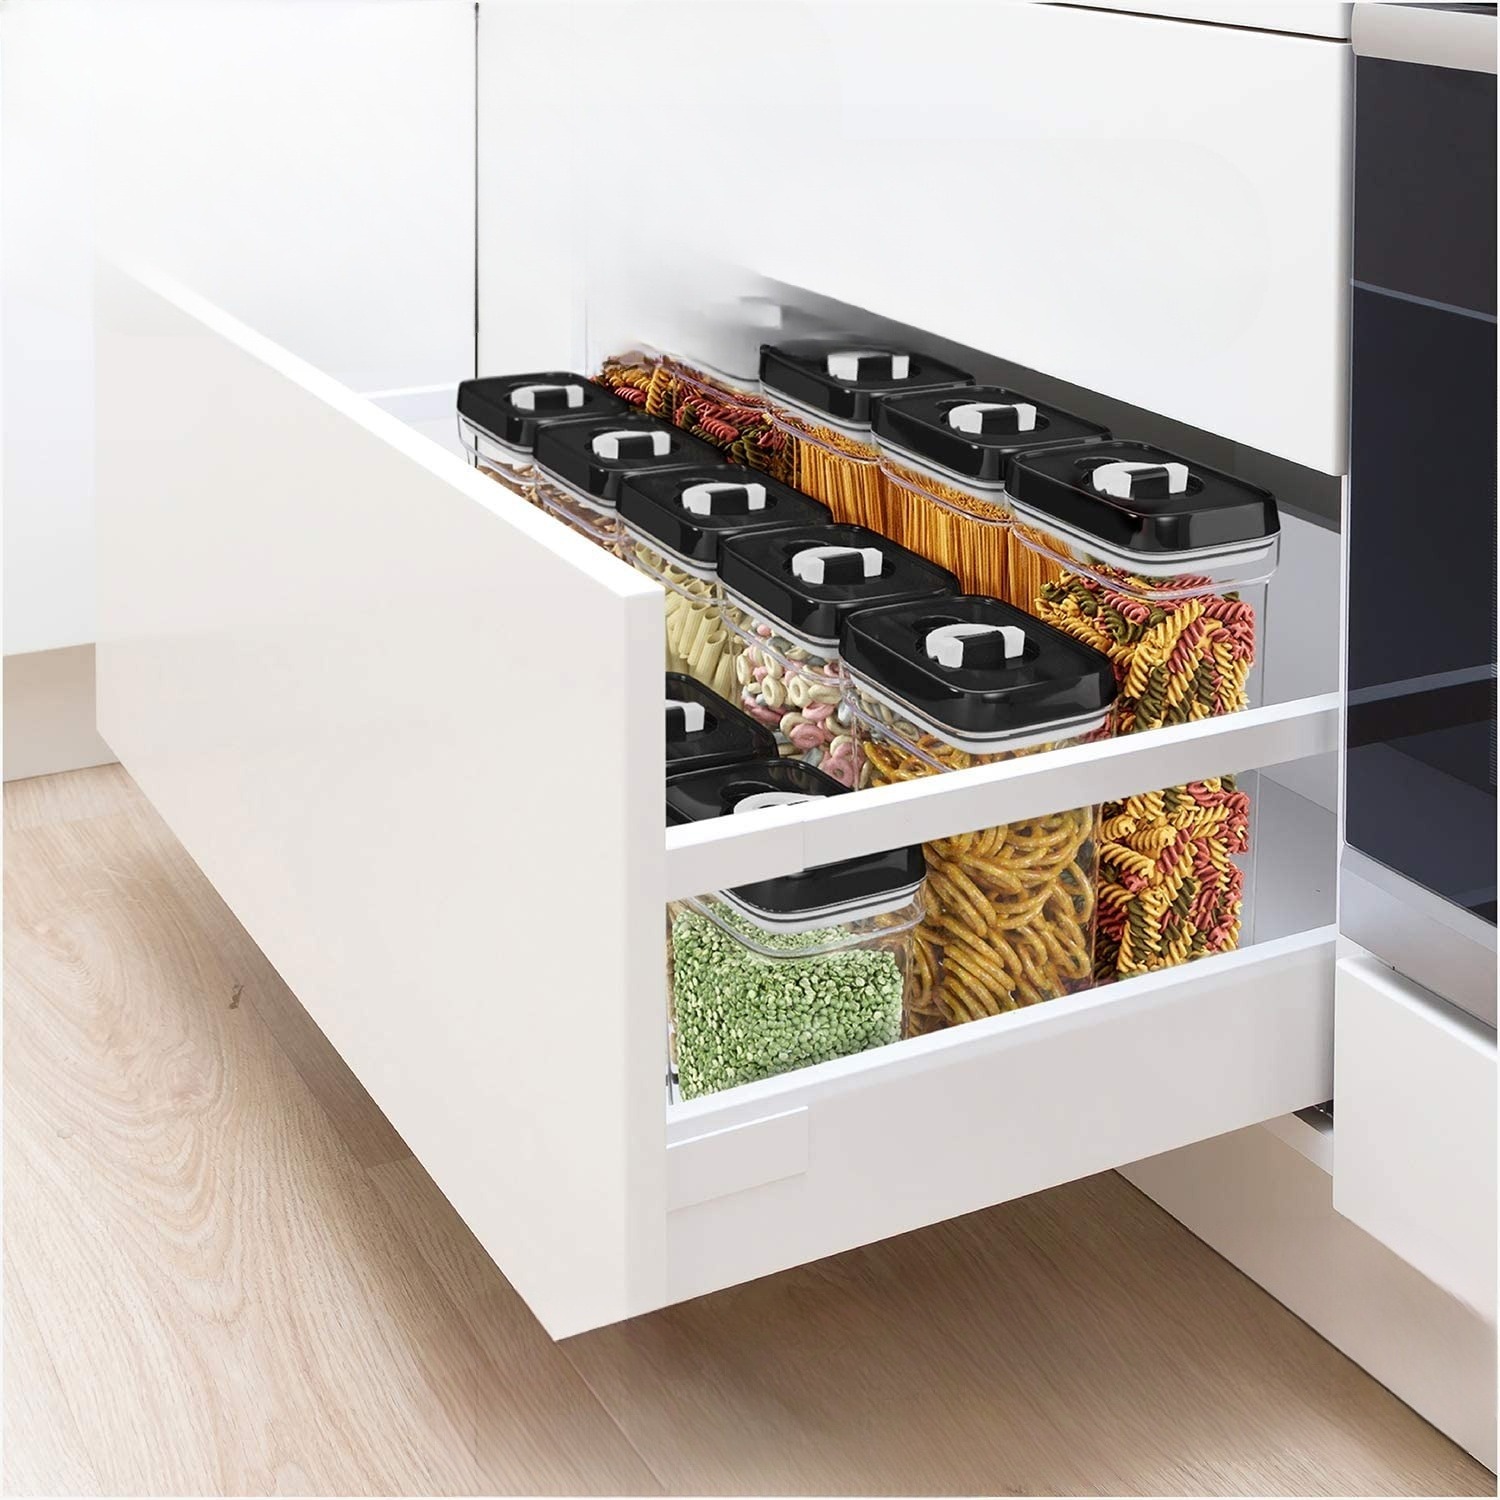
- Practice proper storage: When storing clothing or other items in your dresser, ensure that they are clean and free from bed bugs before placing them inside. Seal clothing in plastic bags or use sealed storage containers to further protect them.
- Monitor for signs of infestation: Keep an eye out for any signs of bed bugs in your dresser, such as dark spots, shed skins, or live bugs. Early detection will allow you to address any potential infestation before it becomes widespread.
- Consider professional inspections: If you live in an area prone to bed bug infestations or have had previous infestations in your home, it may be wise to schedule regular professional inspections to catch any signs of bed bugs early.
By following these preventative measures, you can significantly reduce the risk of future bed bug infestations in your dresser. Remember that vigilance and regular maintenance are key to keeping your dresser and home free from these pests.
Now that you are equipped with the knowledge and steps to prevent bed bugs from infesting your dresser, you can enjoy a pest-free environment and peace of mind.
We hope this guide has been helpful in addressing your bed bug concerns. If you have any further questions or need additional assistance, consult with a professional pest control expert.
Stay vigilant, stay clean, and say goodbye to bed bugs in your dresser!
Conclusion
Dealing with a bed bug infestation in your dresser can be a frustrating and challenging experience. However, by following the steps outlined in this guide, you can effectively eliminate bed bugs from your dresser and minimize the risk of future infestations.
We started by identifying the signs of bed bugs in your dresser and then progressed through the essential steps of clearing the dresser and floor, vacuuming the dresser, disassembling the furniture, washing infested items, treating the dresser with heat, applying insecticide, and finally, reassembling the dresser. Each step plays a crucial role in eradicating the bed bug infestation and ensuring a thorough and lasting solution.
Additionally, we discussed the importance of taking preventative measures to avoid future infestations. Regular inspections, cleanliness, the use of bed bug-proof covers, and cautiousness when acquiring used furniture are all key factors in maintaining a bed bug-free environment for your dresser.
Remember, early detection and prompt action are vital when it comes to dealing with bed bugs. Regularly monitor your dresser and stay attentive to any signs of infestation, such as stains, dark spots, or live bugs.
By following the steps outlined in this guide and incorporating preventative measures, you can enjoy a bed bug-free dresser and have peace of mind knowing that you have taken the necessary steps to protect your home from these persistent pests.
If you find the infestation to be extensive or if you need additional assistance, it is always recommended to consult with a professional pest control expert who can provide specialized treatment options and guidance tailored to your specific situation.
We hope this guide has provided you with valuable insights and practical solutions for getting rid of bed bugs in your dresser. Remember to stay proactive, informed, and vigilant in maintaining a bed bug-free living space. Good luck on your journey to a pest-free dresser!
Frequently Asked Questions about How To Get Rid Of Bed Bugs In A Dresser
Was this page helpful?
At Storables.com, we guarantee accurate and reliable information. Our content, validated by Expert Board Contributors, is crafted following stringent Editorial Policies. We're committed to providing you with well-researched, expert-backed insights for all your informational needs.


0 thoughts on “How To Get Rid Of Bed Bugs In A Dresser”