Home>Garden Essentials>Best Way To Glue A 4 X 6 Grass Mat
Garden Essentials
Best Way To Glue A 4 X 6 Grass Mat
Modified: March 7, 2024
Discover the best way to glue a 4 x 6 garden grass mat with our step-by-step guide. Achieve a beautiful and seamless lawn with our expert tips.
(Many of the links in this article redirect to a specific reviewed product. Your purchase of these products through affiliate links helps to generate commission for Storables.com, at no extra cost. Learn more)
Introduction
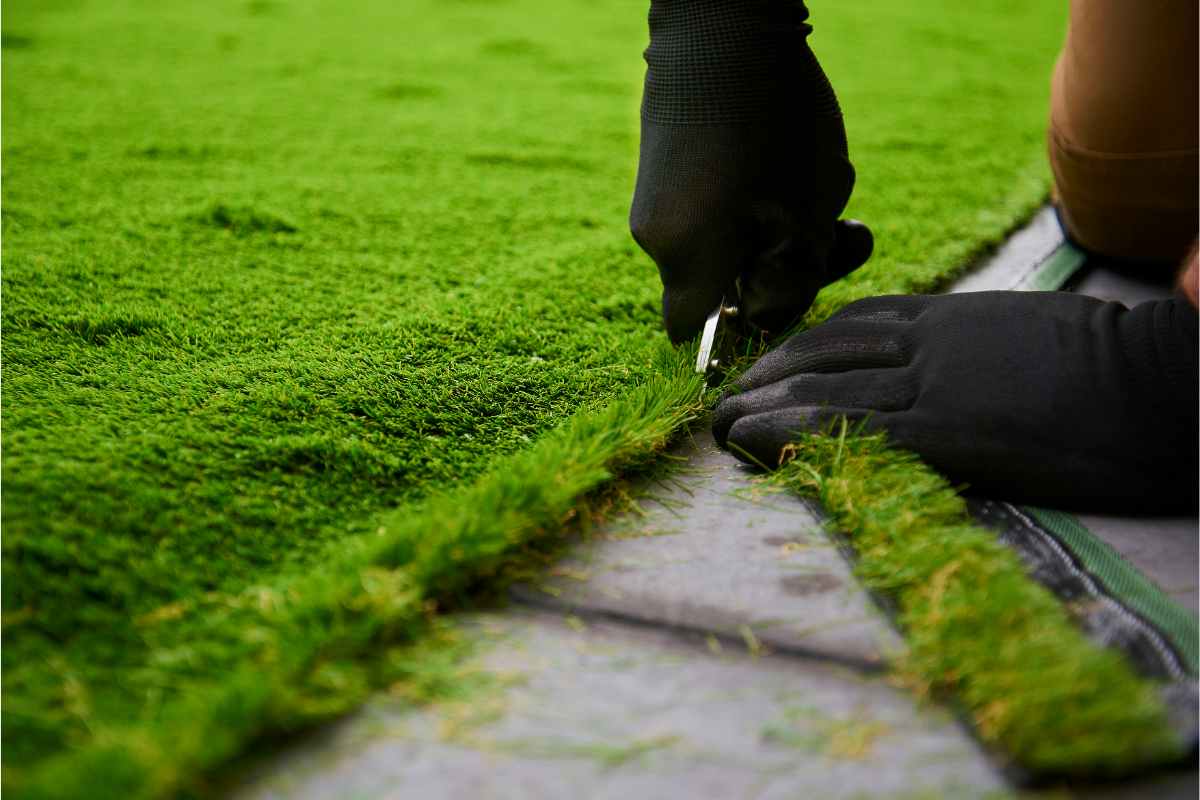
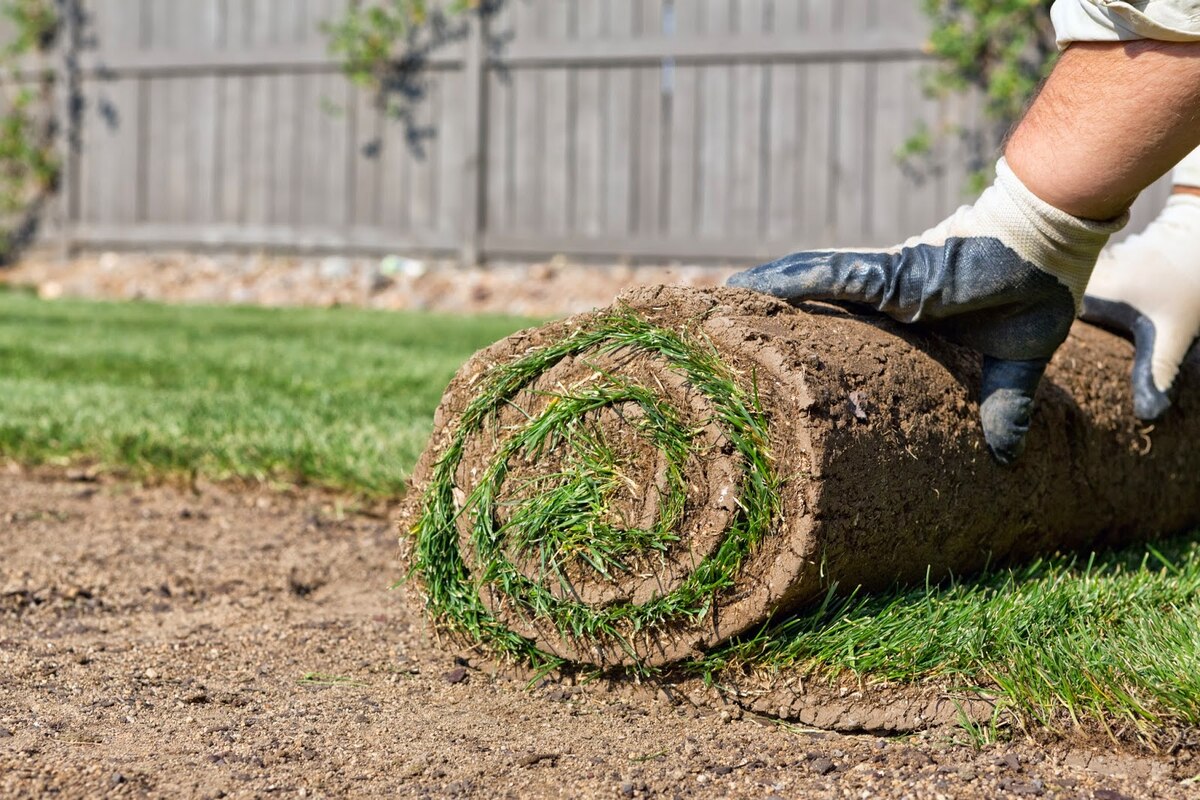
When it comes to creating a realistic and vibrant garden landscape, one of the essential elements is a lush and natural-looking grass mat. Whether you’re a DIY enthusiast or a professional landscaper, knowing the best way to glue a 4×6 grass mat can make a significant difference in the final result.
A properly glued grass mat not only ensures that it stays firmly in place but also enhances the aesthetic appeal of the garden. It provides a seamless transition between natural foliage and artificial turf, creating a visually appealing and realistic environment.
In this article, we will guide you through the step-by-step process of gluing a 4×6 grass mat effectively. We will discuss the materials needed, preparation, application of glue, proper placement of the grass mat, securing the mat, and final touches to give your garden a natural and beautiful look. Let’s dive into the details!
Key Takeaways:
- Properly preparing the surface, using the right adhesive glue, and securing the grass mat ensures a realistic and durable garden landscape. Take your time and follow the steps for a professional result.
- By choosing high-quality materials and following the manufacturer’s instructions, you can create a beautiful and long-lasting grassy area in your garden. Enjoy the tranquility of a lush oasis with proper care and maintenance.
Read also: 6 Amazing AC Filter 20X25X4 for 2025
Materials Needed
Before you begin the process of gluing the grass mat, it’s important to gather all the necessary materials. Here is a list of items you will need:
- A 4×6 grass mat: Make sure to choose a high-quality synthetic grass mat that matches the desired look and feel of your garden. Ensure that the size of the mat fits your space perfectly.
- Adhesive glue: Look for an adhesive specifically designed for outdoor use and suitable for bonding synthetic grass to various surfaces such as concrete, wood, or soil. Make sure the glue is weather-resistant and strong.
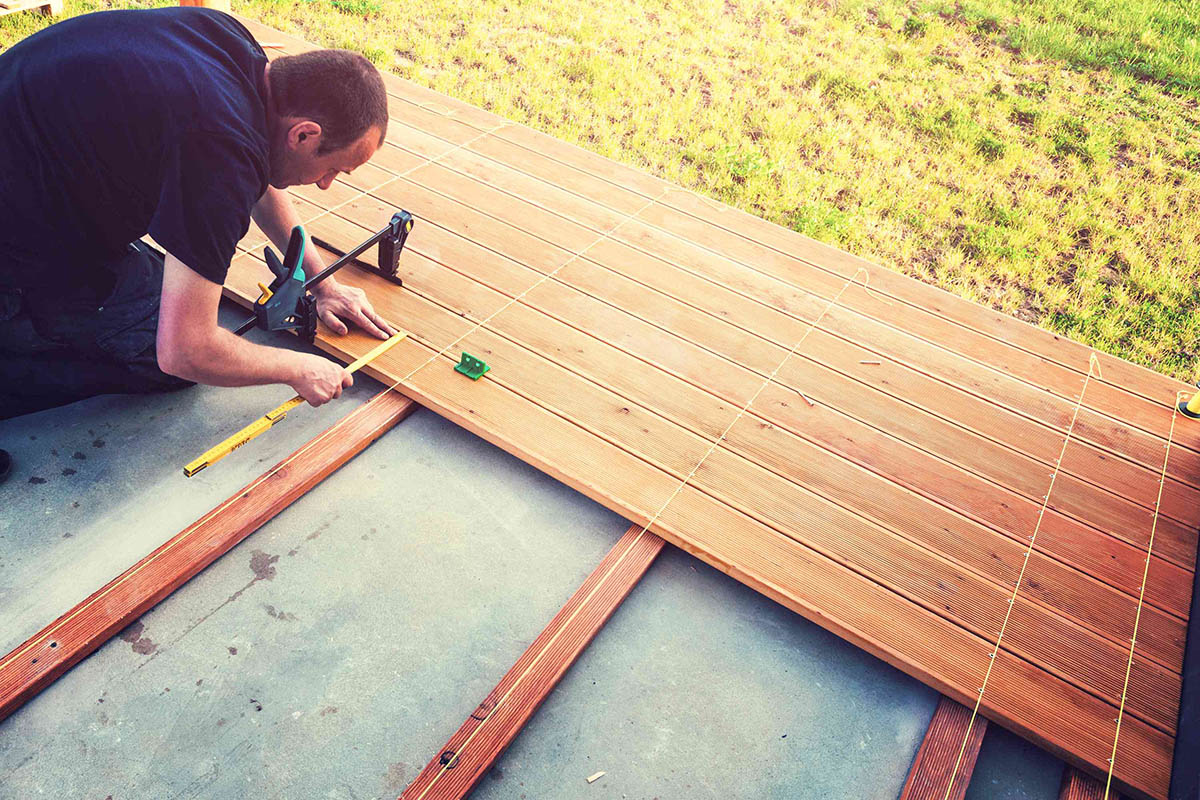
- Tape measure: Use a tape measure to accurately measure the area where you will be placing the grass mat. This will help ensure a precise fit and avoid any unnecessary cutting.
- Clean cloth: You will need a clean cloth or rag to remove any dirt, debris, or moisture from the surface where the grass mat will be glued. This will promote better adhesion.
- Utility knife: A sharp utility knife will come in handy to trim the grass mat if needed. It allows you to make precise cuts and achieve clean edges.
- Protective gloves: It is important to protect your hands from the adhesive glue. Wear protective gloves to prevent any skin irritation or contact with the glue.
- Notched trowel: A notched trowel is used to apply an even layer of adhesive on the surface. It creates ridges that help improve the bonding between the grass mat and the ground.
- Paintbrush: Keep a paintbrush handy to spread the adhesive evenly on the edges of the grass mat. This ensures proper adhesion and prevents any loose or lifted edges.
Make sure you have all these materials readily available before you proceed with the gluing process. Having everything prepared in advance will make the task smoother and more efficient.
Step 1: Preparation
Before you start gluing the grass mat, it is crucial to prepare the surface where the mat will be placed. Proper preparation ensures better adhesion and a more durable installation. Follow these steps to prepare the area:
- Clean the area: Begin by removing any debris, dirt, or loose particles from the surface where the grass mat will be glued. Use a broom or a leaf blower to clear away leaves, twigs, and other unwanted materials.
- Remove existing grass or vegetation: If there is any existing grass or vegetation on the area, it is important to remove it. Use a shovel or a garden hoe to cut and lift the turf, ensuring that you have a clean and even surface.
- Level the ground: Check if the ground is level or if there are any uneven areas. Use a rake or a shovel to even out the surface, ensuring that there are no bumps or depressions that could affect the placement of the grass mat.
- Compact the soil: If you are gluing the grass mat to bare soil, it is essential to compact the soil to create a solid and stable foundation. Use a hand tamper or a plate compactor to compact the soil, ensuring it is firm and level.
- Measure and mark the area: Measure the area where the grass mat will be placed, ensuring that it matches the dimensions of the 4×6 mat. Mark the edges using stakes or spray paint to provide clear guidelines during the gluing process.
By following these preparation steps, you will create a clean, level, and properly marked surface for the grass mat installation. This will ensure a seamless and professional-looking result.
Step 2: Applying Glue
Now that you have prepared the surface, it’s time to apply the adhesive glue. Follow these steps to ensure proper application:
- Read the instructions: Before using the adhesive glue, it is important to carefully read the manufacturer’s instructions. Pay attention to any specific guidelines or precautions mentioned.
- Start at one edge: Begin applying the glue to one edge of the area where the grass mat will be placed. Use a notched trowel to create ridges in the adhesive. These ridges will improve the bonding between the grass and the ground.
- Work in small sections: To prevent the glue from drying out before you lay the grass mat, work in small sections at a time. Apply the adhesive evenly, making sure to cover the entire area beneath the grass mat. Keep the layer of glue consistent for a secure bond.
- Spread with a paintbrush: Once you have applied the adhesive with the notched trowel, use a paintbrush to spread the glue evenly along the edges of the area. This will help secure the edges of the grass mat and prevent them from lifting.
- Follow drying time instructions: Allow the adhesive to dry according to the manufacturer’s instructions. This step is crucial to ensure proper adhesion and a long-lasting installation. Avoid walking or placing any objects on the glued area until the adhesive is completely dry.
Remember to work efficiently and avoid rushing through the glue application process. Take your time to ensure thorough and even coverage. This will contribute to a strong bond between the grass mat and the surface beneath.
Once you have completed this step, you are ready to proceed with placing the grass mat on the glued surface.
Use a strong, waterproof adhesive like silicone or construction adhesive to glue a 4×6 grass mat. Apply the adhesive evenly on the back of the mat and press firmly onto the surface for a secure bond.
Step 3: Placing the Grass Mat
Now that the adhesive is applied, it’s time to carefully place the grass mat onto the glued surface. Follow these steps for a successful placement:
- Align the edges: Position one edge of the grass mat along the marked guideline on the surface. Ensure that it is aligned properly and follows the desired orientation.
- Smooth out wrinkles: As you lay down the grass mat, gently smooth out any wrinkles or folds that may have formed. This will help achieve a seamless and natural appearance.
- Adjust as necessary: If the grass mat needs to be adjusted for a perfect fit, carefully lift and reposition it, ensuring that it aligns with the surrounding area. Take your time to make any necessary adjustments before proceeding.
- Press down firmly: Once the grass mat is in the desired position, firmly press it down onto the adhesive. Apply even pressure across the entire surface to ensure proper contact between the grass and the glue.
- Smooth it out: Use your hands or a soft brush to gently smooth out the surface of the grass mat. This will help eliminate any air pockets or uneven areas, creating a more natural and uniform look.
- Check for proper alignment: Step back and check if the grass mat is aligned properly with the surrounding area. Ensure that the edges line up with any existing borders or pathways for a cohesive overall design.
Take your time during this step to ensure that the grass mat is properly positioned and adhered to the surface. A precise and neat placement will contribute to a visually appealing and realistic garden landscape.
Once you are satisfied with the placement, move on to the next step for securing the grass mat in place.
Read more: How To Load 4X6 Paper Into Canon Printer
Step 4: Pressing and Securing the Mat
After placing the grass mat onto the adhesive, it is important to press it down and secure it properly. This step ensures a strong bond between the grass mat and the surface. Follow these guidelines:
- Use a weighted object: To ensure optimal contact between the grass mat and the glue, place a weighted object, such as heavy books or bricks, on top of the mat. This will apply constant pressure and help the adhesive bond effectively.
- Distribute the weight evenly: Make sure to distribute the weight evenly across the area of the grass mat. This will prevent any uneven settling or lifting along the edges.
- Leave the weight for the recommended time: Refer to the adhesive manufacturer’s instructions for the recommended amount of time to leave the weighted object on the mat. This will allow the adhesive to fully cure and create a strong bond.
- Avoid any disturbances: During this time, it is important to avoid walking or placing any objects on the grass mat. Any disturbances can disrupt the bonding process and compromise the installation.
- Check the edges: After the recommended time has passed, carefully remove the weighted object and inspect the edges of the grass mat. Ensure that they are securely adhered to the surface. If any edges appear loose or lifted, reapply adhesive and press them down firmly.
Properly pressing and securing the grass mat will enhance its longevity and prevent any shifting or lifting over time. Take the necessary precautions to ensure a secure installation.
Once you have completed this step, the adhesive will need time to dry and fully set. Follow the drying time instructions provided by the manufacturer before proceeding to the final step.
Step 5: Drying and Final Touches
After pressing and securing the grass mat, it is important to allow sufficient time for the adhesive to dry and set completely. This step ensures a strong and durable bond. Here’s what you should do:
- Refer to the drying time: Check the manufacturer’s instructions for the recommended drying time of the adhesive. This will vary depending on the type of glue used. Allow ample time for the adhesive to dry before moving forward.
- Avoid foot traffic and heavy objects: During the drying process, it is important to avoid walking on the grass mat or placing any heavy objects on it. This can disrupt the bonding and lead to uneven settling or lifting.
- Inspect for any loose edges: Once the adhesive is fully dry, carefully inspect the edges of the grass mat. Make sure they are securely adhered to the surface. If any edges appear loose or lifted, reapply adhesive and press them down firmly.
- Trim any excess: If necessary, use a sharp utility knife to trim any excess grass that extends beyond the desired edges of the mat. This will give the installation a clean and professional finish.
- Clean and groom the grass mat: After the adhesive has dried and any necessary trimming is done, take the time to clean and groom the grass mat. Use a brush or leaf blower to remove any debris or loose particles. This will restore the mat’s natural appearance and ensure it looks its best.
By following these final steps, you will ensure that the grass mat is properly dried, securely attached, and looks pristine. Your garden will now boast a realistic and vibrant grassy area that adds beauty and allure to the overall landscape.
Congratulations! You have successfully glued a 4×6 grass mat and completed the installation process.
Conclusion
Creating a lush and realistic garden landscape is made easier with the proper installation of a 4×6 grass mat. By following the steps outlined in this article, you can achieve a seamless and professional result. From preparation to gluing, placing, pressing, and final touches, each step contributes to a strong and visually appealing installation.
Remember, selecting high-quality materials and using the right adhesive glue are key factors in ensuring a long-lasting and durable bond between the grass mat and the surface. Taking the time to properly prepare the area and align the grass mat will result in a natural and cohesive look.
Throughout the process, be mindful of drying times and follow the manufacturer’s instructions to achieve the best adhesion. Protect the newly installed grass mat from foot traffic or heavy objects until the adhesive has fully set and is ready for use.
By taking care of your newly installed grass mat and regularly maintaining it, you can enjoy a beautiful and vibrant garden landscape for years to come. Regular grooming, such as removing debris and trimming any overgrown grass, will keep the mat looking fresh and well-maintained.
Now that you know the best way to glue a 4×6 grass mat, go ahead and transform your garden into a lush oasis. Enjoy the beauty and tranquility of a pristine, green space that will impress visitors and provide a relaxing environment for you and your loved ones.
Happy gardening!
Frequently Asked Questions about Best Way To Glue A 4 X 6 Grass Mat
Was this page helpful?
At Storables.com, we guarantee accurate and reliable information. Our content, validated by Expert Board Contributors, is crafted following stringent Editorial Policies. We're committed to providing you with well-researched, expert-backed insights for all your informational needs.


0 thoughts on “Best Way To Glue A 4 X 6 Grass Mat”