Home>Garden Essentials>How Long Does It Take Chives To Germinate
Garden Essentials
How Long Does It Take Chives To Germinate
Modified: August 17, 2024
Discover the garden's secret to chive germination. Learn how long it takes for chives to sprout and begin enjoying the fresh flavors in your meals.
(Many of the links in this article redirect to a specific reviewed product. Your purchase of these products through affiliate links helps to generate commission for Storables.com, at no extra cost. Learn more)
Introduction
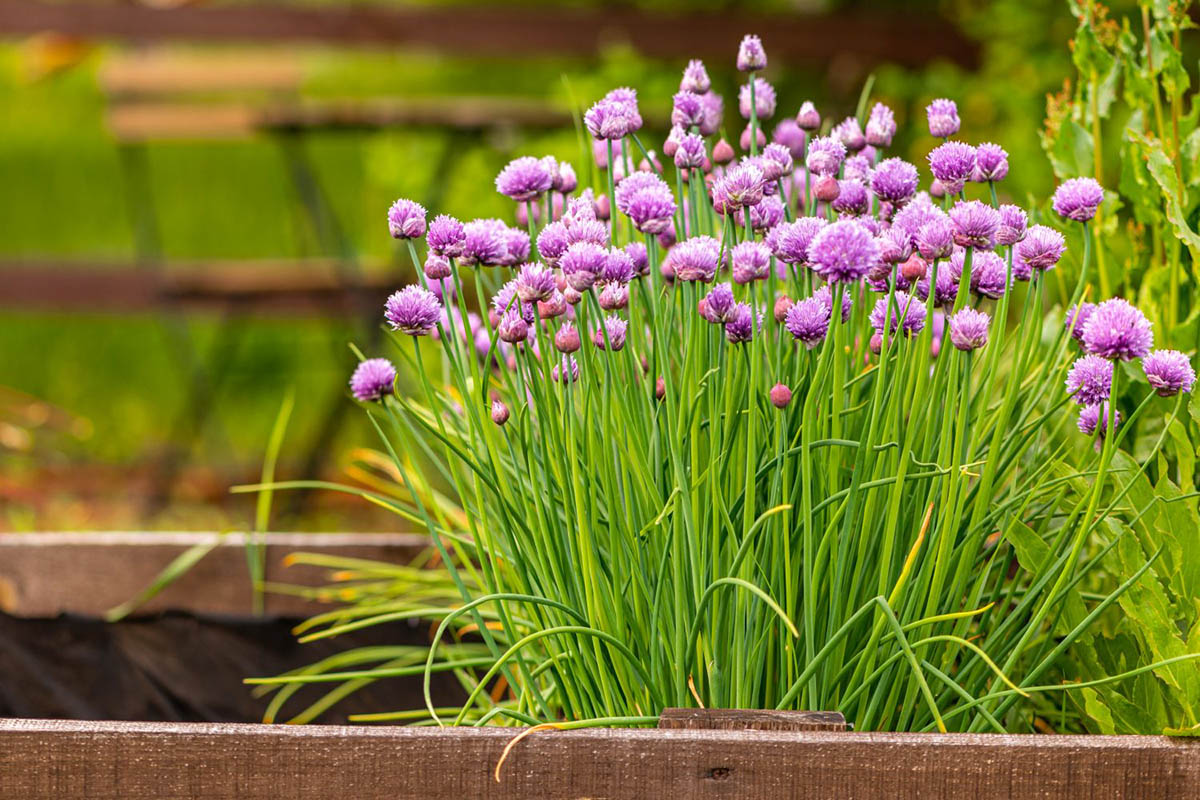
Gardening enthusiasts often enjoy growing a variety of herbs in their plots or containers, not only for their culinary benefits but also for the visual appeal they bring to the space. Among the many popular herbs is chives, a member of the onion family known for its mild yet distinct flavor. If you’re planning to grow chives from seeds, one question that may arise is, “How long does it take for chives to germinate?” In this article, we will explore the factors that affect chive germination time and provide tips on how to expedite the process.
Chive seeds, like most herb seeds, require specific conditions for germination to occur. Understanding these conditions can help ensure a successful growing experience and minimize frustration along the way. From optimal conditions to troubleshooting common issues, we will cover everything you need to know about the germination process of chive seeds.
Whether you’re a seasoned gardener or a beginner looking to try your hand at growing chives, this article will equip you with the knowledge needed to achieve successful germination. So, let’s delve into the factors that influence the time it takes for chives to germinate.
Key Takeaways:
- Chive seeds need warmth, moisture, and darkness to sprout. Techniques like pre-soaking and scarification can speed up the process, but patience is key as germination can take 7-14 days.
- Troubleshoot issues like poor germination, uneven sprouting, and pests to ensure healthy chive seedlings. Remember, gardening takes patience and care, but the rewards are worth it!
Factors Affecting Germination Time of Chives
The germination time of chive seeds can vary based on several factors. Understanding these factors can help you manage your expectations and create the ideal conditions for successful germination. Let’s explore the key factors that influence the germination time of chives.
- Temperature: Chive seeds require a specific temperature range for optimal germination. The ideal temperature for chive seed germination is between 60°F and 70°F (15°C to 21°C). Lower temperatures can significantly slow down the germination process, while higher temperatures can lead to poor germination rates.
- Moisture: Adequate moisture is crucial for chive seed germination. The soil should be consistently moist but not waterlogged. Dry or uneven moisture levels can delay or hinder germination. It’s important to maintain a balance and provide regular, light watering to keep the soil evenly moist.
- Light: Unlike some seeds, chive seeds do not require light for germination. In fact, chives actually prefer darkness during germination. Placing a cover or using a dark germination tray can help simulate the ideal dark conditions required for chive seed germination.
- Seed Quality: The quality of the chive seeds can also impact the germination time. Fresh, viable seeds have a higher likelihood of germinating quickly and successfully. It’s always recommended to purchase seeds from reputable sources to ensure good quality seeds.
- Seed Depth: The depth at which chive seeds are planted can affect germination time. Planting the seeds too deep can delay germination, as the seeds may struggle to reach the soil surface. Aim for a planting depth of approximately ¼ inch (6 mm) to promote optimal germination.
- Soil Quality: Chive seeds thrive in well-draining soil that is rich in organic matter. Ensure that the soil is loose, fertile, and has good drainage to promote efficient water absorption and root development. Testing the soil’s pH level can also be beneficial, as chives prefer a slightly acidic soil pH of 6 to 7.
By taking these factors into consideration and creating optimal conditions, you can significantly influence the germination time of chives. Next, let’s explore the ideal conditions required for chive seed germination.
Optimal Conditions for Chive Germination
To ensure successful germination of chive seeds, it’s essential to provide the optimal conditions. The following factors play a crucial role in creating the ideal environment for chive germination:
- Temperature: Chives prefer a mild temperature range for germination. Aim for a consistent temperature between 60°F and 70°F (15°C to 21°C) to promote speedy and healthy germination. You can use a seedling heat mat or place the seed tray in a warm location if the ambient temperature is lower than the recommended range.
- Moisture: Adequate moisture is vital for chive seed germination. Keep the soil moist but not waterlogged. To maintain the right moisture level, mist the soil surface with a spray bottle or use a bottom-watering method by placing the seed tray in a shallow container filled with water. Avoid overwatering, as it can lead to fungal issues and rotting of the seeds.
- Light: Chives do not require light for germination. In fact, they prefer darkness during this stage. Cover the seed tray with a clear plastic lid or place it in a dark germination tray. Once the seeds have germinated and sprouted, you can provide them with 12-14 hours of light per day using grow lights or by placing them in a sunny location.
- Air Circulation: Good air circulation is important for preventing fungal diseases and promoting healthy growth. Ensure that the seed tray is not placed in a stagnant or overly humid environment. You can use a small fan set on low to create gentle air movement around the seedlings.
- Seed Depth: Plant chive seeds at a depth of approximately ¼ inch (6 mm). This is deep enough to provide sufficient coverage for the seeds while still allowing them to emerge easily. Press the soil gently over the seeds to ensure good seed-to-soil contact.
- Soil Type: Chives thrive in well-draining soil that is rich in organic matter. Prepare the soil by adding compost or well-rotted manure to improve fertility and drainage. Prior to sowing the seeds, ensure that the soil is loosened and free of debris.
By creating the optimal conditions of temperature, moisture, darkness, air circulation, seed depth, and soil type, you can greatly enhance the germination success of chives. However, it’s important to keep in mind that germination time can still vary depending on individual factors. In the next section, we will delve into the average germination time for chives to help you set realistic expectations.
Average Germination Time for Chives
The germination time for chives can range anywhere from 7 to 14 days, but it can sometimes take up to 21 days for the seeds to sprout. Several variables can influence the germination time, including temperature, moisture, seed quality, and soil conditions. It’s important to note that individual seeds may germinate at different speeds, resulting in staggered sprouting.
Chive seeds typically germinate best when provided with consistent temperatures between 60°F and 70°F (15°C to 21°C). If the ambient temperature fluctuates or falls outside of this range, germination may be delayed. Maintaining adequate moisture levels is also crucial for timely germination. Ensure that the soil remains consistently moist but not waterlogged throughout the germination period.
Additionally, the quality of the chive seeds can impact germination time. Fresh, viable seeds are more likely to germinate quickly and uniformly. It is recommended to purchase high-quality seeds from reputable suppliers to increase the likelihood of successful germination.
Keep in mind that germination time can also be affected by external factors such as the presence of any pests or diseases in the growing environment. Ensuring a clean and healthy gardening space can contribute to faster and healthier chive germination.
While the average germination time for chives falls within the range of 7 to 14 days, it’s important to be patient and understand that some seeds may take longer to sprout. However, if you notice no signs of germination after 21 days, it may indicate an issue with the seeds, temperature, moisture, or other factors. In such cases, it is recommended to evaluate and adjust the conditions accordingly or consider sowing new seeds.
Next, we will explore techniques that can help expedite the germination process and ensure successful chive seedling emergence.
Chives typically take 7-14 days to germinate when planted from seeds. Keep the soil consistently moist and provide plenty of sunlight for best results.
Techniques to Speed Up Chive Germination
If you’re looking to speed up the germination process of chive seeds, there are a few techniques you can employ. While germination time can vary based on factors beyond our control, these methods can increase the chances of quicker and more uniform germination. Here are some techniques to expedite chive germination:
- Pre-soaking: Pre-soaking chive seeds for a few hours before sowing can help accelerate germination. Simply place the seeds in a small dish or cup of room temperature water and let them soak for about 2-4 hours. This step can soften the seed coat and trigger the germination process.
- Scarification: Chive seeds have a hard outer coat that can sometimes impede germination. By scarifying the seed coat, you can help speed up germination. Gently scrape the seed coat with sandpaper or make a small nick using a sharp knife before sowing. This process allows moisture to penetrate the seed, promoting faster germination.
- Stratification: Some species of chives benefit from a period of cold stratification to mimic the natural winter conditions required for germination. Place the seeds in a damp paper towel or a moistened mix of vermiculite and perlite, seal them in a plastic bag, and refrigerate for 2-4 weeks. After stratification, plant the chilled seeds and provide the optimal growing conditions.
- Grow lights: Providing supplemental grow lights can enhance germination rates, especially in areas with limited sunlight or during the winter months. Place the seed trays under fluorescent or LED grow lights for 12-14 hours a day. This ensures that the seeds receive adequate light energy to kickstart the germination process.
- Hydroponic Seed Starting: Hydroponic seed starting systems can help expedite chive germination by providing the perfect balance of moisture, nutrients, and oxygen. These systems allow the roots to make direct contact with the nutrient-rich water, eliminating the need for soil. The controlled environment ensures optimal conditions for quick and healthy seedling development.
- Optimize growing conditions: Ensure that the temperature, moisture, and airflow are consistently within the optimal range for chive germination. Regularly monitor and adjust these conditions as needed to promote fast and uniform germination.
By implementing these techniques, you can potentially speed up the germination process and increase the success rate of chive seedlings emerging. Remember to monitor the seeds closely and make adjustments accordingly to provide them with the best possible environment.
Now, let’s discuss some common issues that may arise during chive germination and how to troubleshoot them.
Read more: How Long Does It Take For Mint To Germinate?
Common Issues and Troubleshooting
While chive seeds are relatively easy to germinate, a few common issues can arise during the germination process. Understanding these issues and having the knowledge to troubleshoot them can help you overcome challenges and ensure successful seedling emergence. Here are some common problems and their corresponding solutions:
- Poor Germination Rate: If you notice a low germination rate, it could be due to factors such as old or low-quality seeds. Consider purchasing fresh seeds from reputable suppliers and ensure proper seed storage for future use.
- Uneven Germination: Sometimes, chive seeds may germinate at different rates, resulting in uneven seedling emergence. To address this issue, you can carefully thin out the stronger and more advanced seedlings. This will allow the remaining seedlings to have enough space, light, and resources to grow.
- Fungal Diseases: Excessive moisture or poor ventilation can create a favorable environment for fungal diseases like damping-off. To prevent this, ensure proper air circulation around the seedlings and avoid overwatering. If damping-off occurs, remove affected seedlings carefully and adjust watering practices.
- Pest Infestation: Chive seedlings may be susceptible to pests such as aphids or snails. Monitor the seedlings regularly and take appropriate action if pests are detected. You can use organic pest control methods or consult with a local gardening expert for guidance.
- Dry Soil: Insufficient moisture can hinder germination. If the soil becomes too dry, it can delay or prevent seed germination altogether. Ensure that the soil remains consistently moist by misting it or using a bottom-watering method.
- Improper Planting Depth: Planting chive seeds too deep can result in delayed emergence or even failure to germinate. Follow the recommended planting depth of approximately ¼ inch (6 mm) to promote optimal germination.
- Seedling Legginess: If the seedlings become tall and weak, with stretched-out stems, it indicates a lack of sufficient light. Provide the seedlings with more direct light by adjusting the position of grow lights or placing them in a sunnier location.
By identifying and addressing these common issues promptly, you can ensure a higher success rate for your chive germination. Remember that troubleshooting may involve several factors, so it’s important to monitor your seedlings closely and take appropriate measures based on their specific needs.
Now that you have a good understanding of the common issues and how to troubleshoot them, let’s wrap up this article.
Conclusion
Growing chives from seeds can be a rewarding and fulfilling experience for gardeners of all skill levels. By understanding the factors that affect chive germination time and implementing the techniques mentioned in this article, you can increase your chances of successful and timely seedling emergence.
Factors such as temperature, moisture, light, seed quality, and soil conditions play significant roles in chive germination. Providing optimal conditions, such as maintaining a temperature range of 60°F to 70°F, adequate moisture without overwatering, darkness during germination, and well-draining soil, sets the stage for successful germination.
While the average germination time for chives ranges from 7 to 14 days, it’s important to be patient and understand that individual seeds may germinate at different rates. Techniques such as pre-soaking, scarification, stratification, using grow lights, or hydroponic seed starting can potentially speed up germination. Monitoring the growing environment and making adjustments when necessary are also key to promoting successful chive seedling emergence.
Common issues such as poor germination rate, uneven germination, fungal diseases, pest infestation, dry soil, improper planting depth, and leggy seedlings can be addressed through proper troubleshooting techniques. By identifying these issues early on and taking appropriate action, you can improve the overall germination success and health of your chive seedlings.
Remember, gardening is a journey that requires patience and adaptability. With the knowledge and techniques provided in this article, you are well-equipped to grow chives from seeds successfully. Enjoy the process of nurturing your chives from germination to harvest, and savor the fresh flavors they add to your culinary creations.
Happy gardening!
Frequently Asked Questions about How Long Does It Take Chives To Germinate
Was this page helpful?
At Storables.com, we guarantee accurate and reliable information. Our content, validated by Expert Board Contributors, is crafted following stringent Editorial Policies. We're committed to providing you with well-researched, expert-backed insights for all your informational needs.

0 thoughts on “How Long Does It Take Chives To Germinate”