Home>Garden Essentials>How Long Does It Take Dill To Germinate
Garden Essentials
How Long Does It Take Dill To Germinate
Modified: August 17, 2024
Discover how long it takes for dill seeds to germinate in your garden. Get expert tips and tricks to ensure successful growth and harvest.
(Many of the links in this article redirect to a specific reviewed product. Your purchase of these products through affiliate links helps to generate commission for Storables.com, at no extra cost. Learn more)
Introduction
Welcome to the wonderful world of gardening! If you’re new to gardening or just starting out with herbs, you may be curious about the germination process of different plants. In this article, we will explore the fascinating journey of dill seeds from sowing to sprouting and answer the question, “How long does it take dill to germinate?”
Germination is a critical stage in a plant’s life cycle, where a seed transforms into a seedling. It is an incredible process that involves the activation of a seed’s inner growth potential. Understanding the factors that influence germination can help you create the ideal conditions for your dill seeds to sprout and thrive.
So, let’s dive into the world of dill germination and discover how you can successfully grow this flavorful and aromatic herb in your garden.
Key Takeaways:
- Dill seeds typically take 7 to 14 days to germinate, but factors like temperature and seed quality can affect the timeframe. Patience and proper care are essential for successful dill germination.
- To promote dill germination, use fresh seeds, provide consistent moisture, and ensure proper ventilation. Pre-soaking or pre-chilling seeds can also enhance germination rates. Happy gardening!
Read more: How Long Does It Take For Mint To Germinate?
What is germination?
Before we delve into the specifics of dill germination, let’s first understand what germination truly is. Germination is the process by which a seed develops into a plant. It begins when a seed absorbs water, triggering a series of biochemical changes within the seed that ultimately lead to the emergence of a root, stem, and leaves.
The germination process involves the activation of enzymes within the seed, breaking down stored nutrients and converting them into a form that can be utilized by the developing plant. As the seed swells and cracks open, a tiny root, known as the radicle, emerges. The radicle anchors the plant in the soil and begins to absorb water and nutrients.
Once the radicle has established itself and the seedling has gained enough energy, the shoot begins to grow. As the shoot grows taller, it will eventually reach the soil surface, where it will unfurl its first set of true leaves. From here, the seedling will continue to develop, eventually becoming a mature plant.
Germination is a critical stage in a plant’s life cycle. It is during this phase that the seedling is most vulnerable and delicate. Providing the right conditions and care during germination is crucial in ensuring the successful growth of a plant.
Now that we have a basic understanding of germination, let’s take a closer look at the factors that can influence the germination of dill seeds.
Factors Affecting Dill Germination
Several factors can influence the germination of dill seeds. Being aware of these factors will help you create the optimal conditions for successful dill germination. Let’s explore them in detail:
- Temperature: Dill seeds prefer a temperature range of 70°F to 80°F (21°C to 27°C) for optimal germination. Cooler temperatures can significantly slow down the germination process, while higher temperatures can inhibit germination altogether. It’s important to provide a warm and consistent environment for your dill seeds to germinate successfully.
- Moisture: Adequate moisture is crucial for dill seed germination. The seeds need to be consistently moist but not overly saturated. Keeping the soil evenly moist throughout the germination process will help ensure proper water absorption by the seeds. Avoid letting the soil dry out completely as this can inhibit germination.
- Light: Dill seeds do not require light to germinate. In fact, they actually prefer to germinate in darkness. You can cover the seeds with a thin layer of soil or a light-proof covering to keep them in the dark during germination.
- Soil Quality: Dill seeds thrive in well-draining and fertile soil. Ensure that the soil is loose, crumbly, and rich in organic matter. Avoid heavy soils that can retain excess moisture and inhibit proper seedling development.
- Seed Depth: Dill seeds are small and should be sown shallowly. A general rule of thumb is to plant them no more than ¼ inch (0.6 cm) deep. Planting the seeds too deep can hinder their ability to sprout and emerge from the soil.
By taking these factors into account and providing the ideal conditions, you can greatly enhance the germination success of your dill seeds. Now that we know the factors that influence dill germination, let’s explore the optimal conditions required for dill seeds to sprout.
Ideal Conditions for Dill Germination
To ensure successful germination of dill seeds, it is essential to create the ideal conditions for them to thrive. Here are the key elements to consider:
- Temperature: Dill seeds germinate best when the temperature ranges between 70°F to 80°F (21°C to 27°C). It’s important to maintain a consistent temperature during the germination period. You can use a heating mat or place the seed tray in a warm location to provide the necessary warmth.
- Moisture: Dill seeds require moist soil to germinate. Before sowing the seeds, make sure the soil is properly moistened. After planting, ensure the soil remains consistently moist but not waterlogged. Mist the soil gently or use a spray bottle to avoid displacing the seeds. A clear plastic cover can help retain moisture during the germination process.
- Light: Dill seeds do not require light for germination; in fact, they prefer darkness. Ensure that the seeds are covered with a thin layer of soil or a light-proof covering to create a dark environment. Once the seeds have germinated and sprouted, you can provide them with 12-16 hours of light per day to support healthy growth.
- Soil Quality: Dill thrives in well-draining, fertile soil. Before sowing the seeds, prepare the soil by loosening it with a garden fork or tiller. Incorporate organic matter, such as compost, to improve soil structure and provide essential nutrients for the growing seedlings. A soil pH level between 5.5 and 7.5 is ideal for dill.
- Seed Spacing: When sowing dill seeds, ensure proper spacing to allow for healthy growth. Space the seeds at least 6 to 12 inches (15 to 30 cm) apart, depending on the variety. This will provide the seedlings with enough room to develop and access sufficient nutrients and sunlight.
By providing these optimal conditions, you can greatly increase the chances of successful dill germination. Now let’s move on to the exciting part – the germination process of dill seeds!
Dill seeds typically germinate within 7-10 days when planted in well-draining soil and kept consistently moist. Providing warmth and sunlight can also help speed up the germination process.
Germination Process of Dill Seeds
The germination process of dill seeds is fascinating to witness. Let’s walk through the steps involved in the germination of dill seeds:
- Sowing: Start by sowing the dill seeds in the prepared soil. Make small furrows or shallow holes with your finger or a small tool. Space the seeds according to the recommended distance for the variety you are planting.
- Seeding: Gently place the dill seeds into the furrows or holes, ensuring they are not planted too deep. Dill seeds are small and should be sown no more than ¼ inch (0.6 cm) deep. Cover the seeds lightly with soil, pressing it gently to ensure good seed-to-soil contact.
- Watering: After sowing, water the soil gently to provide sufficient moisture for seed absorption. Use a fine mist or a watering can with a narrow spout to avoid dislodging the seeds. Keep the soil consistently moist throughout the germination process.
- Germination: With the right conditions of temperature, moisture, and darkness, the dill seeds will begin to germinate. The exact time for germination will vary, but typically you can expect to see the first signs of germination within 7 to 14 days.
- Emergence: As germination occurs, the seed coat will split open, and a tiny root, called the radicle, will emerge from the seed. The radicle grows downward, anchoring the seedling in the soil and absorbing water and nutrients from the soil.
- Shoot Development: As the radicle continues to grow, a stem, or shoot, emerges from the seed. The shoot elongates and pushes its way through the soil towards the surface. Soon, the first set of true leaves will unfurl from the shoot.
- Establishment: The seedling will continue to develop, producing more leaves and growing taller. It is crucial to provide adequate light, water, and nutrients to support the healthy growth of the seedling as it establishes itself in the soil.
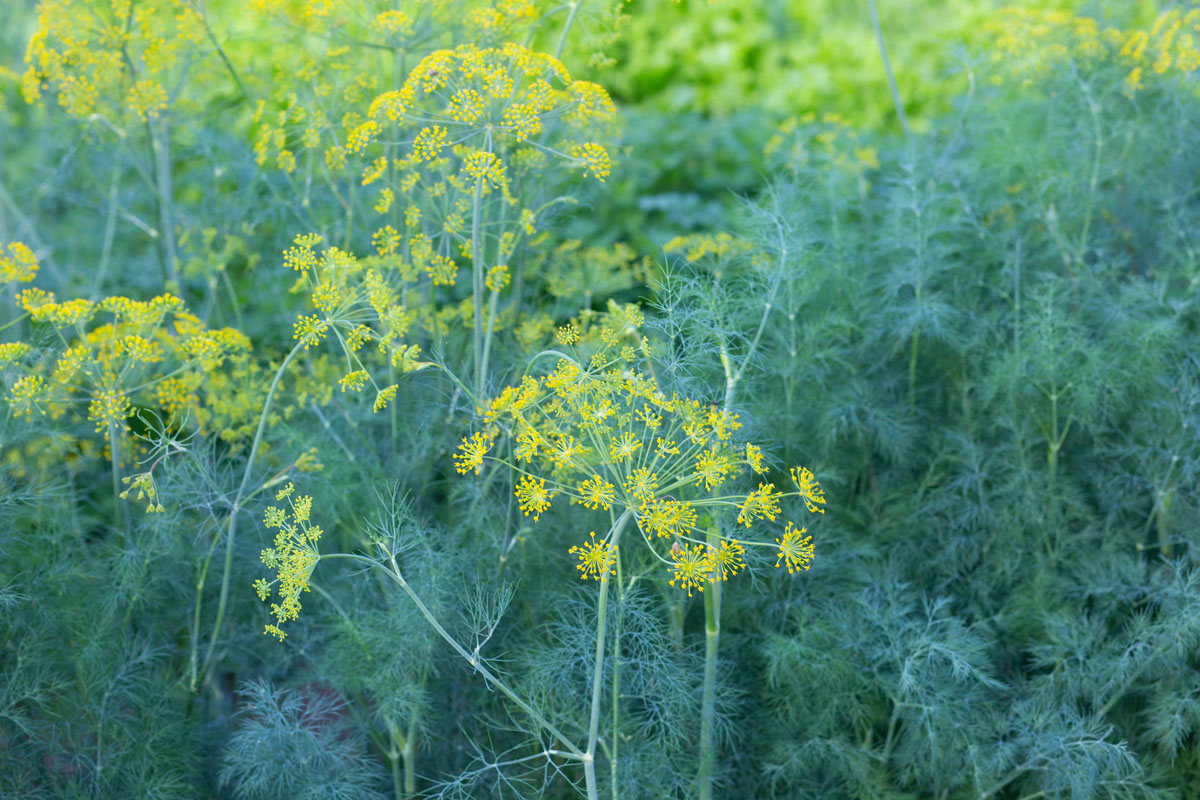
As the dill seedling grows into a mature plant, it will produce feathery foliage and fragrant flower heads. This delightful herb is not only a culinary delight but also an attractive addition to any garden.
Now that you have an idea of the germination process, you might be wondering: how long does it take for dill to germinate? Let’s find out in the next section.
Read more: How Long Does It Take Millet To Germinate
How Long Does Dill Take to Germinate?
The germination time for dill seeds can vary depending on various factors such as temperature, moisture, and seed quality. On average, dill seeds typically take about 7 to 14 days to germinate. However, it’s essential to note that germination can sometimes take longer, up to 21 days or more.
The temperature plays a significant role in the germination rate of dill seeds. Warmer temperatures around 70°F to 80°F (21°C to 27°C) provide an ideal environment for faster germination. At lower temperatures, germination may be slower and less uniform. If the temperatures drop below 60°F (15°C), it can significantly delay or inhibit germination.
Another factor that can affect germination time is the quality and viability of the dill seeds. Fresh, high-quality seeds generally have a higher germination rate and quicker germination time compared to older or low-quality seeds. It’s always recommended to use fresh dill seeds to ensure the best germination results.
Additionally, proper moisture levels are crucial for dill seed germination. The soil should be consistently moist but not waterlogged. Dry or overly saturated soil can hinder germination or cause seed rot. Regularly check the moisture levels and mist the soil gently to keep it adequately moist throughout the germination period.
During the germination process, it’s important to have patience and monitor the progress of your dill seeds. Some seeds may sprout earlier than others, leading to staggered germination. As long as the conditions are optimal and you see signs of germination, such as emerging roots and shoots, your dill seeds are on the right track.
Once your dill seeds have germinated, continue to provide them with proper care, including adequate light, water, and nutrients. Transplant them into a larger container or to your garden once they have developed a few sets of true leaves.
By understanding the average germination time and ensuring the ideal conditions for your dill seeds, you can successfully grow this delightful herb in your garden or indoor space.
Now that you know how long dill takes to germinate, let’s explore some tips to help promote successful dill germination.
Tips for Promoting Dill Germination
To increase the chances of successful dill germination, there are several tips and techniques you can follow. These tips will help create an optimal environment for your dill seeds to sprout and grow. Let’s take a look at them:
- Use fresh seeds: Fresh, high-quality dill seeds have a higher germination rate. Purchase seeds from a reliable source or save seeds from a previous dill plant to ensure viability.
- Pre-soak the seeds: To accelerate germination, you can pre-soak dill seeds in water overnight before sowing. This process softens the seed coat and encourages faster water absorption.
- Pre-chill the seeds: Some gardeners have found success by pre-chilling dill seeds in the refrigerator for a few days before sowing. This mimics the natural process of stratification and can enhance germination rates.
- Sow seeds shallowly: Dill seeds are tiny and should be sown no more than ¼ inch (0.6 cm) deep. Planting them too deep can inhibit their ability to sprout and emerge from the soil. Press the seeds gently into the soil to ensure good seed-to-soil contact.
- Provide consistent moisture: Keep the soil evenly moist throughout the germination process. Avoid overwatering, as it can cause the seeds to rot. Use a fine mist sprayer or a watering can with a narrow spout to water gently.
- Protect from extreme temperatures: Maintain a consistent temperature range of 70°F to 80°F (21°C to 27°C) during germination. Avoid exposing the seeds to extreme temperatures, as it can slow down or inhibit germination.
- Ensure proper ventilation: While maintaining moisture is crucial, it’s also important to ensure proper airflow to prevent fungal diseases. If using a cover or plastic wrap, make sure to provide ventilation by slightly opening or removing the cover once germination has started.
- Transplant carefully: If you need to transplant the dill seedlings, do it with care to avoid damaging the delicate roots. Handle the seedlings by their leaves rather than the stem. Ensure that the new location provides the same favorable conditions as the initial germination spot.
- Provide adequate light: Once the dill seedlings have emerged, provide them with 12-16 hours of light per day. Place them in a sunny spot or use grow lights to ensure they receive sufficient light for healthy growth.
By following these tips, you can give your dill seeds the best chance of germinating successfully. Remember to monitor their progress and make adjustments as needed to provide optimal conditions throughout the germination period.
Now that you’re armed with these valuable tips, you’re ready to embark on a successful dill germination journey. Enjoy the process and soon you’ll be harvesting your own fresh dill leaves, perfect for adding flavor to your culinary creations or enhancing the beauty of your garden.
Good luck with your dill germination efforts!
Conclusion
Growing dill from seed can be an exciting and rewarding experience. Understanding the germination process and providing the ideal conditions for dill seeds to sprout are essential for success.
In this article, we explored the fascinating journey of dill seeds from sowing to sprouting. We learned that germination is the process by which a seed develops into a plant, involving the activation of enzymes and the emergence of roots, shoots, and leaves.
Factors such as temperature, moisture, light, soil quality, and seed depth influence the germination of dill seeds. By creating the optimal conditions, such as maintaining a warm and consistent temperature, providing adequate moisture, and ensuring well-draining soil, you can greatly enhance the germination success of your dill seeds.
Dill seeds typically take around 7 to 14 days to germinate, but this timeframe can vary based on temperature, moisture, and seed quality. It’s important to be patient and monitor the progress of your dill seeds, providing them with proper care and attention as they develop into seedlings and mature plants.
To promote successful dill germination, we provided some helpful tips, including using fresh seeds, pre-soaking or pre-chilling seeds, sowing seeds shallowly, providing consistent moisture, protecting from extreme temperatures, ensuring proper ventilation, transplanting with care, and providing adequate light.
Now armed with this knowledge and the tips provided, you can confidently embark on your dill germination journey. Soon, you’ll have healthy dill plants gracing your garden or indoor space, ready to be harvested and enjoyed in a variety of dishes.
Remember, gardening is a continuous learning process, and each experience presents an opportunity to grow and improve. So, have fun, experiment, and embrace the joy of watching your dill seeds transform into flourishing plants.
Happy gardening and happy dill germination!
Frequently Asked Questions about How Long Does It Take Dill To Germinate
Was this page helpful?
At Storables.com, we guarantee accurate and reliable information. Our content, validated by Expert Board Contributors, is crafted following stringent Editorial Policies. We're committed to providing you with well-researched, expert-backed insights for all your informational needs.

0 thoughts on “How Long Does It Take Dill To Germinate”