Home>Garden Essentials>How Long Does It Take For Collard Greens To Germinate
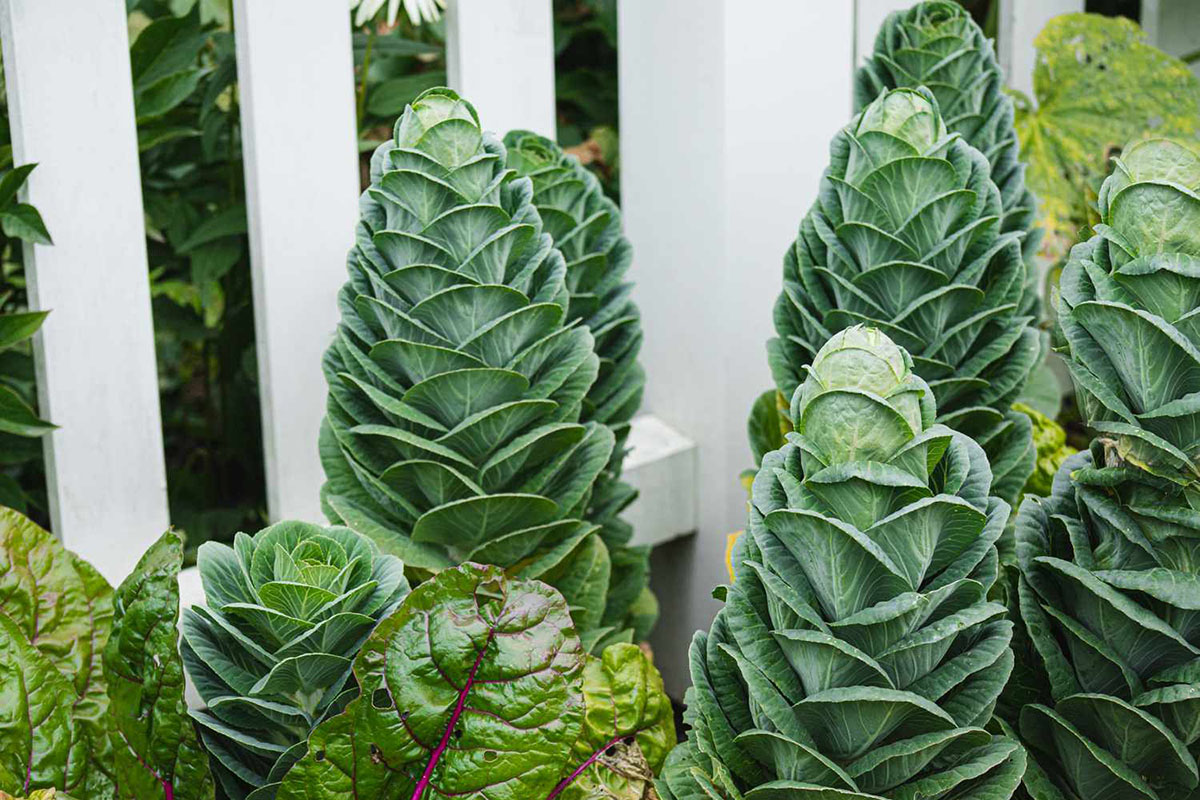

Garden Essentials
How Long Does It Take For Collard Greens To Germinate
Modified: March 16, 2024
Learn how long it takes for collard greens to germinate in your garden. Discover tips and tricks for successful germination and growing.
(Many of the links in this article redirect to a specific reviewed product. Your purchase of these products through affiliate links helps to generate commission for Storables.com, at no extra cost. Learn more)
Introduction
Welcome to the world of gardening! Whether you are a seasoned gardener or just starting out, growing your own vegetables can be a rewarding and satisfying experience. One vegetable that is popular among both beginner and experienced gardeners is collard greens.
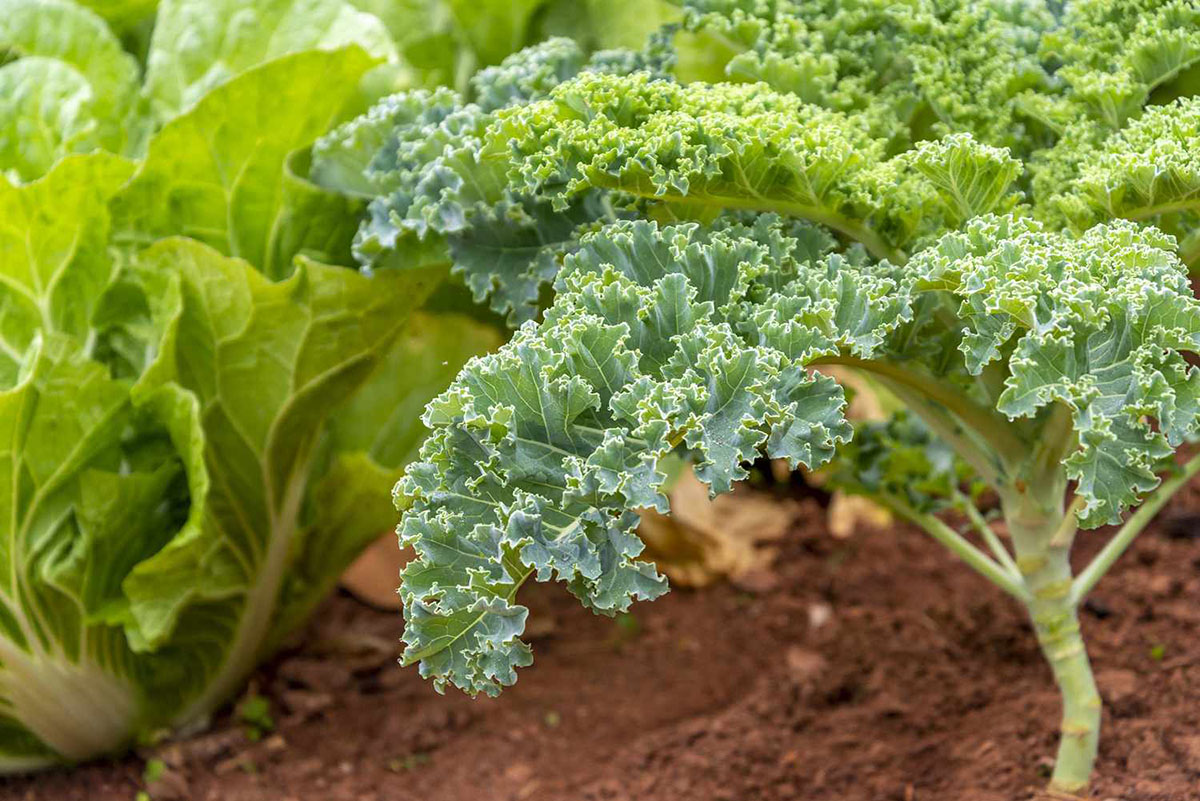
Collard greens, with their dark green leaves and mild flavor, are a staple in many southern dishes. Not only are they delicious, but they are also packed with nutrients like vitamin A, vitamin K, and fiber. The best part is that you can easily grow collard greens in your own backyard.
One important aspect of growing collard greens is understanding the germination process. Germination is the process by which a seed sprouts and begins to grow into a plant. Understanding how long it takes for collard greens to germinate is essential for planning and managing your garden.
In this article, we will explore the factors that can affect the germination time of collard greens, the ideal conditions for germination, and provide a step-by-step guide to help you successfully germinate your own collard greens. Let’s dive in!
Key Takeaways:
- Collard greens take about 7 to 14 days to sprout, but factors like temperature, moisture, and seed quality can affect the germination time. It’s important to provide the right conditions for successful growth.
- Harvest collard greens by picking the outer leaves, allowing the inner ones to keep growing. Store them properly and explore different cooking methods to enjoy their delicious flavor and nutritional benefits.
Read more: How Long Does Green Onion Germination Take?
Factors Affecting Germination Time of Collard Greens
The germination time of collard greens can be influenced by several factors. Understanding these factors will help you optimize the conditions for germination and ensure a successful outcome. Here are some of the key factors to consider:
- Temperature: Collard greens thrive in cooler temperatures, around 55-75°F (13-24°C). The soil temperature plays a crucial role in germination. If the temperature is too cold, germination may be slow or even inhibited. On the other hand, if the temperature is too warm, the seeds may not germinate at all.
- Moisture: Adequate moisture is essential for the germination of collard greens. Dry soil can prevent seeds from absorbing water and initiating the germination process. However, excessive moisture can lead to rotting and fungal diseases. It’s important to maintain a balance and provide consistent moisture throughout the germination period.
- Seed Quality: The quality and viability of the seeds can impact germination time. Fresh, high-quality seeds generally have a higher germination rate and sprout quicker. It’s recommended to purchase seeds from reputable sources and ensure they are not expired.
- Seed Depth: The depth at which the seeds are planted can influence germination time. Collard greens seeds are relatively small and should be sown at a depth of about ¼ to ½ inch (0.6-1.3 cm) in the soil. Planting too deep or too shallow can affect how quickly the seeds sprout.
- Light: Collard greens seeds require darkness for germination. Unlike some other plants, they do not require light to sprout. In fact, excessive exposure to light can inhibit germination. It’s important to cover the seeds with soil and ensure they are kept in a dark environment until they sprout.
- Seed Age: The age of the seeds can impact germination time. As seeds age, their viability decreases, resulting in longer germination periods or even failure to germinate. Using fresh seeds will increase the chances of quick and successful germination.
By taking these factors into account, you can create the optimal conditions for germinating collard greens and maximize your chances of a successful harvest. Let’s move on to the next section to learn about the ideal germination conditions for collard greens.
Ideal Germination Conditions for Collard Greens
To ensure the successful germination of collard greens, it is important to provide them with the ideal conditions. These conditions will facilitate the sprouting of seeds and the growth of healthy seedlings. Here are the key factors to consider when creating the ideal germination conditions for collard greens:
- Temperature: Collard greens prefer cooler temperatures for germination. Aim for a soil temperature of around 55-75°F (13-24°C). You can use a soil thermometer to monitor the temperature and make adjustments if necessary. Germination may be slower in colder temperatures, so it is important to maintain a consistent and slightly warm environment.
- Moisture: Adequate moisture is essential for collard greens to germinate. The soil should be evenly moist, but not overly saturated. You can achieve this by watering your seeds gently and consistently, keeping the soil damp but not waterlogged. Mist the soil regularly if needed to maintain moisture levels.
- Light: Unlike some other plants, collard greens do not require light for germination. In fact, they prefer darkness during the germination process. Ensure that the seeds are covered with soil to keep them in a dark environment. Once the seedlings emerge, they will need exposure to light for healthy growth.
- Seed Depth: Plant collard greens seeds at a depth of about ¼ to ½ inch (0.6-1.3 cm) in the soil. This depth allows for proper moisture absorption and provides a suitable environment for germination. Be cautious not to plant the seeds too deep or too shallow, as it may affect their ability to sprout.
- Air Circulation: Good air circulation is important for preventing moisture-related issues and promoting healthy germination. Avoid overcrowding the seeds and provide space between them to allow air to circulate freely. Additionally, avoid overwatering, as it can lead to stagnant moisture and increase the risk of fungal diseases.
By ensuring these ideal germination conditions, you set the stage for successful collard greens germination. Next, let’s move on to a step-by-step guide to help you germinate collard greens with confidence.
Step-by-Step Guide to Germinating Collard Greens
Germinating collard greens is a relatively straightforward process. By following these step-by-step instructions, you can successfully germinate collard greens and start your journey towards a bountiful harvest:
- Selecting Seeds: Choose high-quality collard greens seeds from a reputable source. Check the seed packet for information on variety, planting depth, and spacing.
- Preparing the Soil: Collard greens prefer well-draining soil rich in organic matter. Prepare the soil by removing any debris and loosening it with a garden fork or tiller. Amend the soil with compost or well-rotted manure to provide nutrients for the growing plants.
- Sowing the Seeds: Create shallow furrows in the prepared soil, about ¼ to ½ inch (0.6-1.3 cm) deep. Space the furrows according to the recommended planting distance for your specific variety. Place the collard greens seeds in the furrows, spacing them evenly and ensuring they are not too close together.
- Covering and Watering: Gently cover the seeds with soil, ensuring they are buried at the recommended depth. Use a watering can or a gentle spray nozzle to water the seeds, thoroughly moistening the soil. Be careful not to overwater, as it can lead to rotting or fungal issues.
- Creating the Ideal Environment: Keep the planted seeds in a warm and dark location, such as a greenhouse or a warm indoor space. Maintain a consistent temperature around 55-75°F (13-24°C) and provide adequate moisture by misting or watering lightly as needed.
- Monitoring and Patience: Keep a close eye on the soil moisture level and temperature. It may take anywhere from 7 to 14 days for collard greens seeds to germinate, depending on the conditions. Be patient and avoid disturbing the seeds during this process.
- Transplanting: Once the seedlings have emerged and have at least 2-3 sets of true leaves, they are ready for transplanting. Choose a sunny spot in your garden with well-draining soil. Dig holes slightly larger than the root ball of each seedling, gently remove the seedlings from the container, and place them into the holes. Backfill the soil and gently firm it around the base of the seedlings.
- Caring for Seedlings: Water the newly transplanted seedlings thoroughly and continue to provide regular moisture as needed. Monitor for pests and diseases and take appropriate measures to protect your plants. Thin the seedlings if they are overcrowded, ensuring that each plant has enough space to grow.
- Harvesting: Collard greens can be harvested when the leaves are large and mature. Start harvesting the outer leaves, leaving the inner leaves to continue growing. This allows for a continuous harvest throughout the growing season.
Following these steps will help you germinate collard greens successfully and set the stage for a thriving garden. However, keep in mind that gardening is a dynamic process, and it’s important to adapt and make adjustments based on your specific growing conditions.
In the next section, let’s explore some common problems and troubleshooting tips during the collard greens germination process.
Collard greens typically take 7-14 days to germinate. Keep the soil consistently moist and provide plenty of sunlight for best results.
Common Problems and Troubleshooting during Germination
While germinating collard greens is generally a straightforward process, there are some common problems that gardeners may encounter. Being aware of these issues and knowing how to troubleshoot them can help ensure a successful germination. Here are some common problems and their solutions:
- Poor Germination: If your collard greens seeds are not germinating or are sprouting slowly, it could be due to several factors. Check the soil temperature and ensure it is within the optimal range of 55-75°F (13-24°C). Also, examine the moisture levels and make sure the soil is consistently moist, but not overly saturated. If the seeds are older, they may have a lower germination rate. Consider purchasing fresh seeds for better results.
- Fungal Diseases: Excessive moisture and poor air circulation can lead to fungal diseases like damping-off. This is when seedlings rot at the soil level, causing them to wither and die. To prevent this, ensure proper air circulation by spacing the seeds adequately and avoid overwatering. If you notice any signs of damping-off, remove the affected seedlings and adjust watering practices.
- Pests: Unfortunately, pests can target young collard greens seedlings. Common culprits include slugs, snails, and flea beetles. Check for any signs of damage, such as chewed leaves or holes, and take appropriate measures to control pests. You can use organic methods like hand-picking or applying natural pest deterrents to protect your seedlings.
- Seedling Legginess: Seedlings that are tall, weak, and have stretched-out stems are referred to as leggy seedlings. This is typically caused by inadequate light and can result in weak, fragile plants. To prevent legginess, ensure that your seedlings receive sufficient light as soon as they emerge. If growing indoors, consider using grow lights to provide the necessary intensity and duration of light.
- Overcrowding: Planting collard greens seeds too close together can lead to overcrowding, competition for resources, and poor growth. Thin out seedlings once they have grown a few sets of true leaves, leaving enough space for each plant to develop fully. This will allow for improved air circulation and prevent the spread of diseases.
By being aware of these common problems and taking proactive measures, you can troubleshoot and address any issues that may arise during the germination of collard greens. Remember to closely monitor your seedlings, provide proper care, and make necessary adjustments to ensure optimal growth.
Now that we have covered common problems and troubleshooting, let’s move on to discussing the expected germination timeframe for collard greens.
Germination Timeframe for Collard Greens
The germination timeframe for collard greens can vary depending on various factors such as temperature, moisture levels, seed quality, and more. On average, collard greens seeds take approximately 7 to 14 days to germinate under optimal conditions.
It’s important to note that germination time can be influenced by temperature. Collard greens prefer cooler temperatures for germination, around 55-75°F (13-24°C). If the temperature is consistently on the cooler side, germination may take longer than the average timeframe. Conversely, warmer temperatures can speed up the germination process.
Additionally, the freshness and quality of the seeds can contribute to the germination timeframe. Fresh seeds tend to have a higher germination rate and sprout more quickly compared to older or lower-quality seeds. When purchasing collard greens seeds, it’s advisable to choose from reputable sources and check the expiration date to ensure the viability of the seeds.
The moisture level in the soil also plays a vital role in germination. Collard greens seeds require consistent moisture to initiate and complete the germination process. If the soil is too dry, it can delay germination or inhibit it altogether. On the other hand, excessively moist soil can lead to rotting and fungal diseases. It’s important to maintain proper moisture levels by watering the seeds gently and consistently, ensuring the soil remains evenly moist but not waterlogged.
During the germination process, it is crucial to provide the seeds with darkness. Collard greens seeds do not require light for germination. In fact, exposing them to excessive light can hinder germination. Keep the seeds covered with soil or provide a dark environment until the seedlings emerge.
It’s worth mentioning that the average germination timeframe mentioned above is just a guideline. The actual germination time can vary depending on individual circumstances. Factors such as soil conditions, seed depth, air circulation, and specific variety of collard greens can also influence the germination timeframe.
Be sure to monitor your seeds closely during the germination period, while providing the ideal conditions for their growth. Patience is key, as some germination may occur earlier than others. With proper care and attention, your collard greens will begin to sprout and develop into healthy seedlings ready for transplantation.
Now that you have an understanding of the germination timeframe, let’s move on to the exciting part: harvesting collard greens!
Harvesting Collard Greens
Once your collard greens have reached maturity, it’s time to start harvesting and enjoying the fruits of your labor. Harvesting collard greens is a simple process, and with proper techniques, you can enjoy a continuous harvest throughout the growing season. Here’s a guide on how to harvest collard greens:
- Plant Maturity: Collard greens are typically ready for harvest when the leaves are large, thick, and vibrant green in color. They should be firm and crisp to the touch.
- Harvesting Technique: To harvest collard greens, start by selecting the outer leaves of the plant. Grasp the leaf at the base of the stem and gently pull it away from the plant, using a slight twisting motion. Alternatively, you can use a sharp garden knife or scissors to cut the leaves just above the crown of the plant.
- Continuous Harvest: Harvesting the outer leaves allows the inner leaves to continue growing. This method ensures a continuous supply of tender leaves throughout the season. As the plant continues to produce new growth, you can harvest leaves as needed for your meals.
- Timing of Harvest: Collard greens can be harvested at any stage of growth, but for the best flavor and texture, it’s recommended to harvest them when the leaves are at their prime. Younger leaves tend to be more tender and milder in flavor, while more mature leaves may be slightly tougher and have a stronger taste.
- Storage and Preservation: To maximize the freshness and shelf life of harvested collard greens, it’s best to use them immediately. However, if you have an abundance, you can store them for a short period in the refrigerator. Wrap the leaves in a damp paper towel or place them in a perforated plastic bag to maintain moisture. They can stay fresh for up to a week when stored properly.
- Cooking and Enjoyment: Collard greens are incredibly versatile in the kitchen. They can be enjoyed raw in salads, lightly steamed or sautéed, added to soups and stews, or even used as a wrap substitute. Explore different recipes and cooking methods to discover your favorite way to savor the delicious flavor and nutritional benefits of collard greens.
Remember to practice sustainable harvesting by not overharvesting your plants. Leave a few of the inner leaves intact to allow new growth and ensure the health of the plant.
By following these guidelines, you can harvest collard greens at their peak freshness, ensuring a delightful culinary experience right from your own garden.
With this comprehensive guide, you now have the knowledge and understanding to successfully germinate collard greens, tend to them throughout their growth, and enjoy a bountiful harvest. Happy gardening and happy cooking!
If you have any other questions or need further assistance, feel free to ask.
Conclusion
Growing collard greens from seed to harvest can be a fulfilling and rewarding experience. By understanding the factors affecting germination time, creating ideal germination conditions, following a step-by-step guide, troubleshooting common problems, and knowing when and how to harvest, you can successfully cultivate your own supply of delicious and nutritious collard greens.
Remember, providing the right temperature, moisture levels, and seed depth are crucial to promoting quick and healthy germination. Keep an eye on the germination timeframe, and be patient as the seeds take time to sprout. Troubleshoot issues like poor germination, fungal diseases, pests, seedling legginess, and overcrowding to ensure the best possible growing conditions for your collard greens.
Once your collard greens reach maturity, harvest them by selectively picking the outer leaves, allowing the inner leaves to continue growing for a continuous harvest. Store harvested collard greens properly to maintain freshness, and explore various cooking methods to enjoy their delicious flavor and nutritional benefits.
Remember that gardening is a continuous learning process. Each garden and growing season is unique, and it’s important to adapt and make adjustments based on your specific conditions. Experiment with different techniques and varieties to find what works best for you.
Whether you’re a seasoned gardener or just starting out, growing collard greens can be a wonderful addition to your gardening journey. From their germination to the delights of harvest and consumption, every step brings joy and satisfaction. So, get your hands dirty, embrace the process, and watch as your collard greens thrive and provide you with abundant, healthy, and delicious greens to enjoy.
Happy gardening and happy harvesting!
Frequently Asked Questions about How Long Does It Take For Collard Greens To Germinate
Was this page helpful?
At Storables.com, we guarantee accurate and reliable information. Our content, validated by Expert Board Contributors, is crafted following stringent Editorial Policies. We're committed to providing you with well-researched, expert-backed insights for all your informational needs.

0 thoughts on “How Long Does It Take For Collard Greens To Germinate”