Home>Garden Essentials>How Long Does Kale Take To Germinate
Garden Essentials
How Long Does Kale Take To Germinate
Modified: March 15, 2024
Discover how long it takes for kale seeds to germinate in your garden. Get expert tips on maximizing growth and success!
(Many of the links in this article redirect to a specific reviewed product. Your purchase of these products through affiliate links helps to generate commission for Storables.com, at no extra cost. Learn more)
Introduction
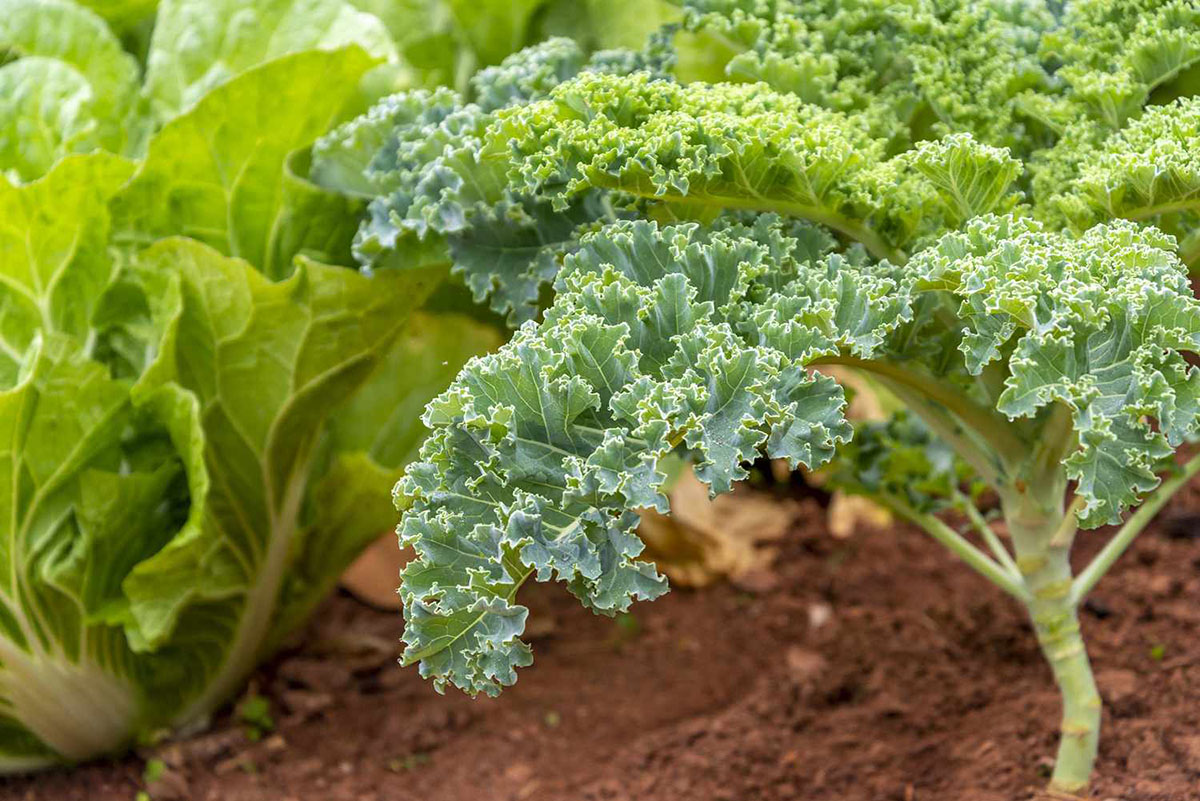
Welcome to the wonderful world of gardening! If you’re a beginner, one of the first plants you might want to try growing is kale. Not only is kale packed with nutrients, but it’s also relatively easy to grow from seed. However, like any plant, kale requires the right conditions to germinate successfully.
In this article, we will explore the fascinating process of kale germination and provide you with valuable insights to help you grow your own kale plants. We will delve into the factors that affect kale germination time, the ideal conditions for germination, step-by-step instructions for germinating kale seeds, monitoring the progress of germination, troubleshooting common problems, and finally, harvesting the delicious kale leaves.
So, if you’re ready to dive in and unlock the secrets of kale germination, let’s get started!
Key Takeaways:
- Kale seeds typically take 5 to 10 days to germinate, but it can take up to 14 days. Factors like seed quality, temperature, moisture, light, and soil quality affect germination time.
- To grow kale successfully, provide ideal conditions like moderate temperature, adequate moisture, darkness for germination, and well-draining soil. Monitor and troubleshoot common germination problems for healthy kale plants.
Read more: How Long Does It Take For Mint To Germinate?
Understanding Kale Germination
Before we dive into the details of kale germination, let’s first understand what it actually means. Germination is the process by which a seed sprouts and starts to grow into a new plant. For kale, germination refers to the period of time it takes for the seeds to break open, send out a root, and develop into a seedling.
Kale seeds are tiny powerhouses of life, containing all the genetic information needed to grow a mature kale plant. When you provide the right conditions, such as moisture, warmth, and proper soil, the seed activates and starts its journey towards becoming a green and leafy kale plant.
It’s important to note that germination time can vary depending on various factors, but on average, kale seeds take around 5 to 10 days to germinate. However, in some cases, it may take up to 14 days for the seeds to sprout.
Understanding the process of kale germination is crucial for ensuring your gardening efforts are successful. By having a clear understanding of the factors that influence germination and the ideal conditions required, you can provide the best environment for your kale seeds to sprout and thrive.
Now that we have a basic understanding of kale germination, let’s explore the factors that can affect the time it takes for kale seeds to germinate.
Factors Affecting Kale Germination Time
Kale germination time can vary depending on several factors. Understanding these factors can help you anticipate how long it may take for your kale seeds to sprout and adjust your gardening practices accordingly. Here are the key factors that can influence kale germination time:
- Seed Quality: The quality of the kale seeds you use plays a significant role in germination time. Fresh, high-quality seeds tend to germinate faster compared to old or low-quality seeds. It’s always best to purchase seeds from reputable suppliers to ensure you’re starting with the best possible seed stock.
- Temperature: Kale seeds germinate best in moderate temperatures ranging from 60°F to 75°F (15°C to 24°C). Cooler temperatures can significantly slow down germination, while excessively hot temperatures can hinder germination or cause poor seedling development. Maintaining a consistent temperature within this range can help optimize germination time.
- Moisture: Adequate moisture is essential for germination. During the germination process, the seed absorbs water, which triggers the activation of enzymes and metabolic processes responsible for sprouting. Keeping the soil consistently moist but not waterlogged creates the ideal environment for kale seeds to germinate.
- Light: Unlike some other plants, kale seeds do not require light to germinate. In fact, they prefer to germinate in darkness. So, there’s no need to expose the seeds to direct sunlight during germination. However, once the seedlings emerge, they will need light for further growth and development.
- Soil Quality: The quality and composition of the soil can impact germination time. Kale seeds prefer well-draining soil with a pH level between 6 and 7. If the soil is too compacted, too sandy, or has an unfavorable pH level, it can hinder germination. Preparing the soil by adding organic matter and ensuring proper drainage can promote quicker and healthier germination.
By considering these factors and making appropriate adjustments, you can help optimize kale germination time and increase your chances of success. Now that we understand the factors influencing kale germination, let’s explore the ideal conditions for germinating kale seeds.
Ideal Conditions for Kale Germination
Creating the ideal conditions for kale germination is crucial for ensuring successful seed sprouting and healthy seedling development. By providing the following conditions, you can optimize kale germination:
- Temperature: Kale seeds germinate best in temperatures ranging from 60°F to 75°F (15°C to 24°C). You can achieve this temperature range by starting your kale seeds indoors in a controlled environment or by waiting until the outdoor temperatures are within this range if you prefer direct sowing.
- Moisture: Adequate moisture is essential for germination. To provide the proper moisture level, thoroughly water the soil before sowing the seeds. After planting, keep the soil consistently moist but not waterlogged. Using a spray bottle or a gentle watering technique can help prevent overwatering and allow the soil to retain proper moisture levels.
- Light: While kale seeds do not require light for germination, they prefer darkness. Sow the seeds at the recommended depth specified on the seed packet and cover lightly with soil to provide the darkness they need. Once the seedlings emerge, move them to a location with bright, indirect light or under grow lights to promote healthy growth.
- Soil Quality: Kale seeds thrive in well-draining soil with a pH level between 6 and 7. Prepare the soil by removing any debris, rocks, or clumps and adding organic matter such as compost or well-rotted manure to improve soil structure and nutrient content. This will create an optimal environment for seed germination.
By providing these ideal conditions, you can increase the chances of successful kale germination. However, it is important to note that individual differences in gardening practices and environmental factors may require some adjustments. Now that we know the ideal conditions, let’s dive into the step-by-step process of germinating kale seeds.
Steps to Germinate Kale Seeds
Germinating kale seeds is an exciting and rewarding process. By following these simple steps, you can increase the chances of successful germination and ensure healthy seedling development:
- Choose the right seeds: Start by selecting high-quality kale seeds from a reputable supplier. Look for seeds that are fresh and well-packaged, as they tend to have a higher germination rate.
- Prepare the containers: If you’re starting seeds indoors, choose small containers with drainage holes. Fill the containers with a well-draining seed-starting mix, leaving about half an inch of space from the top to allow for watering.
- Sow the seeds: Plant two to three seeds in each container, pressing them gently into the soil to ensure good seed-to-soil contact. Cover the seeds lightly with soil according to the recommended depth specified on the seed packet. If you’re unsure about the depth, a good rule of thumb is to cover the seeds with about ¼ inch of soil.
- Water the soil: After sowing the seeds, water the soil thoroughly using a spray bottle or a gentle watering technique. Make sure the soil is evenly moist but not soaked or waterlogged.
- Create a mini greenhouse: To maintain the proper moisture and temperature levels, cover the containers with plastic wrap or place them inside a propagation dome. This creates a mini greenhouse effect and helps retain moisture around the seeds.
- Provide consistent warmth: Place the containers in a warm location with temperatures between 60°F and 75°F (15°C to 24°C). You can use a heating mat or place the containers near a heat source to provide the necessary warmth for germination.
- Monitor and adjust: Keep a close eye on the containers to ensure the soil remains moist. Check for any signs of germination, such as tiny seedling sprouts breaking through the soil. If necessary, mist the soil with water to maintain moisture levels.
- Thin out the seedlings: Once the seedlings have emerged and grown to a few inches tall, carefully thin out the weaker seedlings, leaving only the strongest one in each container. This allows the remaining seedling to have more space and resources to grow.
- Transition to larger containers or the outdoor garden: As the seedlings continue to grow, transplant them to larger containers if needed or directly into the outdoor garden once the weather and soil conditions are suitable.
By following these steps, you can successfully germinate kale seeds and set yourself up for a bountiful harvest of fresh and nutritious kale leaves. Now let’s move on to the next step in the process – monitoring the germination progress.
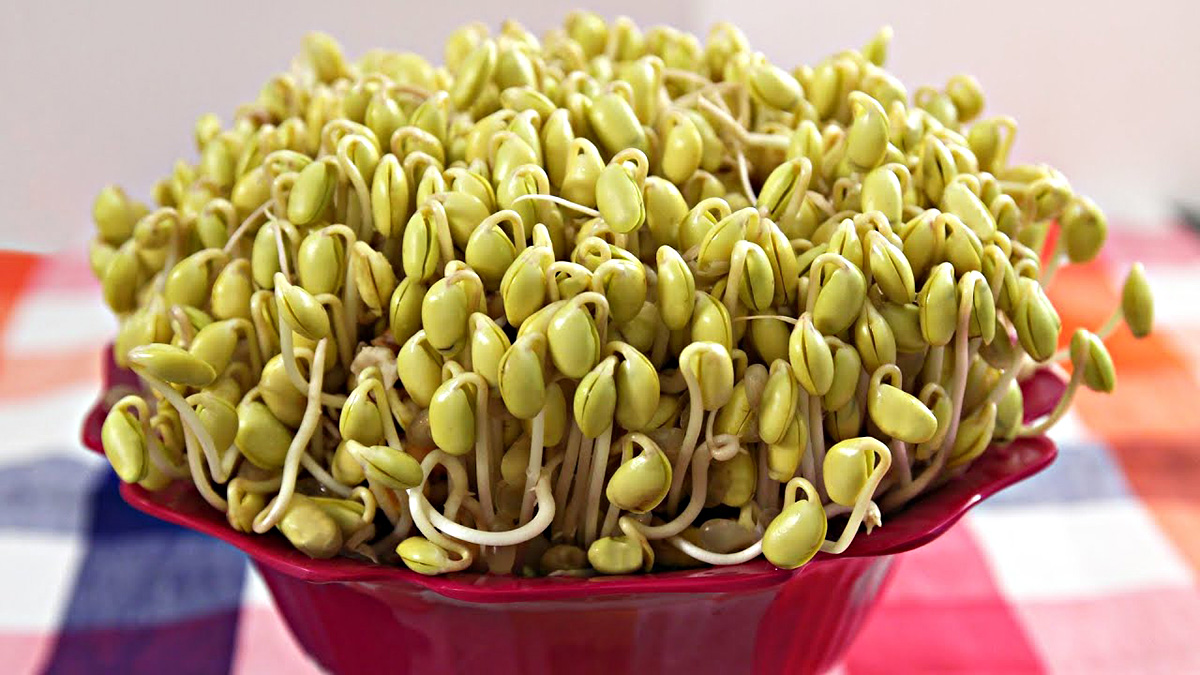
Kale seeds typically germinate within 5-10 days when planted in well-draining soil and kept consistently moist. Providing warmth and light can also help speed up the germination process.
Read more: How Long Does It Take Millet To Germinate
Monitoring Kale Germination Progress
Once you have sown your kale seeds and provided the ideal conditions for germination, it’s important to monitor the progress of germination. This allows you to identify any potential issues early on and make necessary adjustments. Here are some key points to keep in mind when monitoring kale germination:
- Patience is key: Germination takes time, and it’s important to be patient. While kale seeds typically take around 5 to 10 days to germinate, it’s not uncommon for it to take up to 14 days. Resist the temptation to dig up the seeds or disturb the soil, as this can disrupt the germination process.
- Observe the appearance of seedlings: Look for signs of sprouting seedlings. As the seeds germinate, you should start seeing tiny green shoots emerging from the soil. These delicate seedlings will begin to grow and develop their first set of true leaves.
- Check for uniformity: Assess the consistency of germination across your containers or garden rows. If you notice uneven or patchy germination, it could indicate issues with factors such as temperature, moisture, or seed quality. Take note of any areas that may require additional attention or adjustment.
- Monitor moisture levels: Regularly check the moisture level of the soil. While it’s important to keep the soil moist, overwatering and waterlogged soil can lead to the rotting of seeds or the damping off of seedlings. Use your fingers to lightly touch the soil’s surface to gauge its moisture content.
- Assess seedling growth: As the seedlings continue to grow, evaluate their overall health and vigor. Look for strong stems, vibrant green leaves, and steady growth. If you notice weak or leggy seedlings, it could indicate a lack of light or other issues with the growing conditions.
- Maintain temperatures: Ensure the temperature remains within the optimal range for kale germination. Extreme temperature fluctuations can affect germination and seedling development. Use a thermometer to monitor the temperatures in your growing area and make adjustments if necessary.
By regularly monitoring the germination progress of your kale seeds, you can identify any issues or concerns early on and take appropriate actions to address them. This allows you to give your kale seedlings the best chance of growing into healthy and robust plants. Now, let’s move on to the next section – troubleshooting common germination problems.
Troubleshooting Common Germination Problems
Although kale is generally an easy plant to grow, sometimes germination issues can arise. Understanding and troubleshooting common germination problems can help you overcome challenges and ensure successful seed sprouting. Here are some common issues you may encounter and possible solutions:
- Poor or uneven germination: If you notice that only a few seeds have germinated or that germination is patchy, it could be due to factors such as improper moisture levels, temperature fluctuations, or poor seed quality. Ensure that the soil is consistently moist but not waterlogged. Double-check that the temperature remains within the optimum range. If poor seed quality is suspected, consider using fresh, high-quality seeds from a reputable supplier.
- Damping off disease: Damping off is a fungal disease that can affect seedlings, causing them to wilt and die. To prevent damping off, make sure that your containers and tools are clean and sterilized before use. Avoid overwatering and ensure good air circulation around the seedlings. If damping off occurs, remove the affected seedlings and adjust watering practices to prevent further spread.
- Seedling legginess: Leggy seedlings occur when the stem grows long and weak due to insufficient light. To prevent leggy seedlings, provide adequate light as soon as the seedlings emerge. Position grow lights close to the seedlings or move them to a location with bright, indirect sunlight. This will encourage sturdy growth and prevent stretching.
- Seed rot or fungal infections: In some cases, seeds may rot or be affected by fungal infections before they have a chance to germinate. To prevent this, make sure to use well-draining soil, avoid overwatering, and maintain proper air circulation around the seedlings. If you notice any signs of rot or fungal infections, remove the affected seeds or seedlings and adjust your watering practices.
- Insect pests: Some insect pests, such as aphids or flea beetles, can feed on kale seedlings and hinder their growth. Keep an eye out for any signs of pest infestation, such as holes in the leaves or the presence of pests, and take appropriate measures to control them. This can include using organic insecticidal soaps, introducing beneficial insects, or using physical barriers like row covers.
Remember, garden challenges are a part of the growing process, and it’s important to stay observant and proactive in addressing them. By troubleshooting and taking appropriate actions, you can overcome germination problems and ensure healthy kale seedlings. Next, let’s explore the exciting stage of harvesting kale from your germinated seeds.
Harvesting Kale from Germinated Seeds
After patiently nurturing your kale seedlings from germination, the time will come to reap the rewards and harvest your delicious kale leaves. Here are some tips to guide you through the process of harvesting kale:
- Wait for maturity: Kale plants typically reach maturity in approximately 55 to 75 days after germination, depending on the variety. The leaves should be large and firm, with vibrant colors.
- Choose the right time of day: It’s best to harvest kale in the morning when the leaves are crisp and hydrated. This ensures maximum freshness and flavor.
- Pick the outer leaves: Harvest kale by plucking the outer leaves first, starting from the bottom of the plant. This allows the inner leaves to continue growing and ensures a continuous supply of fresh kale throughout the season.
- Use a sharp pair of scissors: To harvest kale leaves, use clean and sharp garden scissors or shears. Cut the leaves near the base of the stem, just above the leaf’s attachment point to the main stalk. Avoid cutting the central growing point or crown as this allows the plant to continue producing new leaves.
- Harvest young and tender leaves: If you prefer more tender kale leaves, harvest them when they are young and small. These baby kale leaves are perfect for salads or adding to smoothies.
- Continue harvesting regularly: As your kale plants continue to grow, regularly harvest mature leaves as needed. This not only promotes further growth but also prevents the plant from becoming overcrowded, which can lead to disease and pest issues.
- Store properly: After harvesting, gently rinse the kale leaves with cool water and pat them dry. Store the leaves in a plastic bag or airtight container in the refrigerator. Properly stored, kale can stay fresh for up to a week.
- Consider succession planting: To ensure a continuous supply of fresh kale, consider succession planting. Start new seeds every few weeks or transplant new seedlings to replace the harvested plants. This way, you can enjoy fresh kale throughout the growing season.
Remember, harvesting kale from your germinated seeds is a satisfying experience. Enjoy the fruits of your labor by incorporating the nutrient-rich kale into various recipes and dishes, from salads and stir-fries to soups and smoothies. Experiment with different cooking methods and flavors to find your favorite way to enjoy this versatile leafy green.
With proper harvesting practices, you can enjoy the abundant and nutritious harvest from your kale plants. Now, let’s conclude our journey through kale germination and harvesting.
Conclusion
Congratulations on completing your journey through kale germination and harvesting! By understanding the process of kale germination, considering the factors that affect germination time, and creating the ideal conditions, you have set yourself up for success in growing your own kale plants.
From selecting high-quality seeds to providing the right temperature, moisture, and soil quality, you have learned how to optimize kale germination. Monitoring the germination progress and troubleshooting common issues have equipped you with the knowledge to overcome challenges that may arise along the way.
As your kale seeds sprout and develop into seedlings, you have witnessed the transformation from tiny seeds to vibrant and healthy plants. Harvesting the mature leaves allows you to enjoy the fresh and nutritious benefits of kale in your culinary endeavors.
Remember, gardening is a continuous learning process, and each experience brings new insights and opportunities for growth. By practicing proper care, regular monitoring, and harvesting practices, you can reap the rewards of your hard work and enjoy an abundant supply of kale throughout the growing season.
So, whether you choose to enjoy kale in salads, sautés, or smoothies, you can take pride in knowing that you played a role in cultivating this nutrient-packed superfood from seed to table.
Happy gardening and may your kale plants flourish and nourish you for years to come!
Frequently Asked Questions about How Long Does Kale Take To Germinate
Was this page helpful?
At Storables.com, we guarantee accurate and reliable information. Our content, validated by Expert Board Contributors, is crafted following stringent Editorial Policies. We're committed to providing you with well-researched, expert-backed insights for all your informational needs.

0 thoughts on “How Long Does Kale Take To Germinate”