Home>Garden Essentials>How Often To Water Seeds After Planting
Garden Essentials
How Often To Water Seeds After Planting
Modified: March 24, 2024
Discover the best watering schedule for your garden seeds after planting. Maximize growth and germination with expert tips from experienced gardeners.
(Many of the links in this article redirect to a specific reviewed product. Your purchase of these products through affiliate links helps to generate commission for Storables.com, at no extra cost. Learn more)
Introduction
Welcome to the world of gardening! Whether you’re a seasoned horticulturist or a beginner with a green thumb, understanding the proper watering practices for seeds is essential for successful plant growth. Seeds are delicate and require specific care in the early stages of development. Knowing how often to water seeds after planting is crucial to ensure their survival and promote healthy growth.
Proper watering techniques are key to providing seeds with the right amount of moisture without causing waterlogging or dehydration. In this article, we will dive into the factors that affect watering frequency and provide you with a comprehensive guide on watering seeds at each stage of their growth.
By following this guide, you will be equipped with the knowledge to make informed decisions about watering your seeds, leading to robust and vibrant plants.
Key Takeaways:
- Proper watering is crucial for seed growth. Factors like soil type, temperature, and humidity affect watering needs. Adjust watering based on environmental conditions for healthy plants.
- Overwatering and underwatering can harm seeds. Look for signs like wilting, dry soil, and slow growth. Adjust watering to keep seeds healthy and thriving.
Understanding the Water Needs of Seeds
Before we delve into watering schedules and frequencies, it’s crucial to understand the water needs of seeds. Seeds are essentially dormant and dehydrated until they encounter the right conditions for germination. Water acts as a catalyst that triggers the process of germination by penetrating the seed coat and activating enzymes necessary for growth.
Seeds require a balance of moisture to germinate successfully. Too much water can lead to rot and fungal diseases, while too little water can inhibit germination and drying out of the seed. The specific water needs vary depending on the type of seed, environmental conditions, and growth stage.
Furthermore, different types of seeds have varying levels of water retention capacity. For instance, larger seeds tend to hold more water compared to smaller ones. Understanding the characteristics of the seeds you are planting will help you determine the optimal watering routine.
Monitoring and adjusting the moisture levels in the soil is critical throughout the seed’s growth journey. By keeping an eye on the moisture content, you can ensure that the seeds receive the necessary water for healthy growth without over- or under-watering them.
Now that we have a better understanding of the water needs of seeds, let us explore the various factors that can affect the frequency of watering.
Factors Affecting Watering Frequency
The frequency of watering seeds after planting can vary depending on several factors. These factors influence how quickly or slowly the soil dries out, impacting the need for additional watering. By understanding these factors, you can better gauge when and how often to water your seeds. Here are some key factors to consider:
- Soil Type: The type of soil plays a significant role in the water-holding capacity. Sandy soils drain quickly, requiring more frequent watering, while clay soils retain moisture for longer periods, necessitating less frequent watering.
- Temperature: Higher temperatures can cause soil to dry out more rapidly, leading to increased watering needs. Conversely, cooler temperatures may slow down evaporation, reducing the frequency of watering.
- Humidity: Humidity levels can influence the rate at which moisture evaporates from the soil. In drier climates, watering may need to be more frequent to compensate for the low humidity.
- Rainfall: The amount of rainfall in your area can affect the need for additional watering. If you’ve recently experienced heavy rainfall, the soil may retain moisture for longer, requiring less frequent watering.
- Planting Depth: The depth at which the seeds are planted can impact their exposure to moisture. Seeds planted closer to the surface may dry out faster, necessitating more frequent watering.
- Plant Size: The size of the plant can also affect its watering needs. Young seedlings have smaller root systems and require more frequent, shallow watering until they establish stronger roots.
These factors are not exclusive, and it’s important to consider them collectively when determining how often to water your seeds. Regularly observe the moisture levels in the soil and adjust your watering schedule accordingly to meet the specific needs of your plants.
Watering Schedule Immediately After Planting
Proper watering immediately after planting is crucial for seed germination and establishment. During this period, the seeds are taking in moisture and initiating the growth process. Here are some guidelines to follow for the watering schedule after planting seeds:
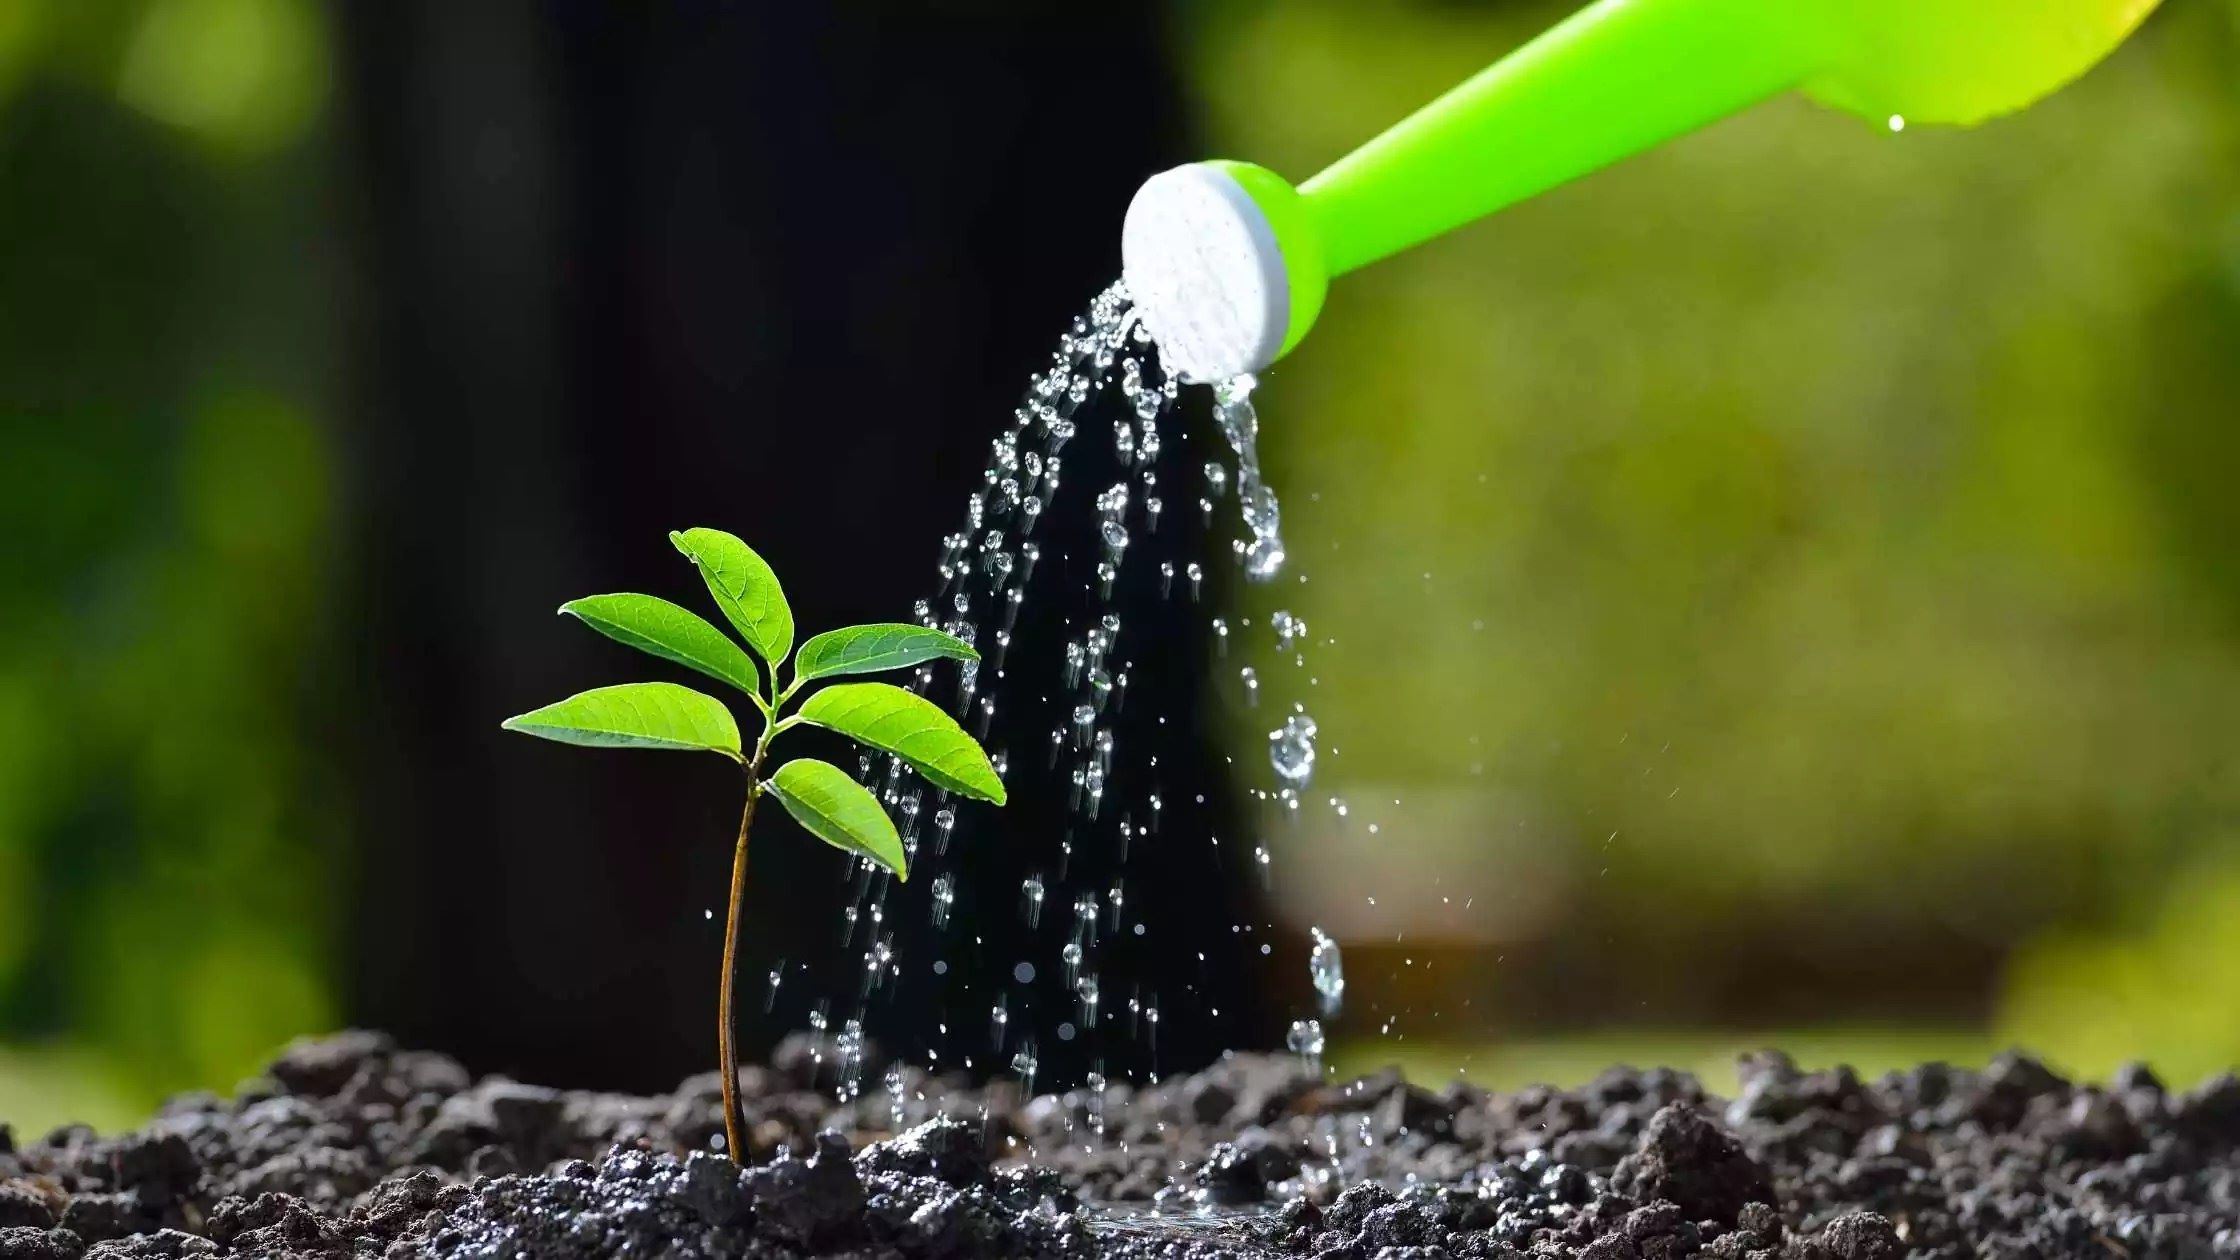
1. Initial Watering: After planting the seeds, it is essential to give them a thorough initial watering. This helps settle the soil and ensures good seed-to-soil contact. Water the planting area gently but deeply, allowing the water to penetrate the soil.
2. Moisture Check: After the initial watering, monitor the soil moisture levels. Check the top inch of the soil by sticking your finger into the soil. If it feels dry, it’s time to water again. If it feels slightly moist, it’s best to wait before watering.
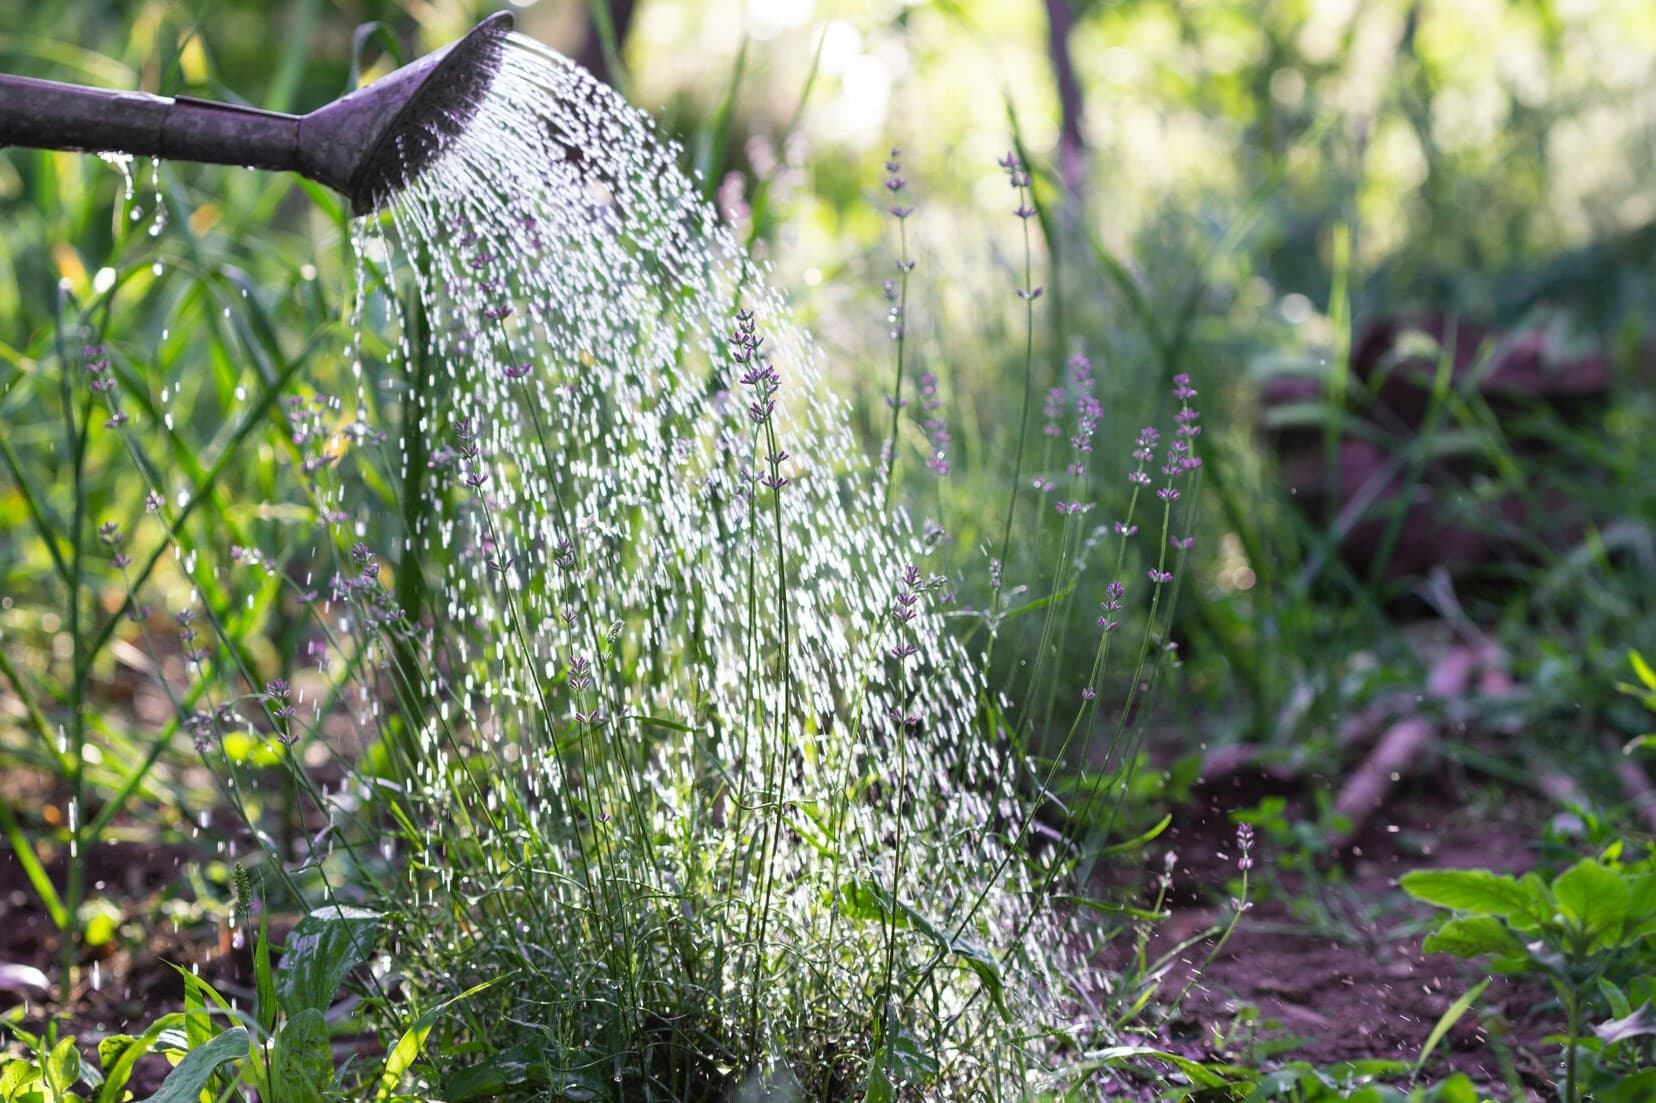
3. Watering Method: When watering immediately after planting, it’s important to use a gentle watering method to avoid disturbing the seeds. Consider using a misting nozzle or a gentle shower setting on your watering can to provide a light and even coverage.
4. Avoid Overwatering: One common mistake is overwatering seeds immediately after planting. Remember that seeds need adequate moisture, but excessive water can lead to rotting and fungal growth. Aim for consistent moisture rather than saturated soil.
5. Adjusting Based on Soil Type: The watering schedule immediately after planting may differ depending on the soil type. If you have sandy soil, you may need to water more frequently to prevent it from drying out too quickly. For clay soil, be careful not to overwater as it retains moisture for longer periods.
6. Be Mindful of Seed Depth: Consider the planting depth of the seeds when determining the watering schedule. Seeds planted closer to the surface may dry out faster and require more frequent watering compared to those planted deeper in the soil.
Remember to maintain a balance between not letting the soil dry out completely and avoiding waterlogged conditions. By following this watering schedule immediately after planting, you provide the seeds with the moisture they need to germinate and kickstart their growth journey.
Watering Frequency During Germination Period
The germination period is a critical phase in a seed’s life cycle. During this stage, the seed absorbs water, softens, and begins to sprout. Providing the right amount of water is essential for successful germination. Here are some guidelines for watering frequency during the germination period:
1. Keep the Soil Moist: It’s crucial to keep the soil consistently moist during the germination period. This means that the top layer of soil should not dry out completely. Dry soil can inhibit the germination process and cause the seeds to die. Regularly check the moisture level, especially during hot and dry conditions.
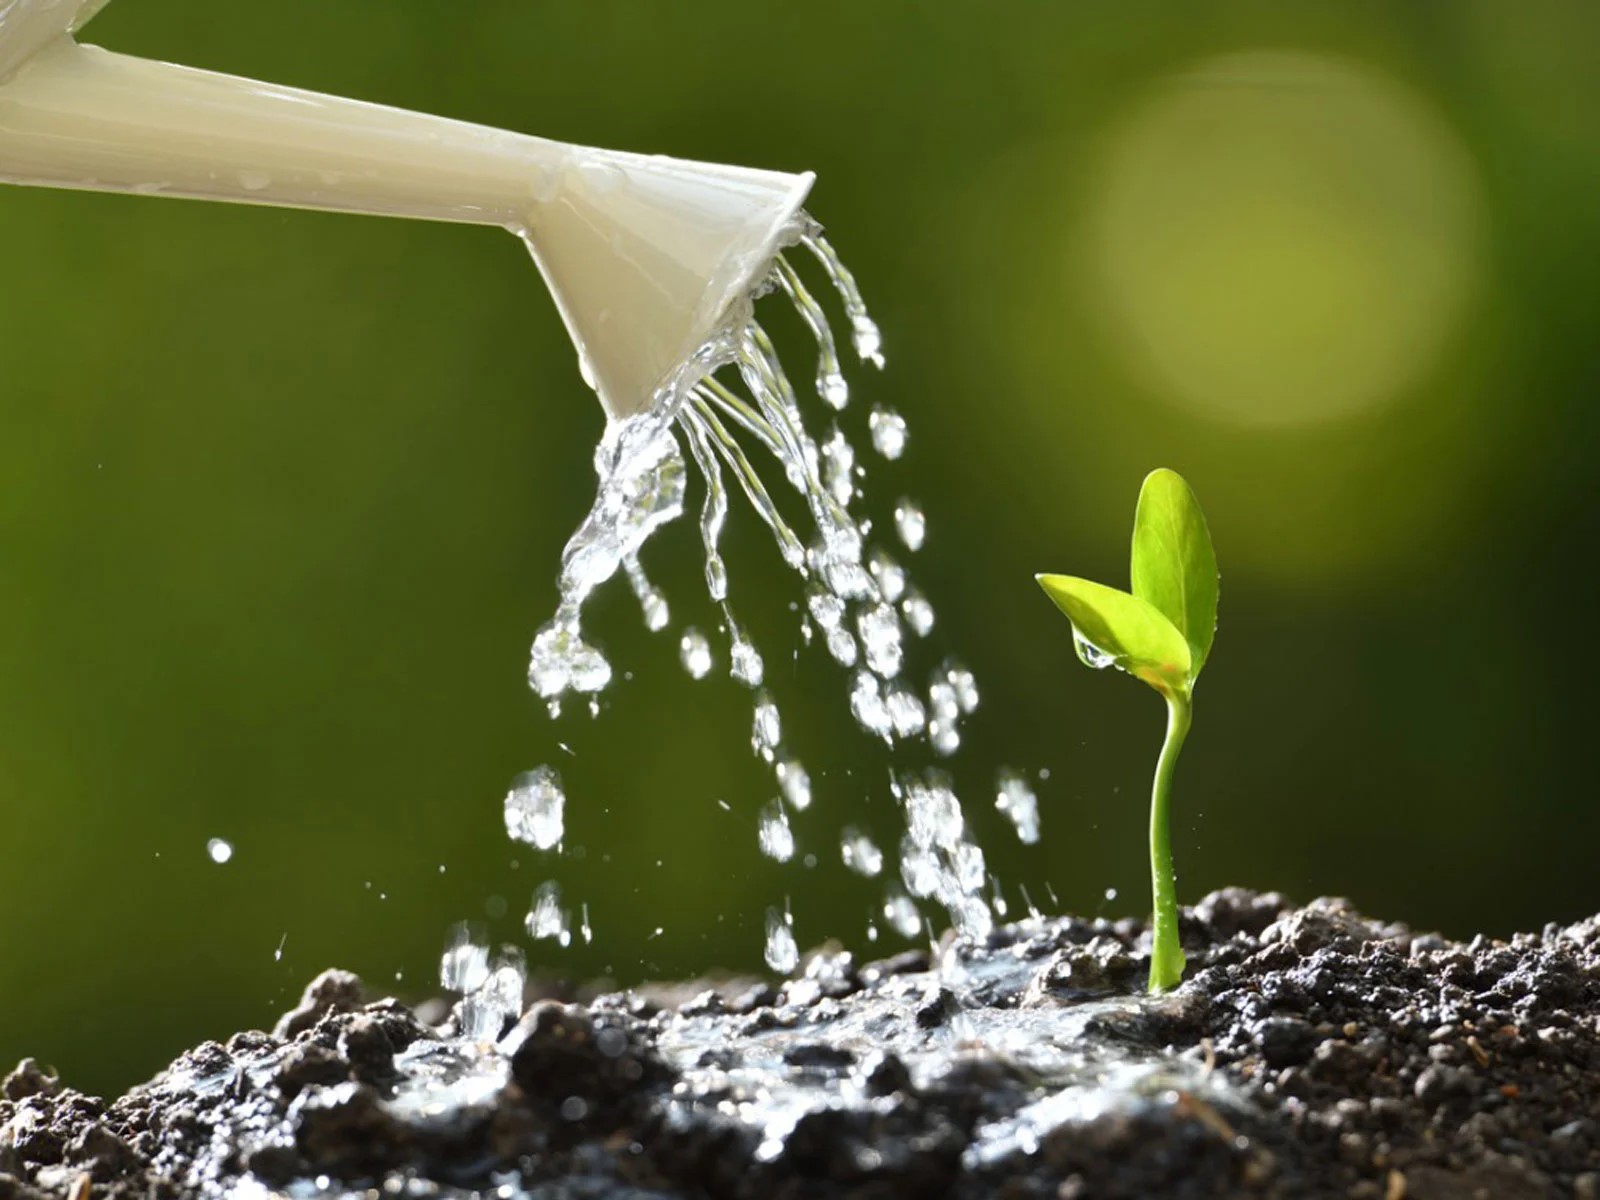
2. Watering Method: When watering during the germination period, it’s important to be gentle to prevent displacing or damaging the young emerging seedlings. Consider using a misting nozzle or a gentle shower setting on your watering can to provide a light, even mist of water.
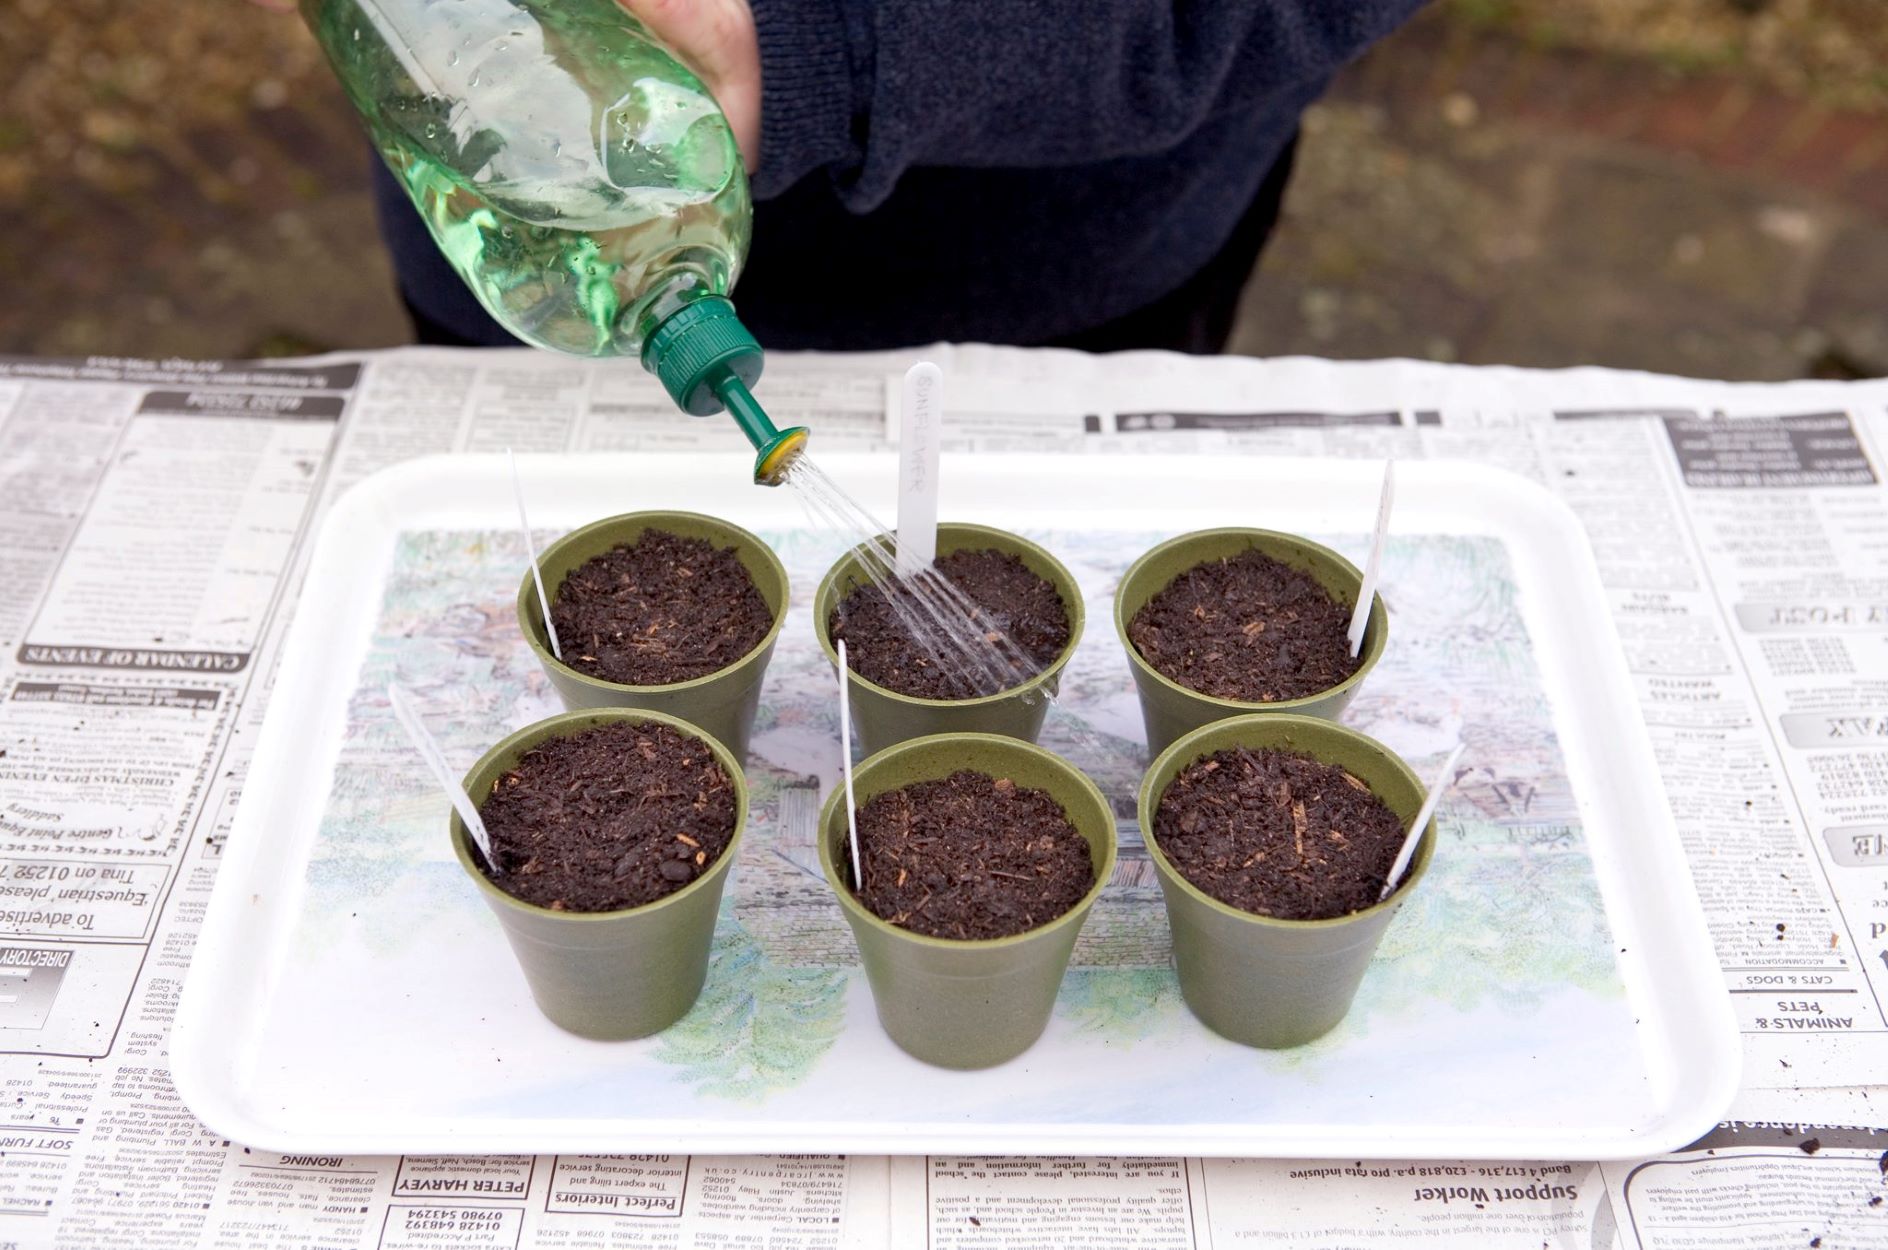
3. Water from the Bottom: Another effective way to provide moisture to seeds during germination is by watering from the bottom. Place the seed tray or container in a shallow tray filled with water, allowing the soil to absorb moisture from the bottom through capillary action. This method helps prevent overwatering and reduces the risk of disturbing the delicate seedlings.
4. Adjusting Based on Soil Type: The watering frequency during the germination period may vary depending on the soil type. Sandy soils tend to dry out more quickly and may require more frequent watering, while clay soils retain moisture for longer and may need less frequent watering. Monitor the moisture level and adjust as needed.
5. Be Cautious of Overwatering: While it’s important to keep the soil moist during germination, be cautious not to overwater. Excessive water can lead to rot or fungal diseases, which can harm or kill the emerging seedlings. Aim for even moisture, not soaking wet soil.
6. Monitor for Seedling Emergence: Once the seedlings start emerging, adjust the watering frequency accordingly. As the seedlings grow, they will require more water to support their growth. Gradually increase the watering amount while ensuring the soil doesn’t become waterlogged.
By maintaining an optimal watering frequency during the germination period, you provide the seeds with the necessary moisture for successful sprouting and healthy seedling development.
Read more: How Often To Water Grass Seed
Watering Frequency During Seedling Stage
As your seeds progress into the seedling stage, their root systems will develop and become more robust. This stage is a crucial period for establishing strong and healthy plants. Proper watering during the seedling stage is vital to support their growth. Here are some guidelines for watering frequency during the seedling stage:
1. Monitor Moisture Levels: Regularly check the moisture levels of the soil to ensure it remains consistently moist. Use your finger to feel the top inch of soil and water when it begins to dry out. Avoid allowing the soil to become bone dry or overly saturated.
2. Water Deeply and Infrequently: Instead of lightly sprinkling the soil, water deeply to encourage the seedlings’ roots to grow deeper. This helps establish a strong root system. However, be cautious not to water too frequently as it can lead to waterlogging and root rot.
3. Adjust Based on Environmental Conditions: Environmental conditions, such as the temperature and humidity levels, can influence the watering needs of seedlings. During hot and dry weather, increased watering may be required to prevent the soil from drying out too quickly. Conversely, in cooler and more humid conditions, less frequent watering may be necessary.
4. Time of Day: Watering in the early morning or late afternoon is ideal during the seedling stage. This allows the plants to absorb the water before the heat of the day and reduces the risk of evaporation. Avoid watering in the evening to prevent prolonged leaf wetness, which can increase the chances of disease development.
5. Avoid Overwatering: Overwatering can be detrimental to seedlings, causing root rot and stunted growth. Ensure that the soil is moist but not waterlogged. Adjust the amount of water based on individual plant needs and environmental factors.
6. Mulching: Consider applying a layer of organic mulch around the base of the seedlings. Mulch helps to conserve soil moisture, reduce weed competition, and regulate soil temperature. This can help maintain a more consistent moisture level and reduce the frequency of watering.
By adhering to a proper watering frequency during the seedling stage, you provide the young plants with the necessary moisture for their growth while encouraging the development of a strong and resilient root system.
Water seeds immediately after planting to ensure the soil is moist. After that, water lightly every day or every other day to keep the soil consistently moist but not waterlogged. Adjust based on the specific needs of the plant.
Watering Frequency During Established Growth
As your plants transition from the seedling stage to established growth, their watering needs may change. At this stage, the roots have spread and the plant is actively growing and producing foliage, flowers, or fruits. Here are some guidelines for watering frequency during the established growth phase:
1. Soil Moisture Check: Regularly monitor the moisture levels in the soil to determine when watering is necessary. Check the soil’s moisture content by inserting your finger or a soil moisture meter about 1-2 inches deep. Water when the topsoil feels dry to the touch.
2. Deep Watering: To encourage the plants’ roots to grow deeper into the soil, water deeply and thoroughly. This promotes a strong and extensive root system. Apply enough water to penetrate the root zone, which is typically 6-12 inches deep, depending on the plant’s size and root structure.
3. Watering Infrequently: Instead of watering lightly and frequently, aim to water less often but more deeply. This encourages the roots to reach deeper for water, making the plants more resilient to drought. However, be cautious not to let the soil dry out completely between waterings.
4. Adjust Based on Environmental Factors: Consider the prevailing environmental conditions when determining the watering frequency. Hot and dry weather conditions may require more frequent watering, while cooler and wetter periods may necessitate less frequent watering. Adapt your watering schedule to accommodate these factors.
5. Time of Day: Watering early in the morning is generally recommended during the established growth phase. This allows the plants to absorb the water before the heat of the day, minimizing water loss through evaporation. Avoid watering in the evening to prevent extended leaf wetness, which can promote disease development.
6. Mulching: Apply a layer of organic mulch around the base of the plants. Mulch helps to conserve soil moisture by reducing evaporation and insulating the soil, regulating soil temperature. This can help maintain a more consistent moisture level and reduce the frequency of watering.
7. Observe Plant Health: Pay attention to the overall health and appearance of your plants. Wilting or yellowing leaves can be signs of underwatering, while excessively drooping or yellowing leaves may indicate overwatering. Adjust the watering frequency accordingly to ensure the plants receive the appropriate amount of water.
By following these guidelines for watering frequency during the established growth phase, you can provide your plants with the necessary moisture to thrive and produce a bountiful harvest or vibrant display of flowers.
Signs of Overwatering Seeds
While water is essential for seed germination and growth, overwatering can pose a threat to the health and survival of your seeds. It’s important to recognize the signs of overwatering to prevent damage and adjust your watering practices accordingly. Here are some common signs of overwatering seeds:
1. Yellowing or Wilting Seedlings: One of the initial signs of overwatering is the yellowing or wilting of seedlings. When roots are constantly submerged in saturated soil, they can suffocate and develop root rot. This leads to a lack of oxygen uptake, causing the seedlings to wilt or turn yellow.
2. Stunted Growth: Overwatered seeds often exhibit stunted growth. The excess moisture prevents the roots from establishing a healthy and robust root system, inhibiting the overall growth of the plant. Seedlings may appear smaller and fail to develop as quickly as they should.
3. Mold or Fungal Growth: Overwatering creates a damp and humid environment that is favorable for mold and fungal growth. If you notice mold or fungus on the soil surface or on the seedlings themselves, it may be an indication of excess moisture. Fungal diseases can cause further damage to the seeds and seedlings.
4. Rotting or Decaying Seeds: Overwatered seeds are prone to rotting or decaying. Excess moisture can cause the seed coat to become soft and mushy, leading to seed deterioration. If you discover seeds that are mushy or disintegrating, it’s a sign of overwatering.
5. Foul Odor: A strong, unpleasant odor emanating from the soil can be an indication of overwatering. Excessive moisture creates anaerobic conditions, causing the growth of bacteria that produce foul-smelling gases. If you detect a pungent odor coming from your seedlings, it’s likely a result of overwatering.
6. Waterlogged Soil: If the soil remains perpetually saturated and does not drain properly, it’s a clear sign of overwatering. You may observe standing water or a soggy, muddy texture of the soil. This indicates that the soil is unable to absorb or drain excess moisture.
By being attentive to these signs, you can identify and address overwatering issues promptly. Adjusting your watering practices and providing proper drainage can help prevent the detrimental effects of overwatering, promoting healthier seed growth and development.
Signs of Underwatering Seeds
While overwatering can harm seeds, underwatering is equally problematic and can hinder their growth and development. It’s essential to recognize the signs of underwatering to ensure your seeds receive adequate moisture for germination and healthy growth. Here are some common signs of underwatering seeds:
1. Wilting Seedlings: One of the most obvious signs of underwatering is the wilting of seedlings. When there is insufficient moisture in the soil, the plants cannot uptake water through their roots. This leads to drooping or wilting of the seedlings, as they are unable to maintain turgidity.
2. Dry and Cracked Soil: Insufficient watering often results in dry and cracked soil. When the soil lacks moisture, it dries out and contracts, causing visible cracks on the surface. This is a telltale sign that the seeds are not receiving enough water to sustain their growth.
3. Slow or Delayed Growth: Underwatered seeds may exhibit slow or delayed growth. Without enough moisture, the seeds struggle to germinate and establish themselves. As a result, seedlings may appear smaller and weaker and may take longer to develop fully.
4. Yellowing or Browning Leaves: Inadequate water supply can cause the leaves of seedlings to turn yellow or brown. This happens as the plant attempts to conserve water by shedding older or damaged leaves. This is a defense mechanism, indicating that the seedlings are under stress due to insufficient moisture.
5. Brittle or Dry Seedlings: Underwatered seedlings may become brittle or excessively dry to the touch. Without enough water, their tissues become dehydrated, causing the seedlings to become fragile and prone to breaking easily.
6. Slow or Uneven Germination: Insufficient moisture can significantly impact the germination process. Underwatered seeds may experience delayed or uneven germination, with some seeds failing to sprout at all. This is because the lack of moisture hinders the enzymatic processes necessary for seed viability and growth.
7. Dull or Lackluster Appearance: Inadequate water can result in a dull or lackluster appearance of seedlings. They may appear wilted, weak, and lacking vibrancy. This is due to the stress the plants experience when deprived of the necessary moisture for photosynthesis and overall health.
By being observant and addressing signs of underwatering promptly, you can provide your seeds with the appropriate amount of water needed for healthy germination and growth. Adjusting your watering practices to ensure consistent soil moisture can help prevent the detrimental effects of underwatering and promote successful seedling development.
Read more: How Often To Water Outdoor Plants?
Adjusting Watering Frequency Based on Environmental Conditions
Watering frequency for seeds should not be a rigid schedule but rather adjusted based on the prevailing environmental conditions. Environmental factors play a crucial role in determining the rate at which moisture evaporates from the soil and the overall water requirements of your plants. By considering these conditions, you can optimize your watering regimen. Here’s how to adjust watering frequency based on environmental conditions:
1. Temperature: High temperatures increase evaporation rates, leading to faster soil drying. On hot days, you may need to water more often to compensate for the increased water loss. Conversely, during cooler periods, the soil retains moisture for longer, requiring less frequent watering. Observe the weather forecast and adjust watering accordingly.
2. Humidity: Humidity affects how quickly plants lose moisture through transpiration. In areas with low humidity, water evaporates faster from the soil, necessitating more frequent watering. In contrast, regions with high humidity retain moisture better, allowing for less frequent watering. Be aware of the humidity levels in your area and adjust watering accordingly.
3. Rainfall: The amount of rainfall your garden receives directly affects your watering routine. If you experience heavy rainfall, it may reduce the need for additional watering. Monitor rainfall levels and adjust watering frequency accordingly, avoiding waterlogging the soil.
4. Wind: Wind can accelerate moisture evaporation from the soil and plant surfaces. Strong winds may dry out the soil faster, leading to increased watering needs. Consider providing windbreaks or placing plants in sheltered areas to minimize water loss caused by wind exposure.
5. Soil Type: Different soil types have varying water-holding capacities. Sandy soil drains quickly and may require more frequent watering, while clay soil retains moisture for longer, necessitating less frequent watering. Understanding your soil type helps you determine the ideal watering frequency for your plants.
6. Drought Conditions: In times of drought or water restrictions, it’s crucial to reduce water usage. Prioritize plants based on their water needs and focus on essential watering. Consider using water-saving techniques such as mulching and drip irrigation to conserve moisture in the soil.
7. Plant Needs: Different plants have varying water requirements. Some plants prefer moist soil, while others thrive in drier conditions. Consider the specific needs of your plants and adjust watering frequency accordingly. Grouping plants with similar water requirements together can help streamline your watering routine.
By adapting your watering frequency based on environmental conditions, you can ensure your plants receive the appropriate amount of water. Regularly observe the moisture levels in the soil and the overall health of your plants to fine-tune your watering practices and promote optimal growth and productivity.
Conclusion
Understanding the proper watering practices for seeds is crucial for successful plant growth. By following the guidelines outlined in this article, you can ensure that your seeds receive the right amount of moisture at each stage of their development. Here’s a quick recap of what we’ve covered:
Firstly, it’s important to understand the water needs of seeds. Seeds require a balance of moisture to germinate successfully, and different factors such as soil type, temperature, and humidity can affect their watering requirements.
We discussed the watering schedule immediately after planting, emphasizing the need for thorough initial watering and monitoring soil moisture levels regularly. We also highlighted the importance of adjusting watering frequencies based on environmental conditions such as temperature, rainfall, and plant size.
Throughout the germination period and seedling stage, maintaining consistent moisture levels is vital. We provided tips on how to achieve this, including misting or bottom watering techniques. We also emphasized the need to be cautious of both overwatering and underwatering, as they can cause damage to the seeds and young plants.
As your plants enter the established growth phase, adjusting the watering frequency based on factors such as soil moisture, environmental conditions, and plant needs becomes crucial. Deep watering and allowing the soil to partially dry out between waterings can promote stronger root systems and healthier plant growth.
Lastly, we discussed the signs of overwatering and underwatering, enabling you to identify and address any watering issues promptly. Understanding these signs can help prevent damage to your plants and optimize their overall health.
Remember, gardening is both an art and a science, and finding the right balance of water for your seeds and plants might require some trial and error. Observe your plants closely, monitor soil moisture levels, and adjust your watering practices accordingly. With time, practice, and careful attention, you’ll develop a deeper understanding of your plants’ water needs.
By implementing the watering guidelines provided in this article, you can help your seeds thrive, ensuring healthy growth, vibrant blooms, and a bountiful harvest in your garden.
Frequently Asked Questions about How Often To Water Seeds After Planting
Was this page helpful?
At Storables.com, we guarantee accurate and reliable information. Our content, validated by Expert Board Contributors, is crafted following stringent Editorial Policies. We're committed to providing you with well-researched, expert-backed insights for all your informational needs.
0 thoughts on “How Often To Water Seeds After Planting”