Home>Garden Essentials>How To Plant A Rooftop Garden
Garden Essentials
How To Plant A Rooftop Garden
Modified: March 7, 2024
Learn how to plant a vibrant and sustainable rooftop garden with our step-by-step guide. Create your own urban oasis with our expert tips and tricks.
(Many of the links in this article redirect to a specific reviewed product. Your purchase of these products through affiliate links helps to generate commission for Storables.com, at no extra cost. Learn more)
Introduction
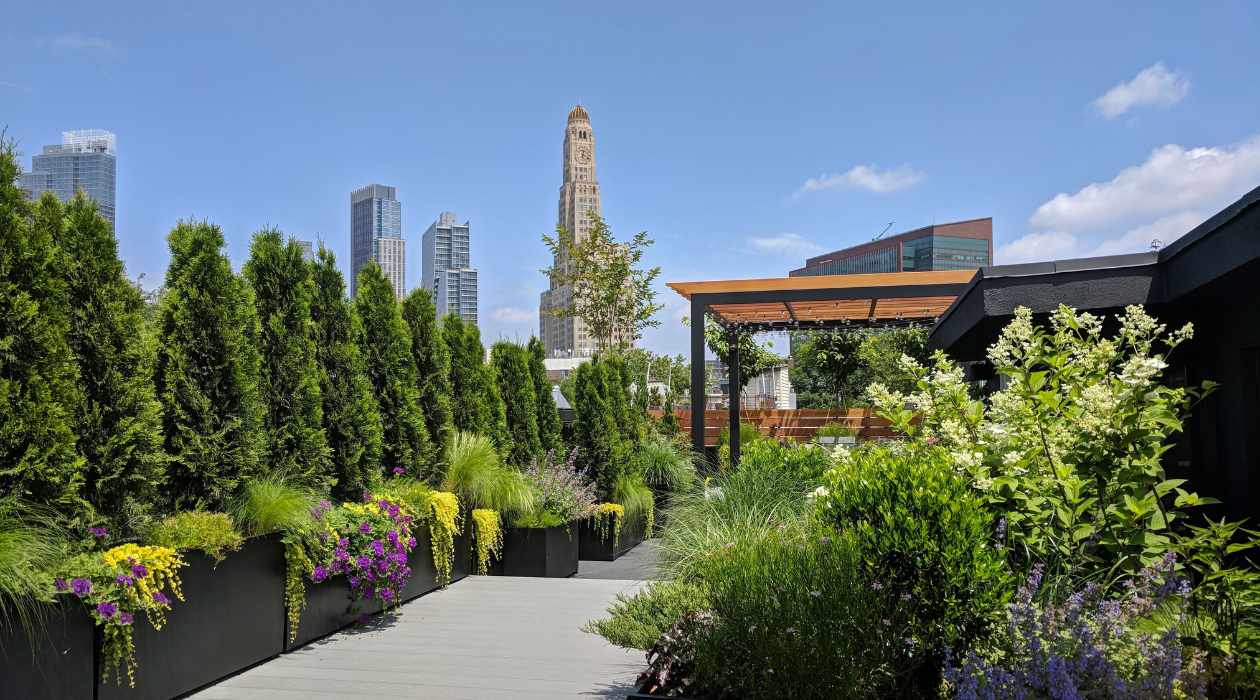
Welcome to the world of rooftop gardening! If you have a rooftop space that is currently unused or underutilized, why not transform it into a beautiful and functional garden? Rooftop gardening is not only a great way to make the most of limited space but also helps to improve the aesthetic appeal of your property, promote sustainability, and even provide a source of fresh produce. Whether you live in an urban area with limited green spaces or simply want to create a serene retreat in the heart of the city, a rooftop garden can be a perfect solution.
Creating a rooftop garden may seem like a daunting task, but with the right knowledge and planning, it can be a rewarding and enjoyable experience. In this article, we will guide you through the process of planting a rooftop garden, from choosing the right location to selecting suitable plants and maintaining your garden throughout the seasons.
Before embarking on your rooftop gardening journey, it is essential to understand the unique considerations and challenges that come with gardening at height. From weight limitations and sunlight exposure to drainage and soil preparation, these factors will determine the success of your rooftop garden.
Get ready to turn your rooftop into a vibrant oasis of greenery, where you can relax, unwind, and reconnect with nature. Let’s begin by exploring the first step in creating a rooftop garden – choosing the right location.
Key Takeaways:
- Transform your rooftop into a beautiful garden oasis by carefully choosing the right location, containers, and plants. With proper maintenance, your rooftop garden can thrive and provide a serene retreat in the heart of the city.
- Maintain a healthy rooftop garden by regularly watering, mulching, and fertilizing your plants. Keep an eye out for pests and diseases, and create a balanced and resilient ecosystem to enjoy the beauty of your rooftop garden.
Read more: How To Build A Rooftop Garden?
Choosing the Right Location
When it comes to rooftop gardening, selecting the right location is crucial for the success of your garden. Here are a few factors to consider when choosing the ideal spot:
- Weight Limit: Before starting your rooftop garden project, it is essential to assess the weight-bearing capacity of your rooftop. Green roofs can be considerably heavier than traditional roofs, especially when they are fully established. Consult with a structural engineer to determine if your roof can support the additional weight of a garden. Knowing the weight limit will help you plan the layout and select appropriate containers.
- Sunlight and Shade: Most plants require a minimum of six to eight hours of direct sunlight per day to thrive. Analyze the sunlight conditions on your rooftop at different times of the day and throughout the year. Take note of any shady areas created by nearby buildings, structures, or trees. This information will help you choose plants that are suitable for your rooftop’s specific lighting conditions.
- Accessibility: Consider the ease of access to your rooftop garden. If there is a convenient and safe way to reach the rooftop, it will make maintenance tasks, such as watering and pruning, much more manageable.
- Wind Exposure: Rooftops are often more exposed to wind than ground-level gardens. Strong winds can dry out plants quickly and may cause damage. Assess the wind patterns on your rooftop and select plants that can tolerate or are resistant to windy conditions.
- View and Privacy: Take advantage of any scenic views offered by your rooftop. Position seating areas, trellises, or tall plants strategically to maximize the view. Additionally, if privacy is a concern, consider adding trellises, screens, or tall plants to create a sense of seclusion.
By carefully considering these factors, you can choose a location that provides the ideal conditions for your rooftop garden to flourish. Now that you’ve selected the right location, let’s move on to the next step – determining the weight limit of your rooftop.
Determining the Weight Limit
Before you begin your rooftop garden project, it is essential to determine the weight capacity of your rooftop. Understanding the weight limit will ensure that you create a garden that is safe and does not exceed the structural capabilities of your building. Here’s how you can determine the weight limit:
- Consult a Structural Engineer: It is highly recommended to consult with a structural engineer who can assess the load-bearing capacity of your rooftop. They will have the expertise to evaluate the structural integrity of your building and provide you with the maximum allowable weight for your rooftop garden.
- Consider Load Distribution: Keep in mind that the weight of your rooftop garden will not be evenly distributed across the entire surface. Different areas of the roof may have different weight-bearing capacities. Take into account any load-bearing walls, columns, or beams that can support heavier elements of your garden, such as large containers or raised beds.
- Weigh Your Containers and Materials: Calculate the weight of the containers, soil, plants, and any other materials you will be using in your rooftop garden. Ensure that this total weight does not exceed the weight limit provided by the structural engineer. It is essential to factor in the weight of the saturated soil, as it can significantly increase the overall weight of your garden.
- Consider Accessibility and Maintenance: Keep in mind that you will need to access your rooftop garden for maintenance tasks such as watering, pruning, and harvesting. Take into account the weight of any equipment, furniture, or additional personnel that may be required during these activities.
- Err on the Side of Caution: It is always better to err on the side of caution and underestimate the weight capacity of your rooftop. This will ensure your safety and the long-term structural integrity of the building. If in doubt, consult with a professional engineer to reevaluate the weight limit and make any necessary adjustments to your garden plans.
By determining the weight limit of your rooftop, you can create a garden that is both visually stunning and structurally sound. Once you have established the weight capacity, you can move on to the next step – assessing the sunlight and shade conditions on your rooftop.
Assessing Sunlight and Shade
Understanding the sunlight and shade conditions on your rooftop is essential for selecting the right plants and ensuring their optimal growth. Here’s how you can assess the sunlight and shade levels:
- Observe Sun Patterns: Spend time on your rooftop at different times of the day to observe the sunlight patterns. Note where the sun rises and sets, as well as any obstructions that may block or filter the sunlight. Identify areas of your rooftop that receive direct sunlight for at least six to eight hours a day, as these are the prime spots for sun-loving plants.
- Consider Shade Sources: Take note of any structures, nearby buildings, or tall trees that cast shade on your rooftop garden. These will create varying levels of shade throughout the day. Understanding the different shade levels will help you choose plants that thrive in partial, dappled, or deep shade.
- Use a Sunlight Meter: Invest in a sunlight meter, also known as a light meter or a lux meter. This handy device measures the intensity of sunlight and can help you determine the amount of light your rooftop receives. Place the meter in different areas of your rooftop to get an accurate reading of the varying light levels.
- Consider Seasonal Changes: Keep in mind that the sunlight and shade patterns on your rooftop may vary throughout the year. Factors such as the angle of the sun during different seasons and the growth of nearby trees can affect the amount and duration of sunlight. Monitor these changes to adjust your plant selection accordingly.
- Choose the Right Plants: Based on your assessment of sunlight and shade, select plants that are well-suited to the lighting conditions of your rooftop garden. Sun-loving plants, such as tomatoes, peppers, and herbs, require direct sunlight, while shade-tolerant plants, like ferns, hostas, and impatiens, can thrive in areas with limited sunlight.
By assessing the sunlight and shade conditions on your rooftop, you can create a garden that is tailored to the specific lighting requirements of your chosen plants. Now that you have determined the sunlight and shade levels, it’s time to select suitable containers for your rooftop garden.
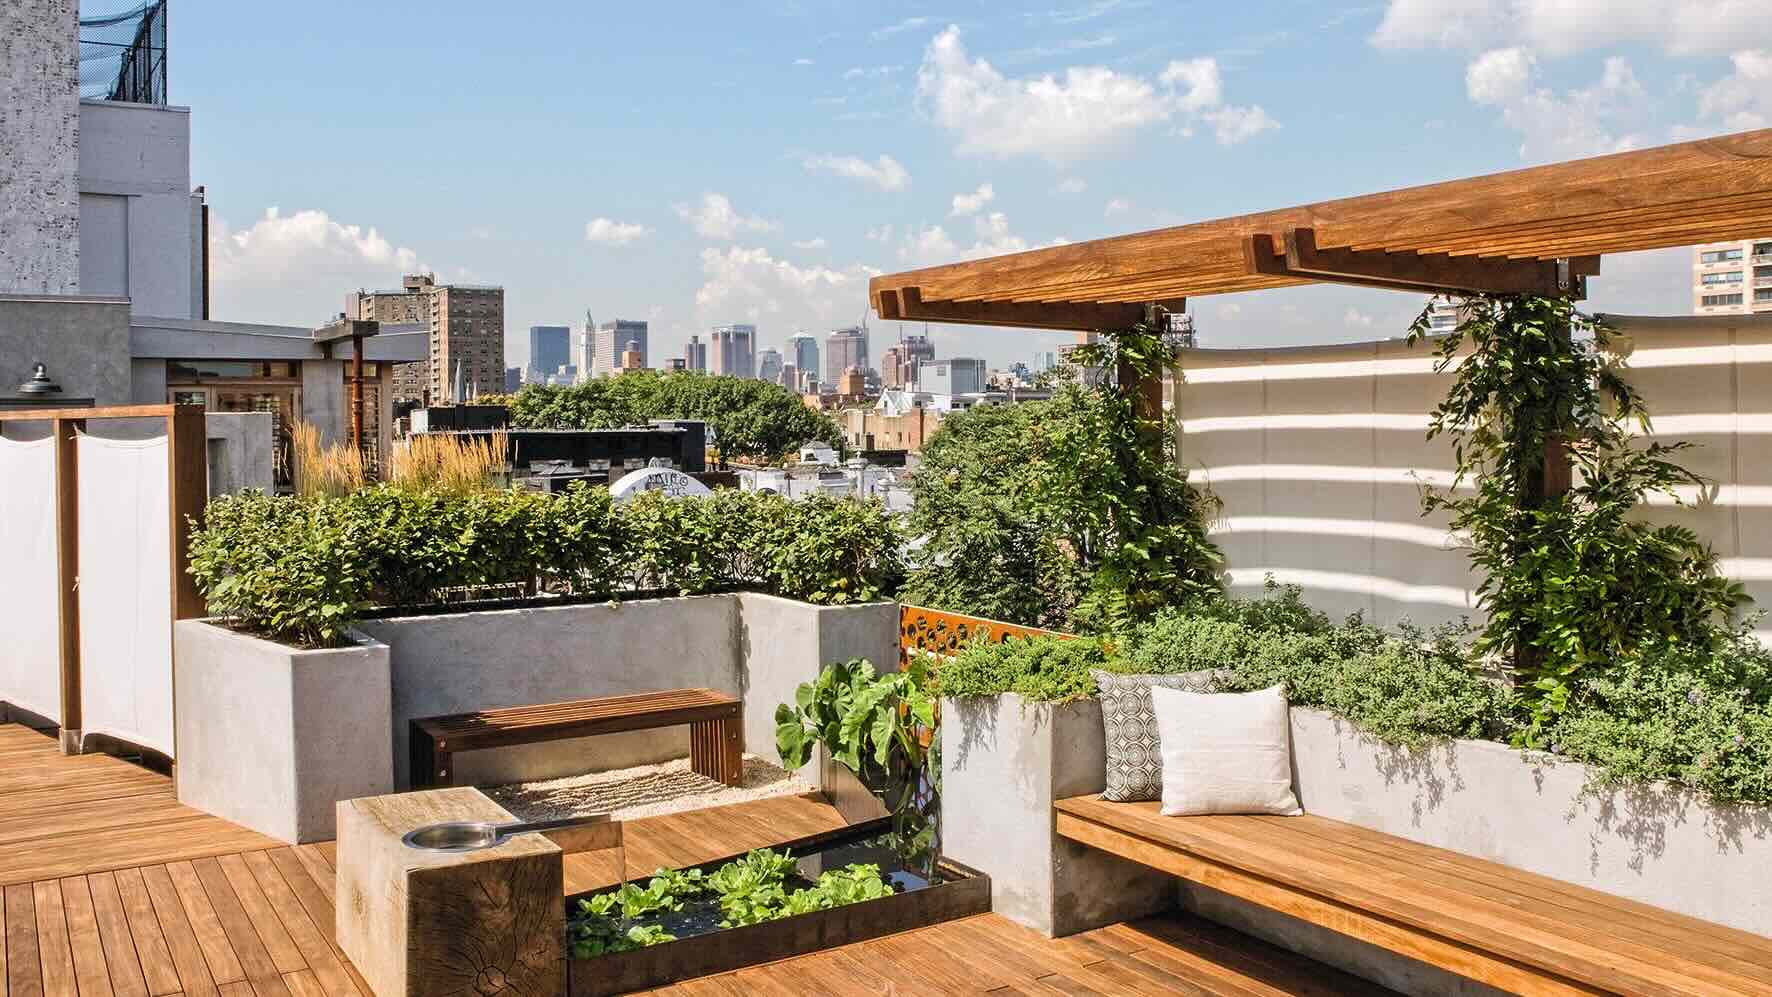
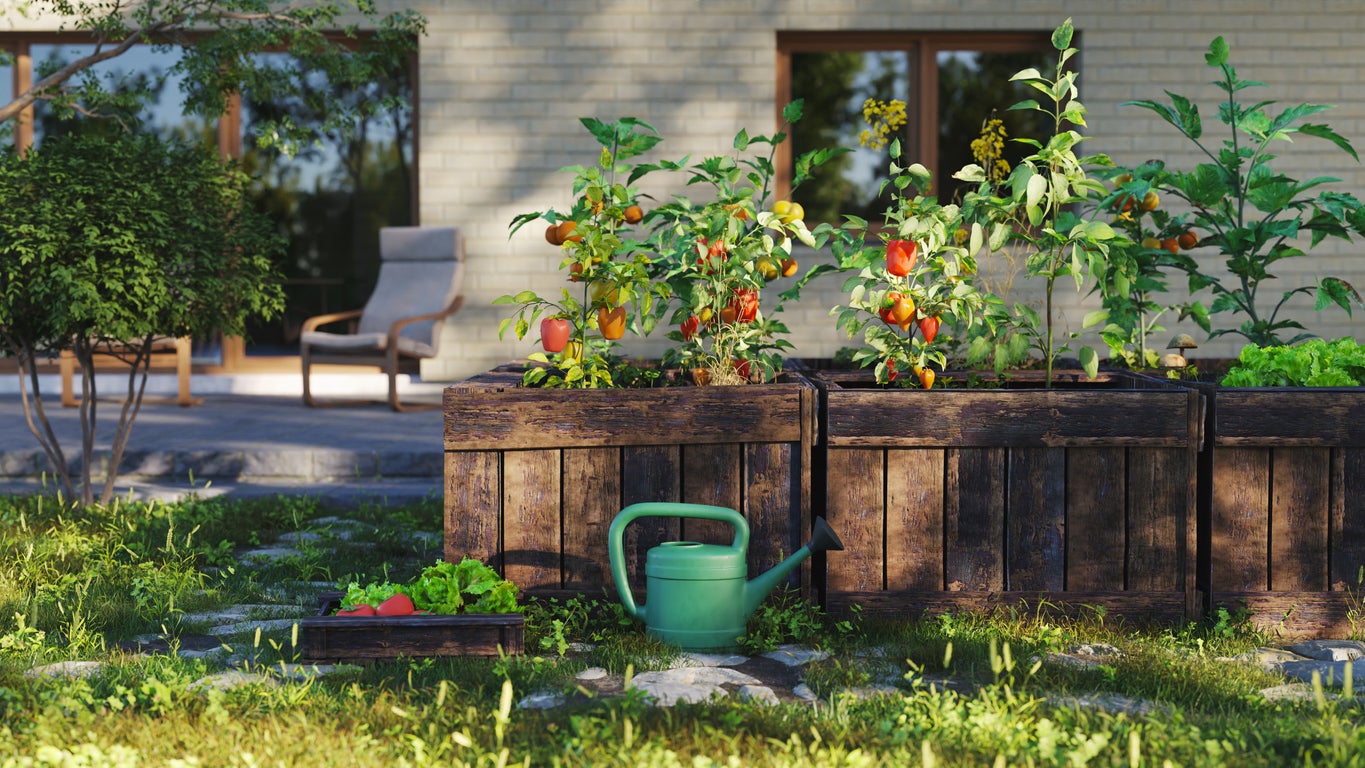
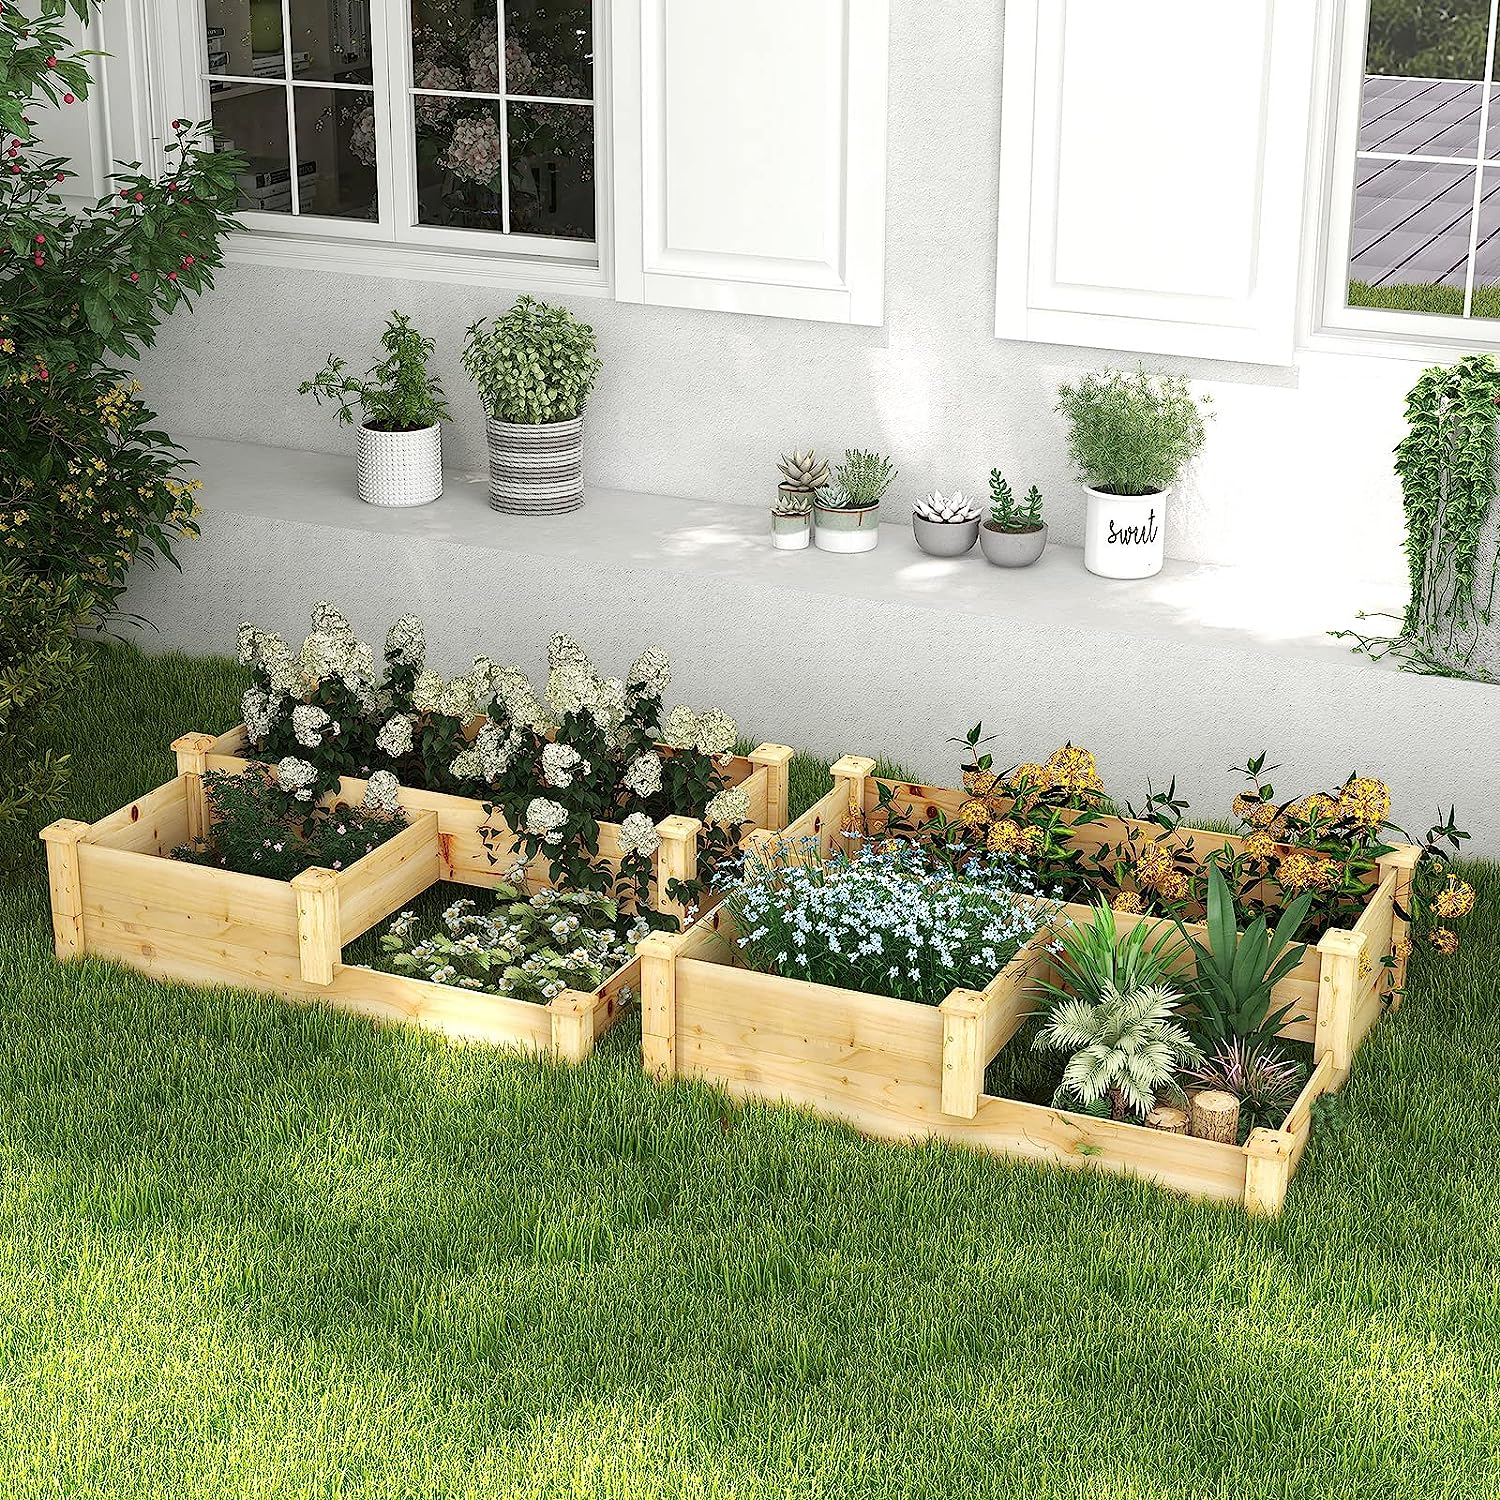
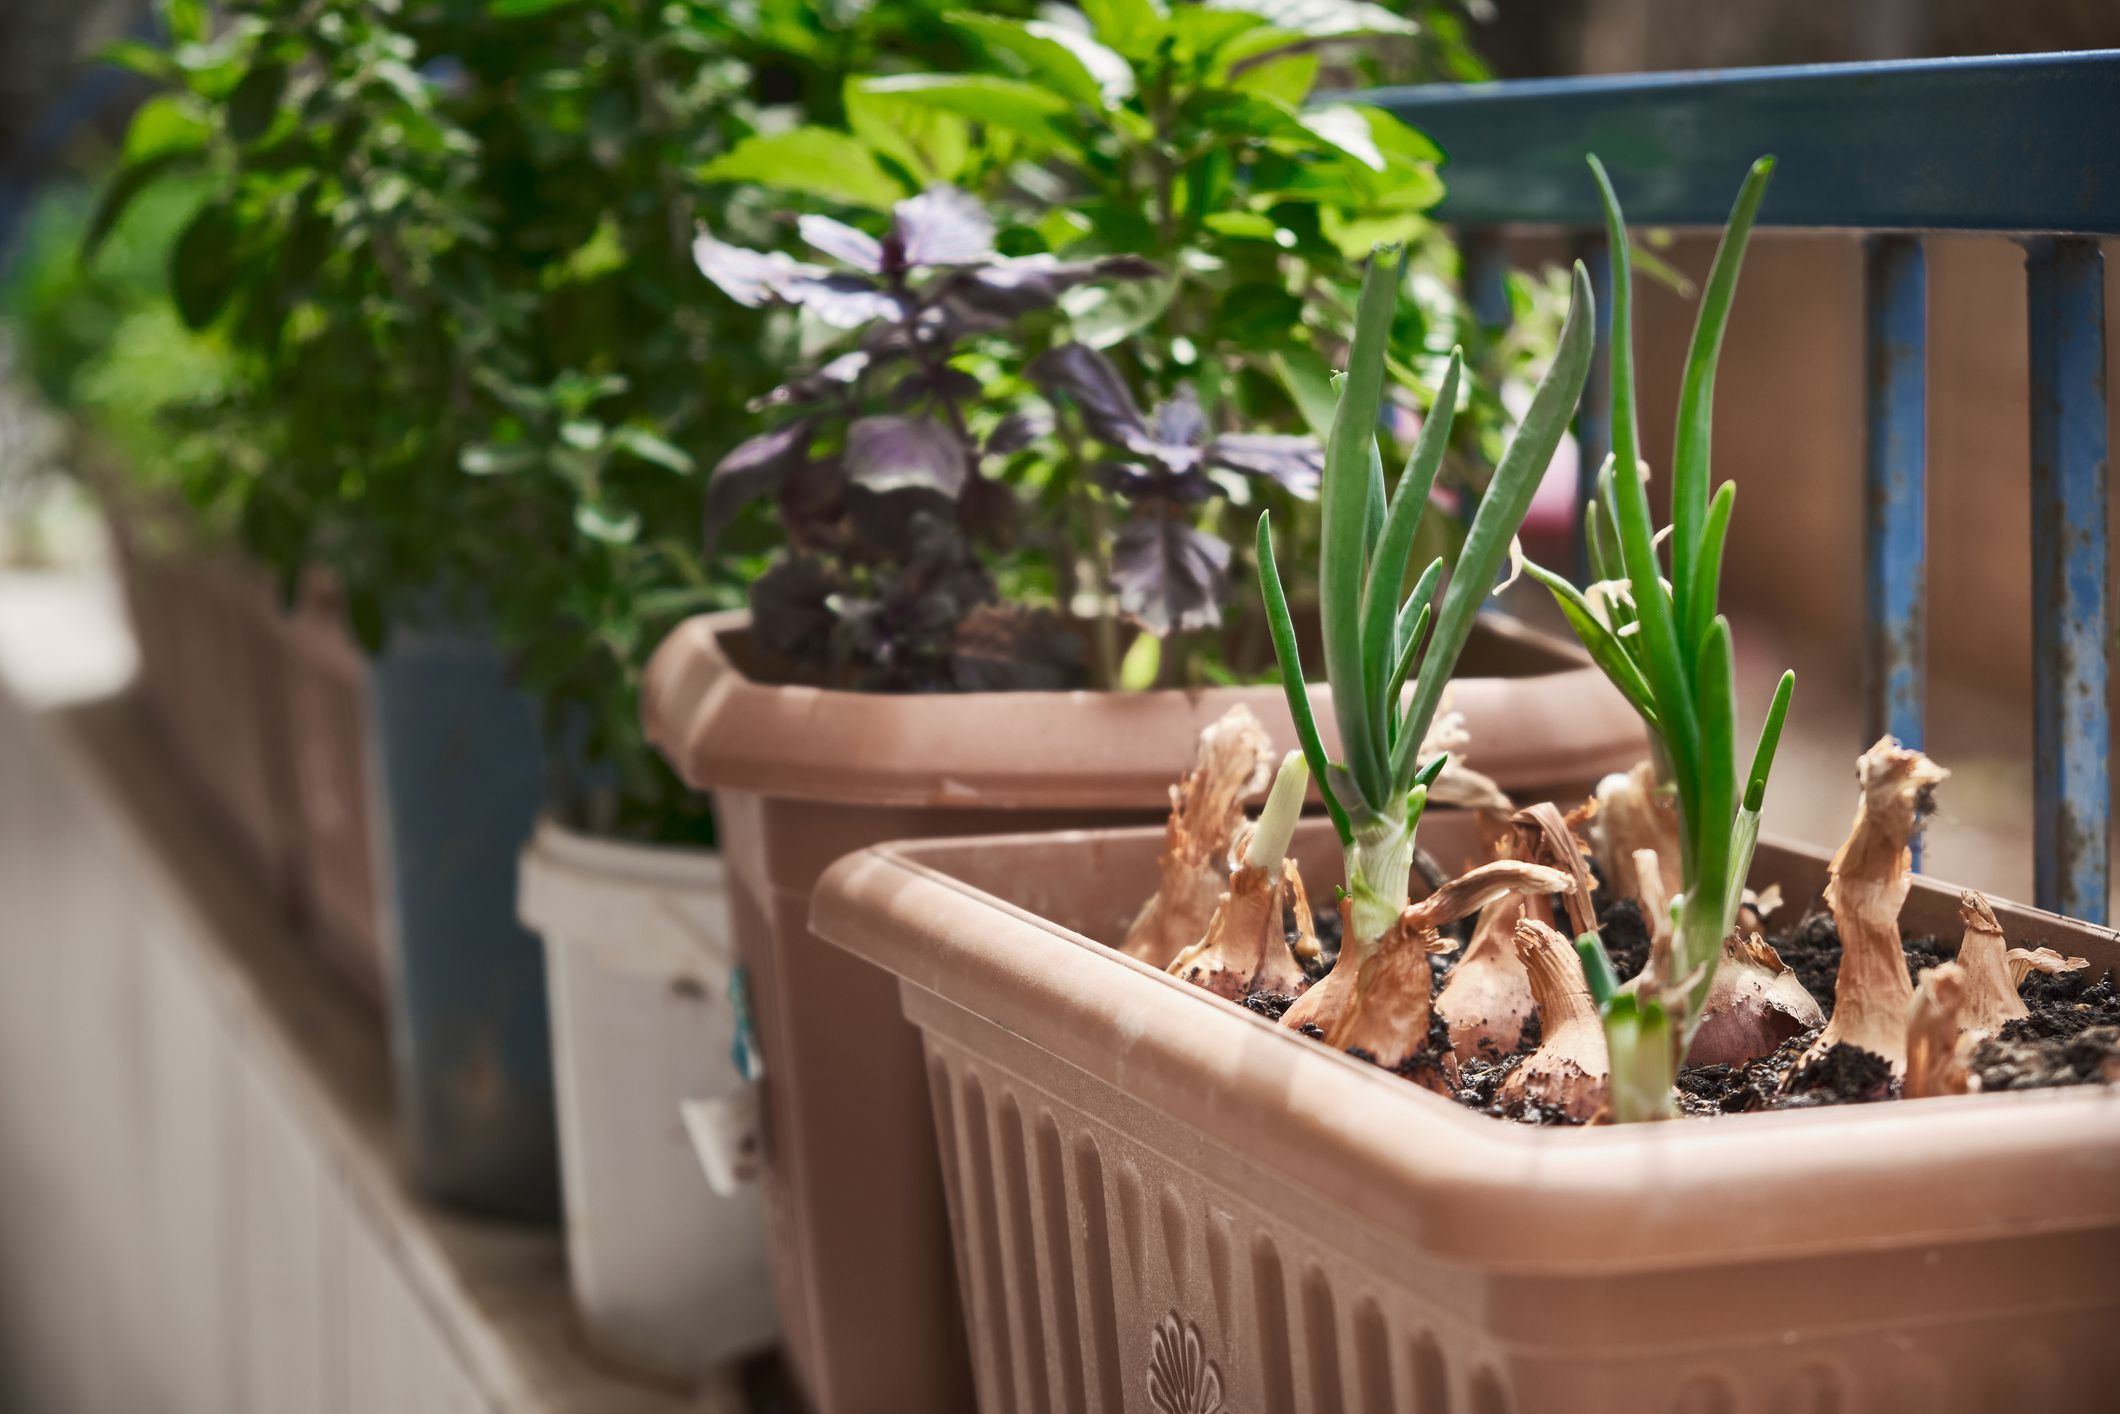
Selecting Suitable Containers
Choosing the right containers for your rooftop garden is essential for both functionality and aesthetics. Here are a few factors to consider when selecting suitable containers:
- Material: Containers come in various materials, including clay, ceramic, plastic, metal, and wood. Each material has its advantages and disadvantages. Clay and ceramic containers are porous and allow for better airflow, but they can be heavy. Plastic containers are lightweight and easy to move around, but they may not be as durable. Consider the pros and cons of each material and choose containers that suit your preferences and the specific needs of your rooftop garden.
- Drainage: Proper drainage is crucial for the health of your plants. Look for containers with drainage holes or the ability to add drainage holes. This will prevent excess water from accumulating and causing root rot. Placing a layer of rocks or gravel at the bottom of the container can also improve drainage.
- Size and Depth: The size and depth of the containers will determine the types and quantities of plants you can grow. Larger containers provide more room for root growth and allow for a greater variety of plants. Ensure that the containers are deep enough for the plant’s root system to establish and thrive.
- Weight and Mobility: Consider the weight of the containers, especially if you are limited by the weight capacity of your rooftop. Lightweight materials like plastic are easier to handle and move around if needed. If you choose heavier materials like clay or ceramic, ensure that they are placed strategically to distribute weight evenly and avoid overloading specific areas.
- Aesthetics: Remember to consider the overall look and feel you want to create in your rooftop garden. Choose containers that complement the style of your garden, whether it’s sleek and modern or rustic and eclectic. You can mix and match different containers to add visual interest and create a unique design.
By carefully selecting suitable containers, you can create a cohesive and functional rooftop garden. Once you have chosen the right containers, the next step is to prepare the roof surface to ensure a stable foundation for your garden.
Read more: How To Do A Rooftop Garden In NYC
Preparing the Roof Surface
Preparing the roof surface is a crucial step in creating a stable foundation for your rooftop garden. Here are the steps to follow when preparing the roof surface:
- Clean the Roof: Start by thoroughly cleaning the roof surface. Remove any debris, dirt, or existing vegetation that may hinder the proper installation of your garden. Sweep or use a leaf blower to clear away loose debris.
- Inspect for Damages: Inspect the roof for any damages or leaks. Repair any cracks, leaks, or structural issues before proceeding. It is important to ensure the roof is in good condition to support the weight of your garden and prevent water damage.
- Protect the Roof: To safeguard your roof against potential damage, consider adding a layer of protection. Install a root barrier or a waterproofing membrane to prevent the roots of your plants from penetrating the roof surface. This is especially important for green roofs or areas where plants will be directly planted in the soil.
- Consider Roof Slope: Take into account the slope of your rooftop when planning your garden. If your rooftop has a significant slope, it may affect water drainage and plant stability. Consider building raised beds or using containers with proper drainage to prevent soil erosion and slippage.
- Add a Protective Layer: To protect the roof surface and improve insulation, consider adding a protective layer like a geotextile fabric or a rubber mat. This will provide an additional buffer between the roof and the containers, reducing the risk of damage and heat transfer.
- Ensure Accessibility: Make sure there is a safe and convenient access point to your rooftop garden. Install stairs, a ladder, or a secure rooftop hatch to ensure ease of movement for maintenance and enjoyment of your garden.
By following these steps to prepare the roof surface, you can create a stable and secure foundation for your rooftop garden. Once the roof surface is prepared, it’s time to install a drainage system to manage excess water.
Installing Drainage Systems
Proper drainage is vital for the health and longevity of your rooftop garden. Installing an effective drainage system will help manage excess water and prevent waterlogging. Here are the steps to follow when installing drainage systems for your rooftop garden:
- Assess Existing Drainage: Evaluate the existing drainage system on your rooftop. Ensure that gutters, downspouts, and drains are clear of debris and functioning properly. If there are any issues with the existing drainage, repair or replace them before proceeding.
- Add Drainage Trays or Saucers: Place drainage trays or saucers beneath your containers to collect excess water that drains through the drainage holes. These trays will prevent water from seeping onto the roof surface and causing damage. Ensure that the trays have sufficient capacity to hold the excess water from your containers.
- Create Drainage Paths: To facilitate proper water flow, create drainage paths on your rooftop. These paths can be made by sloping the roof surface toward existing drains or installing gravel or pebble-filled trenches that direct water to the drains. This will help prevent water from pooling around your plants.
- Install Drainage Pipes: If your rooftop does not have adequate drainage, consider installing drainage pipes. These pipes will help carry excess water away from the rooftop and into a suitable drainage system. Consult with a professional contractor or plumber to determine the best location and design for your drainage pipes.
- Use Permeable Materials: Consider using permeable materials, such as gravel or porous paving, on your rooftop to enhance drainage. These materials allow water to seep through and can be installed in areas where water tends to accumulate or flow.
- Optimize Irrigation Systems: If you have an irrigation system in place, ensure that it is designed for efficient water usage and adequate drainage. Adjust the timing and frequency of watering to allow excess water to drain properly, preventing waterlogging.
By installing a proper drainage system, you can prevent water buildup and ensure the health of your plants. With the drainage system in place, the next step is to create a nutrient-rich soil mixture to support the growth of your rooftop garden.
Creating a Nutrient-rich Soil Mixture
A nutrient-rich soil mixture is essential for the success of your rooftop garden. Plants rely on healthy soil to provide them with the necessary nutrients and support their growth. Here’s how you can create a nutrient-rich soil mixture for your rooftop garden:
- Start with a Base: Begin by selecting a high-quality base material for your soil mixture. A combination of garden soil and compost is a common choice for rooftop gardens. Garden soil provides minerals and structure, while compost enriches the soil with organic matter and beneficial microorganisms.
- Add Organic Matter: Incorporate additional organic matter into your soil mixture to improve its fertility and moisture-retaining capacity. This can include well-rotted manure, leaf mold, or worm castings. Organic matter helps retain moisture, promotes aeration, and slowly releases nutrients to feed your plants.
- Mix in Perlite or Vermiculite: To enhance drainage and prevent soil compaction, mix in perlite or vermiculite. These lightweight materials help create air pockets in the soil, improving root health and overall plant growth. They also retain some moisture, reducing the risk of the soil drying out too quickly.
- Add Nutrient Supplements: Depending on the needs of your plants, you may want to incorporate nutrient supplements into your soil mixture. This can include organic fertilizers or slow-release granules. Follow the instructions on the packaging for the appropriate application rate and frequency.
- Consider pH Levels: The pH level of your soil is important for proper nutrient uptake by your plants. Most plants prefer a slightly acidic to neutral pH. Test the pH level of your soil and adjust it if necessary using organic amendments like lime or sulfur.
- Avoid Compacted Soil: Avoid using heavy clay soil in your rooftop garden, as it can become compacted and restrict proper root growth. If your native soil is heavy clay, consider amending it with sand or compost to improve its structure and drainage.
- Regularly Amend and Monitor: Over time, the soil in your rooftop garden may become depleted of nutrients. Regularly amend the soil with compost or organic matter to replenish nutrients and maintain a healthy soil structure. Additionally, monitor the moisture levels of your soil and adjust watering accordingly.
By creating a nutrient-rich soil mixture, you provide the foundation for healthy and thriving plants in your rooftop garden. With your soil mixture ready, it’s time to move on to the exciting step of choosing the right plants for your rooftop garden.
Choose lightweight containers and a well-draining soil mix for your rooftop garden. Consider the weight of the containers and soil when planning your garden to ensure the structure can support the load.
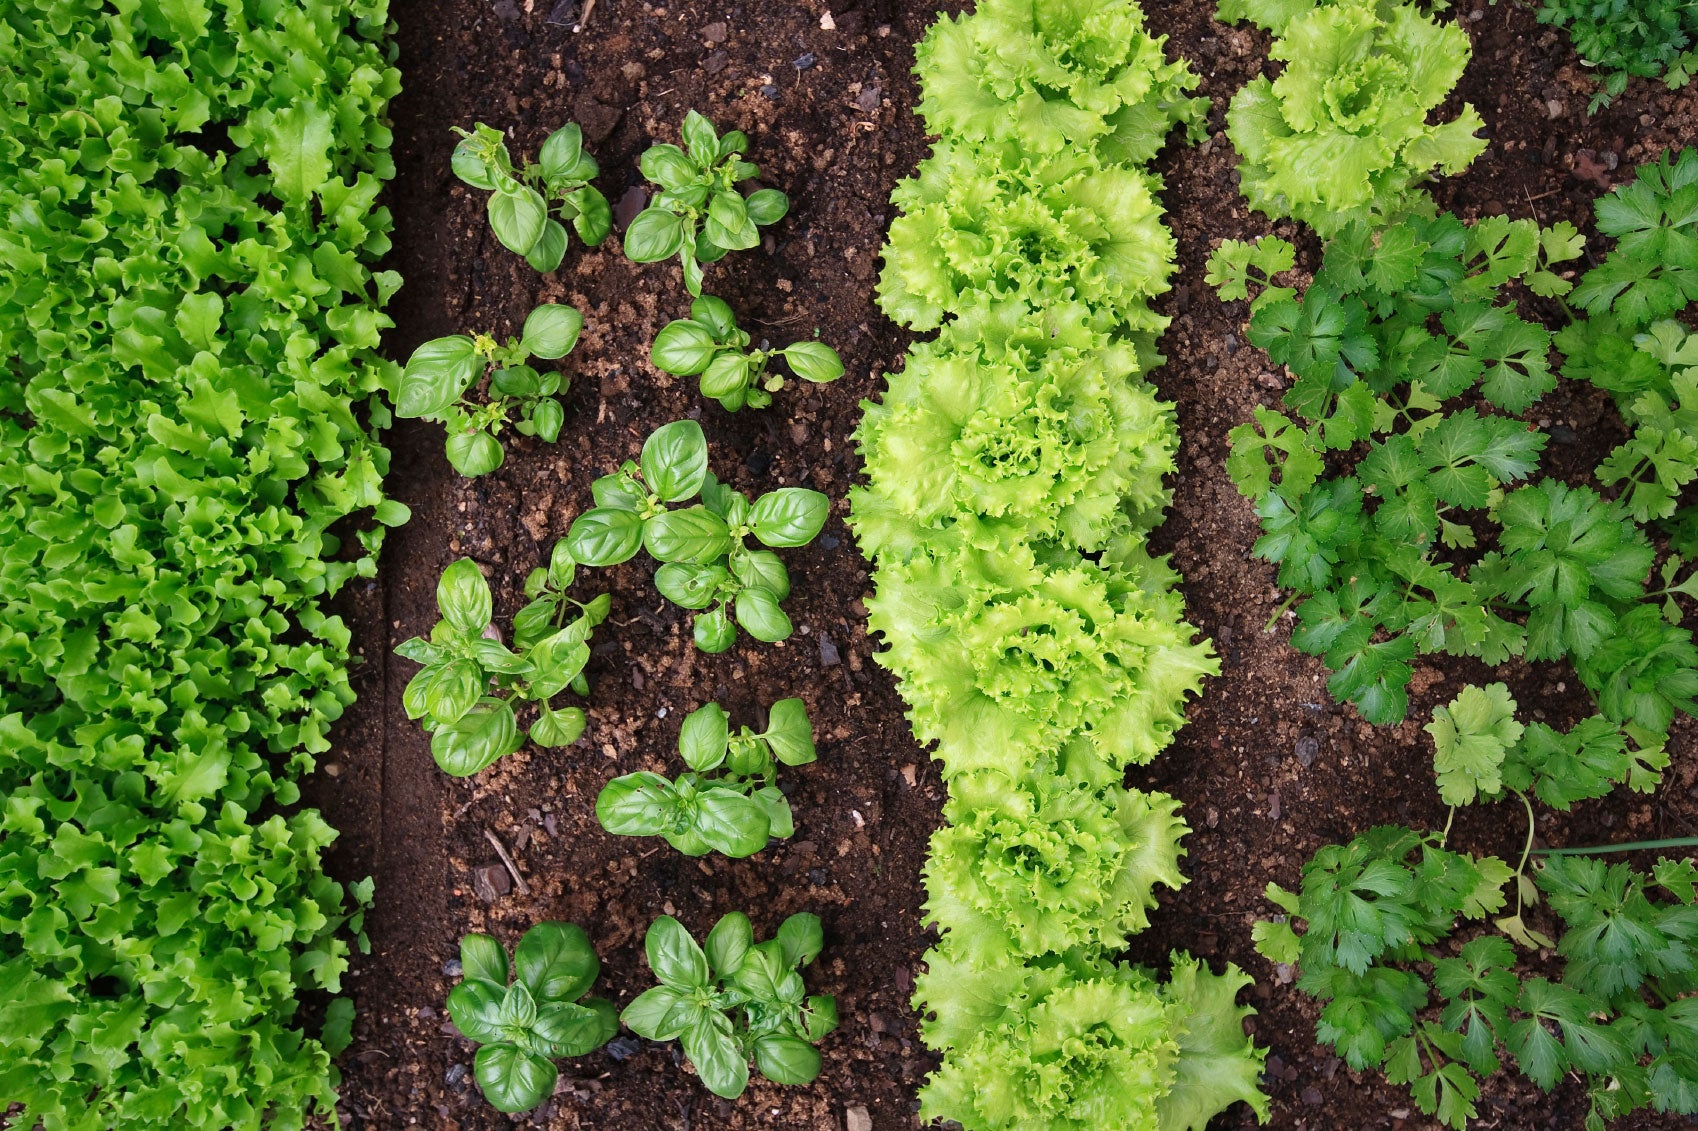
Choosing the Right Plants
Choosing the right plants is crucial for a successful and thriving rooftop garden. Consider the following factors when selecting plants for your rooftop garden:
- Climate and Hardiness: Take into account your local climate and the hardiness of plants. Choose plants that are well-suited to the temperature, rainfall, and sunlight conditions in your area. Consider heat-tolerant plants for rooftop gardens that experience intense sunlight and high temperatures, or cold-hardy plants for regions with harsh winters.
- Sun and Shade Requirements: Based on your assessment of the sunlight and shade conditions on your rooftop, select plants that thrive in the available light levels. Sun-loving plants like tomatoes, peppers, and succulents require direct sunlight for at least six to eight hours a day. Shade-tolerant plants like ferns, hostas, and begonias can thrive with limited sunlight.
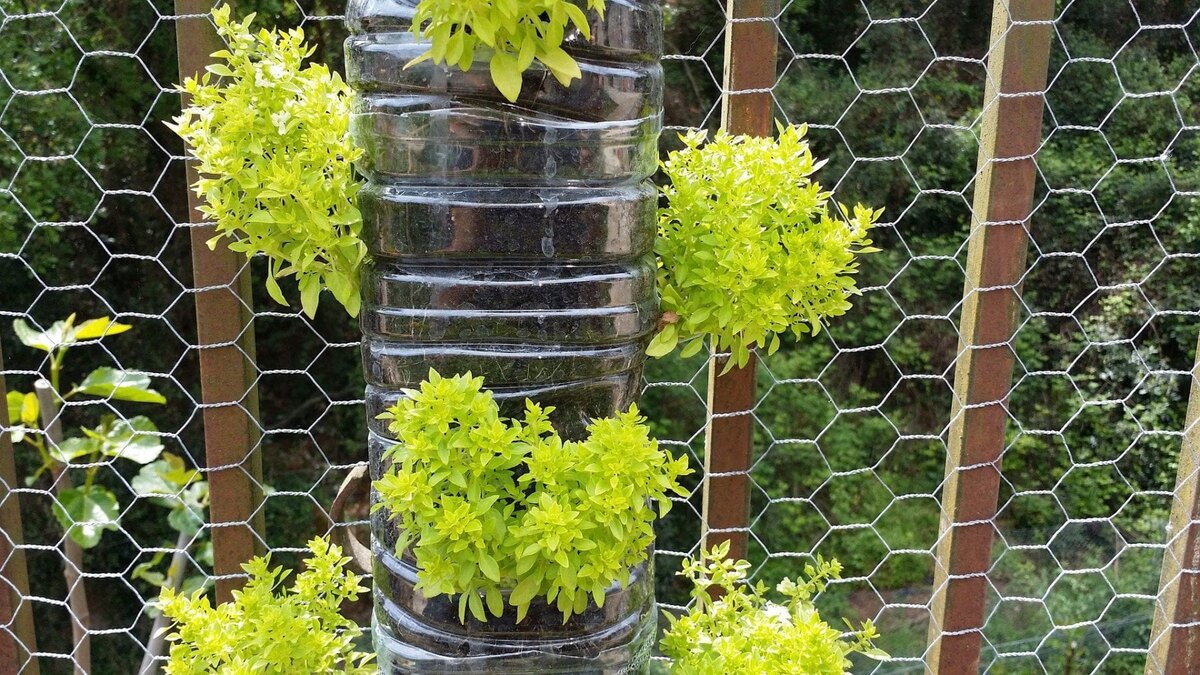
- Size and Growth Habit: Consider the available space on your rooftop and choose plants that are suitable for the size and growth habit you desire. Opt for compact varieties or dwarf cultivars if you have limited space. Additionally, consider vertical gardening techniques, such as trellises or hanging baskets, to maximize space utilization.
- Rooting System: Select plants with shallow or compact rooting systems for lightweight containers or areas with weight restrictions. Avoid plants with aggressive or extensive root systems that may damage the roof surface or invade neighboring containers.
- Drought Resistance: Rooftop gardens are often exposed to direct sunlight and can have higher evaporation rates. Choose plants that have a good tolerance for drought and are capable of conserving water. Native plants or succulents, like sedums and agaves, are excellent choices for water-wise rooftop gardens.
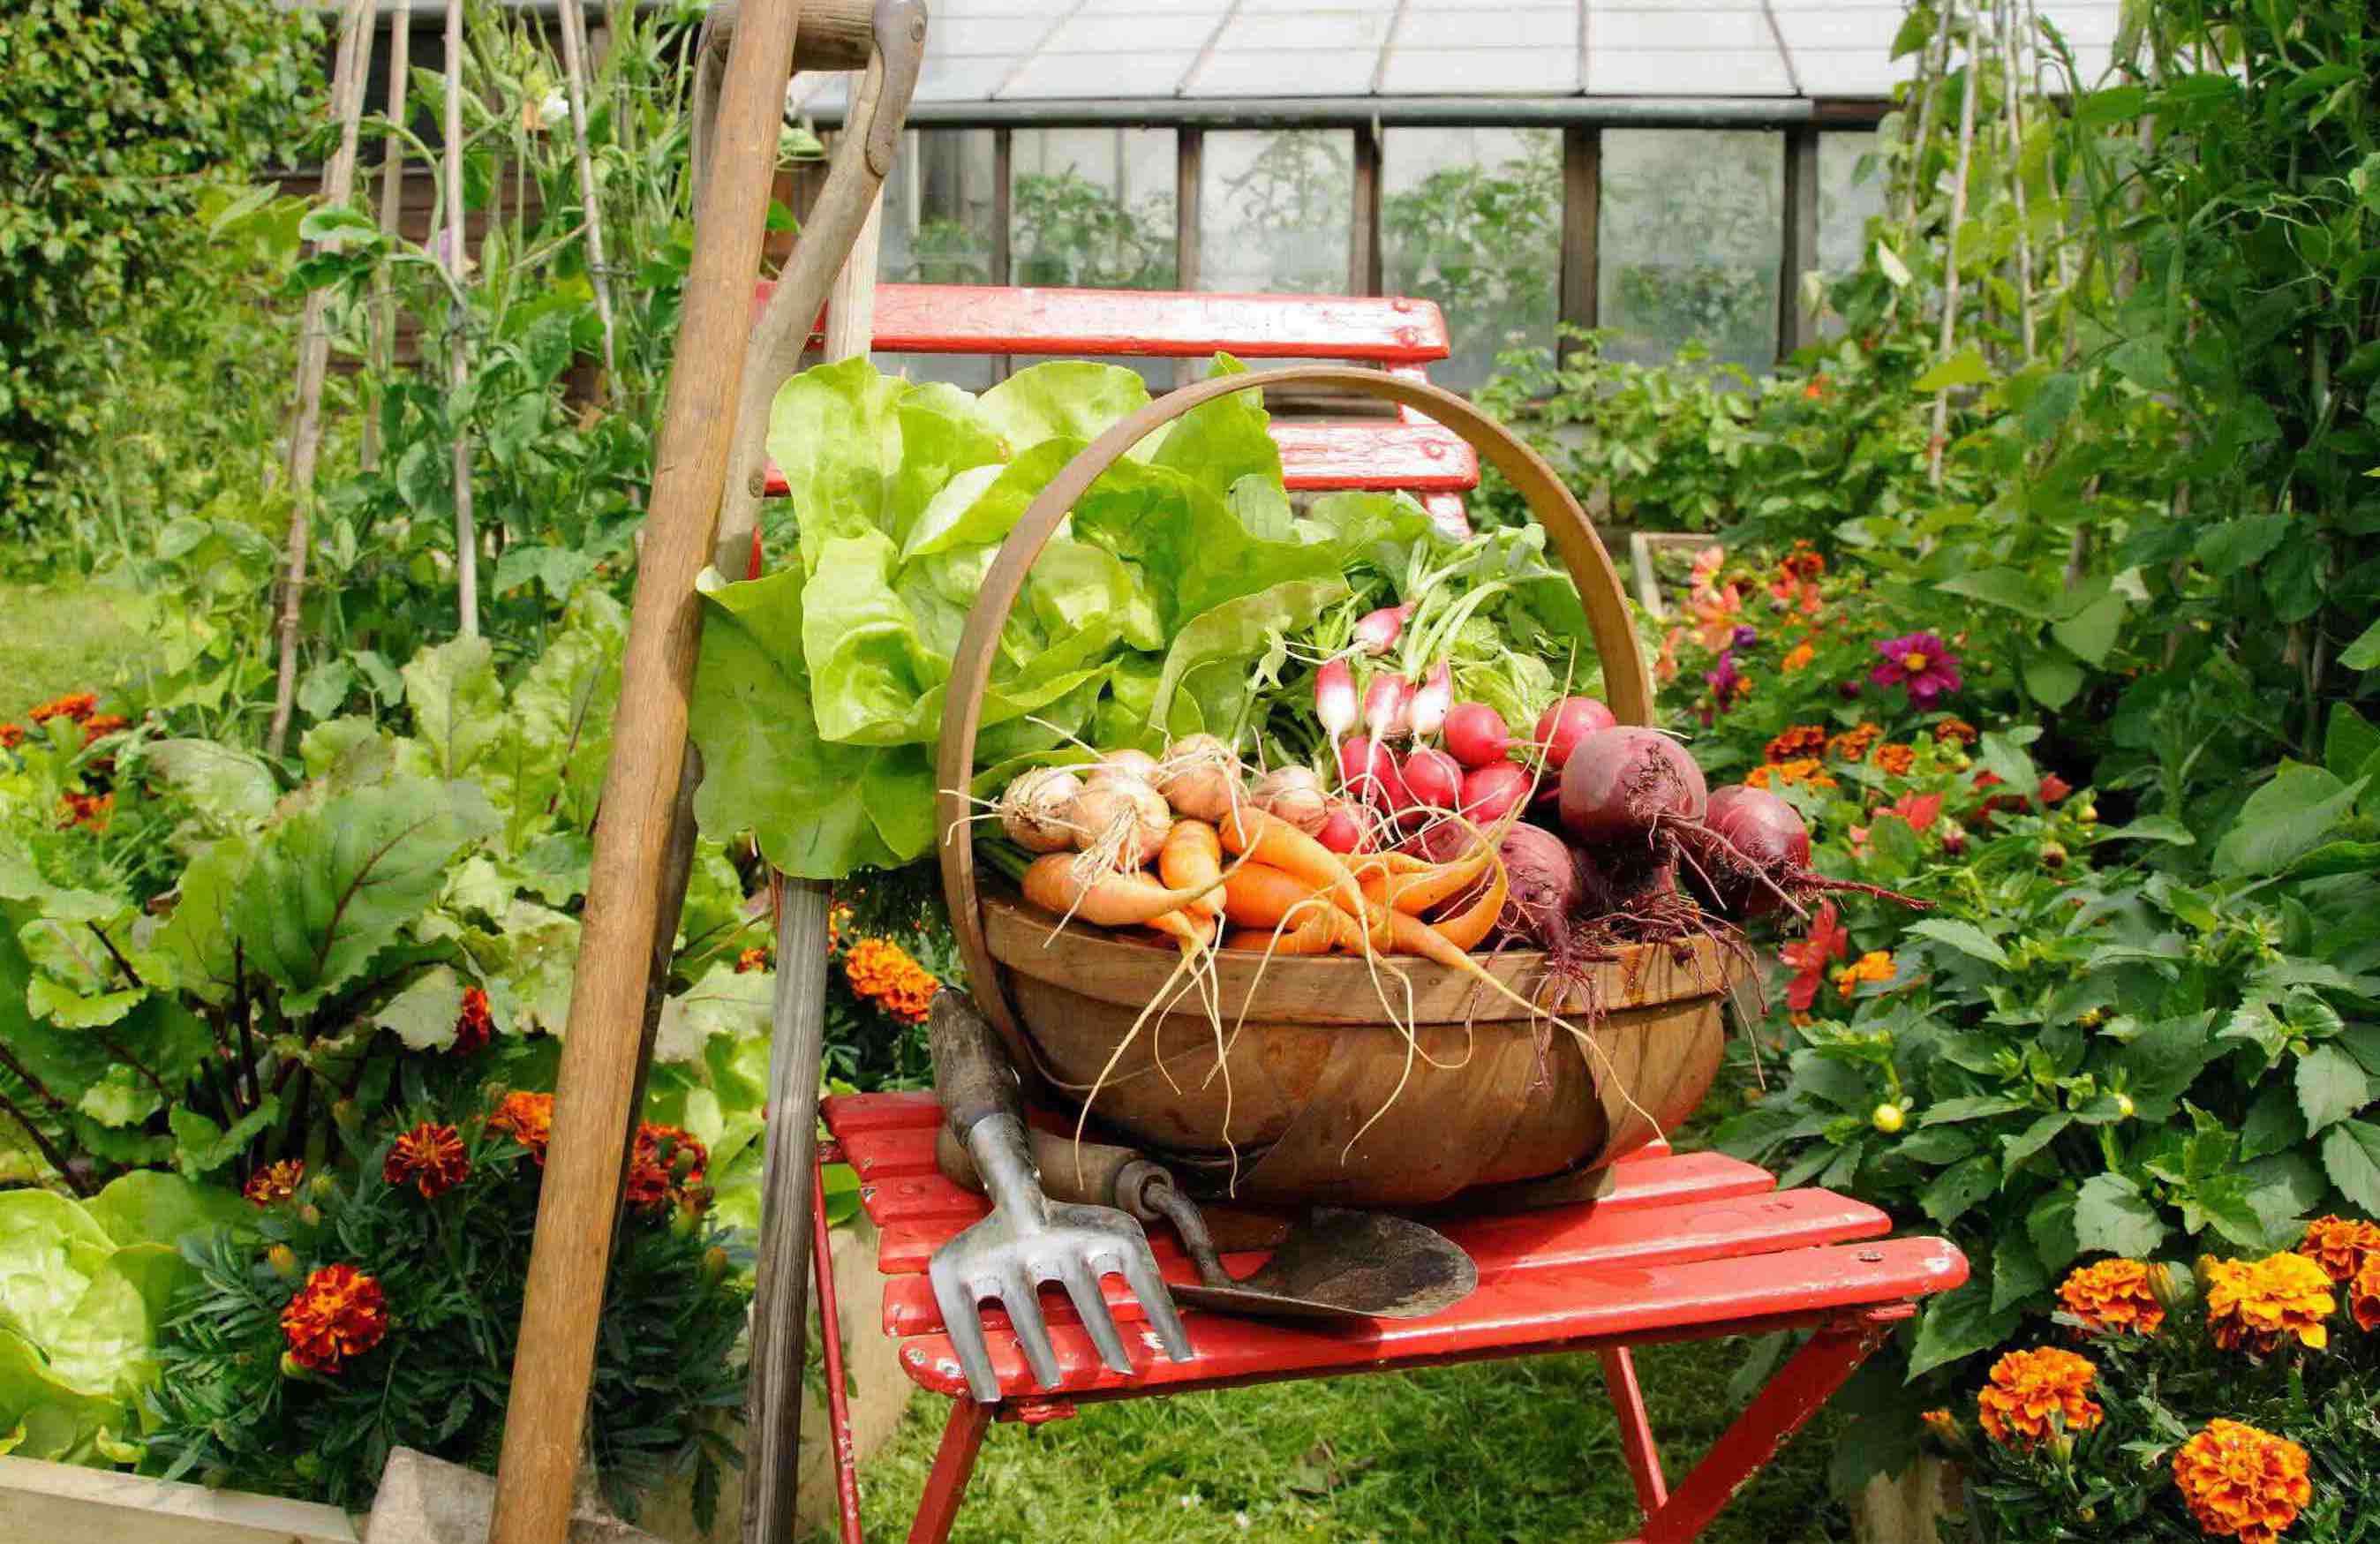
- Edible Plants: If you’re interested in growing your own food, incorporate edible plants into your rooftop garden. Herbs, salad greens, tomatoes, peppers, and strawberries are popular choices for rooftop edible gardens. Just ensure that your rooftop receives enough sunlight and that the weight limit can accommodate the additional soil and plant requirements.
- Consider Year-round Interest: Plan your rooftop garden for year-round interest by selecting a variety of plants with different seasonal characteristics. Choose plants that offer colorful foliage, vibrant flowers, or interesting textures throughout the year to keep your rooftop garden visually appealing and engaging.
When choosing plants for your rooftop garden, it’s important to select those that not only match your preferences but also align with the specific conditions and constraints of your rooftop. Once you have decided on the plants, it’s time to start planting and arranging them in your rooftop garden.
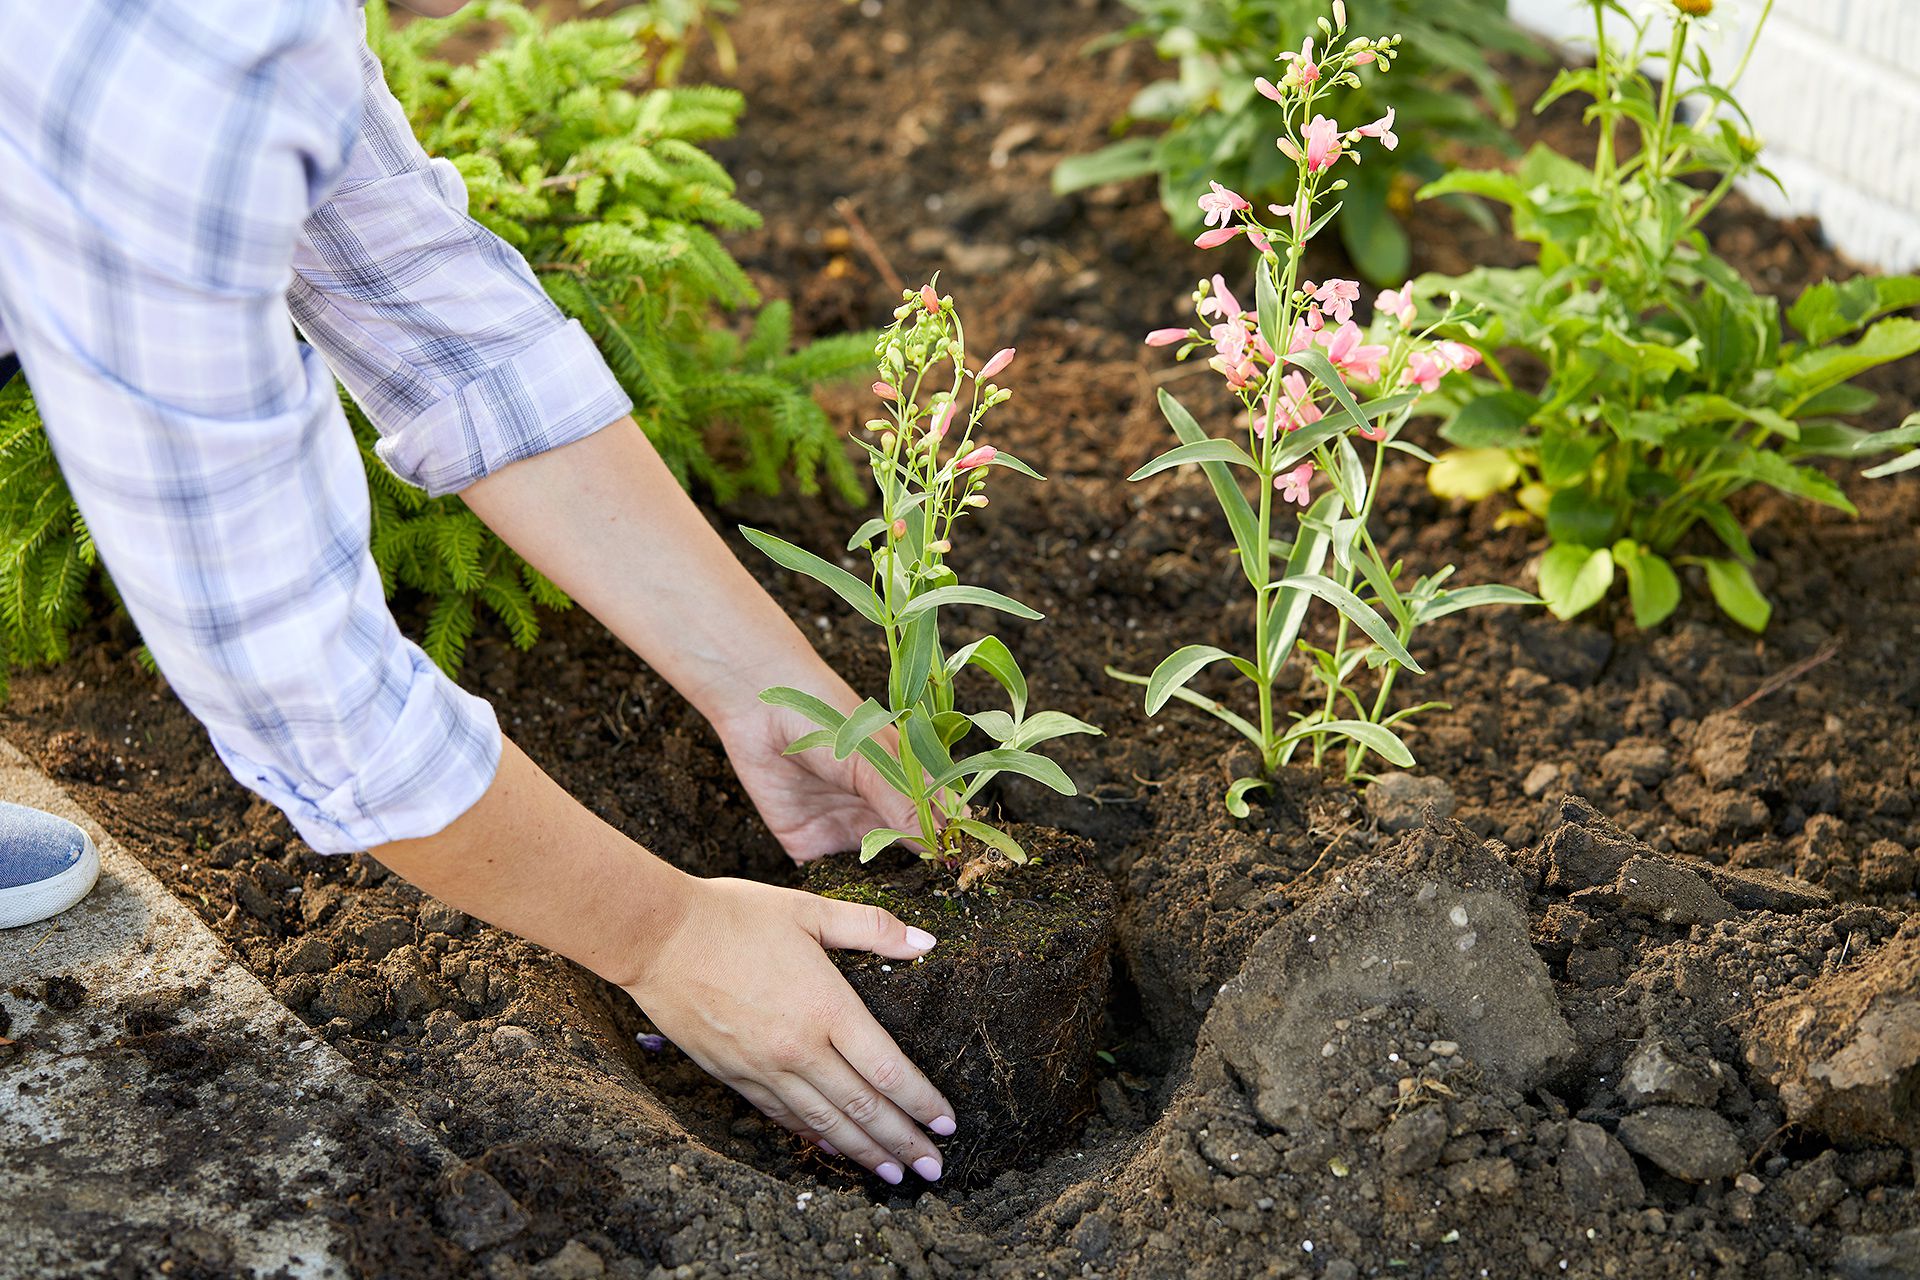
Planting and Arranging Plants
Planting and arranging your plants in a thoughtful and strategic manner will help maximize the beauty and functionality of your rooftop garden. Here are some tips to consider when planting and arranging your plants:
- Container Placement: Place your containers strategically, considering the weight capacity, sunlight exposure, and accessibility of your rooftop. Arrange containers in clusters or groups, creating visual interest and allowing for efficient watering and maintenance.
- Plant Spacing: Follow the recommended spacing guidelines for each plant to allow for proper air circulation and growth. Avoid overcrowding plants, as this can result in competition for resources and increase the risk of pests and diseases. Consider the mature size of the plants when spacing them out.
- Layering: Create depth and dimension in your rooftop garden by using a mix of tall, medium, and low-growing plants. Place taller plants at the back or center of your containers to provide a backdrop, while shorter plants can be positioned in the front or along the edges to create a layered effect.
- Vertical Gardening: Utilize vertical gardening techniques to maximize your rooftop space. Install trellises, arbor structures, or vertical planters to grow vining plants such as climbing roses, passionflowers, or ivy. This not only adds visual interest but also helps create shade and privacy.
- Color and Texture: Incorporate a variety of colors and textures in your rooftop garden to create visual appeal. Combine plants with different foliage colors, flower shapes, and textures. Consider contrasting colors or complementary color schemes to make a bold statement or create a harmonious composition.
- Seasonal Interest: Plan your plantings to ensure year-round interest in your rooftop garden. Incorporate plants with a staggered blooming period or different foliage colors for each season. This will keep your garden vibrant and appealing throughout the year.
- Thriller, Filler, and Spiller: Apply the “Thriller, Filler, and Spiller” design technique to create visually appealing container arrangements. Choose a focal point plant as the thrillers, which are tall and eye-catching. Surround them with fillers, which are medium-sized plants that add volume and color. Finally, incorporate spillers, which are trailing or cascading plants that drape over the edges of containers.
- Consider Companion Planting: Take advantage of companion planting by pairing plants that have beneficial relationships. For example, plant herbs such as basil or marigolds around your vegetable plants to repel pests. Research companion planting combinations that work well together to enhance growth and reduce the risk of plant diseases.
By carefully planting and arranging your rooftop garden, you can create a visually stunning and harmonious space. Consider the growth habits, colors, textures, and heights of your plants to achieve a well-balanced and visually appealing composition. Now that you have planted and arranged your plants, it’s time to understand the importance of proper watering and irrigation for your rooftop garden.
Watering and Irrigation
Proper watering and irrigation are crucial for maintaining the health and vitality of your rooftop garden. Here are some guidelines for effectively watering and irrigating your plants:
- Consistent Watering: Water your plants consistently and regularly, providing them with the appropriate amount of moisture they need to thrive. Establish a watering schedule based on the specific needs of your plants and the prevailing weather conditions.
- Monitor Soil Moisture: Check the moisture level of the soil regularly to avoid under or over-watering. Stick your finger or a moisture meter into the soil to assess the dampness. The goal is to keep the soil moist but not waterlogged.
- Avoid Frequent Shallow Watering: Instead of frequent shallow watering, which can encourage shallow root growth, strive for deep and thorough watering. This allows the water to penetrate deeper into the root zone, encouraging the roots to grow deeper and become more resilient.
- Water Early Morning or Late Evening: Water your plants early in the morning or late in the evening when temperatures are cooler. This minimizes water loss due to evaporation and allows the plants to absorb the moisture more effectively.
- Drip Irrigation: Consider using a drip irrigation system for your rooftop garden. Drip irrigation provides water directly to the plant’s root zone, reducing water wastage and promoting efficient water usage. It also helps prevent foliage diseases that can occur from overhead watering.
- Group Plants with Similar Watering Needs: Group plants with similar watering requirements together. This allows you to water them more efficiently, as you can target the water to specific areas without over or under-watering certain plants.
- Watch for Signs of Over or Under-watering: Pay attention to your plants for signs of over or under-watering. Wilting, yellowing leaves, or leaves that feel dry and brittle may indicate a need for more water. Conversely, yellowing leaves that feel mushy or overly saturated may indicate over-watering.
- Mulch: Apply a layer of organic mulch, such as wood chips or straw, around your plants. Mulch helps retain moisture in the soil, regulate soil temperature, reduce weed growth, and prevent soil erosion. It also adds a decorative element to your rooftop garden.
Remember that the watering needs of your rooftop garden can vary based on factors such as plant species, sunlight exposure, temperature, and rainfall. Regularly assess the moisture level of the soil and adjust your watering routine accordingly. With proper watering and irrigation practices, your rooftop garden will flourish and thrive.
Mulching and Fertilizing
Mulching and fertilizing are essential maintenance practices that contribute to the overall health and productivity of your rooftop garden. Here’s how you can effectively mulch and fertilize your plants:
- Mulching Benefits: Apply a layer of organic mulch around your plants to reap numerous benefits. Mulch helps conserve soil moisture by reducing evaporation, regulates soil temperature, suppresses weed growth, and prevents soil erosion. It also provides a protective barrier, keeping the soil cooler in hot weather and insulating plant roots during colder months.
- Choose the Right Mulch: Select organic mulch materials such as wood chips, straw, shredded leaves, or compost. Avoid using synthetic mulch or excessive amounts of mulch, as they can hinder water and air circulation in the soil. Apply a layer of mulch about 2 to 3 inches thick around your plants, leaving some space around the base of each plant to prevent stem rot.
- Fertilizer Selection: Choose organic fertilizers that provide essential nutrients to your plants while enhancing soil health. Organic fertilizers release nutrients slowly over time, promoting long-term growth and minimizing the risk of nutrient burn. Look for fertilizers with balanced NPK (nitrogen, phosphorus, and potassium) ratios suitable for the specific needs of your plants.
- Timing of Fertilizer Application: Apply fertilizer at the right time to maximize its effectiveness. Generally, it is best to fertilize your plants in the early spring when they are actively growing. However, follow the specific recommendations for each plant species, as some may benefit from additional feedings during the growing season.
- Follow Application Rates: Read and follow the instructions on the fertilizer packaging to determine the appropriate application rates. Applying too much fertilizer can lead to nutrient imbalances, causing harm to your plants and potentially leaching nutrients into the surrounding environment. Always err on the side of caution when fertilizing.
- Avoid Over-fertilization: Over-fertilization can result in excessive leaf growth, weak stems, and increased susceptibility to pests and diseases. Use organic fertilizers that release nutrients slowly, reducing the risk of nutrient overload. If in doubt, perform a soil test to determine the specific nutrient deficiencies in your soil before applying fertilizers.
- Organic Matter as Fertilizer: Incorporate organic matter, such as compost or well-rotted manure, in your soil mixture for ongoing nutrient replenishment. Top-dress your potted plants with compost every year to replenish nutrients and promote healthier growth.
- Compost Tea: Consider using compost tea as a natural plant tonic. Compost tea is created by steeping compost in water to extract beneficial microorganisms and nutrients. Use it as a foliar spray or drench around the base of your plants to provide a boost of organic nutrition.
Remember to regularly check the condition of your mulch and replenish it as needed. Additionally, monitor your plants for any signs of nutrient deficiencies or excesses, adjusting your fertilization practices accordingly. With proper mulching and fertilizing, you’ll promote the long-term health and productivity of your rooftop garden.
Maintaining the Rooftop Garden
Maintaining your rooftop garden is essential to keep it healthy, vibrant, and thriving. Regular maintenance helps prevent issues, promotes optimal growth, and ensures that your garden remains a beautiful and enjoyable space. Here are some key aspects to consider when maintaining your rooftop garden:
- Weeding: Regularly inspect your garden for weeds and promptly remove them to prevent competition for nutrients and space. Use hand pulling or carefully use a small weeding tool to remove weeds, ensuring you remove the entire root system.
- Pruning and Trimming: Prune and trim your plants as needed to maintain their shape, control growth, and promote air circulation. Remove dead or damaged branches, spent flowers, or overgrown foliage. Pruning also helps stimulate new growth and can improve the overall appearance of your rooftop garden.
- Monitoring Pests and Diseases: Keep a close eye on your plants for any signs of pests or diseases. Common rooftop pests include aphids, spider mites, and whiteflies. Identify and address any issues early to prevent widespread infestations or damage to your plants. Use natural pest control methods, such as insecticidal soaps, neem oil, or beneficial insects, whenever possible.
- Regular Watering: Stick to a consistent watering schedule and adjust based on weather conditions. Regularly monitor the moisture level of the soil to avoid under or over-watering. During hot and dry periods, you may need to increase the frequency of watering, while in cooler or rainy periods, you may need to reduce it.
- Monitoring Soil Health: Assess the overall health of your soil by conducting regular pH tests and nutrient analysis. This will help you understand if any amendments or adjustments are needed to maintain optimal soil fertility. Replenish nutrients as necessary with organic fertilizers or compost.
- Inspecting Containers: Periodically inspect your plant containers for any signs of damage, such as cracks or leaks. Replace containers that are no longer structurally sound. Ensure that containers have proper drainage to prevent waterlogging and root rot.
- Seasonal Clean-up: Perform seasonal clean-up tasks to remove any debris, dead plant material, or fallen leaves from your rooftop garden. This helps maintain a tidy and healthy environment, preventing the buildup of pests or diseases.
- Continued Learning: Stay informed about the specific needs of your rooftop garden plants. Research and educate yourself on best practices, new gardening techniques, or innovative solutions that can enhance the health and productivity of your garden. Attend workshops or connect with local rooftop gardening communities to exchange knowledge and experiences.
By consistently maintaining your rooftop garden, you’ll ensure its long-term success and create a beautiful and enjoyable space. With proper care and attention, your rooftop garden will provide a sanctuary for you to relax, reconnect with nature, and indulge in the beauty of plants.
Read more: How Much Does Creating A Rooftop Garden Cost
Dealing with Pests and Diseases
Just like any other garden, rooftop gardens can be susceptible to pests and diseases. It’s important to be proactive in identifying and addressing pest and disease issues to keep your plants healthy. Here are some tips for dealing with pests and diseases in your rooftop garden:
- Regular Inspection: Regularly inspect your plants for any signs of pests or diseases. Look for visible damage to leaves, stems, or fruits, as well as the presence of pests such as aphids, spider mites, or mealybugs. Catching and addressing issues early can prevent widespread infestations.
- Natural Remedies: Whenever possible, opt for natural and organic pest control methods. Use insecticidal soaps, neem oil, or horticultural oils to combat common pests. These methods are effective, environmentally friendly, and pose minimal risk to beneficial insects and the surrounding ecosystem.
- Beneficial Insects: Introduce beneficial insects to your rooftop garden to control pests naturally. Ladybugs, lacewings, and parasitic wasps are examples of beneficial insects that help control aphids, caterpillars, and other pests. Encourage their presence by planting nectar-rich flowers and avoiding the use of chemical pesticides.
- Companion Planting: Utilize companion planting techniques to naturally deter pests. Some plants, such as marigolds, basil, and chives, have natural pest-repellent properties. Interplanting these pest-repellent plants with susceptible plants can help reduce the risk of pest infestations.
- Crop Rotation: Practice crop rotation to avoid the buildup of pests and diseases. Rotate your plantings each year, ensuring that plants from the same family are not grown in the same location consecutively. This disrupts pest life cycles and reduces the chances of diseases spreading.
- Organic Disease Control: For diseases such as fungal infections, powdery mildew, or blight, use organic disease control methods. Copper-based fungicides, sulfur sprays, or homemade remedies like baking soda solutions can help combat these issues. Proper plant spacing and good airflow can also minimize the risk of diseases.
- Pruning and Sanitation: Remove infected plant parts as soon as you notice signs of disease to prevent the spread. Use clean and sharp pruning tools to minimize the risk of further damage. Dispose of infected plant material in sealed bags or burn them to prevent the spread of disease-causing pathogens.
- Accurate Watering: Avoid over-watering your plants, as excessive moisture can create a favorable environment for fungal diseases to thrive. Water your plants at the base, avoiding overhead watering, which can lead to prolonged leaf wetness and increased susceptibility to diseases.
- Maintaining Plant Health: Keeping your plants healthy is the first line of defense against pests and diseases. Provide appropriate sunlight, proper watering, and good nutrition to ensure the overall vigor and resilience of your plants. Healthy plants are better equipped to withstand and recover from pest and disease attacks.
Remember that prevention is key when it comes to pest and disease management. Regular monitoring, early intervention, and the use of natural remedies will help you maintain a healthy and thriving rooftop garden. By fostering a balanced and resilient ecosystem, you can minimize the risk of major pest and disease outbreaks and enjoy the beauty of your plants.
Conclusion
Congratulations on embarking upon the journey of creating your very own rooftop garden! By following the steps outlined in this guide, you are well on your way to transforming your rooftop into a beautiful and vibrant oasis. From choosing the right location and determining the weight limit to selecting suitable containers, preparing the surface, and planting your desired plants, you have built a solid foundation for a successful rooftop garden.
Remember, maintaining your rooftop garden is just as important as creating it. Regular watering, mulching, fertilizing, and vigilant pest and disease management will ensure that your garden remains healthy and productive. Regular assessments and adjustments will help you fine-tune your rooftop garden to meet the changing needs of your plants and ensure their long-term success.
Take the time to enjoy your rooftop garden – it’s not just a space for plants, but also a sanctuary for you to unwind, reconnect with nature, and find solace amidst the hustle and bustle of urban life. The rewards of your efforts will not only be a visually stunning garden, but also cleaner air, enhanced biodiversity, and the joy of witnessing your plants flourish.
As you continue on your rooftop gardening journey, stay curious and open to new ideas and techniques. Keep learning, experimenting, and connecting with fellow rooftop gardeners to exchange knowledge and experiences. Celebrate the unique challenges and rewards that come with gardening in an elevated space.
Remember, a rooftop garden is not just a green space – it’s a symbol of sustainability, urban greening, and the power of nature to transform even the smallest of spaces. So, elevate your gardening game and create a rooftop garden that will not only be a source of pride, but also a haven of beauty and tranquility.
Get ready to enjoy the sights, scents, and sounds of your own little green oasis in the sky. Happy rooftop gardening!
Frequently Asked Questions about How To Plant A Rooftop Garden
Was this page helpful?
At Storables.com, we guarantee accurate and reliable information. Our content, validated by Expert Board Contributors, is crafted following stringent Editorial Policies. We're committed to providing you with well-researched, expert-backed insights for all your informational needs.


0 thoughts on “How To Plant A Rooftop Garden”