Articles
How To Plant Potatoes In A Garden
Modified: September 1, 2024
Learn how to plant potatoes in your garden with our expert gardening tips and techniques. Start growing your own delicious potatoes today!
(Many of the links in this article redirect to a specific reviewed product. Your purchase of these products through affiliate links helps to generate commission for Storables.com, at no extra cost. Learn more)
Introduction
When it comes to gardening, there is something truly special about growing your own food. Not only does it offer a sense of satisfaction and accomplishment, but it also allows you to enjoy fresh, homegrown produce straight from your garden. One vegetable that is relatively easy to grow and provides an abundant harvest is the versatile potato.
Potatoes are a staple in many cuisines and can be prepared in a variety of delicious ways, from mashed and roasted to fried and baked. Not only are they tasty, but they are also packed with essential nutrients like vitamin C, potassium, and fiber.
If you’ve ever wondered how to plant potatoes in your garden, you’ve come to the right place. In this article, we will guide you through the process of planting potatoes from start to finish, ensuring a successful and bountiful harvest.
But before we delve into the details of planting potatoes, let’s first understand the different potato varieties available and how to choose the right ones for your garden.
Key Takeaways:
- Grow your own potatoes by choosing the right varieties, preparing the soil, and providing proper care. Enjoy the satisfaction of harvesting and storing your homegrown tubers for delicious meals.
- Embrace the joy of gardening and deepen your connection with nature through the rewarding experience of growing and harvesting your own potatoes. Happy gardening!
Read more: How To Store Sprouted Potatoes For Planting
Choosing Potato Varieties
When it comes to selecting potato varieties for your garden, you’ll be amazed at the wide range of options available. Different varieties have unique characteristics, such as flavor, texture, and suitability for specific growing conditions. Here are a few factors to consider when choosing potato varieties:
- Growing Season: Potatoes can be classified into three main categories based on their growing season: early, mid-season, and late. Early-season potatoes mature quickly in around 60 to 75 days and are a great choice if you want an early harvest. Mid-season potatoes take around 75 to 90 days to mature, while late-season varieties require 90 to 120 days to reach maturity.
- Skin and Flesh Color: Potatoes come in a variety of skin and flesh colors, ranging from white and yellow to red and purple. Consider the visual appeal of the potatoes you want to grow, as well as the desired taste and texture.
- Disease Resistance: Some potato varieties are more resistant to common diseases like late blight, early blight, and potato scab. Check the disease resistance characteristics of the varieties you’re interested in to minimize the risk of plant diseases in your garden.
- Intended Use: Think about how you plan to use your potatoes. Are you looking for varieties that are great for mashing, boiling, baking, or frying? Different varieties have different textures and flavors that make them more suitable for certain cooking methods.
Some popular potato varieties to consider include Yukon Gold, Russet, Red Pontiac, Fingerling, and Purple Majesty. Do some research and choose varieties that best suit your preferences and growing conditions.
Once you’ve selected the potato varieties you want to grow, it’s time to prepare the soil in your garden to give your potatoes the best possible start. Let’s move on to the next step in the process – preparing the soil.
Preparing the Soil
Before planting potatoes, it’s crucial to prepare the soil to provide the optimal growing conditions for your plants. Here are the steps to follow when preparing the soil:
- Clear the Area: Start by clearing the area where you plan to plant your potatoes. Remove any weeds, rocks, or debris to ensure a clean and healthy growing environment.
- Loosen the Soil: Using a garden fork or a tiller, loosen the soil to a depth of about 8 to 10 inches. This will help promote root development and improve drainage. Avoid working the soil when it is too wet, as it can lead to compaction.
- Amend the Soil: Potatoes thrive in well-draining soil that is rich in organic matter. Add compost, aged manure, or other organic materials to improve the soil’s fertility and structure. Aim for a pH level between 5.5 and 7, which is ideal for potato growth.
- Consider Fertilizing: Conduct a soil test to determine the nutrient levels in your soil. Based on the results, you may need to amend the soil with additional nutrients, such as nitrogen, phosphorus, and potassium, to ensure your potatoes receive adequate nutrition throughout the growing season.
- Level the Soil: After amending the soil and adding fertilizers, level the soil surface with a rake. This will provide an even planting bed for your potato tubers.
By taking the time to properly prepare the soil, you are setting the stage for healthy plant growth and a successful potato harvest.
In the next section, we will discuss how to plant your potato tubers in the prepared soil, ensuring they have the right conditions to sprout and thrive.
Planting Potatoes
Now that you have prepared the soil, it’s time to plant your potato tubers. Follow these steps to ensure proper planting:
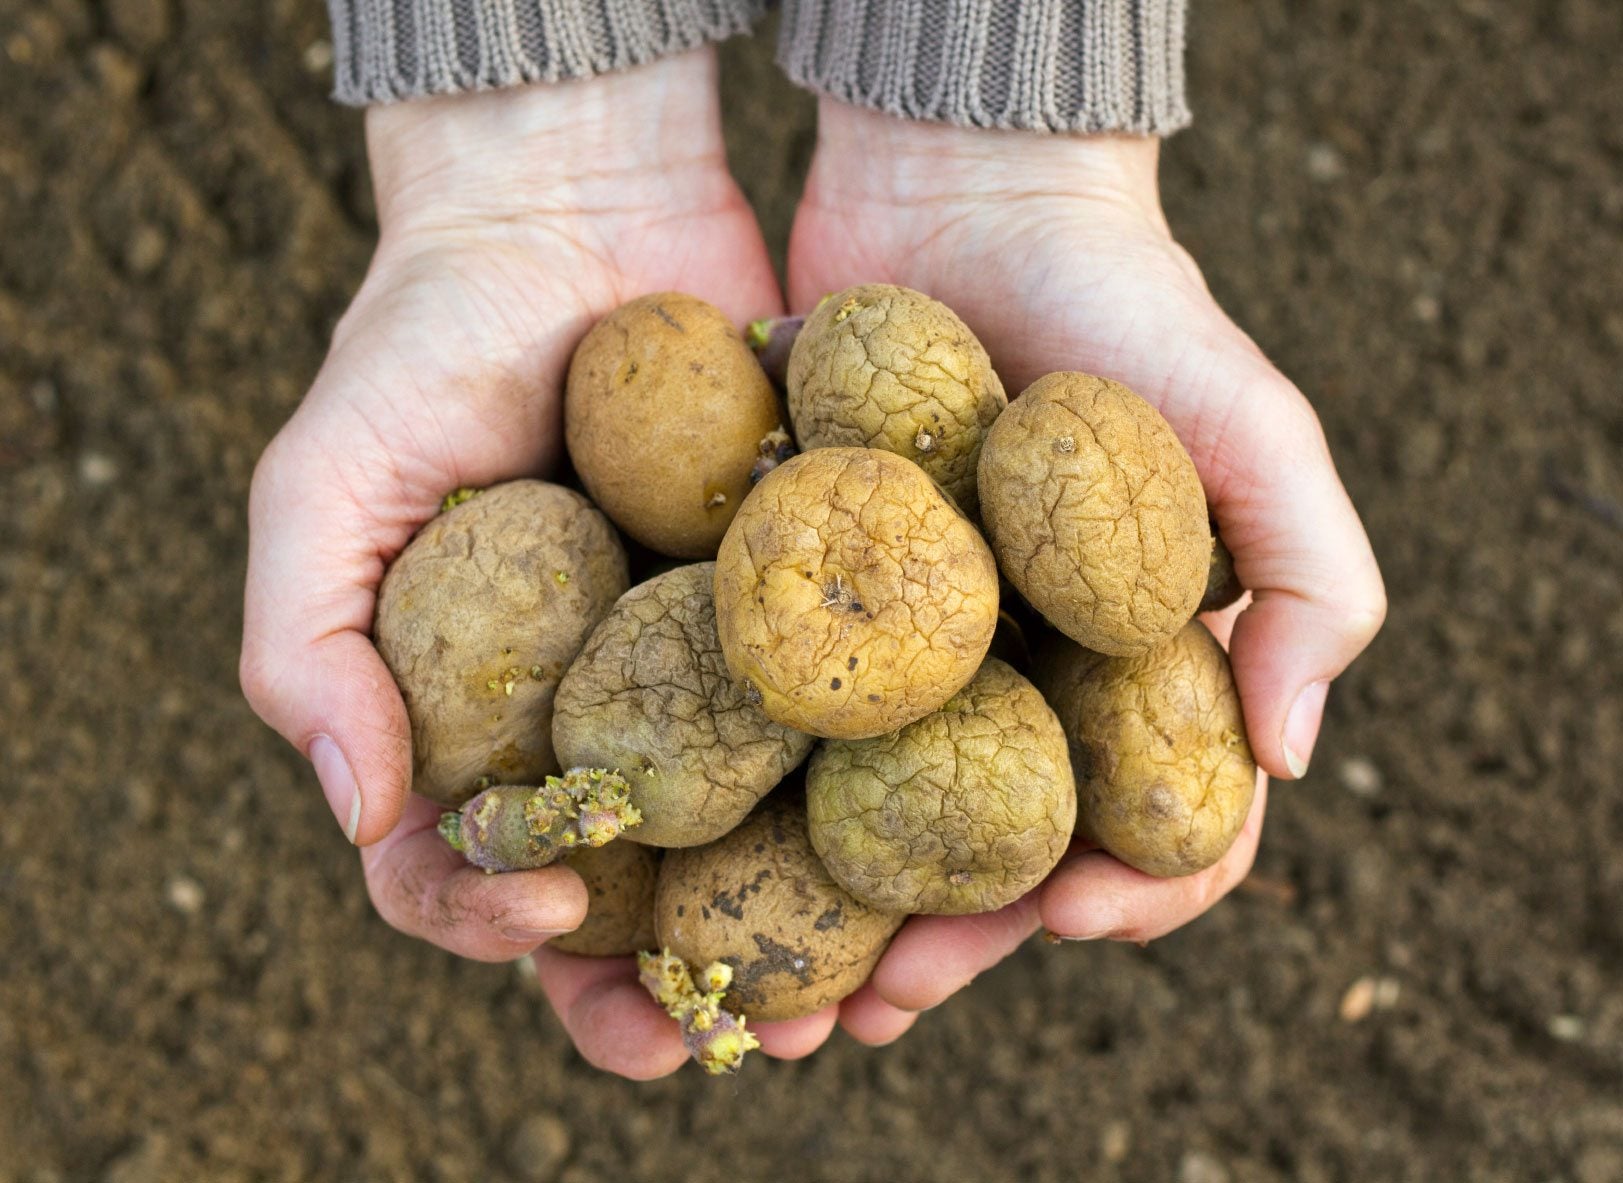
- Cut Seed Potatoes: Start by choosing healthy seed potatoes that are free from diseases and have at least two or three sprouts, also called “eyes.” If the potatoes are large, you can cut them into smaller pieces, making sure each piece has at least one sprout. Allow the cut pieces to dry for a day or two before planting.
- Spacing: Dig shallow trenches in the prepared soil, about 4 to 6 inches deep. Space the trenches about 12 to 15 inches apart with rows spaced 2 to 3 feet apart. This spacing allows the plants to grow without crowding each other and ensures good air circulation.
- Planting: Place the seed potatoes, cut side down, into the trenches, spacing them about 10 to 12 inches apart. Cover the tubers with about 2 inches of soil, gently firming the soil around them. As the potatoes grow, you can gradually fill in the trenches with more soil.
- Watering: After planting, water the soil thoroughly to encourage proper tuber formation. Keep the soil consistently moist but not waterlogged throughout the growing season.
- Protective Measures: To protect the newly planted tubers from unexpected frost or cold temperatures, you can cover the garden bed with straw or horticultural fleece. This provides insulation and helps retain heat.
Remember, it’s important to plant potatoes in well-draining soil to prevent waterlogging, which can lead to rotting tubers. Additionally, ensure that the planting area receives an adequate amount of sunlight, preferably 6 to 8 hours per day.
As the potato plants start to grow, they will require some extra care. In the next section, we will discuss the importance of hilling and mulching to promote healthy growth and maximize your potato yield.
Hilling and Mulching
As your potato plants continue to grow, you’ll need to provide them with additional soil and mulch to promote healthy development and increase your potato yield. Here’s what you need to know about hilling and mulching:
Hilling: Hilling is the process of gradually adding soil around the base of the potato plants as they grow. It helps to protect the developing tubers from exposure to sunlight, which can cause them to turn green and become toxic. Hilling also encourages the production of more tubers along the buried stems, resulting in a higher yield.
About 2 to 3 weeks after planting, when the potato plants reach a height of 6 to 8 inches, use a rake or hoe to gently mound soil around the stems, covering about half of the plant. Repeat this process every few weeks as the plants grow taller. Be careful not to damage the plants or break off any shoots during the hilling process.
Mulching: Mulching is an essential practice in potato cultivation. It helps to conserve moisture, suppress weed growth, and maintain a more consistent soil temperature. After hilling the plants, spread a layer of organic mulch, such as straw, hay, or shredded leaves, around the base of the plants. This will help to smother weeds, retain moisture in the soil, and protect the tubers from direct sunlight.
Make sure to leave a small area around the emerging shoots uncovered by the mulch to allow for proper growth. Renew the mulch layer as needed throughout the growing season to maintain a thickness of 2 to 3 inches.
By regularly hilling your potatoes and mulching the soil, you are creating an environment that is conducive to strong plant growth and a higher potato yield. However, it’s important to remember that consistent watering is crucial for the success of your potato plants. In the next section, we will discuss watering and fertilizing practices for optimal potato growth.
When planting potatoes in a garden, make sure to choose a sunny spot with well-drained soil. Plant the seed potatoes about 12 inches apart and cover them with 3-4 inches of soil. Keep the soil consistently moist but not waterlogged for best results.
Read more: How To Plant Potatoes In Containers
Watering and Fertilizing
Proper watering and fertilizing are essential for the healthy growth and development of your potato plants. Here are some key points to keep in mind:
Watering: Potatoes require consistent moisture throughout the growing season, especially during the tuber formation stage. Adequate watering helps prevent the potatoes from becoming stunted or misshapen. Water deeply once or twice a week, aiming for about 1 to 2 inches of water per week, depending on your climate and soil conditions. Ensure that the soil is evenly moist but not waterlogged.
It’s important to note that the timing of watering is crucial. Avoid watering in the late afternoon or evening, as this can promote the growth of fungal diseases. Instead, water in the early morning to allow the foliage to dry out during the day.
Fertilizing: Potatoes benefit from regular fertilization to ensure proper growth and a high yield. Before planting, incorporate a balanced organic fertilizer or compost into the soil to provide a good foundation of nutrients. Avoid using excessive amounts of nitrogen-rich fertilizers, as this can favor leafy growth over tuber production.
As the potato plants grow, you can provide additional nutrients by side-dressing with a slow-release fertilizer or applying a liquid organic fertilizer every 4 to 6 weeks. Read and follow the instructions on the fertilizers carefully to avoid overdoing it. Always water the plants after fertilizing to help the nutrients reach the root zone.
Monitoring the health and growth of your potato plants is essential. Regularly check for signs of nutrient deficiencies, such as yellowing leaves or stunted growth, and adjust your fertilization practices accordingly.
Now that you’ve learned how to properly water and fertilize your potato plants, it’s essential to be aware of potential pests and diseases that can affect their growth. In the next section, we will discuss strategies to prevent and manage common potato pests and diseases.
Preventing Pests and Diseases
Protecting your potato plants from pests and diseases is crucial to ensure a successful and healthy harvest. Here are some preventive measures you can take:
Crop Rotation: Practice crop rotation by avoiding planting potatoes in the same spot year after year. Rotate your potato crops with other unrelated plants to break the life cycle of pests and reduce the risk of disease buildup in the soil.
Plant Disease-Resistant Varieties: When selecting potato varieties, look for ones that are known to be resistant to common potato diseases. Disease-resistant varieties may be less susceptible to issues like late blight, early blight, and potato scab.
Proper Spacing: Plant your potatoes with adequate spacing to allow for good air circulation. This reduces the likelihood of diseases like blight and helps to keep fungal spores from spreading.
Regular Inspections: Regularly inspect your potato plants for signs of pests or diseases. Look for yellowing or wilting foliage, holes in leaves, presence of insects, or any other abnormalities. Early detection can help prevent the spread of pests and diseases.
Remove Infected Plants: If you notice any plants with signs of disease, promptly remove and dispose of them to prevent the spread to healthy plants. Do not compost the infected plants, as this can spread the disease when using the compost in the garden.
Use Organic Pest Control: Employ organic pest control methods such as handpicking pests, using insecticidal soaps or oils, or introducing natural predators like ladybugs to help control common potato pests like aphids or Colorado potato beetles.
Mulching: The mulch layer around your potato plants not only helps with water retention but can also act as a barrier against underground pests like wireworms. Mulch helps to deter these pests from reaching the growing potatoes.
Practice Good Garden Hygiene: Clean up garden debris and weeds that can harbor pests or diseases. This reduces the potential for infestations and reduces the risk of disease transmission within the garden.
By implementing these preventive measures, you can greatly reduce the risk of pests and diseases impacting your potato crop. However, it is important to be vigilant and take action at the first sign of trouble to protect your plants.
In the next section, we will discuss the exciting part – harvesting your homegrown potatoes!
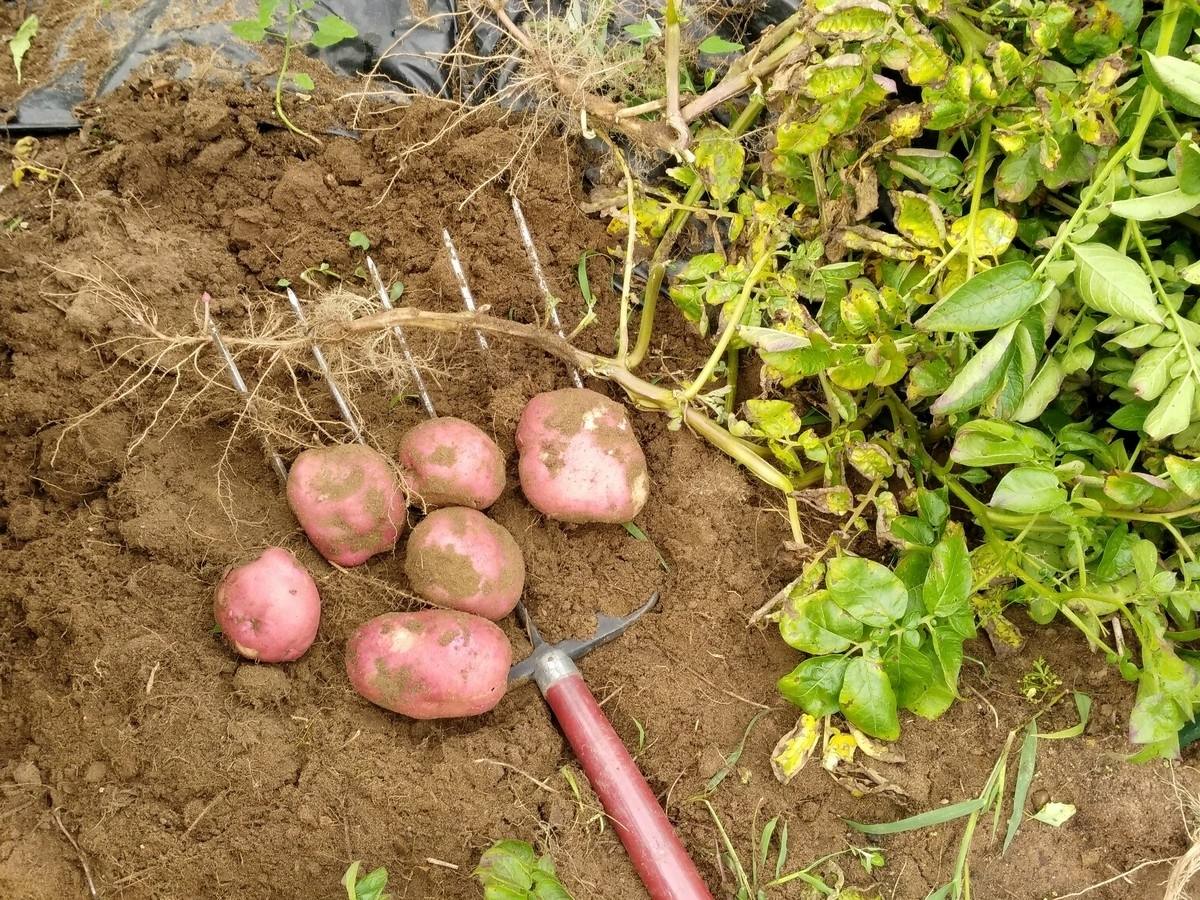
Harvesting Potatoes
Harvesting potatoes is an exciting and rewarding moment for every gardener. It’s the time when you get to enjoy the fruits of your labor. Here are some steps to follow when it’s time to harvest your potatoes:
Observation: Keep a close eye on your potato plants and observe the foliage. When the plants start to turn yellow and the foliage begins to die back, it’s a sign that the potatoes are nearing maturity. This usually occurs about 2 to 3 weeks after flowering.
Prepare the Tools: Gather the necessary tools for harvesting, including a garden fork or shovel, a bucket or container for collecting the potatoes, and gloves to protect your hands.
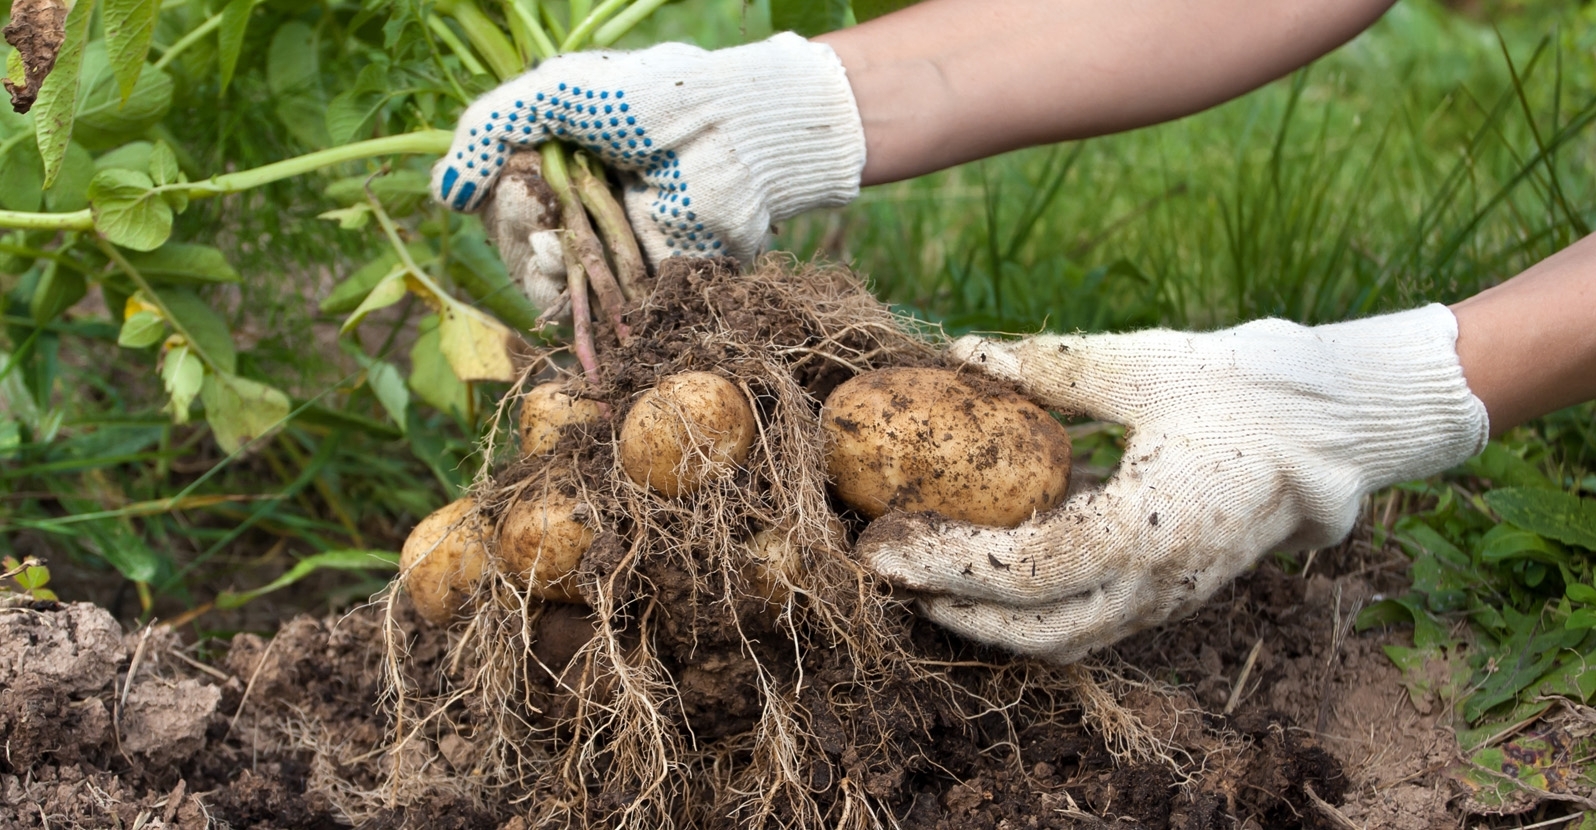
Harvesting: Carefully insert the garden fork or shovel into the soil, a few inches away from the base of the plant. Gently lift the soil and uproot the plant, being careful not to damage the tubers. As you lift the plant, you’ll start to see the potatoes in the soil. Shake off any excess soil and place the harvested potatoes into your bucket or container.
Harvesting New Potatoes: If you’re growing early-season varieties, you can harvest “new potatoes” before the plants fully mature. Simply dig around the base of the plant and carefully harvest the smaller, immature potatoes, leaving the larger ones to continue growing for a later harvest.
Curing: After harvesting, allow the potatoes to cure for a few hours in a cool, dry, and well-ventilated area. This helps to toughen the skin and improves their storage potential.
Storage: Store the harvested potatoes in a cool, dark, and well-ventilated space. Avoid exposing them to direct sunlight or high temperatures, as this can cause sprouting or spoilage. Use the damaged or bruised potatoes first and periodically check for any signs of decay or rotting.
Remember, the harvesting process is the culmination of your gardening journey. Enjoy the satisfaction of harvesting your homegrown potatoes and savor the delicious flavors they bring to your meals.
In the final section, we will discuss tips for storing potatoes to help prolong their shelf life.
Storing Potatoes
Proper storage is key to prolonging the shelf life and maintaining the quality of your harvested potatoes. Follow these tips to ensure your potatoes stay fresh and flavorful for an extended period:
Cleaning: Before storing, gently brush off any excess dirt or debris from the potatoes. Avoid washing them, as excessive moisture can cause rotting. Damaged or bruised potatoes should be used first, as they are more prone to spoiling.
Cool and Dark Location: Choose a storage location that is cool, preferably between 45-55°F (7-13°C), and dark. Excessive heat can lead to sprouting, while light exposure can cause the potatoes to turn green and develop a bitter taste. Avoid storing them in the refrigerator, as the cold temperature can convert starches to sugar and negatively affect the flavor.
Ventilation: Potatoes need good air circulation to prevent moisture buildup, which can lead to rotting. Store them in a well-ventilated area, ensuring there is some airflow to keep them dry.
Avoid Ethylene Production: Some fruits and vegetables, like apples, bananas, and onions, release a gas called ethylene, which can accelerate potato sprouting. Store potatoes away from such ethylene-producing items to maintain their freshness.
Avoid Potatoes Contacting Each Other: To prevent the spread of rot, avoid storing potatoes in a pile where they can touch and rub against each other. Use ventilated containers, baskets, or mesh bags to allow for airflow and to keep the potatoes separated.
Regular Inspection: Periodically check on your stored potatoes for any signs of sprouting, rot, or decay. Remove any spoiled potatoes to prevent the spread of spoilage to the rest of the batch.
Use Before New Harvest: Ideally, try to use up your stored potatoes before the new harvest season begins. This ensures you consume the stored ones while they are still in good condition, flavor, and texture.
By following these storage guidelines, you can enjoy your homegrown potatoes for an extended period, giving you a supply of fresh and delicious tubers until the next planting season.
Now that you’ve learned how to store your potatoes, it’s time to put your knowledge into action and enjoy the fruits of your labor. Happy gardening and bon appétit!
Keep in mind that HTML tags may be added to the text to ensure proper formatting. Please review and validate the output to ensure it is in HTML format.
Read more: How To Grow Sweet Potatoes In Containers
Conclusion
Growing potatoes in your garden can be a rewarding and satisfying experience. From choosing the right potato varieties to harvesting and storing the abundance of delicious tubers, each step in the process contributes to a successful potato-growing venture. By following the guidelines outlined in this article, you are equipped with the knowledge and skills needed to cultivate a bountiful potato harvest.
Remember to select potato varieties that best suit your taste preferences, growing conditions, and intended use. Prepare the soil properly, ensuring it is well-drained and rich in organic matter. Plant your seed potatoes with care, allowing for proper spacing and depth. Hill the plants and provide a layer of mulch to protect the developing tubers.
Water your potato plants consistently and fertilize them as needed to ensure they receive the necessary nutrients to thrive. Implement preventive measures to protect your plants from common pests and diseases. Regularly inspect your plants and take action at the first sign of trouble.
When the time comes, relish the joy of harvesting your own potatoes. Follow proper harvesting techniques and store your potatoes in a cool, dark, and well-ventilated space. Regularly check for any signs of spoilage and use them before the new harvest season begins.
By embarking on this potato-growing journey, you not only get to enjoy the delicious flavors of homegrown potatoes but also deepen your connection with nature and gain a sense of accomplishment. So, roll up your sleeves, get your hands dirty, and embrace the joy of growing your own potatoes. Happy gardening!
Please validate the output to ensure it is in HTML format.
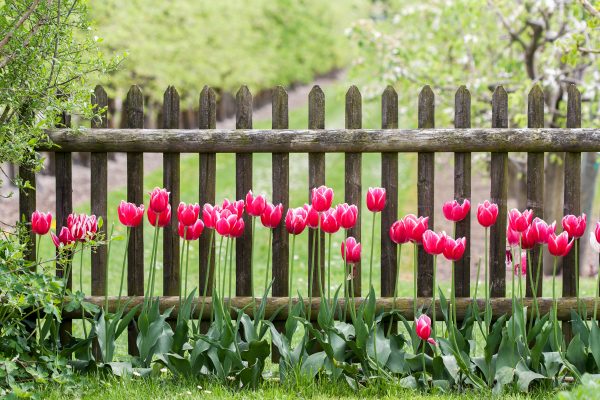
Ready to give your garden a fresh look while keeping pests at bay? Dive into our article on innovative garden fence ideas. You'll find inspiration and practical tips to enhance your outdoor space's beauty and functionality. Whether you're looking to create a cozy retreat or safeguard your newly planted potatoes, these ideas will serve as a perfect guide. Don't miss out on transforming your garden into a delightful and secure haven.
Frequently Asked Questions about How To Plant Potatoes In A Garden
Was this page helpful?
At Storables.com, we guarantee accurate and reliable information. Our content, validated by Expert Board Contributors, is crafted following stringent Editorial Policies. We're committed to providing you with well-researched, expert-backed insights for all your informational needs.

0 thoughts on “How To Plant Potatoes In A Garden”