Home>Garden Essentials>Garden Storage>10 Sloping Garden Ideas: Landscaping Tips For A Tricky Space
Garden Storage
10 Sloping Garden Ideas: Landscaping Tips For A Tricky Space
Modified: September 2, 2024
Discover 10 storage solutions and clever landscaping tips for your sloping garden. Transform your tricky outdoor space into a functional and beautiful oasis.
(Many of the links in this article redirect to a specific reviewed product. Your purchase of these products through affiliate links helps to generate commission for Storables.com, at no extra cost. Learn more)
Introduction
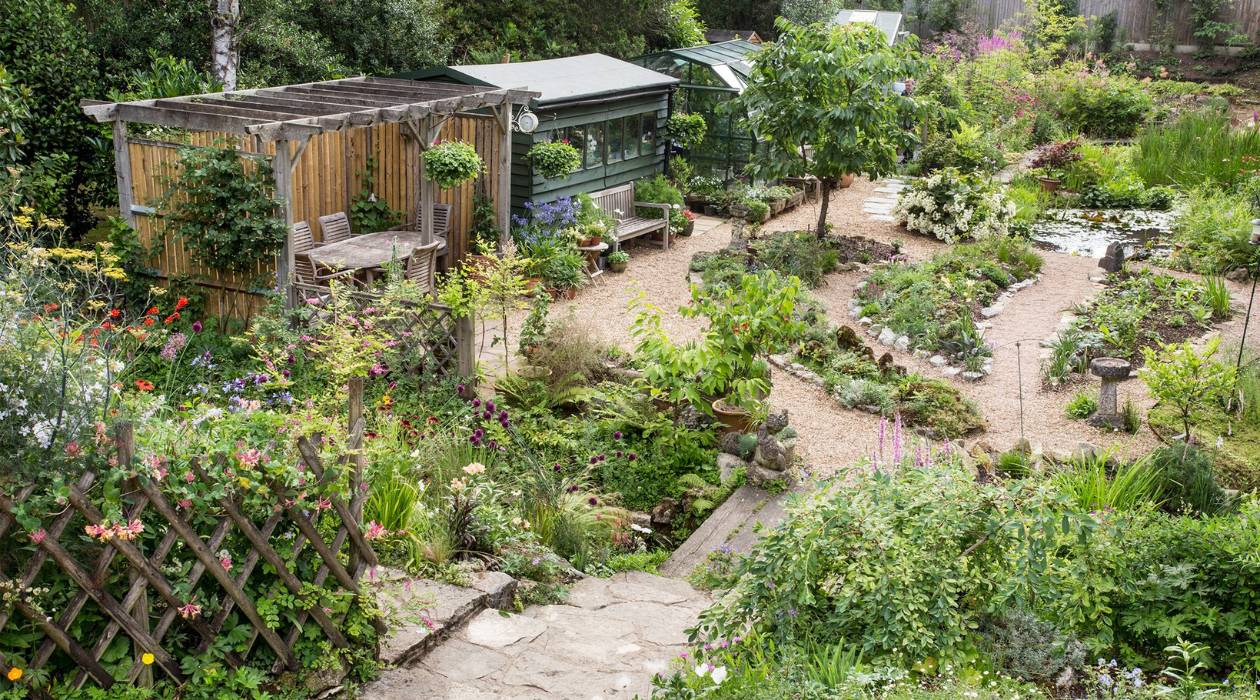
When it comes to landscaping, every space has its unique challenges and opportunities. One particularly tricky space to work with is a sloping garden. The irregular terrain can make it difficult to create a cohesive and functional design. However, with the right ideas and techniques, you can transform your sloping garden into a stunning landscape that maximizes its potential.
In this article, we will explore 10 sloping garden ideas that will help you overcome the challenges of a sloped space and create a beautiful and functional outdoor area. Whether you have a steep slope or a gentle incline, these landscaping tips will inspire you to make the most of your sloping garden.
Each idea will be accompanied by practical tips and suggestions for implementation. We will delve into concepts such as incorporating terraced planters, creating steps and pathways, building retaining walls, utilizing tiered raised beds, designing a water feature, adding a deck or patio, installing a multi-leveled lawn, growing a vertical garden, using potted plants and hanging baskets, and integrating a rockery or slope garden.
By implementing these ideas, you can create different levels within your sloping garden, adding depth and visual interest. Terraced planters, for example, can create beautiful, layered spaces for a variety of plants. Steps and pathways will not only make your garden accessible but will also add an element of charm. Retaining walls can help prevent soil erosion while creating defined areas for planting.
If you have limited space, tiered raised beds can be an excellent solution, allowing you to cultivate a variety of plants in a small area. A water feature, be it a cascading waterfall or a serene pond, can add a sense of tranquility to your garden. A deck or patio can provide a dedicated seating area, where you can relax and enjoy the view.
To make the most of your sloping garden, consider installing a multi-leveled lawn, creating a visually striking landscape. Growing a vertical garden can be an effective way to optimize space while adding a touch of greenery to your garden walls. Don’t overlook the potential of potted plants and hanging baskets – they can add color and vibrancy to any sloping garden.
Lastly, a rockery or slope garden can blend harmoniously with the natural contours of your sloping garden, creating a stunning focal point while providing habitat for various plants and animals.
With these 10 sloping garden ideas, you can transform your challenging terrain into a captivating and functional outdoor space. Get ready to roll up your sleeves and unleash your creativity as we guide you through each idea and provide practical tips for implementation. Let’s make the most of your sloping garden and turn it into a breathtaking oasis!
Key Takeaways:
- Transform your sloping garden into a stunning landscape by incorporating terraced planters, steps and pathways, retaining walls, tiered raised beds, water features, decks or patios, multi-leveled lawns, vertical gardens, potted plants, and rockeries.
- Embrace the challenges of a sloping garden and unleash your creativity to create a breathtaking outdoor space that maximizes its potential, providing a beautiful sanctuary for relaxation, entertainment, and connection with nature.
Incorporating Terraced Planters
One of the most effective ways to transform a sloping garden is by incorporating terraced planters. Terraced planters not only add visual interest to your landscape but also create distinct levels in your garden, making it easier to plant and maintain a variety of plants.
To begin with, assess the slope of your garden and determine how many terraces you would like to create. This will depend on the size of your garden, your personal preferences, and the plants you wish to cultivate.
Start by creating the first terrace, which will be closest to the top of the slope. This can be achieved by building a sturdy retaining wall or using pre-made terracing kits available in garden centers.
Choose materials that complement the overall aesthetic of your garden. Natural stone, timber, or even concrete blocks can be used to construct the retaining walls for the planters. Consider incorporating curves or gentle bends in your walls to create a more organic and visually appealing layout.
Once you have established the first terrace, proceed with constructing additional terraces below it. These can be built with shorter retaining walls or by incorporating steps to transition between levels.
When selecting plants for each terrace, consider their sun and shade requirements, as well as their water needs. Place plants with similar requirements on the same terrace to ensure optimal growing conditions. This will also make it easier to care for the plants and provide targeted maintenance.
Groundcover plants, such as creeping thyme or ajuga, can be used to cover bare soil and prevent erosion on the terraces. In addition, ornamental grasses, cascading flowers, and trailing vines can be strategically planted to add depth and dimension to your terraced garden.
To further enhance the visual appeal, incorporate decorative elements such as garden sculptures, birdbaths, or strategically placed rocks and pebbles.
Remember to consider the safety of your terraced garden. Install sturdy handrails or retaining walls with adequate height to prevent accidents and ensure the stability of the terraces.
Incorporating terraced planters in your sloping garden not only adds beauty but also maximizes space utilization. It allows you to create distinct planting areas and effectively manage water drainage. The multi-level effect created by terraced planters adds depth and interest to your landscape.
So, grab your shovel and get ready to create stunning terraced planters that will transform your sloping garden into a masterpiece of botanical beauty!
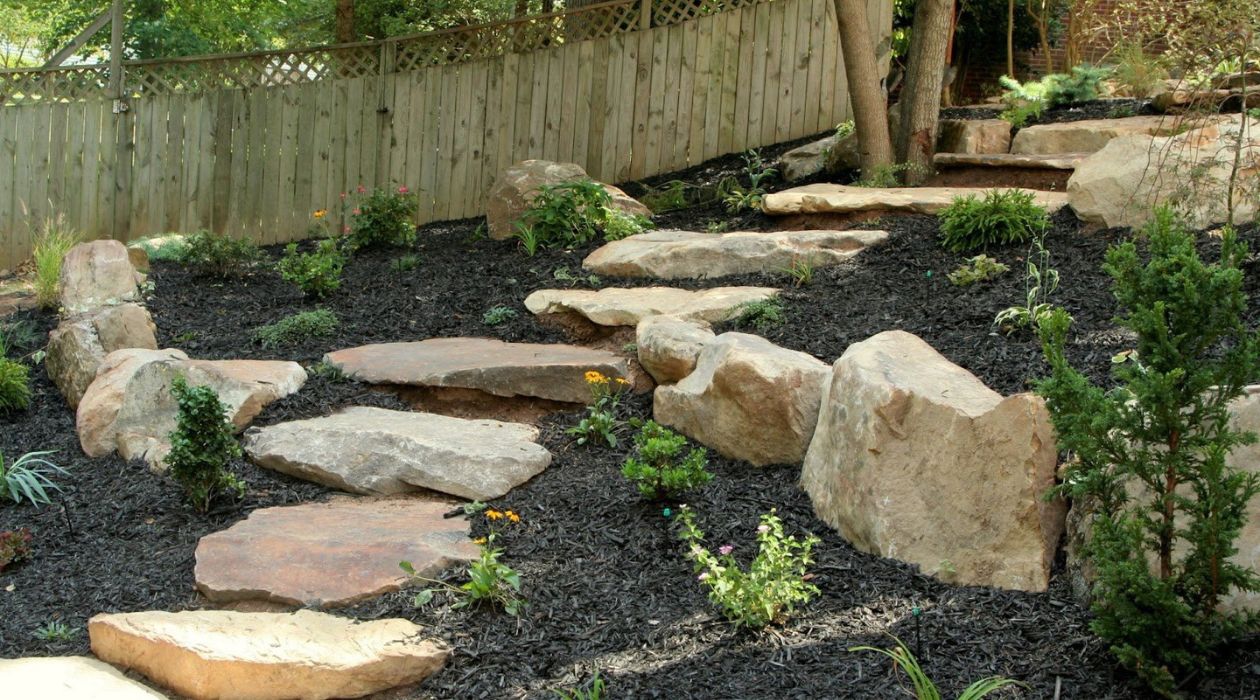
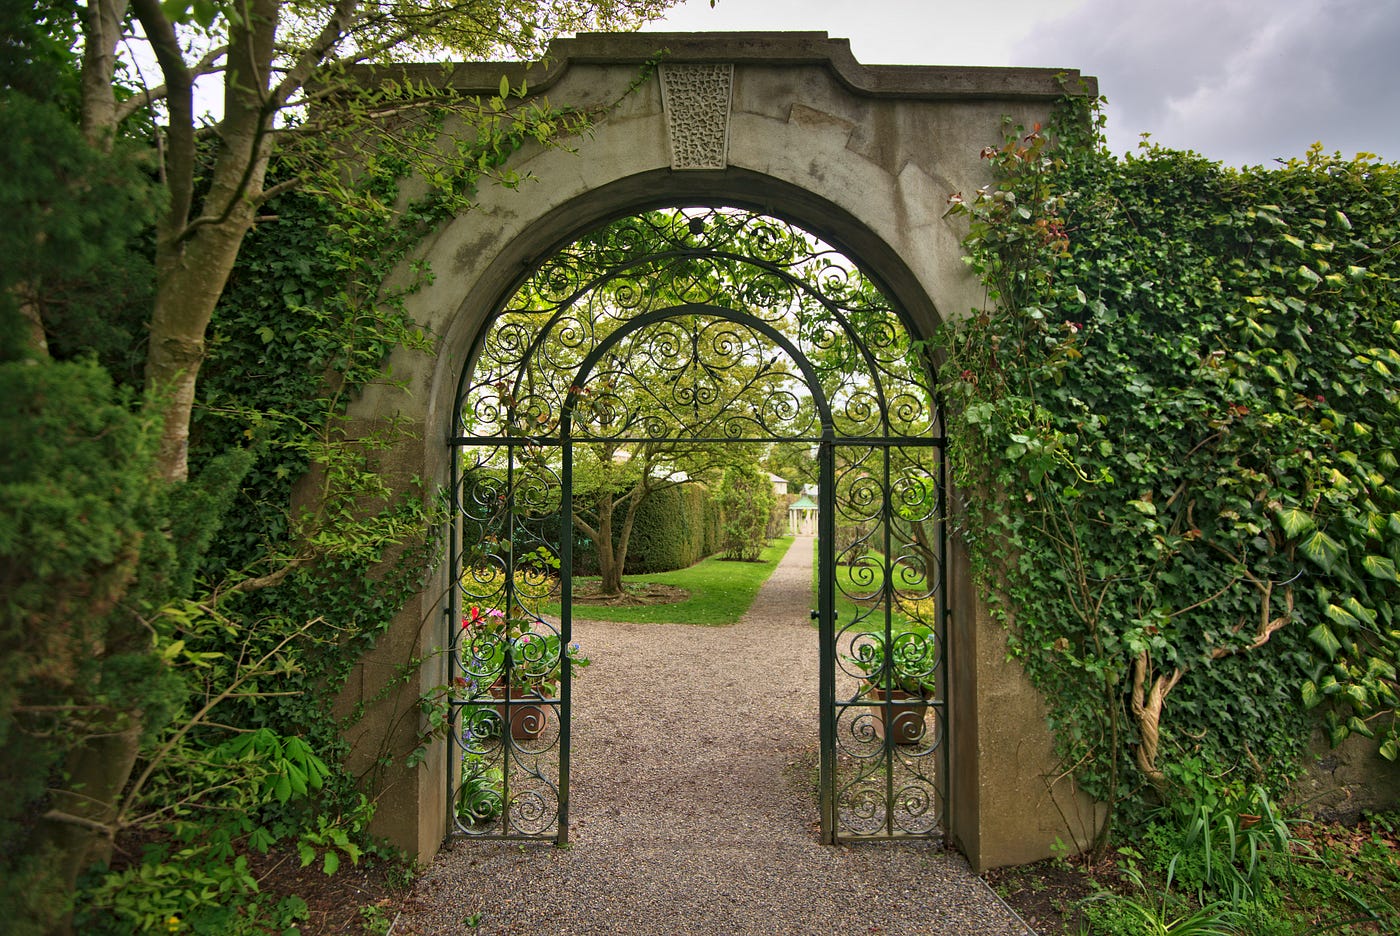
Creating Steps and Pathways
When designing a sloping garden, it’s essential to create steps and pathways that not only provide functional access but also add aesthetic appeal to the space. Steps and pathways not only serve as a way to navigate through your garden but also help prevent soil erosion and create structure within your landscape.
To start, carefully assess the slope of your garden and determine the best placement for steps and pathways. Consider the natural flow of the land and work with it to create a harmonious design.
Begin by marking the desired route for your pathways. Clear any vegetation or debris from the area to ensure a clean and level surface. If necessary, use a shovel to dig out the pathway to the desired depth, accounting for any edging or materials that will be used.
Next, choose the material for your steps and pathways. This will depend on your personal preference and the overall theme of your garden. Options include natural stone, brick, concrete pavers, or even wood. Consider the durability, texture, and visual appeal of each material before making your decision.
Lay a solid foundation for the pathway by adding a layer of crushed stone or gravel. This will help with drainage and prevent the pathway from shifting over time. Use a level to ensure that the foundation is even and properly sloped for water runoff.
If you are creating steps, ensure that each step is level and uniform in height. This will provide stability and a comfortable walking surface. Use a spirit level to check that the steps are even and make any necessary adjustments.
Consider adding handrails to the steps for safety, especially if the slope is steep. These can be made from a variety of materials such as metal, wood, or even rope. Ensure that the handrails are securely fastened and at a comfortable height for all users.
To add visual interest to the steps and pathways, consider using plants and landscaping elements. Place potted plants, shrubs, or flower beds alongside the pathway to create a vibrant and inviting atmosphere. Add lighting fixtures to illuminate the pathway at night for both safety and aesthetics.
Lastly, don’t forget to maintain your steps and pathways regularly. Remove any weeds or debris that may accumulate and keep the surfaces clean and free from hazards.
Creating steps and pathways in your sloping garden not only provides functional access but also adds structure and visual interest. It allows you to navigate the garden with ease while enjoying the beauty of your landscape. So, take the time to plan and construct well-designed steps and pathways that will enhance the overall appeal of your sloping garden.
Building Retaining Walls
When dealing with a sloping garden, building retaining walls is a crucial step to prevent soil erosion and create level areas for planting and other outdoor activities. Retaining walls provide stability and structure to your landscape, allowing you to make the most of your sloping terrain.
To begin, assess the slope of your garden and determine the areas that require retaining walls. Take into consideration any soil erosion or water flow issues that might be present.
Choose the material for your retaining walls based on your preference and the style of your garden. Options include natural stone, brick, concrete blocks, or even wood. Consider the durability, aesthetics, and cost of each material before making your decision.
Start by marking the proposed location of the retaining wall with stakes and string. This will give you a visual guide as you begin the construction process.
Excavate the area where the retaining wall will be built, ensuring that it is level and has a firm base. Dig a trench deep enough to accommodate the first row of the retaining wall material, and smooth out the bottom surface.
Lay the first row of the retaining wall material in the trench, making sure it is level. Use a spirit level to check for accuracy. Add a layer of gravel or crushed stone behind the first row to aid in drainage.
Continue building the retaining wall by adding more rows of material, ensuring that each row is level and securely connected to the previous one. Make adjustments as needed to maintain a straight and sturdy structure.
If necessary, install drainage pipes or weep holes in the retaining wall to allow for proper water drainage. This will prevent water buildup behind the wall, which can cause pressure and damage.
Consider integrating steps or seating areas into the retaining wall design. This not only adds functionality but also enhances the overall appeal of your sloping garden. Ensure that these additional features are built securely and provide a safe and comfortable experience for users.
Once the retaining wall is constructed, backfill the area behind it with soil, compacting it as you go. This will provide stability and support for the retaining wall while also creating a level area for planting or other purposes.
To add a decorative touch, consider incorporating climbing plants or cascading flowers along the retaining wall. This will soften the appearance of the structure and create a vibrant and lush atmosphere.
Regularly inspect and maintain your retaining walls to ensure their structural integrity. Look for any signs of movement or damage such as cracks or bulging and address them promptly.
Building retaining walls in your sloping garden not only offers functional benefits but also adds visual appeal and stability to your landscape. Take the time to plan and construct sturdy and aesthetically pleasing retaining walls that will transform your sloping garden and make it enjoyable for all.
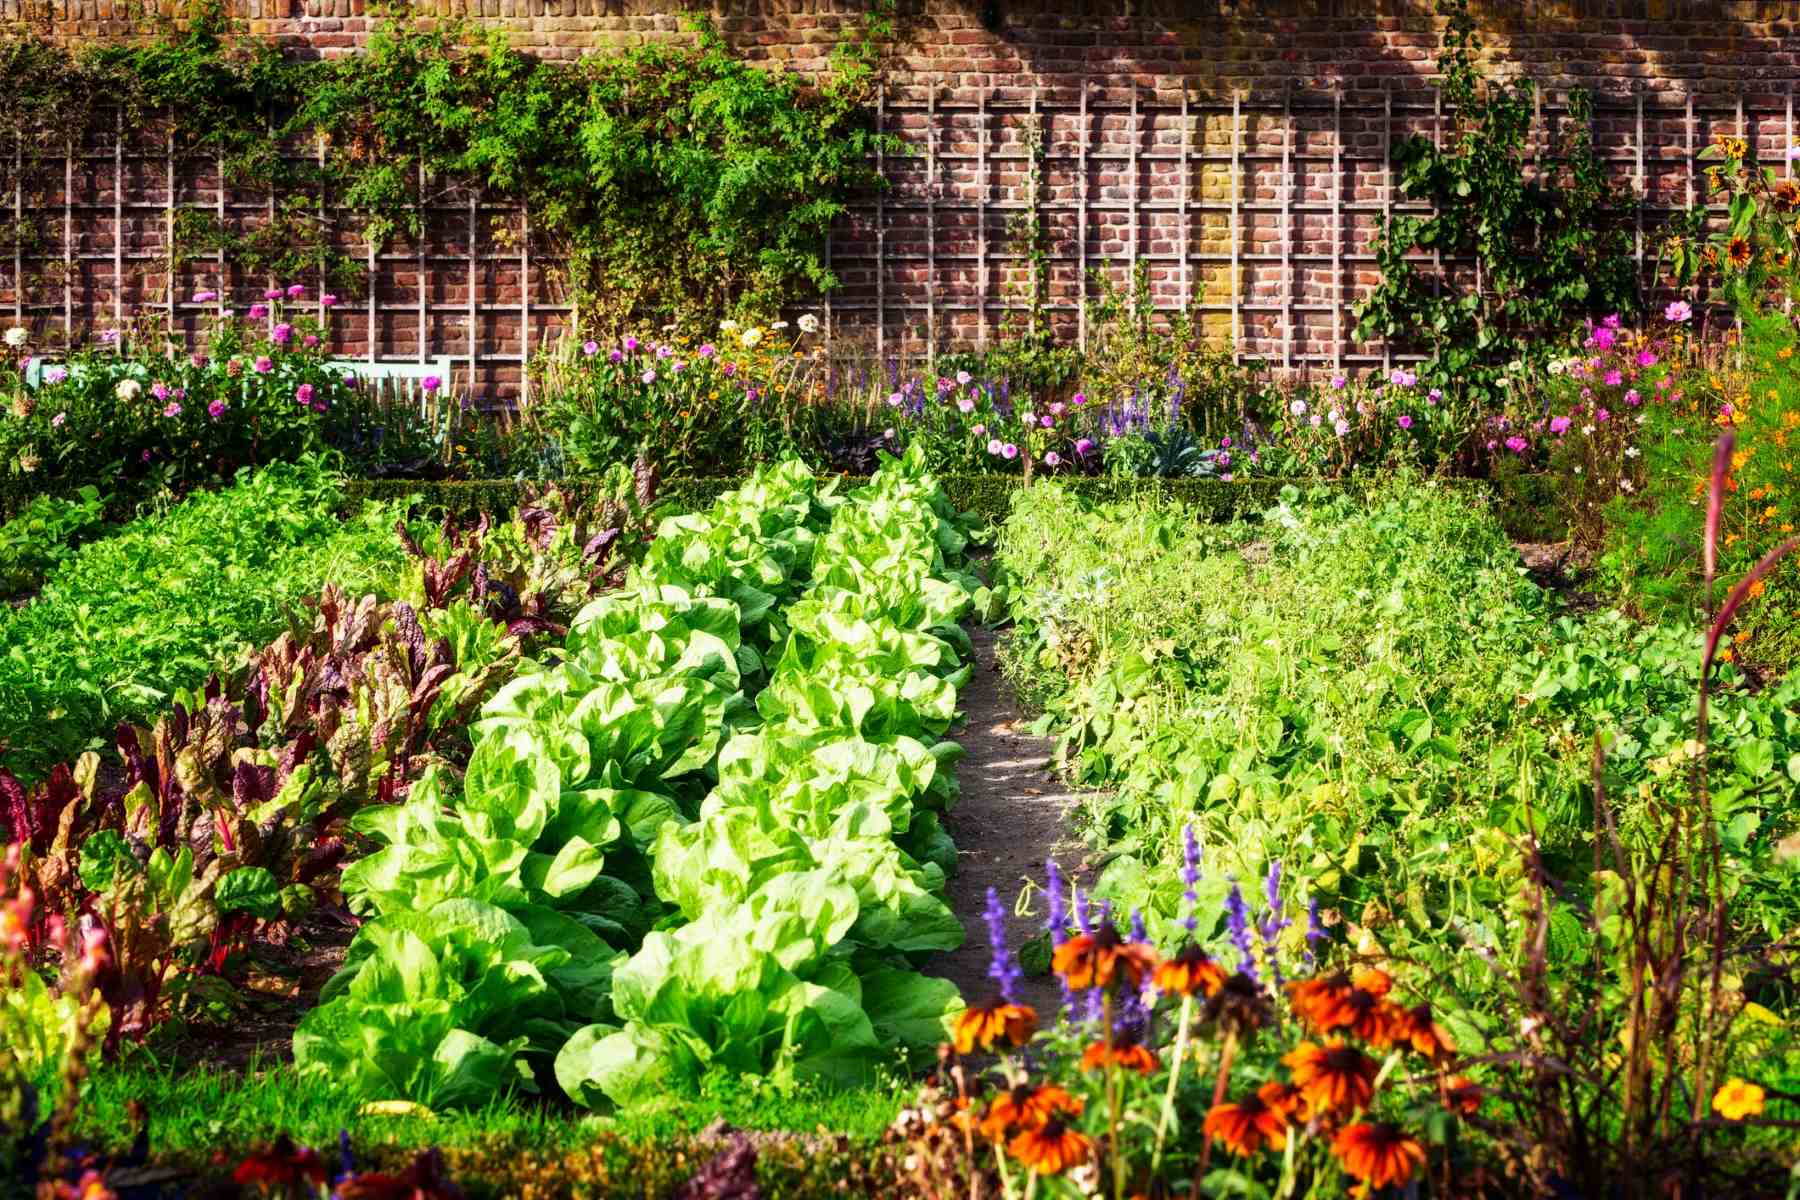
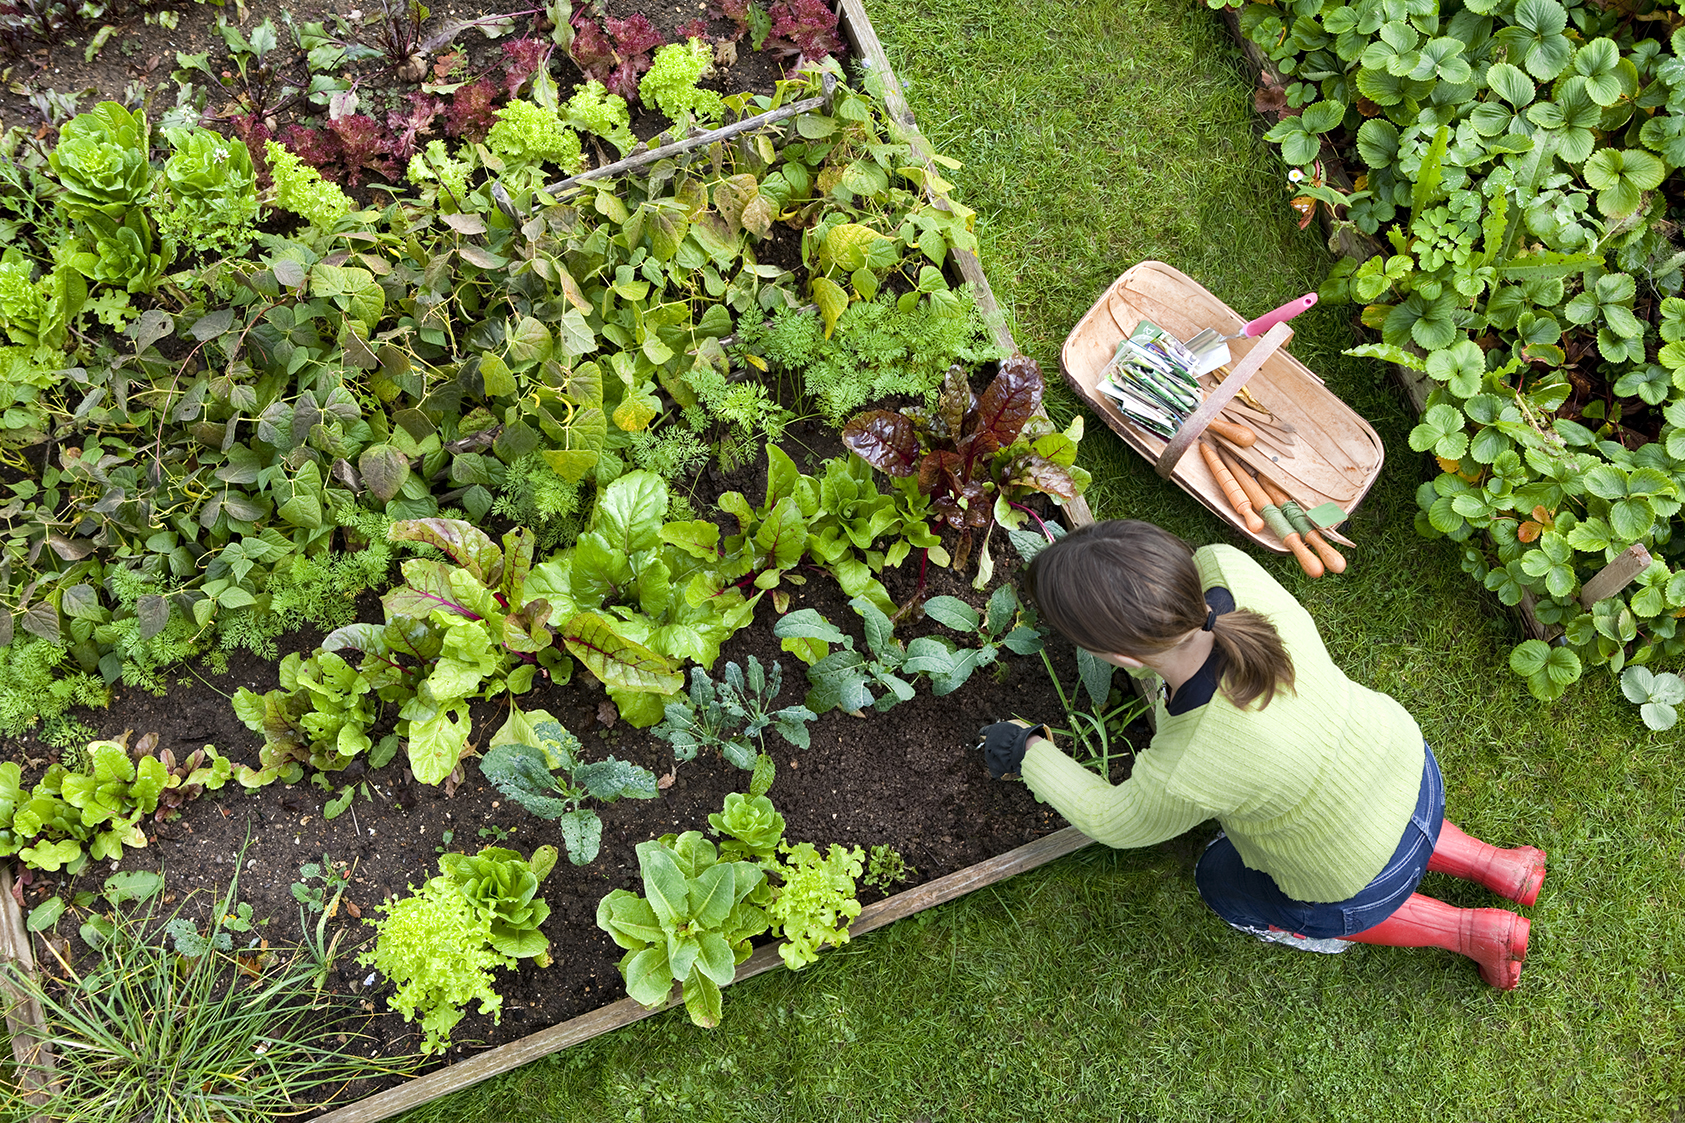
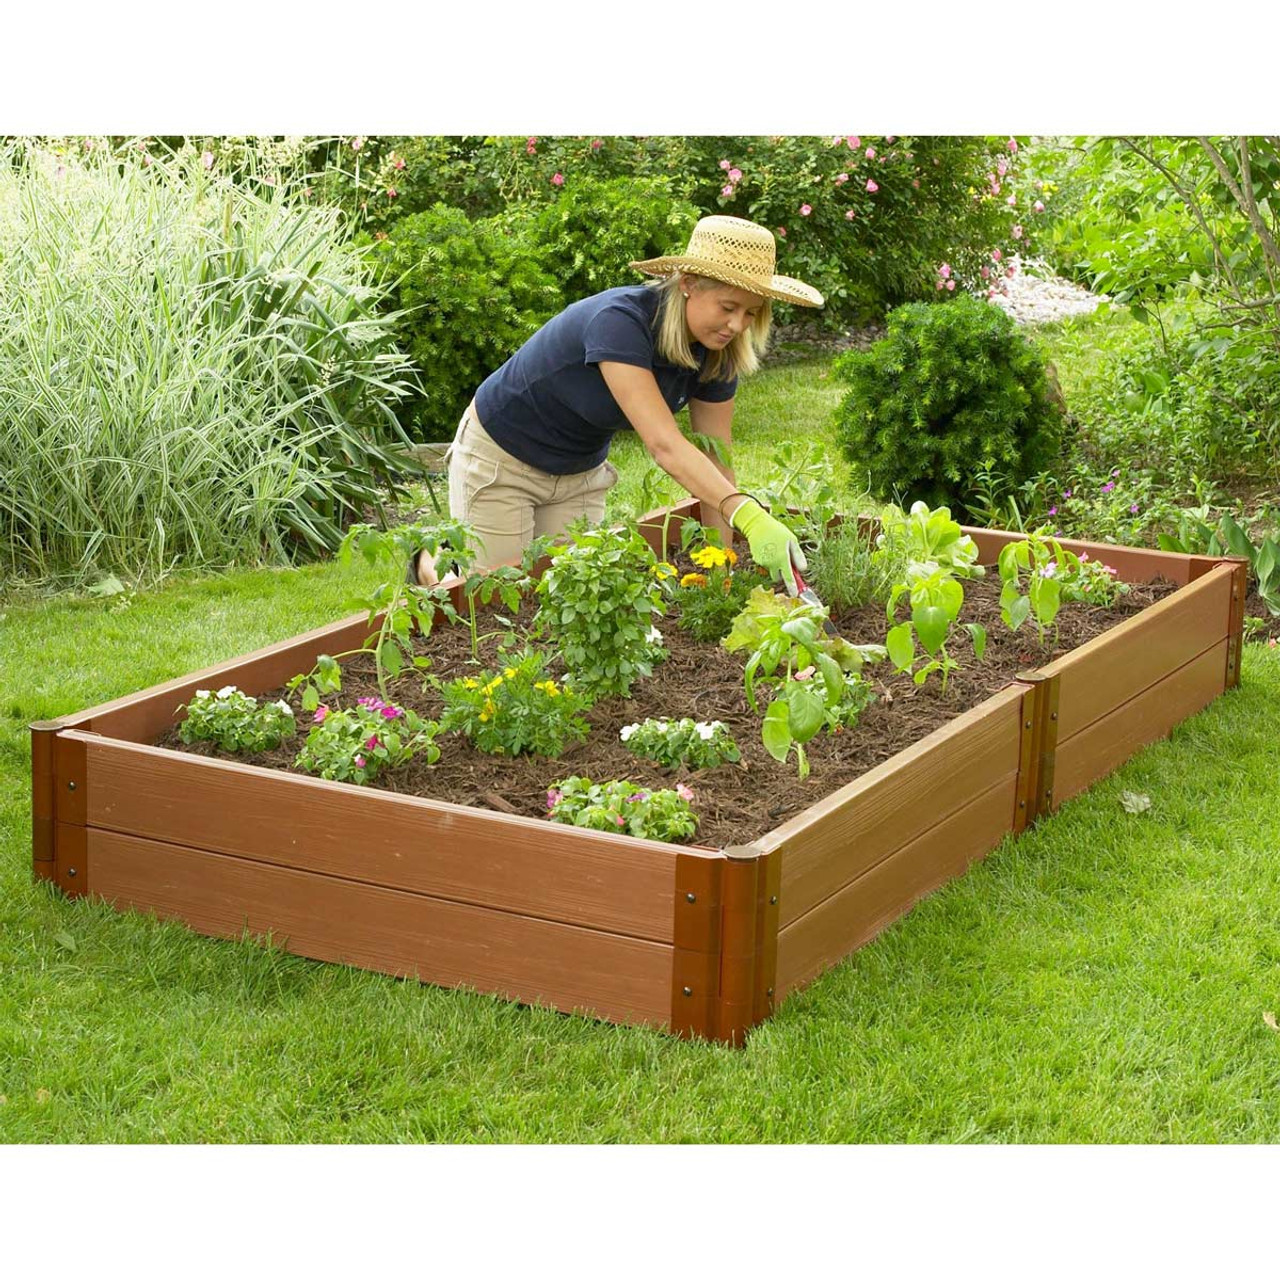
Utilizing Tiered Raised Beds
When working with a sloping garden, utilizing tiered raised beds is an effective way to optimize space and create functional planting areas. Tiered raised beds not only add visual interest to your landscape but also provide better drainage, improved soil quality, and easier access for gardening activities.
To begin, assess the slope of your garden and determine the number of tiers you would like to create. Consider the size of your garden and the plants you intend to grow.
Start by marking the outline of each tier using stakes and string. This will give you a visual guide as you construct the raised beds.
Choose the material for your raised beds, such as wooden planks, bricks, or blocks. Ensure that the material is sturdy and durable to support the weight of the soil and plants. Consider using rot-resistant materials for longevity.
Construct the base of the first tier by securing the chosen material together to form a rectangular or square shape. Ensure that the edges are properly aligned and the structure is level.
Fill the first tier with a well-draining soil mixture, such as a blend of compost, topsoil, and organic matter. This will provide a nutrient-rich environment for your plants to thrive.
Proceed to build the second tier by repeating the process, ensuring that it is aligned with the first tier and securely stacked. Fill it with soil as well and level the surface.
Continue building additional tiers, making sure that each one is level and properly aligned with the others. Add soil to each tier until the desired height is reached.
Plant your desired vegetables, herbs, flowers, or shrubs in each tier according to their sunlight and watering requirements. Consider grouping plants with similar needs together for easier maintenance.
Water your tiered raised beds regularly, ensuring that each tier receives adequate hydration. It’s important to note that the top tiers may dry out faster than the bottom ones, so monitor the moisture levels and adjust watering accordingly.
To add a decorative touch, consider incorporating edging materials like stones or decorative plants along the edges of each tier. This will define the boundaries and enhance the visual appeal of your tiered raised beds.
Regularly monitor the health of your plants and address any issues promptly, such as pests, diseases, or nutrient deficiencies. Prune and harvest as needed to promote healthy growth and maintain the desired appearance.
Utilizing tiered raised beds in your sloping garden not only maximizes space but also allows for efficient planting and maintenance. It provides an organized and aesthetically pleasing layout while creating optimal growing conditions for your plants. Transform your sloping garden into a beautiful and productive oasis by incorporating tiered raised beds.
Read more: How To Build A Garden Bed On A Slope
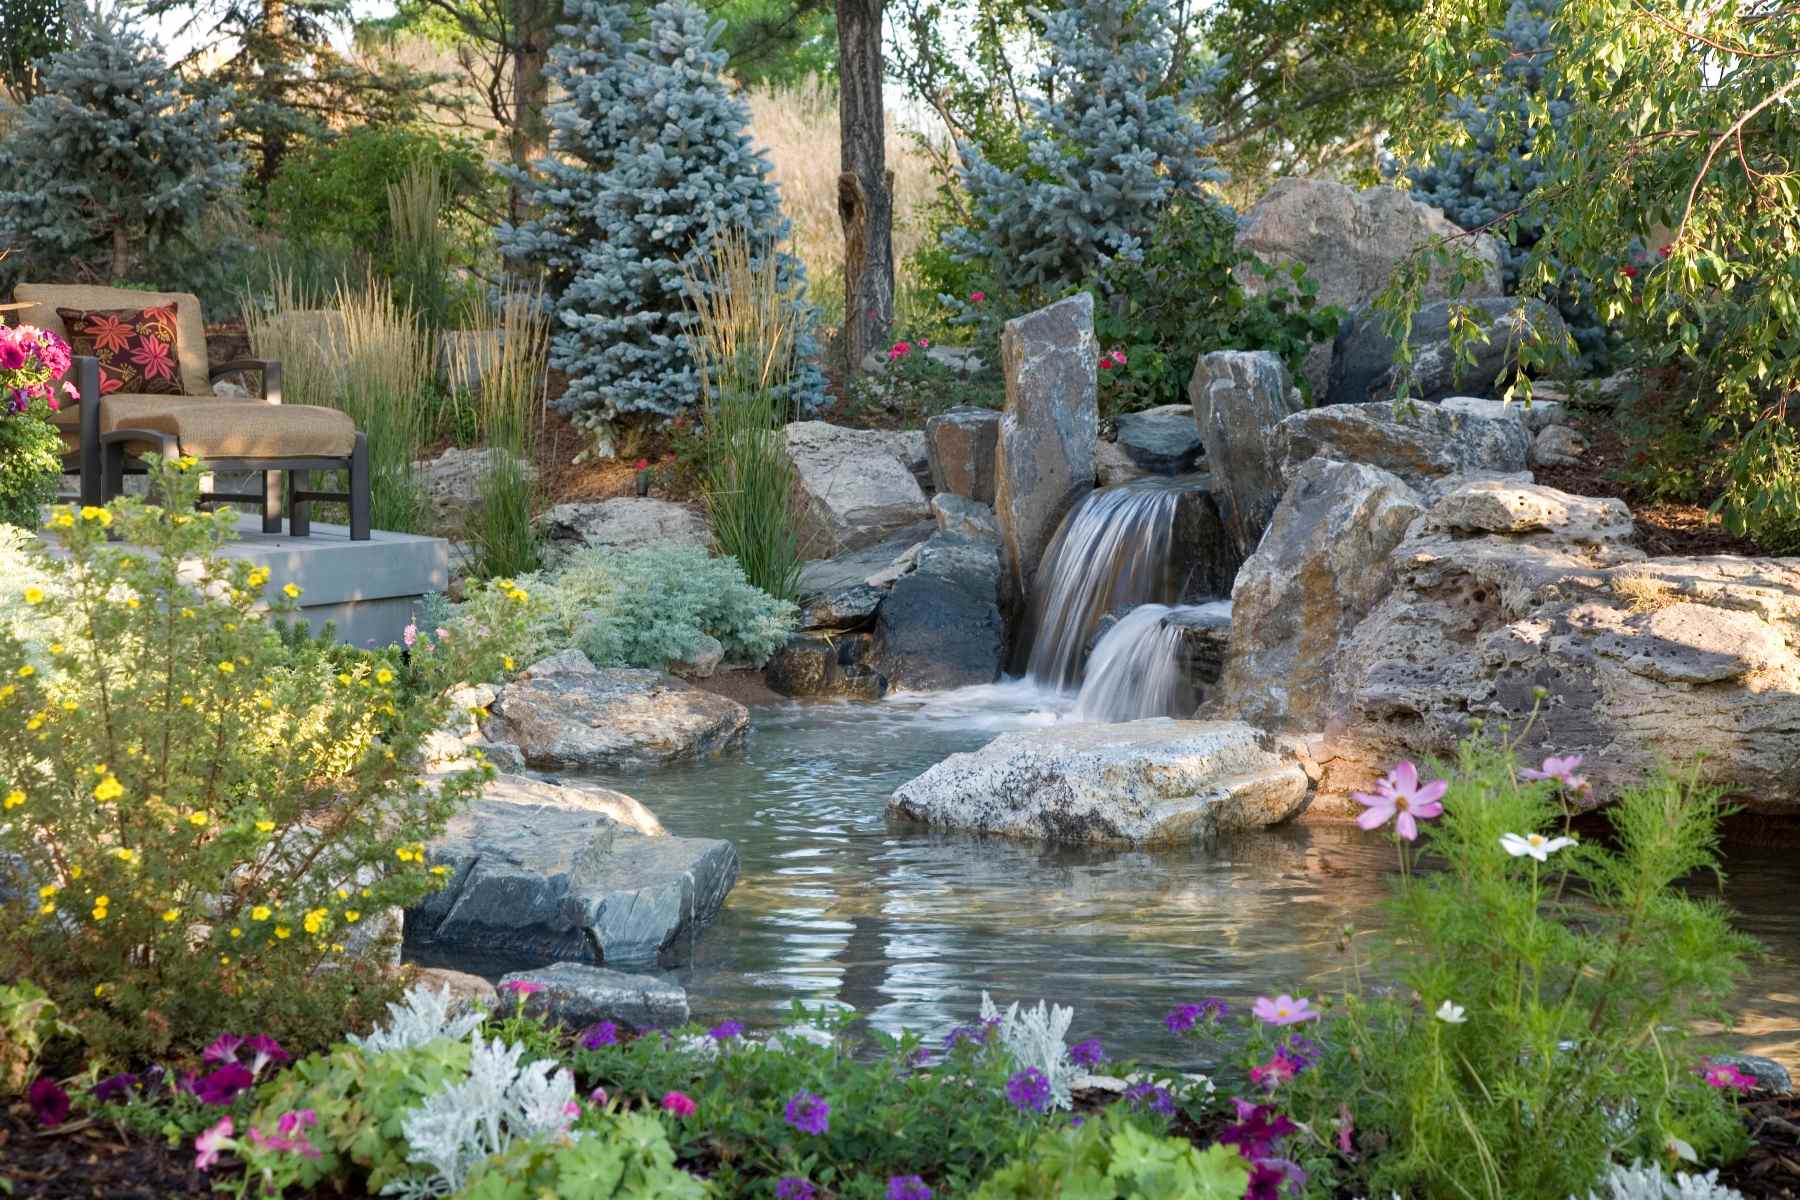
Designing a Water Feature
Designing a water feature in your sloping garden can bring a sense of tranquility and natural beauty to the space. The gentle sound of flowing water and the visual allure of a pond, waterfall, or stream can create a soothing ambiance while adding a focal point to your landscape. Here are some tips for designing a water feature in your sloping garden.
First, assess the slope of your garden and identify the ideal location for your water feature. Look for an area that has a natural dip or depression where water can be contained. This could be at the base of a slope or along a contour line.
Consider the size and scale of your water feature. A small pond, fountain, or cascading waterfall can be suitable options for a sloping garden. Take into account the available space, the surrounding vegetation, and how the water feature will blend with the overall design.
Decide on the style and theme of your water feature. Whether you prefer a natural, rustic look with rocks and plants or a modern, minimalist design, choose elements that align with your personal aesthetic and the surrounding environment.
Plan the layout and construction of your water feature. Determine whether you will need a pond liner or if you will be using natural rocks and soil to create a water-retaining structure. If necessary, consult a professional to ensure proper installation and integration with the existing landscape.
Consider the circulation and filtration system for your water feature to maintain water quality and clarity. This may involve installing a pump, filter, or UV sterilizer, depending on the size and complexity of your water feature.
Integrate plants around your water feature to create a harmonious and natural look. Choose aquatic plants such as water lilies, lotus, or iris to add color and texture. Marginal plants like cattails and rushes can also be incorporated to provide vertical interest along the edges of the water feature.
Add lighting to your water feature to enhance its beauty and extend its enjoyment into the evening hours. Underwater LED lights, spotlights, or string lights can create a stunning visual effect and highlight the cascading water or the plants surrounding the feature.
Consider incorporating seating areas or pathways around your water feature to allow for closer observation and relaxation. Use natural materials like gravel, stepping stones, or wooden decking to create a seamless transition between the water feature and the surrounding landscape.
Regular maintenance is key to keeping your water feature in optimal condition. Remove debris, balance water chemistry, and trim overgrown plants as needed. Additionally, protect your water feature during the winter months by using a pond heater or draining it to prevent damage from freezing temperatures.
A well-designed water feature can transform your sloping garden into a serene and inviting oasis. Take the time to plan and construct a water feature that complements your landscape and brings a sense of natural tranquility to your outdoor space. Enjoy the calming sounds of water and the visual beauty that a water feature can bring to your sloping garden.
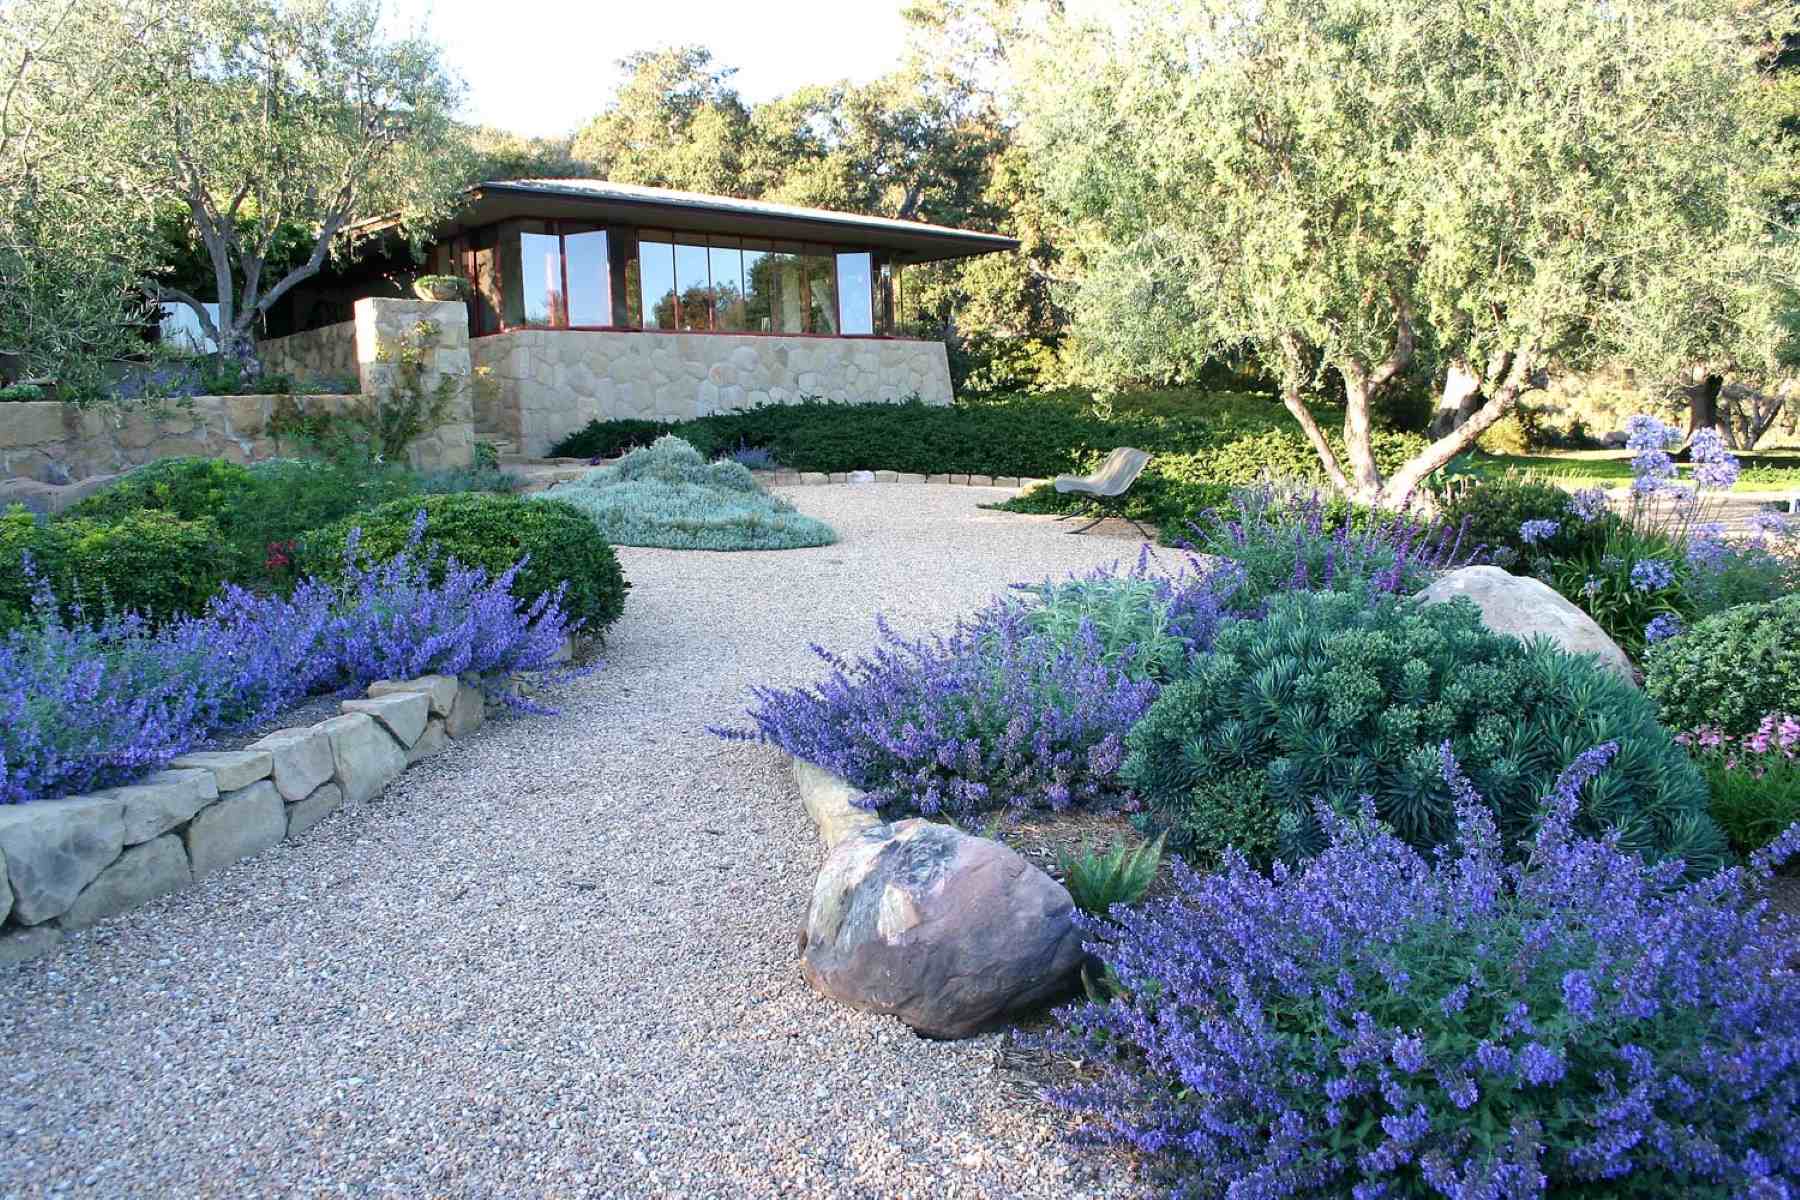
When landscaping a sloping garden, consider using terracing to create flat areas for planting and seating. This can help prevent soil erosion and make the space more usable.
Adding a Deck or Patio
An excellent way to make the most of your sloping garden is by adding a deck or patio. These outdoor living spaces not only provide a designated area for relaxation and entertainment but also create a seamless transition between your indoor and outdoor environments. Here are some tips for adding a deck or patio to your sloping garden.
Start by evaluating the slope of your garden and identifying the most suitable location for your deck or patio. Choose an area that offers a desirable view, maximizes sunlight, and provides a relatively level surface.
Consider the size and shape of your deck or patio based on your available space and intended use. Determine whether you prefer a small, intimate seating area or a larger space for outdoor dining and gatherings.
Design your deck or patio to complement the style of your home and landscape. Choose materials that blend harmoniously with the surroundings, such as wood, composite decking, or natural stone. Consider maintenance requirements and durability when selecting the materials.
Depending on the slope of your garden, you may need to level the area before constructing the deck or patio. This can be done by installing retaining walls or using a combination of retaining strips and gravel to create a stable base.
Plan the layout of your deck or patio to optimize functionality and flow. Consider adding different levels or sections to accommodate various activities, such as a dining area, a seating area, or even a built-in fire pit. Ensure that there is adequate space for movement and furniture placement.
Incorporate railings or balustrades into your deck design to enhance safety, particularly if the slope is steep. Choose materials that complement the overall aesthetic while providing necessary support.
Add features and accessories that enhance the ambiance of your deck or patio. Consider installing outdoor lighting fixtures, such as string lights or wall sconces, to create a warm and inviting atmosphere. Incorporate shade elements like pergolas, umbrellas, or retractable awnings to provide relief from the sun and add a touch of elegance.
Integrate planters, container gardens, or vertical green walls to bring natural beauty to your deck or patio. Select plants that thrive in outdoor conditions and consider their maintenance needs, sunlight requirements, and visual appeal.
Regularly clean and maintain your deck or patio to keep it in good condition. Sweep away debris, power wash surfaces when necessary, and reseal or repaint as needed.
By adding a deck or patio to your sloping garden, you can create an inviting outdoor space to relax, entertain, and enjoy the beauty of your surroundings. Take the time to carefully plan and design your deck or patio, considering functionality, aesthetics, and maintenance requirements. Transform your sloping garden into an outdoor haven that seamlessly connects with your indoor living space.
Installing a Multi-Levelled Lawn
Installing a multi-levelled lawn in your sloping garden can create a visually striking landscape while maximizing the usable space. It provides a unique and dynamic look to your outdoor area and allows for different activities on each level. Here are some tips for installing a multi-levelled lawn in your sloping garden.
Assess the slope of your garden and determine the number of levels you would like to create. Consider the overall size of your garden, the available space, and the desired functionality of each level.
Begin by marking the boundaries of each level using stakes and string. This will help you envision the layout and ensure a clean and precise installation.
Prepare the ground for each level by removing any vegetation, rocks, or debris. Level the area to create a flat surface for the lawn. This may involve adding or removing soil and using a leveling tool or a rake to achieve evenness.
Choose the type of grass that suits your climate, soil conditions, and light exposure. Consider factors such as drought tolerance, wear resistance, and maintenance requirements. It’s advisable to consult with a local garden center or turf specialist for expert advice on the best grass variety for your specific needs.
Install retaining walls or edging materials to separate each level and prevent soil erosion. Retaining walls can be made of different materials such as natural stone, bricks, or concrete blocks. Ensure they are sturdy and properly aligned to provide stability and support.
Once the retaining walls are in place, prepare the soil for each level by adding organic matter, compost, or topsoil. Use a rake or a garden tiller to mix the amendments into the existing soil, improving its quality and drainage.
Spread the grass seed or lay sod on each level, following the manufacturer’s instructions. Ensure good seed-to-soil contact or tight seams for sod installation. Water the newly seeded or sodded areas thoroughly to help promote germination or establishment.
Regularly water and maintain each level to ensure the health and growth of your multi-levelled lawn. Monitor irrigation needs, mow the grass at the appropriate height, and address any weed or pest issues that may arise.
Consider adding pathways or stepping stones between the different levels to facilitate movement and create a visually appealing transition. Use materials that blend with the overall design, such as natural stone or gravel.
To add a decorative touch, incorporate landscaping elements such as flower beds, shrubs, or ornamental grasses. These can be strategically placed on different levels or along the edges of the retaining walls to enhance the overall aesthetic of your multi-levelled lawn.
Regularly inspect and maintain the retaining walls and edges to ensure their stability. Repair any damage or address any issues promptly to prevent further problems.
By installing a multi-levelled lawn in your sloping garden, you can create a beautiful and functional outdoor space. Each level can serve a different purpose, from a play area to a seating nook or a space for gardening. Take the time to plan and construct your multi-levelled lawn carefully, considering functionality, aesthetics, and maintenance requirements. Enjoy the unique and striking landscape that a multi-levelled lawn can bring to your sloping garden.
Growing a Vertical Garden
Growing a vertical garden in your sloping garden can be an innovative and space-efficient way to add greenery and maximize your planting area. By utilizing vertical surfaces, such as walls or fences, you can transform your sloping garden into a lush and vibrant oasis. Here are some tips for growing a vertical garden in your sloping garden.
Assess the available vertical surfaces in your garden, such as walls, fences, or even the sides of raised beds. Consider the amount of sunlight and shade each surface receives to determine the best location for your vertical garden.
Choose the type of plants that are suitable for vertical growth. Look for vining plants, climbers, or those with trailing habits. Examples include ivy, climbing roses, clematis, or even vegetables like tomatoes and cucumbers.
Install a sturdy trellis, grid, or climbing frame against the vertical surface to support the plants as they grow. Ensure that it is securely anchored and can withstand the weight of the plants and any wind or weather conditions.
Prepare the soil or planting medium for your vertical garden. Use a mixture of compost, peat moss, and vermiculite to provide adequate nutrients and moisture retention. Consider using lightweight materials to reduce the overall weight on the vertical surface.
Place the selected plants near their respective supports and gently guide them to grow vertically. Train the vines or stems by tying them loosely to the structure using soft twine or plant ties. Avoid tying tightly, as this can restrict growth or damage the plants.
Regularly water your vertical garden, as plants grown vertically may have increased water requirements due to exposure to sunlight and wind. Consider using drip irrigation or installing a watering system to ensure consistent moisture levels.
Monitor the growth of your plants and prune them as needed to maintain shape and prevent overcrowding. Remove any dead or damaged foliage to promote healthy growth. Consider fertilizing regularly to provide necessary nutrients for optimal plant growth.
To enhance the visual appeal of your vertical garden, consider adding hanging baskets or wall-mounted planters. These can be filled with cascading flowers or trailing foliage plants to add depth and dimension to the overall design.
Incorporate other decorative elements, such as garden art or ornaments, to enhance the aesthetic appeal of your vertical garden. These can be strategically placed amongst the plants or on the supports to create a visually pleasing arrangement.
Regularly inspect the supports and infrastructure of your vertical garden to ensure their stability and durability. Make any necessary repairs or adjustments to prevent damage or collapse.
Growing a vertical garden in your sloping garden not only maximizes space but also adds a unique and eye-catching element to your outdoor space. With careful planning, plant selection, and maintenance, you can create a stunning showcase of greenery on vertical surfaces. Enjoy the beauty and functionality of your vertical garden as it transforms your sloping landscape into a verdant sanctuary.
Read more: The Forbidden Fruit Of Edible Landscaping
Using Potted Plants and Hanging Baskets
Using potted plants and hanging baskets in your sloping garden is a versatile and practical way to add color, texture, and beauty to your outdoor space. These portable and space-saving gardening options allow you to create focal points, define areas, and overcome the challenges of a sloping terrain. Here are some tips for using potted plants and hanging baskets in your sloping garden.
Assess the available space in your sloping garden and identify areas where potted plants and hanging baskets can be placed. Consider factors such as sunlight exposure, water availability, and the overall aesthetic you wish to achieve.
Choose pots and containers that are suitable for your chosen plants. Consider the size, drainage holes, and material of the pots. Terracotta, ceramic, or plastic pots are common options, each with their own advantages. Hanging baskets can be made of wire, wicker, or plastic, depending on your preference.
Select plants that thrive in containers and complement the conditions of your sloping garden. Consider the sunlight requirements, water needs, and growth habits of each plant. Opt for a mix of flowers, foliage, and even dwarf shrubs to create depth and variety.
Position your pots strategically to create visual interest and define different areas of your sloping garden. Place them at varying heights and levels to utilize the natural contours of the terrain. Consider using terraces, steps, retaining walls, or shelving to display your potted plants.
Use a well-draining potting mix to ensure healthy root growth and proper drainage. Add a layer of gravel or broken pottery at the bottom of the pots to enhance drainage and prevent waterlogging.
Regularly water your potted plants and hanging baskets, as containers can dry out more quickly than plants in the ground. Monitor soil moisture levels and adjust your watering regimen accordingly. Consider using self-watering pots or installing a drip irrigation system for convenience.
Fertilize your potted plants according to their specific needs. Use a balanced, water-soluble fertilizer or slow-release granules to provide essential nutrients for healthy growth. Follow the instructions on the fertilizer packaging to avoid over-fertilization.
Prune your potted plants as needed to control growth and promote bushiness or flowering. Remove any dead or yellowing leaves or flowers to maintain a tidy and attractive appearance. Regular grooming will also help prevent pests and diseases.
Consider using hanging baskets to add a vertical element to your sloping garden. Hang them from pergolas, trellises, or hooks attached to walls or fences. Choose trailing and cascading plants, such as petunias, lobelia, or trailing ivy, to create stunning displays of color and texture.
Remember to protect your potted plants from harsh weather conditions, especially during extreme temperatures or heavy rains. Move them to more sheltered areas or provide temporary coverings when necessary.
Using potted plants and hanging baskets in your sloping garden allows you to experiment with different plant combinations, change the arrangement easily, and add seasonal interest. Embrace the versatility of container gardening and enjoy the charm and flexibility it brings to your sloping garden.
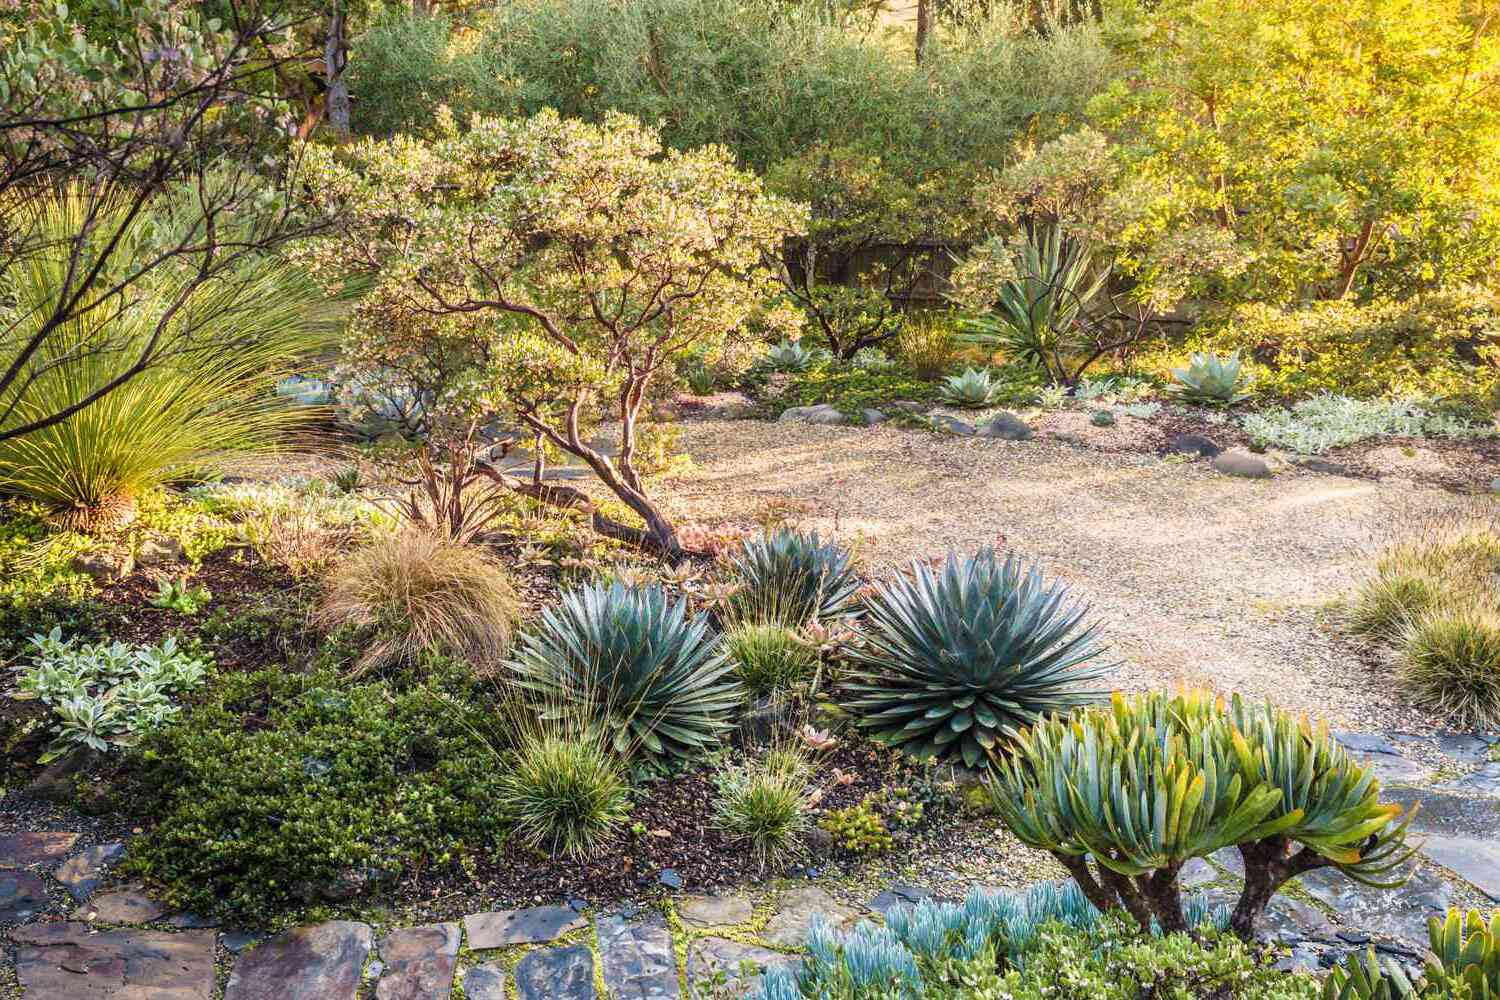
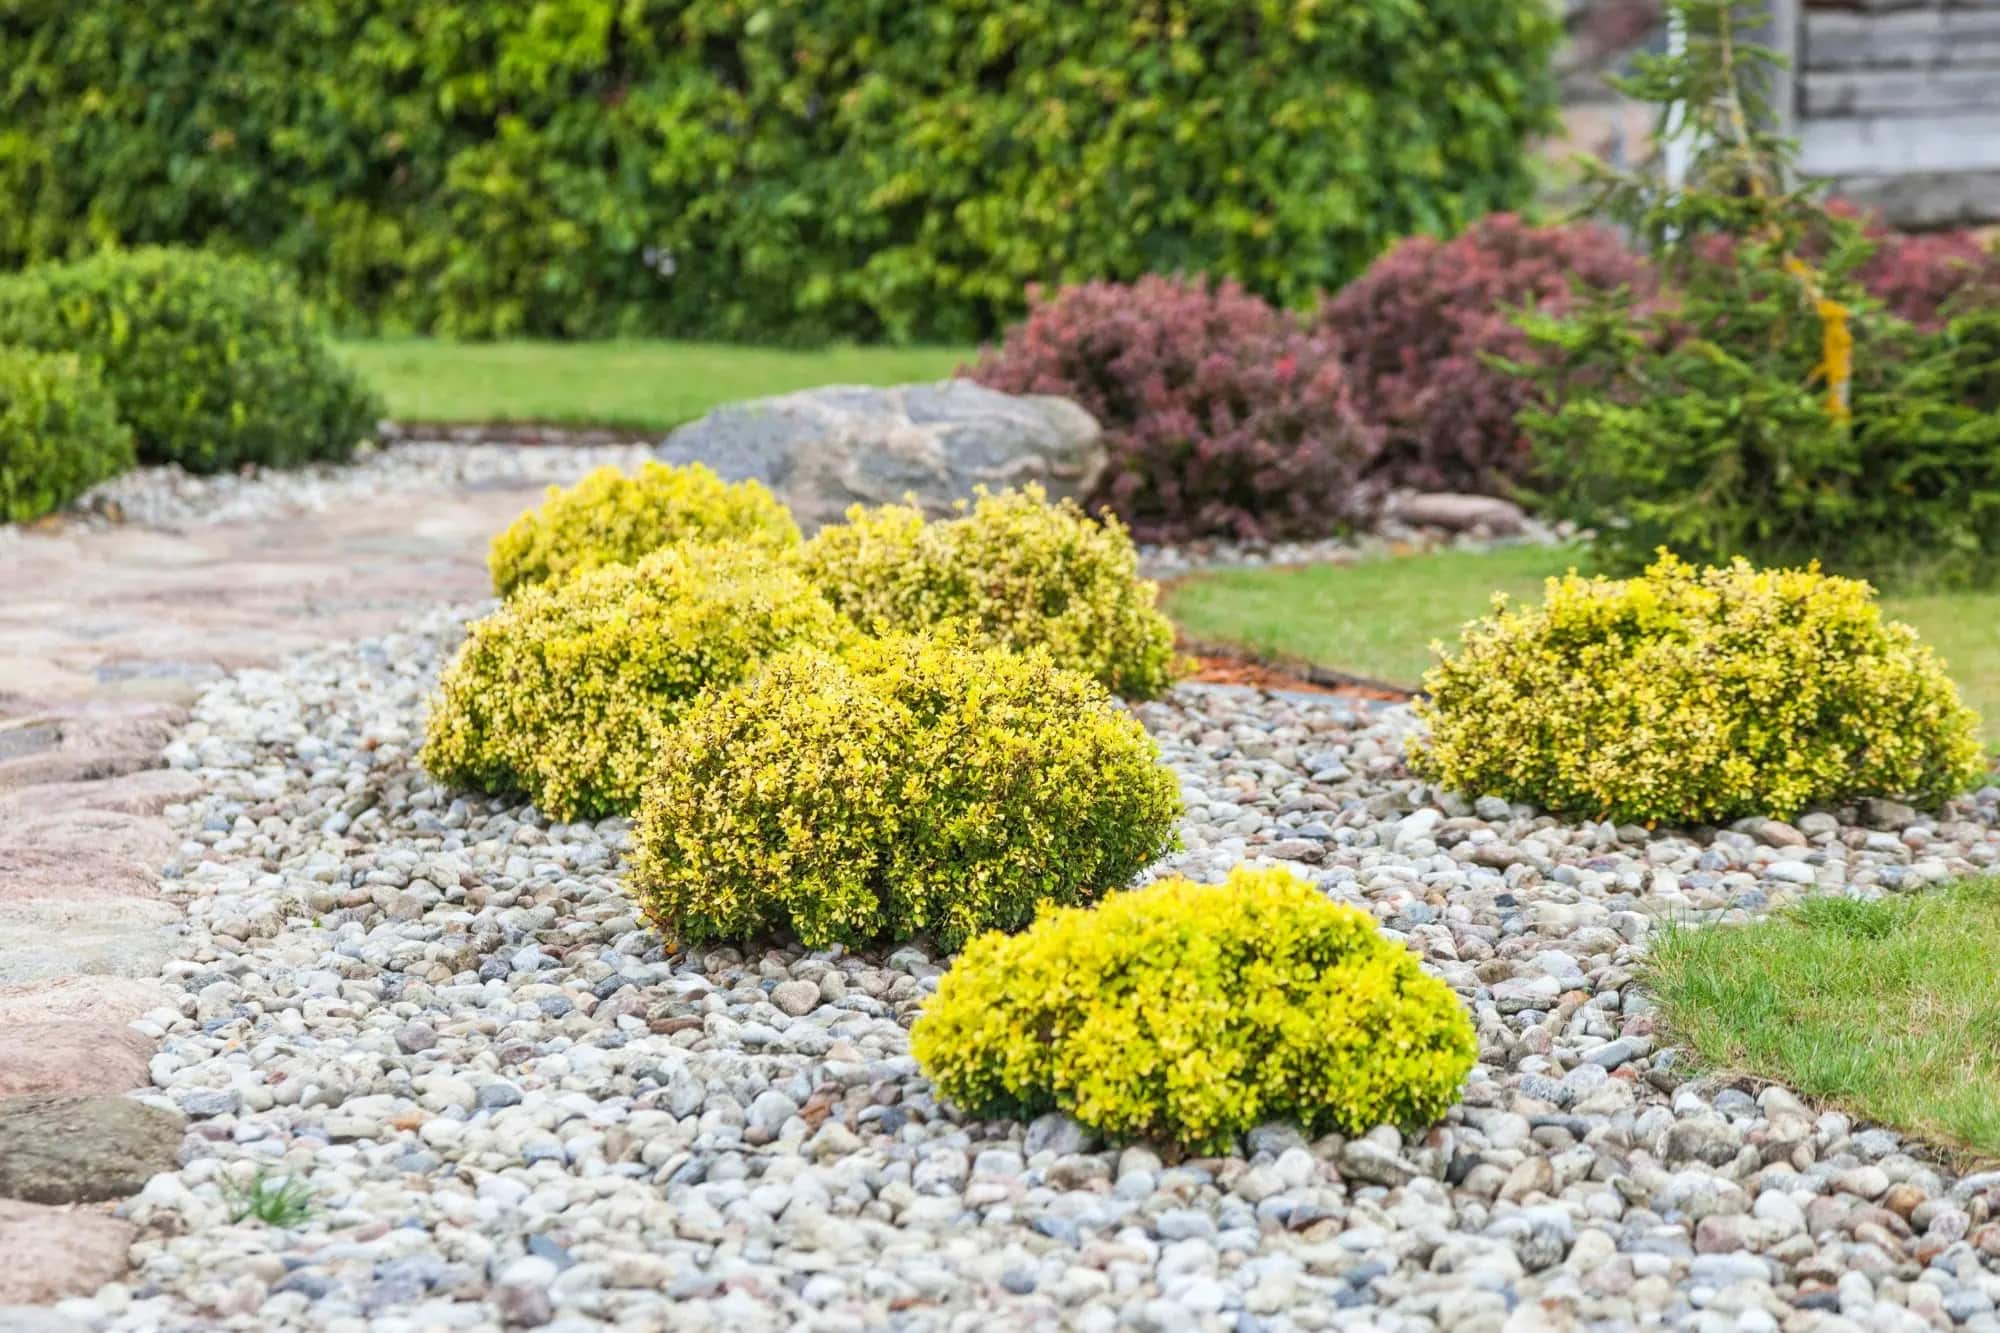
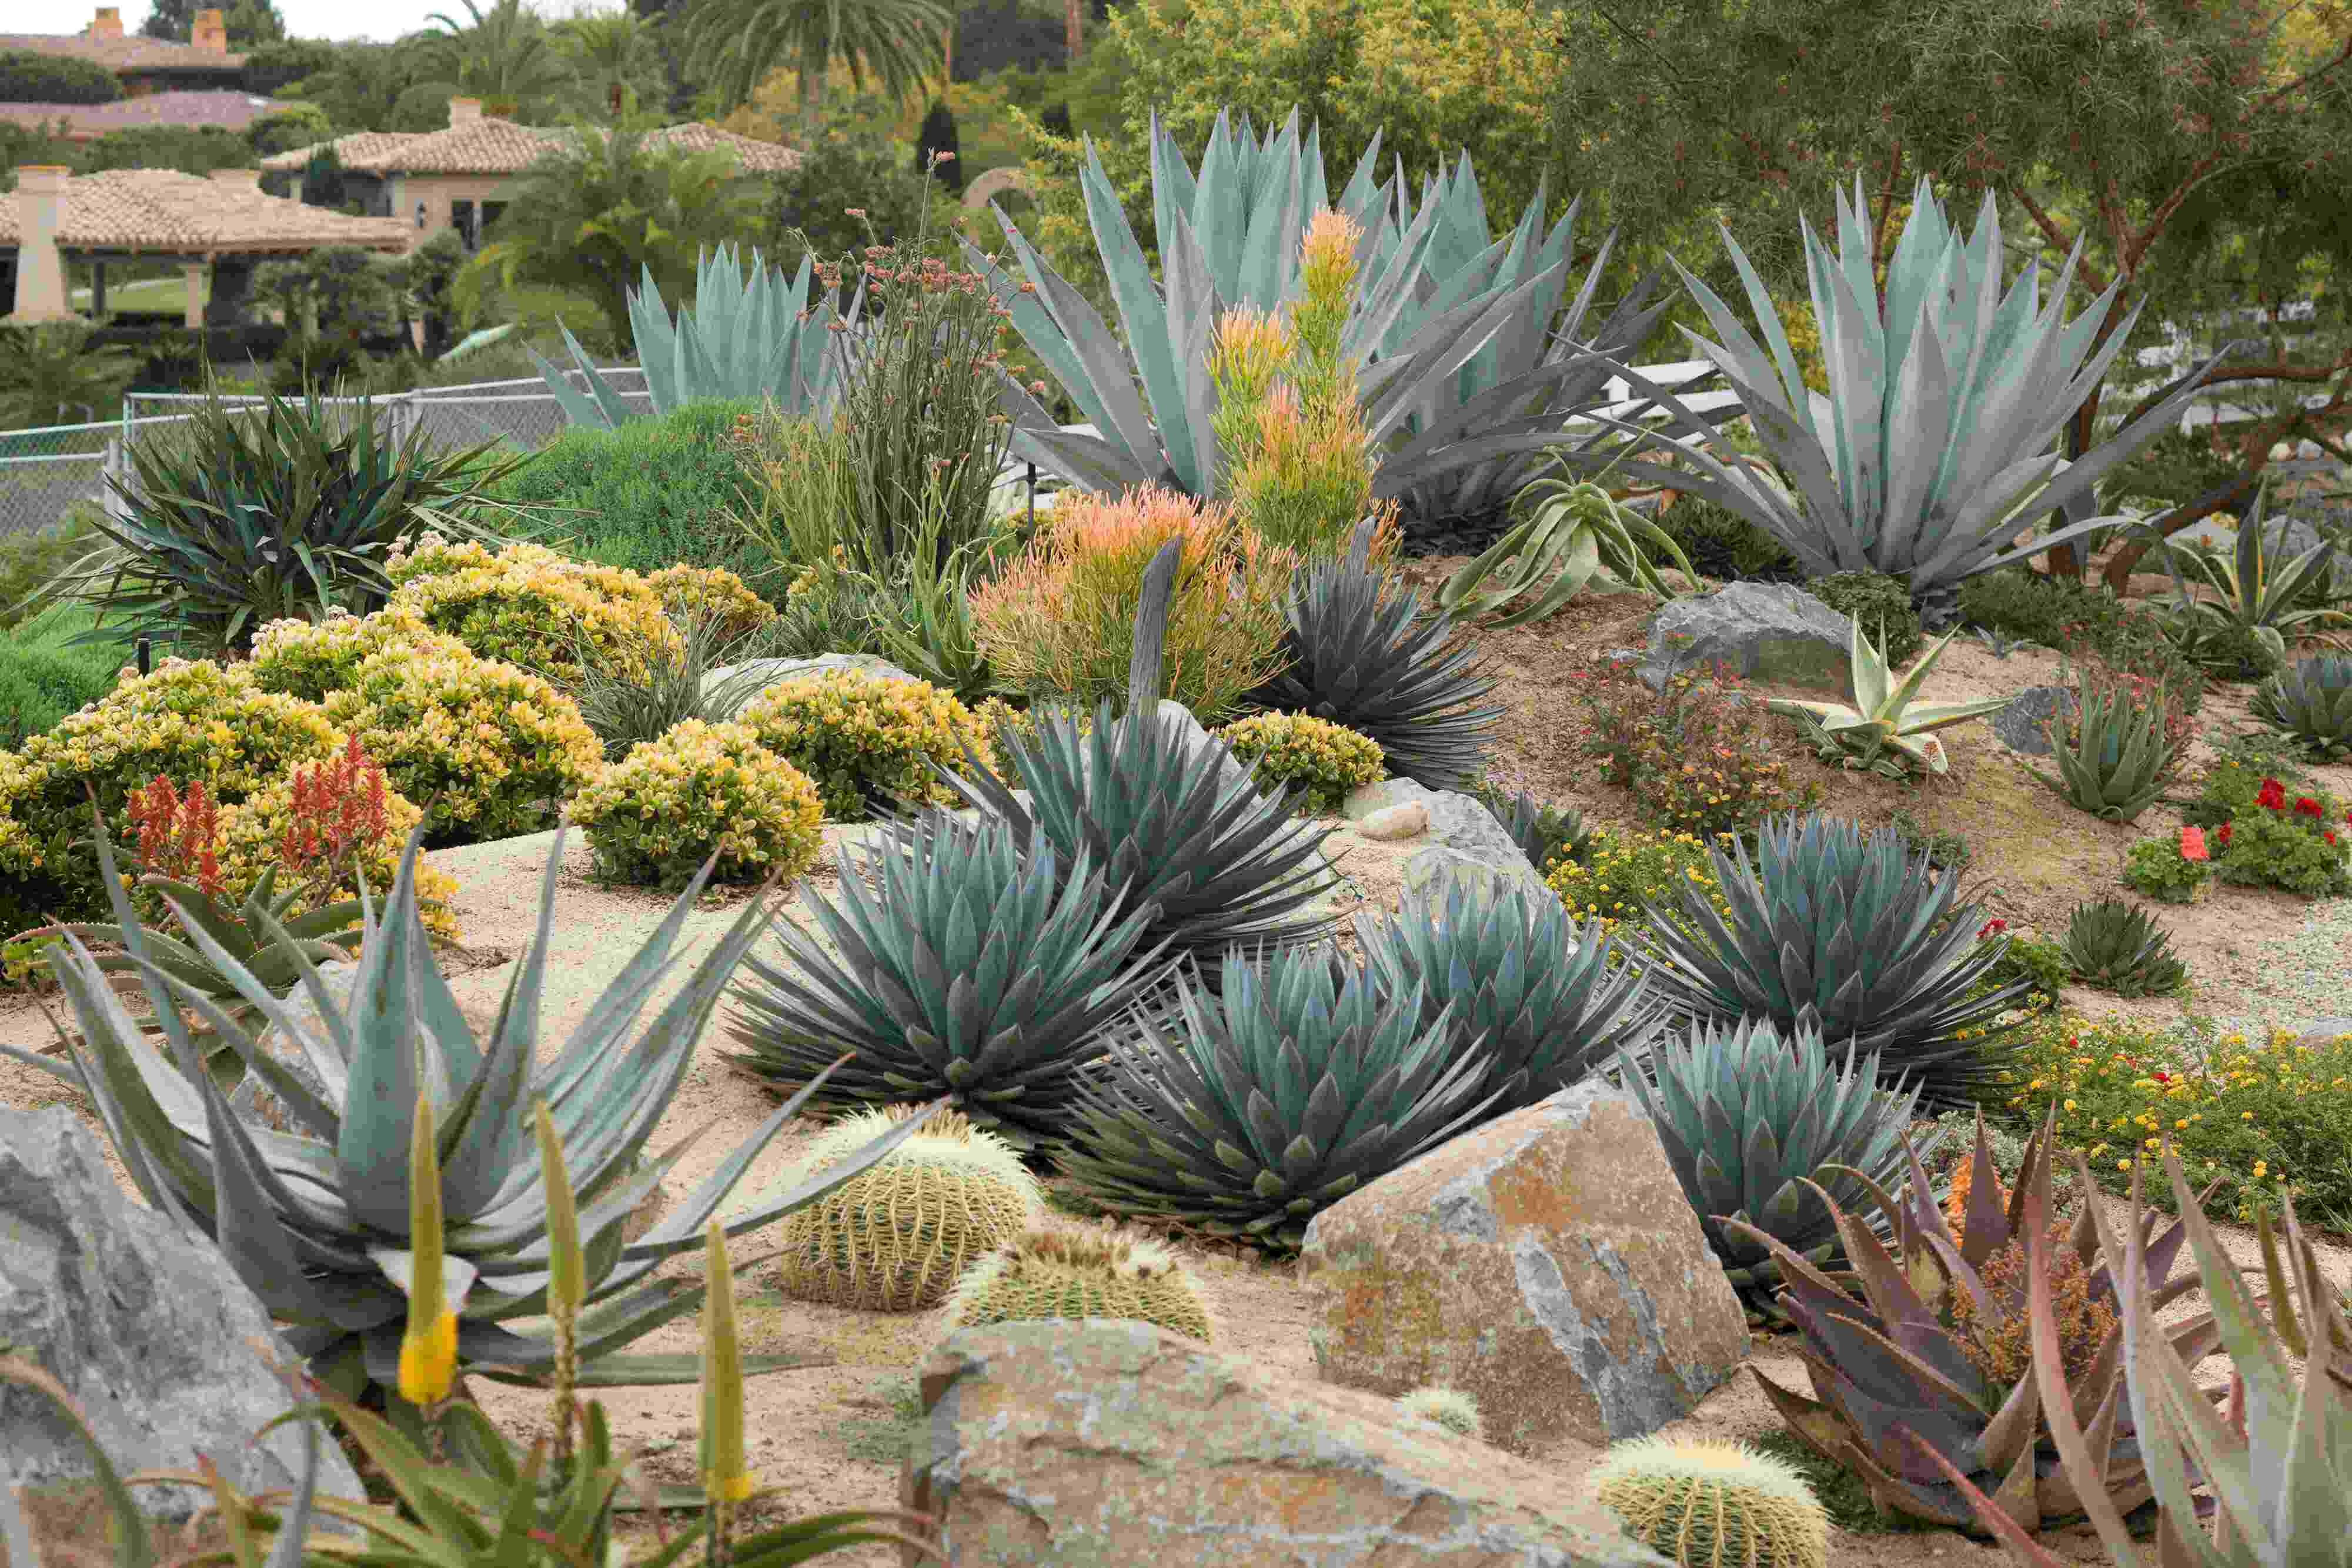
Integrating a Rockery or Slope Garden
Integrating a rockery or slope garden in your sloping landscape can create a captivating and natural focal point while making the most of the unique contours of the terrain. A rockery or slope garden adds texture, visual interest, and a sense of rugged beauty to your outdoor space. Here are some tips for integrating a rockery or slope garden in your sloping garden.
Assess the slope of your garden and select the area where you want to create your rockery or slope garden. Consider the amount of sunlight, soil conditions, and the overall aesthetic you wish to achieve.
Start by clearing the area of any vegetation or debris. Remove large rocks or boulders that may hinder the process of constructing the rockery. Take note of any existing plants or trees that you want to preserve and work around them.
Plan the layout of your rockery or slope garden, taking into account the natural contours of the slope. Consider the size, shape, and distribution of rocks and plants, and how they will interact with each other in the design. Aim for a natural and organic look that blends harmoniously with the surroundings.
Choose rocks of various sizes and shapes to create a visually appealing rockery. Use local, native rocks whenever possible, as they will blend seamlessly into the existing landscape. Arrange the rocks in a staggered, layered manner to create depth and interest.
Prepare the soil for planting by removing any weeds or grass. Add organic matter or compost to improve the soil’s fertility and drainage. Create small pockets or niches between the rocks to accommodate plantings.
Select plants that are suitable for rockeries or slope gardens. Choose species that are adapted to your climate, prefer well-drained soil, and can tolerate the exposure and potential water runoff on the slope. Consider using a variety of groundcovers, grasses, succulents, and alpine flowers to create an eye-catching and diverse rockery garden.
Plant the selected vegetation by gently placing the root ball into the prepared soil pockets. Ensure that there is good contact between the roots and the soil. Water the plants generously after planting to help them establish.
Add mulch or gravel between the plants and rocks to conserve moisture, suppress weed growth, and enhance the overall aesthetic of the rockery. Use materials that complement the color and texture of the rocks.
Regularly maintain and care for your rockery or slope garden. Monitor the soil moisture levels and water as needed. Prune and trim plants to maintain their shape and prevent overcrowding. Remove any weeds or debris that may accumulate.
Consider incorporating other elements such as stepping stones, a small pathway, or a bench within the rockery or slope garden to enhance accessibility and enjoyment of the space. These elements can also serve as focal points and add functionality to the overall design.
Appreciate the natural beauty and rugged charm of your rockery or slope garden throughout the seasons. Take the time to observe the changes and growth of the plants, and make any necessary adjustments or additions to maintain the desired appearance.
Integrating a rockery or slope garden in your sloping landscape adds a unique and captivating element to your outdoor space. Embrace the natural contours and features of your garden, and create a beautiful and low-maintenance rockery that will be a source of joy and admiration for years to come.
Conclusion
Transforming a sloping garden can be a challenging yet rewarding endeavor. By implementing the 10 ideas discussed in this article, you can turn your sloping garden into a breathtaking landscape that maximizes its potential and provides a beautiful outdoor space for relaxation, entertainment, and connection with nature.
Incorporating terraced planters allows you to create distinct levels within your garden, providing room for a variety of plants and adding depth to the landscape. Steps and pathways not only provide functional access but also add visual interest and structure to your garden.
Building retaining walls helps prevent soil erosion, creates level areas for planting, and adds stability and definition to your landscape. Utilizing tiered raised beds is an efficient way to optimize space, improve drainage, and grow a wide variety of plants in a confined area.
Designing a water feature brings a sense of tranquility and natural beauty to your garden. The sound of flowing water and the visual allure of a pond, waterfall, or stream create a serene ambiance and become a focal point in your landscape.
Adding a deck or patio provides a designated area for relaxation and entertainment while seamlessly connecting your indoor and outdoor environments. It enhances your sloping garden by creating a functional and inviting space for socializing and enjoying the outdoors.
Growing a vertical garden utilizes vertical surfaces to add greenery and maximize planting space. It brings a unique and eye-catching element to your sloping garden, allowing you to create stunning displays of climbing or trailing plants.
Using potted plants and hanging baskets offers versatility and flexibility in adding color and texture to your sloping garden. These portable gardening options can be strategically placed to define areas, create focal points, and bring a touch of nature to even the smallest spaces.
Integrating a rockery or slope garden adds texture, visual interest, and a sense of rugged beauty to your landscape. It takes advantage of the unique contours of a sloping garden, creating a captivating focal point that blends harmoniously with the surroundings.
In conclusion, with careful planning, creativity, and implementation of these 10 ideas, your sloping garden can be transformed into a breathtaking outdoor space. Embrace the beauty and challenges of your sloping terrain, and let your creativity guide you in creating a landscape that is both functional and visually stunning. Enjoy the process of transforming your sloping garden into a haven of natural beauty, and create lasting memories in your unique outdoor sanctuary.
Frequently Asked Questions about 10 Sloping Garden Ideas: Landscaping Tips For A Tricky Space
Was this page helpful?
At Storables.com, we guarantee accurate and reliable information. Our content, validated by Expert Board Contributors, is crafted following stringent Editorial Policies. We're committed to providing you with well-researched, expert-backed insights for all your informational needs.


0 thoughts on “10 Sloping Garden Ideas: Landscaping Tips For A Tricky Space”