Home>Garden Essentials>Where Do Rose Seeds Come From

Garden Essentials
Where Do Rose Seeds Come From
Modified: September 1, 2024
Discover the origins of rose seeds in your garden and learn how they play a vital role in the growth of beautiful roses.
(Many of the links in this article redirect to a specific reviewed product. Your purchase of these products through affiliate links helps to generate commission for Storables.com, at no extra cost. Learn more)
Introduction
Welcome to the fascinating world of rose seeds! If you’ve ever wondered where these beautiful blossoms come from, you’re in the right place. In this article, we will delve into the intricate process of rose seed formation, from pollination to harvesting and beyond.
For centuries, roses have captivated people with their enchanting fragrance, vibrant colors, and timeless beauty. They are widely recognized as symbols of love, romance, and elegance. With thousands of cultivars available, each with its unique characteristics, growing roses from seeds can be an exciting and rewarding experience.
However, before we embark on the journey of rose seed cultivation, it’s important to understand the basics of rose pollination. This process plays a crucial role in determining the characteristics of the resulting seeds and ultimately the plants they produce.
Key Takeaways:
- Roses come from seeds formed through pollination by bees and other insects. Understanding the process of seed formation and factors affecting development can help gardeners grow their own unique rose varieties.
- Collecting, harvesting, and storing rose seeds is crucial for successful germination. With patience and care, nurturing the seedlings into healthy plants can bring the joy of growing beautiful roses.
Read more: Where Do The Sunflower Seeds Come From
Understanding Rose Pollination
Rose pollination is the process by which pollen, the male reproductive cells, is transferred from the anther of one flower to the stigma of another flower. This transfer can occur within the same flower (self-pollination) or between different flowers (cross-pollination).
Most rose varieties are cross-pollinated, as they have both male and female parts within the same flower. The key players in rose pollination are the bees, butterflies, and other insects. These pollinators are attracted to the flowers by their vibrant colors and enticing fragrance. As they land on the flower, they inadvertently brush against the anthers, picking up grains of pollen.
The next step is for the pollen-loaded insects to visit another rose flower. As they land on the stigma of this second flower, some of the pollen grains are transferred, initiating the process of fertilization. The pollen grains then travel through the stigma, style, and into the ovary, where the seeds will eventually develop.
It’s worth noting that while cross-pollination is the more common method, some roses can also self-pollinate, where the pollen from the anther fertilizes the stigma within the same flower. This leads to the production of seeds with genetic traits identical to the parent plant.
Now that we have a basic understanding of rose pollination, let’s delve deeper into the flowering and seed production process of roses to see how these beautiful blooms eventually transform into seeds.
Rose Flowering and Seed Production
The lifecycle of a rose plant begins with the emergence of buds, which gradually open to reveal stunning blossoms. Each rose flower consists of several components, including the petals, sepals, stamens, and pistils.
The stamens are the male reproductive organs that produce pollen, while the pistils are the female reproductive organs that contain the ovary. Within the ovary are the ovules, which have the potential to develop into seeds.
As roses go through their blooming phase, the stamens release pollen grains, which are then carried by pollinators or the wind to nearby flowers. The pollen lands on the stigma, which is a sticky surface located on top of the pistil. This is where the process of fertilization begins.
Once pollinated, the ovule within the ovary starts its journey towards becoming a seed. Over time, the petals and sepals of the flower wilt and fall off, leaving behind a swollen structure that will develop into the fruit of the rose plant, known as a rose hip.
The rose hip is a fleshy structure that contains the developing seeds. It provides protection and nourishment to the seeds throughout their maturation process. As the rose hip ripens, it changes in color, usually turning from green to red or orange, depending on the rose variety.
Inside the rose hip, the seeds undergo the final stages of development. They grow larger, become hardened, and acquire a protective outer coat. The precise duration of this process can vary depending on the rose species, but it generally takes several weeks to months.
Once the seeds are fully matured, the rose hip will eventually split open, revealing the seeds nestled within. At this point, they are ready to be harvested and prepared for storage or sowing.
Understanding the anatomy of roses and how seed production occurs is crucial when it comes to collecting and harvesting rose seeds. In the next section, we will delve into the floral anatomy of roses and explain the process of rose seed formation in more detail.
Floral Anatomy of Roses
To understand the process of rose seed formation, it helps to familiarize ourselves with the floral anatomy of roses. Like most flowering plants, roses have specific structures that play key roles in reproduction.
Each rose flower is composed of four main parts: the petals, sepals, stamens, and pistils. The petals are the colorful and often fragrant outermost parts of the flower, while the sepals are the leaf-like structures that protect the developing bud.
The stamens are the male reproductive organs of the rose flower. They consist of two main parts: the filament and the anther. The filament is a thin, elongated structure that supports the anther, which is responsible for producing and releasing pollen.
The pistils, on the other hand, are the female reproductive organs of the rose flower. They consist of several components, including the stigma, style, and ovary. The stigma is located at the top of the pistil and is a sticky surface designed to receive pollen. The style is a slender tube that connects the stigma to the ovary.
The ovary is the part of the pistil where the ovules, or potential seeds, are housed. The number of ovules can vary depending on the rose species and cultivar. After fertilization, each ovule will develop into a seed within the ovary.
It’s worth noting that not all roses have the same number of petals, sepals, stamens, or pistils. The number and arrangement of these floral parts can vary greatly among different rose varieties, adding to the unique beauty and characteristics of each individual rose.
Now that we have a better understanding of the floral anatomy of roses, let’s delve deeper into the process of rose seed formation and the factors that affect their development.
The Process of Rose Seed Formation
The process of rose seed formation begins with successful pollination, where pollen grains from the stamens of one flower are transferred to the stigma of another flower. Once the pollen reaches the stigma, it travels down the style and into the ovary, where the ovules are located.
Inside the ovary, each ovule contains a female gamete, known as an egg cell. When a pollen grain reaches the ovule, it undergoes fertilization, merging with the egg cell to form a zygote. This fertilized egg cell is the precursor to the embryo, which will eventually develop into the rose seed.
After fertilization, the ovule undergoes a series of changes to support the growth and development of the embryo. The ovule wall thickens and becomes the seed coat, providing protection to the developing embryo. The ovary around the seed transforms into the fleshy structure we know as the rose hip, providing nourishment and support.
As the seed matures, it acquires characteristics that are influenced by the genetic traits of both the male and female parents. These traits determine the color, size, fragrance, and other unique characteristics that the resulting rose plant will possess.
Once the seeds are fully developed, they are ready for harvest. Depending on the rose variety, the rose hip will change in color and texture. Some rose hips may turn vibrant red or orange, while others may become dark purple or black. It’s important to wait until the rose hip is fully ripe before collecting the seeds.
The harvested rose seeds can be stored for future planting or sown immediately. Storing the seeds in a cool, dry place helps maintain their viability. When it’s time to plant the seeds, it’s essential to provide them with appropriate growth conditions, including well-draining soil, adequate moisture, and proper light levels to ensure successful germination.
As the seeds germinate and seedlings emerge, they require care and nurturing to ensure healthy growth. Young rose plants are often delicate and susceptible to diseases and pests. Regular watering, proper fertilization, and protection from harsh weather conditions are essential to support their development into mature rose bushes.
Understanding the process of rose seed formation is not only fascinating but also valuable for those interested in propagating roses from seeds. By taking the time to learn about the intricacies of this process, you can successfully grow your own unique rose varieties and witness the beauty of nature unfold before your eyes.
Next, let’s explore some of the factors that can influence the development of rose seeds and how to collect and harvest them effectively.
Read more: Where Do Seed Potatoes Come From
Factors Affecting Rose Seed Development
The development of rose seeds is influenced by various factors that can affect their viability and success in germination. Understanding these factors can help gardeners effectively cultivate and nurture rose seedlings. Let’s explore some of the key factors that impact rose seed development:
1. Pollination:
The successful transfer of pollen from one flower to another is crucial for seed development. Adequate pollination ensures the fertilization of the ovules, leading to the formation of viable seeds. Factors such as the presence of pollinators, weather conditions, and the vigor of the parent plants can influence successful pollination.
2. Genetic Factors:
The genetic makeup of the parent plants plays a significant role in determining the traits of the resulting seeds. Different rose varieties possess unique genetic characteristics that can influence the color, fragrance, size, and disease resistance of the offspring plants. Cross-pollination between distinct rose varieties can result in new and exciting combinations of traits.
3. Environmental Conditions:
The environmental conditions during seed development can impact the quality and viability of rose seeds. Factors such as temperature, humidity, light levels, and soil conditions can all affect seed development. Optimal conditions for seed development may vary depending on the specific rose variety.
Read more: Where Do Radish Seeds Come From
4. Nutrient Availability:
Rose seeds require essential nutrients for their development. The availability and balance of nutrients in the soil can influence seed germination and early growth. Providing adequate organic matter, balanced fertilizers, and maintaining proper soil pH can help support healthy seed development.
5. Disease and Pest Resistance:
Rose seeds that develop from parent plants with strong disease and pest resistance are more likely to produce seedlings that can withstand common ailments. Selecting healthy and disease-resistant parent plants can increase the chances of producing robust and thriving rose seedlings.
6. Harvesting Timing:
The timing of seed harvesting is crucial to ensure optimal seed maturity. Rose hips should be allowed to fully ripen on the plant before harvesting the seeds. Harvesting too early can result in underdeveloped or non-viable seeds, while waiting too long may lead to seed dispersal or seed degradation.
By considering these factors and implementing appropriate measures, gardeners can increase the chances of successful rose seed development. Collecting and harvesting seeds at the right time, utilizing healthy and disease-resistant parent plants, and providing optimal growing conditions can help ensure the growth of beautiful and vibrant rose seedlings.
Now that we’ve explored the factors influencing rose seed development, let’s move on to the next steps of collecting and harvesting rose seeds.
Collecting and Harvesting Rose Seeds
Collecting and harvesting rose seeds is an exciting and rewarding process that allows you to preserve and propagate your favorite rose varieties. Here are some steps to guide you through the collection and harvesting process:
Read more: Where Do Kale Seeds Come From
1. Wait for Complete Ripening:
Allow the rose hips to fully ripen on the plant before harvesting the seeds. Depending on the rose variety, the hips will change in color and texture. They may turn vibrant red, orange, or even dark purple. Ripe rose hips are slightly soft and have a slightly wrinkled appearance.
2. Prepare for Harvesting:
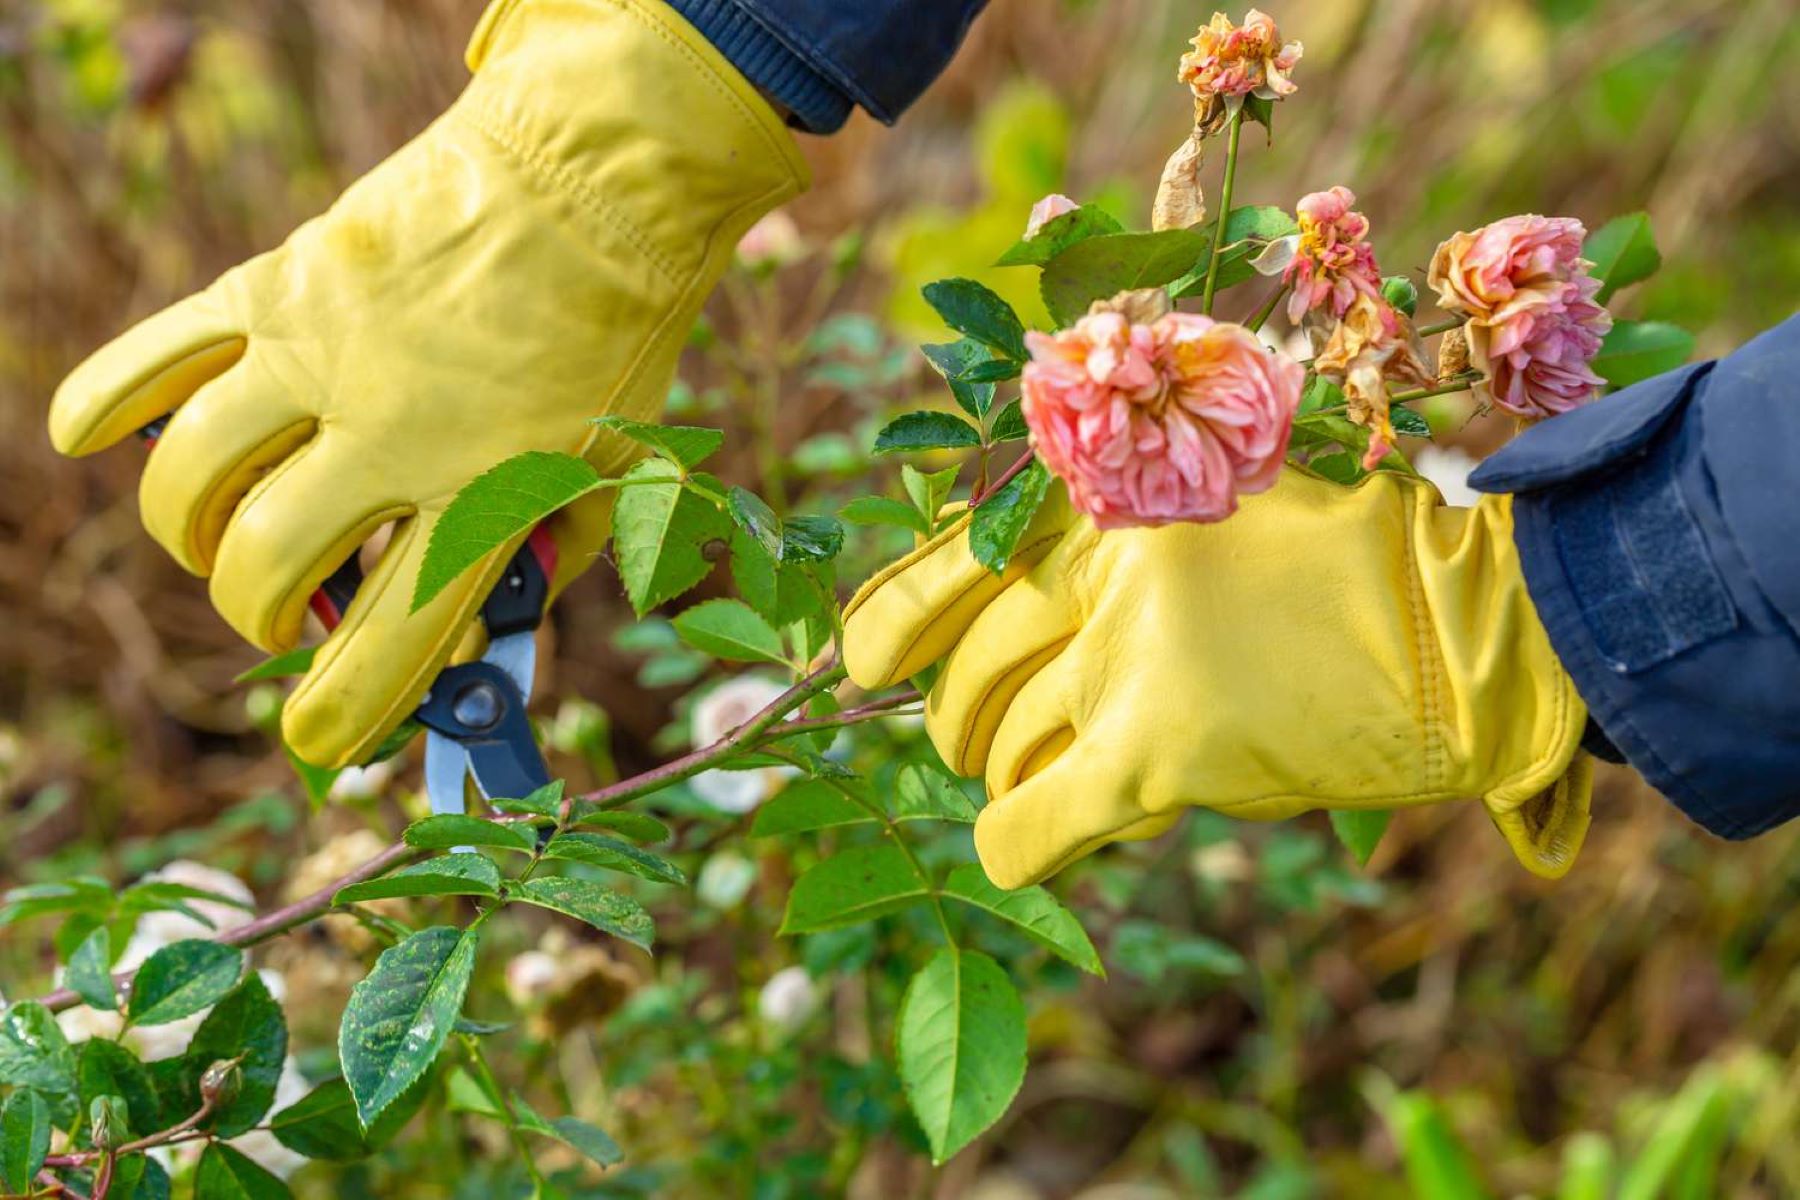
Put on gloves before handling rose hips, as they may have small thorns. Use sharp and clean pruning shears or scissors to carefully cut the ripe rose hips from the plant. Place them in a clean basket or container, taking care not to damage the hips or seeds during the harvesting process.
3. Extract the Seeds:
Once you have harvested the rose hips, it’s time to extract the seeds. Start by cutting the rose hips in half using a sharp knife. Inside, you will find numerous small seeds nestled amongst the pulp. Gently scoop out the seeds, separating them from the pulp and surrounding tissue.
4. Clean the Seeds:
To ensure the viability of the seeds, it’s important to remove any remaining pulp or debris. Place the extracted seeds in a sieve or fine-mesh screen and rinse them under cool running water. Gently rub the seeds with your fingers to remove any stubborn pulp or residue.
Read more: Where Do Sunflower Seeds Come From
5. Drying the Seeds:
After cleaning, lay the seeds on a clean paper towel or a drying rack in a well-ventilated area. Allow them to air dry for several days, ensuring that they are completely dry before storing or sowing. Proper drying helps prevent mold formation and ensures seed longevity.
6. Storage:
If you are not planting the seeds immediately, it’s important to store them properly to maintain their viability. Place the dried seeds in a labeled envelope or airtight container. Store them in a cool, dry, and dark place, such as a refrigerator or a cool basement, to help preserve their quality.
Keep in mind that rose seeds have a limited shelf life, and their viability can decrease over time. Therefore, it’s best to plant the seeds within a year or two for optimal germination rates.
By following these steps, you can successfully collect and harvest rose seeds to grow your own unique rose varieties. With patience and care, you can witness the miracle of life as these seeds transform into beautiful roses that will bring joy and beauty to your garden.
Next, let’s explore the process of sowing rose seeds and caring for the seedlings as they emerge.
Storing and Sowing Rose Seeds
Storing and sowing rose seeds properly is crucial for their successful germination and the growth of healthy seedlings. Here are some guidelines to help you store and sow your collected rose seeds:
Storing Rose Seeds:
After harvesting and drying the rose seeds, it’s important to store them properly to maintain their viability. Follow these steps to store your rose seeds:
1. Labeling:
Label each envelope or container with the name of the rose variety and the date of collection. This will help you keep track of the seeds and ensure you are using them within the recommended timeframe.
2. Cool and Dry Storage:
Place the labeled seeds in airtight containers or sealable plastic bags. Store them in a cool, dark, and dry location, such as a refrigerator. The ideal temperature for storing rose seeds is around 32°F to 41°F (0°C to 5°C).
3. Moisture Control:
Ensure that the storage container or bags are free from moisture. Adding a desiccant packet or dry rice to absorb any moisture can help prevent mold or mildew formation.
4. Regular Check-ups:
Periodically check on the stored seeds to ensure they remain dry and free from any signs of mold or deterioration. If you notice any issues, discard the affected seeds to prevent the spread of potential problems to other seeds.
Read more: Where Do Grass Seeds Come From
Sowing Rose Seeds:
When you are ready to sow your rose seeds, follow these steps to give them the best start for germination:
1. Prepare the Seed Trays:
Fill clean and sterile seed trays or pots with a well-draining seed starting mix. Moisten the mix before sowing the seeds, ensuring it is damp but not waterlogged.
2. Sowing the Seeds:
Place the rose seeds on top of the moistened seed starting mix. Gently press them into the soil, but avoid burying them too deep. Keep in mind that rose seeds typically require a period of cold stratification to break dormancy, so sowing them in the fall or early winter is often recommended.
3. Cover and Water:
Cover the seeds with a thin layer of the same moistened seed starting mix. Water the trays gently from the bottom to avoid disturbing the seeds. Place the trays in a warm location with indirect light.
4. Patience and Care:
Be patient, as rose seeds may take several weeks or even months to germinate. Keep the soil consistently moist but not overly wet. Once the seedlings emerge, provide them with sufficient light, either from a sunny window or under grow lights.
5. Gradual Transition:
When the seedlings have developed several sets of true leaves, gradually acclimate them to outdoor conditions by exposing them to increasing amounts of sunlight and outdoor temperatures over the course of a week or two.
By following these steps for storing and sowing rose seeds, you increase the chances of successful germination and the growth of strong seedlings. With proper care and patience, you can nurture your rose seedlings into beautiful and thriving plants.
Now that you know how to store and sow rose seeds, let’s explore the process of germination and how to care for rose seedlings as they grow.
Germination and Care of Rose Seedlings
Germinating rose seeds is an exciting step in the journey of growing your own roses. With proper care and attention, you can nurture the seedlings into healthy and robust plants. Here are some guidelines for the germination and care of rose seedlings:
Germination:
Germinating rose seeds can be a slow and variable process. Follow these steps to increase the chances of successful germination:
1. Ideal Temperature:
Most rose seeds require a period of cold stratification to break dormancy. Place the seeded trays in a cool location, such as a refrigerator or unheated garage, for 8-12 weeks. This mimics the natural winter conditions that roses typically experience.
2. Moisture Management:
During the stratification period, make sure the soil remains consistently moist, but not overly saturated. Check the trays regularly to ensure proper moisture levels.
3. Gradual Warming:
After the stratification period, gradually transition the seeds to slightly warmer conditions. Place the trays in a location with temperatures around 60°F (15°C) to 70°F (21°C). This will stimulate germination.
4. Patience:
Be patient, as germination can take anywhere from a few weeks to several months, depending on the rose variety. Keep the soil consistently moist and provide adequate warmth and light throughout the germination period.
Care of Rose Seedlings:
Once the rose seedlings have emerged, they require proper care to ensure healthy growth. Follow these tips for caring for your rose seedlings:
1. Light:
Place the seedlings in a location where they can receive bright, indirect light. If growing indoors, consider using grow lights to supplement the natural light source. Aim for 16-18 hours of light per day to promote healthy growth.
2. Watering:
Keep the soil consistently moist, but avoid overwatering, which can lead to root rot. Water the seedlings from the bottom by placing the trays in a shallow tray filled with water. Allow the soil to soak up the water through the drainage holes.
3. Fertilization:
Once the seedlings have developed a few sets of true leaves, begin fertilizing them with a balanced, water-soluble fertilizer. Follow the package instructions for application rates. Fertilize every two to three weeks during the growing season.
4. Transplanting:
As the seedlings grow and develop, they will eventually outgrow their seed trays. Transplant them into larger containers or individual pots with well-draining soil. Handle the seedlings gently to avoid damaging the delicate roots.
5. Hardening off and Outdoor Transplant:
Before transplanting the seedlings into the garden, gradually acclimate them to outdoor conditions. This process, known as hardening off, involves exposing the seedlings to increasing amounts of sunlight and outdoor temperatures over the course of a week or two.
6. Pest and Disease Management:
Monitor the seedlings for any signs of pests or diseases, such as aphids or powdery mildew. Promptly address any issues with organic pest-control methods or appropriate fungicides to protect the young plants.
By providing the right conditions and consistent care, your rose seedlings will grow into strong and beautiful plants. With time and patience, you’ll be rewarded with stunning blooms and the satisfaction of growing your own roses.
Now that you have learned about germinating and caring for rose seedlings, you are well-equipped to embark on your own rose-growing journey. Happy gardening!
Read more: Where Do Sesame Seeds Come From
Conclusion
Cultivating roses from seeds is a remarkable and rewarding experience for any garden enthusiast. From understanding rose pollination to collecting and harvesting seeds, each step in the process offers insights into the intricate world of roses. By learning about the factors that influence seed development and practicing proper storage techniques, you can ensure the viability and success of your collected seeds.
Sowing rose seeds requires patience and care, as germination can be a slow and variable process. However, with the right conditions and consistent attention, the seedlings will emerge, ready to be nurtured into beautiful and resilient rose plants.
Throughout the journey of growing rose seedlings, it’s important to provide them with optimal conditions, including sufficient light, proper watering, and nutrient-rich soil. Transplanting and hardening off the seedlings prepare them for life in the garden, where they can showcase their vibrant blooms and enchanting fragrance.
Remember to keep an eye out for pests and diseases, and promptly address any issues to ensure the health and vitality of your rose plants. With dedication and perseverance, you’ll witness the transformation from tiny seeds to magnificent roses, adding beauty and elegance to your garden.
Whether you choose to grow roses for their aesthetic appeal, their symbolic significance, or simply for the joy of witnessing nature’s wonders, the journey of rose cultivation offers an opportunity to connect with nature and foster a deeper appreciation for the beauty of these iconic flowers.
So go ahead, gather your tools, collect those precious rose seeds, and embark on a journey filled with the sweet aroma and stunning colors of your very own rose garden. Enjoy the process, cherish the growth, and revel in the beauty that unfolds before your eyes.
Happy gardening!
Frequently Asked Questions about Where Do Rose Seeds Come From
Was this page helpful?
At Storables.com, we guarantee accurate and reliable information. Our content, validated by Expert Board Contributors, is crafted following stringent Editorial Policies. We're committed to providing you with well-researched, expert-backed insights for all your informational needs.

0 thoughts on “Where Do Rose Seeds Come From”