Home>Gardening & Outdoor>Outdoor Structures>How To Install Composite Decking With Hidden Fasteners

Outdoor Structures
How To Install Composite Decking With Hidden Fasteners
Modified: October 19, 2024
Learn how to install composite decking with hidden fasteners for a durable and sleek outdoor structure. Follow our step-by-step guide for a professional finish.
(Many of the links in this article redirect to a specific reviewed product. Your purchase of these products through affiliate links helps to generate commission for Storables.com, at no extra cost. Learn more)
Introduction
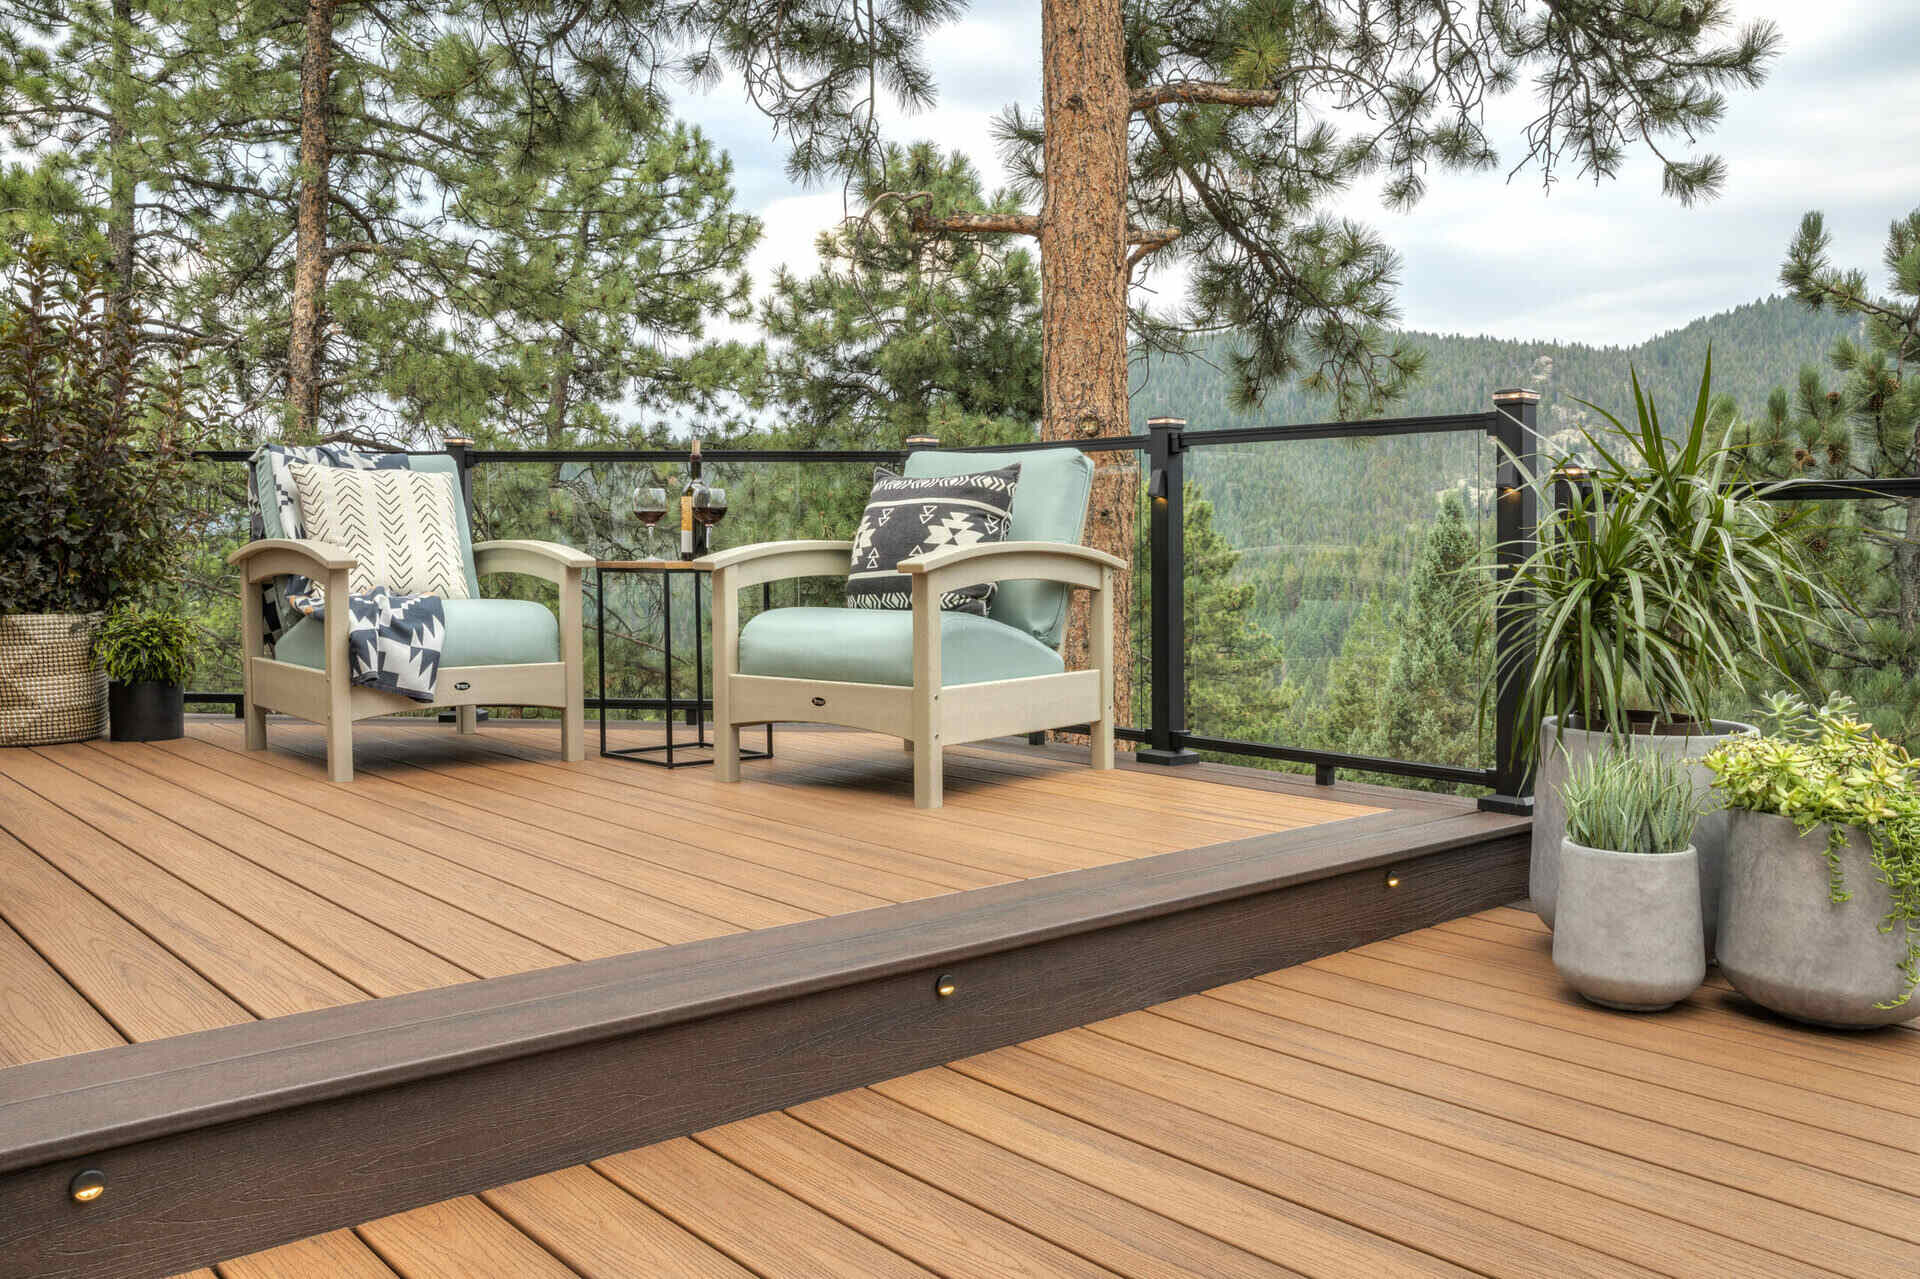
Creating a beautiful and durable outdoor living space is a dream for many homeowners. One of the key elements in achieving this goal is the installation of composite decking with hidden fasteners. This innovative method not only provides a clean and sleek appearance but also offers numerous benefits, including improved aesthetics, reduced risk of moisture-related issues, and enhanced safety due to the absence of protruding fasteners.
In this comprehensive guide, we will walk you through the step-by-step process of installing composite decking with hidden fasteners. Whether you are a seasoned DIY enthusiast or a first-time homeowner embarking on a decking project, this guide will equip you with the knowledge and confidence to complete the installation successfully.
From gathering the necessary materials and tools to laying the first deck board and completing the installation, each step is crucial in ensuring a professional and long-lasting result. By following this guide, you will not only elevate the visual appeal of your outdoor space but also contribute to its structural integrity and longevity.
So, let's dive into the world of composite decking and hidden fasteners, and embark on a journey to transform your outdoor living area into a stunning and inviting retreat.
Key Takeaways:
- Installing composite decking with hidden fasteners enhances the visual appeal and structural integrity of outdoor spaces. It creates a sleek, safe, and durable deck surface for relaxation and entertainment.
- By following the step-by-step guide, homeowners can transform their outdoor living areas into stunning retreats. The use of hidden fasteners eliminates protruding screws, contributing to a seamless and inviting deck surface.
Read more: How To Install Composite Decking
Step 1: Gather Materials and Tools
Before commencing the installation process, it is essential to gather all the materials and tools required for the project. This ensures a smooth and efficient workflow, minimizing interruptions and delays.
Materials:
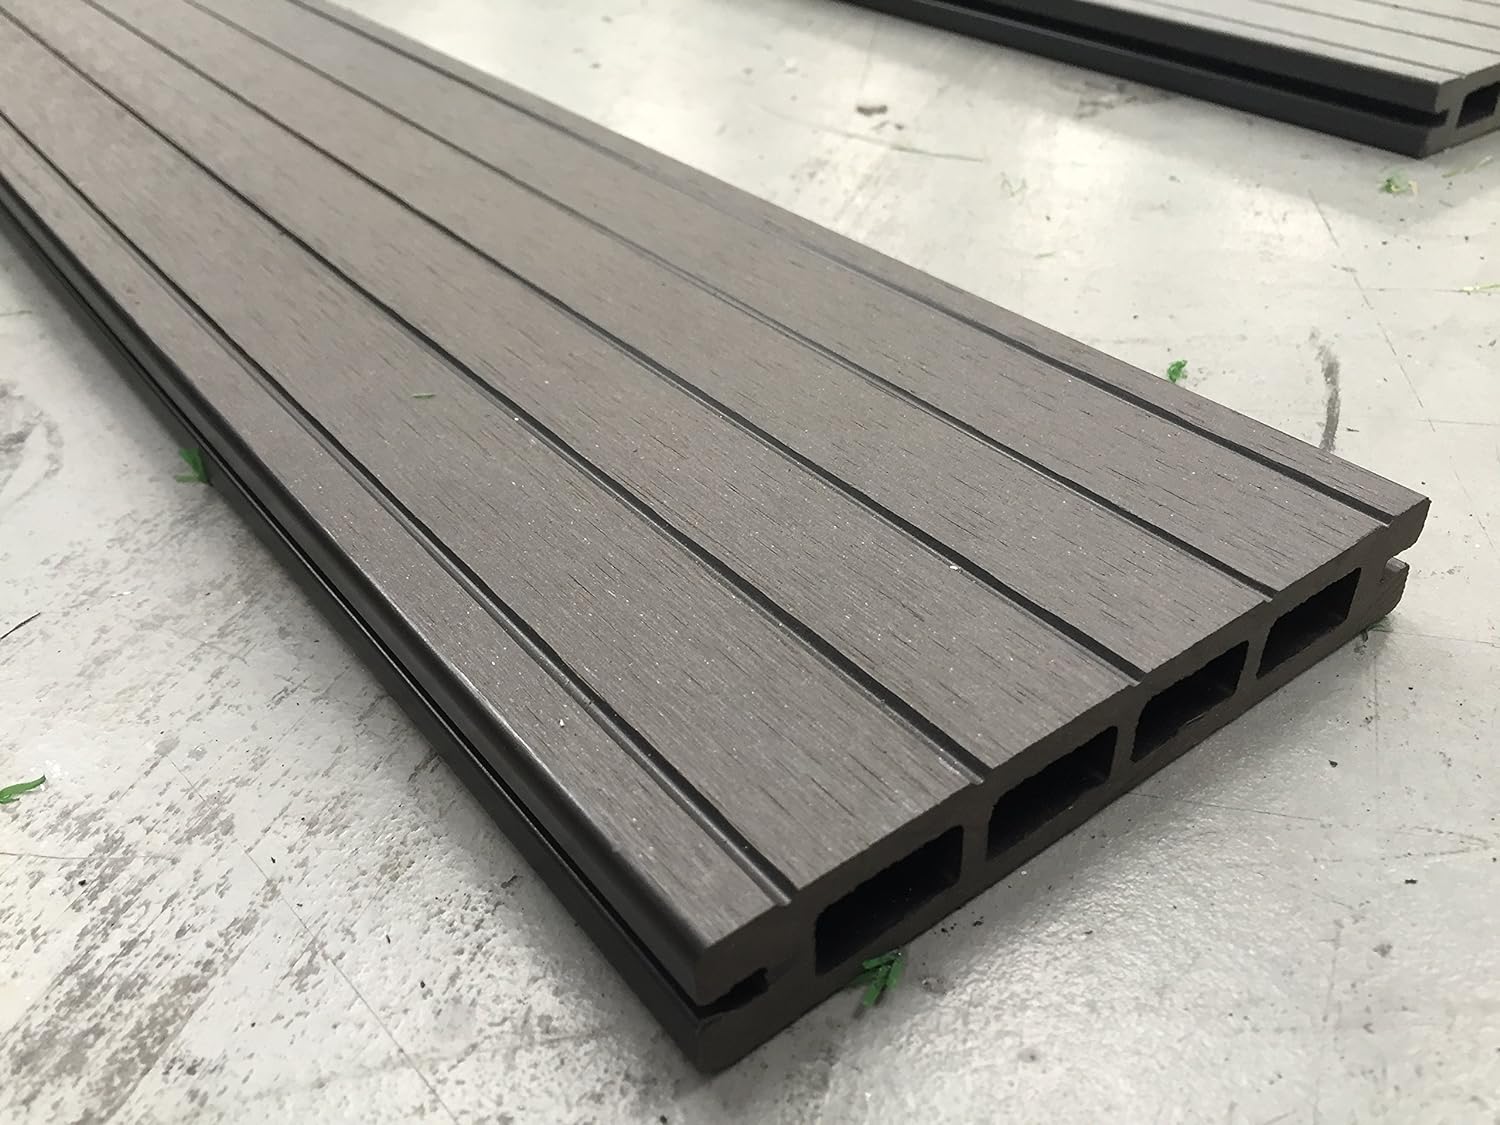
- Composite decking boards
- Hidden fasteners
- Starter clips
- Joist tape
- Joist hangers
- Composite deck screws
- Composite deck cleaner
- Composite deck sealer
When selecting Composite decking boards, consider the desired color, texture, and overall aesthetic to complement your outdoor space. Hidden fasteners should be chosen based on the specific brand and type of decking boards being used. Starter clips are essential for ensuring a secure and uniform start to the decking installation.
Tools:
- Tape measure
- Level
- Chalk line
- Power drill
- Screwdriver
- Composite deck board spacing tool
- Hammer
- Safety goggles
- Work gloves
Once you have gathered all the necessary materials and tools, you are ready to move on to the next step: preparing the deck frame.
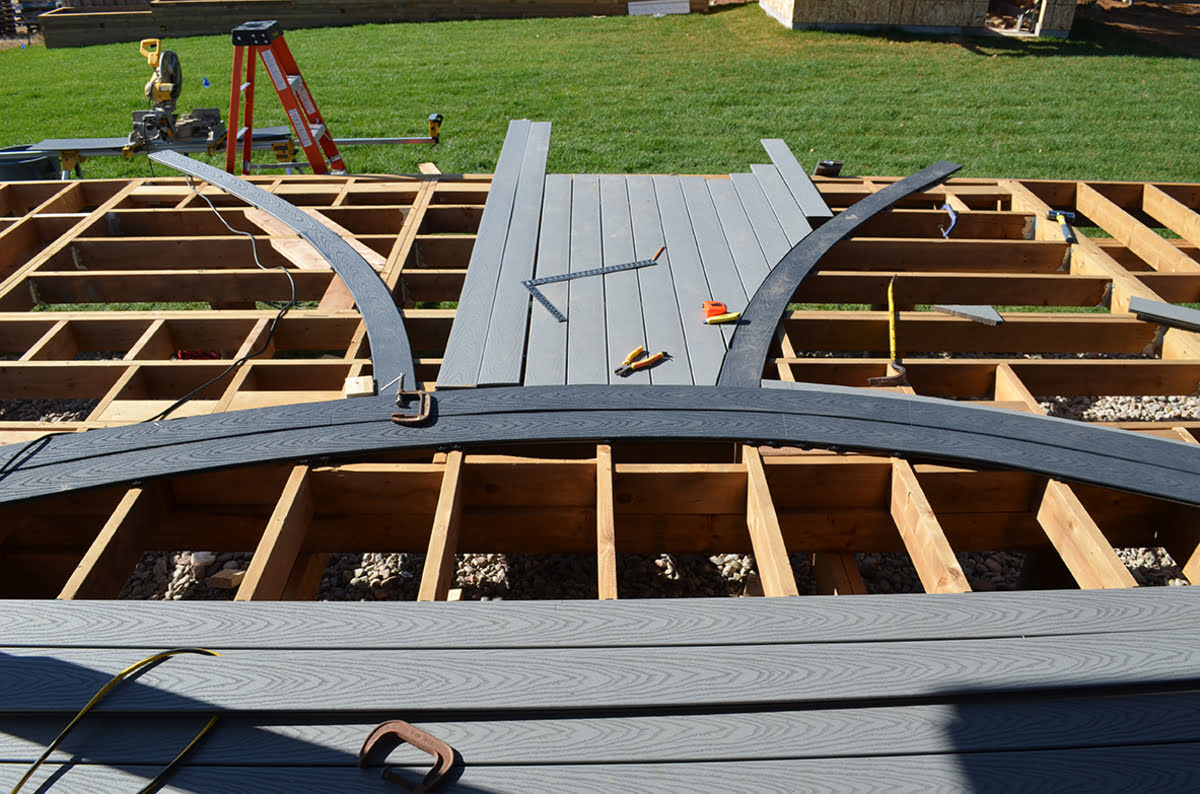
Step 2: Prepare the Deck Frame
Preparing the deck frame is a critical initial step in the installation of composite decking with hidden fasteners. A well-constructed and properly leveled frame serves as the foundation for a stable and visually appealing deck.
Assess the Substructure:
Before proceeding with any modifications or installations, carefully assess the existing substructure to ensure it is structurally sound and free from any damage or deterioration. Address any issues such as rot, decay, or instability before proceeding with the installation.
Install Joist Tape:
Applying joist tape to the top of the joists is essential for protecting the substructure from moisture and prolonging its lifespan. The tape acts as a barrier, preventing water and debris from infiltrating the joists and causing potential damage over time.
Secure Joist Hangers:
If the deck frame requires joist hangers, ensure that they are securely attached to the ledger board and rim joists. Properly installed joist hangers provide crucial support and stability to the deck structure, enhancing its overall strength and load-bearing capacity.
Level the Frame:
Using a level, carefully check and adjust the frame to ensure it is perfectly level and free from any irregularities. A level frame is essential for the uniform and seamless installation of the composite decking boards, preventing any potential issues such as uneven gaps or misaligned boards.
By meticulously preparing the deck frame, you are laying the groundwork for a successful and enduring composite decking installation. With the frame in optimal condition, you are now ready to proceed to the next step: installing starter clips.
Step 3: Install Starter Clips
As you embark on the installation of composite decking with hidden fasteners, the proper installation of starter clips is a pivotal step in ensuring a seamless and professional outcome. Starter clips serve as the foundation for securely fastening the initial deck board while maintaining uniform spacing and alignment.
Positioning the Starter Clips:
Begin by positioning the starter clips along the edge of the deck frame, ensuring they are evenly spaced and aligned to accommodate the width of the composite decking boards. Careful attention to spacing and alignment at this stage is crucial for establishing a consistent and visually appealing deck surface.
Securing the Starter Clips:
Using the appropriate fasteners, securely attach the starter clips to the deck frame, ensuring they are firmly in place and capable of withstanding the installation of the first deck board. The stability and precision of the starter clips play a significant role in the overall integrity and aesthetic quality of the deck installation.
Verifying Alignment and Level:
After installing the starter clips, verify their alignment and level to guarantee that the first deck board will be positioned accurately and securely. This step is essential for laying the foundation for the subsequent installation of the remaining deck boards and hidden fasteners.
By meticulously installing the starter clips, you are setting the stage for a successful and visually stunning composite decking installation. With the starter clips in place, you are now prepared to progress to the next step: laying the first deck board.
Step 4: Lay the First Deck Board
Laying the first deck board is a pivotal moment in the installation process, marking the commencement of creating a visually striking and structurally sound composite decking surface. The precision and care exercised during this step set the tone for the seamless integration of the remaining deck boards and hidden fasteners.
Positioning the First Deck Board:
Carefully position the first deck board onto the installed starter clips, ensuring a snug and secure fit. Pay close attention to the alignment and spacing, as these factors will influence the overall appearance and integrity of the deck surface.
Verifying Alignment and Level:
Once the first deck board is in place, verify its alignment and level to guarantee a uniform and visually appealing installation. Utilize a level and take the time to make any necessary adjustments to ensure the board is impeccably positioned.
Securing the First Deck Board:
Using composite deck screws, securely fasten the first deck board to the starter clips and the underlying deck frame. The strategic placement of screws ensures a secure and stable attachment while maintaining the desired spacing and alignment.
Checking for Stability and Uniformity:
After securing the first deck board, conduct a thorough inspection to confirm its stability and uniformity. A well-positioned and securely fastened first board sets the stage for the subsequent installation of hidden fasteners and additional deck boards.
With the successful laying of the first deck board, you have established the foundation for a visually stunning and enduring composite decking surface. This accomplishment paves the way for the next crucial step: installing hidden fasteners.
When installing composite decking with hidden fasteners, make sure to carefully follow the manufacturer’s instructions to ensure proper spacing and alignment of the boards. This will help create a clean and professional-looking finish.
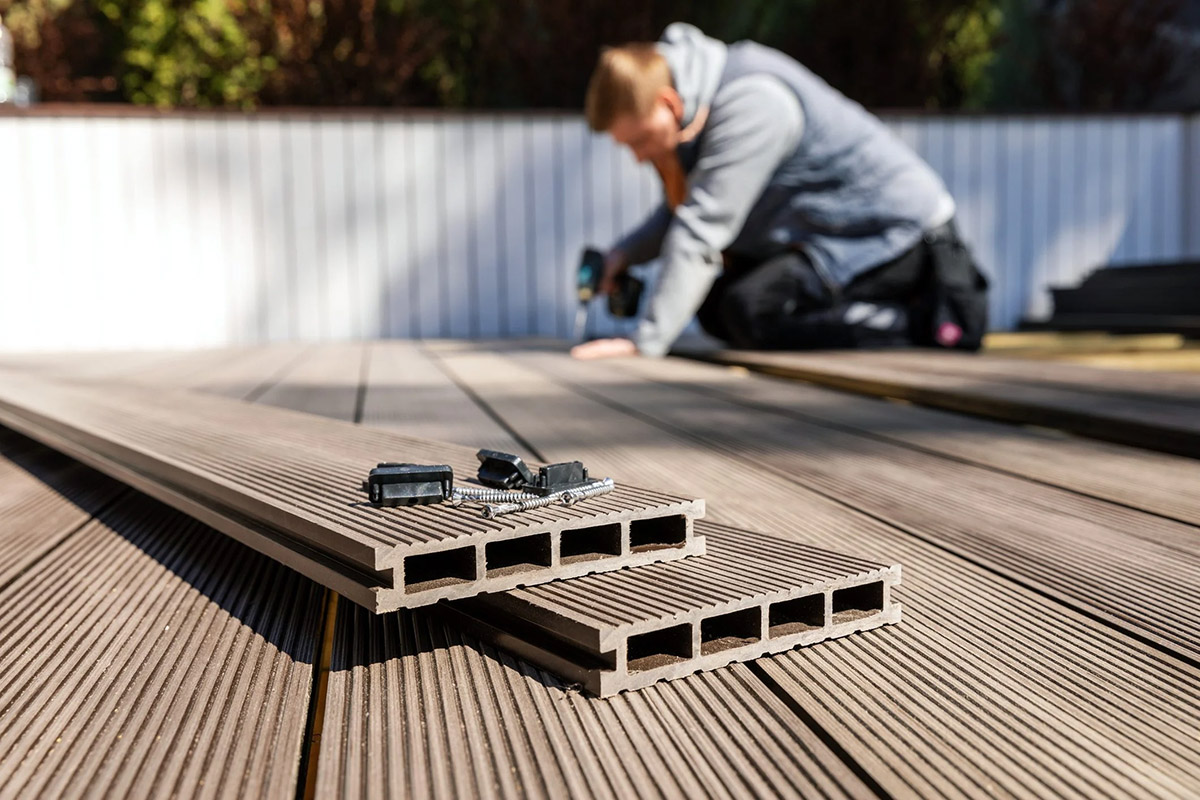
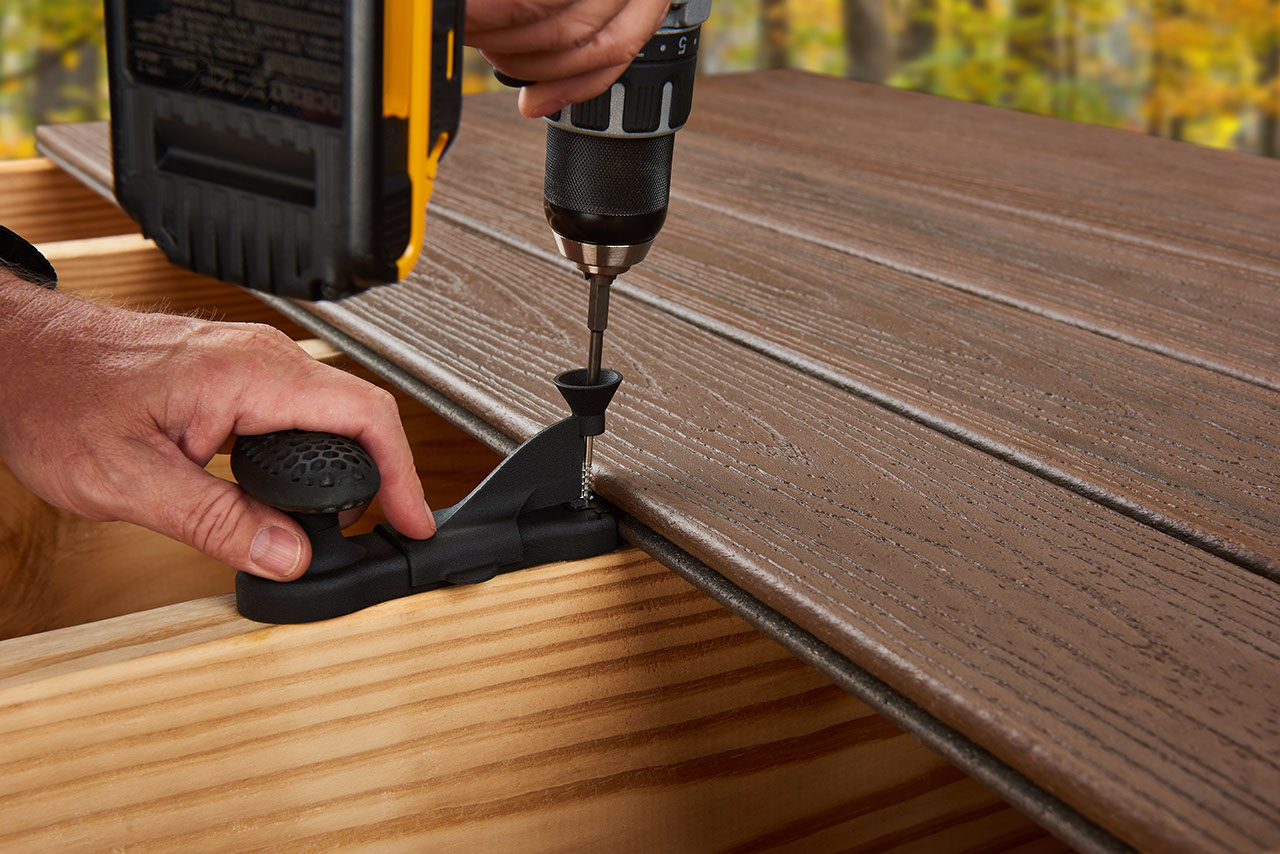
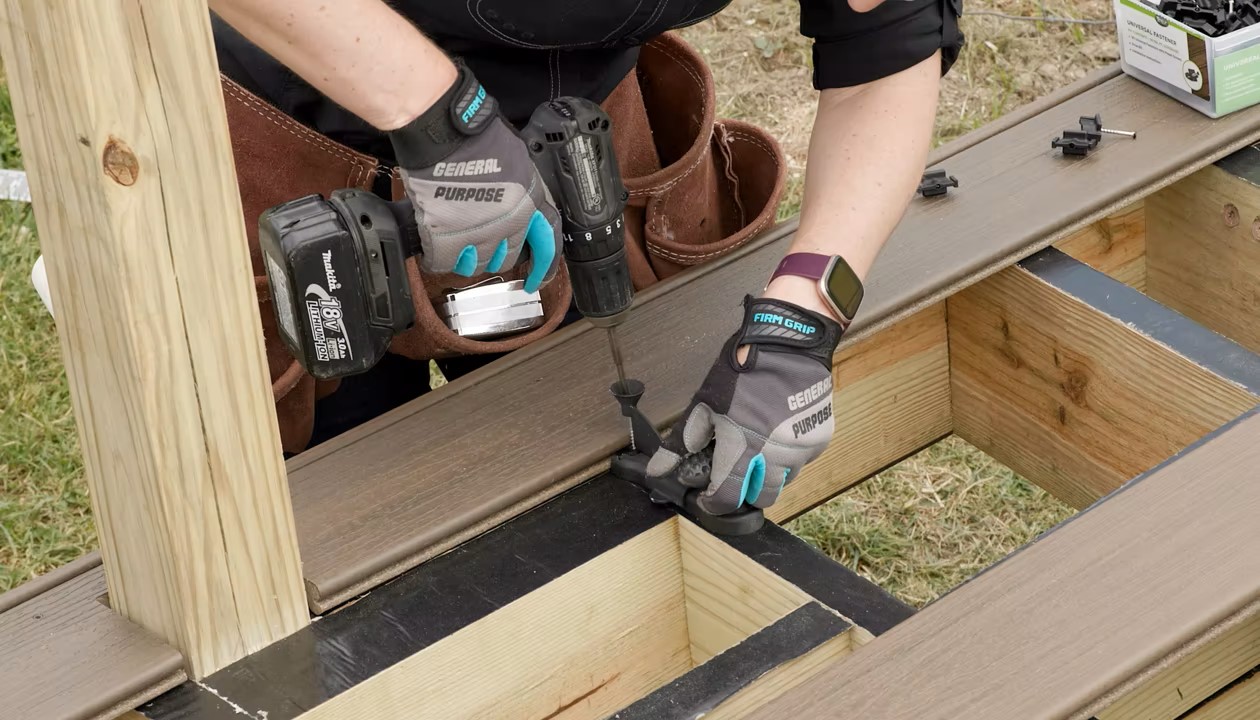
Step 5: Install Hidden Fasteners
Installing hidden fasteners is a transformative step in the process of creating a sleek, unblemished composite decking surface. These innovative fasteners not only contribute to the aesthetic appeal of the deck but also ensure a secure, durable, and safe installation by eliminating the need for visible screws or nails.
Positioning the Hidden Fasteners:
Begin by positioning the hidden fasteners along the exposed edge of the first deck board, ensuring they are evenly spaced and aligned to accommodate the width of the boards. Careful attention to spacing and alignment at this stage is crucial for establishing a consistent and visually appealing deck surface.
Securing the Hidden Fasteners:
Using the recommended fastening method for the specific type of hidden fasteners being utilized, securely attach them to the deck board and underlying frame. The stability and precision of the hidden fasteners play a significant role in the overall integrity and aesthetic quality of the deck installation.
Verifying Alignment and Spacing:
After installing the hidden fasteners, verify their alignment and spacing to guarantee that the subsequent deck boards will be positioned accurately and securely. This step is essential for ensuring a seamless and visually appealing installation of the composite decking.
Completing Hidden Fastener Installation:
Continue installing hidden fasteners along the length of the deck board, maintaining consistent spacing and alignment for a professional and polished result. As each fastener is securely installed, take the time to verify its stability and alignment, ensuring a flawless integration into the deck surface.
With the successful installation of hidden fasteners, you have elevated the visual appeal and structural integrity of the composite decking installation. This accomplishment sets the stage for the seamless integration of the remaining deck boards and the realization of a stunning outdoor living space.
Step 6: Continue Installing Deck Boards
As you progress through the installation of composite decking with hidden fasteners, the seamless integration of additional deck boards is a pivotal phase in bringing your outdoor living space to life. The careful alignment, secure fastening, and meticulous spacing of each board contribute to the creation of a visually stunning and enduring deck surface.
Positioning the Next Deck Board:
Carefully position the next deck board alongside the previously installed board, ensuring a uniform and visually appealing alignment. Pay close attention to the spacing and alignment to maintain consistency and precision throughout the installation process.
Verifying Alignment and Spacing:
After positioning the next deck board, verify its alignment and spacing to guarantee a seamless and visually appealing integration with the existing boards. Utilize a level and take the time to make any necessary adjustments to ensure the board is impeccably positioned.
Securing the Deck Boards:
Using the appropriate fastening method, securely attach the deck boards to the hidden fasteners and the underlying deck frame. The strategic placement of fasteners ensures a secure and stable attachment while maintaining the desired spacing and alignment.
Checking for Stability and Uniformity:
After securing each deck board, conduct a thorough inspection to confirm its stability and uniformity. The seamless integration of each board contributes to the overall visual appeal and durability of the composite decking surface.
By continuing to install deck boards with precision and care, you are advancing towards the realization of a visually stunning and enduring outdoor living space. This accomplishment sets the stage for the final step in the installation process: completing the installation and admiring the remarkable transformation of your deck.
Step 7: Complete Installation
As you approach the final phase of the composite decking installation with hidden fasteners, the completion of the installation marks the culmination of meticulous planning, precise execution, and a steadfast commitment to creating a visually striking and enduring outdoor living space.
Verify Alignment and Stability:
Before concluding the installation, carefully verify the alignment and stability of each installed deck board. Utilize a level and conduct a comprehensive inspection to ensure that every board is impeccably positioned and securely fastened.
Apply Composite Deck Sealer:
Applying a high-quality composite deck sealer serves as a protective measure, safeguarding the decking surface from the effects of moisture, UV exposure, and general wear and tear. The sealer enhances the longevity and resilience of the composite decking, ensuring its enduring beauty for years to come.
Clean the Deck Surface:
After completing the installation, thoroughly clean the deck surface to remove any debris, dust, or construction residue. Utilize a composite deck cleaner to maintain the pristine appearance of the decking, preparing it for enjoyment and relaxation in your outdoor retreat.
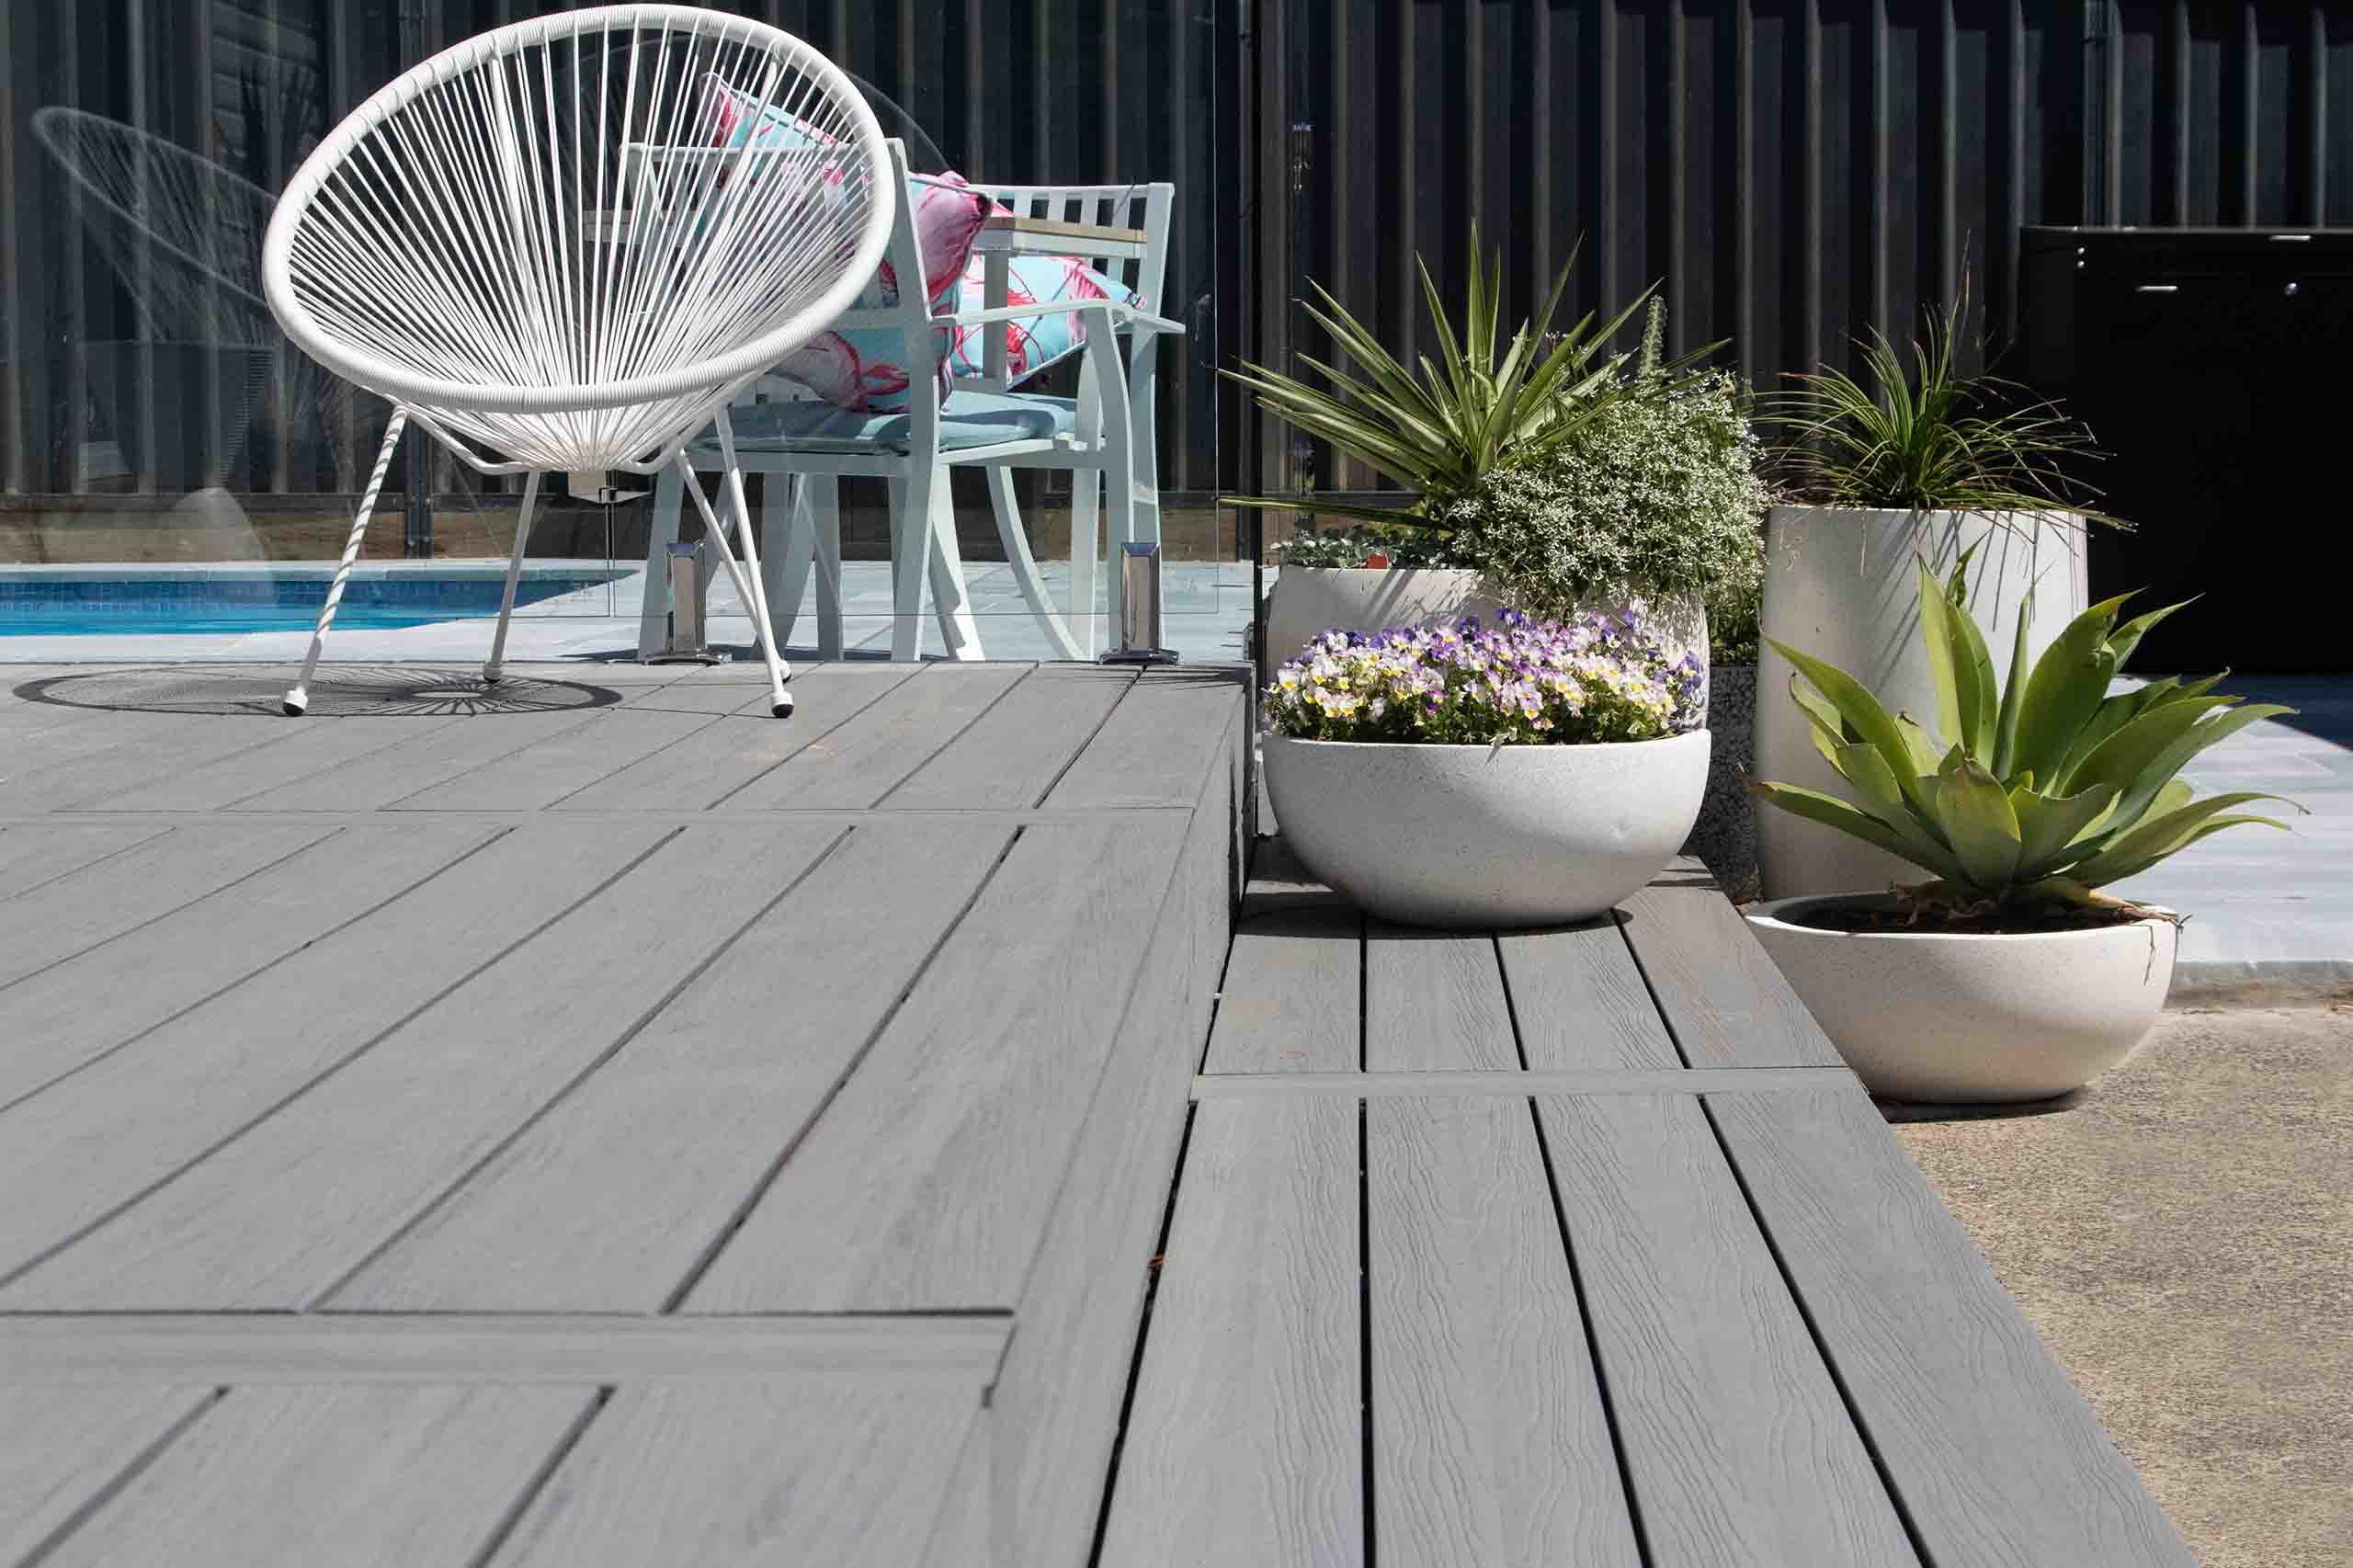
Admire the Remarkable Transformation:
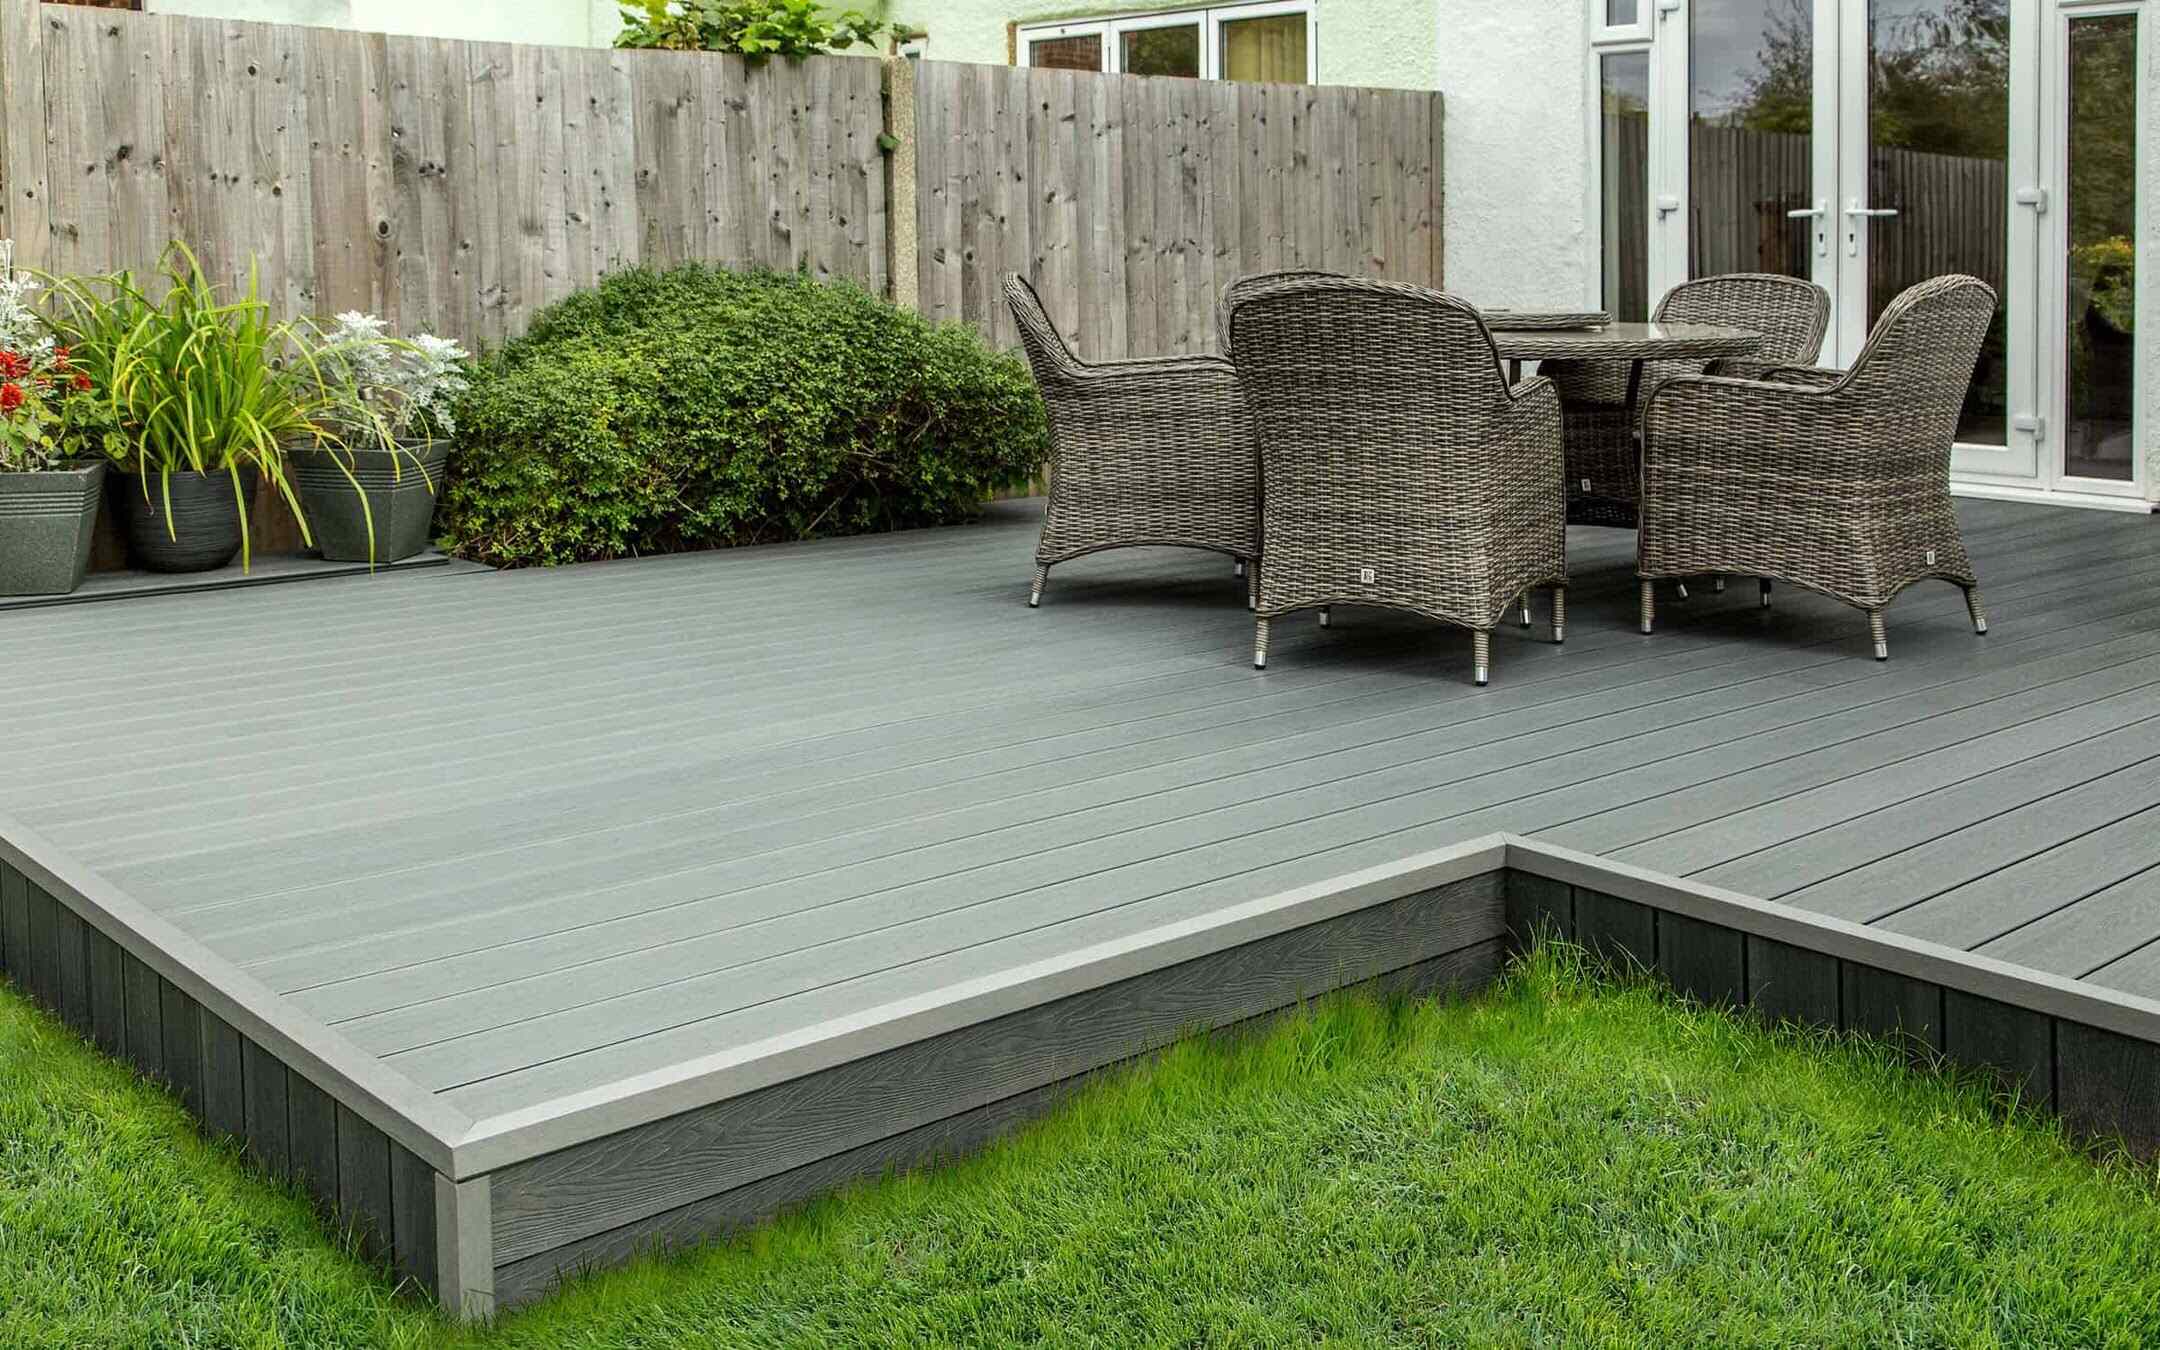
Upon the successful completion of the installation, take a moment to step back and admire the remarkable transformation of your outdoor living space. The composite decking with hidden fasteners has not only enhanced the visual appeal of your deck but also contributed to its structural integrity and long-term durability.
With the installation process now complete, you are ready to revel in the beauty and functionality of your newly transformed outdoor living area. Whether hosting gatherings, savoring quiet moments, or simply basking in the natural splendor, your composite decking installation with hidden fasteners has set the stage for countless memorable experiences in the embrace of your outdoor sanctuary.
Conclusion
Embarking on the journey of installing composite decking with hidden fasteners has not only elevated the visual appeal of your outdoor living space but also contributed to its structural integrity and long-term durability. The meticulous planning, precise execution, and unwavering attention to detail have resulted in the creation of a visually stunning and enduring deck surface that serves as a welcoming retreat for relaxation, entertainment, and cherished moments.
By following the comprehensive guide outlined in this installation process, you have equipped yourself with the knowledge and confidence to transform your outdoor living area into a captivating and functional extension of your home. The utilization of hidden fasteners has not only enhanced the aesthetic appeal of the deck but also eliminated the presence of protruding fasteners, contributing to a safer and more seamless surface for enjoyment.
As you admire the remarkable transformation of your outdoor sanctuary, take pride in the enduring beauty and resilience of the composite decking with hidden fasteners. The meticulous preparation of the deck frame, the precise installation of starter clips, the seamless integration of deck boards, and the strategic placement of hidden fasteners have collectively culminated in the creation of a space that invites relaxation, fosters connection, and stands as a testament to your commitment to quality and craftsmanship.
With the completion of the installation, your outdoor living space is poised to become a cherished haven for countless memorable experiences, from tranquil moments of solitude to joyous gatherings with loved ones. Embrace the beauty, functionality, and enduring allure of your composite decking installation with hidden fasteners, and revel in the countless opportunities it presents for creating lasting memories in the embrace of nature.
May your newly transformed outdoor living space serve as a source of inspiration, rejuvenation, and connection, enriching your life and the lives of those who have the privilege of sharing in its splendor.
Frequently Asked Questions about How To Install Composite Decking With Hidden Fasteners
Was this page helpful?
At Storables.com, we guarantee accurate and reliable information. Our content, validated by Expert Board Contributors, is crafted following stringent Editorial Policies. We're committed to providing you with well-researched, expert-backed insights for all your informational needs.


0 thoughts on “How To Install Composite Decking With Hidden Fasteners”