Home>Home Appliances>Kitchen Appliances>How To Dry Oranges In A Dehydrator

Kitchen Appliances
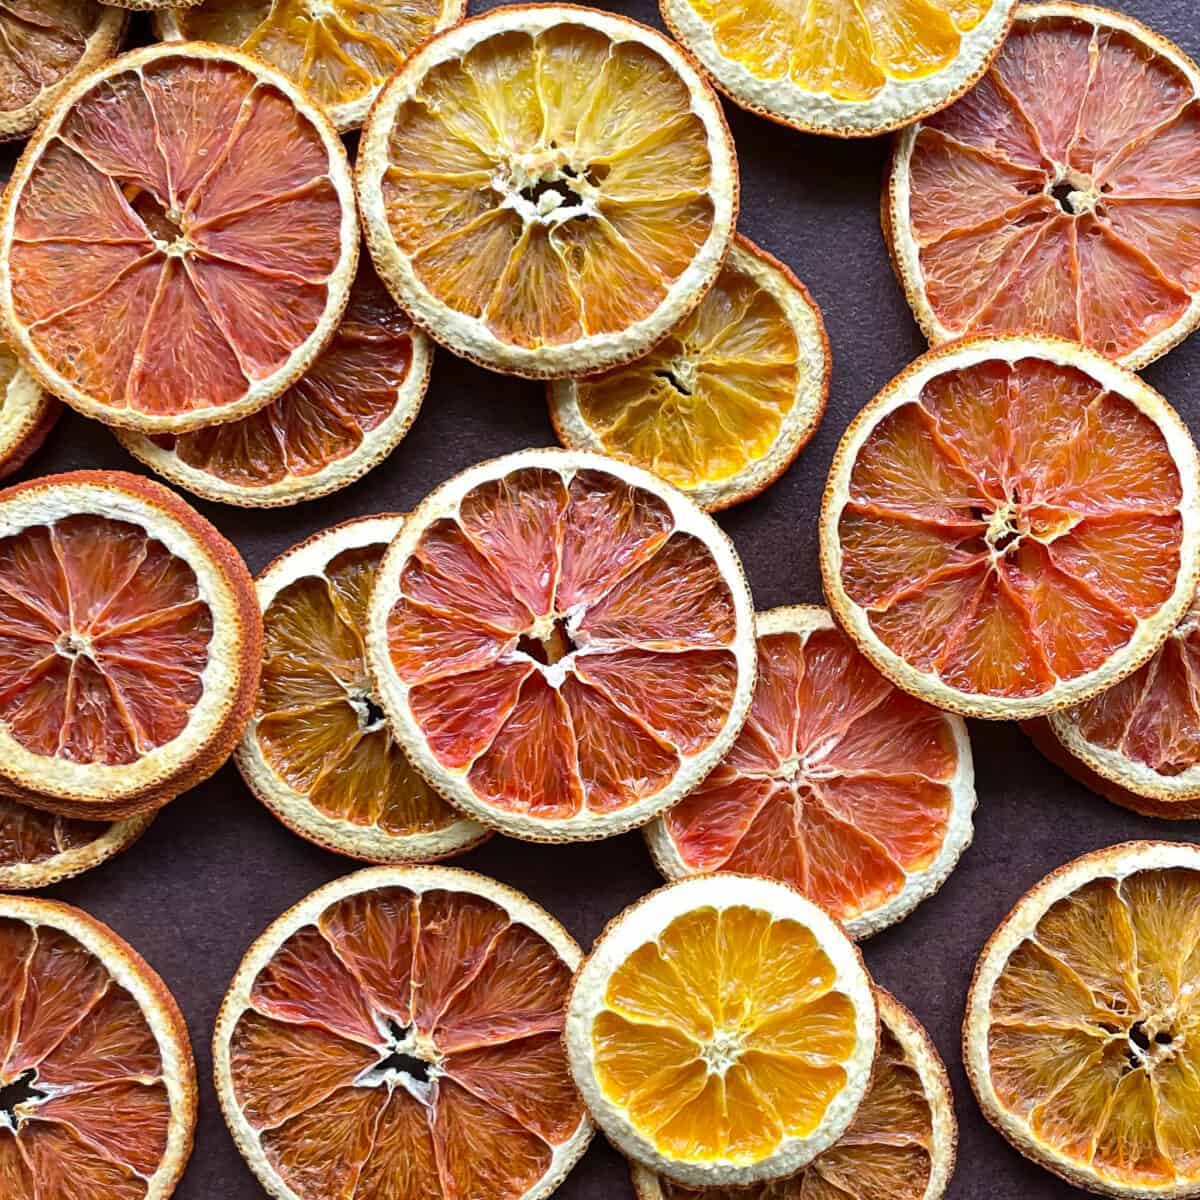
How To Dry Oranges In A Dehydrator
Published: January 6, 2024
Learn how to easily dry oranges in a dehydrator at home. Discover the best techniques for preserving fruit using kitchen appliances.
(Many of the links in this article redirect to a specific reviewed product. Your purchase of these products through affiliate links helps to generate commission for Storables.com, at no extra cost. Learn more)
Introduction
Welcome to the wonderful world of dehydrating oranges! Drying oranges in a dehydrator is a fantastic way to preserve their delightful flavor and aroma while creating a versatile ingredient that can be used in various culinary endeavors. Whether you're an avid home cook, a health-conscious individual, or a dedicated food enthusiast, learning how to dry oranges in a dehydrator will undoubtedly open up a realm of exciting possibilities in your kitchen.
Dried oranges are not only a delicious and nutritious snack but also a fantastic addition to an array of recipes. By dehydrating oranges, you can concentrate their natural sweetness and tanginess, resulting in a delightful burst of flavor with every bite. Furthermore, dried oranges can be used to infuse teas, enhance the flavor of baked goods, adorn cocktails, or simply enjoyed on their own as a healthy snack.
In this comprehensive guide, we will explore the step-by-step process of selecting the right oranges, preparing them for dehydration, using the dehydrator to achieve optimal results, and finally, storing the dried oranges to maintain their freshness. By the end of this article, you will be well-equipped with the knowledge and confidence to embark on your own orange-drying journey, unlocking the full potential of this vibrant and versatile fruit. So, without further ado, let's delve into the delightful art of drying oranges in a dehydrator!
Key Takeaways:
- Drying oranges in a dehydrator preserves their natural sweetness and tanginess, creating a versatile ingredient for snacks, teas, baked goods, and cocktails. It’s a fun and flavorful way to add a burst of sunshine to your culinary creations!
- Selecting the right oranges, preparing them with care, using a dehydrator, and storing the dried slices properly unlocks the full potential of dried oranges. Embrace the creativity and versatility of this delightful ingredient in your kitchen!
Read more: How To Store Dehydrated Oranges
Selecting the Right Oranges
When it comes to dehydrating oranges, selecting the right type of oranges is crucial for achieving the best results. While the process of drying oranges can be applied to various varieties, some oranges are particularly well-suited for dehydrating due to their flavor profile and texture.
Here are some key considerations when selecting oranges for dehydration:
- Variety: Navel oranges are often preferred for dehydrating due to their sweet, juicy flesh and minimal seeds. Valencia oranges, known for their excellent juicing properties, can also be used for dehydrating.
- Ripeness: Opt for oranges that are firm, plump, and free from blemishes. Avoid overly ripe or soft oranges, as they may not dehydrate evenly and could result in a subpar final product.
- Organic vs. Conventional: If possible, choose organic oranges to ensure that the fruit is free from synthetic pesticides and chemicals. Organic oranges also tend to offer a more vibrant flavor and aroma.
- Size: While the size of the oranges does not significantly affect the dehydration process, selecting oranges of similar size can help ensure uniform drying and consistent results.
Once you have selected the perfect oranges for dehydration, it’s time to move on to the next step: preparing the oranges for the drying process.
Preparing the Oranges
Before you can begin the dehydration process, it’s essential to properly prepare the oranges to ensure optimal results. The preparation phase involves washing, slicing, and optionally treating the oranges to maintain their color and prevent oxidation during the drying process.
Here’s a step-by-step guide to preparing the oranges for dehydration:
- Wash the Oranges: Thoroughly rinse the oranges under cool running water to remove any dirt, debris, or residual pesticides. Use a produce brush to gently scrub the surface of the oranges, especially if you are using non-organic fruit.
- Slice the Oranges: Using a sharp knife, slice the oranges into uniform rounds, approximately 1/4 to 1/2 inch thick. Discard the ends of the oranges, as they may contain a higher concentration of pith, which can affect the texture of the dried slices.
- Optional Treatment: To preserve the vibrant color of the oranges and prevent them from browning during dehydration, you can treat the slices with a solution of water and citrus juice. Submerge the orange slices in a mixture of water and lemon juice or orange juice for a few minutes, then drain and pat them dry with paper towels.
Once the oranges are thoroughly washed, sliced, and optionally treated, they are ready to be placed in the dehydrator for the drying process. Proper preparation sets the stage for successful dehydration and ensures that the dried oranges retain their flavor, color, and nutritional value.
With the oranges prepared, it’s time to explore the next crucial step: using the dehydrator to dry the orange slices to perfection.
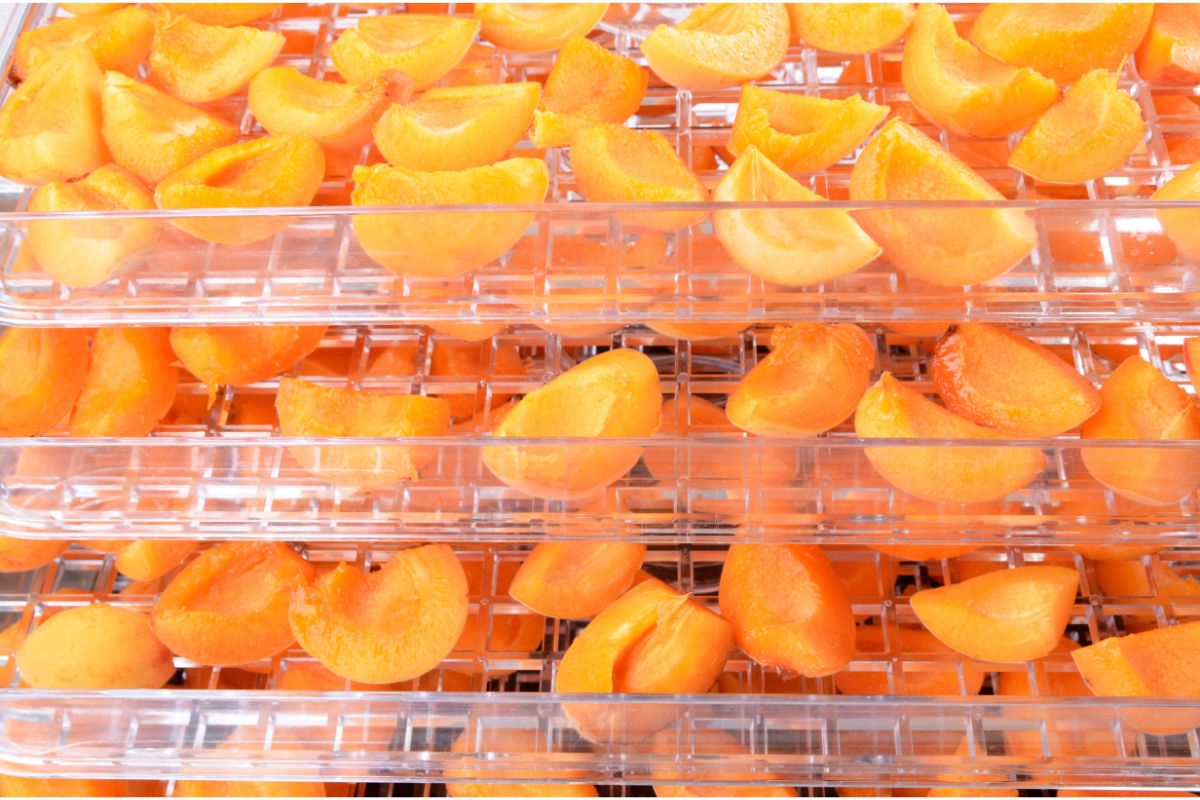
To dry oranges in a dehydrator, slice them into thin rounds and place them on the dehydrator trays in a single layer. Dry them at 135°F for 8-12 hours, or until they are completely dry and leathery. Enjoy as a healthy snack or use them for crafts and decorations.
Using the Dehydrator
Dehydrators are invaluable appliances for transforming fresh fruits, including oranges, into delicious and shelf-stable snacks or ingredients. When it comes to drying oranges, a dehydrator offers precise temperature control and consistent airflow, resulting in evenly dried slices with minimal effort.
Here’s a comprehensive guide to using a dehydrator to dry oranges:
- Preheat the Dehydrator: If your dehydrator requires preheating, set it to the appropriate temperature for drying fruits. Typically, the recommended temperature for dehydrating oranges ranges from 125°F to 135°F (approximately 52°C to 57°C).
- Arrange the Orange Slices: Place the prepared orange slices on the dehydrator trays in a single layer, ensuring that there is space between each slice to allow for proper airflow and even drying. Avoid overcrowding the trays, as this can impede the dehydration process.
- Adjust the Settings: Depending on the specific model of your dehydrator, adjust the settings for temperature and airflow as per the manufacturer’s instructions. Proper airflow is essential for removing moisture from the orange slices effectively.
- Monitor the Drying Process: Once the orange slices are placed in the dehydrator, monitor the drying progress periodically. The duration of the dehydration process can vary based on factors such as the thickness of the slices, the ambient humidity, and the specific dehydrator model.
- Check for Dryness: To determine if the orange slices are adequately dried, carefully remove a few slices from the dehydrator, allow them to cool to room temperature, and then assess their texture and pliability. The slices should be leathery and pliable, with no visible signs of moisture.
By following these steps, you can harness the power of your dehydrator to transform fresh orange slices into delightful, shelf-stable treats. Once the orange slices have reached the desired level of dryness, they are ready to be stored for future use.
With the orange slices expertly dried, let’s explore the next essential aspect: storing the dried oranges to maintain their quality and flavor over time.
Storing the Dried Oranges
Proper storage is key to preserving the flavor, texture, and nutritional quality of the dried oranges. Whether you intend to enjoy the dried oranges as a standalone snack or incorporate them into various recipes, storing them correctly will ensure that they remain fresh and flavorful for an extended period.
Here are the essential steps for storing dried oranges:
- Cooling and Conditioning: Once the orange slices have completed the dehydration process, allow them to cool to room temperature before proceeding with the storage. This cooling period helps to equalize the moisture content within the slices.
- Inspect for Moisture: Before storing the dried oranges, inspect them carefully to ensure that they are thoroughly dry. Any residual moisture could lead to spoilage during storage.
- Choose Appropriate Containers: Select airtight containers such as glass jars, food-grade plastic containers, or vacuum-sealed bags for storing the dried oranges. A proper seal helps prevent moisture and air from compromising the quality of the dried fruit.
- Avoiding Exposure to Light and Heat: Store the containers of dried oranges in a cool, dark place away from direct sunlight and heat sources. Exposure to light and heat can degrade the flavor and nutritional content of the dried fruit.
- Labeling and Date: To keep track of the storage duration, label the containers with the date of storage. Properly stored dried oranges can maintain their quality for several months to a year, depending on the storage conditions.
By following these storage guidelines, you can ensure that your meticulously dried oranges retain their exceptional flavor and nutritional benefits, ready to be enjoyed whenever the craving strikes.
With the dried oranges expertly prepared and stored, you have unlocked a versatile ingredient that can elevate a myriad of culinary creations. Embrace the creativity and culinary possibilities that dried oranges offer, and savor the delightful flavors they impart to your favorite dishes.
As we conclude this guide, you are now equipped with the knowledge and skills to embark on your own orange-drying adventure. Whether you’re crafting vibrant fruit displays, enhancing recipes, or simply enjoying a wholesome snack, dried oranges are sure to add a burst of sunshine to your culinary endeavors.
Read more: How To Dry Figs In A Dehydrator
Conclusion
Congratulations on mastering the art of drying oranges in a dehydrator! By delving into the process of selecting the perfect oranges, preparing them with care, utilizing the dehydrator for optimal results, and storing the dried slices to maintain their freshness, you have embarked on a delightful culinary journey that promises an array of flavorful possibilities.
As you venture into the world of dehydrating oranges, remember that the process is not only a practical method of preserving this vibrant fruit but also an avenue for infusing your culinary creations with a burst of natural sweetness and tanginess.
Whether you choose to enjoy the dried oranges as a wholesome snack, incorporate them into baked goods, infuse them into beverages, or experiment with innovative recipes, the versatility of dried oranges knows no bounds. Embrace your newfound knowledge and let your creativity flourish as you explore the countless ways in which dried oranges can enhance your culinary repertoire.
As you savor the delightful flavors and aromas of your homemade dried oranges, take pride in the fact that you have harnessed the power of dehydration to transform a simple fruit into a versatile and long-lasting culinary treasure.
So, with your dehydrator at the ready and a bounty of fresh oranges within reach, it’s time to embark on your own orange-drying adventure. Let the tantalizing scent of citrus and the promise of vibrant flavors inspire you as you create, innovate, and indulge in the delightful world of dried oranges.
May your kitchen be filled with the sunshine of dried oranges, adding a touch of brightness to every dish and a hint of sweetness to every moment. Happy dehydrating!
Frequently Asked Questions about How To Dry Oranges In A Dehydrator
Was this page helpful?
At Storables.com, we guarantee accurate and reliable information. Our content, validated by Expert Board Contributors, is crafted following stringent Editorial Policies. We're committed to providing you with well-researched, expert-backed insights for all your informational needs.


0 thoughts on “How To Dry Oranges In A Dehydrator”