Home>Home Appliances>Kitchen Appliances>How To Dry Pears In A Dehydrator
Kitchen Appliances
How To Dry Pears In A Dehydrator
Modified: February 18, 2024
Learn how to dry pears in a dehydrator with our easy step-by-step guide. Get the best results using your kitchen appliances. Start dehydrating today!
(Many of the links in this article redirect to a specific reviewed product. Your purchase of these products through affiliate links helps to generate commission for Storables.com, at no extra cost. Learn more)
Introduction
Welcome to the delightful world of dehydrated pears! Drying pears in a dehydrator is a fantastic way to preserve their natural sweetness and create a delicious, nutritious snack that can be enjoyed year-round. Whether you're a seasoned home chef or a newcomer to the art of food dehydration, this comprehensive guide will walk you through the process of transforming fresh, juicy pears into delectable dried treats.
In this article, we'll explore everything from selecting the perfect pears for drying to the step-by-step process of dehydrating them to perfection. Along the way, you'll discover helpful tips and tricks to ensure that your dried pears turn out just the way you like them. So, grab your apron and let's dive into the wonderful world of dehydrated pears!
Key Takeaways:
- Dehydrating pears in a dehydrator preserves their natural sweetness, making a delicious, nutritious snack. Choose ripe, firm pears, prepare them carefully, and store them properly for long-lasting enjoyment.
- Enjoy the delightful process of transforming fresh, juicy pears into delectable dried treats. With patience and care, you can savor the sweet, chewy goodness of your homemade dried pears year-round.
Read more: How To Dry Figs In A Dehydrator
Choosing the Right Pears
When it comes to dehydrating pears, selecting the right variety is crucial to achieving the best results. Look for pears that are ripe but still firm, as overly ripe pears may become mushy during the dehydration process. Some popular pear varieties that are well-suited for drying include Bartlett, Bosc, and Anjou pears. These varieties are known for their sweet, flavorful flesh and are readily available in many grocery stores and farmers’ markets.
Before diving into the drying process, take the time to inspect each pear for any bruising or blemishes. Opt for pears that are free of major imperfections, as these can affect the overall quality of the dried fruit. Additionally, ensure that the pears are at their peak ripeness, as this will contribute to the sweetness and flavor of the final product.
It’s also worth noting that organic pears are an excellent choice for dehydration, as they are free from synthetic pesticides and other harmful chemicals. If possible, source organic pears to create a truly wholesome and natural snack.
By carefully selecting the right pears for dehydration, you’ll set the stage for a delightful and satisfying snacking experience once the drying process is complete.
Preparing the Pears
Before you can start dehydrating your pears, it’s essential to properly prepare them to ensure the best possible outcome. Begin by thoroughly washing the pears under cool running water to remove any dirt, debris, or residue from the skin. Once clean, gently pat the pears dry with a clean kitchen towel.
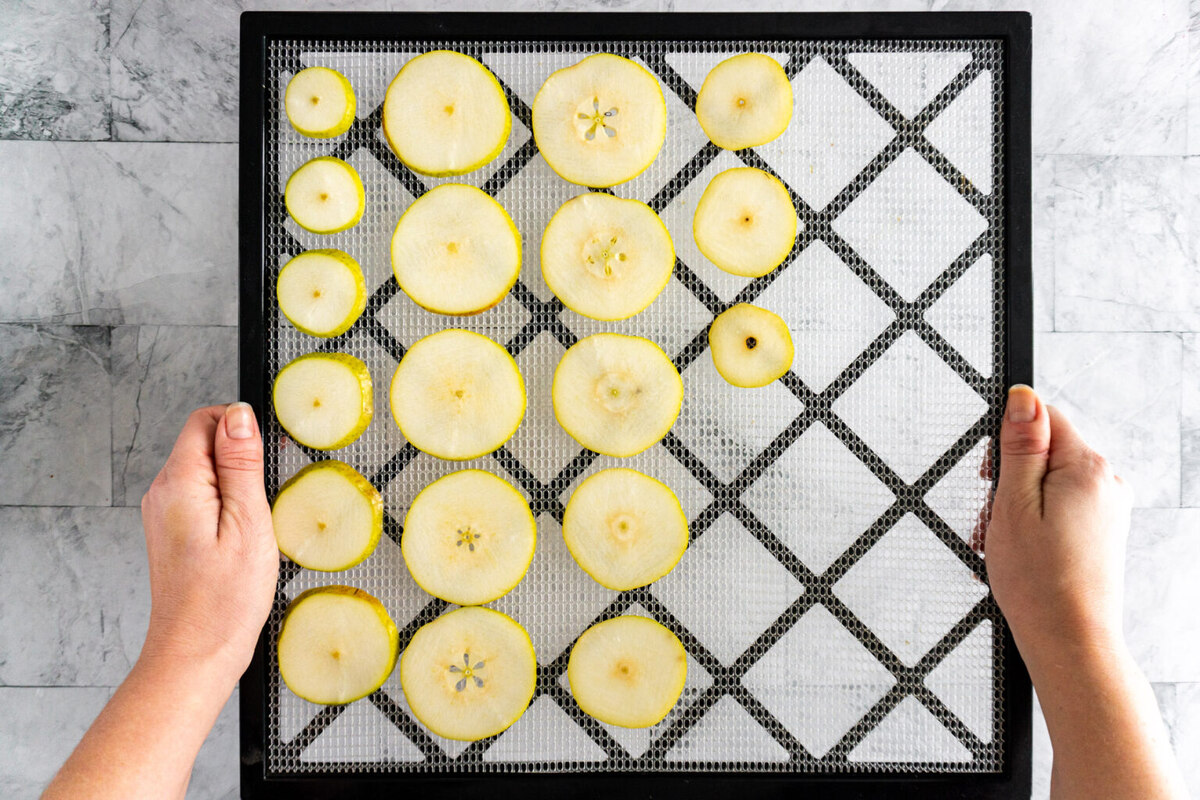
Next, it’s time to peel and core the pears. Using a sharp knife or a vegetable peeler, carefully remove the skin from each pear, taking care to eliminate any blemishes or imperfections along the way. Once peeled, slice the pears into uniform pieces, approximately 1/4 to 1/2 inch thick. This consistency in slicing will help ensure that the pears dehydrate evenly and produce uniformly dried pieces.
After slicing, consider giving the pears a quick dip in a solution of lemon juice and water to help prevent browning. The natural enzymes in the pears can cause them to darken during the drying process, but a brief soak in this solution will help maintain their natural, appetizing color.
Once the pears are sliced and treated with the lemon juice solution, it’s time to arrange them on the dehydrator trays. Be sure to leave some space between the slices to allow for proper air circulation, which is essential for efficient dehydration. With the pears neatly arranged, your dehydrator is now ready to work its magic and transform the fruit into delicious, shelf-stable snacks.
By taking the time to properly prepare the pears for dehydration, you’ll be well on your way to enjoying a bounty of flavorful, nutritious dried fruit that’s perfect for snacking, baking, or adding to your favorite recipes.
To dry pears in a dehydrator, slice them evenly and place them on the dehydrator trays in a single layer. Dry at 135°F for 8-12 hours, or until they are leathery and no moisture is present. Enjoy as a healthy snack or add to granola and baked goods.
Dehydrating the Pears
Now that your pears are meticulously prepared, it’s time to fire up the dehydrator and commence the drying process. Set the dehydrator to the appropriate temperature for drying fruit, typically around 135°F (57°C). The gentle, consistent heat will gradually remove the moisture from the pears, leaving behind concentrated flavors and a satisfyingly chewy texture.
As the pears begin to dry, you’ll notice the transformation taking place. Over the course of several hours, the slices will slowly shrink in size as the moisture evaporates, intensifying the natural sweetness and flavor of the fruit. Depending on the thickness of the slices and the humidity in the air, the drying process may take anywhere from 8 to 16 hours.
Throughout the dehydration process, it’s a good idea to periodically check the pears for dryness. The slices should be pliable and slightly leathery, with no visible moisture remaining. To test for dryness, remove a slice from the dehydrator, allow it to cool for a few minutes, and then give it a gentle squeeze. If no moisture beads form and the pear feels firm and dry, it’s ready to be removed from the dehydrator.
Once the pears have reached the desired level of dryness, turn off the dehydrator and allow the slices to cool completely. This cooling period helps to ensure that any remaining moisture is evenly distributed, reducing the risk of condensation when the pears are stored. After cooling, transfer the dried pears to airtight containers or resealable bags, and store them in a cool, dry place away from direct sunlight.
With the dehydrating process complete, you’ll be rewarded with a supply of delicious dried pears that are perfect for snacking, incorporating into recipes, or sharing with friends and family. The natural sweetness and concentrated flavor of the dried pears make them a versatile and wholesome addition to your pantry.
Storing the Dried Pears
Proper storage is essential for maintaining the quality and freshness of your dehydrated pears. After the pears have been thoroughly dried and cooled, it’s crucial to store them in a manner that protects them from moisture, air, and light, which can compromise their texture and flavor over time.
First and foremost, ensure that the dried pears are completely cooled before storing them. Any residual warmth could lead to condensation inside the storage containers, potentially causing the pears to become moist and susceptible to spoilage.
When it comes to storage containers, opt for airtight glass jars or resealable plastic bags designed for long-term food storage. These containers will help shield the dried pears from exposure to air and humidity, preserving their quality for an extended period.
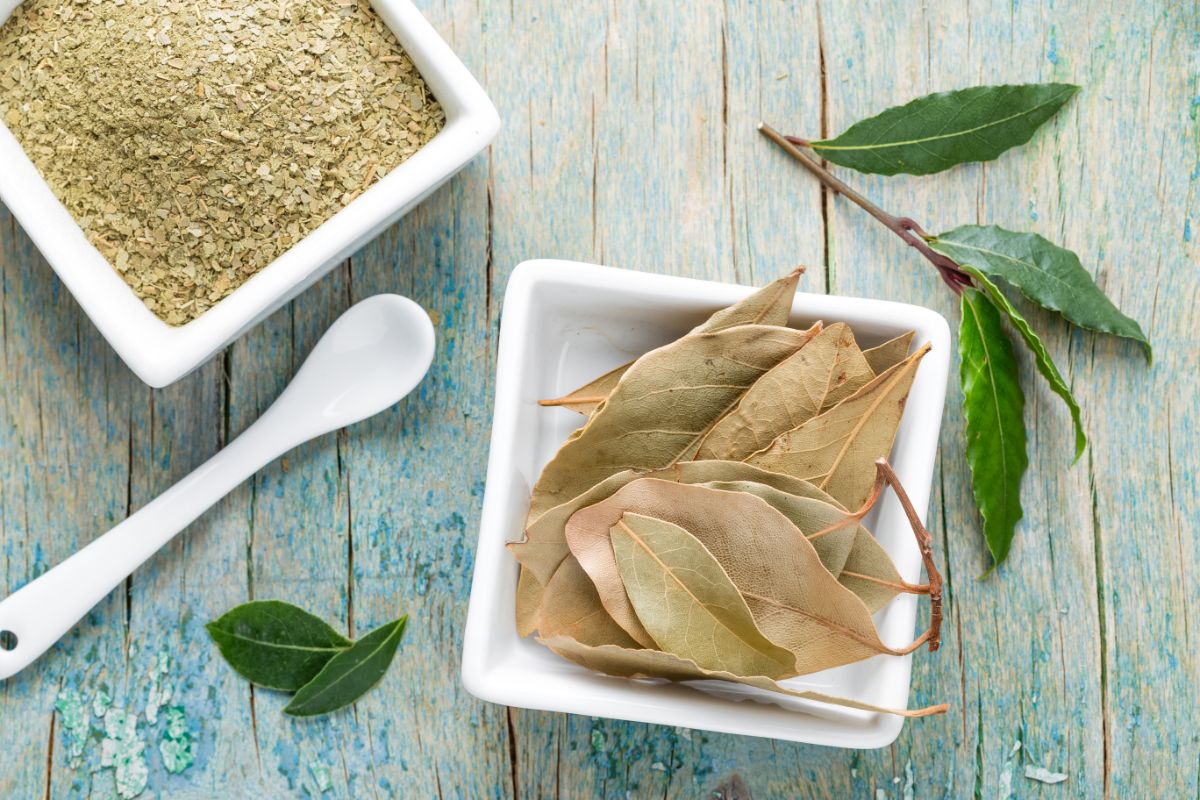
Before sealing the containers, consider adding a small food-grade desiccant packet to help absorb any lingering moisture and maintain the pears’ crispness. Alternatively, you can include a few clean, dry bay leaves, which are known for their natural moisture-absorbing properties and can help keep the pears dry and flavorful.
Once the dried pears are securely stored in airtight containers, place them in a cool, dark pantry or cupboard. Avoid storing them near heat sources or in areas prone to temperature fluctuations, as these conditions can hasten the loss of quality and flavor.
By following these storage guidelines, your dehydrated pears can remain in excellent condition for up to 12 months, retaining their delightful sweetness and chewy texture. Whether enjoyed as a standalone snack or incorporated into your favorite recipes, properly stored dried pears will continue to bring joy and nourishment to your culinary endeavors.
Read more: How To Dry Oranges In A Dehydrator
Conclusion
Congratulations on mastering the art of dehydrating pears! By carefully selecting the finest pears, meticulously preparing them, and patiently dehydrating them to perfection, you’ve unlocked a world of delicious possibilities. Whether enjoyed as a wholesome snack, added to baked goods, or used to infuse flavor into dishes, your dehydrated pears are a testament to your culinary prowess.
As you savor the sweet, chewy goodness of your dried pears, take pride in the fact that you’ve harnessed the natural bounty of fresh fruit and transformed it into a shelf-stable delight. The time and effort you’ve invested in this process have yielded a rewarding outcome that will continue to bring joy to your taste buds and those of your loved ones.
Remember, the journey doesn’t end here. With your newfound knowledge and expertise, you can explore the world of dehydrating a wide array of fruits, from apples and bananas to mangoes and strawberries. Each fruit offers its own unique flavors and textures, waiting to be preserved and enjoyed in new and exciting ways.
So, as you relish the fruits of your labor, consider the endless possibilities that lie ahead. With your dehydrator as your trusty companion, you’re poised to embark on a flavorful adventure, discovering the joys of preserving nature’s bounty one delicious bite at a time.
Embrace the art of dehydrating, and let your creativity flourish as you continue to explore the boundless world of dried fruits. Your journey has only just begun, and the delights that await you are as abundant as the fruits themselves.
Frequently Asked Questions about How To Dry Pears In A Dehydrator
Was this page helpful?
At Storables.com, we guarantee accurate and reliable information. Our content, validated by Expert Board Contributors, is crafted following stringent Editorial Policies. We're committed to providing you with well-researched, expert-backed insights for all your informational needs.


0 thoughts on “How To Dry Pears In A Dehydrator”