Home>Home Security and Surveillance>How Do You Put The Home Defense Battery Wand On
Home Security and Surveillance
How Do You Put The Home Defense Battery Wand On
Modified: March 6, 2024
Learn how to properly install the Home Defense Battery Wand for your home security and surveillance needs. Secure your property with ease and peace of mind.
(Many of the links in this article redirect to a specific reviewed product. Your purchase of these products through affiliate links helps to generate commission for Storables.com, at no extra cost. Learn more)
Introduction
Welcome to the world of home security and surveillance! In today’s fast-paced and interconnected world, keeping our homes and loved ones safe has become a top priority. With advancements in technology, home security systems and surveillance tools have become more accessible and affordable than ever before.
One of the key components of a robust home security system is a reliable and efficient battery wand. The battery wand plays a crucial role in providing backup power to various security devices, ensuring they stay operational even during power outages.
In this article, we will walk you through the process of installing and activating a home defense battery wand. Whether you’re a DIY enthusiast or a tech-savvy individual, this guide will provide you with step-by-step instructions to successfully set up your battery wand and enhance the security of your home.
Before we dive into the installation process, let’s gain a deeper understanding of what a home defense battery wand is and how it works.
Key Takeaways:
- Installing a home defense battery wand involves understanding its purpose, preparing for installation, mounting it securely, connecting it to a power source, and testing its functionality to ensure continuous power supply to security devices.
- Troubleshooting common issues with the battery wand, such as charging problems and device connection issues, is essential for maintaining a reliable home security system and ensuring the safety of your home and loved ones.
Read more: What To Put On A Home Defense Vest
Step 1: Understanding the Home Defense Battery Wand
Before we begin the installation process, it’s important to have a clear understanding of what a home defense battery wand is and how it functions within a home security system.
A home defense battery wand is a compact device that acts as a backup power source for your security devices. It typically consists of a rechargeable battery housed inside a sleek, portable wand-like design. The battery wand is designed to provide uninterrupted power supply to your surveillance cameras, alarm systems, motion detectors, and other security equipment, even during power outages.
What sets the home defense battery wand apart from regular batteries is its ability to automatically switch to battery power when the main power supply is disrupted. This ensures that your security devices continue to function without any interruption, providing continuous protection for your home.
Modern battery wands are equipped with advanced features such as smart charging technology, which optimizes the battery life and ensures efficient power management. Some battery wands also come with built-in surge protection to safeguard your security devices from electrical fluctuations.
When choosing a home defense battery wand, it’s essential to consider factors such as battery capacity, compatibility with your security devices, and ease of installation. Additionally, make sure to select a battery wand that provides sufficient backup time to keep your security system running until the power is restored.
Now that you have a better understanding of the battery wand’s purpose and functionality, let’s move on to the next step, where we will guide you through the preparation process for installing the battery wand.
Step 2: Preparing the Battery Wand for Installation
Now that you have a good understanding of the home defense battery wand, it’s time to prepare it for installation. Proper preparation is key to ensuring a smooth and successful installation process.
Here are the steps to prepare your battery wand for installation:
- Read the Manual: Start by carefully reading the user manual that comes with your battery wand. The manual will provide specific instructions, safety precautions, and any additional information you need to know about your particular model. Familiarize yourself with the features and functions of the battery wand.
- Select the Installation Location: Choose an appropriate location for installing the battery wand. Ideally, it should be near the security devices it will power and within range of an electrical outlet for charging. Ensure the location is easily accessible and not exposed to extreme temperatures or moisture.
- Gather the Required Tools: Collect all the tools you will need for the installation. This may include a drill, screws, screwdriver, level, and any other tools specified in the manual.
- Inspect the Battery Wand: Before installing, check the battery wand for any signs of damage or defects. Ensure all components are present and in good condition. If you notice any issues, contact the manufacturer or retailer for assistance.
- Charge the Battery: If your battery wand is not pre-charged, connect it to a power source using the provided charger. Follow the manufacturer’s instructions on the recommended charging time. Avoid overcharging the battery as it may affect its performance and lifespan.
- Plan the Wiring: If your installation requires wiring, plan the routes and connections beforehand. Ensure you have the necessary wiring components and tools. It’s advisable to consult a professional if you are not experienced in electrical wiring.
By following these steps, you will ensure that your battery wand is ready for installation. In the next step, we will guide you through mounting the battery wand securely on the wall.
Step 3: Mounting the Battery Wand on the Wall
Mounting the battery wand securely on the wall is a crucial step in the installation process. By following the steps below, you can ensure that your battery wand is properly secured and positioned for optimal performance.
- Choose an Ideal Mounting Location: Select a suitable location on the wall where you want to install the battery wand. Ensure it is within reach of the security devices it will power and in close proximity to an electrical outlet.
- Prepare the Wall: Before mounting the battery wand, prepare the wall surface. Clean any dirt, dust, or debris, and ensure the area is dry. This will provide a clean and secure base for attaching the wand.
- Mark the Mounting Holes: Place the battery wand against the wall in the desired position. Use a pencil to mark the locations of the mounting holes on the wall. Double-check the alignment and make any adjustments if needed.
- Drill the Holes: Using an appropriate drill bit, carefully drill the marked holes on the wall. Be cautious to avoid damaging any hidden wiring or pipes behind the wall. If you are unsure, consult a professional.
- Insert Wall Anchors: Insert wall anchors into the drilled holes. Wall anchors provide stability and prevent the screws from coming loose over time. Push the anchors securely into the holes until they are flush with the wall surface.
- Attach the Mounting Bracket: Depending on the battery wand model, you may need to attach a mounting bracket to the wall anchors. Align the bracket with the anchors and use screws to secure it in place. Ensure the bracket is level and tightly attached.
- Secure the Battery Wand: Once the mounting bracket is in place, carefully position the battery wand onto the bracket. Align the holes on the wand with the corresponding holes on the bracket. Securely fasten the wand to the bracket using the provided screws.
- Double-check the Stability: Give the battery wand a gentle tug to ensure it is securely mounted. It should not move or wobble. If it feels unstable, check the brackets and screws for proper alignment and tightness.
By following these steps, you can ensure that your battery wand is securely mounted on the wall. In the next step, we will guide you through connecting the battery wand to the power source.
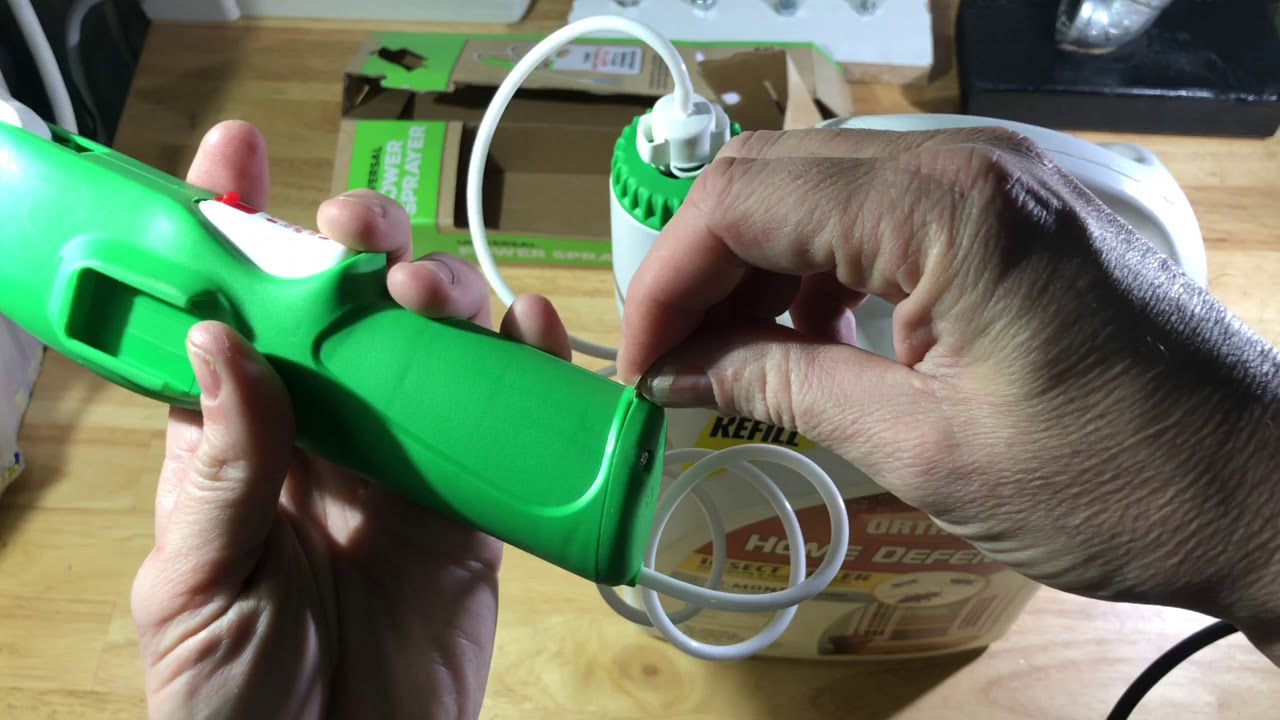
To put the home defense battery wand on, align the wand with the nozzle and push it in until it clicks into place. Make sure it is securely attached before use.
Step 4: Connecting the Battery Wand to the Power Source
Now that you have successfully mounted the battery wand on the wall, it’s time to connect it to a power source. This step is crucial as it ensures that the battery wand stays charged and ready to provide backup power to your security devices.
- Locate the Power Source: Identify the nearest electrical outlet within reach of the battery wand. Ensure that the outlet is in good working condition and easily accessible.
- Check the Power Cable: Inspect the power cable that comes with the battery wand. Ensure that it is free from any damage or frayed wires. If you notice any issues, do not attempt to use the cable. Instead, contact the manufacturer for a replacement.
- Plug in the Power Cable: Insert the power cable into the designated port on the battery wand. Ensure that it is securely and firmly connected. Avoid using excessive force that may damage the port or cable.
- Connect to the Outlet: Insert the other end of the power cable into the electrical outlet. Ensure that it fits securely and is not loosely connected. Use a surge protector if available to provide additional protection against power surges.
- Check for Power: Once the battery wand is connected to the power source, check if the charging indicator light illuminates. This indicates that the battery wand is receiving power and is charging properly.
- Verify the Charging Time: Refer to the battery wand’s user manual to determine the recommended charging time. Allow sufficient time for the battery wand to fully charge before proceeding to the next step.
- Perform Regular Maintenance: It’s important to periodically check the power cable and connections for any signs of damage or loose connections. Clean the charging port and cable if necessary to ensure uninterrupted power supply.
By following these steps, you can properly connect the battery wand to the power source and ensure it stays charged for optimal performance. In the next step, we will guide you through testing and activating the home defense battery wand.
Read more: Where Do You Keep Your Home Defense Shotgun
Step 5: Testing and Activating the Home Defense Battery Wand
After successfully connecting the battery wand to the power source, it’s time to test and activate it to ensure proper functionality and performance. Testing the battery wand will allow you to verify that it is providing backup power to your security devices as intended.
- Verify Power Supply: Confirm that the battery wand is receiving power by checking the charging indicator light. It should be illuminated, indicating that the battery wand is charging or fully charged.
- Activate Security Devices: Now, it’s time to activate your security devices and test if they are receiving power from the battery wand. Turn on your surveillance cameras, alarms, motion detectors, or any other security devices that are connected to the battery wand.
- Monitor Device Functionality: Observe and ensure that all your security devices are functioning properly. Check if the surveillance cameras are recording footage, the alarm systems are triggering when activated, and the motion detectors are detecting movement. If any of the devices are not functioning as expected, check the connections and consult the device’s manual or contact customer support.
- Perform a Power Outage Test: To simulate a power outage, temporarily disconnect the main power source to see if the battery wand kicks in and provides backup power to the security devices. Monitor how long your devices are able to operate on battery power. This will give you an idea of the battery wand’s backup time and help you plan accordingly.
- Make Adjustments if Necessary: If you encounter any issues or notice that certain devices are not receiving power from the battery wand, double-check the connections and ensure everything is securely connected. Troubleshoot any problems following the manufacturer’s guidelines or seek professional assistance if needed.
- Create a Testing and Maintenance Schedule: Regularly test the functionality of your security devices and the battery wand to ensure they are in proper working order. Create a schedule for testing and maintenance to guarantee the continuous and reliable performance of your home defense system.
By following these steps, you can test and activate your home defense battery wand to ensure it is functioning correctly and providing backup power to your security devices. In the next step, we will discuss some common issues that may arise with the battery wand and how to troubleshoot them.
Step 6: Troubleshooting Common Issues with the Battery Wand
While the installation and activation process of a home defense battery wand is typically straightforward, some common issues may arise. Understanding these issues and knowing how to troubleshoot them can help ensure the proper functioning of your battery wand and security system. Here are some common problems you might encounter and their potential solutions:
- Battery Not Charging: If you notice that the battery wand is not charging, check the power cable connection to ensure it is securely plugged in. Verify that the outlet is working by testing it with another device. If the issue persists, consult the user manual or contact the manufacturer for assistance.
- Short Backup Time: If you find that the backup time provided by the battery wand is short, it could be due to various factors. Check if you have connected power-hungry devices that drain the battery quickly. Consider reducing the number of connected devices or upgrading to a battery wand with a higher capacity.
- Device Connection Issues: If your security devices are not receiving power from the battery wand, ensure that all the connections are securely made. Double-check the wiring and connection points to eliminate any loose or faulty connections. If the issue persists, consult the user manual or contact customer support.
- Inadequate Coverage Area: If you find that the battery wand does not have enough power to cover all your security devices, consider adding additional battery wands strategically placed around your home. This will help distribute the backup power and ensure all devices are adequately covered.
- Battery Draining Quickly: If you notice that the battery of the wand is draining faster than expected, it could be due to continuous use or excessive power consumption. You may need to optimize the settings of your security devices to reduce power consumption or consider upgrading to a higher-capacity battery wand.
- Unresponsive Wand: In the event that the battery wand becomes unresponsive or fails to activate your security devices, you may need to reset the wand. Consult the user manual for instructions on how to reset or contact customer support if the issue persists.
Remember, troubleshooting issues with the battery wand is an important part of maintaining a reliable home security system. By following these troubleshooting steps, you can quickly identify and resolve common problems, ensuring the continued safety and protection of your home.
Congratulations! You have now successfully completed the installation, activation, and troubleshooting process for your home defense battery wand. By following these steps, you can have peace of mind knowing that your security devices are always powered and ready to safeguard your home and loved ones.
Remember to regularly perform maintenance checks, test the functionality of your security devices, and keep the battery wand properly charged to ensure its optimal performance. Stay proactive in maintaining your home security system to ensure its effectiveness and reliability for years to come.
Thank you for investing in the safety of your home and utilizing the power of a home defense battery wand. Stay secure!
Conclusion
Ensuring the safety and security of our homes and loved ones is a top priority for all homeowners. With the advancements in technology, home security systems have become more accessible and efficient than ever before. A crucial component of a robust home security system is a reliable and efficient battery wand.
In this article, we have explored the process of installing and activating a home defense battery wand. We started by understanding the purpose and functionality of the battery wand, highlighting its role in providing backup power to security devices during power outages.
From there, we delved into the detailed steps of preparing the battery wand for installation, including selecting a suitable location, gathering the necessary tools, and charging the battery. We then moved on to mounting the battery wand securely on the wall, emphasizing the importance of proper positioning and stability.
Next, we discussed the crucial step of connecting the battery wand to the power source, ensuring that it stays charged and ready to provide backup power. We provided instructions on checking the power supply, plugging in the power cable, and verifying the charging process.
Following that, we explored the testing and activation of the home defense battery wand, including the activation of security devices and the simulation of a power outage. We encouraged regular testing and maintenance to ensure a reliable and continuous power supply to the security system.
Lastly, we addressed common issues that might arise with the battery wand and provided troubleshooting tips to overcome them. By understanding these issues and their solutions, homeowners can effectively resolve any problems that may occur during the usage of the battery wand.
In conclusion, a home defense battery wand is an essential component of a comprehensive home security system. By following the step-by-step installation process, testing the functionality, and troubleshooting any issues, homeowners can have peace of mind knowing their security devices will stay powered and keep their homes protected even during power outages.
Remember to regularly perform maintenance checks, charge the battery wand, and update your security devices as needed. By prioritizing the safety of your home and loved ones, you can create a secure environment and enjoy peace of mind.
Thank you for joining us on this journey to enhance your home security. Stay vigilant, stay protected!
Frequently Asked Questions about How Do You Put The Home Defense Battery Wand On
Was this page helpful?
At Storables.com, we guarantee accurate and reliable information. Our content, validated by Expert Board Contributors, is crafted following stringent Editorial Policies. We're committed to providing you with well-researched, expert-backed insights for all your informational needs.