Home>Ideas and Tips>Backyard Shade Sail Installation for Cool Outdoor Living Spaces
Ideas and Tips
Backyard Shade Sail Installation for Cool Outdoor Living Spaces
Modified: November 1, 2024
Learn how to install backyard shade sails for cool, stylish outdoor living spaces. Enjoy easy installation, UV protection, and aesthetic appeal.
(Many of the links in this article redirect to a specific reviewed product. Your purchase of these products through affiliate links helps to generate commission for Storables.com, at no extra cost. Learn more)
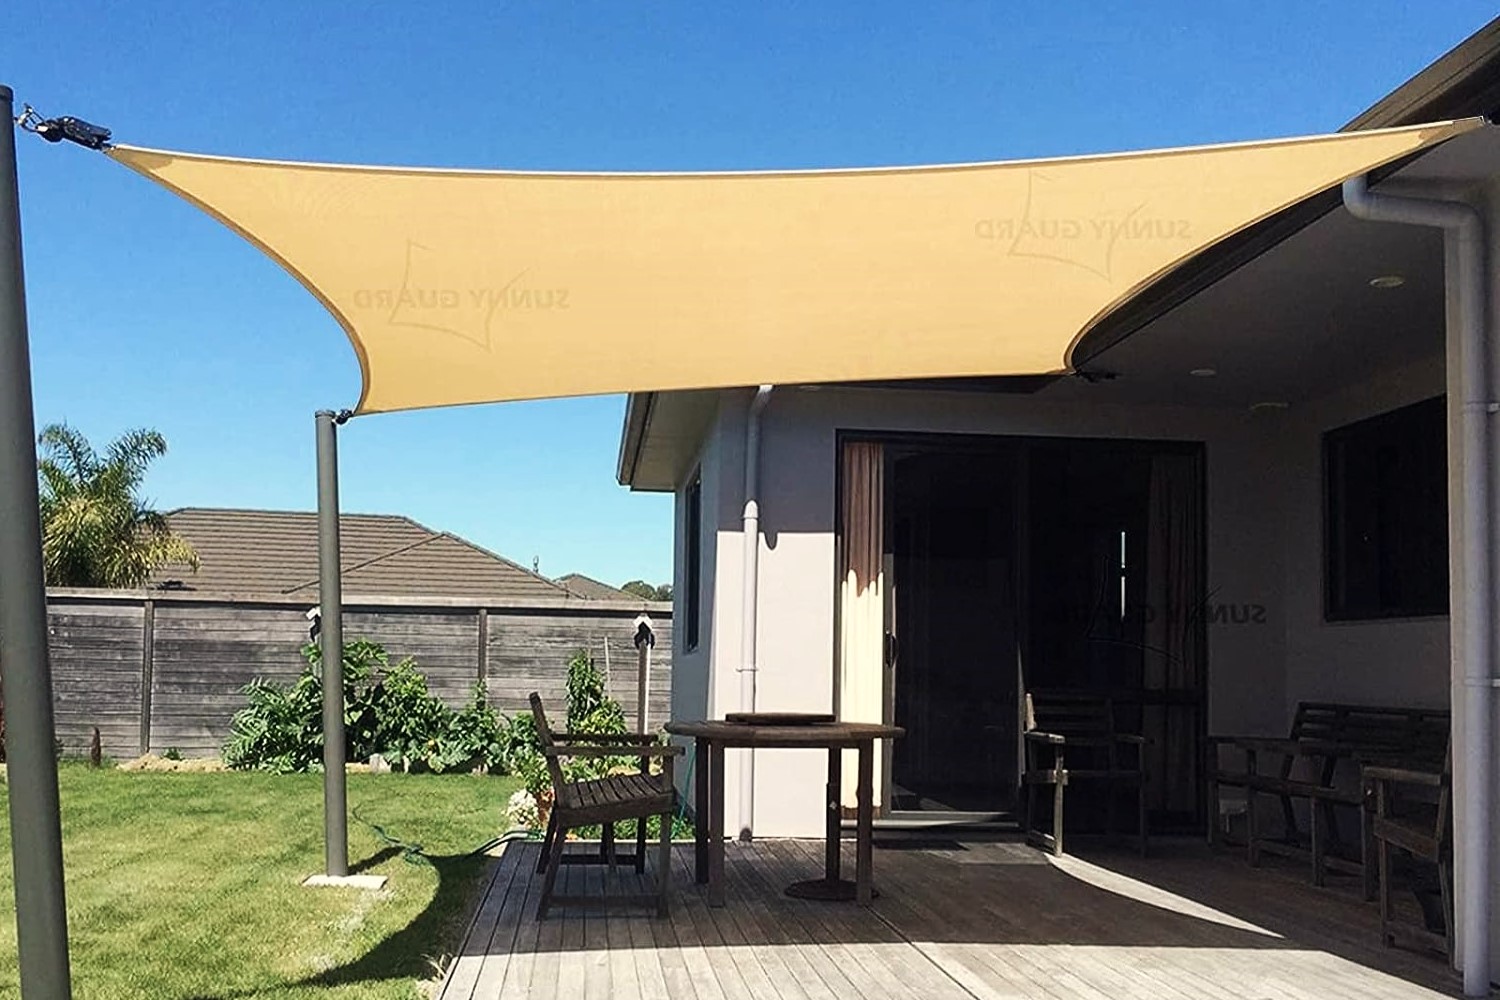
Creating a comfortable and inviting outdoor living space is essential for any homeowner, especially during the hot summer months. One of the most effective ways to achieve this is by installing shade sails. These versatile and stylish structures not only provide excellent shade but also add an aesthetic touch to your backyard. In this article, we will guide you through the process of installing shade sails, highlighting the benefits, different types, and various installation methods.
Benefits of Shade Sails
Shade sails offer numerous benefits that make them an ideal choice for backyard shade solutions. Here are some of the key advantages:
-
Versatility: Shade sails can be installed in various configurations, including triangles, rectangles, and squares. This versatility allows you to tailor the sail to fit your specific needs and the shape of your outdoor space.
-
Easy Installation: Unlike traditional patio covers or pergolas, shade sails are relatively easy to install. They require minimal hardware and can be set up by a DIY enthusiast with basic tools.
-
Durability: High-quality shade sails are made from durable materials that can withstand harsh weather conditions such as heavy rain and strong winds. They are also resistant to UV rays, ensuring they maintain their color and structure over time.
-
Aesthetic Appeal: Shade sails come in a wide range of colors and designs, making them a stylish addition to any backyard. They can be used to create unique patterns or simply provide a clean, modern look.
-
Cost-Effective: Compared to other shade solutions like pergolas or gazebos, shade sails are generally more affordable. They require minimal materials and labor, making them a cost-effective option for homeowners.
-
Flexibility: Shade sails can be easily moved or repositioned as needed. This flexibility is particularly useful if you have different areas of your backyard that require shade at different times of the day.
-
Protection from UV Rays: One of the primary benefits of shade sails is their ability to block UV rays, which are harmful to skin and can cause sunburn and skin damage.
Read more: How To Install Patio Shade Sails
Choosing the Right Shade Sail
Before you start your installation project, it’s crucial to choose the right shade sail for your needs. Here are some factors to consider:
-
Size: Measure your outdoor space carefully to determine the size of the shade sail you need. Consider the dimensions of the area you want to cover and any obstructions like trees or furniture.
-
Material: Look for shade sails made from high-quality materials that are UV-resistant and durable. Popular materials include Sunbrella fabric and Coolaroo fabric.
-
Color: Choose a color that complements your home and backyard decor. Darker colors can provide deeper shade but may make the space darker, while lighter colors can brighten up the area.
-
Type: Decide on the type of shade sail you want—triangle, rectangle, or square. Each type has its own unique benefits and can be used in different configurations.
-
Hardware: Ensure you have all the necessary hardware for installation, including eye hooks, tie-down straps, and galvanized chains.
Step-by-Step Installation Guide
Installing a shade sail is a straightforward process that requires minimal tools and expertise. Here’s a step-by-step guide to help you get started:
Step 1: Prepare the Area
Before you begin installing your shade sail, prepare the area by clearing any debris or obstructions. Ensure that the ground is level and firm to support the posts.
Step 2: Measure and Mark the Posts
Measure out where you want to place your posts, ensuring they are evenly spaced and aligned with the corners of your shade sail. Mark these points with stakes or flags.
Step 3: Dig Holes for Posts
Dig holes for each post, making sure they are deep enough to provide stability (about 1/3 of the post below ground). Fill the holes with cement to secure the posts firmly in place.
Step 4: Install Eye Hooks
Install eye hooks at the top of each post. These hooks will be used to connect the shade sail to the posts. Use galvanized metal hooks or other durable materials meant for outdoor use.
Step 5: Prepare the Shade Sail
Spread out the shade sail flat on the ground to ensure there are no rips or tears. Use ground stakes in each corner to pull the sail taut and measure the sides to verify it comes in the correct size.
Step 6: Secure the Shade Sail
Loosely secure the shade sail to each post using bungee cords to get things in place. Once aloft, wrap tie-down straps around each post and attach them to the grommet in each corner of the shade sail. Tighten the sail until it is taut in each corner using ratcheting functionality on tie-down straps. Finally, secure the grommets with galvanized chains or quick links.
Step 7: Adjust and Enjoy
Adjust the angle of your shade sail as needed to ensure optimal shade coverage throughout the day. Enjoy your new outdoor living space with the added comfort and style provided by your shade sail.
Additional Tips and Tricks
While installing a shade sail is relatively straightforward, there are some additional tips and tricks that can make your life easier:
-
Angle Posts: When using metal posts, angle them 10 degrees away from the center of your structure for added stability. For wooden posts, angle them 20 degrees for better support against bending and flexing.
-
Use Guide Wires: If using wooden posts, consider using guide wires or cables to reinforce them for added stability.
-
Consider Wind Direction: Position your shade sail in a way that it directs rain runoff towards a drain or other designated area to prevent water accumulation.
-
Maintenance: Regularly inspect your shade sail for any damage or wear and tear. Clean it periodically with mild soap and water to maintain its appearance and functionality.
Case Studies and Real-Life Examples
Let’s take a look at some real-life examples of how shade sails have transformed backyard spaces:
Example 1: Mid Modern Mama’s Shade House
Mid Modern Mama lost their 70-year-old maple tree due to drought and neglect, which left them without natural shade in their backyard. To create a new shade solution, they built a shade house inspired by Victorian lath houses. They installed a large shade sail over the top for the hottest months of summer, providing deep and cool shade that significantly dropped the temperature underneath.
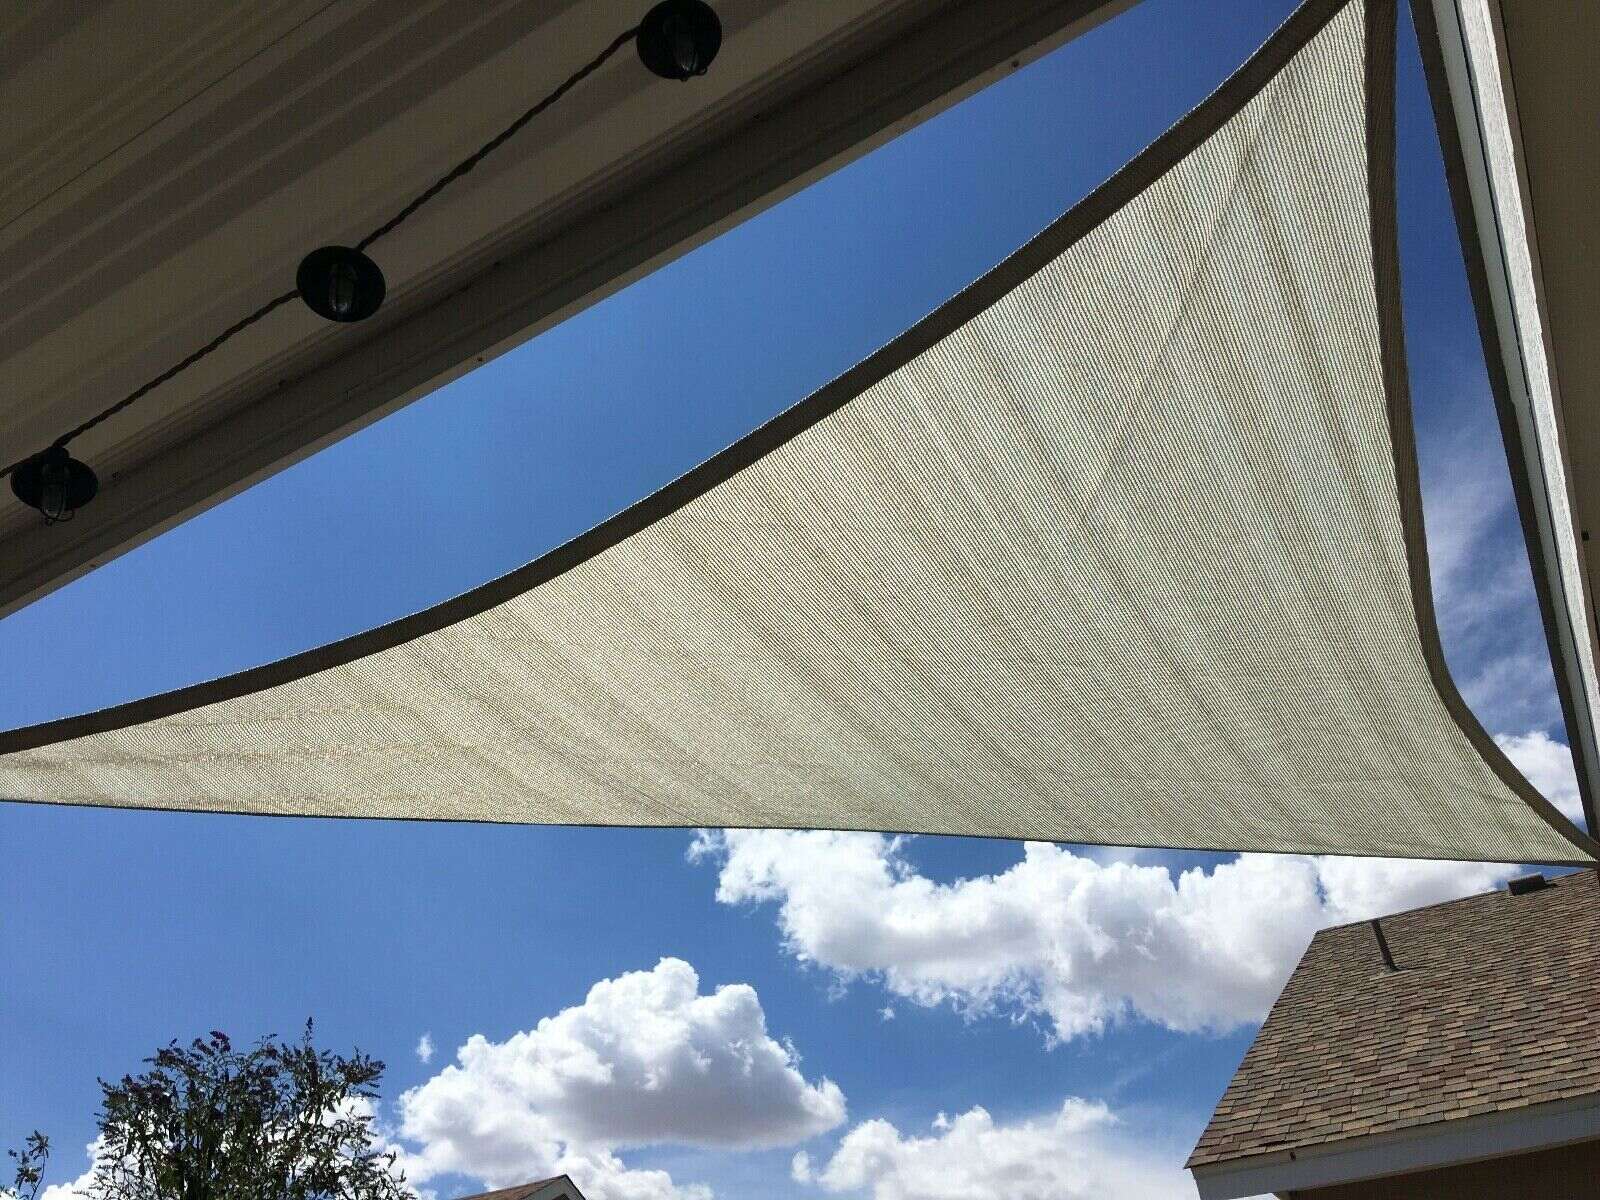
Example 2: DIY Shade Sail Installation
A homeowner in Colorado installed shade sails in their backyard to protect themselves from the intense sun rays. They used 6-inch by 6-inch posts buried 2 feet deep in the ground for added stability. The installation process involved mixing cement for the posts, installing eye hooks, preparing the sail, securing it to the posts using tie-down straps and galvanized chains, and finally enjoying their new patio shade.
Example 3: Reinvented Delaware’s Sun Shade Story
Reinvented Delaware faced a long-standing issue with lack of shade in their backyard despite spending thousands of dollars on umbrellas over the years. They finally installed a custom-made sun shade sail from The Hues, which provided the needed shade for their patio and took under two hours to install. This solution not only solved their shade problem but also added aesthetic appeal to their outdoor living space.
Conclusion
Shade sails are an excellent solution for creating cool outdoor living spaces. They offer versatility, ease of installation, durability, aesthetic appeal, cost-effectiveness, flexibility, and protection from UV rays. By following our step-by-step guide and considering additional tips and tricks, you can transform your backyard into a comfortable oasis perfect for enjoying all year round. Whether you’re looking to replace lost natural shade or simply enhance your outdoor space with style and functionality—shade sails are an ideal choice that will make your backyard a more livable and enjoyable place.
By following these steps and tips outlined in this article, you’ll be well on your way to creating a shaded paradise in your own backyard. Whether you’re a seasoned DIY enthusiast or just starting out with home improvement projects—shade sails offer an accessible solution that’s both practical and stylish. So why wait? Get shady and make your outdoor space more livable and comfortable all year round
Was this page helpful?
At Storables.com, we guarantee accurate and reliable information. Our content, validated by Expert Board Contributors, is crafted following stringent Editorial Policies. We're committed to providing you with well-researched, expert-backed insights for all your informational needs.

0 thoughts on “Backyard Shade Sail Installation for Cool Outdoor Living Spaces”