Home>Ideas and Tips>Upgrading Your Home’s Basement With DIY Home Theater
Ideas and Tips
Upgrading Your Home’s Basement With DIY Home Theater
Modified: November 1, 2024
Transform your basement into a cozy home theater with our DIY guide. Learn about planning, equipment, soundproofing, and more for an immersive experience.
(Many of the links in this article redirect to a specific reviewed product. Your purchase of these products through affiliate links helps to generate commission for Storables.com, at no extra cost. Learn more)
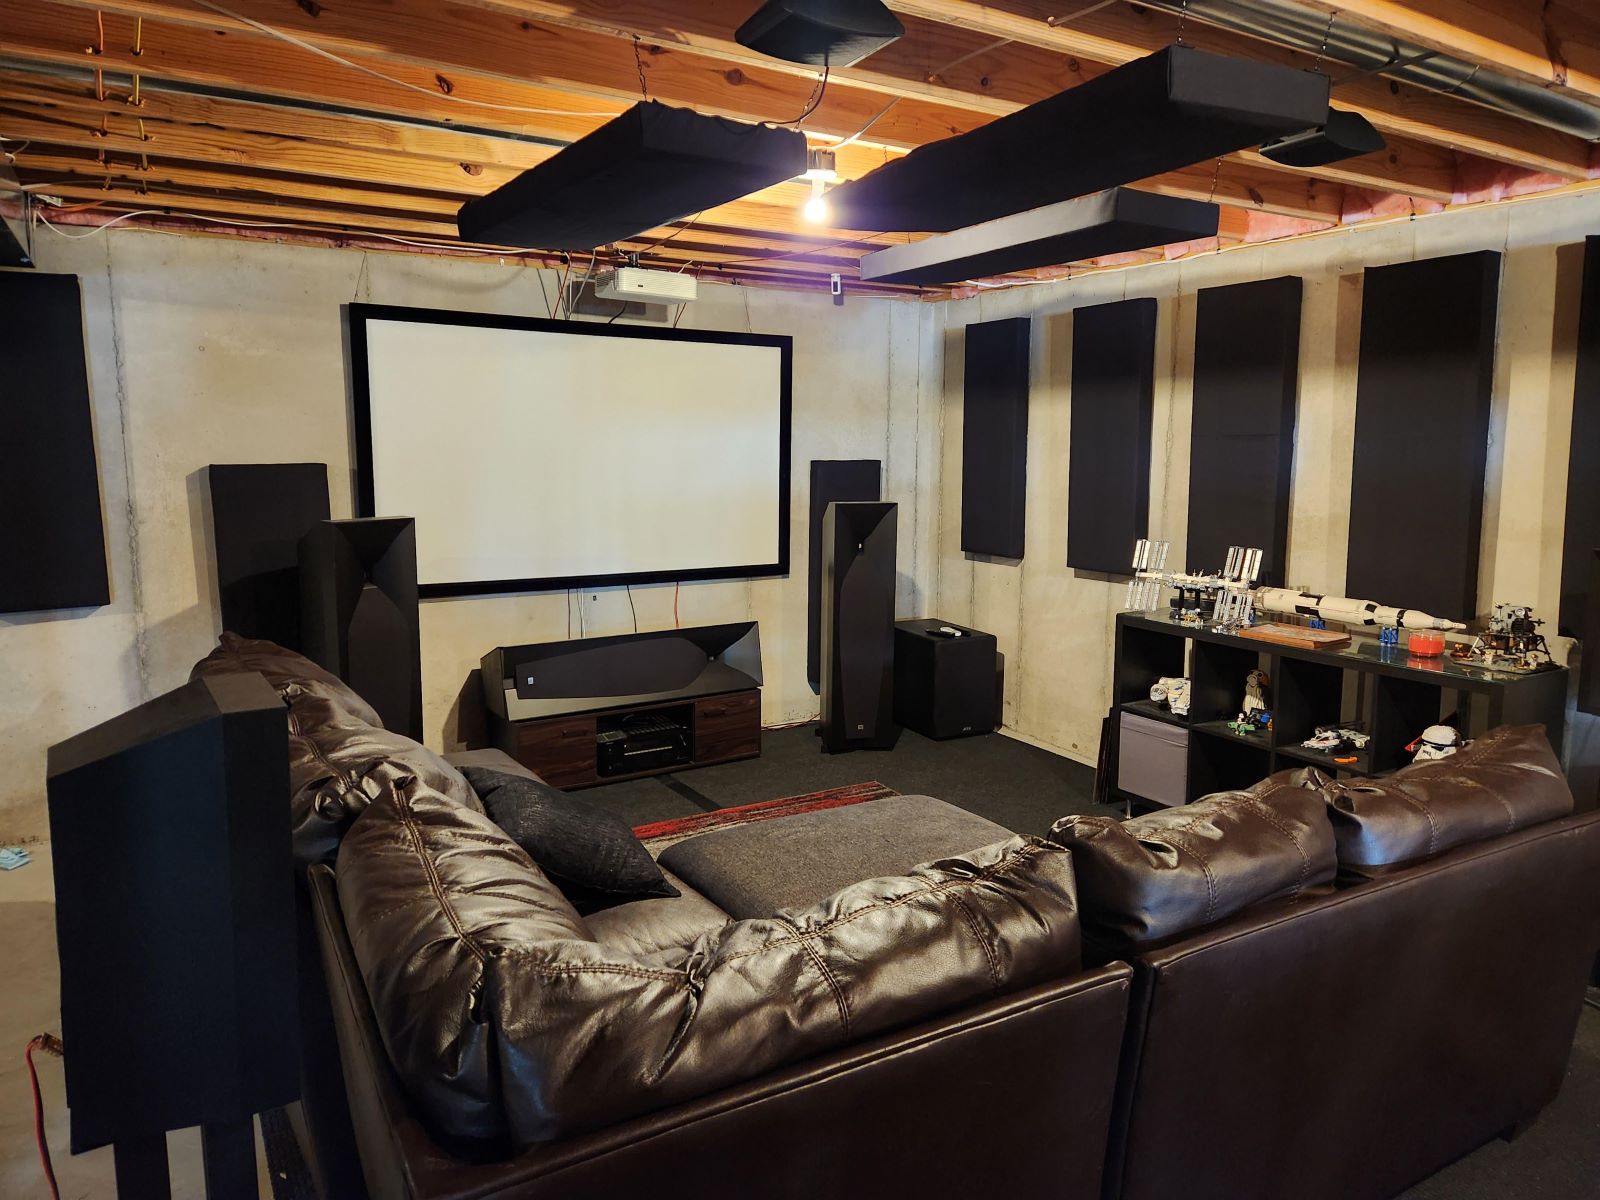
Creating a home theater in your basement can be a fantastic way to enhance your living space and provide an immersive entertainment experience. With the right planning, tools, and materials, you can turn an unfinished or underutilized basement into a cozy movie palace. In this article, we will guide you through the process of upgrading your home's basement with a DIY home theater, covering everything from design considerations to practical tips for installation.
Why Choose a Basement for Your Home Theater?
Basements offer several natural advantages that make them ideal for home theaters:
-
Acoustic Properties: The concrete floor and cinder block or poured concrete walls of a basement provide excellent soundproofing. This helps in minimizing sound reflections and ensuring that the audio remains clear and unobtrusive for both you and your neighbors.
-
Light Control: Basements typically have few or no windows, which allows for easy darkness control. This is crucial for creating an immersive movie experience.
-
Space Flexibility: Basements often have ample space that can be tailored to fit various home theater configurations, from small setups to elaborate systems.
Planning Your Home Theater
Before you start transforming your basement into a home theater, it's essential to plan carefully. Here are some key steps to consider:
1. Assessing Your Space
-
Measure Your Room: Take precise measurements of your basement space to determine the best layout for your home theater. Consider the dimensions of your screen, seating area, and speaker placement.
-
Identify Obstacles: Note any structural elements like support beams or ductwork that may affect your design.
-
Visualize Your Layout: Use software or apps like RoomSketcher or SketchUp to create a 3D model of your space. This will help you visualize different layouts and make adjustments before starting the project.
2. Choosing Your Equipment
-
Projector vs. TV: Decide whether you want to use a projector or a large-screen TV. Projectors offer flexibility in screen size and can be more cost-effective for larger screens.
-
Screen Size: Determine the optimal screen size based on the room dimensions and seating distance. A larger screen can be more immersive but may require more precise placement to avoid distortion.
-
Sound System: Plan your sound system carefully, considering both the number of channels (e.g., 5.1 or 7.1) and the type of speakers (e.g., wall-mounted or floor-standing).
-
Media Player: Choose a media player that supports your preferred streaming services and can handle high-definition content.
3. Budgeting
-
Set a Budget: Determine how much you are willing to spend on the project. This will help you make decisions about the quality of equipment and materials.
-
Prioritize: Focus on essential components first, such as the projector or sound system, and then allocate funds for additional features like smart lighting or acoustic panels.
Designing Your Home Theater
1. Layout Considerations
-
Screen Placement: Place the screen on the largest wall possible to maximize screen size and soundstage width.
-
Seating Arrangement: Arrange seating to ensure optimal viewing angles and comfort. Consider reclining chairs or sectional sofas for an immersive experience.
-
Speaker Placement: Position speakers strategically to create an immersive audio experience. Typically, front speakers should be placed at ear level or slightly above, while rear speakers should be placed higher to create a wider soundstage.
2. Soundproofing
-
Rockwool Panels: Use rockwool panels for soundproofing walls and ceilings to minimize sound reflections and ensure clear audio.
-
Resilient Channel: Install resilient channel between drywall layers to further reduce sound transmission.
-
Acoustic Panels: Add acoustic panels to walls and ceilings to absorb sound waves and improve overall acoustics.
3. Cable Management
-
Hiding Cables: Use cable management systems or conceal cables behind walls to keep them out of sight and prevent tripping hazards.
-
Labeling Cables: Label cables clearly so that you can easily identify which cable connects to which device during setup.
Equipment Selection
1. Projectors
-
Resolution: Choose a projector with high resolution (e.g., 4K) for crisp visuals.
-
Brightness: Select a projector with sufficient brightness for your room conditions (e.g., ambient light levels).
-
Connectivity: Ensure the projector has multiple HDMI ports for connecting various devices like Blu-ray players or gaming consoles.
2. Sound Systems
-
Receiver/Processor: Opt for a home theater preamplifier/processor if you want more flexible amplification options and better control over your sound system.
-
Speakers: Select speakers that match your budget and desired sound quality. Consider both wall-mounted and floor-standing options for an immersive experience.
-
Subwoofer: Add a subwoofer to enhance low-frequency response and create a more cinematic experience.
3. Media Players
-
Streaming Capabilities: Choose a media player that supports popular streaming services like Netflix, Hulu, or Amazon Prime Video.
-
4K Support: Ensure the media player can handle 4K content for high-definition viewing experiences.
Installation Tips
1. Wiring
-
HDMI Cables: Use high-quality HDMI cables to connect your projector or TV to your sound system and other devices.
-
Speaker Cables: Ensure speaker cables are long enough to reach all speakers without compromising sound quality.
-
Power Distribution: Plan power distribution carefully to avoid overloading outlets or tripping circuit breakers.
2. Acoustic Treatment
-
Area Rugs: Place area rugs between seating areas and speakers to dampen sound reflections and improve overall acoustics.
-
Acoustic Panels: Hang acoustic panels on walls and ceilings using brackets or screws to absorb sound waves effectively.
-
Bookshelves: Utilize bookshelves filled with books as makeshift acoustic panels if you don't have dedicated panels available.
3. Smart Lighting
-
Color-Changing Lights: Use smart lights like Hue Play Gradient that change color according to what's happening on your screen for an immersive experience.
-
Mood Lighting: Set up smart lights around the room for different moods—game night, movie night, or casual hangout sessions.
Additional Features
1. Popcorn Machines
-
Convenience: Install a popcorn machine near your seating area for an authentic movie-going experience at home.
-
Aesthetics: Choose a popcorn machine that complements your home theater decor without being too obtrusive.
2. Bass Shakers
-
Enhanced Experience: Consider adding bass shakers under your couch or chair for an enhanced low-frequency response experience.
-
DIY Options: If budget is a concern, you can make your own bass shakers using materials like wood or PVC pipes and amplifiers like Fosi M-03.
DIY Projects
1. Soundproofing
-
Rockwool Panels: Create your own rockwool panels using rockwool insulation and DIY frames for effective soundproofing without breaking the bank.
-
Acoustic Panels: Fill DIY acoustic panels with rockwool insulation and cover them with fabric for an aesthetically pleasing solution.
2. Decorative Elements
-
Movie Poster Panels: Design your own movie poster panels using fabric printed with your favorite movie posters or artwork.
-
Couches & Seating: Opt for comfortable sectional sofas like those from Costco or IKEA that fit well within your budget and provide ample seating options.
Conclusion
Upgrading your home's basement into a DIY home theater requires careful planning, strategic design considerations, and practical installation tips. By following these steps—from assessing your space to selecting the right equipment—you can create an immersive entertainment space that rivals commercial cinemas while adding value to your home. Whether you're a seasoned DIY enthusiast or just starting out, this guide provides everything you need to transform your basement into a cozy movie palace tailored specifically for you and your family's enjoyment.
References:
- Crutchfield – How to turn your basement into a home theater
- Crutchfield – Transforming a Basement into a Home Theater
- Reddit – My DIY basement home theater
By following these detailed steps and incorporating practical tips from experienced DIY enthusiasts, you'll be well on your way to creating an exceptional home theater experience in your basement that will delight both you and your loved ones for years to come.
Was this page helpful?
At Storables.com, we guarantee accurate and reliable information. Our content, validated by Expert Board Contributors, is crafted following stringent Editorial Policies. We're committed to providing you with well-researched, expert-backed insights for all your informational needs.


0 thoughts on “Upgrading Your Home’s Basement With DIY Home Theater”