Home>Ideas and Tips>Upgrading Your Home’s Exterior With DIY Landscape Lighting

Ideas and Tips
Upgrading Your Home’s Exterior With DIY Landscape Lighting
Published: September 19, 2024
Enhance your home's curb appeal and safety with DIY landscape lighting. Learn cost-effective, easy steps to install beautiful, energy-efficient outdoor lights.
(Many of the links in this article redirect to a specific reviewed product. Your purchase of these products through affiliate links helps to generate commission for Storables.com, at no extra cost. Learn more)
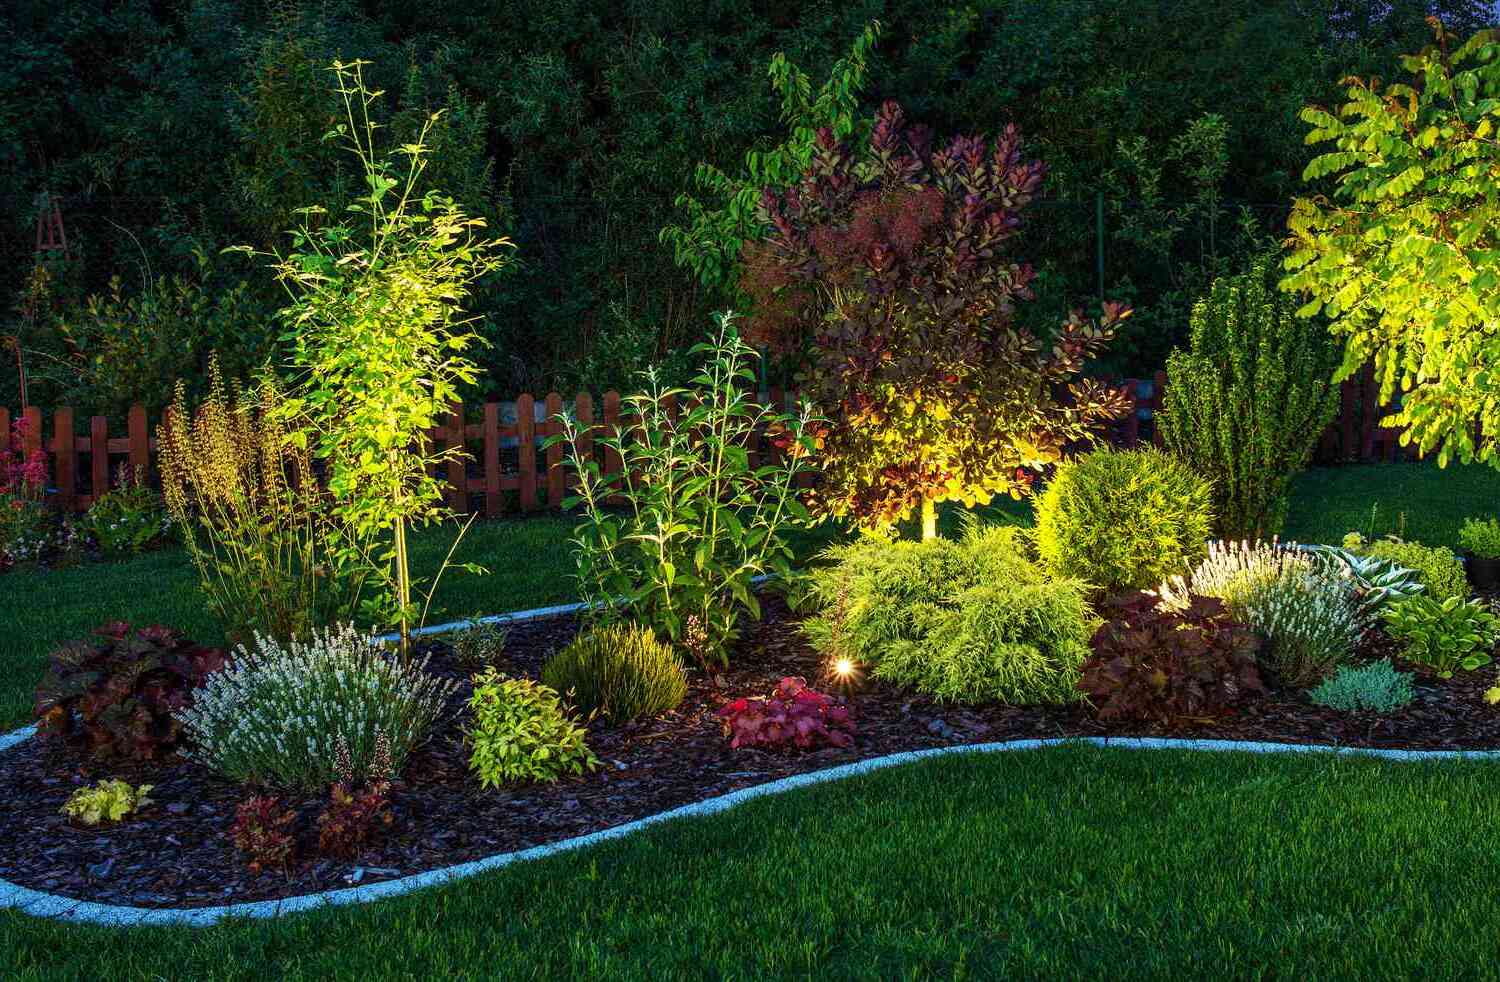
Adding landscape lighting to your home's exterior can significantly enhance its curb appeal, safety, and overall aesthetic value. While hiring a professional can be expensive, installing DIY landscape lighting is a feasible and rewarding project that can be completed with minimal electrical knowledge. In this article, we will guide you through the process of upgrading your home's exterior with DIY landscape lighting, covering the necessary materials, steps, and tips to ensure a successful installation.
Why Choose DIY Landscape Lighting?
Before diving into the installation process, it's essential to understand the benefits of choosing DIY landscape lighting. Here are a few compelling reasons:
-
Cost-Effective: While high-end professional installations can be expensive, DIY landscape lighting kits are often affordable and can be purchased in various price ranges to fit your budget.
-
Customization: With DIY kits, you have complete control over the design and placement of your lights. This allows you to tailor the lighting to your specific needs and preferences.
-
Ease of Installation: Most DIY landscape lighting kits come with simple instructions and minimal electrical requirements, making it accessible even for those without extensive electrical knowledge.
-
Energy Efficiency: Low-voltage landscape lighting is energy-efficient and environmentally friendly, using significantly less power than traditional outdoor lighting systems.
-
Aesthetic Appeal: Properly installed landscape lighting can highlight the best features of your home and yard, creating a beautiful and inviting exterior.
Materials Needed
To start your DIY landscape lighting project, you'll need the following materials:
-
Lights: These come in various types such as path lights, deck lights, up/spot lights, flood lights, and well lights. Each type serves a specific purpose:
- Path Lights: Direct light downward for safety along walkways.
- Deck Lights: Can be wired into deck stairs or railings.
- Up/Spot Lights: Ideal for trees and larger bushes or flags on the house or yard.
- Flood Lights: Used to wash the house exterior with light.
- Well Lights: Provide soft ambient lighting in garden beds.
-
Power Pack: This is the transformer that converts AC power from an outlet to low-voltage DC power for your lights. Ensure it is sized appropriately based on the total wattage of all your lights.
-
Wire: Choose a wire gauge suitable for your power pack and number of lights. Common gauges include 14-gauge wire for lower wattage setups and higher gauges for more extensive installations.
-
Connectors: Waterproof connectors are essential for securing the wire connections and ensuring they remain watertight.
-
Outdoor Outlet: You'll need an outdoor electrical outlet near where you plan to install the lights. This will serve as the power source for your system.
Planning Your Landscape Lighting Design
Before you begin installing your lights, it's crucial to plan out your design carefully:
-
Identify Key Features: Determine what features you want to highlight with your lighting. This could include trees, garden beds, walkways, or architectural details of your home.
-
Consider Obstacles: Think about any obstacles that might interfere with wiring such as sidewalks, driveways, or mulch areas.
-
Choose Light Placement: Decide where each type of light will go based on its intended use and how it will enhance the appearance of your home and yard.
-
Balance Lighting: Ensure that you don’t overlight your space; too many lights can create an uncustomized look. Start with a few lights and add more as needed.
Step-by-Step Installation Guide
Step 1: Choose Your Lights
Select the type and number of lights you need based on your design plan. Consider factors like wattage requirements and the specific features you want to highlight.
Step 2: Determine Power Pack Size
Calculate the total wattage of all your lights and choose a power pack that can handle this amount plus some extra for potential future additions. For example:
- If you have three path lights at 11 watts each and four flood lights at 20 watts each:
- Total wattage = (3 * 11) + (4 * 20) = 33 + 80 = 113 watts
- Round up to the nearest higher wattage for safety (e.g., a 200-watt power pack).
Step 3: Select Wire Gauge
Choose a wire gauge that matches your power pack's capacity. A 14-gauge wire is commonly used for lower wattage setups while higher gauges are needed for more extensive installations.
Step 4: Install Outdoor Outlet
Ensure there is an outdoor electrical outlet near where you plan to install the lights. This will serve as the power source for your system.
Step 5: Run Wire
Run the wire from the outlet to where you'll be placing your first light. Hide it along the house or in mulch as needed. Use waterproof connectors to secure connections along the way.
Step 6: Connect Lights
Connect each light to the wire using waterproof connectors. Start with one light and test it before moving on to others.
Step 7: Test Lights
Plug in the power pack and test each light individually to ensure they are working correctly. Adjust placements as needed for optimal effect.
Step 8: Bury Wire (Optional)
If desired, bury the wire in grass or mulch for a cleaner appearance. However, always check local codes regarding wire depth requirements.
Tips for Successful Installation
-
Keep It Simple: Avoid overcomplicating your design; simple installations are often more effective than complex ones.
-
Use Proper Tools: Invest in good quality wire cutters, pliers, and other tools necessary for secure connections.
-
Check Local Codes: Ensure compliance with local electrical codes regarding low-voltage installations.
-
Test Thoroughly: Double-check all connections before burying wire or finalizing placements.
-
Maintenance: Regularly inspect connections for signs of wear or damage; replace any damaged parts promptly.
Additional Considerations
Smart Home Integration
For those interested in smart home technology, integrating your landscape lighting with smart home systems like Philips Hue or LIFX can add an extra layer of functionality and control over your lighting setup.
Energy Efficiency
Low-voltage landscape lighting is not only aesthetically pleasing but also energy-efficient compared to traditional outdoor lighting systems.
Aesthetic Appeal
Properly installed landscape lighting can highlight architectural features of your home while creating a welcoming ambiance in your yard.
Conclusion
Upgrading your home's exterior with DIY landscape lighting is a rewarding project that offers numerous benefits including enhanced curb appeal, improved safety, and increased aesthetic value. By following these steps and tips outlined above, you can create a beautiful and inviting exterior space that showcases the best features of your home and yard. Remember to keep it simple, use proper tools, check local codes, test thoroughly, and maintain regularly for long-lasting results.
Whether you're looking to add path lights for safety or flood lights for ambiance, this guide provides you with everything you need to get started on transforming your home's exterior into a stunning display of light and beauty. So why wait? Start planning your DIY landscape lighting project today and enjoy the transformative power of well-designed outdoor lighting
Was this page helpful?
At Storables.com, we guarantee accurate and reliable information. Our content, validated by Expert Board Contributors, is crafted following stringent Editorial Policies. We're committed to providing you with well-researched, expert-backed insights for all your informational needs.


0 thoughts on “Upgrading Your Home’s Exterior With DIY Landscape Lighting”