Articles
How Do Circuit Breakers Go Bad
Modified: October 28, 2024
Learn why circuit breakers can go bad and the common signs of a faulty breaker. Read articles to understand how circuit breakers work and how to troubleshoot issues.
(Many of the links in this article redirect to a specific reviewed product. Your purchase of these products through affiliate links helps to generate commission for Storables.com, at no extra cost. Learn more)
Introduction
Circuit breakers are an essential component of our electrical systems, ensuring the safe and reliable distribution of electricity within our homes and buildings. However, like any other mechanical device, circuit breakers can go bad over time or due to various factors. Understanding the causes and signs of circuit breaker failure is crucial for maintaining the safety and functionality of our electrical infrastructure.
In this article, we will explore the common causes of circuit breaker failure and the signs that may indicate a faulty circuit breaker. We will also discuss how to test a circuit breaker and when it may be necessary to replace a faulty one.
So, if you’ve ever wondered why circuit breakers go bad or if you suspect that you may be dealing with a faulty one, read on to learn more.
Key Takeaways:
- Regular maintenance and inspections of circuit breakers are crucial for identifying potential issues early on and preventing major failures, ensuring the safety and reliability of electrical systems.
- If you suspect a faulty circuit breaker, promptly consult a licensed electrician for thorough testing and, if necessary, professional replacement to ensure the continued safety and functionality of your electrical system.
Read more: How Do Tandem Breakers Work
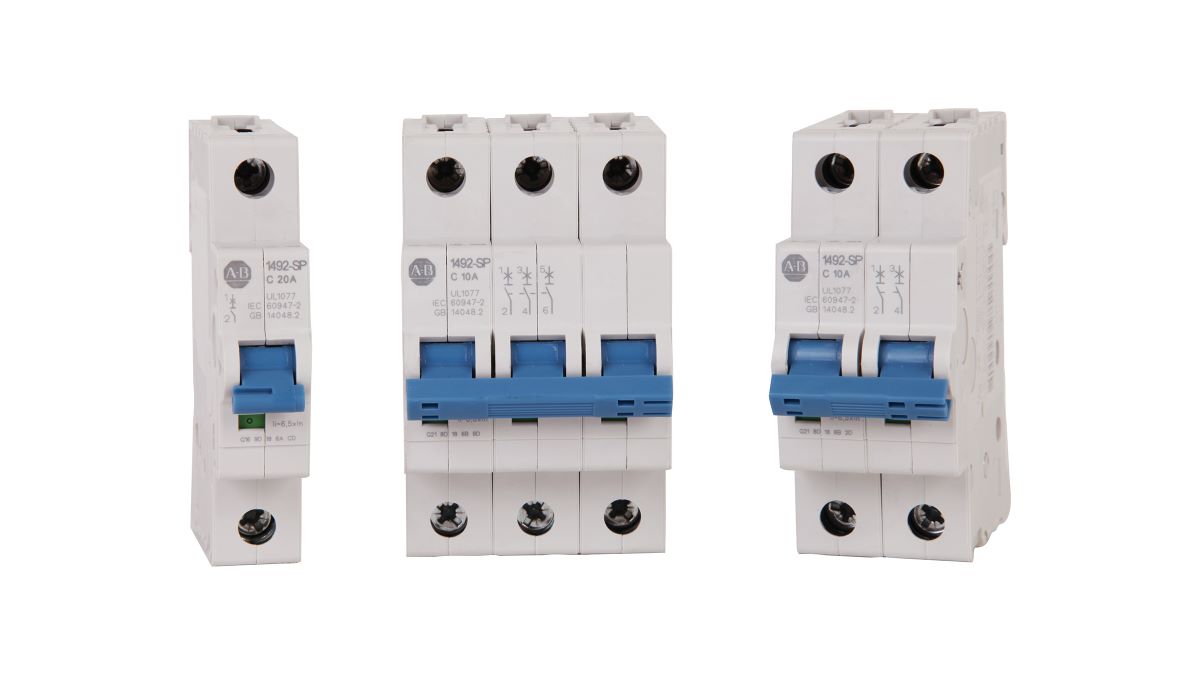
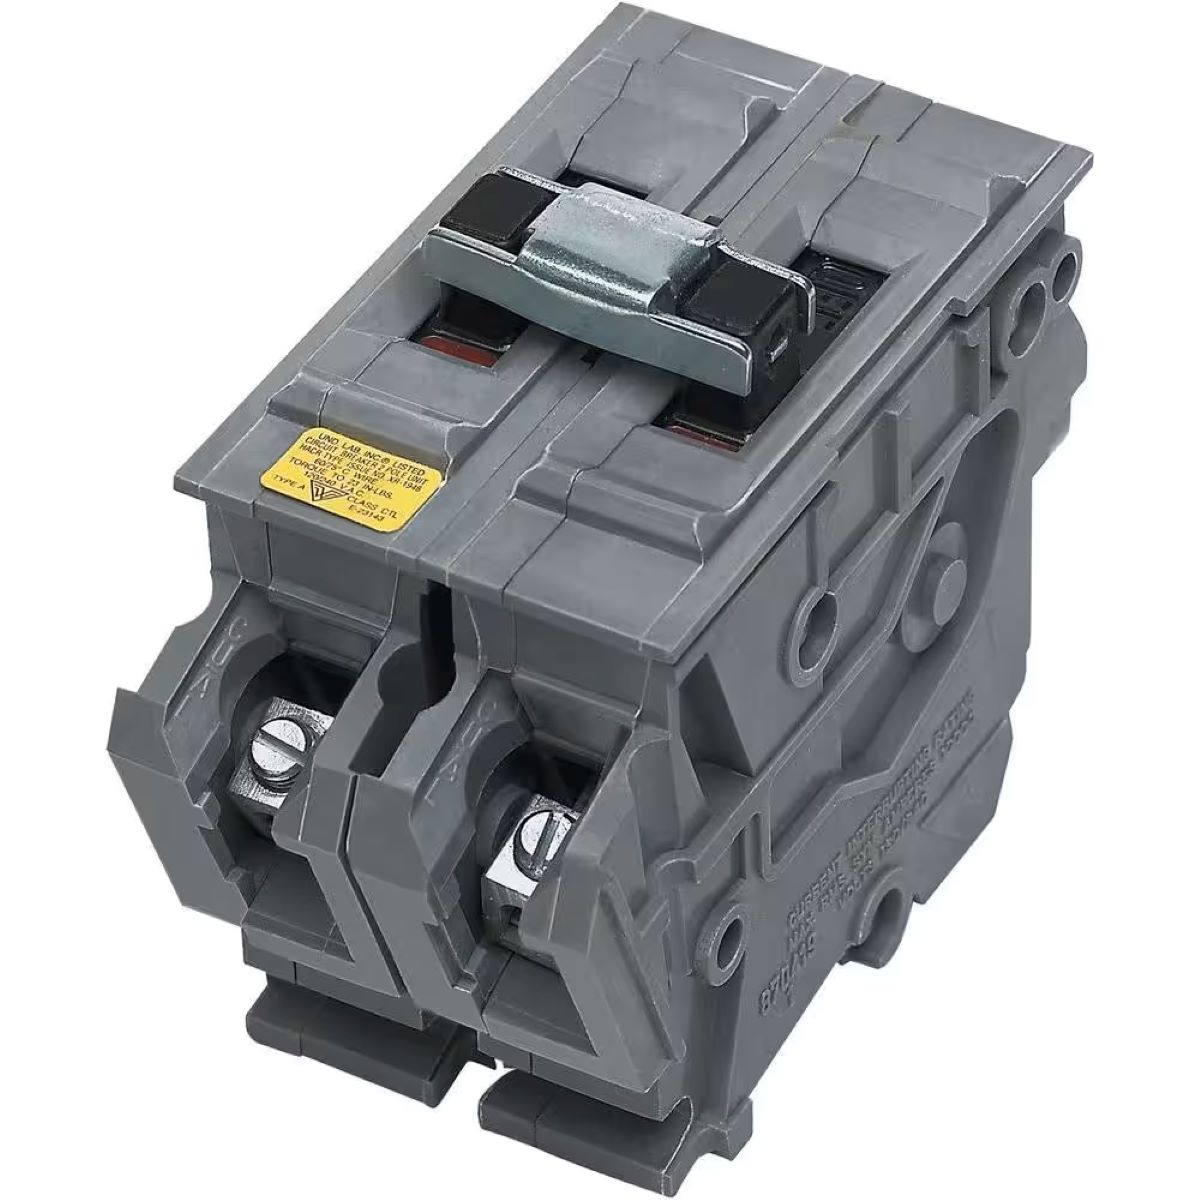
What is a Circuit Breaker?
A circuit breaker is a device designed to protect electrical circuits from damage caused by excessive current, short circuits, or electrical surges. It serves as a safety mechanism by interrupting the flow of electricity in the event of a fault, preventing potential damage to electrical equipment, overheating, and even electrical fires.
Essentially, a circuit breaker acts as a switch that automatically trips, or opens, when it detects abnormal electrical conditions. When a fault occurs, such as an overload or a short circuit, the circuit breaker quickly interrupts the current flow to prevent further damage to the circuit and connected devices.
The basic components of a circuit breaker include a bimetallic strip or an electromagnet, a mechanism to trip the circuit, and a set of contacts that open and close the circuit. The bimetallic strip or electromagnet is designed to respond to excessive heat or current, causing the circuit breaker to trip and cut off the flow of electricity.
Circuit breakers come in various types and sizes, depending on their intended application. They can be found in residential, commercial, and industrial electrical systems, playing a vital role in protecting electrical circuits and equipment.
It is important to note that circuit breakers are different from fuses. While both devices serve to protect electrical circuits, fuses are typically one-time-use devices that need to be replaced after they “blow” or melt due to a fault. On the other hand, circuit breakers can be reset after tripping, making them more convenient and cost-effective in the long run.
Overall, circuit breakers are critical components in electrical systems, providing protection against potential hazards and ensuring the safe and reliable distribution of electricity.
Common Causes of Circuit Breaker Failure
Circuit breakers are designed to withstand various electrical conditions and provide reliable protection. However, several factors can contribute to their failure over time. Here are some common causes of circuit breaker failure:
- Overloading: One of the primary reasons for circuit breaker failure is overloading. When the electrical load on a circuit exceeds its capacity, the circuit breaker may trip to prevent overheating, damage, or fire. Continuous overloading can lead to stress on the breaker, causing it to wear out and fail.
- Short Circuit: A short circuit occurs when a hot wire comes into direct contact with a neutral or ground wire, causing a sudden surge of electrical current. This excessive current can cause the circuit breaker to trip and protect the circuit. However, repeated short circuits can damage the internal components of the breaker, leading to failure.
- Electrical Surges: Power surges, whether from lightning strikes or voltage fluctuations, can put a significant strain on circuit breakers. While they are designed to handle small surges, repeated exposure to high-voltage surges can weaken the breaker’s components and eventually cause failure.
- Aging and Wear: Like any mechanical device, circuit breakers can deteriorate over time due to aging and wear. The constant opening and closing of the contacts, exposure to heat, and other environmental factors can degrade the performance of the breaker. As the breaker gets older, its ability to trip accurately and protect the circuit decreases, leading to potential failure.
- Loose Connections: Loose electrical connections can create resistance, causing heat buildup and increased current flow. Over time, this extra stress on the circuit breaker can lead to failure. Regular inspections and tightening of electrical connections can help prevent this issue.
It is worth noting that while circuit breakers are designed to protect against these common causes of failure, they are not immune to them. Regular maintenance and periodic inspections of circuit breakers can help identify potential issues early on and prevent major failures.
In the next sections, we will explore the signs that may indicate a faulty circuit breaker and discuss how to test and replace them if necessary.
Overloading
Overloading is one of the most common causes of circuit breaker failure. It occurs when the electrical load on a circuit exceeds its rated capacity. Every circuit breaker has a specific amperage rating, indicating the maximum amount of electrical current it can safely handle.
When the load on a circuit exceeds this rating, the circuit breaker trips to protect the circuit from overheating, damage, or fire. This interruption breaks the flow of electricity and shuts off power to the overloaded circuit.
There are several factors that can lead to overloading a circuit:
- High Powered Appliances: Using high-powered appliances such as air conditioners, heaters, or refrigerators on the same circuit can easily overwhelm the circuit’s capacity. These appliances require a significant amount of electrical power to operate, and if multiple high-powered devices are connected to a single circuit, it can lead to overloading.
- Multiple Devices: Connecting a large number of electrical devices to a single circuit can increase the overall electrical load. For example, plugging multiple devices into a power strip or outlet can add up to more current than the circuit can handle.
- Faulty Wiring or Connections: Poorly installed or faulty wiring can result in increased resistance, leading to overheating and overloading. Loose connections, frayed wires, or damaged outlets can also contribute to an increased electrical load on the circuit.
- Inadequate Circuit Design: In some cases, the initial circuit design may not have considered the electrical demands of the devices connected to it. For instance, older homes may have outdated electrical systems that are not equipped to handle modern electrical loads.
It’s important to be mindful of the electrical load on each circuit to avoid overloading. If a circuit breaker frequently trips, it could be a sign that you have too many devices connected to the circuit or that the circuit is insufficient for the electrical demands.
To prevent overloading, consider taking the following steps:
- Spread the electrical load across multiple circuits to distribute the current more evenly.
- Use dedicated circuits for high-powered appliances.
- Avoid using power strips or extension cords for devices that require a significant amount of power.
- Ensure that wiring and connections are in good condition and meet electrical safety standards.
- Consider consulting with a qualified electrician to assess your electrical system’s capacity and make any necessary upgrades or modifications.
By being mindful of the electrical load and taking appropriate precautions, you can prevent overloading and prolong the lifespan of your circuit breakers.
Short Circuit
A short circuit is another common cause of circuit breaker failure. It occurs when a hot wire comes into direct contact with a neutral wire or ground wire, resulting in a sudden surge of electrical current. This excessive current flow can lead to overheating, damage to the circuit, and potentially dangerous situations such as electrical fires.
Short circuits can occur due to a variety of reasons:
- Faulty Wiring: Wiring issues, such as damaged insulation or loose connections, can cause hot wires to come into contact with other wires or parts of the circuit. This creates a direct path for electricity to flow, bypassing the normal electrical load and causing a short circuit.
- Appliance or Equipment Faults: Malfunctioning appliances or faulty electrical equipment can also cause short circuits. These faults may develop due to damaged cords, worn-out components, or internal wiring problems. When an appliance or equipment experiences a short circuit, it can trigger the circuit breaker to trip.
- Water or Moisture: Water is a good conductor of electricity, and if it comes into contact with electrical components or wiring, it can cause a short circuit. This is particularly common in damp environments, such as basements or areas with water leaks.
- Rodent or Pest Infestation: Rodents and pests can sometimes chew through electrical wires, causing them to become exposed and potentially leading to a short circuit. This is especially dangerous as it increases the risk of electrical fires.
When a short circuit occurs, the circuit breaker quickly detects the excessive current flow and trips to interrupt the electrical supply. This protective measure prevents further damage to the wiring, electrical devices, and the overall electrical system.
If you suspect a short circuit, here are some steps to take:
- Disconnect the Power: If you notice smoke, burning smell, or any signs of an electrical short circuit, immediately turn off the power to the affected circuit by switching off the circuit breaker in the electrical panel. This will help prevent additional damage and potential electrical hazards.
- Inspect the Wiring and Connections: Carefully inspect the wiring and connections in the affected area. Look for any signs of damaged insulation, exposed wires, or loose connections that may have caused the short circuit.
- Address the Issue: If you are confident in your electrical troubleshooting skills, you may attempt to repair the wiring or resolve the issue causing the short circuit. However, it is generally recommended to consult a licensed electrician for professional assistance to ensure the problem is safely and correctly addressed.
- Replace Tripped Circuit Breaker: After resolving the short circuit issue, you can reset the circuit breaker by switching it back on. If the circuit breaker continues to trip or fails to reset, it may indicate a more significant problem and require further investigation by a professional.
It is crucial to address short circuits promptly to prevent potential electrical hazards and protect your electrical system. Regular maintenance, professional inspections, and proper wiring practices can help mitigate the risk of short circuits and prolong the life of your circuit breakers.
Read more: What Do Arc Fault Breakers Do
Electrical Surges
Electrical surges are sudden, temporary spikes in voltage that can exceed the normal flow of electricity in a circuit. These surges can cause significant stress on electrical components, including circuit breakers, and may ultimately lead to their failure.
There are different types of electrical surges that can occur:
- Internal Surges: Internal surges originate within the electrical system itself. They can be caused by various factors, such as sudden changes in voltage demand from appliances or equipment, faulty wiring, or aging electrical infrastructure.
- External Surges: External surges result from events outside of the electrical system, such as lightning strikes, power grid fluctuations, or utility switching operations. These surges can introduce a massive amount of voltage into the electrical system and potentially overwhelm the circuit breakers.
- Transient Surges: Transient surges are brief but intense bursts of electrical energy that can occur in a matter of microseconds. These surges are commonly caused by high-powered devices or equipment, such as motors turning on or off, and can have a significant impact on the electrical system.
- Backfeed Surges: Backfeed surges occur when there is a sudden reversal of electrical current flow. This can happen, for example, when a power outage ends and the power is restored, causing a surge of electricity to flow back into the system.
Electrical surges can pose a significant risk to sensitive electronic devices, appliances, and electrical components, including circuit breakers. They can cause damage to the insulating layers and internal components of the breakers, ultimately leading to failure.
While circuit breakers are designed to handle small surges, repeated exposure to significant surges can wear them down over time. Here are some tips to protect circuit breakers from electrical surges:
- Install Surge Protectors: Surge protectors, also known as surge suppressors, are devices that are plugged into outlets to protect connected devices from electrical surges. They can redirect excess voltage to the grounding system, preventing it from reaching the circuit breakers and other components.
- Use Uninterruptible Power Supply (UPS) Systems: UPS systems provide battery backup and surge protection for critical devices, such as computers or servers. They can help prevent damage from sudden power outages, voltage fluctuations, and electrical surges.
- Grounding and Bonding: Ensuring proper grounding and bonding of electrical systems can help dissipate electrical surges and reduce the risk of damage to circuit breakers and other components. It is essential to follow local electrical codes and regulations for grounding practices.
- Avoid Power Cycling: Power cycling refers to the act of frequently turning electrical devices on and off. This can generate transient surges that may impact circuit breakers and other electrical equipment. Instead, it is advisable to use energy-saving settings or standby modes when not actively using devices.
By taking precautions to protect against electrical surges, you can help safeguard circuit breakers and maintain the integrity of your electrical system. However, if you experience frequent or prolonged surges, it is recommended to consult with a qualified electrician to assess the situation and determine appropriate protective measures.
Aging and Wear
Aging and wear are natural processes that can affect the performance and reliability of circuit breakers over time. As circuit breakers age, their internal components can degrade, leading to increased resistance, decreased functionality, and even failure.
Several factors contribute to aging and wear in circuit breakers:
- Mechanical Stress: Circuit breakers undergo repeated mechanical stress each time they trip to interrupt the flow of electricity. Over time, this constant opening and closing can cause wear on the internal contacts and other moving parts of the breaker, affecting its performance and longevity.
- Heat and Temperature Cycling: Circuit breakers are exposed to heat generated by electrical currents flowing through them. Over time, this heat can affect the insulation materials, contact surfaces, and other components of the breaker. Furthermore, temperature cycling, caused by changes in ambient temperature or heating and cooling cycles, can further stress the breaker’s components and lead to fatigue and degradation.
- Corrosion and Contamination: Circuit breakers can be exposed to various environmental factors, including moisture, dust, dirt, and chemicals. These contaminants can accumulate on the internal components of the breaker, leading to corrosion or poor conductivity. Corrosion and contamination can create additional resistance in the circuit, causing overheating and contributing to the failure of the breaker.
- Material Degradation: The insulation materials used in circuit breakers can degrade over time due to exposure to heat, moisture, UV radiation, and other factors. As the insulation breaks down, it can compromise the breaker’s ability to effectively isolate and protect the circuits, increasing the risk of electrical faults and failures.
As circuit breakers age, their tripping characteristics may also change. They may take longer to trip or trip at lower currents. This can result in inadequate protection for the electrical circuits and equipment they are meant to safeguard.
To mitigate the effects of aging and wear on circuit breakers, regular maintenance and inspections are essential. Here are some recommended practices:
- Visual Inspections: Regularly inspect the circuit breakers for signs of damage, loose connections, or abnormal wear. Look for any discoloration, melting, or burning marks, as these can be indications of overheating or arcing.
- Cleaning and Lubrication: Keep the circuit breakers clean and free from dust or debris. When applicable, use approved lubricants to ensure smooth operation of moving parts.
- Electrical Testing: Conduct periodic electrical testing to verify the performance and tripping characteristics of the circuit breakers. This can be done using specialized electrical testing equipment, such as multimeters or insulation resistance testers.
- Professional Maintenance: For complex or high-voltage electrical systems, it is advisable to engage the services of a qualified electrician or maintenance professional. They can perform more extensive tests, inspections, and necessary repairs that require specialized knowledge and tools.
If signs of significant wear or aging are detected, it may be necessary to replace the circuit breaker. Regular maintenance, coupled with prompt action to address any issues, can help prolong the life of your circuit breakers and ensure the continued safety and reliability of your electrical system.
Loose Connections
Loose connections in electrical systems can pose a serious risk and lead to circuit breaker failure. Loose connections occur when electrical wires or terminals are not securely fastened, resulting in a poor electrical connection. These loose connections can cause excessive resistance, overheating, and even arcing, leading to potential damage or fire hazards.
There are several factors that can contribute to loose connections:
- Improper Installation: Improper installation of electrical wiring, devices, or circuit breakers can lead to loose connections. If wires are not securely tightened to terminals or if terminals are not properly screwed down, it can result in loose connections.
- Breakdown of Insulation: Over time, insulation around electrical wires can deteriorate due to factors such as heat, moisture, or physical stress. When insulation breaks down, it can expose the wiring and increase the likelihood of loose connections.
- Vibration or Movement: Vibrations from machinery, equipment, or even household activities can cause electrical connections to loosen over time. Constant movement or vibration can gradually loosen terminals, leading to poor electrical contact.
- Expansion and Contraction: Temperature changes can cause expansion and contraction of electrical components. This thermal cycling can result in loosening of connections if they are not properly secured or if the materials used have different rates of expansion and contraction.
- Corrosion: Corrosion is another factor that can contribute to loose connections. When exposed to moisture or certain chemicals, metal terminals can corrode, reducing their conductivity and causing poor electrical connections.
Loose connections in circuit breakers can have severe consequences. They can cause an increase in resistance, leading to the generation of heat and potential overheating of the breaker. This heat can eventually lead to the failure of the breaker. Additionally, loose connections can cause arcing, which can not only damage the electrical components but also create a fire hazard.
To prevent loose connections and ensure the integrity of your electrical system, consider taking the following precautions:
- Proper Installation: Make sure that electrical wiring, devices, and circuit breakers are installed correctly. Follow manufacturer instructions and consider seeking professional help if needed.
- Regular Inspections: Conduct regular inspections of electrical connections, paying close attention to terminals, wire connections, and electrical panels. Look for signs of discoloration, melting, or burned marks, as these may indicate loose connections.
- Ensure Proper Tightening: When making electrical connections, ensure that terminals and wire connections are securely tightened. However, it is important to avoid overtightening, as this can damage the components.
- Address Corrosion and Damage: If corrosion or damage is detected, take appropriate steps to address the issue. This may involve cleaning the affected components or replacing them if necessary.
- Consult a Professional: If you are unsure about the condition of your electrical connections or if you suspect loose connections, it is recommended to consult a qualified electrician. They can perform a thorough inspection, identify any loose connections, and make the necessary repairs or replacements.
By ensuring secure and tight electrical connections, you can minimize the risk of circuit breaker failure due to loose connections and maintain the safety and reliability of your electrical system.
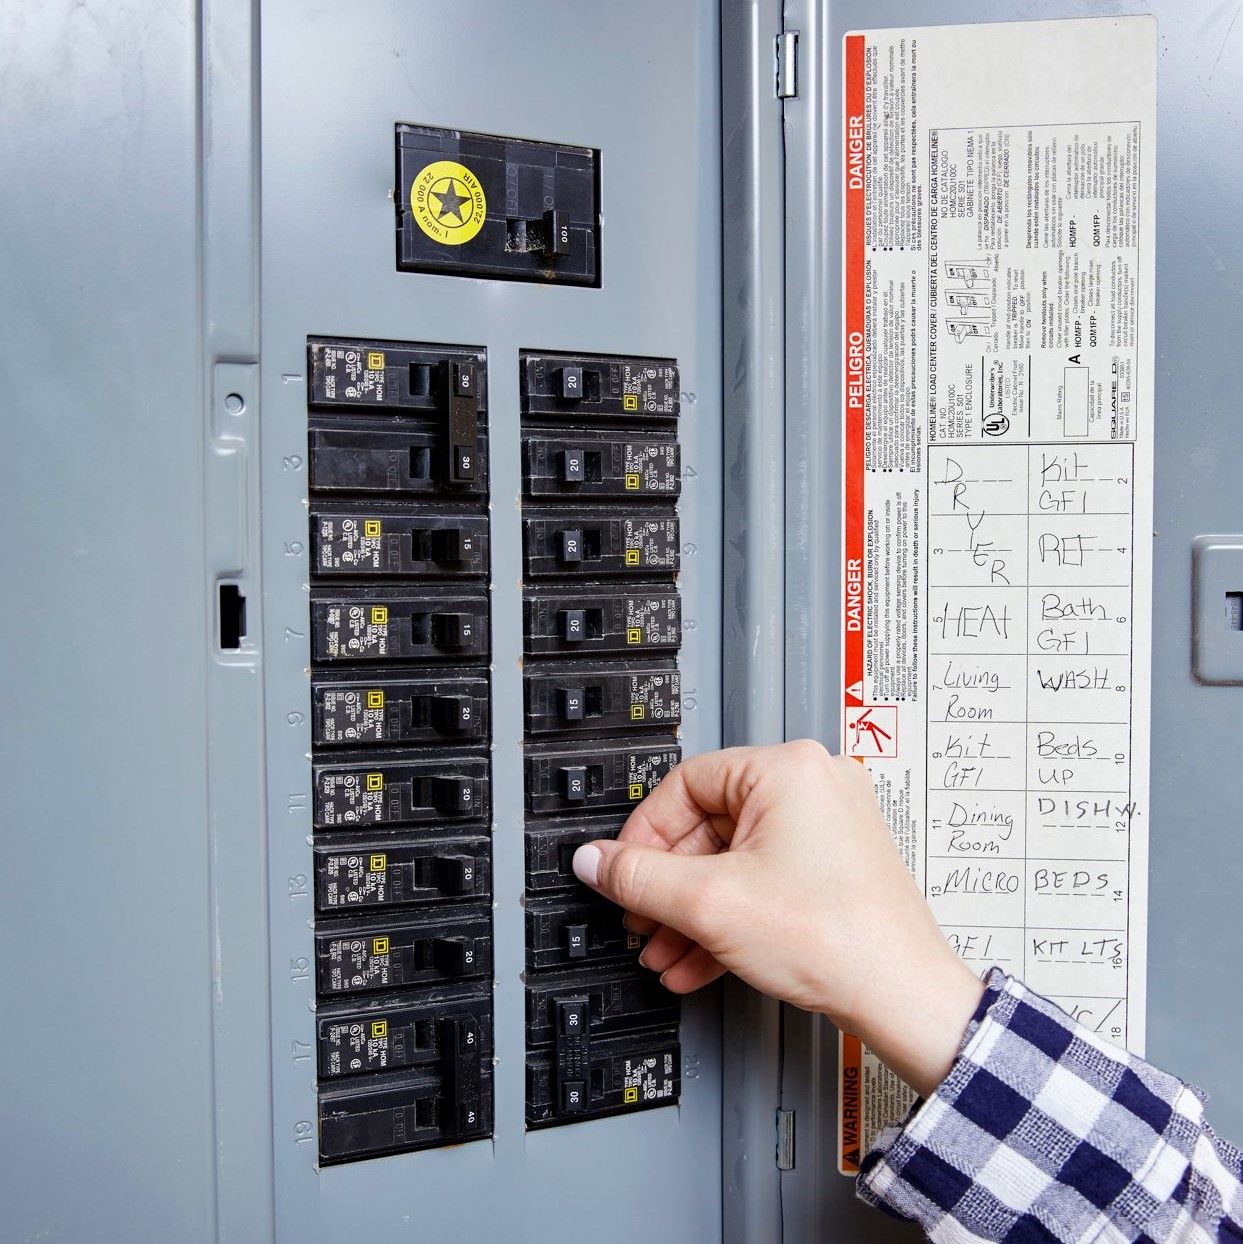
Signs of a Bad Circuit Breaker
Identifying the signs of a bad circuit breaker is vital for maintaining the safety and functionality of your electrical system. A faulty or failing circuit breaker can pose numerous risks, including electrical shock, damage to electrical devices, and even fire hazards. Here are some common signs that may indicate a bad circuit breaker:
- Flickering or Dimming Lights: If you notice that your lights flicker or dim frequently, it could be a sign of a faulty circuit breaker. Fluctuations in voltage caused by a bad breaker can result in inconsistent power supply to the lights, leading to flickering or dimming.
- Tripped Circuit Breakers: A circuit breaker “trips” or automatically switches off when it detects an overcurrent or fault in the circuit. If your circuit breaker trips frequently without any apparent reason, or if it immediately trips again after being reset, it may indicate a faulty breaker.
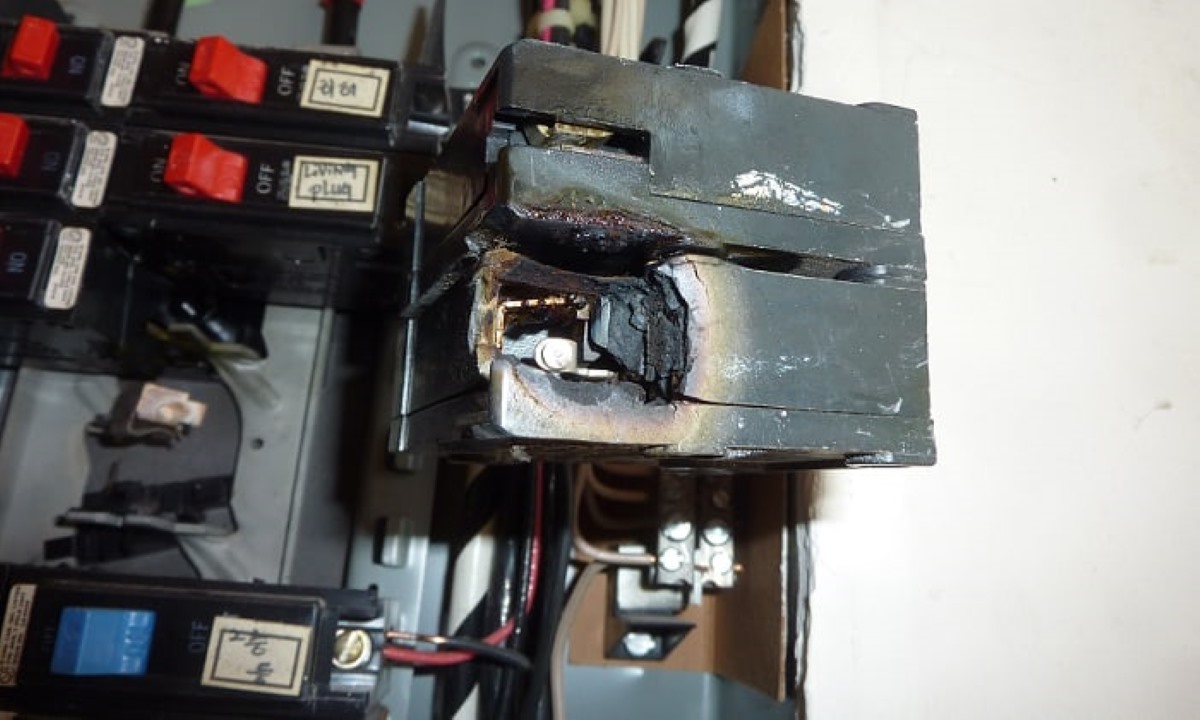
- Burning Smell or Strange Noises: A distinct burning smell or unusual noises, such as buzzing or crackling sounds, coming from the electrical panel or circuit breaker could indicate an overheating or arcing issue. These signs should be taken seriously and addressed promptly, as they can be indicative of a dangerous electrical condition.
- Frequently Resetting Circuit Breakers: If you find yourself needing to repeatedly reset a circuit breaker to restore power, it may indicate that the breaker is not functioning properly. Circuit breakers should trip occasionally to protect circuits from overloads or faults, but if they trip frequently under normal conditions, it could be a sign of a faulty breaker.
- Inconsistent or Non-Responsive Breaker: A circuit breaker that fails to trip during an overload or does not respond when manually turned on or off may indicate a malfunctioning breaker. Inconsistent behavior or unresponsiveness is a clear sign that the breaker needs to be checked or replaced.
- Physical Damage or Corrosion: Visual inspection of the circuit breaker panel is important. Look for any signs of physical damage, such as cracks or warping, as well as corrosion on the terminals or other components. Physical damage and corrosion can compromise the integrity of the breaker and affect its performance.
If you notice any of these signs, it is crucial to take immediate action to address the issue. Dealing with faulty circuit breakers requires caution and should be done by a qualified electrician. They can perform a thorough inspection, identify the problem, and determine whether the circuit breaker needs repair or replacement.
Remember, attempting to fix or replace a circuit breaker without proper knowledge and expertise can be dangerous. Leave it to the professionals to ensure the safety and functionality of your electrical system.
Flickering or Dimming Lights
One of the common signs of a bad circuit breaker is flickering or dimming lights. If you notice that your lights flicker or dim without any apparent reason, it could be an indication of a faulty circuit breaker or an underlying electrical issue.
Here are some potential causes of flickering or dimming lights:
- Circuit Overload: Flickering lights can occur when the electrical circuit is overloaded. If you have multiple high-powered appliances or devices connected to the same circuit, it can exceed the circuit breaker’s capacity, leading to voltage fluctuations and causing the lights to flicker or dim.
- Faulty Wiring: Poorly installed or damaged wiring can result in loose connections or faulty electrical pathways. This can cause interruptions in the electrical flow, leading to flickering lights. If the wiring connections are not secure or if there is a short circuit in the circuit breaker, it can cause the lights to flicker or dim.
- Faulty Circuit Breaker: A faulty or worn-out circuit breaker may not be able to handle the electrical load consistently. When the breaker trips frequently or fails to provide a stable current, it can result in flickering or dimming lights. The breaker may not be able to maintain a consistent flow of electricity, causing fluctuations in voltage and affecting the lighting in your home or building.
- Loose or Damaged Light Bulbs: Sometimes, the issue may not be with the circuit breaker or electrical system but with the light bulbs themselves. Loose or damaged light bulbs can cause flickering or dimming lights. Ensure that the light bulbs are screwed in securely and replace any bulbs that show signs of damage.
- Elevated Electrical Demand: During periods of high electrical demand, such as when multiple appliances are running simultaneously, there may be voltage drops in the electrical system. This can cause lights to flicker or dim temporarily. However, if the flickering or dimming occurs even under normal electrical usage, it could indicate a problem.
If you experience persistent or frequent flickering or dimming lights, it is important to address the issue promptly to prevent further electrical problems or potential hazards. Here are some steps you can take:
- Check Other Electrical Devices: Determine if the flickering or dimming lights occur when specific appliances or devices are turned on. This can help identify if there is an overload issue on a particular circuit.
- Inspect Light Bulbs: Ensure that the light bulbs are securely screwed in and in good condition. Replace any damaged bulbs or those that continue to flicker or dim after being tightened.
- Reset the Circuit Breaker: Try resetting the circuit breaker associated with the affected lights. Sometimes a momentary power surge or glitch can cause the lights to flicker. However, if the problem persists, it may indicate a deeper issue with the circuit breaker.
- Consult a Professional Electrician: If the flickering or dimming lights persist, it is advisable to consult a licensed electrician. They can perform a thorough inspection of your electrical system, identify any faulty wiring or a malfunctioning circuit breaker, and make the necessary repairs or replacements.
Remember, it is important to prioritize safety when dealing with electrical issues. If you are unsure or uncomfortable with troubleshooting the problem yourself, always seek the assistance of a qualified electrician to ensure your electrical system is properly maintained and functioning correctly.
Regular maintenance and testing of circuit breakers can help identify any potential issues before they become a problem. Look for signs of overheating, corrosion, or loose connections, and address them promptly to prevent circuit breaker failure.
Tripped Circuit Breakers
Tripped circuit breakers are a common occurrence and serve as an essential safety feature in our electrical systems. When a circuit overload or fault is detected, a circuit breaker “trips” or switches off to protect the circuit and prevent further damage or hazards. However, frequent tripping of circuit breakers can indicate an underlying issue that needs to be addressed.
Here are some possible reasons why circuit breakers trip:
- Overload: The most common reason for a circuit breaker to trip is an overload. This happens when the electrical load on the circuit exceeds its capacity. It could be caused by running too many high-powered appliances or devices on the same circuit simultaneously. The breaker’s internal mechanism detects the excessive current and trips to interrupt the flow and protect the circuit.
- Short Circuit: A short circuit occurs when a hot wire comes into direct contact with a neutral wire or ground wire, resulting in a sudden surge of electrical current. This excessive current flow can trigger the circuit breaker to trip. Short circuits can be caused by damaged wiring, faulty appliances, or wiring issues.
- Ground Fault: A ground fault occurs when an electrical current leaks to the ground due to a wiring problem or faulty equipment. Ground faults can cause the circuit breaker to trip as a safety measure to prevent electric shock or damage.
- Aging Circuit Breaker: Circuit breakers have a lifespan, and over time, their internal components may degrade or wear out. As a result, they may become more sensitive and trip more easily. If your circuit breaker is old or has been tripping frequently, it may be a sign that it needs to be replaced.
- Faulty Electrical Device: A faulty electrical device or appliance connected to the circuit can also cause the circuit breaker to trip. If the device has a short circuit or ground fault, it can trigger the breaker to trip when it is turned on or in use.
If you experience frequent or repeated circuit breaker trips, it is important to take the following steps:
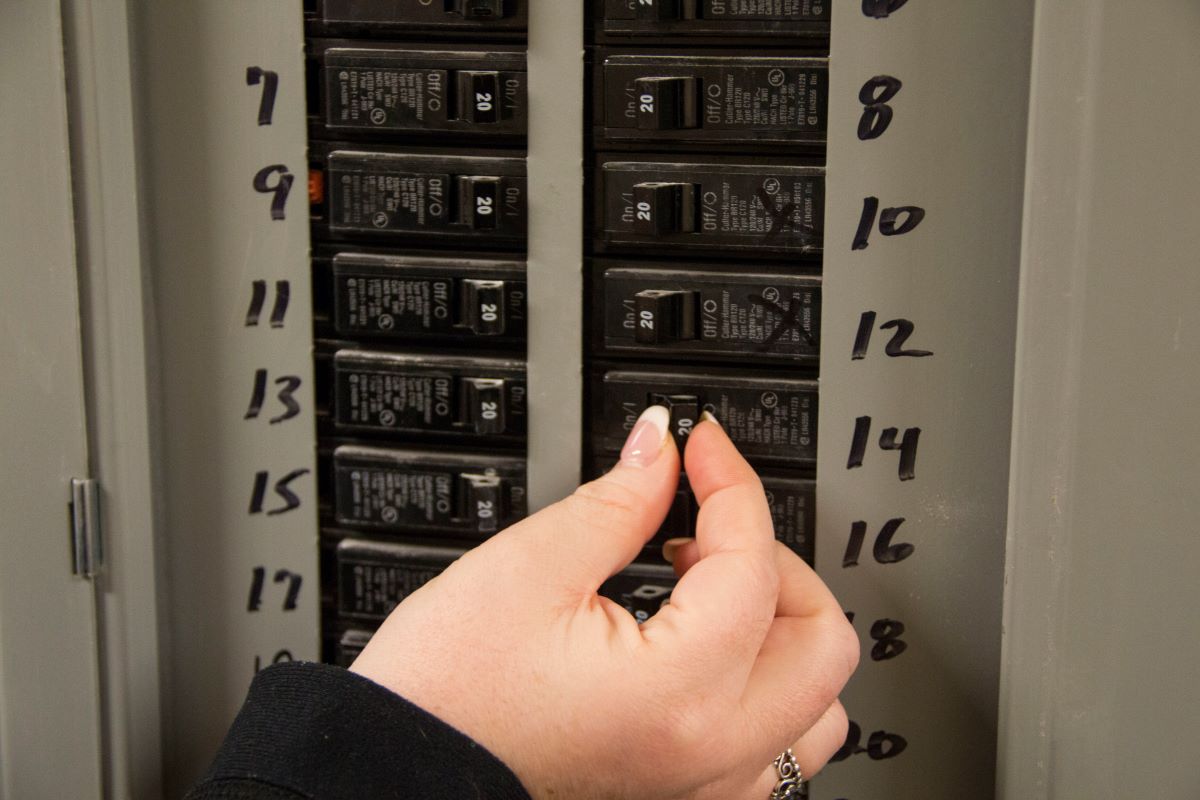
- Identify the Tripped Breaker: Locate the specific circuit breaker that has tripped. In the electrical panel, look for a switch that is in the “off” position or in a position different from the rest.
- Unplug or Disconnect Devices: If the cause of the trip is an overloaded circuit or a faulty device, unplug or disconnect the electrical devices or appliances that were in use when the breaker tripped.
- Reset the Circuit Breaker: To reset the circuit breaker, first, switch it completely to the “off” position, then back to the “on” position. This resets the internal mechanism of the breaker. However, if the breaker trips immediately or frequently after resetting, it may indicate a more significant issue that requires professional attention.
- Investigate the Cause: Once the circuit breaker is reset, try to identify the cause of the trip. Check for overloaded circuits, damaged wiring, or faulty appliances. If you are uncertain or unable to determine the cause, it is advisable to consult a licensed electrician to assess the situation.
- Take Preventive Measures: To prevent future tripping, distribute electrical loads evenly across circuits, avoid running too many high-powered appliances simultaneously, and address any faulty wiring or appliances promptly.
It is crucial to address frequent circuit breaker trips, as they indicate an underlying issue that needs to be resolved. Not addressing the problem can lead to electrical hazards, damage to appliances, or even fire. If in doubt, always seek the assistance of a qualified electrician to ensure the safety and functionality of your electrical system.
Burning Smell or Strange Noises
If you detect a burning smell or unusual noises coming from your electrical panel or circuit breaker, it is crucial to address the issue immediately. These signs can indicate a serious problem with the circuit breaker or the electrical system, and should not be ignored as they could lead to potential hazards.
Here are some possible causes of a burning smell or strange noises:
- Overheating: A burning smell can arise from overheating electrical components. When a circuit breaker or its internal components become overloaded or stressed, it can generate excessive heat, leading to a burning odor. Overheating may be caused by an overloaded circuit, loose or damaged connections, or a faulty breaker.
- Short Circuit or Arcing: If you notice strange noises such as buzzing, crackling, or popping sounds, it could indicate a short circuit or arcing within the circuit breaker or electrical panel. These noises are the result of electrical currents moving through an unintentional path, which can generate heat and potentially cause electrical fires.
- Electrical Sparks: In some cases, a burning smell or strange noises may be accompanied by small electrical sparks visible within the electrical panel. Sparks can occur due to loose connections or faulty breakers, and they should be taken as a severe warning sign of an electrical problem.
- Corrosion or Damage: If there is corrosion or damage to the components within the circuit breaker or electrical panel, it can contribute to overheating and the production of a burning smell. Corrosion can occur due to moisture exposure or the accumulation of dust and dirt.
- Faulty Wiring: Wiring problems, such as frayed or damaged wires, can cause arcing, sparks, or overheating. This can result in a burning smell or unusual noises coming from the electrical panel or circuit breaker.
When you detect a burning smell or strange noises, here’s what you should do:
- Turn Off the Power: If you notice a burning smell or strange noises coming from the electrical panel, immediately turn off the power to that area by switching off the circuit breaker associated with it. This will help prevent any potential electrical hazards.
- Consult a Licensed Electrician: It is important to consult a licensed electrician to inspect and diagnose the issue. They are trained to handle electrical problems safely and can accurately identify the cause of the burning smell or strange noises.
- Avoid DIY Repairs: Electrical issues can be complex and dangerous, so it is strongly advised against attempting to repair or troubleshoot the problem yourself. Leave it to the professionals to handle the situation properly and ensure your safety.
- Follow Professional Recommendations: After the electrician has assessed the problem, follow their recommendations for repairs or replacements. This may involve replacing a faulty breaker or addressing any wiring issues or other faults within the electrical system.
Never ignore a burning smell or strange noises coming from your electrical panel or circuit breaker. Taking immediate action and seeking professional assistance will help prevent electrical hazards, protect your property, and ensure the safety of yourself and others in your home or building.
Frequently Resetting Circuit Breakers
If you find yourself frequently resetting a circuit breaker to restore power, it is a clear sign that something is amiss. Circuit breakers are designed to trip and shut off the electrical current when there is an overload or fault in the circuit. However, if the breaker trips frequently under normal conditions, it indicates a problem that needs to be addressed. Here are some possible reasons for a circuit breaker that frequently needs to be reset:
- Overloaded Circuit: An overloaded circuit occurs when the electrical load on the circuit exceeds its capacity. If you have too many high-powered appliances or devices connected to the same circuit, it can cause the breaker to trip. Consider redistributing the load by connecting the devices to different circuits or reducing the number of devices on the circuit.
- Short Circuit or Ground Fault: A short circuit or ground fault can also cause a circuit breaker to trip frequently. A short circuit occurs when a hot wire comes into contact with a neutral wire or ground wire, creating a surge of electrical current. A ground fault occurs when an electrical current leaks to the ground due to a wiring issue or faulty equipment. Both of these faults can cause the breaker to trip repeatedly. Inspect the wiring and electrical devices connected to the circuit to identify and address any short circuits or ground faults.
- Faulty Electrical Device: A faulty electrical device or appliance connected to the circuit can trip the breaker. If a specific device consistently causes the breaker to trip, it may have a short circuit or ground fault. Disconnect the device and have it repaired or replaced to prevent further issues.
- Loose Electrical Connection: Loose electrical connections can cause intermittent power disruptions and result in the breaker tripping frequently. Inspect the wiring connections on the circuit to ensure they are secure and tightened properly. If you find any loose connections, tighten them or consult a licensed electrician for assistance.
- Faulty Circuit Breaker: In some cases, a malfunctioning or worn-out circuit breaker itself may be the cause of frequent tripping. Circuit breakers have a lifespan and can degrade over time. If the breaker is old or has been tripping frequently, it may need to be replaced with a new one to ensure proper functioning and safety.
To address the issue of frequently resetting circuit breakers, follow these steps:
- Distribute Electrical Load: Avoid overloading circuits by distributing the electrical load more evenly across multiple circuits. Consider the power requirements of your devices and adjust accordingly.
- Inspect Wiring and Connections: Conduct a thorough inspection of the electrical wiring and connections on the circuit. Look for any signs of damage, loose connections, or faulty wiring. If you’re uncertain about electrical work, it’s best to consult a licensed electrician to perform the inspection.
- Disconnect Faulty Devices: If a specific device repeatedly trips the circuit breaker, disconnect it from the circuit and have it examined or replaced by a professional to eliminate the source of the problem.
- Consider Professional Help: If the issue persists or you’re unsure about how to proceed, it’s wise to seek the assistance of a licensed electrician. They can diagnose the problem, identify faulty components, and provide the necessary repairs or replacements.
- Replace Faulty Breakers: If the circuit breaker itself is determined to be faulty, it’s essential to have it replaced with a new one. Only a qualified electrician should handle circuit breaker replacements to ensure it is installed correctly and meets safety standards.
Remember, frequent tripping of circuit breakers should not be ignored, as it can indicate underlying electrical problems or potential safety hazards. By taking prompt action and seeking professional assistance when needed, you can ensure the proper functioning and safety of your electrical system.
Read more: Why Do Arc Fault Breakers Trip
How to Test a Circuit Breaker
It is essential to periodically test circuit breakers to ensure they are functioning correctly and providing reliable protection for your electrical system. Testing a circuit breaker involves inspecting its physical condition, as well as conducting electrical tests to assess its performance. Here are the steps to test a circuit breaker:
Visual Inspection:
- Safety First: Before starting any inspection or testing, ensure your safety by wearing appropriate personal protective equipment (PPE) such as gloves and safety goggles.
- Inspect the Circuit Breaker Panel: Start by visually examining the circuit breaker panel. Look for any signs of physical damage, such as cracks, warping, or burned marks. Physical damage can indicate a faulty breaker that needs to be replaced.
- Check for Warmth or Hot Spots: With caution, carefully touch the circuit breaker to check for warmth or hot spots. A warm or hot breaker could indicate an overloaded or faulty circuit. However, exercise extreme caution as a hot breaker could cause burns.
- Inspect for Burnt Odor: Smell around the circuit breaker panel for any burnt or unusual odors. A burnt smell could indicate overheating or arcing, which requires immediate attention from a licensed electrician.
Electrical Testing:
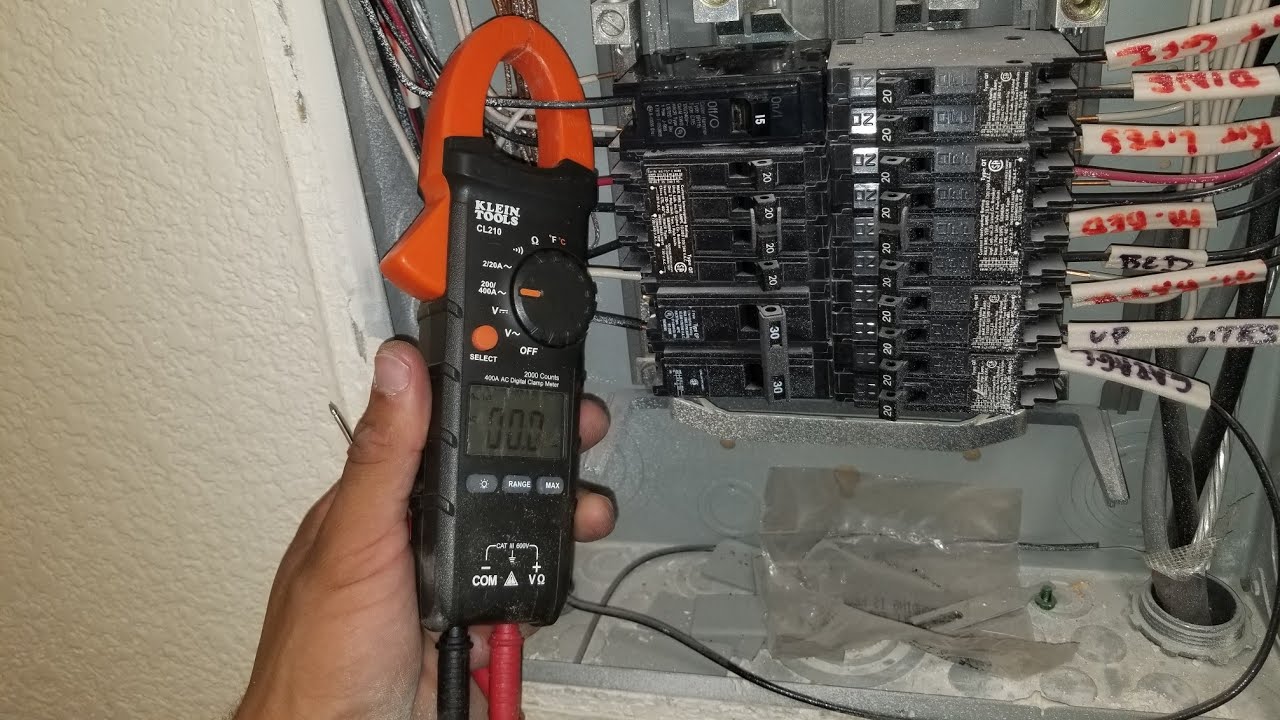
Electrical testing of a circuit breaker requires using a multimeter or electrical testing equipment. If you’re not familiar with electrical testing procedures, it is recommended to hire a licensed electrician to perform these tasks.
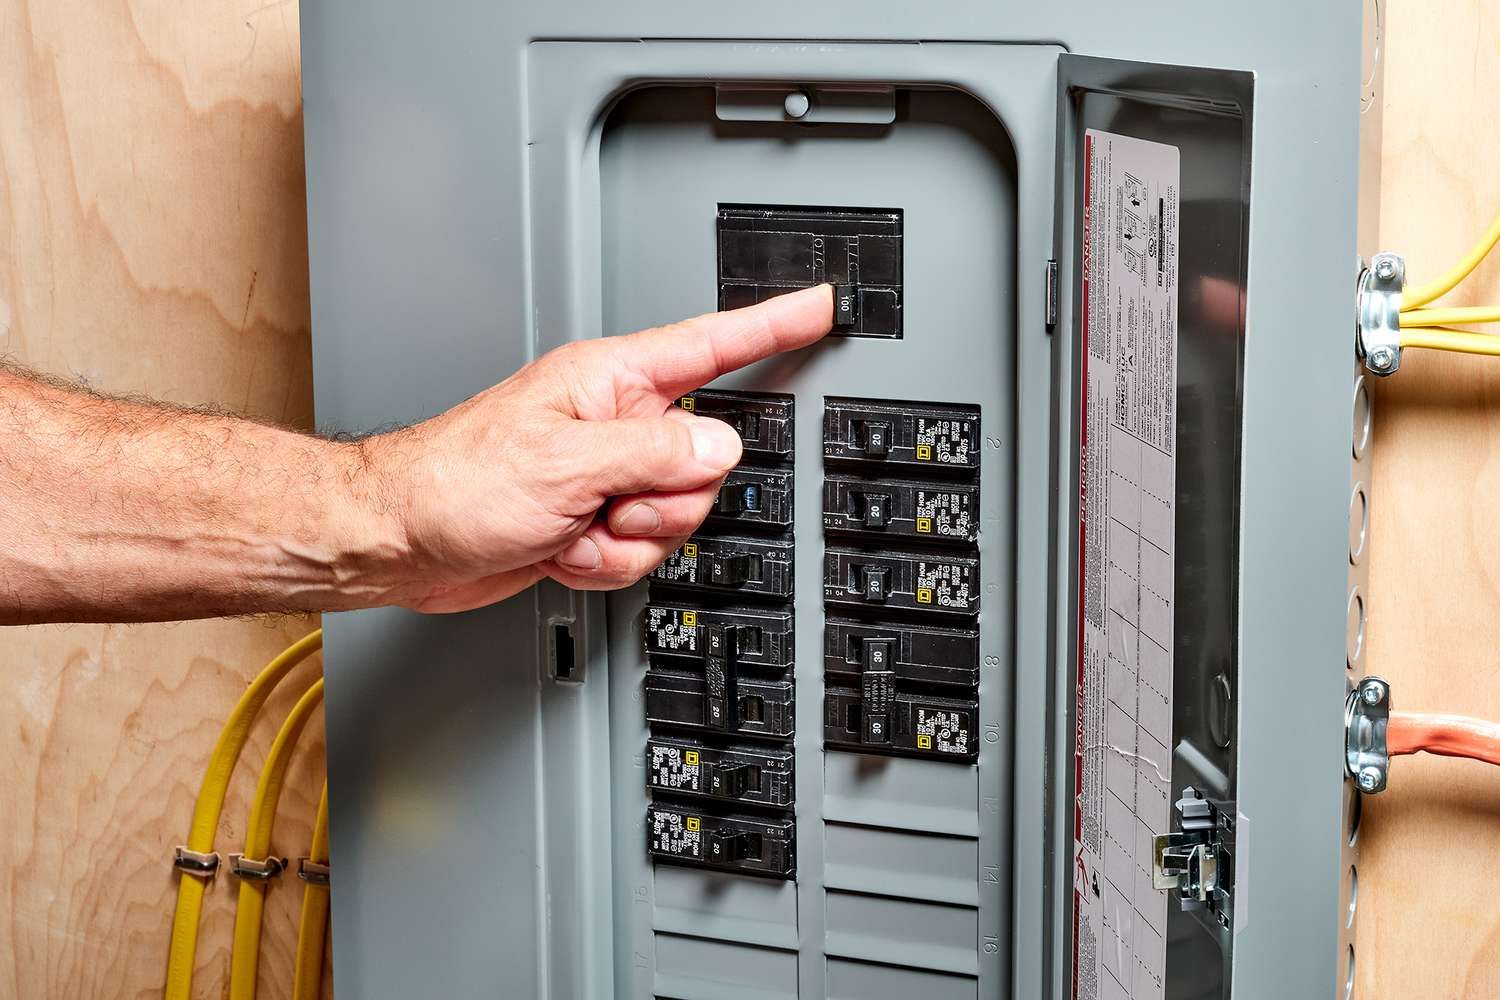
- Identify the Circuit: Locate the circuit breaker that you want to test. Turn off the power to the specific circuit by switching off its corresponding breaker in the circuit breaker panel.
- Check for Voltage: Using a multimeter set to the voltage testing mode, carefully test for voltage at the terminal screws of the breaker. Ensure that there is no voltage present by confirming a reading of zero volts. If voltage is detected, do not proceed with further testing and seek professional assistance.
- Check Continuity: To check continuity, set your multimeter to the continuity testing mode. With the power off, carefully remove the wires from the breaker’s terminals and touch the multimeter probes to each terminal. A reading of zero or low resistance indicates continuity, whereas a reading of high resistance or infinite resistance indicates a faulty or open circuit breaker.
- Perform a Load Test: A load test involves simulating the normal circuit conditions to ensure the circuit breaker can handle the expected electrical load. Consult a licensed electrician to perform a load test using professional testing equipment.
It is important to note that circuit breakers can be dangerous to work with due to the risk of electrical shock. If you’re unsure about testing procedures or lack experience, it is strongly advised to consult a licensed electrician to perform the testing or inspection for you.
Regular testing and maintenance of circuit breakers ensure proper functionality and help prevent potential electrical hazards. A qualified electrician can provide expert advice, perform necessary tests, and address any concerns or issues with the circuit breakers in your electrical system.
Visual Inspection
A visual inspection is an essential part of testing a circuit breaker as it allows you to assess its physical condition and identify any visible signs of damage or wear. Conducting a thorough visual inspection can help ensure the circuit breaker is in good working condition and minimize the risk of electrical incidents. Here is how to perform a visual inspection:
- Safety First: Prioritize your safety by wearing appropriate personal protective equipment (PPE) such as gloves and safety goggles. Make sure the power to the circuit breaker is switched off before proceeding with the inspection.
- Inspect the Circuit Breaker Panel: Begin the visual inspection by examining the circuit breaker panel itself. Look for any cracks, warping, or signs of physical damage on the panel enclosure. Damaged panels may require immediate attention and repair.
- Examine the Circuit Breaker: Direct your attention to the individual circuit breakers within the panel. Inspect each breaker for any visible signs of damage or wear. Look for:
- Cracked or broken housing: A damaged or compromised housing can expose the internal components and may require the replacement of the breaker.
- Burn marks or discoloration: Burn marks or discoloration can indicate instances of overheating or arcing, suggesting a potential issue with the breaker or the circuit it protects.
- Loose or corroded connections: Check for loose or corroded wiring connections at the terminals of the breaker. Loose connections can create resistance, overheating, and may pose a fire hazard.
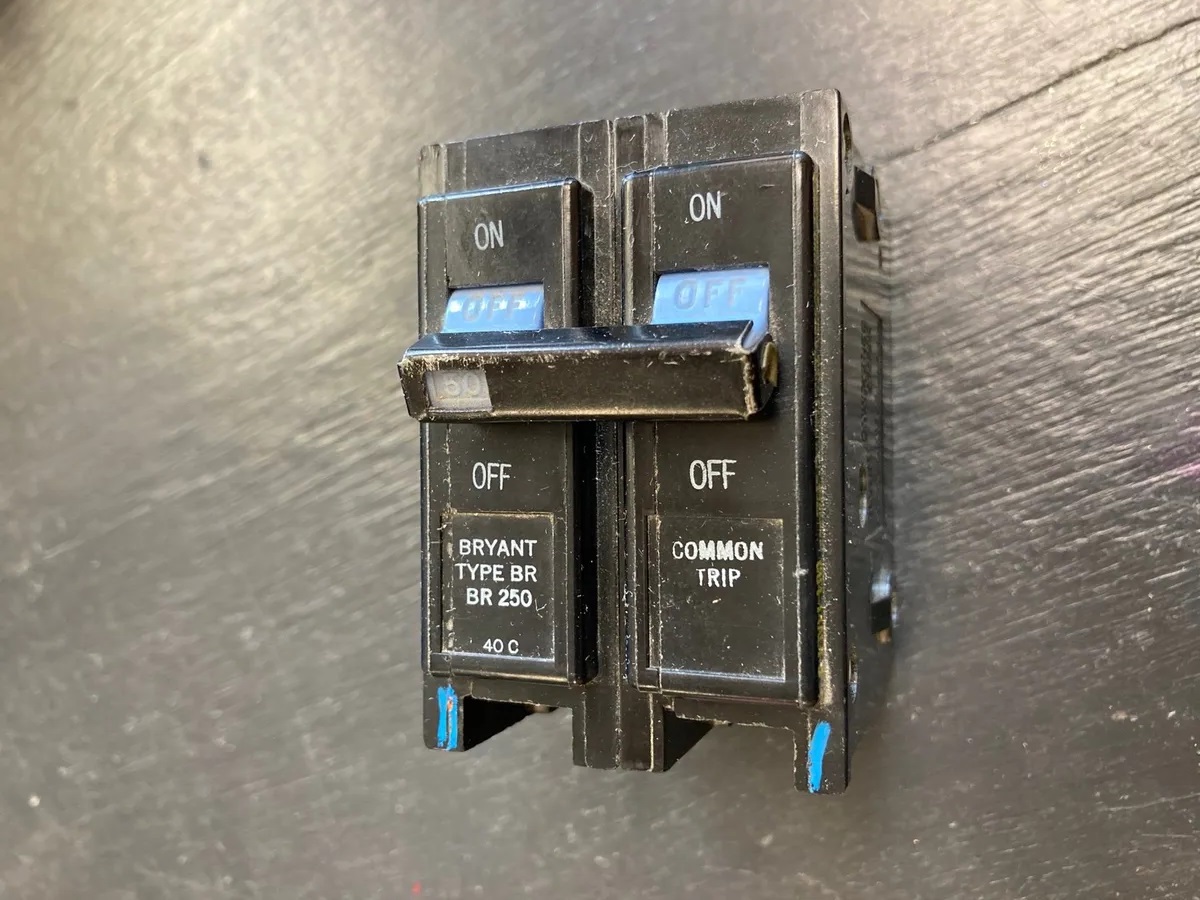
- Tripped indicators: If the breaker has a visual trip indicator, which typically appears as a red flag or a colored window, ensure that it is functioning correctly. If the indicator is showing a tripped position when the breaker is actually in the “on” position, it may indicate a malfunction.
- Look for any Burning Smell or Unusual Odors: While conducting the visual inspection, note any detectable odors, especially the smell of burning or unusual chemical scents. These odors may indicate a potentially hazardous electrical issue and should be promptly addressed by a licensed electrician.
- Verify Proper Labeling: Check that the circuit breakers are correctly labeled and properly marked to identify their corresponding circuits. Accurate labeling is essential for proper maintenance, troubleshooting, and electrical safety.
- Document and Report: Take notes or photos of any visible damage, concerns, or discrepancies you observe during the inspection. This documentation can be useful for future reference and when seeking professional assistance or consulting a licensed electrician.
A visual inspection provides valuable insights into the condition of the circuit breaker and can help identify potential issues before they escalate into more significant problems. However, it is important to note that a visual inspection alone may not unveil all internal issues or defects within the breaker. For a comprehensive assessment of the breaker’s functionality, it is advisable to conduct electrical tests and consult a licensed electrician.
Regular inspections and maintenance of circuit breakers contribute to the safety, reliability, and optimal performance of electrical systems, ensuring smooth operation and minimizing the risk of electrical hazards.
Using a Multimeter
Using a multimeter, an essential electrical testing tool, provides a more in-depth assessment of the functionality and performance of a circuit breaker. By measuring electrical parameters, such as voltage, continuity, and resistance, a multimeter can help determine whether a circuit breaker is operating as desired. Here is how to use a multimeter to test a circuit breaker:
- Safety First: Prioritize your safety by wearing appropriate personal protective equipment (PPE), including gloves and safety goggles. Ensure that the power to the circuit breaker is switched off before proceeding.
- Select the Proper Setting: Set the multimeter to the appropriate mode for the task at hand. To test a circuit breaker, you will typically use voltage testing, continuity testing, and resistance testing modes.
- Voltage Testing: Start by conducting a voltage test to ensure there is no voltage present in the circuit breaker. Place the multimeter probes on the terminal screws of the circuit breaker. If the multimeter reads zero volts, there is no voltage present, and it is safe to proceed. If there is voltage detected, do not proceed with further testing as it could be dangerous. In such cases, consult a licensed electrician.
- Continuity Testing: Continuity testing helps check if a circuit is complete or if there is any interruption. First, disconnect the power to the circuit breaker. Then, using the multimeter’s continuity testing mode, touch one probe to the line terminal or load side of the breaker and the other probe to the load or output terminal. A reading of low resistance or a beep indicates continuity, meaning the circuit is complete. A reading of high resistance or no continuity suggests an open circuit and may indicate a faulty breaker.
- Resistance Testing: Resistance testing helps measure the resistance across the circuit breaker. Switch the multimeter to resistance or ohms mode and touch the probes across the line and load terminals of the circuit breaker. A normal functioning breaker would typically show very low resistance, near zero ohms. Higher resistance readings could indicate a problem with the breaker.
- Compare Readings: Compare your readings with the manufacturer’s specifications or seek guidance from a licensed electrician to determine if the circuit breaker meets the desired performance standards.
- Document and Report: Keep a record of the measurements and readings obtained during the testing. These records can serve as a reference for future inspections and maintenance.
It is important to note that testing circuit breakers with a multimeter requires a certain level of electrical knowledge and expertise. If you are unsure or unfamiliar with the process, it is advisable to consult a licensed electrician. They have the necessary skills and experience to perform thorough testing, interpret the results, and provide appropriate advice or recommendations based on their findings.
Regular testing and maintenance of circuit breakers help ensure their proper functioning, reliability, and the safety of your electrical system.
Replacing a Faulty Circuit Breaker
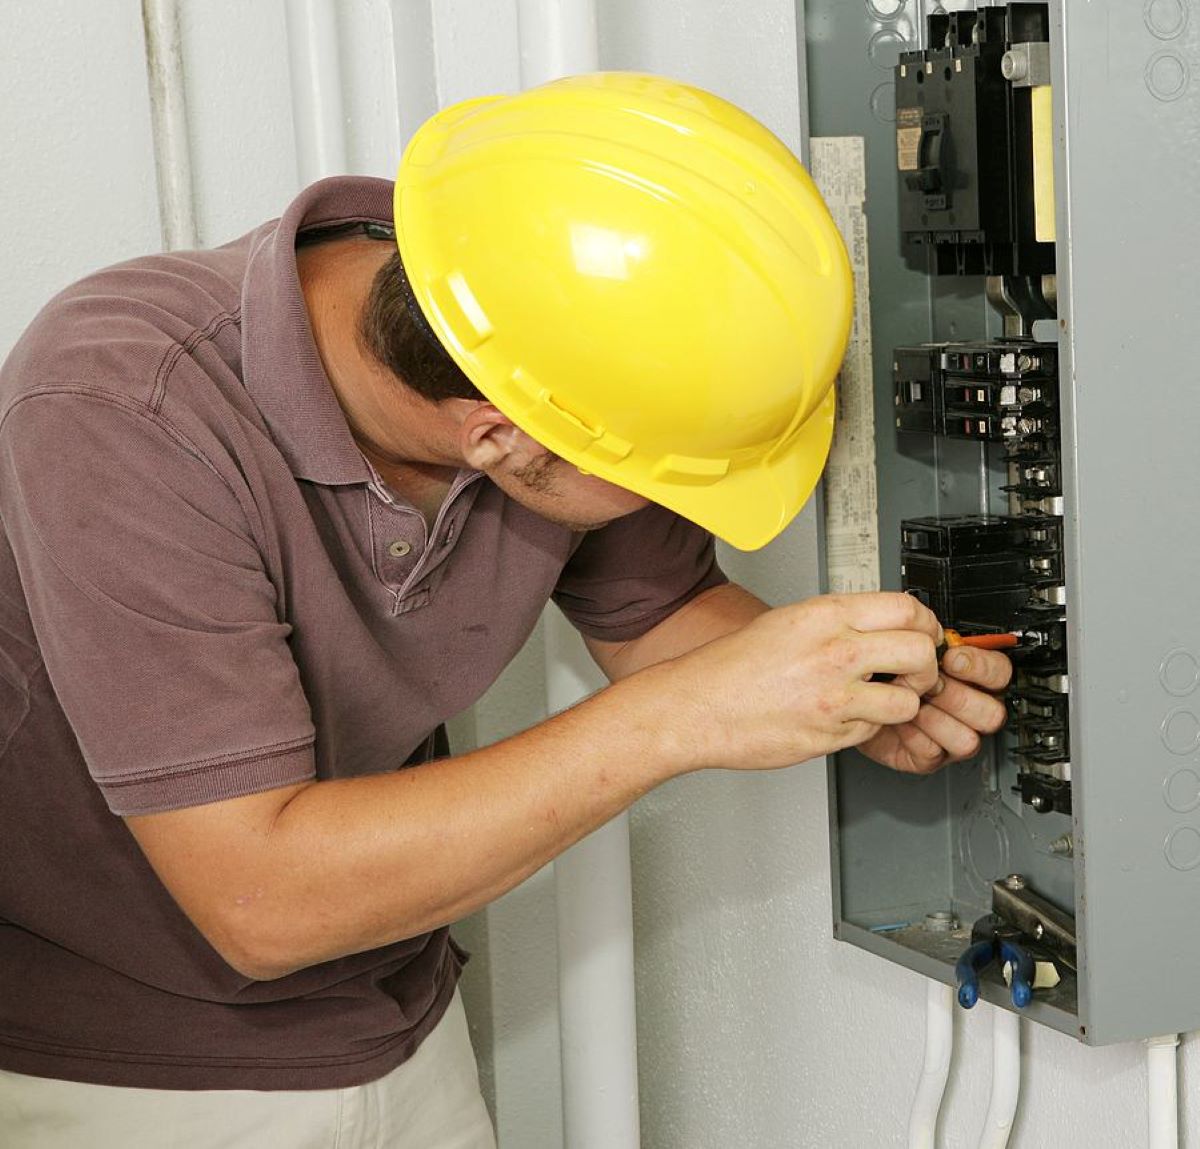
If a circuit breaker has been diagnosed as faulty or is no longer performing its intended function, it may be necessary to replace it with a new one. Replacing a circuit breaker requires knowledge of electrical systems and should be done by a licensed electrician or a qualified professional. Here are the steps involved in replacing a faulty circuit breaker:
- Safety First: Prioritize your safety by wearing appropriate personal protective equipment (PPE) such as gloves and safety goggles. Always turn off the power to the circuit breaker panel before beginning any work.
- Identify the Faulty Breaker: Determine which circuit breaker needs to be replaced. You can do this by referencing the circuit breaker directory or by testing each breaker’s functionality with a multimeter.
- Obtain a Matching Replacement: Ensure that you have a suitable replacement breaker that matches the specifications of the existing one. It is crucial to use the correct type and amperage rating to maintain the integrity and safety of the electrical system.
- Turn Off the Power: To replace the circuit breaker safely, turn off the power to the entire electrical panel. This can be done by switching off the main breaker or by turning off the corresponding circuit breaker for the panel’s specific area.
- Remove the Old breaker: Carefully remove the wires connected to the faulty breaker by loosening the terminal screws. Take note of the wire connections and their locations for proper reinstallation. Using appropriate tools, remove the faulty breaker from the panel by gently pulling it out of its connector slot.
- Install the New breaker: Insert the new circuit breaker into an empty slot in the panel, ensuring that it is properly aligned with the bus bar. Securely connect the wires to the terminals, making sure that they are tightened down securely and in the correct positions as noted earlier.
- Double-Check the Connections: Before restoring power, double-check all wire connections to ensure they are tight and secure. An improperly connected breaker can lead to dangerous electrical issues.
- Restore Power and Test: After confirming all connections, turn the power back on by switching on the main breaker or restoring power to the specific area. Test the circuit to ensure the new breaker is functioning correctly and providing power as expected.
- Update the Circuit Breaker Directory: Update the circuit breaker directory or labeling to reflect the replacement. This will help in future troubleshooting and maintenance tasks.
It is important to emphasize that replacing a circuit breaker should be performed by a licensed electrician or a qualified professional with experience in handling electrical systems. They have the expertise to safely navigate electrical components, maintain proper connections, and ensure compliance with local electrical codes and regulations. Handling electrical work without the necessary knowledge and training can be risky and may lead to electrical hazards or damage to the system.
By entrusting the replacement of a faulty circuit breaker to a qualified professional, you can rest assured that the job will be done correctly and in accordance with safety standards, ensuring the continued functionality and safety of your electrical system.
Conclusion
Understanding the causes, signs, and testing of faulty circuit breakers is essential for maintaining a safe and efficient electrical system. Circuit breakers play a critical role in protecting our homes and buildings from overloads, short circuits, and other electrical faults that could lead to serious hazards or damage.
In this article, we have explored the common causes of circuit breaker failure, including overloading, short circuits, electrical surges, aging, and loose connections. We have discussed the signs that may indicate a bad circuit breaker, such as flickering or dimming lights, tripped breakers, burning smells, strange noises, and frequent resets. Additionally, we have covered how to test circuit breakers through visual inspection and using a multimeter, emphasizing the importance of safety precautions and professional assistance when necessary.
Ultimately, if a circuit breaker is found to be faulty or compromised, it is crucial to take prompt action to address the issue. This may involve replacing the faulty breaker with a matching replacement, ensuring proper installation and connection. Remember that circuit breaker replacements should ideally be carried out by a licensed electrician or qualified professional to ensure a safe and accurate replacement process.
Regular inspections, electrical testing, and maintenance of circuit breakers are key to preserving the integrity and reliability of your electrical system. By staying vigilant and addressing any issues promptly, you can help prevent electrical hazards, ensure proper electrical distribution, and maintain a safe environment for yourself, your family, and your property.
If you have any concerns or doubts about circuit breakers, it is always best to consult with a licensed electrician. They have the expertise and knowledge to provide the necessary guidance, inspections, and repairs to keep your electrical system in optimal condition.
Keeping your home in top shape goes beyond fixing faulty circuit breakers. Regular home maintenance is crucial for ensuring everything runs smoothly and safely. Diving into our detailed guide on essential upkeep tasks will equip you with practical tips and strategies for keeping your living space efficient and problem-free. Not only will you learn what tasks to tackle, but also how to carry them out effectively.
Frequently Asked Questions about How Do Circuit Breakers Go Bad
Was this page helpful?
At Storables.com, we guarantee accurate and reliable information. Our content, validated by Expert Board Contributors, is crafted following stringent Editorial Policies. We're committed to providing you with well-researched, expert-backed insights for all your informational needs.


0 thoughts on “How Do Circuit Breakers Go Bad”