Home>Articles>How To Add More Breakers To A Full Breaker Box
Articles
How To Add More Breakers To A Full Breaker Box
Modified: October 20, 2024
Learn how to add more breakers to a full breaker box with these helpful articles. Expand your electrical knowledge and ensure a safe and efficient electrical system.
(Many of the links in this article redirect to a specific reviewed product. Your purchase of these products through affiliate links helps to generate commission for Storables.com, at no extra cost. Learn more)
Introduction
Welcome to our comprehensive guide on how to add more breakers to a full breaker box. If you find yourself in a situation where your electrical panel is at maximum capacity and you need to accommodate new circuits or appliances, this article is for you. We will walk you through the process, step by step, ensuring that you understand the necessary safety precautions and procedures.
Breaker boxes, also known as electrical panels, are the central hub for distributing power throughout your home or building. They contain a series of circuit breakers that control the flow of electricity to different areas and appliances. Each breaker is designed to handle a specific amount of electrical current, which is measured in amps.
However, over time, you may find that your electrical needs exceed the capacity of your current breaker box. This can be due to the addition of new appliances, renovations, or other electrical upgrades. When faced with this challenge, adding more breakers to your existing breaker box is a viable solution.
Before we dive into the process, it’s important to note that electrical work can be dangerous if not done correctly. It is always recommended to consult a licensed electrician for any major electrical work. However, for those who have a good understanding of electrical systems and are comfortable working with electricity, we will outline the steps involved in adding more breakers to a full breaker box.
Throughout this guide, we will emphasize the importance of safety and following local building codes and regulations. Safety should always be your top priority when dealing with electricity, so if you are unsure about any step or procedure, it is best to consult a professional.
Now, let’s get started and learn how to safely and correctly add more breakers to a full breaker box, ensuring that your electrical system can keep up with your growing needs.
Key Takeaways:
- Prioritize safety and proper planning when adding more breakers to a full breaker box. Always consult a licensed electrician if uncertain, and adhere to local regulations and permit requirements for a safe and efficient electrical upgrade.
- The process of adding more breakers involves assessing load calculations, obtaining permits, planning the installation, and following precise steps for mounting, connecting, testing, and restoring power. By following these steps, you can expand your electrical system safely and effectively.
Read more: How To Check Breakers In Breaker Box
Understanding Breaker Boxes
Before we begin the process of adding more breakers to a full breaker box, let’s take a moment to understand how a breaker box functions and the role it plays in your electrical system.
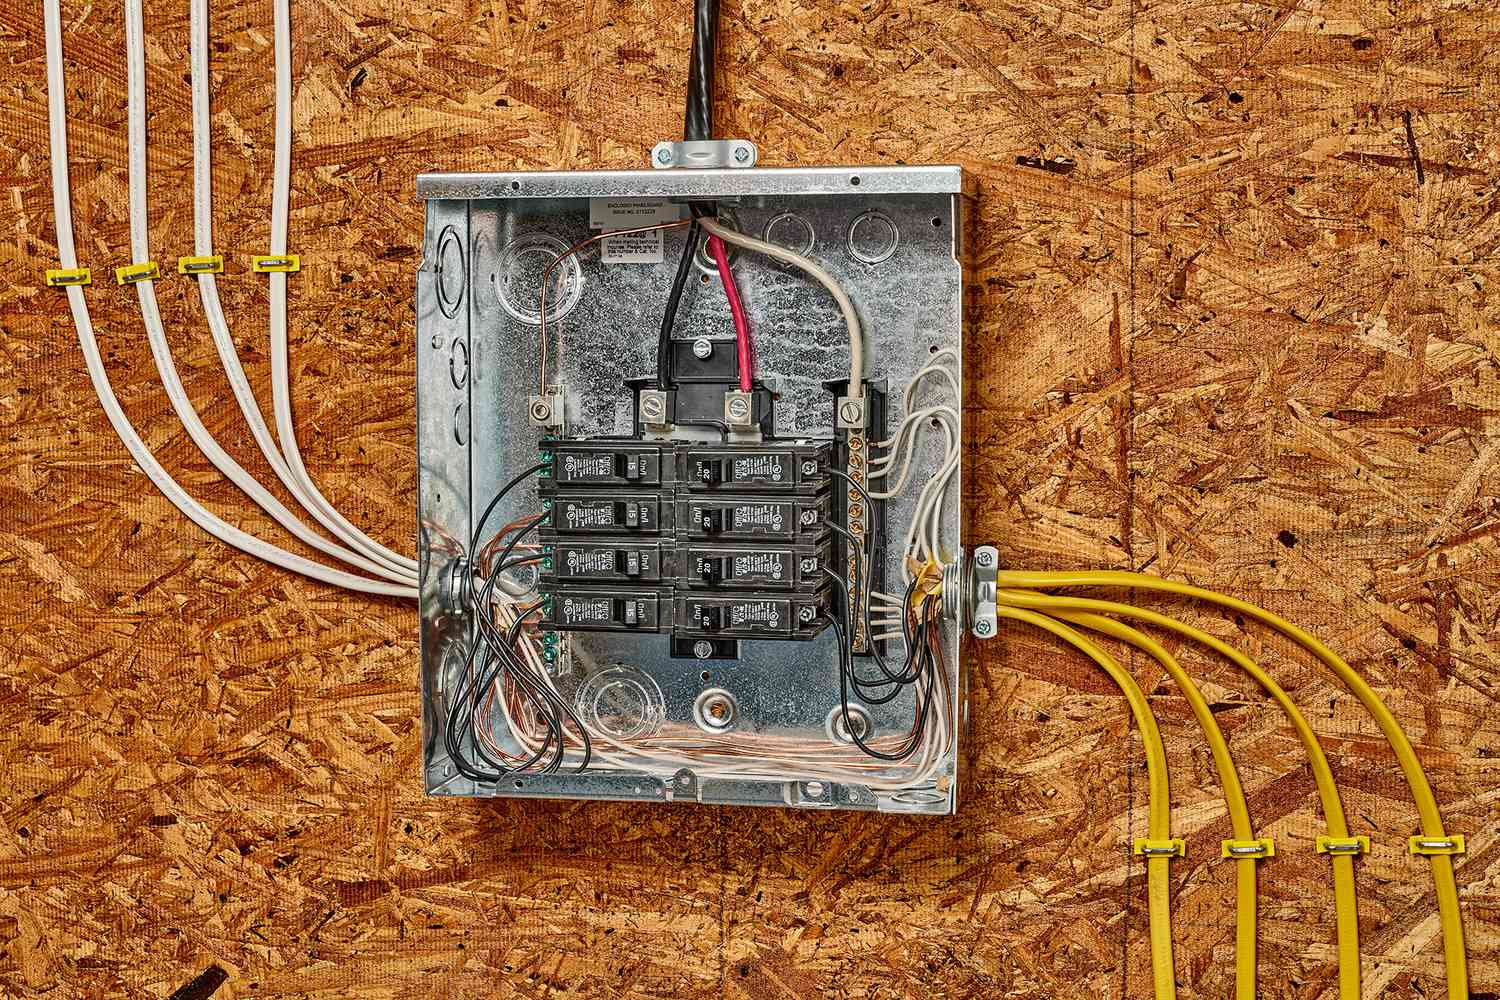
Breaker boxes, also referred to as electrical panels or distribution boards, serve as the central point for controlling and distributing electricity throughout your home or building. They are typically located in a utility room, basement, or garage, and are responsible for safely distributing electrical power to various circuits and appliances.
A standard breaker box consists of two main components:
- Main Breaker: This is a large switch or breaker located at the top or bottom of the panel. It controls the flow of electricity from the utility company into your home or building. In case of an overload or electrical fault, the main breaker will trip, cutting off power to the entire panel.
- Circuit Breakers: These are smaller switches or breakers located below the main breaker. Each circuit breaker is connected to a specific circuit in your home, such as the lighting circuit, kitchen circuit, or HVAC circuit. They act as protection devices, interrupting the electrical current in case a circuit exceeds its designated current rating.
Circuit breakers come in various sizes, commonly measured in amps, and each circuit breaker is designed to handle a specific load or electrical current. For example, a typical lighting circuit may be protected by a 15-amp or 20-amp breaker, while a larger appliance circuit like the stove or air conditioner may have a 30-amp or higher breaker.
It is important to note that the total sum of the amperage ratings for all the circuit breakers in your breaker box should not exceed the main breaker’s rating. This ensures that your electrical system is safely designed to handle the electrical load without overloading.
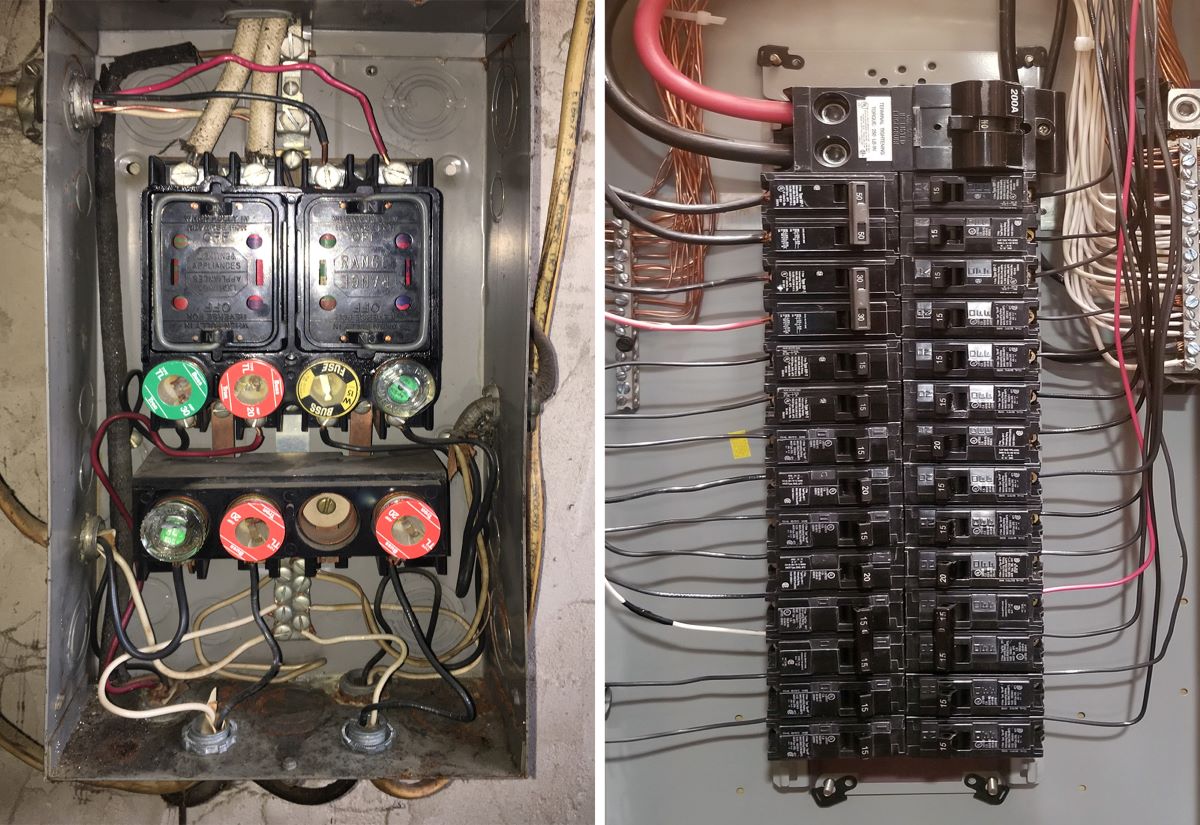
Additionally, breaker boxes may have spaces for extra breakers, referred to as “open slots.” These open slots allow for future expansion and the addition of more circuits. However, in some cases, the breaker box may already be at maximum capacity, with all slots filled. When this happens, adding more breakers becomes a bit more involved and requires careful planning and steps to ensure the safety and efficiency of your electrical system.
Now that we have a better understanding of breaker boxes and how they function, let’s move on to the necessary safety precautions before attempting to add more breakers to a full breaker box.
Safety Precautions
When working with electricity, safety should always be the top priority. Before attempting to add more breakers to a full breaker box, it is essential to take the following safety precautions:
- Turn Off the Power: Before opening the breaker box or working on any electrical components, make sure to turn off the power supply. Locate the main breaker and switch it to the “Off” position to cut off power to the entire panel. Verify that there is no power flowing through the box using a voltage tester.
- Wear Protective Gear: While working on electrical systems, always wear appropriate protective gear, including safety goggles, gloves, and non-conductive footwear. These safeguards will help protect you from potential electric shock or other hazards.
- Work in a Dry Environment: Ensure that the area where you are working on the breaker box is dry. Moisture can increase the risk of electrical shock, so avoid working in damp or wet conditions.
- Use Insulated Tools: When working on electrical components, use insulated tools specifically designed for electrical work. Insulated tools help minimize the risk of electrical shock by preventing direct contact with live wires.
- Familiarize Yourself with Wiring Guidelines: Before attempting any electrical work, familiarize yourself with local building codes and guidelines. Ensure that you are aware of the proper wiring techniques and requirements to ensure a safe and compliant installation.
- Consult a Licensed Electrician: If you are unsure about any aspect of the process or if you have limited experience working with electrical systems, it is highly recommended to consult a licensed electrician. They have the expertise and experience to safely handle electrical installations.
It is important to note that working with electrical systems can be complex and potentially dangerous. If you are uncomfortable or uncertain about any step in the process, it is best to seek professional assistance to ensure the safety of yourself, your home, and others.
Now that we have discussed the safety precautions, let’s move on to understanding the load calculation and the importance of obtaining the necessary permits before adding more breakers to a full breaker box.
Assessing the Load Calculation
Before adding more breakers to a full breaker box, it is crucial to assess the electrical load calculation of your home or building. This calculation determines the amount of electrical current required to power all the circuits and appliances in your premises.
Here are the steps to assess the load calculation:
- Identify Existing Circuits and Appliances: Make a list of all the circuits and appliances currently connected to your breaker box. This includes lighting circuits, kitchen circuits, HVAC systems, and any other electrical installations.
- Determine the Amperage Ratings: Note down the amperage ratings for each circuit breaker in your breaker box. This information is usually printed on the breaker switch itself or can be found in the breaker box documentation.
- Calculate Total Amperage: Add up the amperage ratings for all the circuit breakers. This will give you the total electrical load on your existing breaker panel.
- Consider Future Electrical Needs: Take into account any planned electrical upgrades or additions. This may include installing new appliances, adding more circuits, or renovating parts of your home. Factor in the estimated amperage requirements for these future additions.
- Compare Load Calculation with Panel Capacity: Check the amperage capacity of your breaker box. This information is typically labeled on the panel door or can be found in the manufacturer’s documentation. Ensure that the total load calculation does not exceed the capacity of your breaker box to avoid overloading the electrical system.
If the load calculation exceeds the capacity of your breaker box, adding more breakers will require careful planning and considerations. You may need to upgrade your electrical service or install a sub-panel to accommodate the additional circuits.
It is important to note that performing an accurate load calculation can be complex. If you are uncertain or need assistance, it is advisable to consult a licensed electrician who can help assess your electrical load and provide recommendations tailored to your specific needs.
Now that we have reviewed the load calculation, let’s discuss the importance of obtaining the required permits before proceeding with the installation.
Obtaining the Required Permits
Before adding more breakers to a full breaker box, it is essential to obtain the necessary permits from your local building or electrical authority. Permits ensure that the work is being done in compliance with local regulations and safety standards. Here are the steps to obtaining the required permits:
- Contact Local Authority: Research and identify the appropriate local authority responsible for granting electrical permits. This could be the building department, electrical inspector’s office, or a similar governing body.
- Review Permit Requirements: Contact the local authority and inquire about the specific permit requirements for your project. They will provide information on the necessary documentation, fees, and any additional guidelines to follow.
- Submit Permit Application: Fill out the permit application form, providing accurate details about the planned electrical work. This may include information about the breaker box, the number of additional breakers, and any other relevant information.
- Attach Supporting Documentation: Along with the permit application, you may need to submit supporting documentation. This can include electrical plans, load calculations, equipment specifications, and any other required paperwork. Ensure that all documents are complete and comply with the local authority’s guidelines.
- Pay Permit Fee: Depending on your location, there may be a fee associated with obtaining the electrical permit. Make sure to pay the required fee as specified by the local authority. This fee covers the administrative costs associated with reviewing and processing your application.
- Wait for Approval: Once you have submitted the permit application, it will undergo a review process. The local authority will assess your plans and ensure they comply with building codes and safety standards. This review process may take a few days or weeks, depending on the workload of the authority.
- Receive Permit and Confirmation: If your permit application is approved, you will receive the electrical permit along with a confirmation of approval. This documentation will be essential for inspections and any future reference.
It is crucial to note that failing to obtain the required permits can result in legal consequences and potential safety hazards. It’s always best to follow the proper procedures and obtain the necessary permits before starting any electrical work.
Once you have obtained the required permits, you can proceed to plan the installation of the additional breakers in your full breaker box. In the next section, we will discuss the steps involved in this planning process.
Read more: How To Add More Alarm Sounds To Alexa
Planning the Installation
Proper planning is crucial when adding more breakers to a full breaker box. This ensures that the installation is organized and efficient, minimizing any potential risks or issues. Here are the steps to consider when planning the installation:
- Evaluate Space and Capacity: Assess the available space in your breaker box and determine if there are any open slots for additional breakers. If all slots are occupied, you may need to explore other options, such as installing a sub-panel or upgrading your electrical service.
- Identify Circuit Requirements: Determine the specific circuits or appliances that require additional breakers. This will help you determine the size and type of breakers needed. Different circuits may have different amperage requirements, so it’s important to match them correctly.
- Consider Future Expansion: Anticipate any future electrical needs and consider leaving some open slots for potential expansion. This will save you from having to go through the process again if you require more breakers in the future.
- Create a Wiring Diagram: Draw a wiring diagram or plan to visualize how the new breakers will be connected. This diagram should indicate the circuit numbers, existing breakers, and the location of the new breakers to ensure clarity during the installation process.
- Purchase the Necessary Breakers: Based on your planning and wiring diagram, purchase the appropriate breakers from a reputable electrical supply store. Ensure that the breakers meet the required amperage and compatibility specifications for your breaker box.
- Gather the Required Tools and Materials: Collect all the necessary tools and materials needed for the installation. This may include screwdrivers, wire strippers, wire connectors, and other electrical equipment. Having everything readily available will make the installation smoother and more efficient.
- Double-Check Safety Precautions: Review the safety precautions outlined at the beginning of this guide and ensure you have taken all necessary safety measures. This includes turning off the power and wearing appropriate protective gear.
By carefully planning the installation process, you can ensure a smooth and well-executed addition of more breakers to your full breaker box. Remember to always adhere to local codes and regulations and consult a licensed electrician if you have any doubts or concerns.
Now that you have completed the planning phase, the next step is to gather the necessary tools and materials in preparation for the installation. In the following section, we will discuss the tools and materials required for the process.
Gathering the Necessary Tools and Materials
Before you can begin the process of adding more breakers to a full breaker box, it is important to gather all the necessary tools and materials. Having everything prepared beforehand will save you valuable time and ensure a smooth installation. Here are the tools and materials you will need:
- Screwdriver: A screwdriver, preferably a flathead and Phillips head, will be needed to remove and install breakers.
- Wire Strippers: Wire strippers are essential for safely removing the insulation from electrical wires.
- Wire Connectors: Wire connectors, also known as wire nuts, are used to securely connect and protect electrical wires.
- Plastic Wire Clamps: These clamps are used to secure and protect electrical cables within the breaker box.
- Voltage Tester: A voltage tester is crucial for confirming that the power to the breaker box has been properly shut off before beginning any work.
- Electrical Tape: Electrical tape is used to insulate wire connections and provide an added layer of safety.
- Label Maker or Labels: Labels or a label maker can be handy for clearly identifying the new breakers, circuits, and appliances.
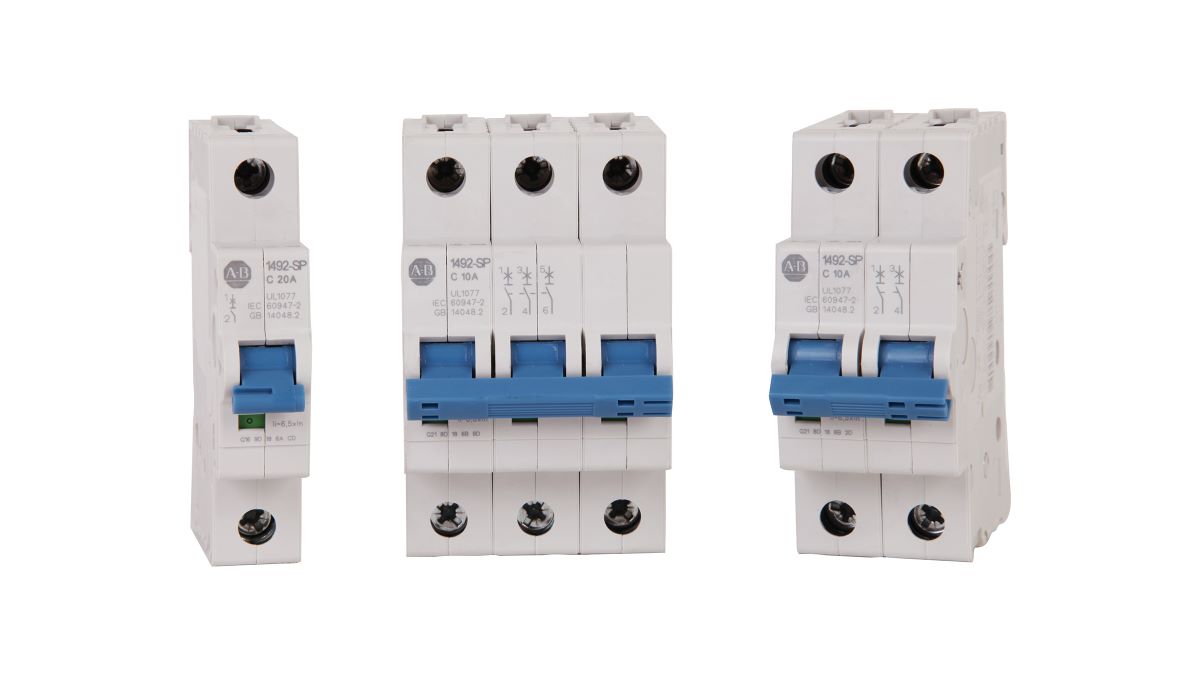
- New Breakers: Depending on the size and type of breaker you need, purchase the appropriate breakers that match the amperage requirements of the circuits.
- Wire and Cables: If you are running new wiring for the additional breakers, ensure you have the necessary electrical wire and cable to connect the circuits.
- Permits and Documentation: Keep all the relevant permits and documentation handy in case they are required during the installation or later inspections.
Before starting the installation process, ensure that all tools and materials are in good working condition and meet the required safety standards. If any tools are damaged or worn out, replace them to avoid any complications during the process.
Gathering the necessary tools and materials is an important step in preparing for the installation of additional breakers in your full breaker box. With everything at your disposal, you can proceed with confidence and efficiency.
Now that you have the tools and materials ready, the next step is to shut off the power to the breaker box, as outlined in the following section of this guide.
Shutting Off the Power
Before you can begin working on the breaker box, it is crucial to shut off the power to ensure your safety. Here are the steps to follow when shutting off the power:
- Locate the Main Breaker: Identify the main breaker in your breaker box. It is usually located at the top or bottom of the panel and is larger than the other breakers.
- Switch the Main Breaker to the “Off” Position: Using a firm grip, switch the main breaker to the “Off” position. This will cut off power to the entire electrical panel, ensuring that no live current is present.
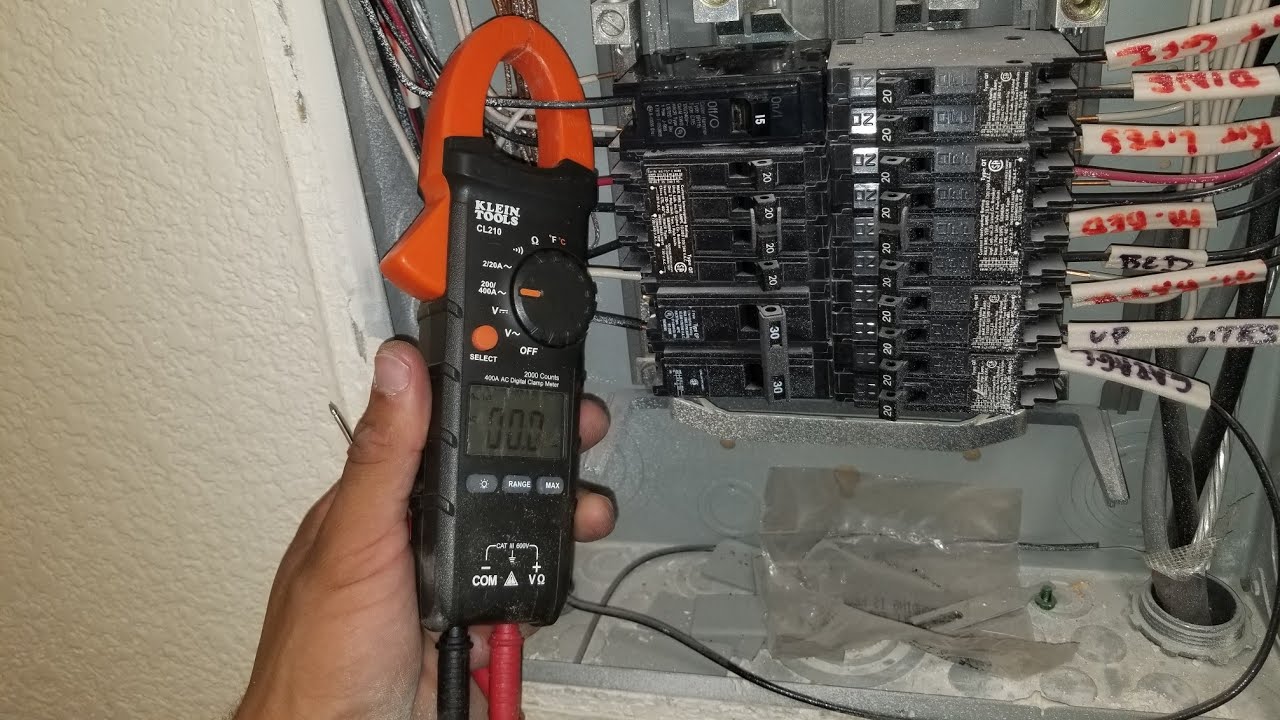
- Test for Power: Even after switching off the main breaker, it is crucial to verify that there is no power flowing to the breaker box. Use a voltage tester or a multimeter to test various electrical outlets or fixtures in your home to confirm that they are not receiving power.
- Label the Breaker Box: Once you have confirmed that the power is off, consider labeling the breaker box to inform others that work is being done and that the power should not be restored without your knowledge.
It is important to note that shutting off the power is a critical step to ensure your safety and the integrity of the electrical system. Failure to do so can lead to serious injuries or damage to the electrical components. If you are unsure about any aspect of shutting off the power or testing for live current, consult a licensed electrician.
With the power safely turned off, you can now proceed to remove the breaker box cover, as outlined in the next section.
Before adding more breakers to a full breaker box, consult a licensed electrician to ensure the box can handle the additional load and to safely install the new breakers.
Removing the Breaker Box Cover
Now that the power has been safely shut off, it is time to remove the breaker box cover to gain access to the interior. Here are the steps to follow when removing the breaker box cover:
- Put on Safety Gear: Before handling the breaker box cover, make sure to put on safety goggles and gloves to protect yourself from any loose debris or sharp edges.
- Inspect the Cover: Take a moment to examine the breaker box cover. Identify any screws, clips, or fasteners that are securing it in place.
- Remove the Screws or Fasteners: Using a screwdriver or the appropriate tool, carefully remove the screws or fasteners that are holding the breaker box cover in place. Set the screws aside in a safe location to avoid misplacing them.
- Gently Lower the Cover: With the screws or fasteners removed, gently lower the breaker box cover, ensuring that it does not get caught on any wires or protruding components inside the panel.
- Set the Cover Aside: Once the breaker box cover is safely removed, set it aside in a secure location. You may want to keep it nearby for reinstallation later in the process.
It is important to handle the breaker box cover with care to prevent any damage or interference with the electrical components. Avoid using excessive force or dropping the cover, as this can lead to accidents or damage to the panel.
With the breaker box cover removed, you now have access to the interior of the panel. In the next section, we will discuss the process of mounting the new breaker.
Read more: How To Add More Stuffing To Couch Cushions
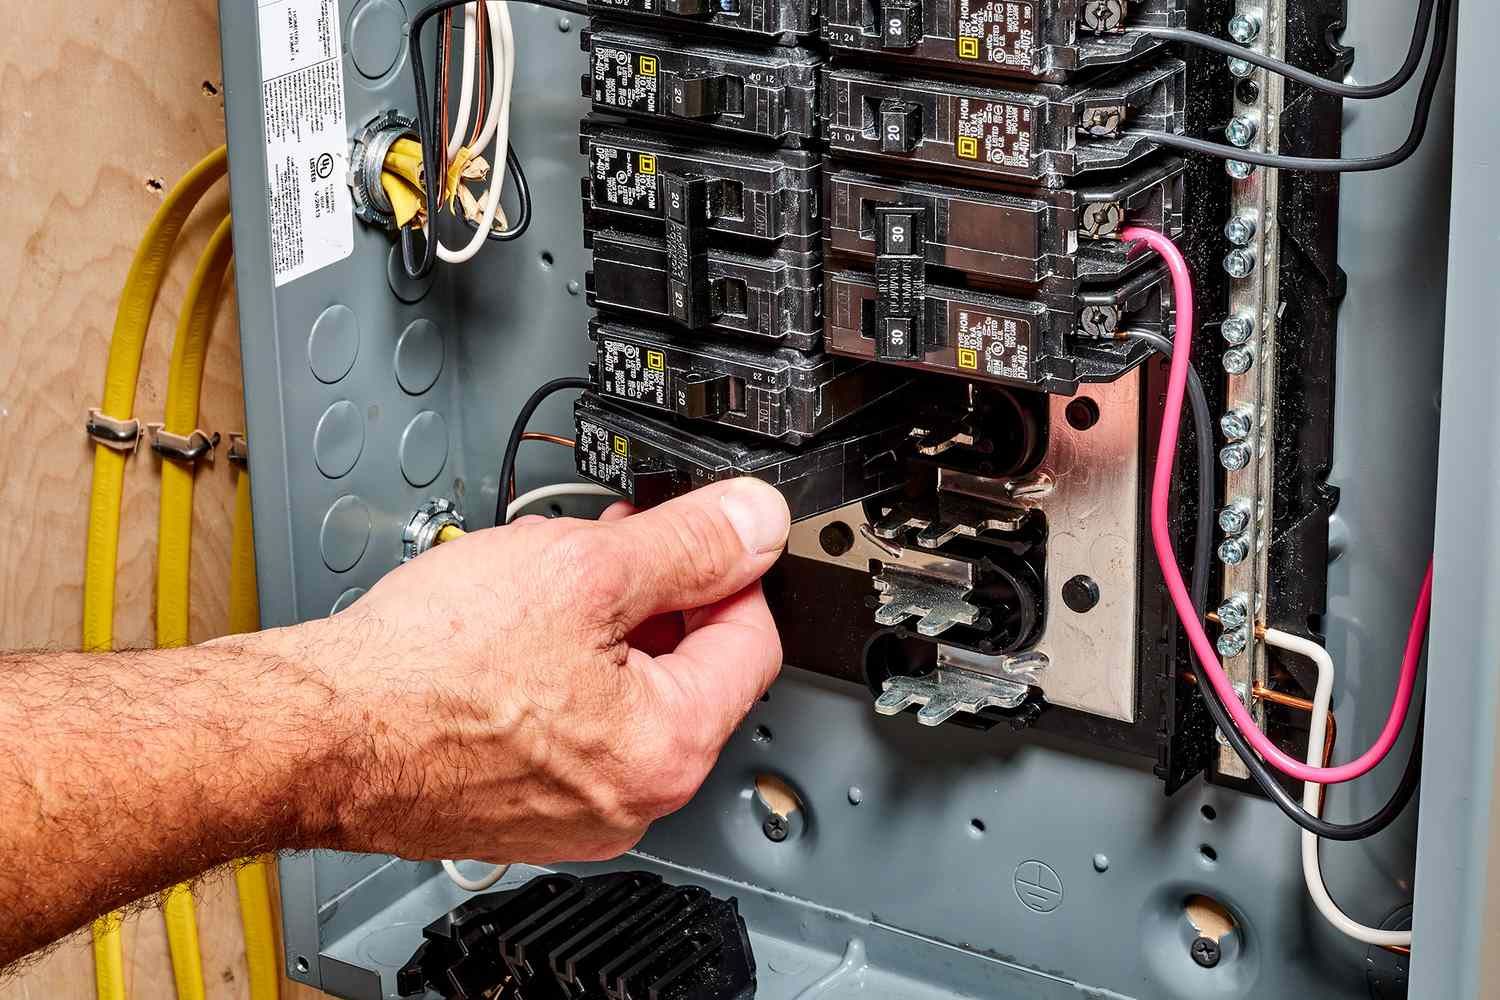
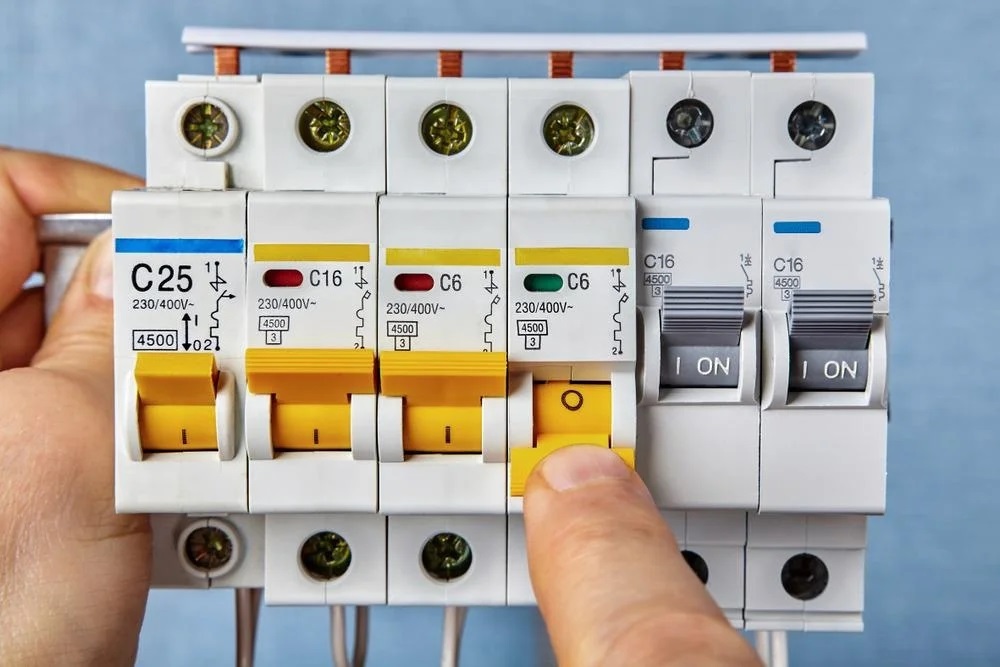
Mounting the New Breaker
With the breaker box cover removed, you can now proceed to mount the new breaker in the desired slot. Here are the steps to follow for mounting the new breaker:
- Select an Open Slot: Identify an open slot in the breaker box where you want to install the new breaker. Ensure that the slot is compatible with the size and type of breaker you have.
- Position the Breaker: Hold the new breaker with the handle facing towards the center of the panel. Align the breaker’s connection tabs with the slots on the panel bus bar.
- Insert the Breaker: Firmly push the breaker into the slot, ensuring that it is securely seated. The connection tabs should make a solid contact with the bus bar.
- Apply Pressure: Using gentle pressure, push down on the breaker until it snaps into place. You may hear a clicking sound, indicating that it is properly installed.
- Confirm Proper Alignment: Double-check that the breaker is aligned straight and parallel with the other breakers in the panel. This will ensure proper functionality and avoid any issues or misalignment in the future.
It is crucial to refer to the manufacturer’s instructions or guidelines for your specific breaker model to ensure proper installation. Different breaker models may have unique installation requirements, so familiarize yourself with the recommended methods before proceeding.
Once the new breaker is securely mounted in the desired slot, the next step is to connect the wires to the breaker, as outlined in the following section.
Connecting the Wires
Now that the new breaker is securely mounted in the breaker box, it is time to connect the wires. Here are the steps to follow for connecting the wires to the new breaker:
- Identify the Circuit: Identify the circuit that corresponds to the new breaker. This circuit may be a new branch circuit or an extension of an existing circuit, depending on your specific installation requirements.
- Turn off the Power: Double-check that the power to the breaker box is turned off before proceeding. It is essential to ensure your safety during the wire connection process.
- Strip the Wire Insulation: Use wire strippers to remove approximately 1/2 inch of insulation from the end of each wire that will be connected to the breaker. Ensure that the exposed wire is clean and free from any frayed or damaged strands.
- Loosen the Terminal Screw: Locate the terminal screw on the new breaker and loosen it using a screwdriver. Some breakers may have a clamp-style terminal, in which case you will need to open the clamp.
- Insert the Wires: Insert the stripped end of each wire into the appropriate terminal or clamp on the breaker. Ensure that the wires are inserted fully and make a secure connection with the terminal.
- Tighten the Terminal Screw: Tighten the terminal screw on the breaker to secure the wires in place. If you are using a clamp-style terminal, close the clamp to secure the wires tightly.
- Inspect the Connections: After making the wire connections, visually inspect each connection to ensure that the wires are securely fastened and there are no loose strands or exposed wires.
- Label the Breaker: Use a label maker or write directly on the breaker to identify the circuit or appliance it is connected to. This will make it easier for future reference and troubleshooting.
It is important to follow proper wiring techniques and ensure that the wire connections are secure and properly tightened. Loose or improper connections can result in electrical issues or hazards.
Once you have successfully connected the wires to the new breaker, the next step is to test the connections, as outlined in the following section.
Testing the Connections
After connecting the wires to the new breaker, it is important to test the connections to ensure they are functioning properly. Taking the time to test the connections will help identify any potential issues or errors before restoring power. Follow these steps to test the connections:
- Turn on a Test Device: Plug in a test device or appliance, such as a lamp or small electrical device, into an outlet on the circuit connected to the new breaker.
- Switch on the Breaker: Return to the breaker box and switch on the new breaker for the connected circuit. Take note of any changes or responses from the test device or appliance.
- Verify Power: Ensure that the test device or appliance is receiving power. If it operates as expected, it confirms that the wire connections to the new breaker are successful.
- Check for Any Issues: Observe the functioning of the test device or appliance connected to the new breaker. Watch for any signs of flickering lights, unusual sounds, or other electrical abnormalities. If you notice any issues, immediately switch off the breaker and reassess the connections for any loose or faulty wiring.
Performing a thorough test helps validate the integrity of the wire connections and ensures that the circuit is properly powered. It is important to rectify any issues or abnormalities before proceeding to the next steps.
If the test is successful and the connected circuit is functioning correctly, you can proceed to reinstall the breaker box cover, as outlined in the following section.
Reinstalling the Breaker Box Cover
Now that the new breaker is properly installed and the wire connections have been tested, it is time to reinstall the breaker box cover. Here are the steps to follow for reinstalling the cover:
- Inspect the Interior: Before reinstalling the cover, take a moment to inspect the interior of the breaker box. Ensure that all wires are neatly organized and that there are no loose or exposed connections.
- Align the Cover: Hold the breaker box cover in the correct orientation, aligning it with the main panel. Make sure the cover is level and matches the position of the breaker slots.
- Secure the Cover: Using the previously removed screws or fasteners, secure the breaker box cover to the panel. Insert the screws into the corresponding holes and tighten them using a screwdriver or the appropriate tool.
- Ensure a Snug Fit: Check that the breaker box cover is securely fastened and does not have any loose or wobbly areas. It should fit snugly against the panel, providing full coverage and protection.
By taking the time to properly reinstall the breaker box cover, you ensure that the electrical panel is protected from dust, debris, and accidental contact. A securely fitted cover also helps maintain the overall safety and functionality of the breaker box.
Now that the breaker box cover is back in place, the final step is to restore power to the breaker box, as explained in the next section.
Read more: How To Open An Outdoor Breaker Box
Restoring Power
With the breaker box cover securely reinstalled, you can now proceed to restore power to the breaker box. Follow these steps to safely restore the power:
- Double-Check Connections: Before restoring power, double-check that all wire connections are secure, without any exposed or loose wires. Inspect the breaker box and ensure that everything is in order.
- Ensure Breakers Are in the Off Position: Check that all the breakers in the panel are turned off. This prevents any sudden power surges or electrical issues when restoring the power.
- Turn On the Main Breaker: Locate the main breaker and switch it to the “On” position. This will restore power to the entire electrical panel.
- Verify Power Restoration: Confirm that power has been successfully restored by testing various outlets, light switches, and appliances throughout your home or building. Ensure that all electrical fixtures and devices are functioning as expected.
- Monitor for Any Issues: Keep an eye out for any signs of electrical problems, such as flickering lights, tripped breakers, or unusual sounds. If you encounter any issues or abnormalities, immediately switch off the main breaker and consult a licensed electrician.
After restoring power, it is important to periodically check the breaker box and connected circuits for any signs of overheating, loose connections, or other issues. Regular maintenance and inspections will help ensure the ongoing safety and efficiency of your electrical system.
By following these steps, you have successfully added more breakers to a full breaker box and restored power safely. It is important to always prioritize safety and consult a licensed electrician if you have any doubts or concerns throughout the process.
Congratulations on expanding the capacity of your breaker box to accommodate your electrical needs!
Conclusion
Congratulations on completing the process of adding more breakers to a full breaker box! By following the steps outlined in this comprehensive guide, you have expanded the capacity of your electrical system to accommodate your growing needs safely and efficiently.
Throughout this guide, we emphasized the importance of safety precautions, understanding breaker boxes, assessing load calculations, obtaining necessary permits, planning the installation, gathering the required tools and materials, shutting off the power, removing the breaker box cover, mounting the new breaker, connecting the wires, testing the connections, reinstalling the breaker box cover, and finally, restoring power.
It is crucial to always prioritize safety when working with electricity. If you have any doubts or concerns during the process, consult a licensed electrician who can provide professional guidance and assistance.
Remember to adhere to local building codes and regulations, obtain the necessary permits, and conduct thorough testing before restoring power. This ensures the integrity and safety of your electrical system.
Adding more breakers to a full breaker box is a significant electrical task that requires proper planning, knowledge, and skill. If you are uncertain or uncomfortable with this process, it is always best to seek professional help from a licensed electrician.
We hope this guide has been informative and helpful in guiding you through the process of adding more breakers to a full breaker box. By following these steps, you have taken a crucial step towards meeting your electrical needs and ensuring the safety and functionality of your electrical system.
Thank you for taking the time to read this guide, and we wish you success in all your electrical endeavors!
Frequently Asked Questions about How To Add More Breakers To A Full Breaker Box
Was this page helpful?
At Storables.com, we guarantee accurate and reliable information. Our content, validated by Expert Board Contributors, is crafted following stringent Editorial Policies. We're committed to providing you with well-researched, expert-backed insights for all your informational needs.


0 thoughts on “How To Add More Breakers To A Full Breaker Box”