Articles
How Do I Clean My Air Fryer
Modified: January 18, 2024
Looking for articles on how to clean your air fryer? Discover expert tips and tricks to keep your air fryer in top condition for delicious, guilt-free cooking.
(Many of the links in this article redirect to a specific reviewed product. Your purchase of these products through affiliate links helps to generate commission for Storables.com, at no extra cost. Learn more)
Introduction
Air fryers have become increasingly popular in recent years as a healthier alternative to deep frying. They use hot air to cook food, resulting in crispy and delicious dishes with significantly less oil. However, just like any kitchen appliance, air fryers require regular cleaning to maintain their performance and ensure food safety.
In this article, we will guide you through the process of cleaning your air fryer, step by step. We will share safety precautions to keep in mind, as well as tips and tricks to effectively clean both the interior and exterior of your appliance. By following these guidelines, you can enjoy continued use of your air fryer and prolong its lifespan.
So, let’s jump right in and learn how to give your air fryer a thorough cleaning!
Key Takeaways:
- Regularly cleaning your air fryer with mild dish soap and non-abrasive materials ensures optimal performance and extends its lifespan, allowing you to enjoy delicious, healthy meals for years to come.
- Safety precautions, such as unplugging the air fryer and using natural cleaning solutions like vinegar and baking soda, are essential for maintaining a clean and hygienic appliance while ensuring your safety.
Read more: How Do I Cook Bacon In An Air Fryer
Safety Precautions
Before you start cleaning your air fryer, it’s important to ensure your safety by following these precautions:
- Unplug the air fryer: Always make sure that the appliance is unplugged from the power source before attempting to clean it. This will reduce the risk of electric shock.
- Allow the air fryer to cool down: Give your air fryer sufficient time to cool down after use. Cleaning a hot appliance can be dangerous and may cause burns.
- Read the manufacturer’s instructions: Familiarize yourself with the specific cleaning instructions provided by the manufacturer. Different air fryers may have slightly different cleaning requirements.
- Use non-abrasive materials: When cleaning the exterior and interior parts of your air fryer, avoid using abrasive materials that may scratch or damage the surfaces. Opt for soft cloths or non-abrasive sponges instead.
- Avoid harsh chemicals: Stay away from harsh cleaning agents, such as bleach or abrasive chemicals, as they may damage the coating or finish of your air fryer. Stick to mild dish soap or vinegar solutions for cleaning.
- Handle with care: When cleaning the removable parts, be gentle to avoid any accidental breakage. Follow the proper assembly and disassembly procedures outlined in the user manual.
By keeping these safety precautions in mind, you can ensure a safe and effective cleaning experience for your air fryer.
Preparing the Air Fryer for Cleaning
Before diving into the cleaning process, there are a few steps you need to take to properly prepare your air fryer:
- Unplug the air fryer: Ensure that the appliance is completely unplugged from the power source. This is essential for your safety during the cleaning process.
- Allow it to cool down: Give the air fryer sufficient time to cool down after use. This will not only prevent burns but also make it easier to handle and clean.
- Remove the detachable components: Most air fryers come with removable parts such as the basket, tray, and any accessories. Take them out carefully and set them aside for cleaning separately.
- Empty excess oil and debris: If there is any leftover oil or food debris in the air fryer, empty it out. Dispose of the oil properly and remove any food remnants with a soft cloth or paper towel.
Now that your air fryer is ready for cleaning, you can proceed to the next steps. Remember to refer to the manufacturer’s instructions for any specific guidance on cleaning the removable parts.
By preparing your air fryer beforehand, you can ensure a smoother and more efficient cleaning process.
Cleaning the Exterior of the Air Fryer
Keeping the exterior of your air fryer clean not only improves its aesthetic appeal but also prevents the buildup of dirt and grime. Here’s how you can effectively clean the exterior:
- Wipe with a damp cloth: Start by wiping the exterior surfaces of the air fryer with a damp cloth. Make sure the cloth is only slightly damp, as excessive moisture can damage the appliance. Use gentle, circular motions to remove any dirt or stains.
- Use mild dish soap: For more stubborn stains or grease, you can mix a small amount of mild dish soap with warm water. Dip the cloth in the soapy solution and gently scrub the affected areas. Avoid using harsh chemicals or abrasive cleaners, as they may damage the finish of your air fryer.
- Dry thoroughly: After cleaning, make sure to dry the exterior of the air fryer thoroughly with a clean towel. This helps prevent water spots and ensures that the appliance is ready for use.
- Pay attention to buttons and controls: If your air fryer has buttons or control panels, be cautious when cleaning around them to avoid damaging the electronic components. Use a damp cloth or a soft-bristle toothbrush to gently clean these areas.
- Remove stubborn stains: If there are any stubborn stains that are difficult to remove with soap and water, you can try using a vinegar solution. Mix equal parts of vinegar and water, apply it to the stained areas, and let it sit for a few minutes before wiping it off. Rinse thoroughly afterward.
Remember to avoid submerging the entire air fryer in water or using abrasive materials that can scratch the surface. By following these steps, you can effectively clean the exterior of your air fryer and keep it looking as good as new!
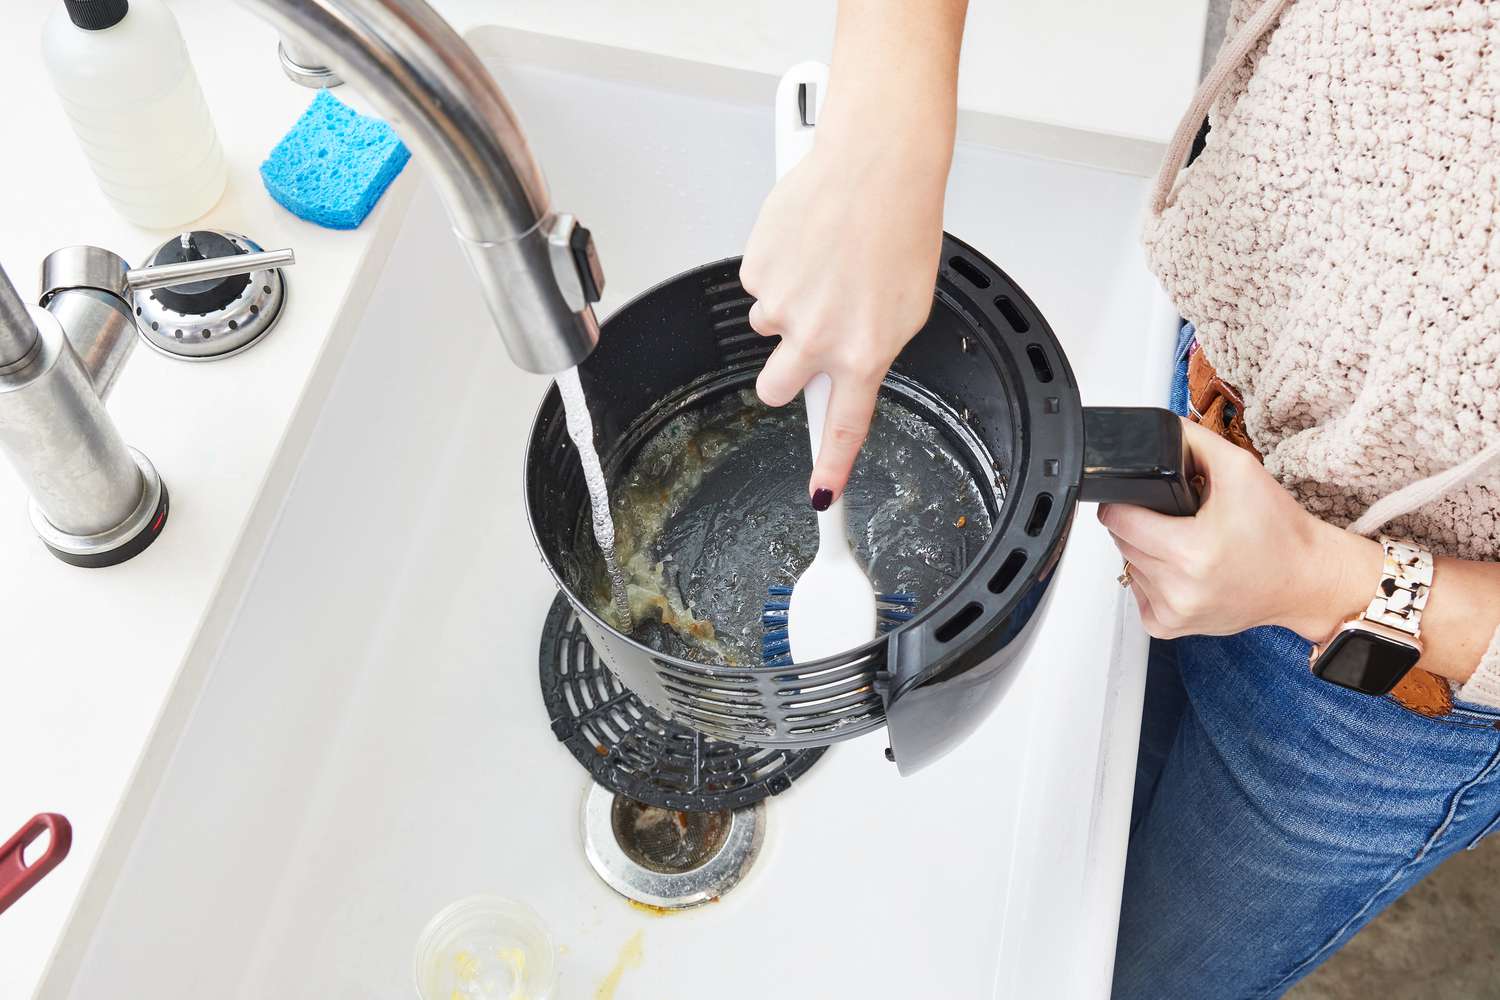
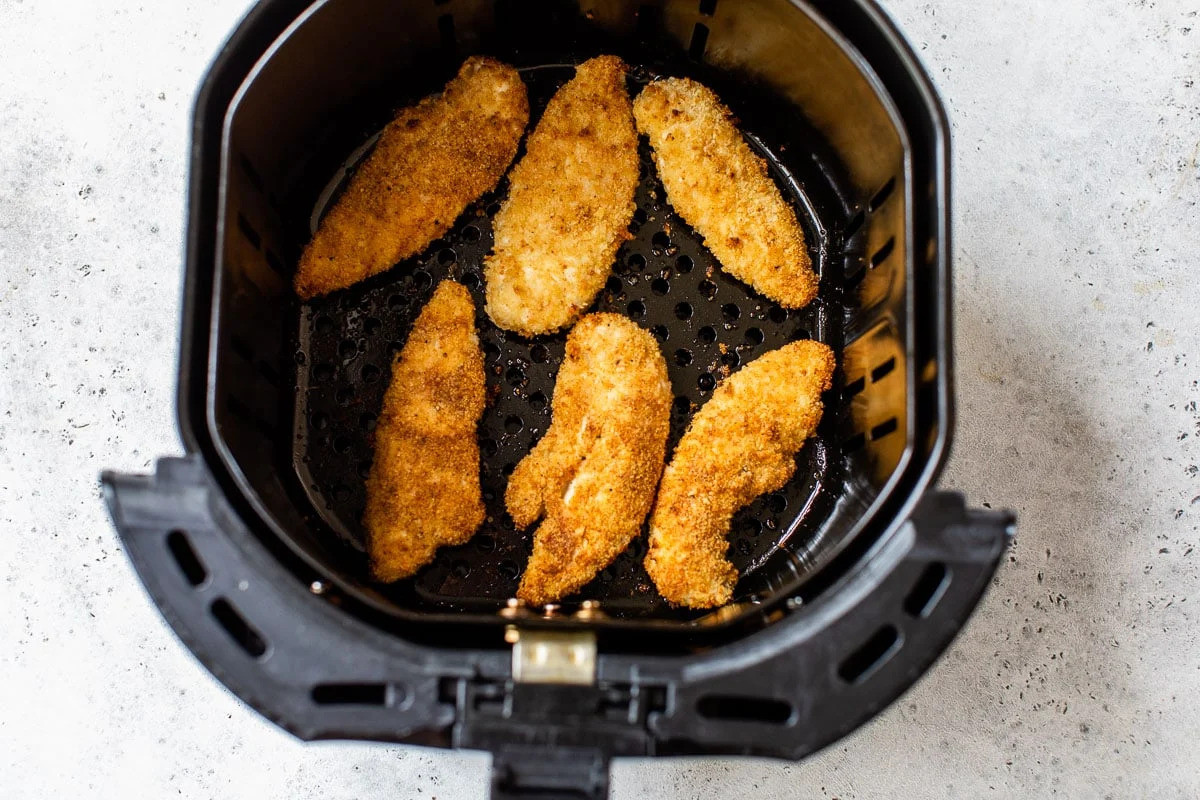
Cleaning the Interior Basket and Tray
The interior basket and tray of your air fryer are where the cooking magic happens. To ensure the best cooking performance and prevent any unwanted flavors, it’s important to clean these components regularly. Here’s how you can do it:
- Remove the basket and tray: Take out the interior basket and tray from the air fryer. These components are usually dishwasher-safe, but double-check the manufacturer’s instructions to confirm.
- Soak in warm, soapy water: Fill your sink or a basin with warm water and add a few drops of mild dish soap. Place the basket and tray in the soapy water and let them soak for about 15-30 minutes. This will help loosen any stuck-on food particles and make them easier to clean.
- Scrub gently: After soaking, use a soft sponge or brush to gently scrub the basket and tray. Pay special attention to any areas with stubborn residue. Avoid using abrasive materials that could damage the non-stick coating.
- Rinse thoroughly: Once you’re done scrubbing, rinse the basket and tray under running water to remove any soap residue. Ensure that all soap is thoroughly rinsed off to avoid any soapy aftertaste in your food.
- Dry completely: Use a clean towel or air dry the basket and tray before reassembling them into the air fryer. This will prevent any moisture from causing unpleasant odors or affecting the cooking process.
If there are any stubborn stains or burnt particles that are difficult to remove, you can sprinkle baking soda on the affected areas and scrub gently. Baking soda helps to loosen up tough stains and eliminate odors.
Remember to check the manufacturer’s instructions for any specific cleaning recommendations for your air fryer’s basket and tray. By properly cleaning and maintaining these components, you can ensure optimal cooking performance and healthier meals.
To clean your air fryer, start by unplugging it and letting it cool. Then, remove the basket and pan and wash them with hot water and dish soap. Use a non-abrasive sponge to avoid damaging the non-stick coating. Wipe down the inside and outside of the air fryer with a damp cloth.
Read more: How Long Do I Cook Bacon In An Air Fryer
Removing Stubborn Stains and Residue
Over time, your air fryer may develop stubborn stains or residue that can be challenging to remove with regular cleaning methods. Here are some techniques you can try to tackle those tough spots:
- Vinegar and water solution: Mix equal parts of white vinegar and water in a spray bottle. Spray the solution onto the stubborn stains or residue in the air fryer’s interior and let it sit for a few minutes. The acidity of the vinegar helps break down the stains, making them easier to wipe away.
- Baking soda paste: Create a paste by mixing baking soda with a small amount of water. Apply the paste to the stained areas and let it sit for about 15-30 minutes. Then, scrub gently with a sponge or soft brush. Baking soda’s abrasive nature helps to lift off tough stains and residue.
- Citrus solution: Cut a lemon or lime in half and squeeze the juice onto the stubborn stains. The citric acid in the fruit acts as a natural cleaner and can help dissolve the residue. Allow the juice to sit for a few minutes before wiping it clean with a damp cloth.
- Non-abrasive cleaner: If the above methods don’t work, you can try using a non-abrasive cleaner specifically designed for kitchen appliances. Follow the instructions on the cleaner and ensure that it is safe for use on the surfaces of your air fryer.
After using any cleaning solution, make sure to rinse the interior thoroughly with water to remove any residue. Once the stubborn stains and residue are gone, proceed to clean the rest of the air fryer per the regular cleaning instructions.
Remember to always handle cleaning solutions with caution and follow safety guidelines provided by the manufacturer. By being persistent and using these techniques, you can remove stubborn stains and restore the pristine condition of your air fryer.
Cleaning the Heating Element
The heating element is a crucial component of your air fryer that requires regular cleaning to maintain its efficiency and performance. Although it is not directly exposed to food, it can still accumulate grease and debris over time. Here’s how you can clean the heating element:
- Ensure the air fryer is unplugged and completely cooled down before cleaning the heating element. Safety should always be your top priority.
- Use a soft, dry brush or a clean, dry cloth to gently brush or wipe away any loose debris or crumbs from the heating element. Be careful not to apply excessive pressure to avoid damaging the element.
- If there are any stubborn stains or residue, you can create a paste using baking soda and water. Apply the paste to the stained areas and let it sit for a few minutes to loosen the debris.
- Gently scrub the baking soda paste with a soft brush, being careful not to damage the heating element. The mild abrasive properties of baking soda can help remove grime and grease.
- After scrubbing, use a damp cloth to wipe away the baking soda residue from the heating element.
- Allow the heating element to air dry completely before reassembling it back into the air fryer.
It’s important to note that the heating element should never be submerged in water or exposed to liquid cleaning agents. Doing so can cause damage to the element and compromise its functionality.
Regular maintenance and cleaning of the heating element will help prolong its lifespan and ensure that your air fryer continues to cook your food evenly and efficiently.
Drying and Reassembling the Air Fryer
After cleaning the various components of your air fryer, it is important to ensure that everything is thoroughly dried before reassembling the appliance. Here’s what you need to do:
- Use a clean, dry cloth or paper towel to wipe down all the cleaned parts of the air fryer. Make sure to remove any residual moisture to prevent it from accumulating and causing unpleasant odors or affecting the performance of the appliance.
- Allow the components to air dry completely. This may take some time, so be patient. Placing them in a well-ventilated area can help speed up the drying process.
- Once all the parts are completely dry, carefully reassemble the air fryer according to the manufacturer’s instructions. Pay attention to the proper alignment of the components to ensure they fit securely.
- Ensure that the interior basket and tray are properly inserted into the air fryer. This allows for correct airflow during cooking and ensures even cooking results.
- Plug the air fryer back into the power source only after you have reassembled it completely.
Remember to always refer to the specific instructions provided by the manufacturer for your particular air fryer model. This will ensure that you correctly assemble the appliance and avoid any potential damage or safety hazards.
By taking the time to properly dry and reassemble your air fryer, you can enjoy its optimal performance and continue to prepare delicious and healthy meals with ease.
Conclusion
Cleaning your air fryer is an essential task that not only maintains its performance but also ensures the safety and quality of your meals. By following the proper cleaning steps and precautions, you can keep your air fryer in excellent condition and enjoy delicious, healthy food for years to come.
Remember to always unplug the air fryer and let it cool down before cleaning. Take care to clean both the interior and exterior of the appliance, using non-abrasive materials and mild cleaning agents. Pay special attention to the removable components, such as the basket and tray, which may require more attention due to direct contact with food during cooking.
If you encounter stubborn stains or residue, there are various methods you can try, such as vinegar and water solutions or baking soda paste. These natural methods can effectively break down tough stains and make them easier to remove.
Don’t forget to give the heating element some attention as well. Keep it free from debris and gently clean it to ensure optimal performance.
Once you have completed the cleaning process, make sure to dry all the components thoroughly before reassembling them. Take your time to properly align and fit the parts according to the manufacturer’s instructions.
By following these steps, you can maintain a clean and hygienic air fryer, prolonging its lifespan and ensuring that it continues to cook your food to perfection. So, embrace this cleaning routine and enjoy many more delicious and healthy meals from your air fryer!
Frequently Asked Questions about How Do I Clean My Air Fryer
Was this page helpful?
At Storables.com, we guarantee accurate and reliable information. Our content, validated by Expert Board Contributors, is crafted following stringent Editorial Policies. We're committed to providing you with well-researched, expert-backed insights for all your informational needs.


0 thoughts on “How Do I Clean My Air Fryer”