Articles
How Do I Make My Own Electrical Cord
Modified: October 31, 2024
Learn how to make your own electrical cord with our step-by-step articles, providing you with all the information and techniques you need.
(Many of the links in this article redirect to a specific reviewed product. Your purchase of these products through affiliate links helps to generate commission for Storables.com, at no extra cost. Learn more)
Introduction
Electrical cords are an essential component of our everyday lives. We rely on them to power our electronic devices, lamps, and appliances. However, there may be situations where you need a customized electrical cord that matches your specific needs. Whether you’re working on a DIY project or need to replace a faulty cord, making your own electrical cord can be a convenient and cost-effective solution.
In this article, we will guide you through the process of making your own electrical cord. From choosing the right wire gauge to attaching the plug and socket, we’ll provide you with step-by-step instructions to ensure you can create a safe and functional cord.
Before we delve into the details, it’s important to note that working with electricity can be dangerous if proper precautions are not taken. Always prioritize safety and, if you are unsure or uncomfortable about any part of the process, consult a professional electrician.
Key Takeaways:
- Create a safe and customized electrical cord by choosing the right wire gauge, measuring and cutting the wire, and securely attaching the plug and socket. Prioritize safety and testing for a reliable end product.
- Making your own electrical cord empowers you to meet specific needs while ensuring safe and reliable connections. Follow the step-by-step guide, prioritize safety, and enjoy the flexibility of a custom cord.
Read more: What Electrical Cord Do I Need For My RV
Safety Precautions
Before you start making your electrical cord, it’s crucial to follow these safety precautions:
- Always work in a well-ventilated area and away from flammable materials.
- Ensure that you have the appropriate tools, such as wire strippers, pliers, and a voltage tester.
- Make sure your workspace is dry and free from any potential water sources.
- Disconnect the power source before starting any work on the cord.
- Double-check the voltage requirements of the device you are powering to ensure you select the correct wire gauge.
- Inspect the cord periodically for any signs of wear or damage and replace it if necessary.
Materials Required
Before you can begin making your electrical cord, gather the following materials:
- Wire – Choose a wire with the appropriate gauge for your device. Refer to the manufacturer’s specifications or consult an electrician if you are unsure.
- Plug – Select a plug that matches the electrical socket you plan to use.
- Socket – Choose a socket that is compatible with the plug and meets the voltage requirements of your device.
- Wire cutters – Use wire cutters to cut the wire to the desired length.
- Wire strippers – These will help you remove the insulation from the wire ends.
- Pliers – Pliers are handy for attaching the plug and socket securely.
- Voltage tester – Use a voltage tester to verify that the cord is correctly wired and functioning.
Key Takeaways:
- Create a safe and customized electrical cord by choosing the right wire gauge, measuring and cutting the wire, and securely attaching the plug and socket. Prioritize safety and testing for a reliable end product.
- Making your own electrical cord empowers you to meet specific needs while ensuring safe and reliable connections. Follow the step-by-step guide, prioritize safety, and enjoy the flexibility of a custom cord.
Read more: What Electrical Cord Do I Need For My RV
Safety Precautions
Working with electricity can be hazardous, so it’s important to prioritize safety when making your own electrical cord. Follow these precautions to ensure a safe working environment:
- Work in a well-ventilated area: Adequate ventilation helps dissipate any potential heat build-up and reduces the risk of electrical components overheating.
- Use insulated tools: Insulated tools provide an extra layer of protection against electrical shock. Make sure your wire cutters, pliers, and other tools have insulated handles.
- Turn off the power: Before you start working on your electrical cord, always disconnect the power source. This prevents any accidental shocks or short circuits.
- Wear protective gear: It’s important to wear protective gear such as safety glasses and gloves to protect yourself from any potential hazards, such as flying debris or contact with energized parts.
- Check for damaged wires: Before using the wire for your cord, inspect it thoroughly for any damage or exposed wires. If you notice any signs of wear or fraying, do not use it and replace it with new wire.
- Choose the right wire gauge: Selecting the appropriate wire gauge is crucial to ensure the cord can handle the electrical load. Check the device’s specifications or consult an electrician to determine the correct gauge.
- Secure connections: When attaching the plug and socket, ensure that the connections are tight and secure. Loose connections can lead to overheating and pose a fire hazard.
- Perform a voltage test: Once you have assembled your electrical cord, use a voltage tester to confirm that it is properly wired and functioning. This will help identify any potential issues before plugging it in.
- Keep cords away from water: Water and electricity don’t mix well. Ensure that your electrical cord is kept away from water sources to avoid the risk of electric shock or short circuits.
- Regularly inspect the cord: After making your own electrical cord, periodically inspect it for signs of wear, fraying or damage. If you notice any issues, replace the cord to avoid any potential hazards.
By following these safety precautions, you can minimize the risks associated with working on electrical cords and ensure a safe and functional end product.
Materials Required
Before you start making your own electrical cord, gather the following materials:
- Wire – Choose a wire with the appropriate gauge for your specific electrical needs. The wire gauge determines the amount of electrical current that can safely pass through the cord. Refer to the manufacturer’s specifications or consult an electrician to determine the correct gauge for your project.
- Plug – Select a plug that matches the type of electrical socket you plan to use. There are various types of plugs, including two-pronged and three-pronged plugs, with different configurations for different regions.
- Socket – Choose a socket that is compatible with the plug and meets the voltage requirements of your device. Make sure the socket has proper insulation and a solid connection to ensure safe operation.
- Wire cutters – Use wire cutters to cut the wire to the desired length. Make sure your wire cutters are sharp and in good condition for clean cuts.
- Wire strippers – These tools are essential for removing the insulation from the wire ends, allowing for proper connection to the plug and socket. Select wire strippers that match the gauge of your wire for precise stripping.
- Pliers – Pliers will come in handy for attaching the plug and socket securely. Choose a pair of pliers with a comfortable grip and a size appropriate for the task.
- Voltage tester – A voltage tester is crucial for ensuring that your electrical cord is wired correctly and functioning properly. This tool allows you to test for the presence of electrical current and identify any potential issues before plugging in your cord.
- Heat shrink tubing (optional) – Heat shrink tubing can provide additional insulation and protection to the wire connections. It is especially useful for strengthening the joint between the wire and the plug or socket.
- Electrical tape – Electrical tape can be used to secure and insulate wire connections. Choose high-quality electrical tape that is durable and provides excellent electrical insulation.
- Marker or label maker – Having a marker or label maker on hand will help you label your cord for easy identification and organization.
By gathering these materials, you’ll be well-prepared to embark on your journey of making your own electrical cord. With the right tools and equipment, you can create a customized cord that suits your specific needs and ensures safe and reliable electrical connections.
Step 1: Choosing the Right Wire Gauge
Choosing the correct wire gauge is crucial when making your own electrical cord. The wire gauge determines the amount of electrical current that can safely flow through the wire without overheating it. Using an incorrect gauge can result in poor performance, potential damage to your devices, or even fire hazards.
To determine the appropriate wire gauge, consider the following factors:
- Amperage of the device: Consult the manufacturer’s specifications to find the amperage rating of the device you will be using with the electrical cord. This information is essential in determining the wire gauge. Higher amperage devices require thicker wire gauges to handle the electrical load.
- Length of the cord: The length of the cord also plays a role in selecting the wire gauge. Longer cords experience more resistance, which can lead to voltage drops. To compensate for this, you may need to use a thicker wire gauge to maintain a stable voltage supply.
- Voltage requirements: Ensure that the wire gauge you choose meets the voltage requirements of your device. The voltage rating should be clearly stated in the device’s specifications. Using a wire with an insufficient voltage rating can result in electrical malfunctions or faults.
- National or local electrical codes: Depending on your location, there may be specific electrical codes or regulations that dictate the wire gauge requirements for specific applications. Familiarize yourself with these codes to ensure compliance and safe operation of your electrical cord.
Once you have gathered these details, consult a wire gauge chart or an electrician to determine the appropriate wire gauge for your specific requirements. It’s important to select a wire with a gauge that can handle the maximum amperage of your device, considering both the length of the cord and the voltage requirements.
Remember, it’s always better to err on the side of caution and choose a slightly thicker wire gauge if you are unsure. A thicker wire will have less resistance, resulting in more efficient electrical flow and less chance of overheating.
By carefully selecting the right wire gauge, you can ensure that your electrical cord is capable of safely delivering the required power to your device without compromising its performance or safety.
When making your own electrical cord, be sure to use the appropriate wire gauge for the intended use, and always follow safety guidelines for handling and connecting wires.
Step 2: Measuring and Cutting the Wire
After determining the appropriate wire gauge for your electrical cord, the next step is to measure and cut the wire to the desired length. It is important to have an accurately measured wire to ensure a proper fit and efficient use of materials. Follow these steps to measure and cut the wire:
- Gather your tools: Before you begin, make sure you have wire cutters, a tape measure or ruler, and any other necessary tools at hand.
- Decide on the length: Determine the length of the electrical cord you need. Consider the distance from the power source to the device you will be connecting. It is better to have a slightly longer cord than necessary to allow for flexibility and ease of use.
- Measure the wire: Use a tape measure or ruler to measure the desired length of the wire. Stretch it out along a flat surface to ensure accurate measurements. Take into account any bends or turns the wire will need to make.
- Mark the cutting point: Once you have measured the wire, mark the cutting point with a marker or tape. This will serve as a guide when you cut the wire.
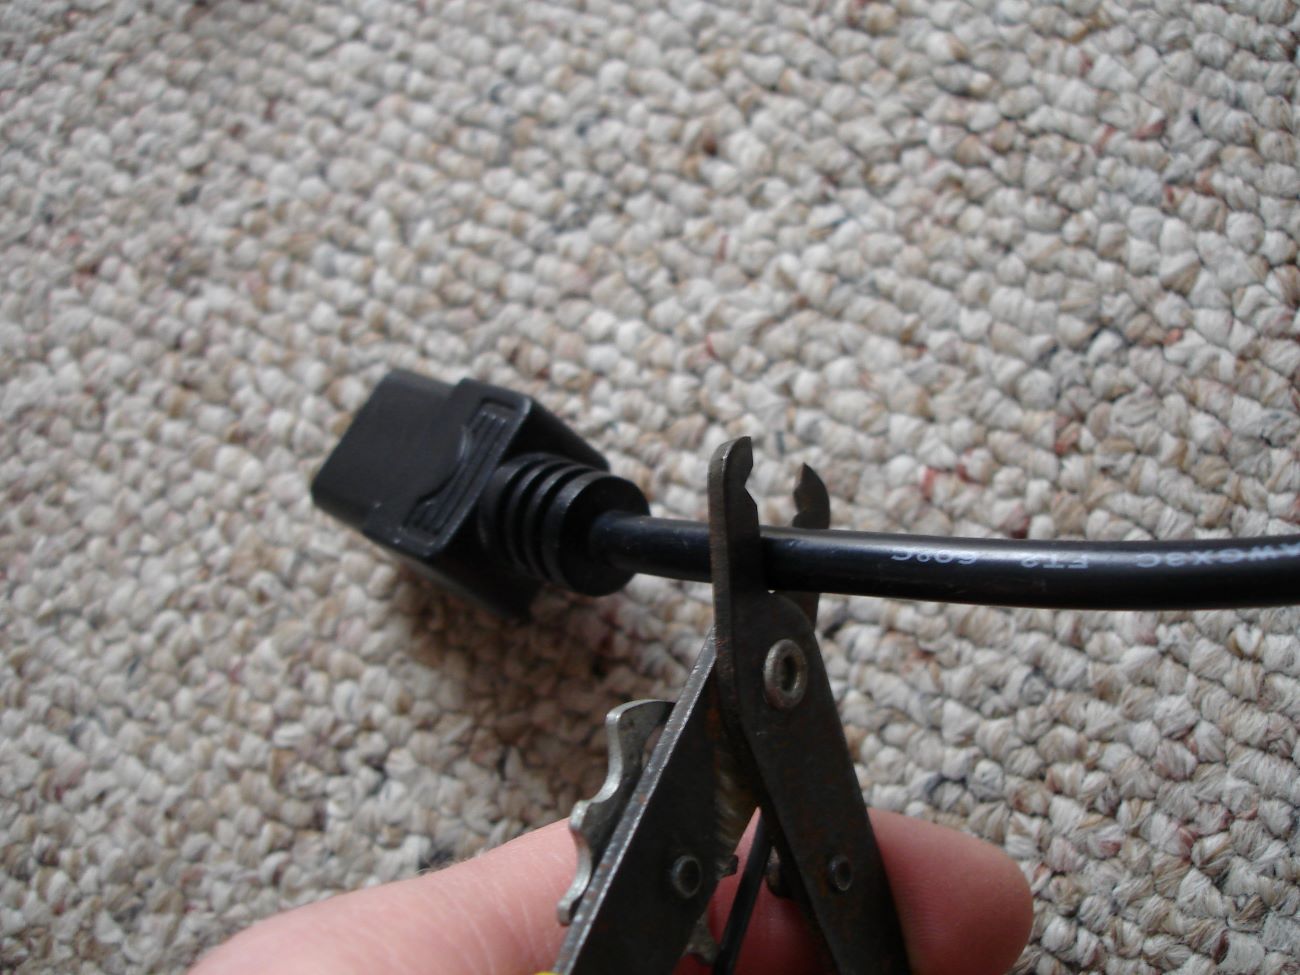
- Cut the wire: Use wire cutters to cut the wire at the marked cutting point. Ensure that the cut is clean and straight to avoid any fraying or uneven ends. Double-check the length to make sure it matches your desired measurement.
It is essential to be precise when measuring and cutting the wire to ensure a proper fit and effective use of the electrical cord. Taking the time to accurately measure and cut the wire will result in a more professional-looking final product.
Remember to exercise caution when using wire cutters, and always wear safety gloves to protect your hands from sharp edges. Additionally, it is wise to keep spare wire on hand, in case you encounter any errors or need to make adjustments during the assembly process.
By following these steps, you will have successfully measured and cut the wire to the desired length for your electrical cord. Now, you can proceed to the next step of stripping the wire ends to prepare them for connection.
Step 3: Stripping the Wire Ends
Once you have measured and cut the wire to the desired length for your electrical cord, the next step is to strip the wire ends. Stripping the wire ends involves removing the insulation from the tips of the wire to expose the conductive metal strands. This step is crucial for ensuring proper electrical connections. Follow these steps to strip the wire ends:
- Gather your tools: Before you begin, make sure you have a pair of wire strippers that match the gauge of your wire. Wire strippers are specifically designed to strip insulation from wires cleanly and efficiently.
- Determine the stripping length: Check the instructions or specifications for the plug and socket you will be using to determine the recommended stripping length. This length will typically be marked on the wire strippers for quick reference.
- Locate the stripping notches: Find the appropriate stripping notches on the wire strippers that match the gauge of your wire. These notches are usually labeled with the corresponding wire gauge size.
- Position the wire: Hold the wire firmly in one hand, ensuring that the end you are stripping is free and accessible.
- Align the wire with the stripping notches: Place the wire within the jaws of the wire strippers, aligning the area you wish to strip with the recommended stripping notch.
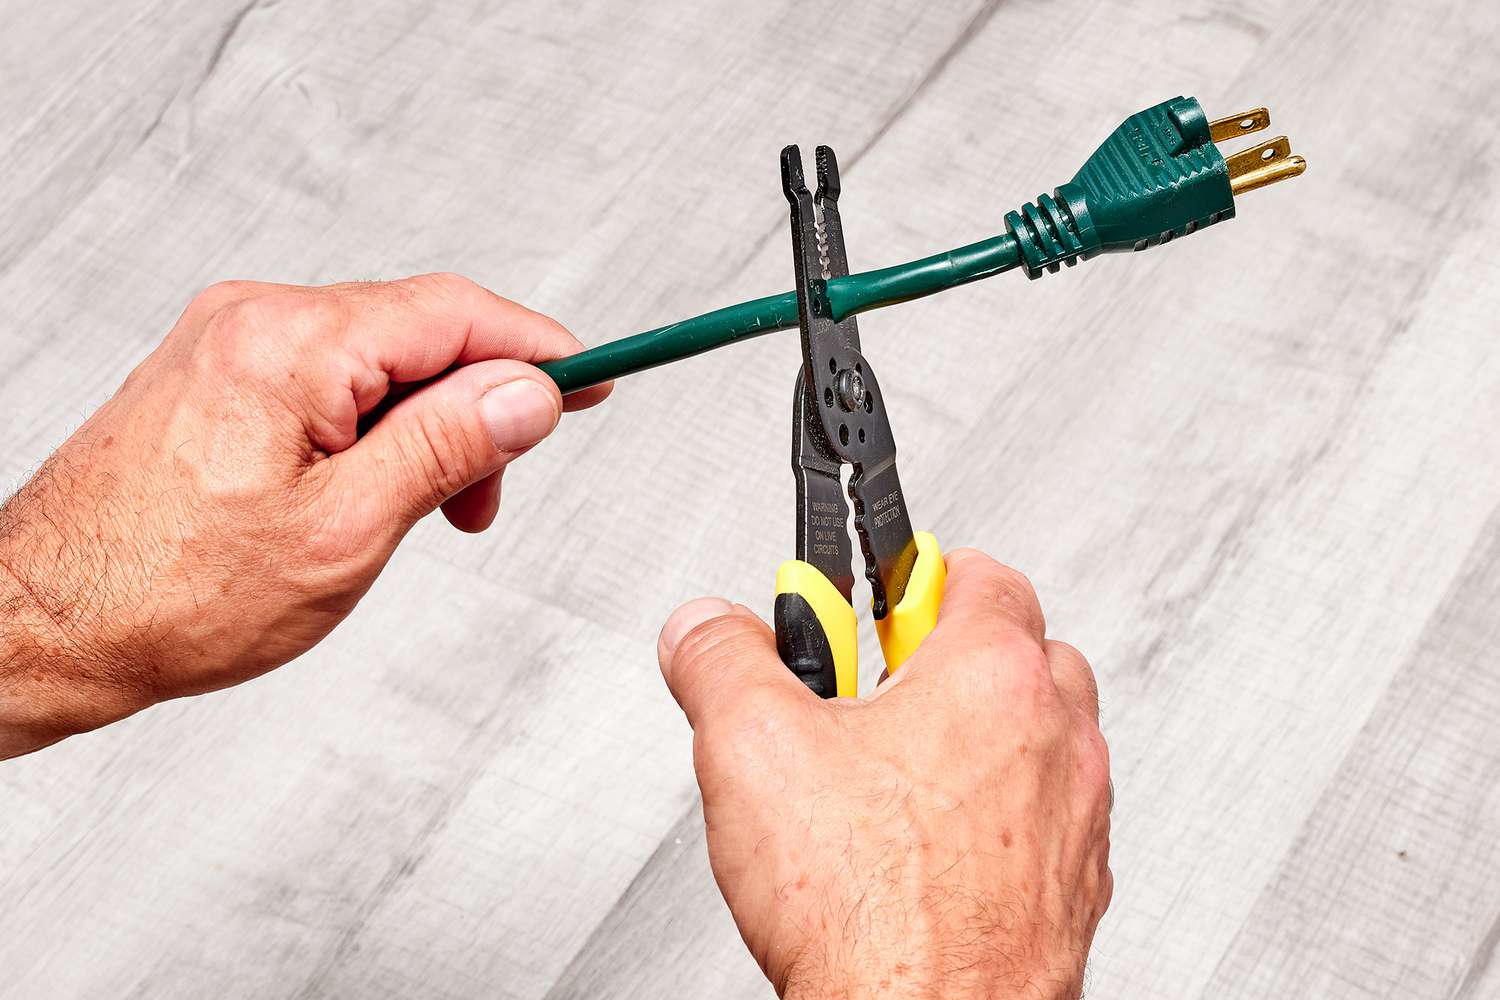
- Apply pressure and rotate: Squeeze the handles of the wire strippers to apply pressure and then rotate the tool around the wire in a circular motion. This action will cut through the insulation and remove it cleanly, leaving the bare metal strands exposed.
- Inspect the stripped wire: After stripping, visually inspect the wire ends to ensure that all the insulation has been removed, and the metal strands are fully exposed. Trim any excess strands if necessary to create a clean and even surface.
Remember to be careful when stripping the wire ends to avoid damaging the metal strands or injuring yourself. Take your time and apply even pressure to achieve clean and precise results.
Once you have successfully stripped the wire ends, you are ready to move on to the next step, which is attaching the plug. Stripping the wire ends properly ensures a solid and reliable electrical connection when connecting the wire to the plug or socket.
Step 4: Attaching the Plug
With the wire ends stripped and ready, the next step in making your own electrical cord is attaching the plug. The plug is what allows you to connect your electrical cord to a power source. Follow these steps to properly attach the plug:
- Gather your tools: Before you begin, ensure you have the necessary tools, including the plug, wire cutters, pliers, and electrical tape (optional).
- Prepare the wire: Ensure that the stripped wire ends are untangled and free from any frayed strands. It’s important to have a clean and well-prepared wire for a secure connection.
- Identify the plug’s terminals: Plugs typically have two or three terminals labeled with letters or symbols, such as “L” for the live wire, “N” for the neutral wire, and “E” for the earth wire. Refer to the instructions or markings on the plug to confirm the correct terminals.
- Attach the wire to the plug: Connect the live wire (usually black or brown) to the live terminal, the neutral wire (usually blue) to the neutral terminal, and the earth wire (usually green-yellow) to the earth terminal. For each wire, insert the exposed end into the corresponding terminal and tighten the terminal screw securely with pliers. Note that the exact attachment method may vary depending on the plug design, so follow the manufacturer’s instructions if available.
- Secure the connections: Once the wires are attached, double-check that each wire is securely connected to its respective terminal. Gently tug on the wire to ensure it is held firmly in place.
- Inspect and insulate: Inspect the connections to ensure there are no loose strands or exposed metal. If necessary, trim any excess wire or insulation. Optionally, wrap electrical tape around the base of the plug and wires to provide additional insulation and reinforcement.
When attaching the plug, make sure to follow the manufacturer’s instructions and pay attention to the specific requirements of your plug and wire. Tight and secure connections are essential to prevent overheating or electrical malfunctions.
Before testing your electrical cord, it is important to conduct a visual inspection to ensure the plug is securely attached and there are no visible signs of damage. Additionally, always remember to disconnect the plug from the power source before making any adjustments or modifications to the cord.
With the plug successfully attached to the wire, you’re ready to move on to the next step of attaching the socket and completing your electrical cord.
Step 5: Attaching the Socket
Once you have attached the plug, the next step in making your own electrical cord is attaching the socket. The socket is where you will connect your devices or appliances to power. Follow these steps to properly attach the socket:
- Gather your tools: Before you begin, make sure you have the necessary tools, including the socket, wire cutters, pliers, and electrical tape (optional).
- Prepare the wire: Ensure that the stripped wire ends are untangled and free from any frayed strands. Having a clean and well-prepared wire is important for a secure connection.
- Identify the socket’s terminals: Sockets typically have two or three terminals labeled with letters or symbols, such as “L” for the live wire, “N” for the neutral wire, and “E” for the earth wire. Refer to the instructions or markings on the socket to confirm the correct terminals.
- Attach the wire to the socket: Connect the live wire (usually black or brown) to the live terminal, the neutral wire (usually blue) to the neutral terminal, and the earth wire (usually green-yellow) to the earth terminal. For each wire, insert the exposed end into the corresponding terminal and tighten the terminal screw securely with pliers. Follow the manufacturer’s instructions for the specific attachment method.
- Secure the connections: Double-check each wire connection to ensure it is securely attached to its respective terminal. Give the wires a gentle tug to verify that they are held firmly in place.
- Inspect and insulate: Inspect the connections to ensure there are no loose strands or exposed metal. Trim any excess wire or insulation if necessary. Optionally, wrap electrical tape around the base of the socket and wires for additional insulation and support.
- Test the electrical cord: Before using the electrical cord, it’s crucial to test it to ensure it is functioning correctly. Follow proper safety procedures and use a voltage tester to confirm that the wires are properly connected, and there are no electrical faults.
When attaching the socket, it’s important to follow the manufacturer’s instructions and adhere to the specific requirements of your socket and wire. A secure and reliable connection is essential for safe and efficient operation.
After attaching the socket, visually inspect the connections for any signs of damage or loose wires. Ensure there are no exposed metal parts and that all connections are securely tightened. Once you have completed these steps, you have successfully attached the socket and completed your electrical cord.
Remember to always prioritize safety and, if you have any doubts or concerns, it’s advisable to consult a professional electrician before using your homemade electrical cord.
Step 6: Testing the Electrical Cord
After completing the previous steps of making your own electrical cord, it’s crucial to test the cord to ensure it is functioning correctly and safely. Testing the electrical cord helps you identify any potential issues before using it with your devices or appliances. Follow these steps to test your electrical cord:
- Prepare for testing: Before starting the test, ensure that the cord is disconnected from the power source. Make sure all connections are secure and there are no loose wires or exposed metal.
- Choose a safe testing environment: Find a dry and well-ventilated area free from flammable materials. This helps ensure safety during the testing process.
- Use a voltage tester: A voltage tester is an essential tool for testing electrical circuits and cords. Place the tester’s prongs into the corresponding slots for the live and neutral wires of the socket.
- Turn on the power: Reconnect the cord to the power source, and turn on the power. If the cord has a switch, turn it on.
- Check for proper voltage readings: The voltage tester should display the appropriate voltage reading, corresponding to the voltage of the power source. For example, in many countries, residential voltage is around 110-120 volts or 220-240 volts.
- Verify consistent readings: Keep the voltage tester connected to the cord for a few moments to ensure that the voltage remains consistent and stable. Fluctuations in voltage could indicate a faulty or unstable connection.
- Check the earth connection (if applicable): If your cord has an earth wire, also known as a grounding wire, use the voltage tester to check for continuity between the earth terminal and a grounded surface. This ensures that the earth connection is intact and properly grounding the cord.
- Inspect for any abnormalities: While testing, be vigilant for any signs of abnormal behavior, such as sparks, unusual sounds, or flickering lights. These can indicate potential electrical problems that need to be addressed.
- Disconnect and review: After testing, disconnect the cord from the power source and review the test results. If everything appears to be in order, you can proceed to use the electrical cord. However, if you notice any issues during the test, consult a professional electrician to address and resolve the problem.
Testing your homemade electrical cord is an essential step to ensure it is safe and functioning properly. By following these steps and conducting a thorough test, you can have confidence in the reliability and safety of your electrical cord.
Remember, always prioritize safety when working with electricity. If you have any doubts or concerns about the testing process or the performance of your cord, seek assistance from a qualified electrician.
Conclusion
Making your own electrical cord can be a rewarding and practical endeavor. By following the steps outlined in this guide, you can create a customized cord that meets your specific needs while ensuring safe and reliable electrical connections. Here’s a quick recap of the steps involved:
- Choose the right wire gauge: Select the appropriate wire gauge based on the device’s amperage, cord length, voltage requirements, and applicable electrical codes.
- Measure and cut the wire: Use precise measurements and sharp wire cutters to cut the wire to the desired length.
- Strip the wire ends: Use wire strippers to remove the insulation from the tips of the wire, exposing the conductive metal strands.
- Attach the plug: Connect the stripped wire ends to the respective terminals of the plug, ensuring secure connections and tightening the terminal screws.
- Attach the socket: Connect the stripped wire ends to the corresponding terminals of the socket, ensuring secure connections and checking for any loose or exposed wires.
- Test the electrical cord: Use a voltage tester to verify that the cord is properly wired and functioning, checking for proper voltage readings and ensuring stability.
Throughout the process, it is vital to prioritize safety by following precautions such as working in a well-ventilated area, disconnecting the power source, and wearing protective gear. Regularly inspect your cord for any signs of wear or damage and replace it if necessary.
By making your own electrical cord, you gain the flexibility to create a custom cord that suits your specific requirements. Whether you’re working on a DIY project or need a replacement cord, the knowledge and skills gained from this guide empower you to tackle electrical cord creation confidently.
However, it’s essential to note that working with electricity can be dangerous if not done properly. If you are uncertain or uncomfortable with any aspect of the process, it’s always best to consult a professional electrician for guidance and assistance.
With the proper understanding, preparation, and adherence to safety guidelines, you can successfully make your own electrical cord. Enjoy the satisfaction of creating a functional and personalized cord that powers your devices and appliances reliably.
Frequently Asked Questions about How Do I Make My Own Electrical Cord
Was this page helpful?
At Storables.com, we guarantee accurate and reliable information. Our content, validated by Expert Board Contributors, is crafted following stringent Editorial Policies. We're committed to providing you with well-researched, expert-backed insights for all your informational needs.


0 thoughts on “How Do I Make My Own Electrical Cord”