Home>Articles>How Do I Hook Up The Electrical Cord To The Dryer
Articles
How Do I Hook Up The Electrical Cord To The Dryer
Modified: August 20, 2024
Learn how to properly connect the electrical cord to your dryer with step-by-step instructions and expert advice. Find more informative articles on dryer connections and maintenance.
(Many of the links in this article redirect to a specific reviewed product. Your purchase of these products through affiliate links helps to generate commission for Storables.com, at no extra cost. Learn more)
Introduction
When it comes to hooking up the electrical cord to your dryer, it’s essential to follow the proper steps to ensure a safe and reliable connection. The electrical cord is what provides power to your dryer, allowing it to function and dry your clothes effectively. Whether you’re replacing an old cord or installing a new one, it’s crucial to handle the process with care and attention to detail.
In this article, we will guide you through the step-by-step process of hooking up the electrical cord to your dryer. By following these instructions, you’ll be able to safely connect the cord and ensure that your dryer operates efficiently and effectively.
Please note that working with electricity can be dangerous if not done correctly. If you’re not confident in your abilities or have little experience with electrical work, it’s always best to hire a professional electrician to handle the installation for you.
Now, let’s dive into the steps required to hook up the electrical cord to your dryer.
Key Takeaways:
- Ensure safety by turning off the power supply before replacing the electrical cord on your dryer. Use the right tools and materials to make a secure and reliable connection.
- Follow the step-by-step process to confidently install or replace the electrical cord, ensuring a properly functioning and efficient dryer. Always prioritize safety and seek professional help if needed.
Read more: How To Hook Electrical Cord Up To A Ballast
Step 1: Gather the necessary tools and materials
Before you begin the installation process, make sure you have all the tools and materials you’ll need. This will help streamline the process and ensure that you have everything at your disposal. Here’s a list of the tools and materials you’ll require:
- Flathead screwdriver
- Phillips screwdriver
- Wire strippers
- Electrical tape
- New electrical cord (make sure it’s compatible with your dryer and meets the necessary specifications)
It’s essential to use the correct tools and materials for this installation to ensure a secure and reliable connection. Using improper tools or low-quality materials can lead to safety hazards and damage to your dryer.
Once you have gathered all the necessary tools and materials, you’re ready to proceed to the next step.
Step 2: Turn off the power supply
Before you begin working on the electrical connections, it’s crucial to turn off the power supply to your dryer. This step is essential for your safety and to prevent any electrical accidents.
Locate the main electrical panel in your home. It is usually found in the basement, utility room, or garage. Open the panel door and identify the circuit breaker that controls the power to your dryer. It is typically labeled with the appliance name or marked “dryer.”
Switch off the circuit breaker by flipping it to the “off” position. You can check if the power is truly off by attempting to turn on the dryer. If it doesn’t start, you can be sure that the power is successfully turned off.
Once the power supply is turned off, it’s advisable to place a “Do Not Touch” sign on the circuit breaker to alert others in the household about the ongoing work. Safety should always be a top priority when working with electricity.
Now that you have successfully turned off the power, you can proceed to the next step with confidence, knowing that the electrical connections are safe to handle.
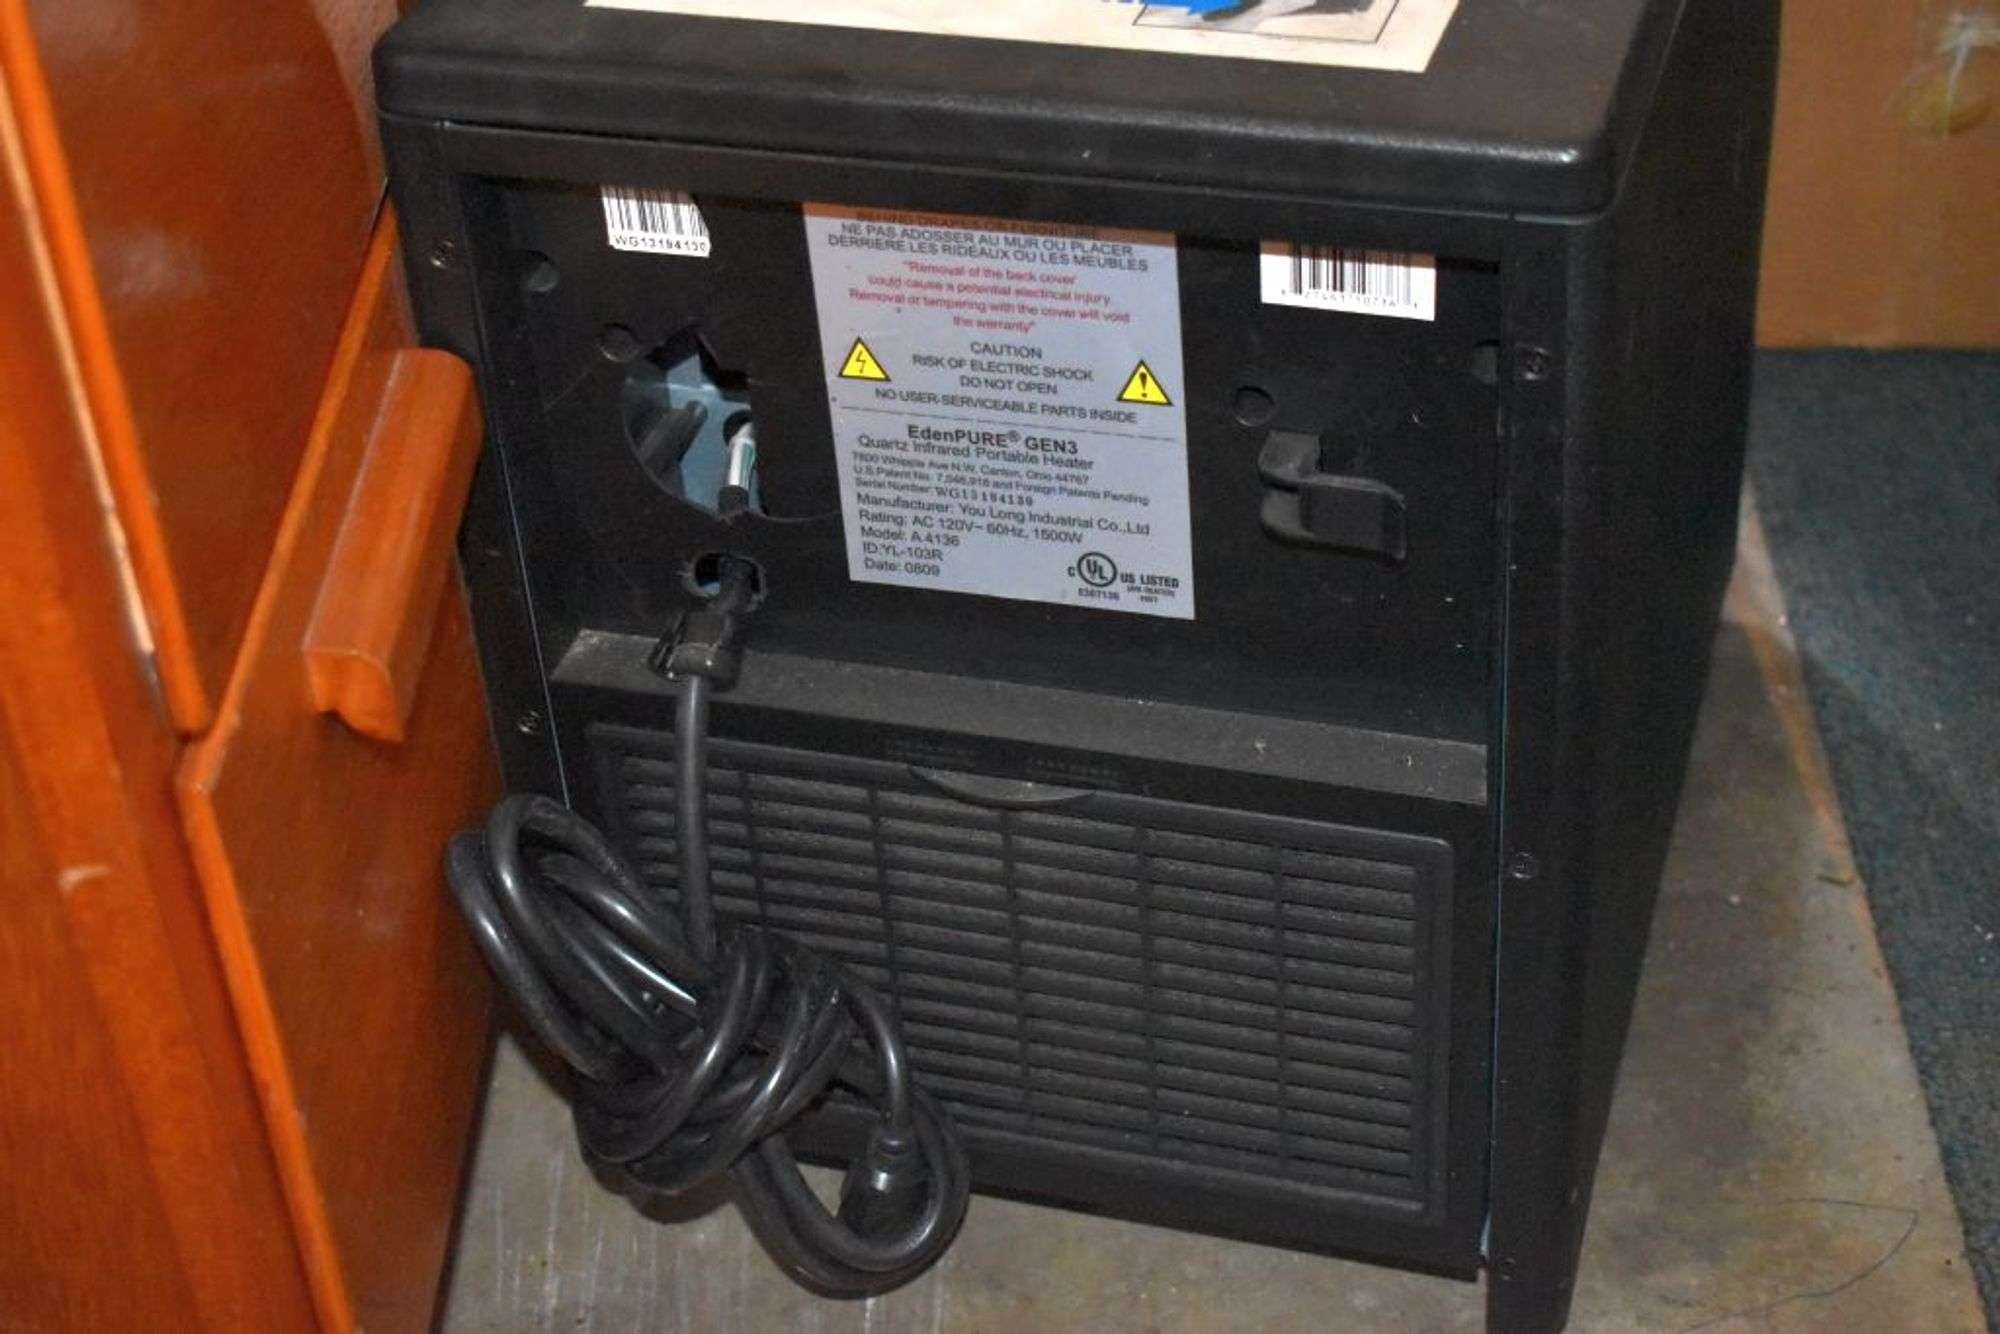
Step 3: Remove the old electrical cord
With the power supply turned off, you can now begin removing the old electrical cord from your dryer. Follow these steps to complete this process:
- Locate the access panel on the back of your dryer. This panel covers the area where the electrical cord connects to the dryer.
- Use a screwdriver to remove the screws securing the access panel in place. Set aside the screws in a safe location.
- Gently pull the access panel away from the back of the dryer to expose the electrical connections.
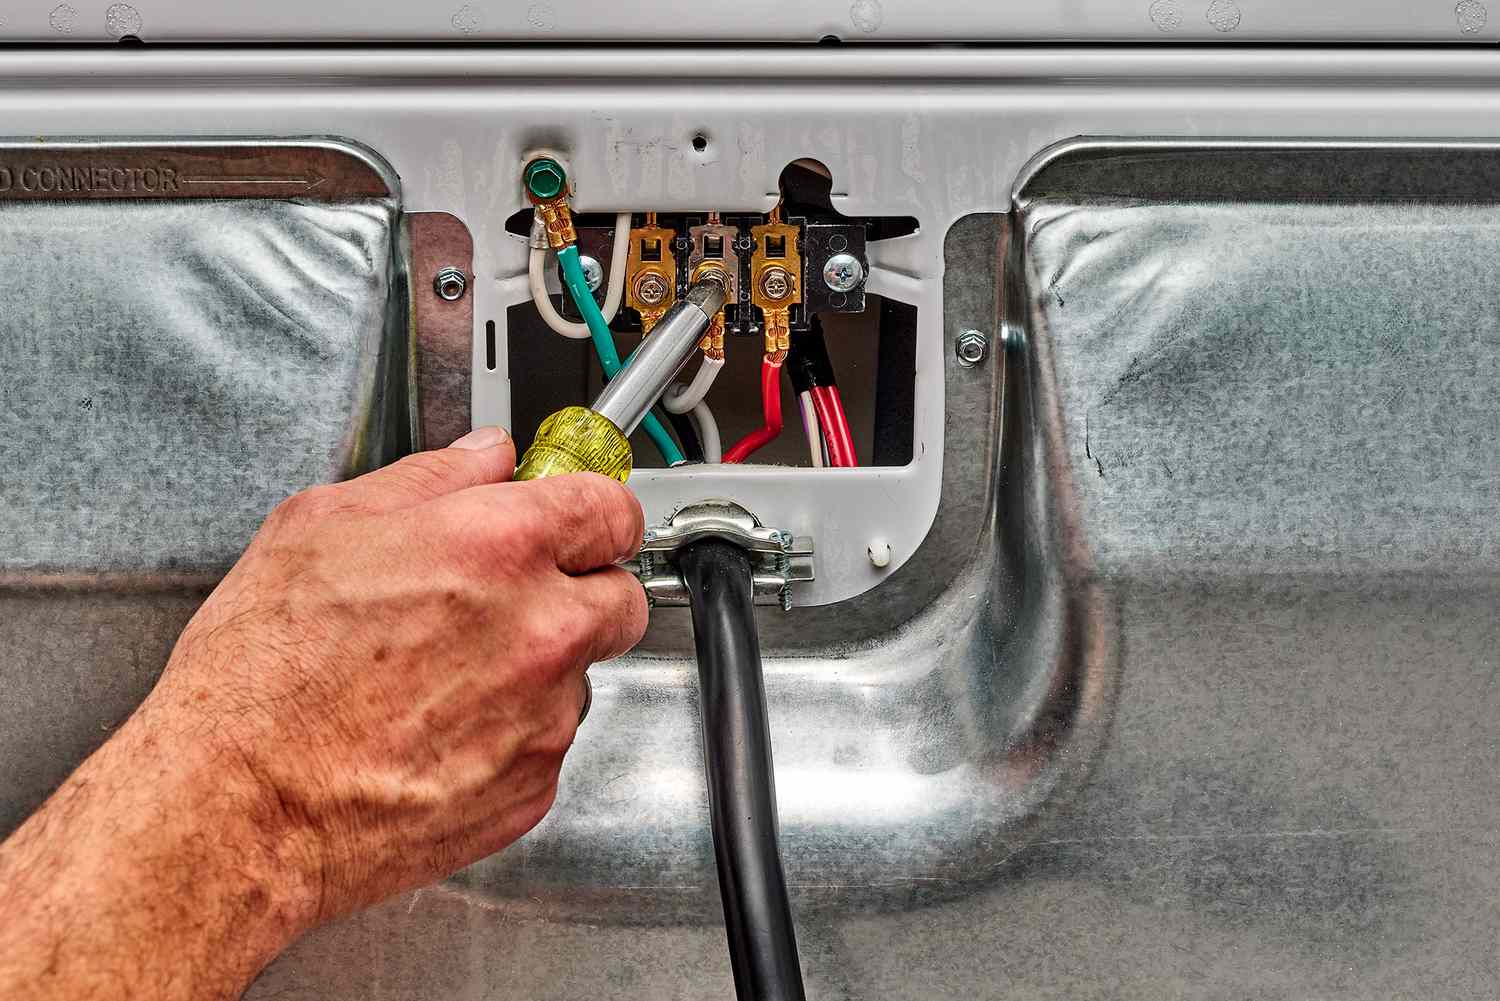
- Take a moment to observe how the old electrical cord is connected. Note the color-coded terminals and where the wires are attached.
- Using either a flathead or Phillips screwdriver (depending on the type of connections), loosen the screws holding the wires in place. Carefully remove each wire from its corresponding terminal.
- Once all the wires are disconnected, remove the old electrical cord from the dryer.
- Inspect the old cord for any damages or signs of wear. It’s important to replace the cord if it appears frayed or damaged in any way.
With the old electrical cord removed, you’re now ready to move on to the next step in the installation process.
Make sure the dryer is unplugged before starting. Remove the cover plate on the back of the dryer. Connect the red and black wires to the hot terminals, the white wire to the neutral terminal, and the green wire to the ground terminal. Tighten the screws securely and replace the cover plate.
Step 4: Prepare the new electrical cord
Now that the old electrical cord has been removed, it’s time to prepare the new electrical cord for installation. Follow these steps to ensure a smooth and secure connection:
- Examine the new electrical cord to ensure it is the correct type and meets the necessary specifications for your dryer. Check for any damage or defects before proceeding.
- Identify the three wires on the cord: the black wire, the white wire, and the green or bare copper wire.
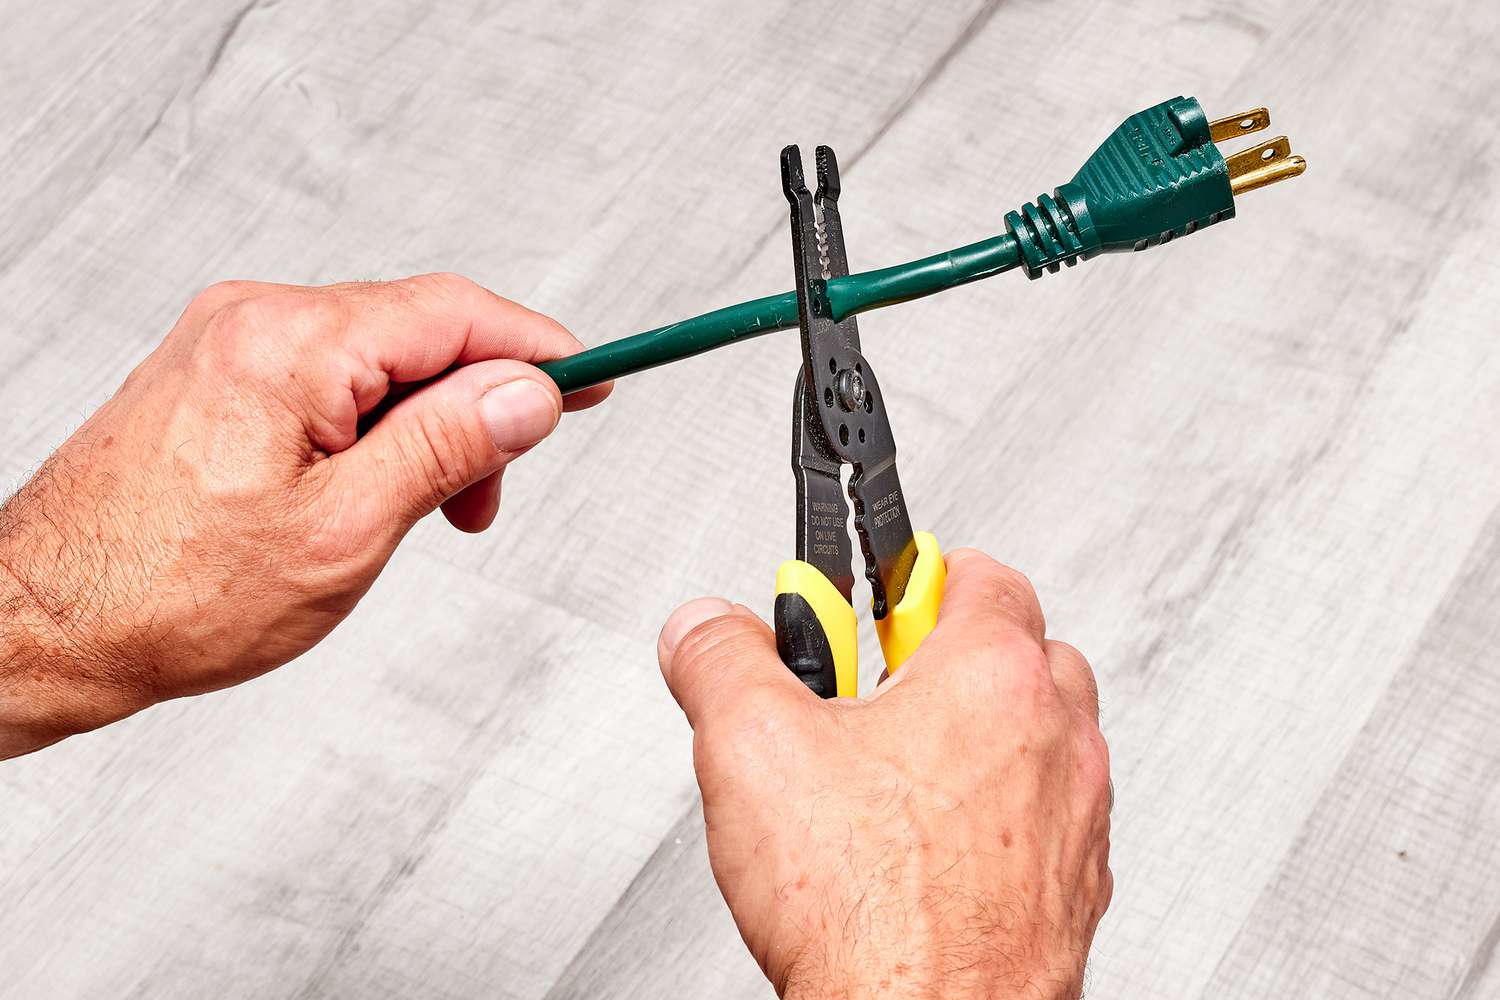
- Using your wire strippers, carefully remove approximately 1.5 inches (3.8 cm) of insulation from the end of each wire. Be cautious not to damage the actual wire strands during this process.
- Once the wires are stripped, twist the exposed wire strands to ensure they are tightly held together. This will make it easier to connect them securely to the dryer.
- If the new cord does not have an attached strain relief, attach one to the end of the cord. A strain relief helps to prevent the wires from being pulled loose from the terminals.
- Secure the strain relief onto the cord by tightening the screws, making sure it is positioned correctly.
With the new electrical cord prepared and ready, you can now move on to the next step and begin installing it onto your dryer.
Read more: How To Hook Up An Electric Dryer
Step 5: Install the new electrical cord
Now that you have prepared the new electrical cord, it’s time to install it onto your dryer. Follow these steps to ensure a proper and secure installation:
- Align the new electrical cord with the access panel on the back of the dryer.
- Insert the three wires into the corresponding terminals, following the color-coded guide. The black wire connects to the brass or gold-colored terminal, the white wire connects to the silver-colored terminal, and the green or bare copper wire connects to the green-colored terminal.
- Tighten the screws on each terminal to secure the wires in place. Ensure that the wire strands are fully inserted into the terminals and that the screws are securely fastened.
- Double-check all connections to ensure they are properly tightened and secure.
- Slide the access panel back onto the dryer, aligning it with the screw holes.
- Use the screws that were set aside earlier to secure the access panel in place. Tighten the screws snugly but be careful not to overtighten them.
With the new electrical cord installed and the access panel securely fastened, you’re ready to move on to the final step to ensure a successful connection.
Step 6: Test the connection
The final step in hooking up the electrical cord to your dryer is testing the connection to ensure everything is working correctly. Follow these steps to perform the test:
- Double-check that the power supply to the dryer is still switched off.
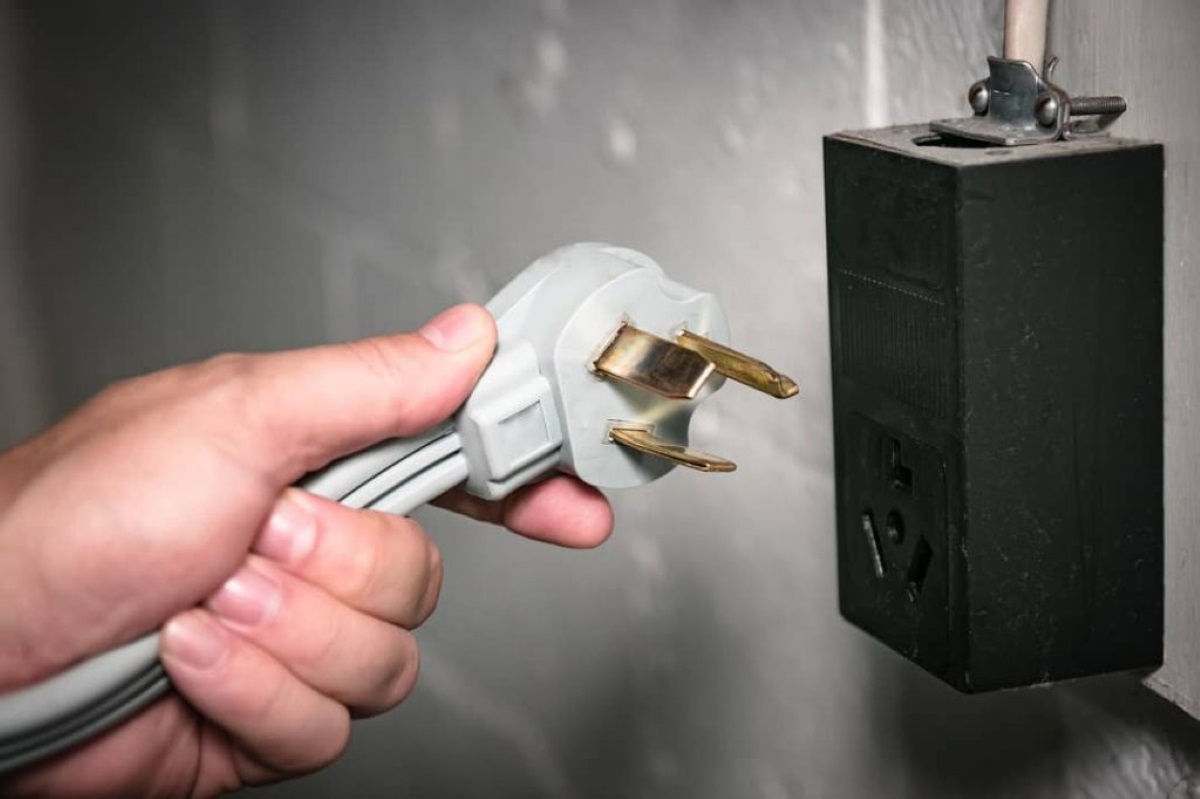
- Once you’ve confirmed the power is off, plug the dryer into the electrical outlet.
- Ensure that the dryer’s control panel is set to the “off” position.
- Turn on the power supply to the dryer by flipping the circuit breaker to the “on” position.
- Return to the dryer and set the control panel to the desired cycle or drying mode.
- Observe the dryer to ensure it powers on and begins operating. Listen for any unusual sounds or smells that could indicate a problem.
- Allow the dryer to run for a few minutes to ensure it is functioning correctly and circulating air properly.
- Check that the power cord is not getting excessively hot during operation. If it feels excessively hot to the touch, turn off the dryer immediately and consult a professional for further assistance.
If the dryer functions properly and there are no issues detected during the test, congratulations! You have successfully hooked up the electrical cord to your dryer.
However, if you notice any problems during the test or have concerns about the connection, it’s essential to reach out to a professional electrician for further evaluation and assistance.
Conclusion
Hooking up the electrical cord to your dryer is a task that requires careful attention to ensure a safe and efficient connection. By following the step-by-step process outlined in this article, you can successfully install or replace the electrical cord and have your dryer up and running smoothly.
Remember, safety should always be the top priority when working with electricity. Be sure to turn off the power supply and take precautions to avoid any accidents. If you’re not confident in your abilities or lack experience in electrical work, it’s best to seek the assistance of a professional electrician.
By gathering the necessary tools and materials, turning off the power supply, removing the old electrical cord, preparing the new cord, and installing it correctly, you’re setting yourself up for a reliable and functioning dryer. Finally, it’s crucial to test the connection to ensure everything is working as intended.
With a properly hooked up electrical cord, you can enjoy the convenience and efficiency of your dryer, knowing that it is safely connected and ready to handle your laundry needs.
Remember, if you have any concerns or notice any issues during the installation process, it’s always best to consult a professional. They can provide expert guidance and ensure that your dryer is set up correctly.
Now that you have the knowledge and understanding of how to hook up the electrical cord to your dryer, you can confidently tackle this task and enjoy the benefits of a properly functioning appliance.
Frequently Asked Questions about How Do I Hook Up The Electrical Cord To The Dryer
Was this page helpful?
At Storables.com, we guarantee accurate and reliable information. Our content, validated by Expert Board Contributors, is crafted following stringent Editorial Policies. We're committed to providing you with well-researched, expert-backed insights for all your informational needs.
0 thoughts on “How Do I Hook Up The Electrical Cord To The Dryer”