Articles
How Long Will Yeast Last In The Freezer
Modified: August 24, 2024
Learn about the longevity of yeast when stored in the freezer. Discover how long yeast can last and maintain its quality. Find helpful articles on yeast storage and usage.
(Many of the links in this article redirect to a specific reviewed product. Your purchase of these products through affiliate links helps to generate commission for Storables.com, at no extra cost. Learn more)
Introduction
Yeast is a crucial ingredient in baking and brewing, renowned for its ability to leaven dough and ferment beverages. Whether you’re an avid home baker or a professional brewer, you might find yourself wondering how long yeast can last in the freezer.
Properly storing yeast is essential to maintain its freshness and effectiveness. Freezing yeast is a popular method used by many to extend its shelf life. However, there are several factors to consider when freezing yeast, as it may affect its viability and overall performance.
In this article, we will explore the factors that can influence the shelf life of yeast, the basics of freezing yeast, and how to properly store it in the freezer. We will also delve into how long yeast can last when stored in the freezer, the signs of yeast spoilage, and provide some helpful tips for freezing and thawing yeast.
So if you’re curious about prolonging the life of your yeast stash and ensuring its freshness for all your baking and brewing endeavors, let’s dive in and discover the ins and outs of freezing yeast!
Key Takeaways:
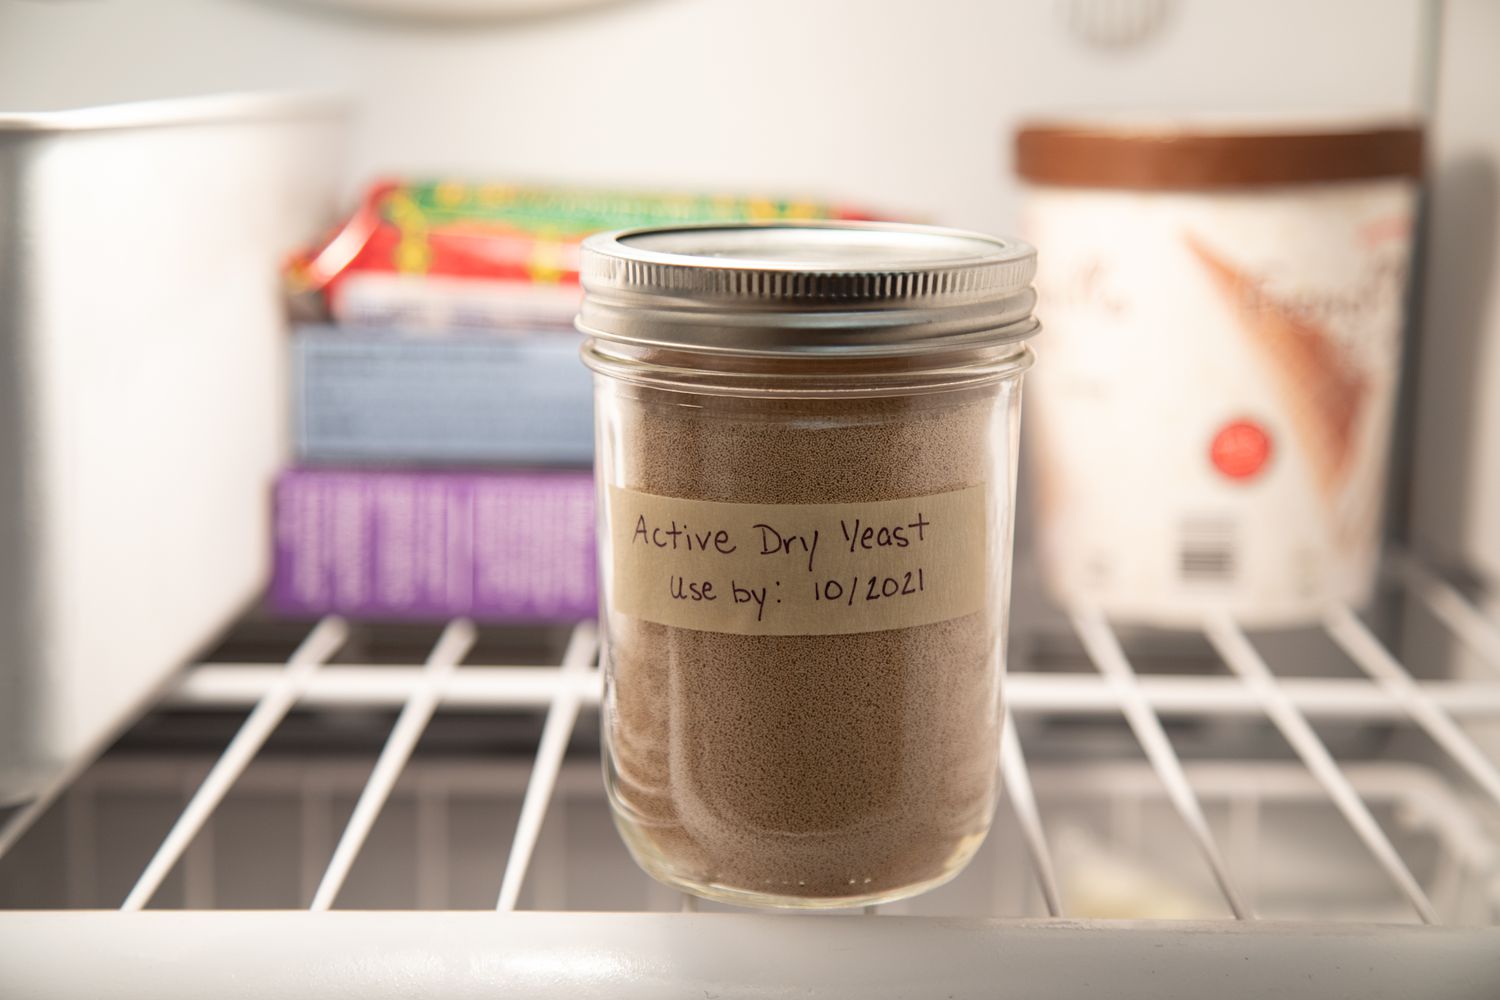
- Properly frozen yeast can last up to 12 months in the freezer, but for optimal results, it’s best to use it within the first 6 to 8 months. Always test its activity before using.
- Signs of yeast spoilage include off odor, changes in appearance, lack of activity, ineffectiveness in baking or brewing, and mold or unusual growth. Discard spoiled yeast to avoid disappointing outcomes.
Read more: How Long Will Flour Last In The Freezer
Factors Affecting Yeast Shelf Life
Several factors can impact the shelf life of yeast, whether it is stored in the pantry or the freezer. Understanding these factors can help you make informed decisions about how to best preserve and utilize your yeast supply.
1. Type of Yeast: There are different types of yeast available in the market, including active dry yeast, instant yeast, and fresh yeast. Each type has its own characteristics and recommended storage methods. For example, active dry yeast has a longer shelf life compared to fresh yeast.
2. Moisture: Yeast is sensitive to moisture. Excessive moisture can activate the yeast prematurely, leading to a reduced shelf life. It is crucial to store yeast in a dry environment to prevent moisture absorption.
3. Temperature: Yeast is a living microorganism and is highly sensitive to temperature fluctuations. Warm temperatures can accelerate yeast activity and shorten its shelf life. On the other hand, low temperatures can slow down yeast activity and help prolong its freshness.
4. Oxygen Exposure: Exposure to oxygen can cause yeast to deteriorate quickly. Oxygen can lead to oxidation and the loss of yeast’s leavening power. It is important to store yeast in airtight containers to minimize oxygen exposure.
5. Contamination: Contamination from bacteria or other microorganisms can greatly impact yeast’s shelf life. Proper handling and cleanliness during yeast preparation and storage are crucial to prevent contamination.
6. Quality of the Yeast: The quality of the yeast itself can affect its shelf life. Fresh and high-quality yeast tends to have a longer shelf life compared to yeast that is nearing its expiration date.
7. Packaging: The packaging of yeast can also play a role in its shelf life. Yeast that comes in vacuum-sealed or airtight packaging tends to have a longer shelf life compared to yeast in open or resealable packaging.
By considering these factors, you can optimize the storage conditions and extend the shelf life of your yeast. However, freezing yeast remains one of the most effective methods for long-term storage, as it helps preserve yeast’s viability and freshness for an extended period.
Freezing Yeast: The Basics
Freezing yeast is a popular method used by home bakers and brewers to prolong its shelf life and maintain its quality. When done correctly, freezing yeast can help preserve its viability and ensure it remains effective for future use.
Here are the basics of freezing yeast:
- Choose the Right Packaging: Before freezing yeast, it is important to choose the right packaging. Transfer the yeast into airtight containers or freezer-safe bags to minimize exposure to air and moisture. Make sure to label the containers with the date of freezing for easy tracking.
- Divide into Portions: If you have a large quantity of yeast, consider dividing it into smaller portions before freezing. This allows you to thaw only the amount you need for each baking or brewing session, reducing waste and preserving the remaining yeast.
- Remove Excess Air: When packaging the yeast, ensure that there is minimal excess air inside the container. Excess air can lead to freezer burn and affect the quality of the yeast. Squeeze out any air pockets before sealing the container tightly.
- Select the Desired Freezing Temperature: Set your freezer temperature to the ideal range for yeast storage. The recommended freezer temperature for yeast is around -0.4°F to 0°F (-18°C to -18°C). Freezing the yeast at this temperature helps maintain its freshness and viability.
- Place in the Freezer: Once you have prepared the yeast for freezing, place it in the coldest part of the freezer. Avoid storing it near the freezer door, as this area tends to experience greater temperature fluctuations. Maintaining a consistent freezing temperature is essential for preserving the yeast’s quality.
- Keep Freezer Conditions Stable: It is important to maintain stable freezer conditions. Avoid frequent temperature fluctuations or opening the freezer door unnecessarily, as this can affect the yeast’s viability. Consistent freezing conditions ensure that the yeast remains in dormant state and retains its quality.
By following these basic steps, you can freeze yeast effectively and ensure its long-term viability. Properly frozen yeast can remain stable for an extended period, providing you with a reliable supply for your baking and brewing needs.
Understanding Yeast Storage in the Freezer
Freezing yeast is a reliable method for long-term storage, but understanding how yeast behaves and reacts in the freezer is essential to maintain its quality and effectiveness.
When yeast is frozen, its activity is significantly slowed down due to the low temperature. The extreme cold puts the yeast cells into a dormant state, preventing them from reproducing and consuming nutrients. This dormancy helps preserve the yeast’s viability and extends its shelf life.
However, it is important to note that freezing yeast does not stop the deterioration process completely. Over time, yeast cells may still lose some of their activity and viability, albeit at a much slower rate compared to storing yeast in the pantry.
Yeast stored in the freezer undergoes a process called ice crystal formation. When water within the yeast cells freezes, ice crystals form and can potentially damage the yeast cells. To minimize this damage, it is crucial to freeze yeast quickly and at a low temperature.
Furthermore, fluctuations in freezer temperature can affect the quality of frozen yeast. Temperature fluctuations can cause ice crystals to melt and re-form, leading to cellular damage. It is important to maintain a consistent freezing temperature to ensure the yeast remains in a stable and dormant state.
It’s worth mentioning that freezing yeast can lead to slight changes in its appearance and texture. Upon thawing, you may notice a separation of fluid and solids in the yeast. This separation is normal and does not indicate spoilage or loss of effectiveness. Gently stirring or kneading the thawed yeast can help reincorporate the separated components.
Overall, understanding yeast’s behavior in the freezer can help you make informed decisions about its storage and usage. While freezing can extend the shelf life of yeast, it is important to note that frozen yeast may gradually lose some of its activity and efficacy over time.
Now that we have a better understanding of yeast storage in the freezer, let’s delve into how long yeast can last when stored in these frozen conditions.
How Long Can Yeast Last in the Freezer?
The duration of yeast’s viability in the freezer depends on various factors, including the quality of the yeast, the storage conditions, and how well it is protected from moisture and air. While freezing yeast can significantly extend its shelf life, it is important to understand that frozen yeast will eventually lose its effectiveness over time.
Typically, when stored properly in the freezer, yeast can maintain its viability for up to 12 months or even longer. However, it is recommended to use the yeast within the first 6 to 8 months for optimal results.
It’s important to note that the quality of the yeast before freezing plays a significant role in determining its longevity. Using fresh, high-quality yeast that has not expired prior to freezing will provide the best results. Proper packaging and protection from air and moisture are also crucial to maintain yeast’s viability throughout its time in the freezer.
If you store yeast in the freezer beyond its recommended shelf life, it may still be usable, but its leavening power and effectiveness may diminish. As a result, you may need to use a larger quantity of yeast or allow for longer rising times in your baking or brewing recipes.
Remember to always test the frozen yeast before using it in a recipe. To do this, you can proof a small amount of the yeast in warm water with a bit of sugar. If the yeast activates and produces a frothy foam within a reasonable time frame (around 5-10 minutes), it is likely still viable and can be used in your baking or brewing endeavors.
Ultimately, while frozen yeast can last for an extended period, it is best to use it within the first 6 to 8 months for optimal results. Always check the yeast’s activity before using it, and adjust quantities or rising times as needed to account for any potential decrease in its effectiveness.
Now let’s explore the signs that indicate yeast spoilage, so you can identify if your frozen yeast has gone bad.
Yeast can last up to 6 months in the freezer if properly stored in an airtight container. Be sure to label the container with the date it was frozen to keep track of its freshness.
Read more: How Long Will Sausage Last In The Freezer
Signs of Yeast Spoilage
While freezing can help preserve yeast and extend its shelf life, it is still possible for yeast to spoil over time. It is important to be able to identify the signs of yeast spoilage to prevent any undesirable outcomes in your baking or brewing projects.
Here are some common signs that indicate yeast spoilage:
- Off Odor: If your yeast emits a strong, unpleasant odor that is different from its typical smell, it may be a sign of spoilage. Fresh yeast typically has a mild, slightly sweet aroma, so any foul or rancid smell could indicate contamination or yeast gone bad.
- Change in Appearance: Yeast that has spoiled may have visible changes in its appearance. It may appear discolored, with a yellow or brownish tint, or have an unusual texture. These changes can indicate the presence of harmful microorganisms or degradation of the yeast’s structure.
- Lack of Activity: When yeast has gone bad, it may lose its leavening power and fail to activate properly. If you notice that your yeast is not producing bubbles or frothing up when proofed in warm water with sugar, it may be a clear sign that the yeast is no longer viable.
- Ineffectiveness in Baking or Brewing: If your baked goods or brewed beverages do not rise properly or have a strange taste despite using the recommended amount of yeast, it could indicate yeast spoilage. Lack of fermentation or inconsistent results may suggest that the yeast has lost its ability to perform as it should.
- Mold or Unusual Growth: The presence of mold or any unusual growth on your yeast is a definite sign of spoilage. Mold indicates contamination and can lead to health risks if consumed. It is important to discard the yeast immediately if you notice any signs of mold or abnormal growth.
If you encounter any of these signs, it is best to discard the yeast and obtain a fresh supply for your baking or brewing needs. Using spoiled yeast can result in disappointing or even ruined outcomes in your recipes.
Now that we have explored the signs of yeast spoilage, let’s dive into some tips for properly freezing yeast to prevent spoilage and maximize its shelf life.
Tips for Freezing Yeast Properly
To ensure that your yeast remains fresh and effective during its time in the freezer, it is important to follow proper freezing techniques and take certain precautions. Here are some tips for freezing yeast properly:
- Use Fresh Yeast: Start with fresh, high-quality yeast before freezing. Using expired or old yeast may result in decreased effectiveness even after freezing.
- Divide into Portions: If you have a large amount of yeast, consider dividing it into smaller portions before freezing. This way, you can thaw only the amount you need for each baking or brewing session, reducing waste.
- Choose Airtight Containers: Use airtight containers or freezer-safe bags to store the yeast. Make sure the containers are tightly sealed to prevent exposure to air and moisture. Label the containers with the freezing date for easy reference.
- Remove Excess Air: Squeeze out as much air as possible from the containers before sealing them. Excess air can lead to freezer burn and affect the quality of the yeast.
- Use Moisture-resistant Packaging: If using freezer bags, choose those with moisture-resistant properties to minimize moisture absorption and prevent freezer burn.
- Store in the Coldest Part of the Freezer: Place the yeast in the coldest part of the freezer, away from the freezer door. This area experiences fewer temperature fluctuations, ensuring a more stable environment for the yeast.
- Avoid Frequent Thawing and Refreezing: Thawing and refreezing yeast multiple times can affect its quality. Try to portion and freeze the yeast in quantities that align with your usage to minimize the need for repeated thawing and refreezing.
- Monitor Freezer Temperature: Regularly check and maintain a consistent freezer temperature for optimal yeast storage. Fluctuations in temperature can impact the yeast’s viability.
- Note the Freezing Date: Keeping track of the freezing date is essential to ensure that you use the yeast within its recommended shelf life.
- Properly Label the Containers: Clearly label the containers with the type of yeast and the freezing date. This will help you identify and use the yeast in a timely manner.
By following these tips, you can ensure that your yeast remains in optimal condition during its time in the freezer. Properly frozen yeast can retain its freshness and effectiveness, providing you with a reliable supply for your baking and brewing projects.
Now that you know how to freeze yeast correctly, let’s explore how to thaw it effectively when you’re ready to use it.
Thawing Frozen Yeast
When you’re ready to use the yeast that you’ve frozen, it’s important to thaw it properly to maintain its viability and effectiveness. Here are some guidelines for thawing frozen yeast:
- Transfer to the Refrigerator: Start by transferring the frozen yeast from the freezer to the refrigerator. Place the container in a designated area where it won’t be disturbed. Thawing yeast in the refrigerator allows for a slow and controlled thawing process.
- Give It Time to Thaw: Thawing yeast in the refrigerator may take several hours or even overnight. It’s important to be patient and allow the yeast to thaw naturally at its own pace. Avoid using heat or microwave to speed up the thawing process, as it can negatively affect the yeast’s viability.
- Check for Proper Thawing: After a few hours, check the yeast to see if it has completely thawed. It should be soft and pliable, with no frozen or icy parts. Gently knead or stir the yeast to reincorporate any separated components.
- Use Thawed Yeast Promptly: Once the yeast has thawed, it’s best to use it as soon as possible. The longer the yeast sits at room temperature, the more its viability may decline.
- Proof the Yeast: Before using the thawed yeast in your recipe, it’s a good idea to proof it to ensure its activity. Dissolve a small amount of yeast with a pinch of sugar in warm water. If the yeast activates and creates a frothy foam within 5-10 minutes, it’s ready to use. If not, it may have lost some of its viability and should be replaced.
- Adjust Recipe as Needed: Depending on the efficacy of the thawed yeast, you may need to make adjustments to your recipe. If the yeast appears less active, you might need to increase the amount used or allow for a longer rising time. Monitor the dough or batter closely during the fermentation process to ensure proper leavening.
Thawing frozen yeast correctly is crucial to preserving its effectiveness and ensuring successful baking or brewing results. By following these tips, you can thaw yeast safely and maintain its viability.
Now that we’ve covered the proper thawing process, let’s wrap up our discussion.
Conclusion
Freezing yeast can be an effective method to extend its shelf life and ensure its freshness for future use. By understanding the factors that affect yeast shelf life and following proper freezing techniques, you can preserve the viability and effectiveness of your yeast supply.
Factors such as yeast type, moisture, temperature, oxygen exposure, contamination, yeast quality, and packaging all play a role in determining the shelf life of yeast. Freezing yeast helps slow down its activity and preserve its viability, but it’s important to note that frozen yeast will gradually lose some of its effectiveness over time.
When properly stored in the freezer, yeast can last up to 12 months or even longer. However, it is recommended to use the yeast within the first 6 to 8 months for optimal results. Testing the yeast’s activity before using it in a recipe is also advised to ensure its viability.
Signs of yeast spoilage include off odor, changes in appearance, lack of activity, ineffectiveness in baking or brewing, and mold or unusual growth. If you observe any of these signs, it is best to discard the yeast and obtain a fresh supply.
Properly freezing yeast involves choosing the right packaging, dividing it into portions, removing excess air, selecting the desired freezing temperature, placing it in the coldest part of the freezer, and maintaining stable freezer conditions. Thawing frozen yeast by transferring it to the refrigerator and allowing it to thaw naturally is recommended, followed by proofing the yeast before use.
By following these guidelines and techniques, you can maximize the shelf life of your yeast and ensure its effectiveness in your baking and brewing endeavors.
So, the next time you find yourself with extra yeast and want to make it last, consider freezing it properly. With the right storage and thawing techniques, you’ll always have fresh and viable yeast on hand to create delicious breads, fluffy cakes, and flavorful beers.
Frequently Asked Questions about How Long Will Yeast Last In The Freezer
Was this page helpful?
At Storables.com, we guarantee accurate and reliable information. Our content, validated by Expert Board Contributors, is crafted following stringent Editorial Policies. We're committed to providing you with well-researched, expert-backed insights for all your informational needs.


0 thoughts on “How Long Will Yeast Last In The Freezer”