Home>Articles>How Should Drumsticks Be Arranged To Ensure Even Cooking In A Microwave Oven

Articles
How Should Drumsticks Be Arranged To Ensure Even Cooking In A Microwave Oven
Modified: August 25, 2024
Learn the best way to arrange drumsticks for even cooking in a microwave oven with these helpful articles.
(Many of the links in this article redirect to a specific reviewed product. Your purchase of these products through affiliate links helps to generate commission for Storables.com, at no extra cost. Learn more)
Introduction
Microwave ovens have become an essential appliance in modern kitchens, providing quick and convenient cooking options. From reheating leftovers to preparing full meals, these devices have revolutionized the way we cook. However, one common challenge that microwave users often encounter is achieving even cooking, especially when it comes to meat like drumsticks.
Understanding how to arrange drumsticks in a microwave oven is crucial for ensuring that they cook evenly. Unevenly cooked drumsticks can result in some parts being overcooked while others remain undercooked, compromising both the taste and the overall dining experience. In this article, we will delve into the art of arranging drumsticks in the microwave to promote even cooking.
Before we dive into the specifics, it’s essential to have a basic understanding of how microwave cooking works. Unlike traditional ovens that heat food from the outside in, microwaves use electromagnetic waves to create heat within the food itself. These waves excite water molecules, generating heat that cooks the food.
Even cooking is crucial for several reasons. Firstly, it ensures that the drumsticks reach the desired level of doneness and are safe to consume. Secondly, it enhances the flavor and texture of the drumsticks, providing a delightful eating experience. Lastly, even cooking helps prevent foodborne illnesses by eliminating any bacteria or harmful microorganisms that may be present in undercooked areas.
Several factors can affect the evenness of cooking in a microwave oven. One such factor is the size and shape of the drumsticks. Thicker or larger drumsticks may take longer to cook, which can result in uneven heating if not properly arranged. Another factor is the density of the drumsticks. Dense or frozen drumsticks will require additional cooking time to ensure thorough cooking.
Now that we understand the importance of even cooking and the factors that can affect it, let’s explore the proper arrangement techniques to ensure evenly cooked drumsticks in a microwave oven. By following these methods, you can enjoy perfectly cooked drumsticks that are juicy, flavorful, and safe to eat. So let’s get started!
Key Takeaways:
- Properly arranging drumsticks in a microwave, such as using a single layer or rotating during cooking, ensures even cooking, resulting in juicy, flavorful, and safe-to-eat meat for a delightful dining experience.
- Factors like size, density, and placement of drumsticks, as well as using shields or covers, play a crucial role in achieving even cooking in a microwave oven, enhancing the taste and visual appeal of the dish.
Read more: How To Cook Bacon In A Microwave Oven
Understanding Microwave Cooking
Microwave cooking is a unique and efficient method of preparing food. Unlike traditional cooking methods that rely on direct heat transfer, microwave ovens use electromagnetic waves to heat the food from the inside out. This innovative technology allows for fast and even cooking, making it a popular choice for many households.
When microwaves are emitted from the oven’s magnetron, they penetrate the food and interact with the water molecules present in it. These microwaves cause the water molecules to vibrate rapidly, generating heat. As a result, the food is cooked quickly and uniformly.
One of the advantages of microwave cooking is its speed. Compared to conventional cooking methods such as baking or stove-top cooking, microwaving can significantly reduce cooking time. This is particularly beneficial for busy individuals who want to prepare meals in a hurry.
Furthermore, microwaving is known to retain the nutritional value of the food. Because the cooking process is quick, fewer nutrients are lost compared to other methods that require longer cooking times. However, some water-soluble nutrients, such as vitamin C, may still be affected by microwave cooking. To minimize nutrient loss, it’s advisable to use minimal water and avoid overcooking.
Microwave ovens offer versatility in terms of the types of food they can cook. From reheating leftovers to steaming vegetables and even baking cakes, there is a wide range of dishes that can be prepared in a microwave. However, it’s important to note that not all foods are suitable for microwave cooking. Foods with a high fat or oil content, such as deep-fried items, may not produce desirable results in a microwave oven.
While microwave cooking has numerous benefits, it’s crucial to remember that not all foods cook evenly in a microwave oven. Achieving even cooking, especially for meat like drumsticks, requires proper arrangement and understanding of the appliance’s limitations.
In the next section, we will explore the importance of achieving even cooking in a microwave oven and the factors that can affect it. By understanding these factors, you will be better equipped to arrange drumsticks in a way that promotes uniform cooking and exceptional taste.
Importance of Even Cooking
Achieving even cooking is essential for several reasons, regardless of the cooking method used. This holds true for microwave cooking, especially when it comes to meat like drumsticks. Let’s explore the importance of even cooking and how it impacts the taste, safety, and overall dining experience.
First and foremost, even cooking ensures that the drumsticks reach the desired level of doneness. No one wants to bite into a piece of meat only to find it undercooked or raw in the center. Properly cooked drumsticks ensure that harmful bacteria, such as Salmonella or E. coli, are eliminated, making the food safe to consume. By eliminating potential health risks, even cooking helps protect you and your loved ones from foodborne illnesses.
In addition to safety, even cooking greatly impacts the flavor and texture of the drumsticks. When meat is cooked unevenly, some parts may become overcooked and dry, while others may remain undercooked and chewy. This inconsistency in texture can be unappetizing and detract from the overall enjoyment of the meal. Evenly cooked drumsticks, on the other hand, are juicy, tender, and full of flavor, resulting in a more pleasant dining experience.
Moreover, even cooking ensures that the flavors are distributed evenly throughout the drumsticks. When all parts are cooked uniformly, the seasoning, marinade, or sauce applied to the drumsticks is absorbed and distributed evenly, enhancing the taste and overall deliciousness of the dish.
Even cooking also plays a role in the aesthetic appeal of the drumsticks. When presented on a plate, visually appealing and evenly cooked drumsticks give the impression of a well-prepared meal. On the other hand, a plate of unevenly cooked drumsticks can appear unappealing and haphazard.
Whether you are cooking for yourself, your family, or guests, achieving even cooking demonstrates your culinary skills and attention to detail. It showcases your ability to create a dish that is not only visually pleasing but also delicious and safe to consume.
Now that we understand the importance of even cooking in microwave ovens, let’s delve into the factors that can affect the evenness of cooking. By understanding these factors, we can implement proper arrangement techniques to ensure that drumsticks are cooked to perfection in the microwave. So, let’s explore these factors in the next section.
Factors Affecting Even Cooking in a Microwave Oven
Several factors can have an impact on the evenness of cooking in a microwave oven. Understanding these factors is crucial for arranging drumsticks properly to ensure they cook uniformly and to avoid any undercooked or overcooked spots. Let’s take a closer look at the factors that can affect the even cooking in a microwave oven.
1. Size and Thickness: The size and thickness of drumsticks play a significant role in determining the cooking time. Thicker or larger drumsticks require longer cooking times to ensure that they are cooked all the way through. If drumsticks of varying sizes are cooked together, some may be undercooked or overcooked if not arranged properly.
2. Density: The density of the drumsticks can impact the cooking time as well. Frozen or dense drumsticks will require more time to cook thoroughly compared to thawed or less dense ones. It’s important to consider the density of the drumsticks when arranging them for even cooking.
3. Placement: The placement of the drumsticks inside the microwave oven can affect the evenness of cooking. Placing drumsticks too close together may result in uneven cooking, as the microwaves may have difficulty penetrating the dense areas. Ensure that there is enough space between the drumsticks to allow for proper heat distribution.
4. Shape and Orientation: The shape and orientation of the drumsticks can also impact even cooking. When arranging the drumsticks, it is beneficial to place larger ends towards the outer edges of the microwave turntable. This arrangement allows for more even exposure to the microwaves, promoting uniform cooking.
5. Microwave Wattage: The wattage of the microwave oven can affect the cooking time and evenness of cooking. Higher wattage ovens tend to cook food quicker, while lower wattage ovens may take longer. It is important to adjust the cooking time accordingly to ensure even cooking, regardless of the microwave’s wattage.
Understanding these factors will help you make informed decisions when arranging drumsticks in the microwave oven. In the following sections, we will discuss different methods for proper drumstick arrangement to ensure even cooking. By implementing these techniques, you can enjoy perfectly cooked drumsticks that are tender, flavorful, and safe to eat. Let’s explore these methods in the upcoming sections.
Proper Arrangement of Drumsticks for Even Cooking
Achieving even cooking in a microwave oven requires proper arrangement of the drumsticks. To ensure that the drumsticks cook uniformly and avoid any undercooked or overcooked spots, let’s explore different methods for arranging drumsticks for even cooking.
1. Method 1: Placing Drumsticks in a Single Layer
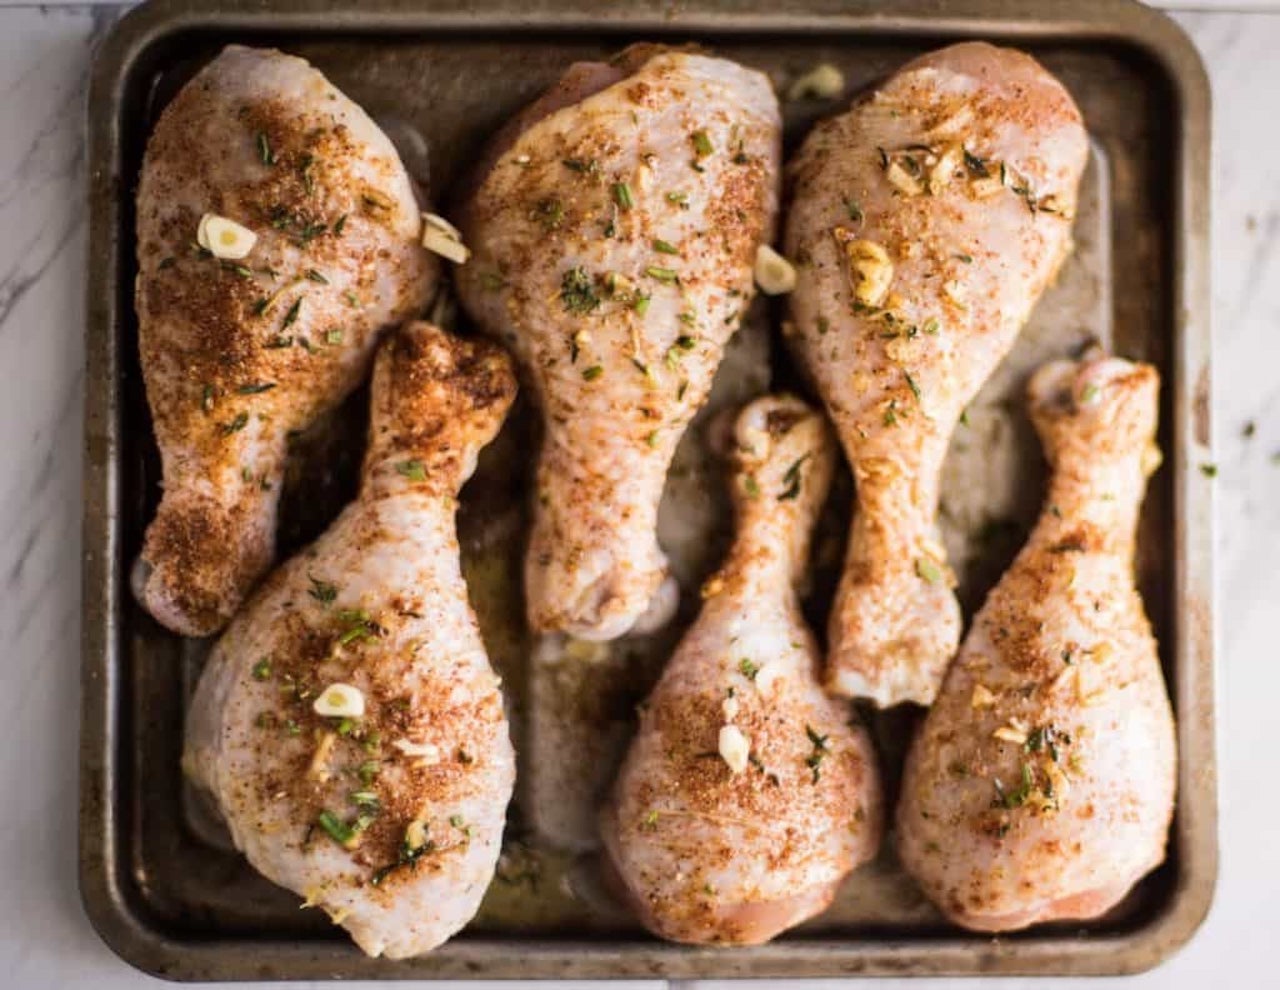
– Arrange the drumsticks in a single layer on a microwave-safe plate or dish. Avoid stacking or overlapping them.
– By arranging the drumsticks in a single layer, the microwaves can penetrate the meat more evenly, promoting uniform cooking.
2. Method 2: Using a Microwave-Safe Rack or Plate
– If you have a microwave-safe rack or plate with raised edges, place it in the microwave oven.
– Arrange the drumsticks on the rack or plate, ensuring that they are not touching or overlapping.
– Elevating the drumsticks allows the microwaves to circulate around the meat, facilitating even cooking.
3. Method 3: Rotating Drumsticks During Cooking
– Midway through the cooking process, pause the microwave and rotate the drumsticks.
– This technique helps distribute heat more evenly and prevents any hot spots that may occur due to uneven microwave distribution.
4. Method 4: Using Microwave-Safe Parchment Paper or Microwave-Safe Cover
– If you’re concerned about potential splattering or want to retain moisture, cover the drumsticks with microwave-safe parchment paper or a microwave-safe cover.
– The cover traps steam, ensuring the drumsticks remain moist while promoting even cooking.
5. Method 5: Creating a Shield for Drumstick Ends
– Drumstick ends tend to cook faster than the thicker parts. To avoid overcooking, you can create a shield using microwave-safe foil or a small piece of parchment paper.
– Cover the drumstick ends, leaving the rest exposed. This shields the thinner parts from excessive heat, promoting even cooking.
By implementing these proper arrangement techniques, you can ensure that your drumsticks cook evenly, resulting in tender, juicy, and delicious meat. It’s important to note that cooking times may vary depending on the microwave oven’s wattage and the thickness and density of the drumsticks. Adjust the cooking time accordingly and use a food thermometer to ensure they reach the recommended internal temperature for safe consumption.
In the next section, we will further explore each method in detail, providing step-by-step instructions and additional tips to help you achieve optimal results. So, let’s dive into the specific methods for arranging drumsticks in the microwave for even cooking.
Method 1: Placing Drumsticks in a Single Layer
One of the simplest and effective methods for achieving even cooking of drumsticks in a microwave oven is by arranging them in a single layer. This method allows for proper heat distribution, ensuring that each drumstick cooks uniformly. Let’s explore the steps for implementing this method:
1. Choose a microwave-safe plate or dish: Select a microwave-safe plate or dish that is large enough to accommodate all the drumsticks in a single layer without overcrowding. The plate should have a flat surface to provide an even cooking environment.
2. Prepare the drumsticks: Before arranging the drumsticks on the plate, pat them dry with paper towels to remove excess moisture. This will help the drumsticks cook more evenly and enhance browning during the cooking process. Season the drumsticks with your desired spices or marinade if desired.
3. Arrange the drumsticks in a single layer: Place the drumsticks on the microwave-safe plate, ensuring that they are not touching or overlapping each other. Leave some space between the drumsticks to allow for proper heat circulation.
4. Start the microwave oven: Once the drumsticks are arranged in a single layer, place the plate in the center of the microwave turntable. Close the door securely.
5. Set the cooking time and power level: Set the desired cooking time and power level according to the specific recipe or the drumstick’s thickness. It’s recommended to use the medium or high power setting for faster and more even cooking.
6. Cook the drumsticks: Start the microwave oven and let the drumsticks cook for the specified time. It is advisable to pause the microwave and check the internal temperature of the drumsticks using a food thermometer during the cooking process. This will help ensure that they reach the safe minimum internal temperature of 165°F (74°C).
7. Rotate if needed: If you notice any uneven browning or cooking, carefully remove the plate from the microwave and rotate the drumsticks. This step helps promote even cooking by allowing different sides of the drumsticks to receive equal exposure to the microwaves.
8. Rest and serve: Once the drumsticks are cooked thoroughly and reach the desired level of doneness, remove the plate from the microwave. Let the drumsticks rest for a few minutes before serving to allow the juices to redistribute, resulting in juicier meat.
By following the simple steps of placing drumsticks in a single layer, you can achieve even cooking and enjoy perfectly cooked drumsticks every time. It’s essential to adjust the cooking time according to your microwave oven’s wattage and the thickness and density of the drumsticks to ensure optimal results. In the following sections, we will explore additional methods for arranging drumsticks in the microwave to promote even cooking.
Arrange the drumsticks in a single layer on a microwave-safe plate, with the thicker parts facing outward. This will help ensure even cooking and prevent any parts from being undercooked.
Method 2: Using a Microwave-Safe Rack or Plate
Another effective method for achieving even cooking of drumsticks in a microwave oven is by utilizing a microwave-safe rack or plate with raised edges. This method allows for proper circulation of heat, resulting in uniformly cooked drumsticks. Let’s dive into the steps for implementing this method:
1. Choose a microwave-safe rack or plate: Select a microwave-safe rack or plate with raised edges that can fit comfortably inside your microwave oven. The rack or plate should be able to elevate the drumsticks, allowing for air circulation and even cooking.
2. Prepare the drumsticks: Before arranging the drumsticks, make sure they are dry with the excess moisture removed. Use paper towels to pat them dry, as this will help in achieving better browning and even cooking. Season the drumsticks with your desired spices or marinade, if desired.
3. Place the rack or plate in the microwave: Position the microwave-safe rack or plate with raised edges in the center of the microwave turntable. Ensure that it is stable and balanced to prevent accidents during the cooking process.
4. Arrange the drumsticks on the rack or plate: Place the drumsticks on the rack or plate, making sure they are not touching or overlapping. Leave some space between the drumsticks to allow for proper heat circulation.
5. Start the microwave oven: Close the microwave door securely and start the oven. Set the desired cooking time and power level according to the specific recipe or the thickness of the drumsticks. Using the medium or high power setting is recommended for faster and more even cooking.
6. Cook the drumsticks: Let the drumsticks cook for the specified time. It is advisable to pause the microwave and check the internal temperature using a food thermometer during the cooking process. This will help ensure that the drumsticks reach the safe minimum internal temperature of 165°F (74°C).
7. Rotate if needed: If you notice any uneven browning or cooking, carefully remove the rack or plate from the microwave and rotate the drumsticks. This step allows different sides of the drumsticks to receive equal exposure to the microwaves, ensuring even cooking.
8. Rest and serve: Once the drumsticks are cooked thoroughly and reach the desired level of doneness, remove the rack or plate from the microwave. Let the drumsticks rest for a few minutes before serving to allow the juices to redistribute, resulting in juicier meat.
By using a microwave-safe rack or plate with raised edges, you can elevate the drumsticks and promote proper air circulation, resulting in more evenly cooked drumsticks. Remember to adjust the cooking time based on your microwave oven’s wattage and the drumstick’s thickness and density to achieve the best results. In the upcoming sections, we will explore additional methods for arranging drumsticks in the microwave for even cooking.
Method 3: Rotating Drumsticks During Cooking
To ensure even cooking of drumsticks in a microwave oven, one effective method is to rotate them during the cooking process. This technique helps distribute heat more evenly, preventing any hot spots that may occur due to uneven microwave distribution. Let’s delve into the steps for implementing this method:
1. Prepare the drumsticks: Begin by drying the drumsticks with paper towels to remove any excess moisture. This step promotes better browning and even cooking. Season the drumsticks with your preferred spices or marinade, if desired.
2. Arrange the drumsticks on a microwave-safe plate: Place the drumsticks on a microwave-safe plate, ensuring they are not touching or overlapping each other. Leave some space between the drumsticks for proper heat circulation.
3. Start the microwave oven: Position the plate with the drumsticks in the center of the microwave turntable. Close the microwave door securely.
4. Set the cooking time and power level: Set the desired cooking time and power level according to the specific recipe or the thickness of the drumsticks. Use the medium or high power setting for optimal results.
5. Cook the drumsticks: Start the microwave oven and allow the drumsticks to cook for the initial portion of the specified cooking time. The exact duration will depend on the recipe or the drumstick’s thickness.
6. Pause and rotate the drumsticks: About halfway through the cooking time, pause the microwave and carefully remove the plate with the drumsticks. Use oven mitts or a towel to protect your hands from the heat. Rotate each drumstick to expose different sides.
7. Cook the drumsticks further: Place the plate back in the microwave and resume cooking. The rotating motion helps ensure even exposure to the microwaves, promoting uniform cooking.
8. Check for doneness and adjust if needed: Use a food thermometer to check the internal temperature of the drumsticks. Ensure they reach the recommended minimum internal temperature of 165°F (74°C) to ensure they are fully cooked and safe to eat. If additional cooking time is needed, adjust accordingly.
9. Rest and serve: Once the drumsticks are cooked thoroughly and reach the desired level of doneness, remove them from the microwave. Let them rest for a few minutes to allow the juices to redistribute, resulting in juicier meat.
By employing the method of rotating drumsticks during the cooking process, you can ensure more even exposure to the microwaves, promoting uniform cooking. Remember to adjust the cooking time based on the specific microwave oven’s wattage and the drumstick’s thickness and density. In the following sections, we will explore additional methods for arranging drumsticks in the microwave to promote even cooking.
Method 4: Using Microwave-Safe Parchment Paper or Microwave-Safe Cover
Using microwave-safe parchment paper or a microwave-safe cover is an effective method to ensure even cooking of drumsticks in a microwave oven. These covers help trap steam and retain moisture during the cooking process, preventing dryness and promoting uniform cooking. Let’s explore the steps for implementing this method:
1. Prepare the drumsticks: Start by drying the drumsticks with paper towels to remove any excess moisture. This step promotes better browning and even cooking. Season the drumsticks with your desired spices or marinade, if desired.
2. Place the drumsticks on a microwave-safe plate: Arrange the drumsticks on a microwave-safe plate, ensuring they are not touching or overlapping each other. Leave some space between the drumsticks for proper heat circulation.
3. Cover with microwave-safe parchment paper: Take a sheet of microwave-safe parchment paper and place it over the drumsticks. Ensure the parchment paper covers the drumsticks completely, creating a seal to trap steam.
4. Use a microwave-safe cover: Alternatively, you can use a microwave-safe cover specifically designed for microwave cooking. Place the cover over the plate, ensuring it fully covers the drumsticks.
5. Start the microwave oven: Position the plate with the drumsticks and the parchment paper or cover in the center of the microwave turntable. Close the microwave door securely.
6. Set the cooking time and power level: Set the desired cooking time and power level based on the recipe or the drumstick’s thickness. It’s recommended to use the medium or high power setting for optimal results.
7. Cook the drumsticks: Start the microwave oven and allow the drumsticks to cook for the specified time. The parchment paper or cover will help trap steam and retain moisture, promoting even cooking and preventing them from drying out.
8. Check for doneness and adjust if needed: Pause the microwave oven and use a food thermometer to check the internal temperature of the drumsticks. Ensure they reach the recommended minimum internal temperature of 165°F (74°C) to confirm they are fully cooked and safe to eat. Adjust the cooking time if needed.
9. Rest and serve: Once the drumsticks are cooked thoroughly and reach the desired level of doneness, remove them from the microwave oven. Allow the drumsticks to rest for a few minutes to allow the juices to redistribute, resulting in juicier meat.
By using microwave-safe parchment paper or a microwave-safe cover, you can create a seal that traps steam, ensuring the drumsticks remain moist during cooking. This method promotes even cooking and prevents the drumsticks from drying out. Adjust the cooking time as needed based on your specific microwave oven’s wattage and the drumstick’s thickness and density. In the following sections, we will explore additional methods for arranging drumsticks in the microwave to promote even cooking.
Read more: How To Preheat Microwave Oven
Method 5: Creating a Shield for Drumstick Ends
To prevent the thinner ends of drumsticks from overcooking in a microwave oven, you can create a shield using microwave-safe foil or a small piece of parchment paper. This method helps promote even cooking and prevents the ends from becoming dry or burnt. Let’s explore the steps for implementing this method:
1. Prepare the drumsticks: Begin by drying the drumsticks with paper towels to remove any excess moisture. This step promotes better browning and even cooking. Season the drumsticks with your preferred spices or marinade, if desired.
2. Arrange the drumsticks on a microwave-safe plate: Place the drumsticks on a microwave-safe plate, ensuring they are not touching or overlapping each other. Leave some space between the drumsticks for proper heat circulation.
3. Create a shield for the drumstick ends: Tear off a sheet of microwave-safe foil or cut a small piece of microwave-safe parchment paper. The shield should be large enough to cover the thinner ends of the drumsticks.
4. Cover the drumstick ends: Place the foil or parchment paper over the thinner ends of the drumsticks, creating a shield that protects them from excessive heat exposure.
5. Start the microwave oven: Position the plate with the drumsticks and the shield in the center of the microwave turntable. Close the microwave door securely.
6. Set the cooking time and power level: Set the desired cooking time and power level based on the recipe or the drumstick’s thickness. Using the medium or high power setting is recommended for optimal results.
7. Cook the drumsticks: Start the microwave oven and let the drumsticks cook for the specified time. The shield helps prevent the ends from overcooking, promoting a more even cooking process.
8. Check for doneness and adjust if needed: Pause the microwave and use a food thermometer to check the internal temperature of the drumsticks. Ensure they reach the recommended minimum internal temperature of 165°F (74°C) to ensure they are fully cooked and safe to eat. Adjust the cooking time if needed.
9. Rest and serve: Once the drumsticks are cooked thoroughly and reach the desired level of doneness, remove them from the microwave. Allow the drumsticks to rest for a few minutes to allow the juices to redistribute, resulting in juicier meat.
By creating a shield for the drumstick ends using microwave-safe foil or parchment paper, you can protect them from overcooking while ensuring even cooking of the thicker parts. Adjust the cooking time based on your specific microwave oven’s wattage and the drumstick’s thickness and density. In the following sections, we will summarize the methods discussed and conclude the article.
Conclusion
Achieving even cooking of drumsticks in a microwave oven is essential for a delicious and enjoyable dining experience. By following the proper arrangement techniques and considering various factors, you can ensure that the drumsticks cook uniformly, resulting in tender, flavorful, and safe-to-eat meat.
We explored several methods for arranging drumsticks in a microwave oven to promote even cooking:
1. Placing drumsticks in a single layer allows for proper heat distribution and eliminates overcrowding.
2. Using a microwave-safe rack or plate elevates the drumsticks, facilitating air circulation and even cooking.
3. Rotating the drumsticks during cooking ensures that all sides receive equal exposure to the microwaves.
4. Utilizing microwave-safe parchment paper or a cover helps trap steam, preventing dryness and promoting even cooking.
5. Creating a shield for the drumstick ends using microwave-safe foil or parchment paper prevents overcooking.
It is important to note that cooking times may vary depending on the microwave oven’s wattage, the drumstick’s thickness, and the density of the meat. Adjusting the cooking time and monitoring the internal temperature with a food thermometer are key factors in achieving optimal results.
By implementing these methods and considering the factors that affect even cooking, you can enjoy perfectly cooked drumsticks that are juicy, flavorful, and safe to eat. Remember to let the drumsticks rest for a few minutes before serving to allow the juices to redistribute, resulting in an even more delightful eating experience.
Whether you are cooking for yourself, your family, or guests, the art of arranging drumsticks in a microwave oven ensures that every bite is a tasty and satisfying one. Be creative with your seasoning and marinade choices to enhance the flavor of the drumsticks, and don’t be afraid to experiment with different methods to find your preferred cooking style.
So, the next time you prepare drumsticks in a microwave oven, keep these tips and techniques in mind to achieve even cooking and elevate your culinary skills. With practice and attention to detail, you’ll be able to impress with perfectly cooked drumsticks that everyone will enjoy.
Happy cooking and bon appétit!
Frequently Asked Questions about How Should Drumsticks Be Arranged To Ensure Even Cooking In A Microwave Oven
Was this page helpful?
At Storables.com, we guarantee accurate and reliable information. Our content, validated by Expert Board Contributors, is crafted following stringent Editorial Policies. We're committed to providing you with well-researched, expert-backed insights for all your informational needs.


0 thoughts on “How Should Drumsticks Be Arranged To Ensure Even Cooking In A Microwave Oven”