Articles
How To Descale Philips Coffee Machine
Modified: February 26, 2024
Learn how to descale your Philips coffee machine with our informative articles. Follow these steps to ensure your coffee maker stays in optimal condition for a delicious cup of joe every time.
(Many of the links in this article redirect to a specific reviewed product. Your purchase of these products through affiliate links helps to generate commission for Storables.com, at no extra cost. Learn more)
Introduction
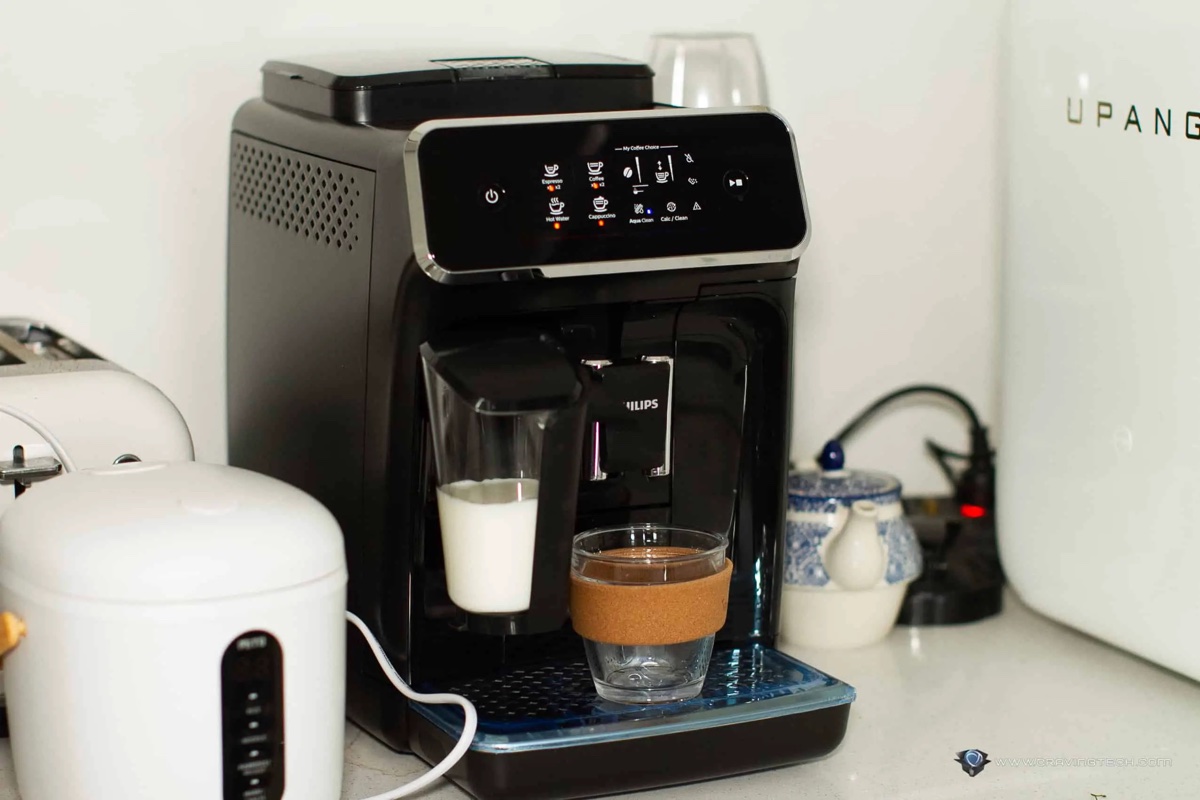
Welcome to the world of coffee lovers! If you’re a proud owner of a Philips coffee machine, you know the joy that comes from brewing your favorite cup of coffee in the comfort of your own home. But with great coffee comes great responsibility – the responsibility to properly maintain and care for your coffee machine. One essential maintenance task that should not be overlooked is descaling.
What exactly is descaling? Why is it important? And how can you efficiently descale your Philips coffee machine? In this article, we will explore the answers to these questions, providing you with a step-by-step guide to keep your machine in great shape and ensure the best-tasting coffee every time.
Key Takeaways:
- Regular descaling is crucial to preserve the taste, improve performance, and extend the lifespan of your Philips coffee machine. Follow the step-by-step guide for optimal maintenance.
- By incorporating regular descaling and maintenance, you can enjoy the full flavor of your favorite coffee beans, maintain machine performance, and extend its lifespan.
Read more: How To Descale A Delonghi Coffee Machine
What is Descaling?
Descaling is the process of removing mineral deposits that accumulate over time in your coffee machine. These mineral deposits, primarily calcium and magnesium, are commonly found in water and are responsible for limescale build-up. As water passes through the machine during the brewing process, these minerals can settle and form a hard, crusty layer on internal components, such as the heating element, pipes, and valves.
When limescale accumulates, it can negatively impact the performance of your coffee machine. It can lead to clogged pipes, reduced water flow, and inefficient heating, all of which can affect the quality and taste of your coffee. In addition, limescale can cause your machine to work harder, resulting in increased energy consumption and potential damage to the internal components over time.
Regular descaling is crucial to ensure that your Philips coffee machine operates optimally and maintains its longevity. By removing limescale deposits, you can keep your machine running smoothly and enjoy delicious, consistent cups of coffee.
Why Descaling is Important
Descaling is an essential maintenance task for your Philips coffee machine, and here’s why:
- Preserves Taste and Flavor: Limescale build-up affects the taste of your coffee. As the mineral deposits accumulate, they can interfere with the brewing process, resulting in a bitter or off-flavored cup of coffee. Descaling removes these deposits, allowing the coffee machine to work efficiently and preserve the true taste and aroma of your coffee beans.
- Improves Performance and Efficiency: Over time, limescale can clog pipes, valves, and the heating element of your coffee machine. This can lead to reduced water pressure, slower brewing times, and inefficient heating. Regular descaling helps to remove these mineral deposits, enabling your machine to function optimally, ensuring faster brewing, adequate water flow, and energy efficiency.
- Prevents Damage and Extends Lifespan: Limescale build-up can cause internal components of your coffee machine to deteriorate. The heating element, pipes, and valves are particularly susceptible to damage. Descaling helps prevent corrosion and prolongs the lifespan of your machine, saving you from costly repairs or the need for premature replacement.
- Optimizes Maintenance and Warranty: Some Philips coffee machines come with built-in descaling programs or indicators that prompt you when it’s time to descale. By regularly performing this maintenance task, you not only keep your machine in top shape but also ensure that your warranty remains valid.
In summary, descaling is crucial to preserve the taste and flavor of your coffee, improve the performance and efficiency of your machine, prevent damage, and extend its lifespan. By making descaling a part of your coffee machine maintenance routine, you can enjoy the best possible cup of coffee every time.
Signs that Your Philips Coffee Machine Needs Descaling
Regular descaling is vital for maintaining the optimal performance of your Philips coffee machine. But how do you know when it’s time to descale? Here are some signs to look out for:
- Slower Brewing Time: If you notice that your coffee machine takes longer than usual to brew a cup of coffee, it could be a sign of limescale build-up. The presence of mineral deposits can restrict the flow of water, resulting in slower brewing times.
- Reduced Water Flow: When limescale accumulates, it can clog the internal pipes and valves of your coffee machine. As a result, you may experience a decrease in water flow during the brewing process. This can lead to weaker coffee or even incomplete brewing.
- Unpleasant Taste or Odor: Limescale can affect the taste and aroma of your coffee. If you notice an unpleasant taste or a strange smell in your brewed coffee, it may indicate that mineral deposits have built up in your machine. Descaling can help eliminate these issues and restore the natural flavor of your coffee.
- Loud or Unusual Noises: If your coffee machine starts making unusual noises during operation, such as gurgling or grinding sounds, it could be due to limescale affecting the internal components. Descaling can help remove these deposits and restore smooth and quiet functioning.
- Build-up or Stains: Take a look at the inside of your coffee machine’s water reservoir or the brewing chamber. If you notice a visible build-up of residue or stubborn stains, it’s a clear indication that descaling is necessary. Removing these mineral deposits will not only improve the appearance but also the performance of your machine.
It’s important to pay attention to these signs and not overlook the need for descaling. By addressing these issues promptly, you can ensure that your Philips coffee machine continues to deliver the best-tasting coffee and maintains its longevity.
Step 1: Gather the Necessary Materials
Before you begin the descaling process for your Philips coffee machine, it’s important to gather all the necessary materials. Having everything prepared beforehand will help ensure a smooth and efficient descaling experience. Here’s what you’ll need:
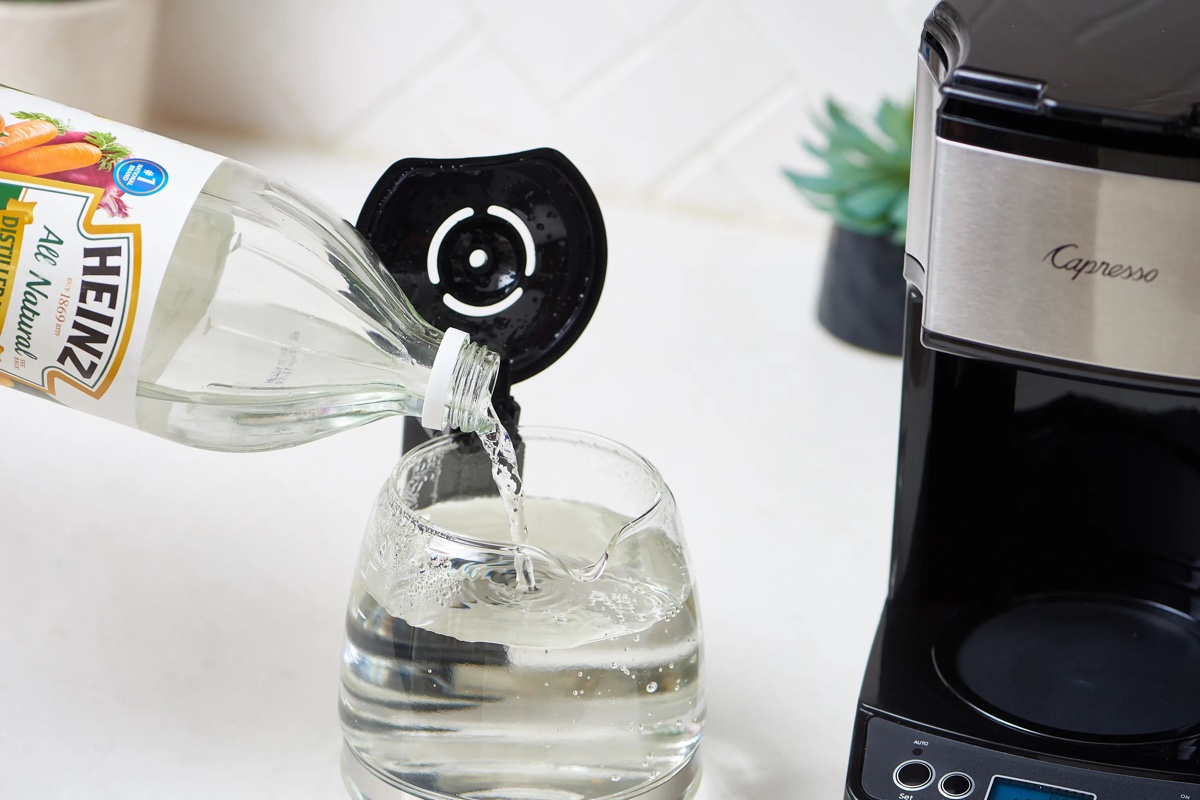
- Descaling Solution: Choose a descaling solution that is compatible with your Philips coffee machine. Philips may recommend a specific descaling product, or you can find descaling solutions that are suitable for coffee machines in general. Avoid using vinegar as it may corrode the internal components of your machine. Read the instructions on the descaling solution for the appropriate quantity to use.
- Water: You’ll need clean, cold water for the descaling process. Make sure you have enough water to fill the water reservoir of your coffee machine.
- Empty Container: Prepare a container that is large enough to hold the water reservoir capacity. This container will collect the water and descaling solution mixture that will flow out of the coffee machine during the descaling process.
- Microfiber Cloth or Sponge: Have a microfiber cloth or sponge ready for cleaning the exterior of your coffee machine. This will help remove any residue or stains that may have accumulated over time.
- Protective Gloves: It’s always a good idea to wear protective gloves to avoid direct contact with the descaling solution, as it may cause skin irritation. Safety should be a priority during the descaling process.
- Timer or Clock: Keep a timer or clock handy to keep track of the recommended descaling time specified in the instructions provided by Philips or the descaling solution manufacturer.
- User Manual: Retrieve the user manual that came with your Philips coffee machine. It will provide detailed instructions specific to your model, ensuring that you follow the correct descaling procedure.
By gathering these materials before starting the descaling process, you’ll be well-prepared and able to complete the task efficiently, ensuring the best results for your Philips coffee machine. Now that you have everything ready, let’s move on to the next step: preparing the descaling solution.
Read more: How To Descale Breville Coffee Machine
Step 2: Prepare the Descaling Solution
Once you have gathered all the necessary materials, it’s time to prepare the descaling solution for your Philips coffee machine. The descaling solution is essential for effectively removing the limescale deposits that have built up over time. Here’s how to prepare the solution:
- Refer to the User Manual: Consult the user manual provided with your Philips coffee machine to find the recommended descaling solution for your specific model. The manual will provide the instructions and product recommendations to ensure safe and optimal descaling.
- Measure the Descaling Solution: Follow the dosage instructions provided with the descaling solution. Measure the appropriate amount of solution needed based on your coffee machine’s water reservoir capacity. Use a measuring cup or follow the marks on the descaling solution bottle to ensure accurate dosage.
- Mix the Solution: In a container, mix the measured descaling solution with the specified amount of cold water. Stir the mixture well to ensure that the solution is thoroughly blended.
- Check the Temperature: Make sure the descaling solution and water mixture is at room temperature or slightly warmer. Extreme temperatures can potentially damage the coffee machine or affect the effectiveness of the descaling process, so be mindful of the temperature.
- Fill the Water Reservoir: Open the lid of your coffee machine’s water reservoir and pour the descaling solution mixture into it. Fill the reservoir to the indicated maximum level.
Preparing the descaling solution correctly is crucial for achieving the best results. Following the user manual instructions and recommended dosage ensures that the descaling process is safe and effective for your Philips coffee machine. Now that the descaling solution is ready, let’s move on to the next step: starting the descaling process.
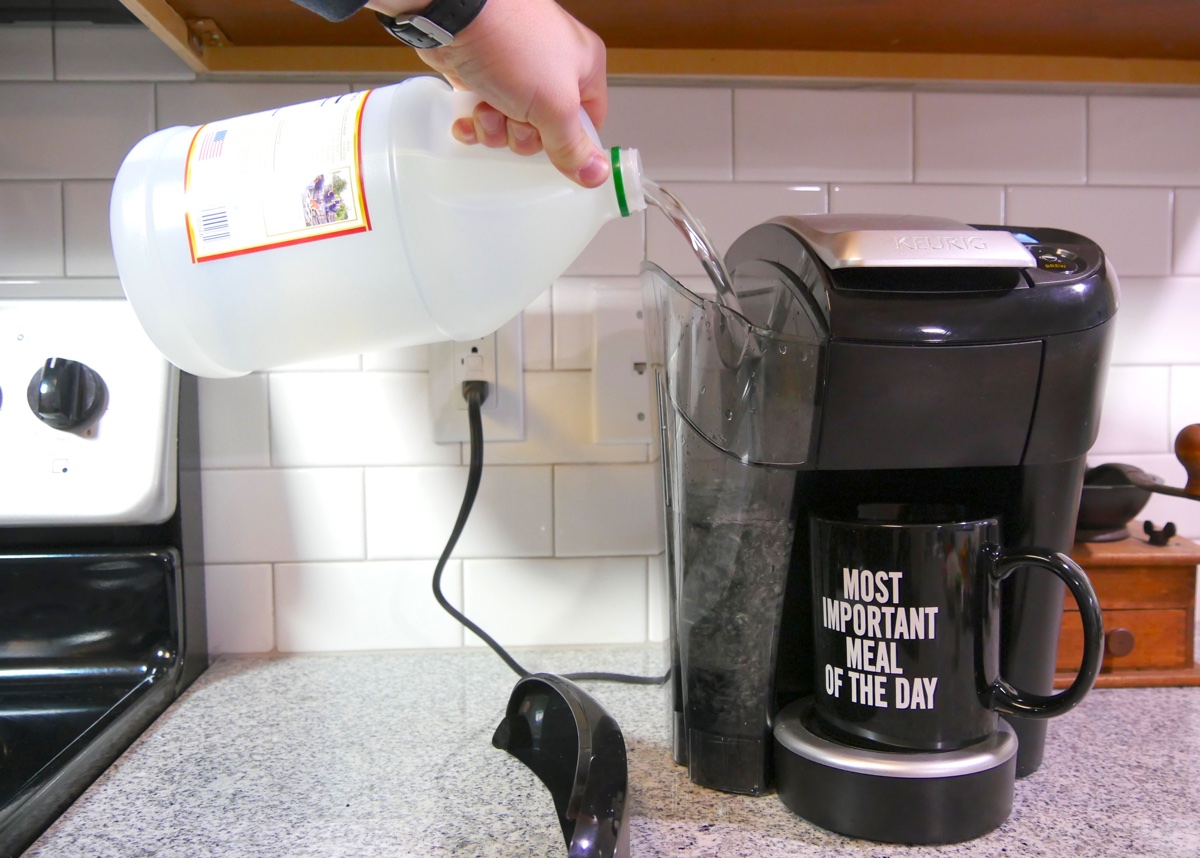
Use a mixture of equal parts water and white vinegar to descale your Philips coffee machine. Run the solution through the machine, then follow with a few cycles of plain water to rinse. Repeat every 1-2 months to keep your machine in top condition.
Step 3: Start the Descaling Process
With the descaling solution prepared and the water reservoir filled, it’s time to start the descaling process for your Philips coffee machine. This step will help remove the limescale build-up and restore your machine’s optimal performance. Follow these steps to begin the descaling process:
- Plug in and Power On: Ensure that your coffee machine is properly plugged into a power source and turned on.
- Position a Container: Place a container or cup large enough to hold the water and descaling solution mixture underneath the coffee spout. This container will collect the liquid that flows out during the descaling process.
- Start the Descaling Program: If your Philips coffee machine has a built-in descaling program, refer to the user manual to activate it. The machine will prompt you through the process with indicator lights or display messages. Follow the on-screen or on-machine instructions to initiate the descaling cycle.
- Activate Manual Descaling: If your coffee machine doesn’t have a dedicated descaling program, refer to the user manual for manual descaling instructions. Typically, this involves pressing specific buttons or a combination of buttons to trigger the descaling process. Follow the manual’s instructions carefully to ensure proper operation.
- Allow the Solution to Flow: Once the descaling program is activated, the machine will start pumping and circulating the descaling solution through the internal components. This process helps to dissolve and remove the limescale deposits that have accumulated.
- Observe the Machine: During the descaling process, closely monitor your coffee machine. Ensure that the descaling solution flows smoothly and consistently without any interruptions. Pay attention to any error messages or indicator lights that may appear, as they could indicate an issue that needs to be addressed.
- Complete the Descale Cycle: Follow the recommended descaling time specified in the user manual or descaling solution instructions. Typically, this process takes around 15-30 minutes, but times may vary depending on the specific model. Allow the machine to complete the entire descaling cycle without interruptions.
Starting the descaling process is a crucial step in maintaining the performance of your Philips coffee machine. Whether through a built-in descaling program or manually activating the process, ensuring that the descaling solution thoroughly circulates through the machine is essential. Let’s now move on to the next step: rinsing the coffee machine.
Step 4: Rinse the Coffee Machine
After completing the descaling process, it is important to rinse your Philips coffee machine to remove any remaining descaling solution and ensure that it is clean and ready for use. Follow these steps to accomplish this:
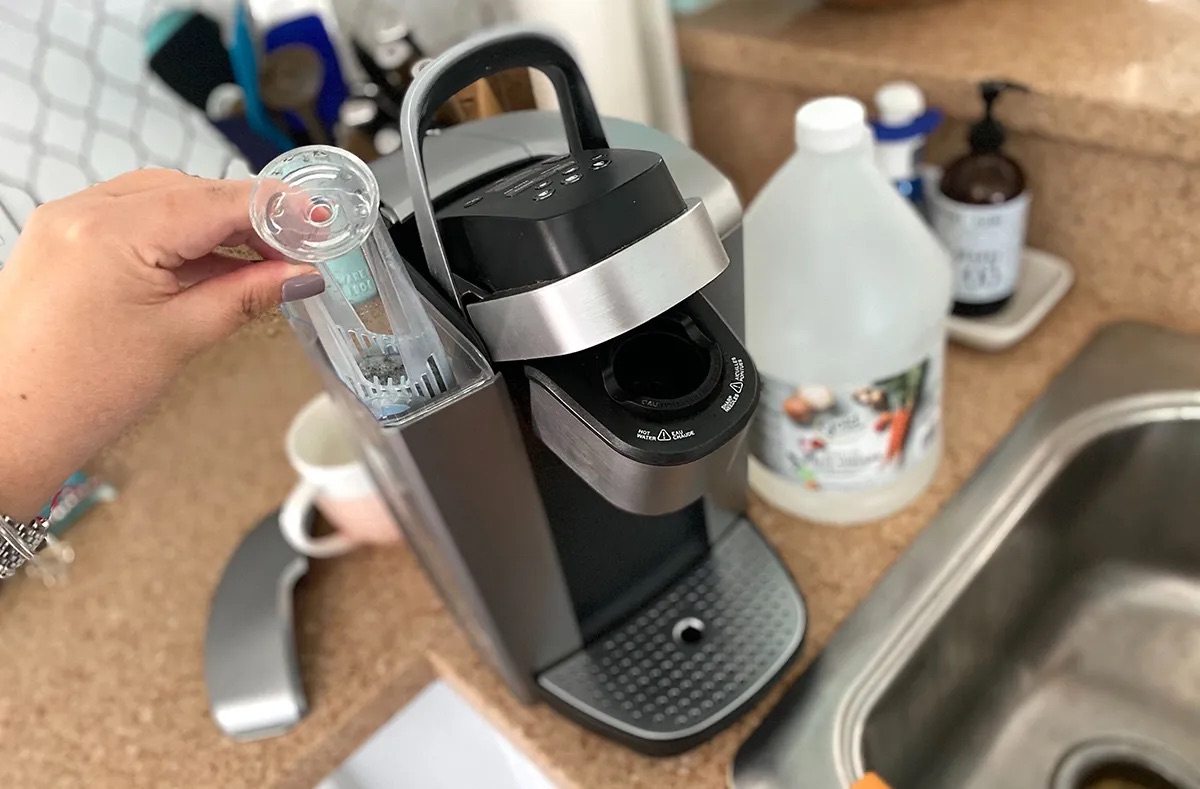
- Prepare Fresh Water: For rinsing, empty the water reservoir and rinse it thoroughly. Replace it with fresh, clean water to ensure proper rinsing.
- Position a Container: Place a container or cup under the coffee spout or outlet to capture the water that will flow out during the rinsing process.
- Rinse the Machine: Depending on your Philips coffee machine model, you might need to activate a rinsing cycle. Refer to the user manual for specific instructions on how to initiate the rinsing process. Typically, this involves pressing specific buttons or following particular steps on the machine’s interface. Follow the instructions to ensure proper rinsing.
- Allow Water to Flow: Start the rinsing cycle and let the fresh water flow through the coffee machine. This will help flush out any remaining descaling solution and residue.
- Monitor the Rinsing Process: Observe the machine during the rinsing cycle. Ensure that the water flows smoothly without any interruptions or unusual sounds. Pay attention to any error messages or indicator lights that may appear, as they could indicate an issue that needs to be addressed.
- Complete the Rinsing Cycle: Allow the machine to complete the entire rinsing cycle. This will ensure that all traces of the descaling solution are thoroughly removed from the internal components of the coffee machine.
- Empty and Refill the Water Reservoir: Once the rinsing process is complete, empty the water reservoir again and rinse it to ensure all remaining residue is removed. Fill the reservoir with fresh water for the next step, which involves cleaning the coffee machine.
Rinsing the coffee machine is an important step to remove any leftover descaling solution and ensure the machine is clean and ready for use. By following these steps, you can ensure that your Philips coffee machine is properly rinsed, setting the stage for the next step: cleaning the coffee machine.
Step 5: Clean the Coffee Machine
Now that you have completed the descaling and rinsing process, it’s time to clean your Philips coffee machine. Regular cleaning helps maintain the hygiene and performance of your machine. Follow these steps to effectively clean your coffee machine:
- Turn Off and Unplug the Machine: Before starting the cleaning process, ensure that your coffee machine is turned off and unplugged to prevent any accidents.
- Remove and Wash Removable Parts: Take out any removable parts, such as the coffee filter, drip tray, and water reservoir. Rinse them with warm soapy water and thoroughly clean them. Use a non-abrasive sponge or cloth to scrub away any residue or stains. Rinse the parts with clean water and set them aside to dry.
- Clean the Exterior: Take a damp microfiber cloth or sponge and wipe down the exterior surfaces of the coffee machine. Pay attention to any stains or spills and gently clean them. Avoid using abrasive or harsh cleaning agents that could damage the machine’s finish.
- Clean the Coffee Spout: Use a small brush or a toothbrush to clean the coffee spout. Remove any coffee grounds or residue that may have accumulated. Ensure that the spout is clean and free from any blockages.
- Wipe the Water Reservoir: Use a clean, damp cloth to wipe the inside of the water reservoir. This will remove any residue or impurities that may have accumulated during the descaling process. Ensure that the reservoir is completely dry before placing it back into the machine.
- Reassemble the Machine: Once all the parts are clean and dry, reassemble the coffee machine. Place the cleaned removable parts back into their respective positions, ensuring they are properly secured.
- Perform a Test Run: Fill the water reservoir with fresh water and turn on the machine. Run a test cycle without coffee to ensure that everything is functioning properly. Check for any leaks or unusual sounds.
Regularly cleaning your coffee machine helps maintain its performance and extends its lifespan. By following these steps, you can keep your Philips coffee machine clean and ready to brew your next delicious cup of coffee. Now, with the cleaning process complete, let’s move on to the next step: the final rinse.
Read more: How To Descale Tchibo Coffee Machine
Step 6: Final Rinse
After cleaning your Philips coffee machine, it’s important to perform a final rinse to ensure that any remaining residue or cleaning agents are completely removed. This step will help maintain the integrity of your machine and ensure the best tasting coffee. Follow these steps for the final rinse:
- Prepare Fresh Water: Empty and rinse the water reservoir to remove any leftover cleaning solution or residue. Fill it with fresh, clean water.
- Position a Container: Place a container underneath the coffee spout or outlet to catch the water that will flow out during the final rinse.
- Start the Rinse Cycle: Activate the rinsing cycle on your Philips coffee machine, following the instructions provided in the user manual. This process will allow the fresh water to flow through the internal components, removing any traces of cleaning agents or residue.
- Monitor the Rinse Process: Keep an eye on the machine during the rinse cycle. Ensure that the water flows smoothly and without interruption. Pay attention to any error messages or indicator lights that may appear, as they could indicate a problem that needs attention.
- Complete the Rinse Cycle: Allow the machine to complete the full rinse cycle. This will ensure that all remaining cleaning agents and residue are thoroughly flushed out of the machine.
- Empty and Refill the Water Reservoir: Once the rinse cycle is complete, empty the water reservoir again and give it a final rinse. Fill it with fresh water one more time to prepare your Philips coffee machine for the next use.
Performing a final rinse ensures that your coffee machine is free from any cleaning agents and residue, resulting in a clean and fresh taste for your brewed coffee. Now that you have completed the final rinse, let’s move on to the last step: resetting the machine.
Step 7: Reset the Machine
After completing the descaling, rinsing, and cleaning processes for your Philips coffee machine, it’s important to reset the machine to ensure that it is ready for use. Resetting the machine will help clear any previous settings or notifications that were triggered during the maintenance process. Follow these steps to reset your coffee machine:
- Turn Off and Unplug the Machine: Before resetting the machine, make sure it is turned off and unplugged for safety.
- Refer to the User Manual: Consult the user manual that came with your Philips coffee machine for specific instructions on how to reset the machine. Different models may have different reset procedures, so it’s important to follow the manual’s guidance to ensure accurate resetting.
- Follow the Reset Instructions: Depending on your coffee machine model, resetting may involve a combination of button presses or specific steps to be followed. These instructions can vary, so carefully read and understand the manual’s reset procedure.
- Complete the Reset Process: Follow the steps outlined in the manual to complete the reset process. This will clear any previous settings or notifications that may have been triggered during maintenance, providing a fresh start for your Philips coffee machine.
- Plug in and Power On the Machine: Once the reset process is complete, plug in your coffee machine and turn it on. It should be ready for regular use, with all settings returned to their default or factory state.
Resetting your Philips coffee machine after maintenance is an important step to ensure that it is properly calibrated and ready to brew your favorite coffee. By following the specific instructions in the user manual, you can easily reset the machine and enjoy your next cup of coffee with peace of mind. With the machine reset, you have completed all the necessary steps for descaling and maintaining your Philips coffee machine.
By following these steps, you can ensure that your Philips coffee machine stays in optimal condition, allowing you to enjoy delicious, flavorful coffee every time you brew. Regular descaling and maintenance will keep your machine running smoothly and extend its lifespan, providing you with many more delightful coffee moments. So, go ahead and savor that perfect cup of coffee from your well-maintained Philips coffee machine!
Conclusion
Congratulations! You have successfully learned how to descale and maintain your Philips coffee machine. By following the step-by-step guide outlined in this article, you can ensure that your coffee machine remains in optimal condition, consistently delivering delicious cups of coffee.
Descaling is a vital maintenance task that helps remove limescale deposits, which can affect the taste and performance of your coffee machine. Regular descaling not only enhances the flavor of your coffee but also extends the lifespan of your machine.
Throughout this article, we discussed the importance of descaling and the signs that indicate when your Philips coffee machine needs descaling. We provided a detailed guide on how to gather the necessary materials, prepare the descaling solution, start the descaling process, rinse the coffee machine, clean the machine, perform a final rinse, reset the machine, and finally, provided a conclusion.
Remember to refer to the user manual specific to your Philips coffee machine for model-specific instructions and guidelines. Always follow the recommended descaling solutions and dosages to ensure the safety and effectiveness of the descaling process.
By incorporating regular descaling and maintenance into your coffee routine, you can enjoy the full flavor and aroma of your favorite coffee beans, maintain the performance of your Philips coffee machine, and extend its lifespan.
So go ahead, take care of your coffee machine, and savor every sip of your perfectly brewed coffee. Happy brewing!
Frequently Asked Questions about How To Descale Philips Coffee Machine
Was this page helpful?
At Storables.com, we guarantee accurate and reliable information. Our content, validated by Expert Board Contributors, is crafted following stringent Editorial Policies. We're committed to providing you with well-researched, expert-backed insights for all your informational needs.

0 thoughts on “How To Descale Philips Coffee Machine”