Articles
How To Do Chimney Sweeping
Modified: October 20, 2024
Learn the effective techniques and tools for articles on how to do chimney sweeping. Keep your home safe and your chimney clean with our expert advice.
(Many of the links in this article redirect to a specific reviewed product. Your purchase of these products through affiliate links helps to generate commission for Storables.com, at no extra cost. Learn more)
Introduction
Chimney sweeping is an essential maintenance task that should not be overlooked by homeowners. Neglecting regular chimney maintenance can lead to a range of problems, including poor chimney performance, increased risk of chimney fires, and potential health hazards. In this article, we will explore the importance of chimney sweeping, the tools and equipment needed for the task, safety measures to be taken, and a step-by-step guide on how to effectively sweep a chimney.
A chimney plays a crucial role in any home with a fireplace or wood-burning stove. It serves as a passageway for smoke and gases to safely exit the home. However, over time, the inner walls of a chimney can accumulate creosote, a highly flammable substance produced by the combustion of wood. Creosote buildup can obstruct the airflow, leading to poor chimney performance and increased risk of a chimney fire.
Regular chimney sweeping not only removes creosote buildup but also helps to eliminate any blockages caused by debris, animal nests, or other obstructions. By keeping the chimney clean and clear, homeowners can ensure efficient and safe operation of their fireplaces or stoves.
To effectively sweep a chimney, you will need a set of specialized tools and equipment. These include a chimney brush, extension rods, a chimney sweeping vacuum, and a flashlight. Additionally, you may need a ladder, protective clothing, gloves, a dust mask, and safety goggles to ensure personal safety during the process.
It is crucial to prioritize safety when performing any chimney sweeping tasks. Before starting, make sure to inspect the chimney for any signs of damage, such as cracks or loose masonry. It is important to address these issues before proceeding with the cleaning process.
In this article, we will delve into a step-by-step guide on how to effectively sweep a chimney. We will cover everything from removing creosote buildup to cleaning the firebox, smoke shelf, and flue. We will also discuss how to remove debris and soot and how to inspect for any signs of damage that may require professional attention.
Regular chimney sweeping is a necessary maintenance task to ensure the safe and efficient operation of fireplaces and wood-burning stoves. By following the proper procedures, using the right tools, and taking necessary safety precautions, homeowners can maintain the longevity of their chimneys and create a warm and cozy environment in their homes.
Now, let’s dive deeper into the importance of chimney sweeping, the tools and equipment needed, safety precautions to be taken, and a comprehensive step-by-step guide on how to effectively sweep a chimney.
Key Takeaways:
- Regular chimney sweeping is crucial for preventing fires, maintaining efficiency, and ensuring safety. Proper tools, safety precautions, and thorough cleaning are essential for a well-functioning chimney.
- Prioritize safety, proper tools, and thorough inspections to maintain a safe and efficient chimney. Regular cleaning and maintenance are key to preventing hazards and ensuring a cozy fireplace experience.
Read more: How Much Do Chimney Sweeps Make
Importance of Chimney Sweeping
Regular chimney sweeping is of utmost importance for several reasons. Let’s explore the key reasons why homeowners should prioritize this essential maintenance task:
1. Preventing Chimney Fires: One of the most significant reasons to regularly sweep a chimney is to prevent chimney fires. Creosote is a highly flammable substance that can accumulate on the inner walls of the chimney. When the temperature inside the chimney reaches a certain level, this buildup can ignite, leading to a dangerous and potentially devastating chimney fire. Regular sweeping removes the creosote, significantly reducing the risk of a fire and ensuring the safety of your home and family.
2. Maintaining Efficient Fireplace Functionality: Over time, creosote buildup and debris can obstruct the airflow in the chimney, negatively impacting the efficiency of your fireplace or wood-burning stove. Poor airflow can result in smoke backing up into the room, excess smoke production, and difficulty in lighting a fire. Regular chimney sweeping ensures proper ventilation, allowing the fireplace to function efficiently, providing warmth and comfort during colder months.
3. Preventing Carbon Monoxide Poisoning: A blocked or poorly functioning chimney can also lead to the buildup of carbon monoxide, a colorless and odorless gas. Carbon monoxide poisoning can be life-threatening, causing symptoms such as headaches, dizziness, nausea, and even loss of consciousness. Regular chimney sweeping removes any blockages or obstructions, reducing the risk of carbon monoxide buildup and keeping your home safe.
4. Extending the Lifespan of Your Chimney: A clean and well-maintained chimney is less likely to experience structural issues. Creosote buildup can eat away at the internal lining of the chimney, leading to corrosion and deterioration. By regularly sweeping the chimney, you can prevent damage caused by excessive buildup and ensure the longevity of your chimney.
5. Avoiding Animal Intrusion: Chimneys often attract birds, squirrels, raccoons, and other animals looking for a warm and safe place to nest. These animals can block the chimney and create obstructions, hindering the proper functioning of the vent. Regular chimney sweeping helps to remove any animal nests or debris, preventing future infestations and maintaining optimal chimney performance.
6. Compliance with Building Codes and Insurance Requirements: In many jurisdictions, regular chimney sweeping is required by building codes and may be necessary to maintain insurance coverage. By ensuring that your chimney is regularly swept and cleaned, you can comply with these regulations and maintain the necessary coverage to protect your property.
Overall, chimney sweeping is an essential maintenance task that should not be neglected. It helps prevent chimney fires, ensures efficient fireplace functionality, prevents carbon monoxide poisoning, extends the lifespan of the chimney, avoids animal intrusion, and ensures compliance with building codes and insurance requirements. By prioritizing regular chimney sweeping, homeowners can maintain a safe and efficient heating system, providing warmth and comfort for years to come.
Tools and Equipment Needed
When it comes to chimney sweeping, having the right tools and equipment is essential to ensure a thorough and effective cleaning. Here are the key tools you will need:
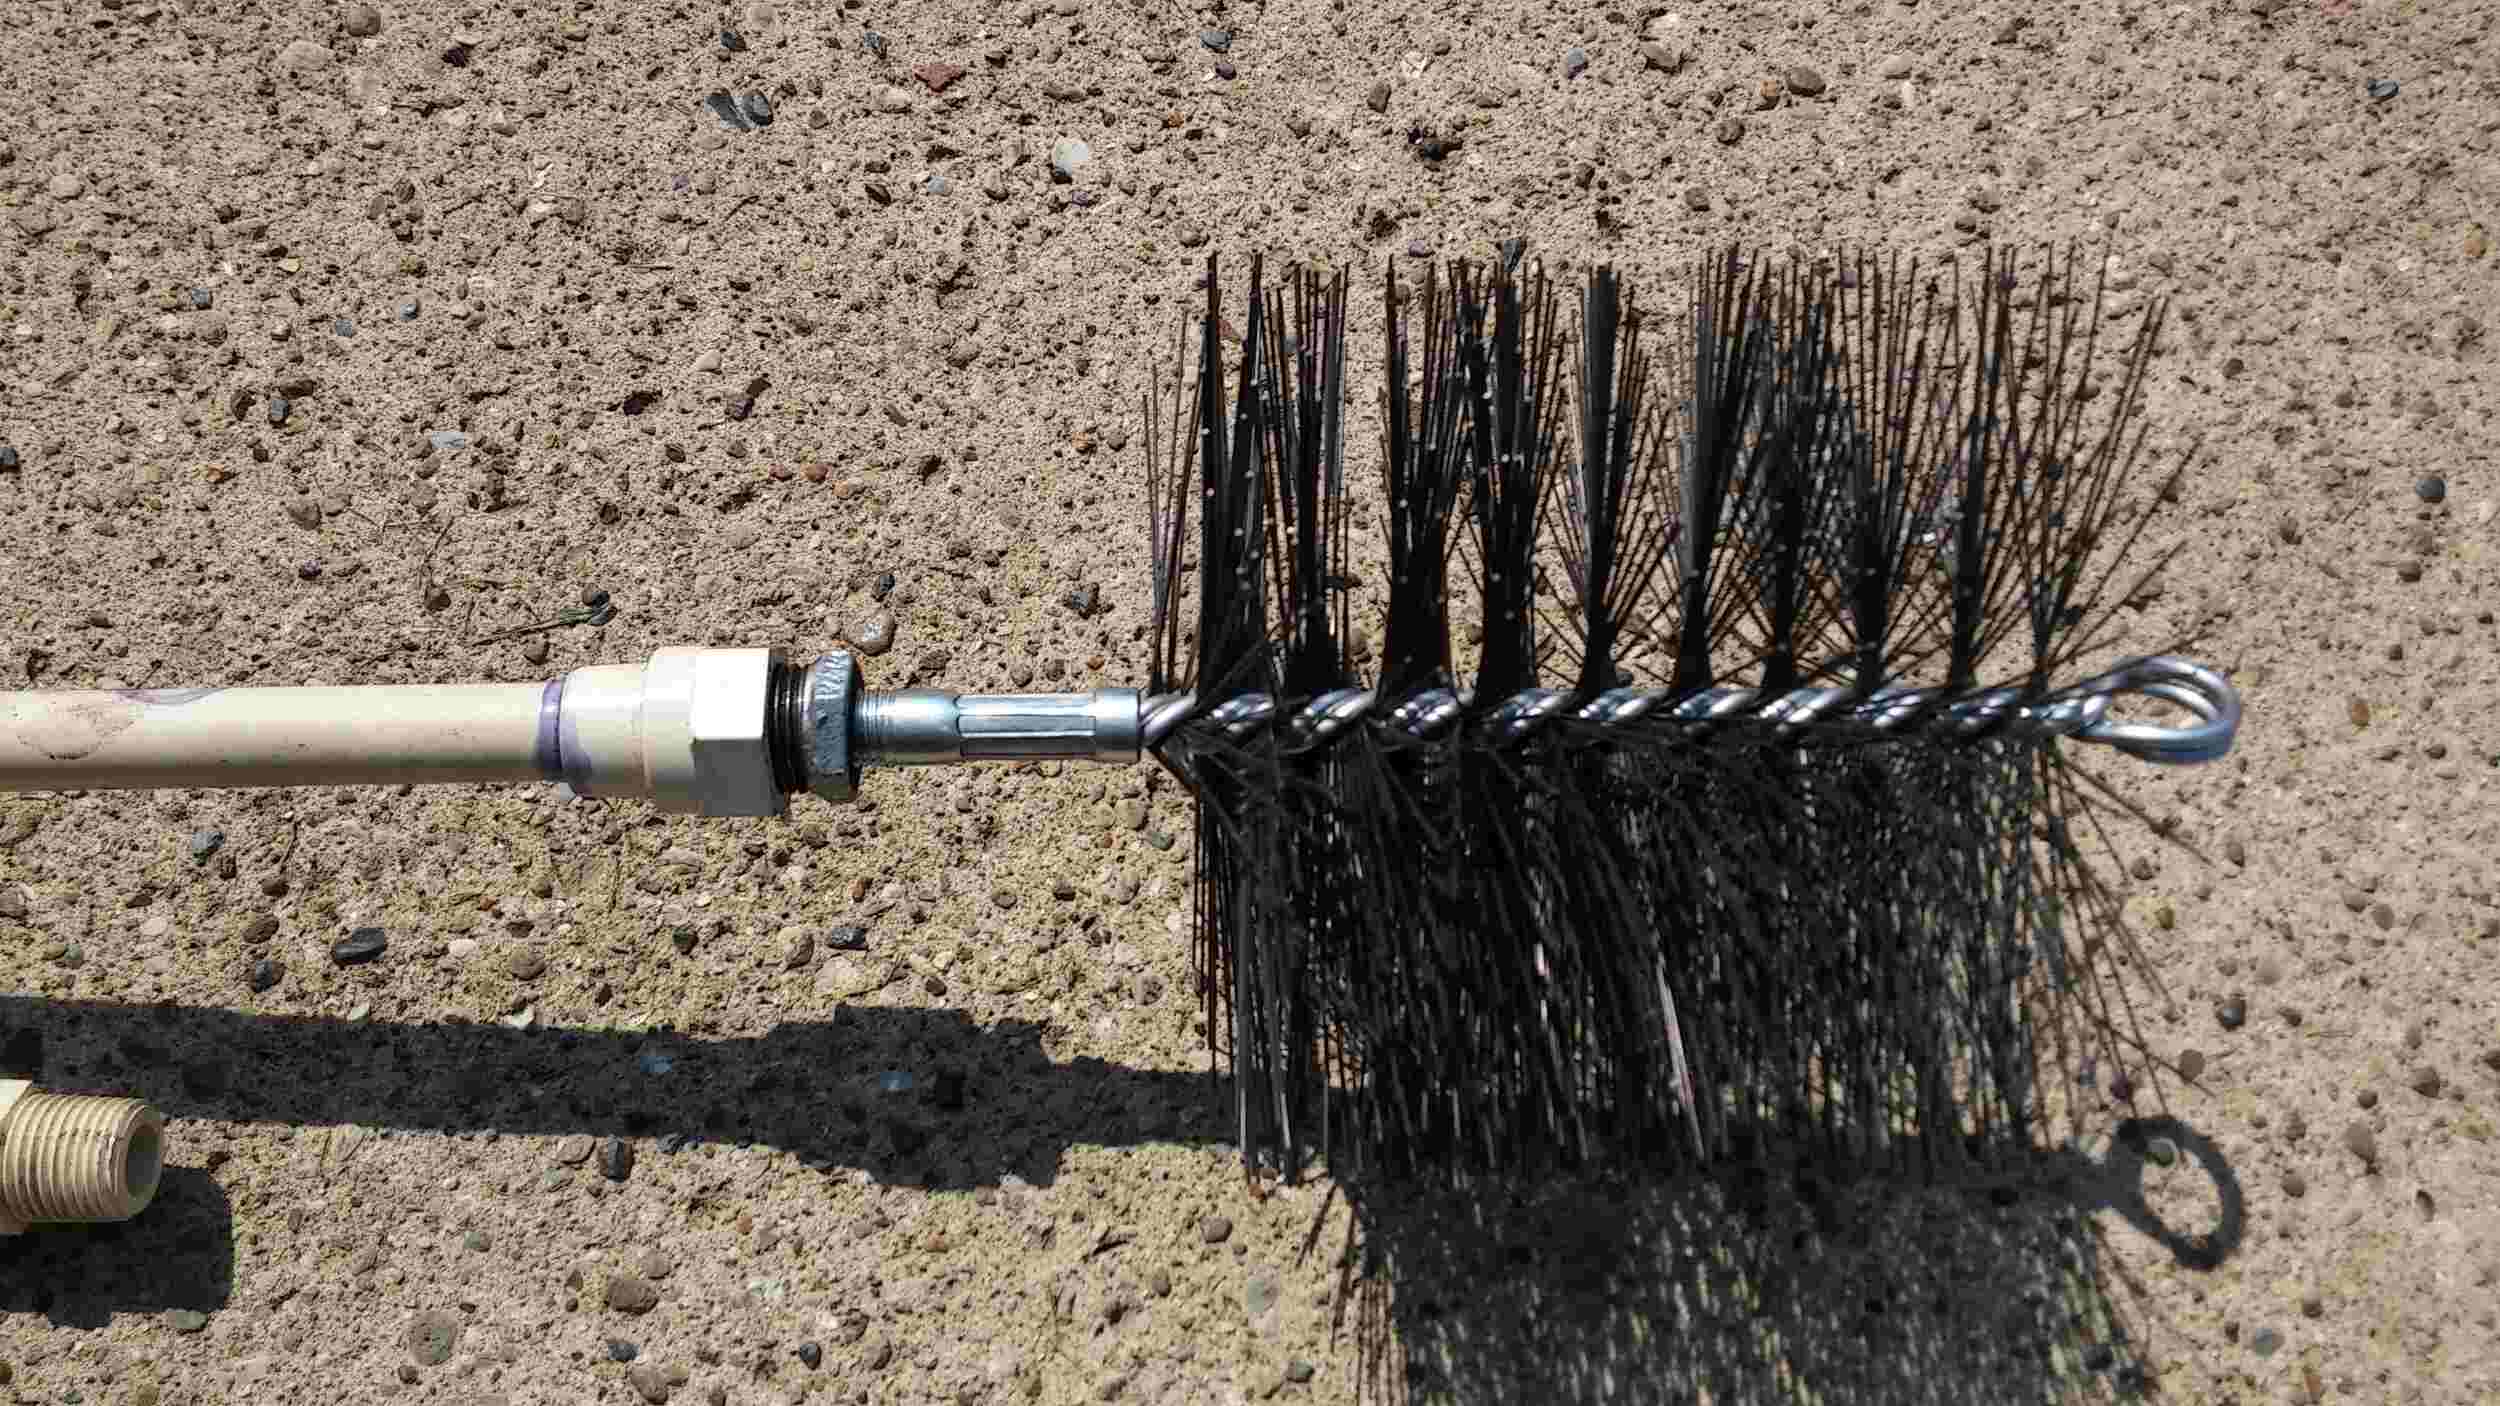
1. Chimney Brush: A chimney brush is the primary tool used for cleaning the chimney. It typically consists of stiff bristles attached to a long handle. The size and type of brush you need will depend on the dimensions and material of your chimney. Make sure to choose a brush that is appropriate for your specific chimney.
2. Extension Rods: Extension rods are used to extend the length of the chimney brush. These rods are typically made of fiberglass or metal and can be attached securely to reach the full length of the chimney. It is important to ensure that the rods are firmly connected to prevent detachment during the cleaning process.
3. Chimney Sweeping Vacuum: A chimney sweeping vacuum is a specialized vacuum cleaner designed to effectively capture and contain soot and debris during the sweeping process. These vacuums are equipped with high-efficiency filters that prevent the release of harmful particles into the air. Using a vacuum will help minimize mess and ensure a clean and efficient cleaning process.
4. Flashlight: A flashlight is an essential tool for inspecting the interior of the chimney. It allows you to have a clear view of the chimney walls, flue, and other components. Opt for a flashlight with a bright and adjustable beam to ensure proper visibility during the inspection and cleaning process.
5. Ladder: Depending on the height of your chimney, you will need a sturdy ladder to safely access the chimney top. Make sure the ladder is in good condition and securely positioned before climbing. It is crucial to prioritize safety and stability when using a ladder during the chimney sweeping process.
6. Protective Clothing: Wearing appropriate protective clothing is crucial to ensure personal safety during chimney sweeping. This includes long-sleeved shirts, long pants, gloves, and safety goggles. Additionally, it is recommended to wear a dust mask or respirator to protect against inhaling soot particles.
7. Dust Sheet and Drop Cloths: To protect your surroundings from soot and debris, lay down a dust sheet or drop cloths around the fireplace area. This will help contain any mess and make the cleanup process easier after the chimney sweeping is complete.
8. Chimney Inspection Tools: Apart from the cleaning tools mentioned above, you may also need specialized chimney inspection tools, such as a mirror or camera, to examine hard-to-reach areas of the chimney. These tools can help you identify any signs of damage or structural issues that may require professional attention.
Having the right tools and equipment is essential for a successful chimney sweeping. By ensuring you have the necessary tools, you can effectively clean your chimney, maintain its efficiency and safety, and enjoy a well-functioning fireplace or wood-burning stove.
Safety Precautions
When it comes to chimney sweeping, safety should always be the top priority. Here are some important safety precautions to keep in mind before, during, and after the chimney sweeping process:
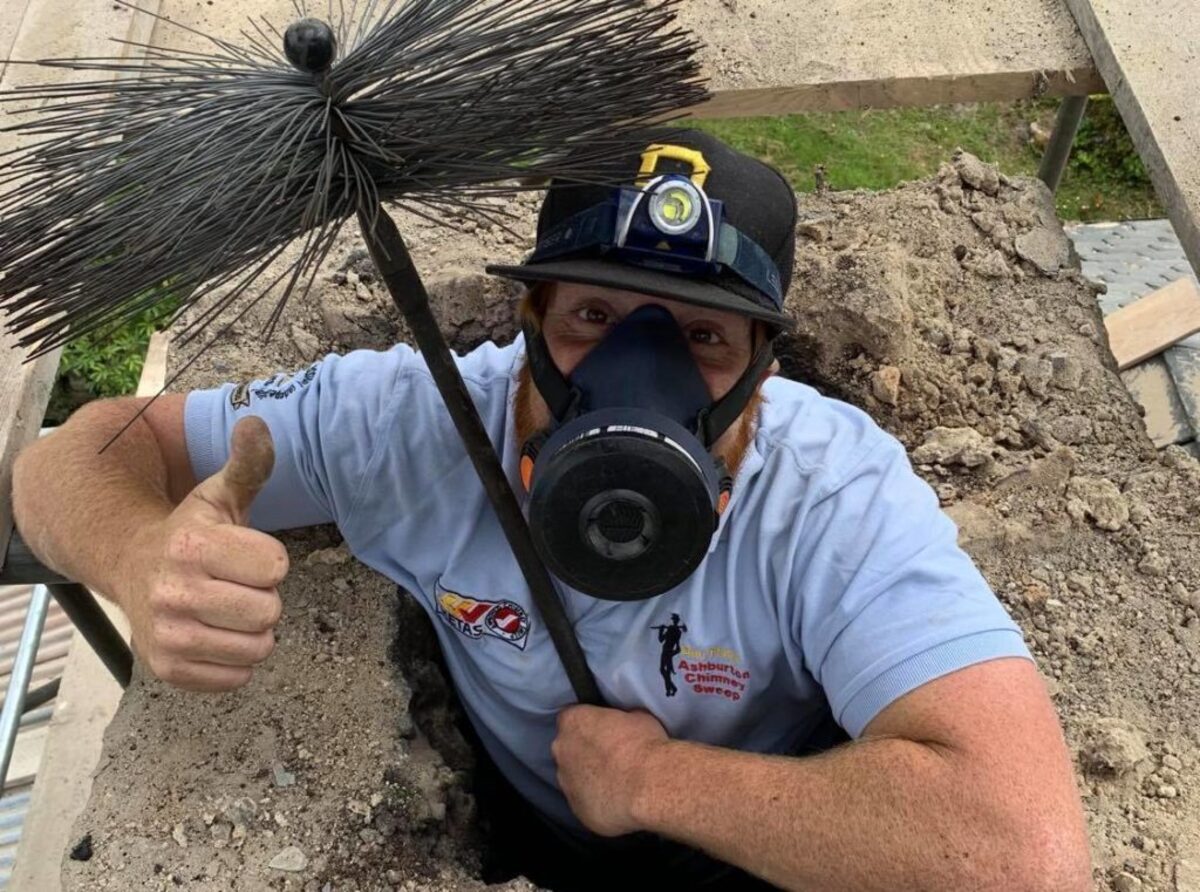
1. Personal Protective Equipment (PPE): Wear appropriate personal protective equipment, including long-sleeved shirts, long pants, gloves, safety goggles, and a dust mask or respirator. PPE helps protect against direct contact with soot, chemicals, and other potentially hazardous materials.
2. Proper Ventilation: Ensure that the room where you are performing the chimney sweeping is well-ventilated. Open windows or doors to allow fresh air to circulate and prevent the accumulation of soot particles.
3. Clear the Area: Clear the area around the fireplace or wood-burning stove to minimize the risk of tripping or knocking over objects. Remove any furniture, rugs, or other flammable materials from the vicinity.
4. Chimney Inspection: Before starting the cleaning process, thoroughly inspect the chimney for any signs of damage, such as cracks, loose bricks, or deteriorated mortar. If you notice any structural issues, it is advisable to seek professional assistance before proceeding with the sweeping.
5. Use Stable Ladder: If you need to access the chimney top, use a sturdy and stable ladder. Ensure that it is placed on a level surface and secure it properly before climbing. Have someone assist you by spotting the ladder from the base.
6. Communicate with Family Members: Inform family members or other occupants of the home that you will be performing chimney sweeping. Advise them to avoid using the fireplace or wood-burning stove during the cleaning process to prevent accidents or injury.
7. Chimney Fire Extinguisher: Keep a fire extinguisher nearby in case of an unexpected chimney fire. Make sure you are familiar with how to operate it and have it readily accessible during chimney sweeping.
8. Work Slowly and Carefully: Take your time when sweeping the chimney and avoid rushing through the process. Work carefully and methodically, ensuring that each segment of the chimney is thoroughly cleaned.
9. Proper Disposal of Debris: Safely dispose of the debris and soot collected during the chimney sweeping process. Place it in a sealed container or bag before discarding it to prevent the release of harmful particles into the environment.
10. Don’t DIY Complex Issues: If you encounter any complex issues, such as extensive damage, blockages, or significant deterioration, it is best to seek professional help. Avoid attempting to resolve complicated chimney problems on your own, as it may further endanger your safety or cause more damage.
By adhering to these safety precautions, you can ensure a safe and successful chimney sweeping process. Remember, if you are unsure about any aspect of chimney sweeping or feel uncomfortable performing the task on your own, it is always best to seek professional assistance from a licensed chimney sweep.
Step-by-Step Guide to Sweeping a Chimney
Sweeping a chimney may seem like a daunting task, but by following a step-by-step process, you can effectively clean your chimney and maintain its optimal performance. Here is a comprehensive guide to help you navigate through the chimney sweeping process:
1. Gather the Necessary Tools: Before you begin, ensure that you have all the tools and equipment needed for chimney sweeping, including a chimney brush, extension rods, a chimney sweeping vacuum, flashlight, ladder, and personal protective equipment (PPE) like gloves, safety goggles, and a dust mask.
2. Perform a Visual Inspection: Inspect the chimney both from the inside and outside. Look for any signs of damage, such as cracks, loose bricks, or deteriorated mortar. If you notice structural issues, it is advisable to contact a professional chimney sweep for assistance.
3. Prepare the Workspace: Lay down a dust sheet or drop cloths around the fireplace area to protect your surroundings from soot and debris. Remove any furniture or flammable objects nearby and ensure proper ventilation in the room.
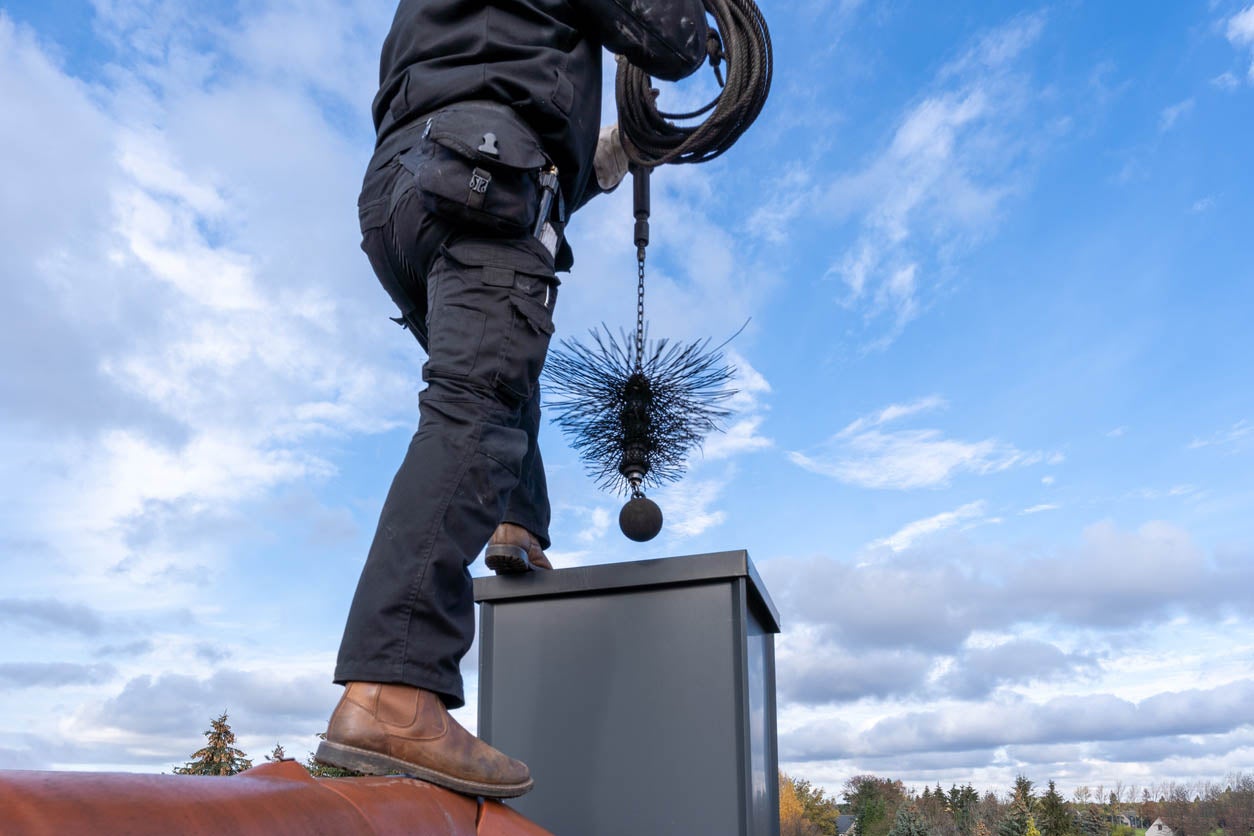
4. Climb the Ladder: If your chimney requires access from the top, securely position the ladder and climb up to the chimney top. Make sure the ladder is stable and have someone assist you by spotting from the base.
5. Attach the Brush to Extension Rods: Attach the chimney brush to the extension rods securely. Carefully insert the brush into the chimney and extend the rods to reach the full length of the chimney.
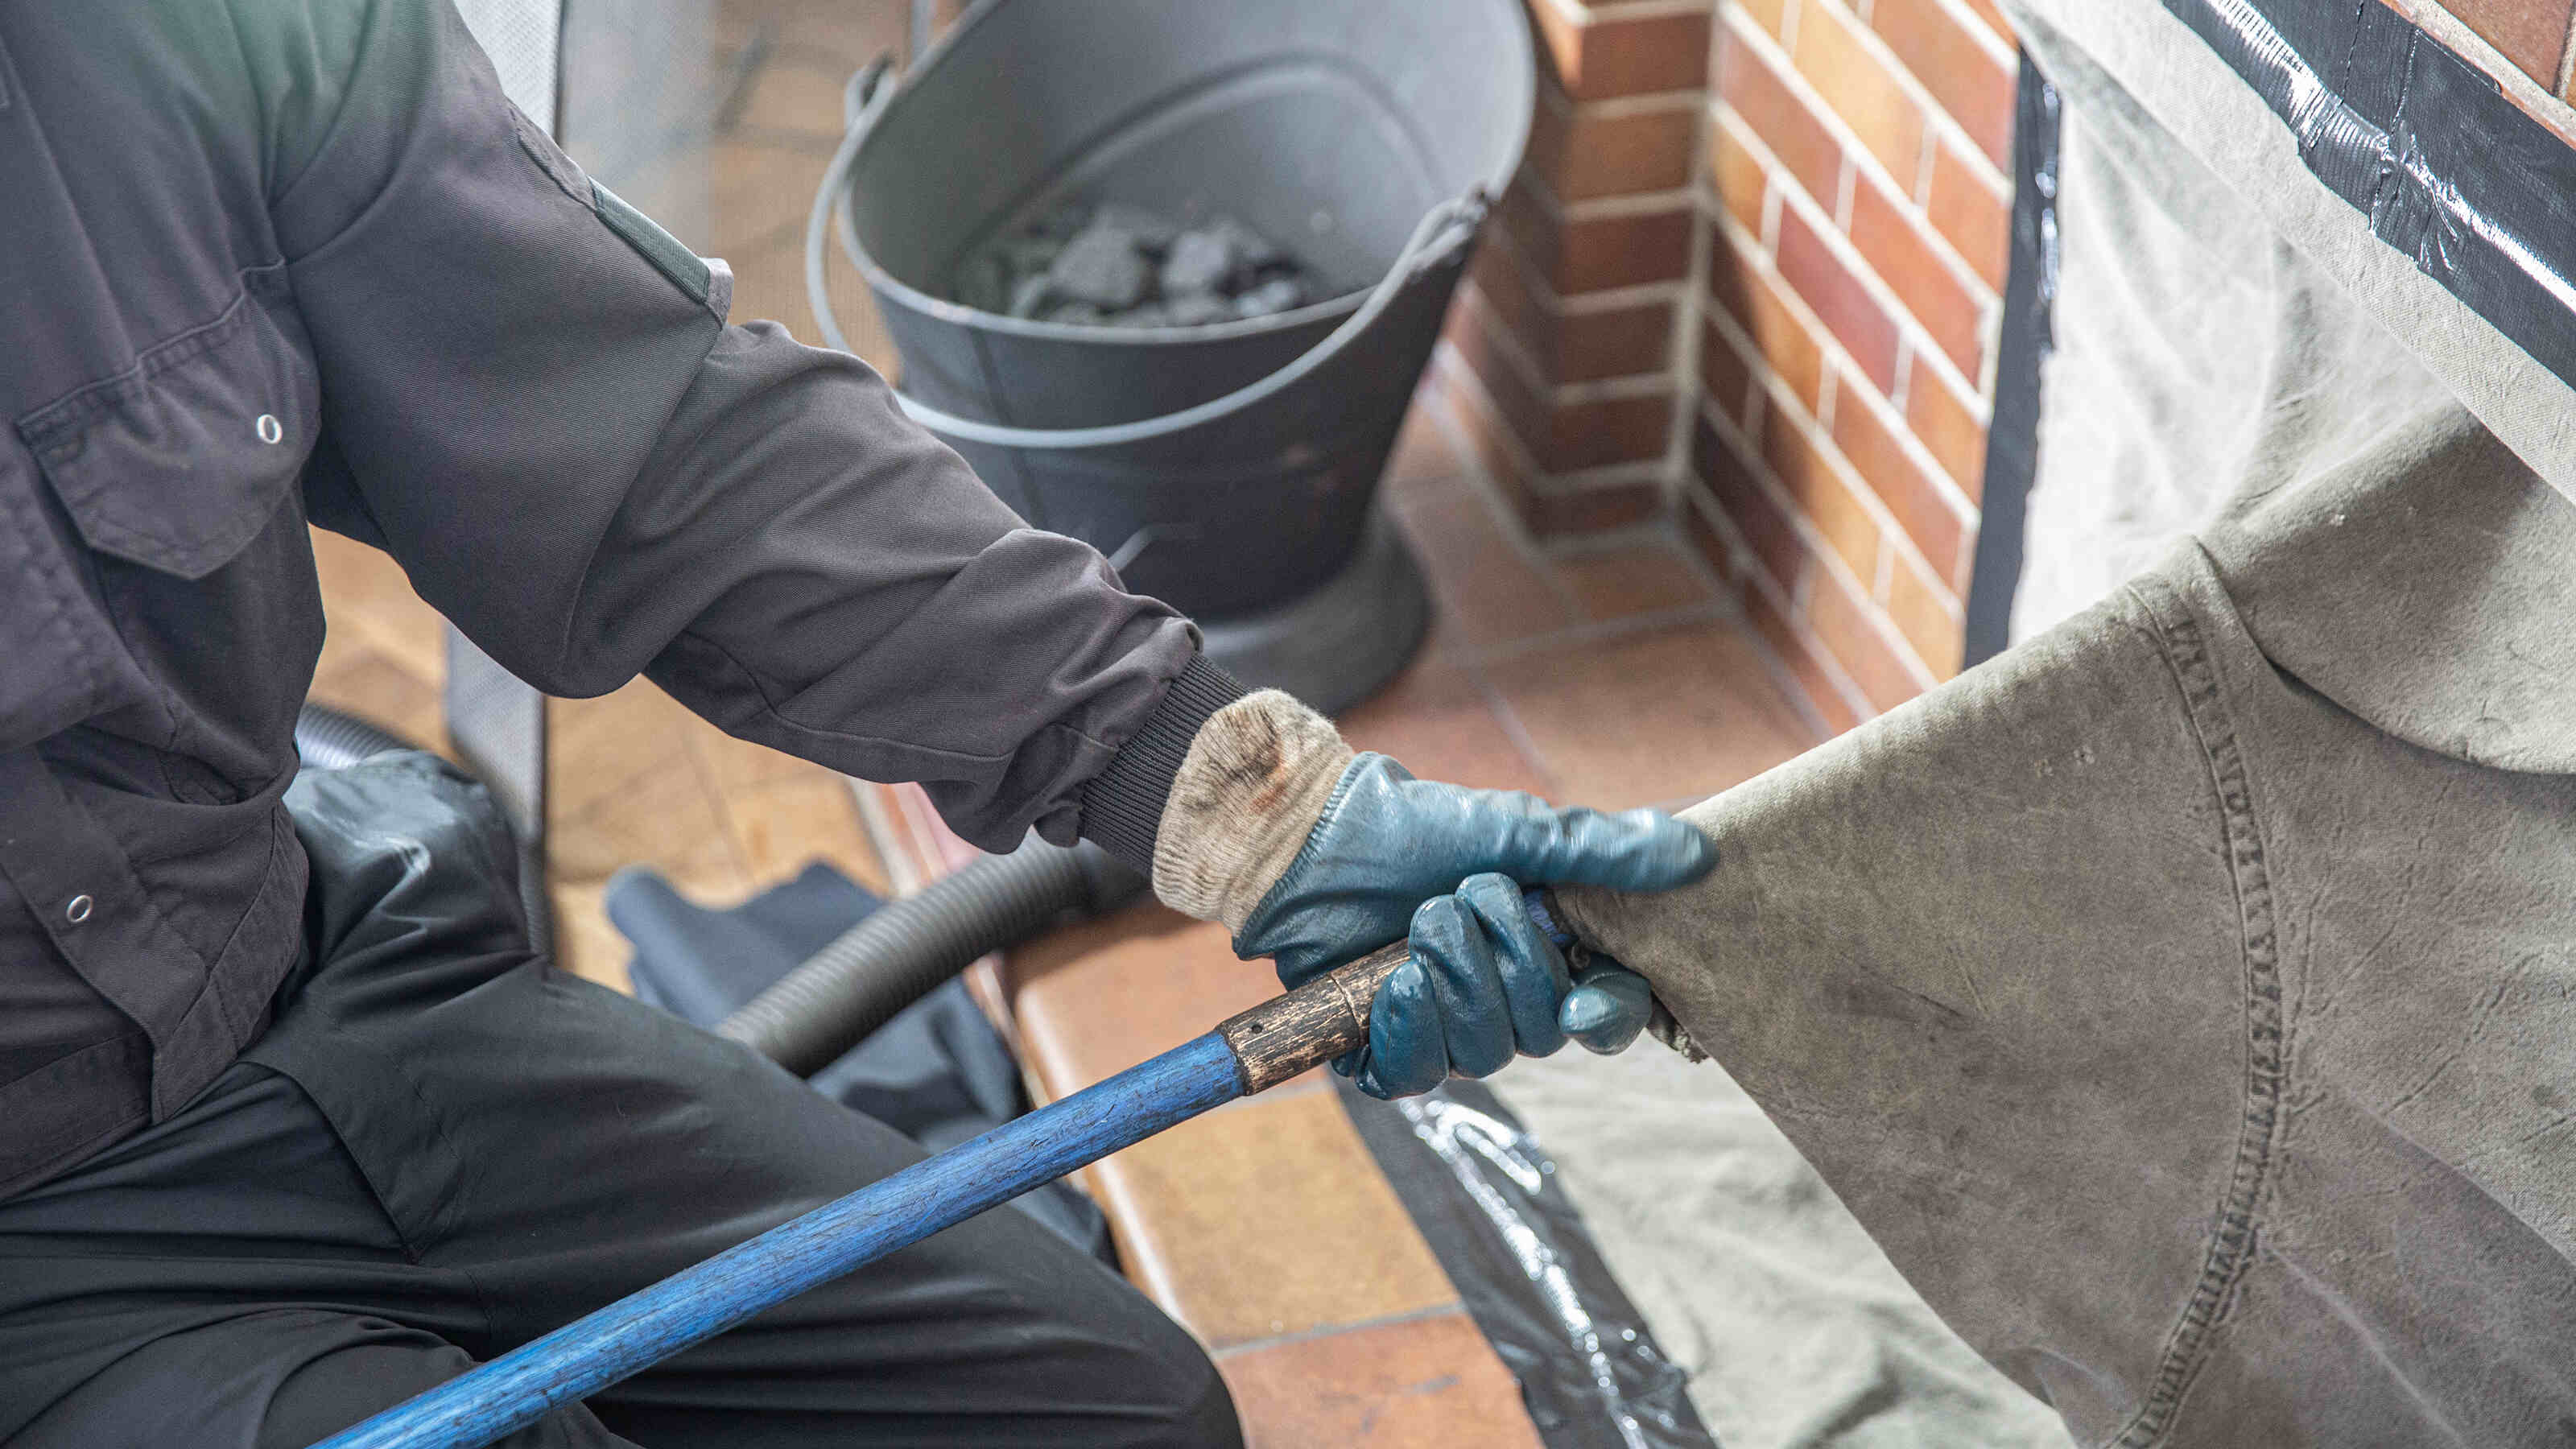
6. Sweep the Chimney: Starting from the bottom of the chimney, use a firm and steady motion to push the brush up and down. Rotate the brush as you sweep to cover all sides of the chimney walls. Continue sweeping until you reach the top of the chimney.
7. Remove the Brush and Debris: Once you have reached the top of the chimney, carefully detach the brush from the extension rods. Use a chimney sweeping vacuum to remove any loose debris and soot that has accumulated at the bottom of the fireplace or wood-burning stove.
8. Clean the Firebox and Smoke Shelf: Use a brush and vacuum to clean the firebox, removing any ash, soot, or debris. Pay close attention to the smoke shelf, which is located directly above the firebox. Clear out any accumulated creosote or blockages.
9. Inspect the Chimney Cap and Flue: Use a flashlight to inspect the chimney cap and flue. Look for any obstructions, animal nests, or debris that may hinder the proper functioning of the chimney. Remove any blockages or call a professional if necessary.
10. Check for Signs of Damage: After cleaning, perform a final inspection for any signs of damage, such as cracks, loose bricks, or deteriorated mortar. If you notice any significant issues, it is best to consult with a professional chimney sweep.
11. Cleanup and Disposal: Safely dispose of the debris and soot collected during the cleaning process. Seal it in a bag and discard it properly to prevent the release of harmful particles into the environment. Clean up the workspace thoroughly, removing any remaining dust or debris.
Following this step-by-step guide will enable you to effectively sweep your chimney, ensuring its proper function and reducing the risk of chimney fires and other issues. However, if you have any doubts or feel uncomfortable performing chimney sweeping on your own, it is always recommended to seek professional assistance from a licensed chimney sweep.
Read more: How Do I Become A Certified Chimney Sweep
Removing Creosote Buildup
Creosote, a highly flammable substance, can accumulate on the inner walls of a chimney over time. It is imperative to remove this buildup regularly to reduce the risk of chimney fires and maintain the optimal performance of your chimney. Here is a step-by-step guide on how to effectively remove creosote from your chimney:
1. Gather the Necessary Tools: Before you begin, ensure that you have the necessary tools and equipment for removing creosote buildup. This includes a chimney brush, extension rods, personal protective equipment (PPE), such as gloves, safety goggles, and a dust mask, and a chimney sweeping vacuum.
2. Prepare the Workspace: Protect the surrounding area by placing a dust sheet or drop cloths on the floor to catch any debris or soot that may fall during the cleaning process. Open windows or doors to provide adequate ventilation.
3. Secure the Brush to Extension Rods: Attach the appropriately sized chimney brush to the extension rods. Ensure that the brush is securely fastened to the rods to prevent it from becoming loose during the cleaning process.
4. Start from the Bottom: Begin the process of removing creosote buildup by inserting the brush into the chimney from the bottom. Push the brush up the chimney walls using a firm and steady motion. Rotate the brush as you sweep to cover all sides of the chimney walls.
5. Extend the Rods: As you reach higher sections of the chimney, extend the extension rods to their full length while keeping a firm grip on the brush. This will allow you to reach the entire length of the chimney and effectively remove creosote.
6. Sweep the Chimney: Continue sweeping the chimney by moving the brush up and down with a rhythmic motion. Be sure to cover all areas, including corners and bends, to dislodge and remove any creosote buildup.
7. Repeat the Process: If you encounter stubborn creosote deposits, repeat the sweeping process multiple times to ensure thorough removal. It may be necessary to use a bit of extra force to dislodge hardened or stubborn buildup.
8. Use a Chimney Sweeping Vacuum: After completing the brushing process, use a chimney sweeping vacuum to remove any loose debris and soot that has accumulated at the bottom of the fireplace or wood-burning stove. Vacuum the firebox and surrounding area as well.
9. Inspect the Chimney: Once the creosote removal is complete, carefully examine the chimney walls for any remaining buildup or signs of damage. It is important to address any issues promptly to ensure the safe operation of your chimney.
10. Dispose of Debris: Safely dispose of the creosote and debris collected during the cleaning process. Place it in a sealed bag or container before discarding it to prevent the release of harmful particles into the air.
11. Clean Up: Thoroughly clean the workspace and remove any remaining dust or debris. Vacuum the dust sheet or drop cloths, and store all tools and equipment properly for future use.
Regularly removing creosote buildup is crucial to maintain the safety and efficiency of your chimney. By following these steps and ensuring proper maintenance, you can reduce the risk of chimney fires, improve chimney performance, and enjoy the warmth and comfort of your fireplace or wood-burning stove with peace of mind.
Make sure to wear protective gear such as gloves, goggles, and a mask when chimney sweeping to protect yourself from soot and debris. It’s also important to use the right tools and equipment for the job.
Inspecting and Cleaning the Chimney Cap and Flue
Inspecting and cleaning the chimney cap and flue is an essential part of chimney maintenance. The chimney cap protects the chimney opening from debris, animals, and weather elements, while the flue serves as the passage for the smoke and gases to exit the chimney. Here is a step-by-step guide on how to effectively inspect and clean the chimney cap and flue:
1. Safety First: Before starting the inspection and cleaning process, ensure that you are wearing appropriate personal protective equipment (PPE), such as gloves, safety goggles, and a dust mask to protect yourself from debris and potential irritants.
2. Access the Chimney Cap: If your chimney has a cap, carefully access it by climbing a ladder or using a secure means of access. Ensure that the ladder is stable and someone is there to spot you from the base.
3. Inspect the Chimney Cap: Begin by visually inspecting the chimney cap. Look for any signs of damage, such as cracks, rust, or loose hardware. Ensure that the cap is securely attached and in good condition to effectively protect the chimney opening.
4. Remove Debris: If there is any debris, such as leaves, twigs, or small animal nests, carefully remove them from the chimney cap. Use a soft brush or gloved hand to clear away the debris, taking care not to dislodge the cap or damage any components.
5. Check the Flue: Shine a flashlight down the flue to inspect its condition. Look for any obstructions, such as bird nests, branches, or creosote buildup. If you notice any major blockages, it is recommended to seek professional assistance for safe removal.
6. Clean the Chimney Cap: If the chimney cap requires cleaning, use a soft brush or cloth to remove any built-up dirt, soot, or debris. Avoid using harsh chemicals or abrasive materials that could damage the cap’s finish. Clean both the interior and exterior surfaces of the cap.
7. Clear the Flue: Use a chimney brush or specialized flue cleaning tool to remove any creosote buildup or obstructions from the flue. Insert the brush or tool through the chimney cap and carefully sweep the flue walls, moving the brush up and down in a steady motion. Ensure that you cover the entire length of the flue.
8. Remove Residual Dust and Debris: After cleaning, vacuum any residual dust or debris that may have accumulated on the chimney cap or flue walls. Use a chimney sweeping vacuum or a regular vacuum cleaner with a high-efficiency filter to effectively capture the particles.
9. Inspect for Damaged Components: After cleaning, thoroughly inspect the chimney cap and flue for any signs of damage, such as cracks, missing pieces, or excessive wear. If you notice any significant issues, it is best to consult a professional chimney service provider for further assessment and repairs.
10. Maintain Regular Inspection and Cleaning: Repeat the chimney cap and flue inspection and cleaning process at least once a year, or as recommended by professionals, to ensure optimal chimney performance and safety.
Regularly inspecting and cleaning the chimney cap and flue is crucial to maintain the efficiency and functionality of your chimney system. By following these steps and taking the necessary precautions, you can ensure a well-maintained chimney that operates safely and effectively for years to come.
Cleaning the Firebox and Smoke Shelf
Cleaning the firebox and smoke shelf is an important part of chimney maintenance. The firebox is the area where the fire is contained, while the smoke shelf is located above the firebox and helps redirect smoke and gases into the flue. Here is a step-by-step guide on how to effectively clean the firebox and smoke shelf:
1. Safety First: Before you begin, make sure you are wearing appropriate personal protective equipment (PPE), including gloves, safety goggles, and a dust mask to protect yourself from debris and potentially harmful substances.
2. Prepare the Workspace: Lay down a dust sheet or drop cloths in the area surrounding the firebox to catch any debris or soot that may fall during the cleaning process. Open windows or doors to provide proper ventilation.
3. Remove Ashes: Start by removing any ashes from the firebox using a metal shovel or small dustpan and brush. Scoop the ashes into a metal container and dispose of them safely. Avoid using a regular vacuum cleaner, as it may get damaged by the fine ash particles.
4. Inspect the Firebox: Take a close look at the firebox walls, floor, and grate to check for any signs of damage, such as cracks, loose bricks, or deteriorated mortar. If you notice significant issues, consult a professional chimney service provider for proper assessment and repairs.
5. Sweep out Loose Debris: Use a small broom or brush to sweep away any loose debris, such as soot, cobwebs, or small particles, from the firebox. Ensure that the debris is collected and disposed of properly.
6. Clean the Firebox Walls: Mix a solution of mild dish soap and warm water in a bucket. Dip a soft brush or sponge into the solution and gently scrub the firebox walls. Pay attention to the areas with noticeable soot buildup. Rinse the brush or sponge frequently and change the cleaning solution if it becomes too dirty. Wipe down the walls with a clean cloth or sponge dampened with plain warm water to remove any soap residue. Allow the firebox to dry before using the fireplace again.
7. Clear the Smoke Shelf: Use a brush or vacuum to clear any debris or soot from the smoke shelf. This area is located above the firebox and can accumulate creosote and other residues. Pay close attention to the edges and corners of the smoke shelf, as buildup is more likely in those areas.
8. Inspect the Damper: Check the damper, which is located above the firebox, for proper functionality. Ensure that it moves freely and opens and closes correctly. If you notice any issues with the damper, such as blockages or rust, consult a professional for assistance.
9. Clean Fireplace Accessories: If you have fireplace accessories, such as a grate, poker, or log holder, take the time to clean them as well. Wipe them down with a damp cloth or sponge and mild soap solution. Rinse them thoroughly and allow them to dry before placing them back in the firebox.
10. Dispose of Debris: Dispose of any debris, ashes, or cleaning residue in a secured container or bag. Seal it to prevent the release of particles into the air and dispose of it safely.
11. Clean Up: Thoroughly clean the workspace, removing any remaining dust or debris. Vacuum the dust sheet or drop cloths and store your cleaning tools properly for future use.
Regularly cleaning the firebox and smoke shelf is crucial to maintain the safety and efficiency of your fireplace. By following these steps and taking the necessary precautions, you can enjoy a clean and well-maintained firebox, ensuring a cozy and inviting fireplace experience.
Removing Debris and Soot
Removing debris and soot from your chimney is an essential part of chimney maintenance. Over time, debris such as leaves, twigs, and animal nests can accumulate, along with soot from the combustion of wood. Here is a step-by-step guide on how to effectively remove debris and soot from your chimney:
1. Assemble the Necessary Tools: Before you begin, gather the tools and equipment needed for debris and soot removal. These include a chimney brush, extension rods, personal protective equipment (PPE) like gloves, safety goggles, and a dust mask, and a chimney sweeping vacuum.
2. Prepare the Workspace: Lay down a dust sheet or drop cloths around the fireplace area to catch any debris or soot that may fall during the cleaning process. Open windows or doors for proper ventilation.
3. Access the Chimney Top: If your chimney requires access from the top, securely position a ladder and climb to the chimney top. Ensure the ladder is stable and have someone spot you from the base.
4. Inspect for Debris: Take a close look at the chimney opening and flue to check for any visible debris, such as leaves, twigs, or animal nests. Use a flashlight to illuminate the areas for a thorough inspection.
5. Remove Debris: Carefully remove any visible debris by hand or with the help of a small brush or broom. Dispose of the debris in a sealed bag or container to prevent any mess or scattering. Take care not to push the debris further into the chimney or drop it into the fireplace or stove.
6. Clean the Flue: Attach the chimney brush to the extension rods securely. Insert the brush into the chimney opening and move it up and down in a steady motion to clean the flue walls. Use a twisting motion to cover all sides and dislodge any soot or debris.
7. Extend the Rods: As you progress upwards, extend the extension rods to cover the full length of the chimney. This ensures a thorough cleaning of the flue from top to bottom. Keep a firm grip on the brush and rods to prevent detachment or accidents.
8. Use a Chimney Sweeping Vacuum: As you sweep the flue, use a chimney sweeping vacuum to collect any loosened debris or soot that falls into the fireplace or stove. This will help prevent any mess or contamination of the space.
9. Repeat if Necessary: For heavily sooted or debris-laden chimneys, you may need to repeat the process of brushing and vacuuming multiple times to ensure thorough removal. Pay attention to areas that appear more congested or clogged.
10. Inspect for Residual Debris: After cleaning, inspect the chimney opening and flue once again to ensure there is no visible debris or soot left. Use a flashlight to have a clear view of the interior. If necessary, repeat the cleaning process until the chimney is clear of all debris.
11. Dispose of Debris: Properly seal and discard all collected debris and soot in a sealed bag or container to prevent the release of particles into the air. Dispose of it in accordance with your local waste management guidelines.
12. Clean Up: Thoroughly clean the workspace, removing any remaining dust or debris. Vacuum the dust sheet or drop cloths and store all tools and equipment properly for future use.
Regularly removing debris and soot from your chimney is crucial to maintain its functionality and prevent chimney fires. Following this step-by-step guide will help ensure a clean and efficient chimney that provides warmth and safety for years to come.
Read more: What Size Of Chimney Sweep Brush Do I Use
Checking for Any Signs of Damage
Regularly checking for signs of damage in your chimney is essential to ensure its safety and functionality. Here is a step-by-step guide on how to effectively check for any signs of damage:
1. Safety First: Before you begin the inspection, ensure that you are wearing personal protective equipment (PPE) such as gloves, safety goggles, and a dust mask to protect yourself from debris and potential irritants.
2. Access the Chimney Top: If your chimney has a chimney cap or exhaust vent on the roof, securely position a ladder and climb up to reach the chimney top. Ensure the ladder is stable and have someone spot you from the base.
3. Inspect the Chimney Cap or Exhaust Vent: Begin by inspecting the chimney cap or exhaust vent for any visible signs of damage, such as cracks, dents, or loose components. These can compromise the chimney’s ability to keep out debris, animals, and water.
4. Examine the Chimney Crown: The chimney crown is the topmost part of the chimney structure. Check for any cracks, gaps, or deterioration in the cement or masonry material. A damaged chimney crown can lead to water infiltration and further chimney deterioration.
5. Look for Cracked or Loose Bricks: Carefully examine the chimney’s exterior surface for any cracked or loose bricks. Cracked bricks can allow water to seep in, potentially leading to further damage. Loose bricks may require immediate attention to prevent them from falling or causing structural issues.
6. Check the Mortar Joints: Inspect the mortar joints between the bricks. Mortar deterioration can weaken the chimney’s structure and compromise its stability. Look for any gaps, crumbling mortar, or signs of erosion.
7. Inspect the Flue Liner: Shine a flashlight down the chimney flue to inspect the condition of the flue liner. Look for any cracks, gaps, or signs of deterioration. Damaged flue liners can increase the risk of chimney fires and allow harmful pollutants to enter the living space.
8. Look for Signs of Water Damage: Examine the interior walls of the firebox and chimney for any signs of water damage, such as staining, mold, or rust. Water intrusion can cause structural deterioration, leading to costly repairs if not addressed promptly.
9. Check the Chimney Flashing: Examine the chimney flashing, which is the metal sheeting used to seal the gap between the chimney and the roof. Look for any signs of damage or deterioration, such as cracks, rust, or gaps in the flashing. Damaged flashing can result in water leaks and subsequent structural damage.
10. Look for Other Visible Signs of Damage: Pay attention to any other visible signs of damage, including loose or damaged chimney caps, chimney pots, or masonry sealant. Any visible cracks, chips, or structural issues should be noted for further evaluation and potential repairs.
11. Consult with a Professional: If you notice significant signs of damage or are unsure about the severity of any issues, it is advisable to consult with a professional chimney service provider. They will have the expertise to assess the level of damage accurately and recommend the appropriate repairs or maintenance.
Regularly checking for signs of damage in your chimney is vital for maintaining its safety and functionality. By following this step-by-step guide and addressing any identified issues promptly, you can ensure a well-maintained chimney and enjoy the warmth and comfort of your fireplace with peace of mind.
Conclusion
Maintaining a clean and well-functioning chimney is crucial for the safety and efficiency of your fireplace or wood-burning stove. By following the steps outlined in this comprehensive guide, you can effectively sweep your chimney, remove creosote buildup, inspect and clean the chimney cap and flue, and address any signs of damage. Regular chimney sweeping, along with proper maintenance and adherence to safety precautions, ensures optimal performance and reduces the risk of chimney fires, carbon monoxide poisoning, and other hazards.
Chimney sweeping should not be taken lightly, as neglecting this essential task can lead to serious consequences. Removing creosote buildup and debris not only improves the efficiency of your chimney but also prevents chimney fires and prolongs the lifespan of the chimney system. Regular inspections allow you to identify any signs of damage early on, facilitating timely repairs and avoiding more extensive issues down the line.
Throughout the chimney sweeping process, it is important to prioritize safety. Wear appropriate personal protective equipment (PPE), follow safety guidelines, and do not hesitate to seek professional assistance if needed. Chimney sweeping can be a complex task, and experts have the knowledge and experience to handle any challenges or repairs that may arise.
In conclusion, regular chimney sweeping and maintenance should be an integral part of your home care routine. By maintaining a clean and safe chimney, you ensure the efficient and reliable operation of your fireplace or wood-burning stove, while also safeguarding the well-being of your family and property. Don’t overlook the importance of chimney sweeping – make it a priority to keep your chimney in optimal condition, allowing you to enjoy the warmth and ambiance of a crackling fire for years to come.
Frequently Asked Questions about How To Do Chimney Sweeping
Was this page helpful?
At Storables.com, we guarantee accurate and reliable information. Our content, validated by Expert Board Contributors, is crafted following stringent Editorial Policies. We're committed to providing you with well-researched, expert-backed insights for all your informational needs.


0 thoughts on “How To Do Chimney Sweeping”